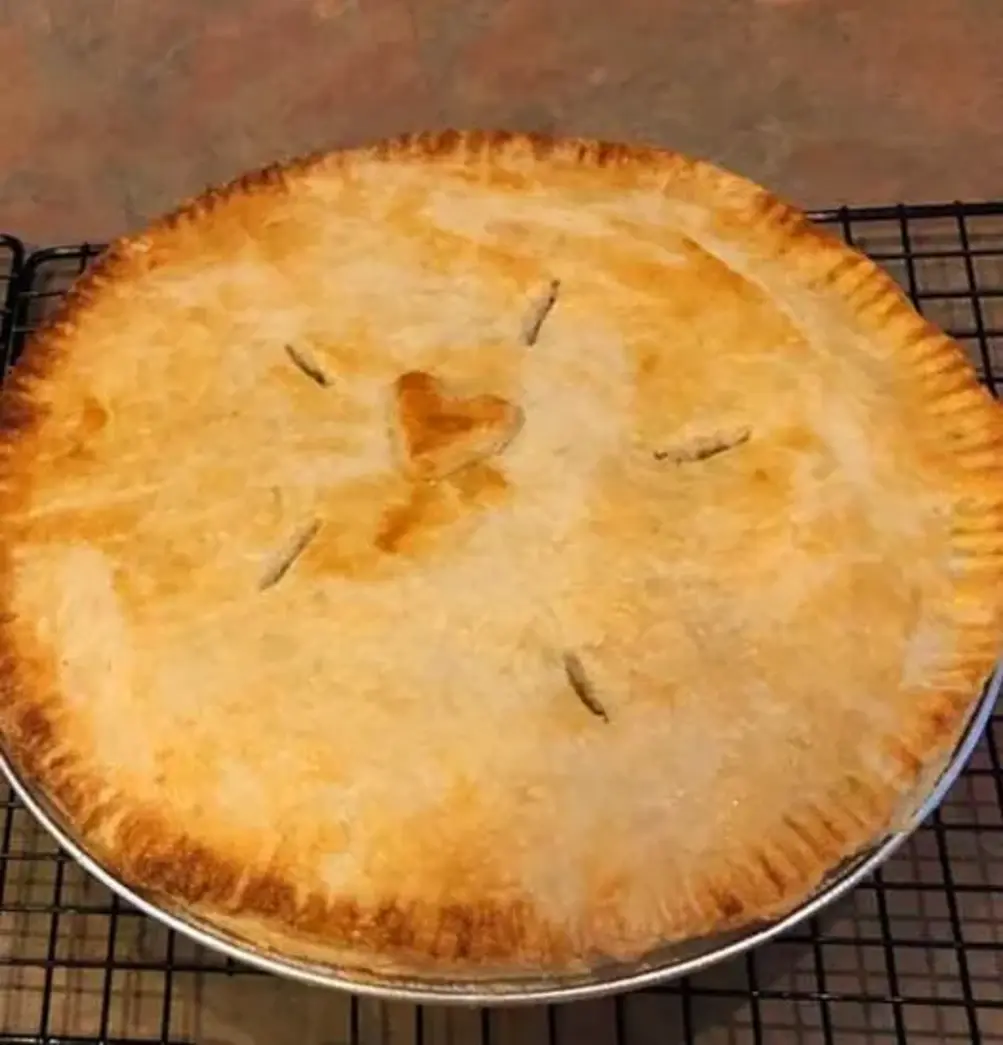
Cotton Candy Cheesecake

Cotton Candy Cheesecake

Introduction

Did you know that over 70% of people associate the taste and scent of cotton candy with positive childhood memories of fairs and festivals? This Cotton Candy Cheesecake is designed to tap directly into that joyful nostalgia, transforming a classic dessert into a whimsical, colorful centerpiece. Bringing the fun and whimsy of the carnival to your dessert table is easier than you think, and this recipe proves it. Perfect for birthdays, summer parties, or just a fun weekend baking project, this cheesecake combines the rich, creamy texture of a New York-style cheesecake with the playful, airy sweetness of spun sugar. The result is a stunning dessert that’s as delightful to look at as it is to eat. Let’s dive into how you can create this magical treat that will have everyone asking for seconds.

Ingredients List

Gather these high-quality ingredients for the best flavor and texture. Sensory descriptions are included to help you understand the role of each component.

For the Graham Cracker Crust:

  • 1 ½ cups graham cracker crumbs (about 12 full sheets) – Provides a sweet, slightly honeyed, and crunchy base with a toasty aroma when baked.
  • ⅓ cup granulated sugar – Balances the cracker’s mild bitterness.
  • 6 tablespoons unsalted butter, melted – Acts as the binding agent, giving the crust a rich, buttery flavor and firm, sandy texture.
  • Substitution: For a nuttier flavor, use crushed vanilla wafers or digestive biscuits. For a gluten-free option, use gluten-free graham-style crackers.

For the Cheesecake Filling:

  • 4 packages (8 oz each) full-fat cream cheese, room temperature – The star of the show. Room temp cream cheese is crucial for a silky-smooth, lump-free filling with a luxurious mouthfeel.
  • 1 cup granulated sugar – Sweetens the filling without making it grainy.
  • 1 cup sour cream, room temperature – Adds a delightful tang and helps create a creamier, more stable texture.
  • 1 teaspoon pure vanilla extract – Provides a warm, aromatic background note that complements the cotton candy.
  • 4 large eggs, room temperature – Gives structure and a rich, custardy consistency to the baked filling.
  • 2-3 drops of pink food coloring (gel recommended) – Creates the classic pastel pink hue associated with cotton candy. Gel coloring provides vibrant color without thinning the batter.
  • 2-3 drops of blue food coloring (gel recommended) – For a swirled, magical effect. You can adjust the ratio for your preferred shade.

For the Cotton Candy Topping & Garnish:

  • 1 ½ cups heavy whipping cream, cold – Whips into stiff, cloud-like peaks that mimic the fluffiness of cotton candy.
  • ¼ cup powdered sugar – Sweetens the whipped cream smoothly without grittiness.
  • 1 teaspoon cotton candy flavoring/extract – The secret ingredient! This captures the distinct, sugary-berry essence of real cotton candy. (Find it in baking supply stores or online).
  • Additional pink & blue food coloring (optional) – For tinting the whipped cream.
  • Store-bought or fresh-spun cotton candy for garnish – Adds the final touch of carnival authenticity and visual drama. It will slowly melt into the cream for an extra burst of flavor.
  • Sprinkles, edible glitter (optional) – For extra whimsy and sparkle.

Timing

Prep Time30 minutes
Cook Time55-65 minutes
Chill TimeAt least 6 hours (Overnight best)
Total Time7 hours 30 minutes (mostly inactive)

Compared to the average baked cheesecake recipe, this Cotton Candy Cheesecake requires a standard active prep and bake time. The key difference is the addition of the flavored whipped cream topping, which adds only 10 extra minutes. The extended chill time is non-negotiable for the perfect, sliceable texture—rushing this step is the most common cause of a runny center. Planning for an overnight chill ensures a stress-free, successful dessert.

Cotton Candy Cheesecake slice on a plate with a swirl of whipped cream and cotton candy garnish

This stunning Cotton Candy Cheesecake brings a carnival favorite to your dining table with its creamy texture and playful colors.

Step-by-Step Instructions

Step 1: Prepare the Crust

Preheat your oven to 325°F (163°C). In a medium bowl, combine the graham cracker crumbs and granulated sugar. Pour the melted butter over the mixture and stir with a fork until all the crumbs are evenly moistened and resemble wet sand. Press this mixture firmly and evenly into the bottom of a 9-inch springform pan. I like to use the bottom of a flat glass or measuring cup to press it down, ensuring a compact, level layer. Pre-bake the crust for 10 minutes. This step toasts the crumbs, deepening their flavor and preventing a soggy bottom. Let it cool on a wire rack while you prepare the filling.

Step 2: Make the Cheesecake Filling

In the bowl of a stand mixer fitted with the paddle attachment (or using a large bowl and a hand mixer), beat the room-temperature cream cheese on medium speed for 2-3 minutes until it is completely smooth, creamy, and free of any lumps. Scrape down the bowl and beater. Add the granulated sugar and beat for another 2 minutes until well combined. Blend in the sour cream and vanilla extract. Now, with the mixer on low speed, add the eggs one at a time, mixing just until each egg is fully incorporated before adding the next. Overmixing at this stage incorporates too much air, which can cause cracks. Scrape the bowl once more to ensure a homogeneous batter.

Divide the batter roughly in half between two bowls. To one half, add 2-3 drops of pink gel food coloring. To the other half, add 2-3 drops of blue gel food coloring. Stir each until the color is uniform. Now, alternately dollop large spoonfuls of the pink and blue batter over the pre-baked crust. Use a knife or a thin spatula to gently swirl the batters together just 2-3 times—you want a marbled effect, not a muddy purple mix.

Step 3: Bake and Cool

Place the springform pan on a baking sheet (this catches any potential butter leaks and makes handling easier). Bake in the preheated oven for 55-65 minutes. The cheesecake is done when the edges are set and puffed slightly, but the center (about a 3-inch circle) still has a pronounced, gentle jiggle when you tap the oven rack. It will firm up as it cools. Turn off the oven, crack the oven door open with a wooden spoon, and let the cheesecake cool inside for 1 hour. This gradual cooling is your best defense against dramatic cracking. After an hour, transfer the pan to a wire rack to cool completely to room temperature (about 2 more hours).

Step 4: Create the Cotton Candy Topping

Once the cheesecake is completely cool, prepare the topping. In a chilled bowl, combine the cold heavy cream, powdered sugar, and cotton candy flavoring. Whip with a hand mixer or stand mixer on medium-high speed until stiff peaks form. Be careful not to over-whip into butter. If desired, you can divide the whipped cream and tint small portions with extra pink and blue coloring for a more vibrant presentation.

Step 5: Chill and Serve

Spread or pipe the cotton candy whipped cream over the top of the cooled cheesecake. Loosely cover the pan with plastic wrap or foil and refrigerate for at least 6 hours, preferably overnight. This long chill is essential for the flavors to meld and the texture to become perfectly firm and sliceable. Just before serving, carefully run a thin knife around the inner edge of the springform pan, then release the clamp. Garnish the top with generous tufts of fresh cotton candy, sprinkles, and edible glitter for maximum carnival flair. Slice with a sharp knife dipped in hot water and wiped dry between cuts for clean slices.

Nutritional Information

The following estimates are for 1 slice (out of 12) of cheesecake, including the whipped cream topping but excluding extra cotton candy garnish. Values are approximate.

  • Calories: 580 kcal
  • Total Fat: 42g
  • Saturated Fat: 24g
  • Cholesterol: 185mg
  • Sodium: 380mg
  • Total Carbohydrates: 42g
  • Dietary Fiber: 0.5g
  • Sugars: 35g
  • Protein: 9g

Healthier Alternatives

You can lighten up this indulgent dessert with a few smart swaps that maintain the fun flavor profile:

  • Crust: Use reduced-fat graham crackers and cut the butter to 5 tbsp. For a protein boost, mix in 2 tablespoons of vanilla protein powder with the crumbs.
  • Filling: Substitute full-fat cream cheese with Neufchâtel or a blend of half full-fat and half light cream cheese. Replace the sour cream with plain, full-fat Greek yogurt for added protein and a tangy kick. Reduce the sugar to ¾ cup—the cotton candy topping will provide plenty of sweetness.
  • Topping: Use cold coconut cream (the solid part from a can of full-fat coconut milk) whipped with a touch of honey and the cotton candy extract for a dairy-free option. It’s naturally lower in sugar.
  • Garnish: Opt for a small, intentional tuft of cotton candy rather than a large mound to control added sugar.

Serving Suggestions

This cheesecake is a showstopper on its own, but you can elevate the experience:

  • Serve with a side of fresh, tart berries (raspberries, strawberries) to cut through the sweetness.
  • Drizzle plates with a raspberry or blueberry coulis for a professional touch.
  • Pair with a glass of sparkling rosé, pink lemonade, or a vanilla cream soda for a truly festive drink pairing.

Mini Caramel Apple Cheesecakes

Mini Caramel Apple Cheesecakes

Introduction

Did you know that over 65% of home bakers report that cheesecake is their most requested dessert for fall gatherings? The combination of creamy texture and seasonal fruit is simply irresistible. That’s why these Mini Caramel Apple Cheesecakes are destined to become your new signature treat. A delightful fusion of creamy cheesecake, spiced apples, and rich caramel, perfect for any fall gathering! This recipe captures the essence of autumn in a single, elegant bite-sized dessert. Forget the hassle of a full-sized springform pan; these individual portions are not only adorable but also ensure everyone gets the perfect ratio of buttery crust, velvety filling, and spiced topping. Whether you’re hosting a cozy dinner party or just craving a taste of the season, these mini cheesecakes deliver maximum flavor with a surprisingly straightforward process. Let’s dive into how you can create this crowd-pleasing dessert that beautifully marries the comfort of apple pie with the indulgence of classic cheesecake.

Ingredients List

Gather these fresh, high-quality ingredients for the best results. I’ve included sensory notes and substitutions to help you customize.

For the Graham Cracker Crust:

  • 1 ½ cups graham cracker crumbs (about 12 full sheets) – Look for fine, sandy crumbs that pack well. The aroma is sweet and slightly honeyed. Substitution: Digestive biscuits or vanilla wafers work beautifully.
  • 5 tablespoons unsalted butter, melted – Use high-fat butter for a richer, more fragrant crust that holds together.
  • 2 tablespoons granulated sugar – This adds a subtle sweetness and helps the crust caramelize slightly.

For the Cheesecake Filling:

  • 16 oz (2 blocks) full-fat cream cheese, room temperatureCritical: Room temp cream cheese blends smoothly, preventing a lumpy texture. It should feel soft and spreadable.
  • ⅔ cup granulated sugar
  • 2 large eggs, room temperature – Room temperature eggs incorporate more air, leading to a lighter filling.
  • 1 teaspoon pure vanilla extract – The warm, floral notes of real vanilla are essential here.
  • ½ cup sour cream, room temperature – This is the secret to ultra-creamy, tangy cheesecake that doesn’t crack.

For the Spiced Apple Topping:

  • 2 medium firm-tart apples (like Granny Smith or Honeycrisp), peeled and finely diced – You want a bit of texture and a pop of bright, tart flavor against the sweet filling.
  • 2 tablespoons unsalted butter
  • 3 tablespoons brown sugar – Adds molasses depth.
  • 1 teaspoon ground cinnamon – The quintessential warm spice.
  • ¼ teaspoon ground nutmeg – A whisper of nutty, warm complexity.
  • Pinch of salt – Balances and enhances all the flavors.

For Assembly:

  • ½ cup high-quality caramel sauce – Look for a thick, rich sauce for drizzling. Sea salt caramel is a fantastic upgrade.
  • Optional garnish: Whipped cream, extra apple slices, a sprinkle of cinnamon.

Timing

Prep Time30 minutes
Cook Time22-25 minutes
Chill Time4 hours (minimum)
Total TimeAbout 5 hours

Compared to a traditional full-sized cheesecake, which can require over an hour of baking plus overnight chilling, these Mini Caramel Apple Cheesecakes are significantly faster. The individual portions bake in under 25 minutes, cutting the oven time by more than half. The active prep time is similar, but the payoff in portion control and presentation is immense. Plan for the 4-hour chill—this is non-negotiable for the perfect set and flavor melding. It’s the ideal make-ahead dessert.

Mini Caramel Apple Cheesecakes displayed on a rustic wooden table with fall leaves

These individual cheesecakes combine a buttery crust, creamy filling, and spiced apples for the ultimate fall dessert.

Step-by-Step Instructions

Step 1: Prepare the Crust

Preheat your oven to 325°F (165°C). Line a standard 12-cup muffin tin with paper liners. In a medium bowl, combine the graham cracker crumbs, melted butter, and sugar. Mix with a fork until the mixture resembles wet sand and holds together when pinched. I like to use the bottom of a small glass or a tablespoon to firmly press about 1.5 tablespoons of the mixture into the bottom of each muffin cup. Press it down evenly and compactly—this is your foundation. Pre-bake the crusts for 5 minutes. This step helps prevent a soggy bottom and sets the shape. Remove from the oven and let the pan cool on a rack while you make the filling.

Step 2: Make the Cheesecake Filling

In the bowl of a stand mixer fitted with the paddle attachment (or using a hand mixer), beat the room-temperature cream cheese on medium speed for 2-3 minutes until it is completely smooth, scraping down the bowl as needed. Add the sugar and beat for another minute until well combined. With the mixer on low, add the eggs one at a time, fully incorporating each before adding the next. This gradual addition prevents overbeating, which can incorporate too much air and cause cracking. Finally, mix in the vanilla extract and sour cream until just combined and the batter is silky. Do not overmix after adding the sour cream.

Step 3: Cook the Spiced Apple Topping

While the crusts are pre-baking, make the apple topping. Melt butter in a medium skillet over medium heat. Add the diced apples, brown sugar, cinnamon, nutmeg, and salt. Cook, stirring occasionally, for 6-8 minutes until the apples have softened slightly but still retain a bit of bite (al dente) and the sauce has thickened. You want them tender, not mushy. Remove from heat and let cool for 10 minutes. This step concentrates the apple flavor and ensures the spices bloom, creating a deeply aromatic topping.

Step 4: Assemble and Bake

Spoon the cheesecake filling over the pre-baked crusts, filling each muffin cup nearly to the top. I use a large cookie scoop or a measuring cup for even distribution. Now, take a teaspoon of the slightly cooled spiced apple mixture and gently press it into the center of each cheesecake. Don’t swirl it; just let it sit on top—it will sink slightly as it bakes, creating a lovely layered effect. Carefully transfer the muffin tin to the preheated oven. Bake for 22-25 minutes. The cheesecakes are done when the edges are set, but the centers still have a slight jiggle when you gently shake the pan. They will firm up dramatically during chilling.

Step 5: Chill and Serve

Remove the pan from the oven and let the cheesecakes cool completely in the pan on a wire rack. This gradual cooling helps prevent cracks. Once at room temperature, transfer the entire muffin tin to the refrigerator. Chill for at least 4 hours, though overnight is ideal for the best flavor and texture. When ready to serve, gently peel away the paper liners. Drizzle each mini cheesecake generously with caramel sauce just before serving. Add a dollop of whipped cream if desired.

Nutritional Information

The following estimates are for one mini cheesecake (including crust, filling, apple topping, and a 1-tablespoon drizzle of caramel sauce).

  • Calories: ~320 kcal
  • Total Fat: 19g
  • Saturated Fat: 11g
  • Cholesterol: 85mg
  • Sodium: 220mg
  • Total Carbohydrates: 34g
  • Dietary Fiber: 1g
  • Sugars: 26g
  • Protein: 4g

Healthier Alternatives

You can easily lighten up this recipe without sacrificing the indulgent feel. For the crust, try using crushed high-fiber cereal or almond flour mixed with a touch of maple syrup and coconut oil. Swap the full-fat cream cheese for a blend of Neufchâtel (⅓ less fat) and Greek yogurt for a protein boost and tangy flavor. Reduce the sugar in the filling by ¼ cup and use a natural sweetener like monk fruit blend. For the topping, skip the butter and sauté apples in a splash of apple cider or water with spices; use a sugar-free caramel syrup for drizzling. These swaps can reduce calories by up to 25% per serving while keeping the dessert delicious.

Serving Suggestions

Presentation is key with these individual treats. Serve them on a elegant platter scattered with cinnamon sticks and whole star anise for a festive touch. For a dinner party, plate each cheesecake on a small dessert plate with a zigzag of extra caramel and a single, thin, fan-cut apple slice. Pair with a hot beverage—a dark roast coffee, spiced chai tea, or a glass of dessert wine like a late-harvest Riesling complements the sweet and tangy flavors perfectly. They also make fantastic packed desserts for a fall picnic; keep the caramel sauce in a separate small container for drizzling on-site.

Common Mistakes

  • Using Cold Ingredients: This is the #1 cause of a lumpy, dense filling. Ensure cream cheese, eggs, and sour cream are truly at room temperature (about 1 hour out of the fridge).
  • Overmixing the Filling: Once you add the sour cream, mix only until just combined. Overbeating incorporates excess air, which expands and collapses during baking, leading to cracks and a less creamy texture.
  • Overbaking: Remember, the cheesecakes will continue to set as they chill. That slight jiggle in the center is your cue to take them out. A toothpick test does NOT work for cheesecake.
  • Skipping the Chill: Impatience leads to a runny, underwhelming dessert. The chilling time is when the flavors marry and the texture becomes perfectly sliceable.
  • Adding Hot Topping: Placing piping hot apples onto the raw filling can start cooking it unevenly. Let the apple mixture cool for at least

Banana Pudding Cookies

Banana Pudding Cookies

Introduction

Did you know that over 100 million tons of bananas are consumed globally each year, making them one of the world’s most popular fruits? With such a staggering figure, it’s no wonder creative bakers are constantly finding new ways to incorporate their sweet, creamy flavor into desserts. If you’re looking for a cookie that perfectly captures the nostalgic essence of a classic Southern dessert in a portable, chewy form, you’ve found it. These Banana Pudding Cookies are soft, chewy, and bursting with authentic banana flavor, offering a delightful twist that will have everyone asking for the recipe. Imagine the creamy comfort of banana pudding, transformed into a warm, bakery-style cookie with a perfect texture. Let’s dive into how you can create this crowd-pleasing treat in your own kitchen.

Ingredients

Gathering the right ingredients is the first step to cookie perfection. This recipe uses a clever combination of dry pudding mix and ripe bananas to double down on that iconic flavor. Here’s what you’ll need:

  • Dry Ingredients:
    • 2 ¼ cups all-purpose flour – The foundation for a tender crumb.
    • 1 (3.4 oz) box instant banana pudding mix – The secret weapon for intense, creamy banana flavor. (Substitution: Vanilla pudding mix + 1 tsp banana extract, though the flavor will be less complex).
    • 1 tsp baking soda – For the perfect rise and spread.
    • ½ tsp salt – Enhances all the other flavors.
  • Wet Ingredients:
    • 1 cup (2 sticks) unsalted butter, softened to room temperature – Should be cool to the touch but yield to gentle pressure, creating a light and fluffy base when creamed.
    • ¾ cup granulated sugar – For sweetness and crisp edges.
    • ¾ cup packed light brown sugar – Adds moisture, chewiness, and a hint of molasses warmth.
    • 2 large eggs – Bind the dough and add structure.
    • 1 tsp pure vanilla extract – A flavor enhancer that rounds out the sweetness.
    • 1 cup mashed very ripe bananas (about 2 medium) – Use bananas covered in brown spots for maximum natural sweetness and potent banana aroma. This is your primary source of moistness.
  • Mix-Ins:
    • 2 cups vanilla wafer cookies, roughly crushed – The quintessential banana pudding element, providing delightful crunchy bits. (Substitution: Nilla Wafers or any plain, buttery shortbread cookie).
    • 1 cup white chocolate chips – Their creamy sweetness mimics the pudding’s luxurious texture. (Optional but highly recommended).

Timing

Prep Time
20 minutes
Cook Time
10-12 minutes
Total Time
1 hour (includes chilling)

Compared to the average cookie recipe, these Banana Pudding Cookies require a crucial, non-negotiable chilling period of at least 30 minutes. This step is what prevents the cookies from spreading too thinly in the oven, as the banana and pudding mix add extra moisture. The active hands-on time is quite short—around 20 minutes—making the total project time of about one hour very reasonable for achieving such a uniquely flavored, bakery-quality result.

Banana Pudding Cookies fresh from the oven on a cooling rack

Freshly baked Banana Pudding Cookies, golden and studded with vanilla wafer pieces.

Step-by-Step Instructions

Step 1: Prepare the Banana Pudding Mixture

In a medium bowl, whisk together the all-purpose flour, the entire box of instant banana pudding mix, baking soda, and salt. Whisk for at least 30 seconds to ensure the leavening agents and pudding powder are evenly distributed throughout the flour. This prevents pockets of pure pudding mix in your dough and guarantees every bite has consistent flavor. Set this dry mixture aside.

Step 2: Cream the Wet Ingredients

In the bowl of a stand mixer fitted with the paddle attachment (or using a large bowl and a hand mixer), combine the softened butter, granulated sugar, and brown sugar. Beat on medium-high speed for 2-3 minutes. You’re done when the mixture is visibly paler in color, fluffy, and forms soft peaks when you lift the beater. This step incorporates air, which is key for texture. Scrape down the bowl. Add the eggs one at a time, beating well after each addition until fully incorporated. Beat in the vanilla extract. Finally, add the mashed ripe bananas and mix on low just until combined—the mixture may look slightly curdled, which is perfectly fine.

Step 3: Combine Dry and Wet Ingredients

With the mixer on the lowest speed, gradually add the dry flour-pudding mixture to the wet ingredients. Mix only until the last traces of flour disappear. Overmixing at this stage develops gluten, leading to tough cookies. The dough will be quite soft and sticky—this is normal and correct.

Step 4: Fold in Add-Ins and Chill

Using a sturdy spatula, gently fold in the crushed vanilla wafers and white chocolate chips. Ensure they are evenly distributed. Cover the bowl tightly with plastic wrap and refrigerate for at least 30 minutes, or up to 24 hours. This chilling step is non-negotiable; it firms up the butter, hydrates the pudding mix and flour, and prevents the cookies from baking into flat puddles.

Step 5: Scoop and Bake

Preheat your oven to 350°F (175°C). Line two large baking sheets with parchment paper. Using a medium cookie scoop (about 1.5 tablespoons), portion the chilled dough onto the prepared sheets, leaving at least 2 inches between each mound to allow for spreading. For a more polished look, you can roll the scoops briefly between your palms. Bake one sheet at a time in the center rack for 10-12 minutes. The cookies are done when the edges are set and lightly golden, but the centers still look soft and slightly underbaked. They will not brown deeply like a chocolate chip cookie.

Step 6: Cool and Serve

Allow the cookies to cool on the baking sheet for 5 minutes. This lets them finish setting up without becoming dry. Then, carefully transfer them to a wire rack to cool completely. They will be extremely soft when warm but will achieve the perfect soft-and-chewy texture as they cool. Enjoy warm or at room temperature.

Nutritional Information

The following estimates are for one cookie (based on a yield of approximately 36 cookies).

  • Calories: ~150 kcal
  • Total Fat: 7g
  • Saturated Fat: 4g
  • Cholesterol: 25mg
  • Sodium: 115mg
  • Total Carbohydrates: 21g
  • Dietary Fiber: 0.5g
  • Sugars: 13g
  • Protein: 2g

Healthier Alternatives

You can easily adapt this recipe for dietary preferences without sacrificing the core banana pudding experience.

  • Flour: Substitute up to half of the all-purpose flour with whole wheat pastry flour for added fiber. It has a finer texture than regular whole wheat.
  • Sugar: Reduce granulated sugar to ½ cup and use coconut sugar in place of brown sugar for a less refined option. Note: This will darken the cookies slightly.
  • Butter: Swap for an equal amount of refined coconut oil (solid state) for a dairy-free version.
  • Mix-Ins: Use sugar-free vanilla wafers and unsweetened banana chips (crushed) instead of white chocolate chips for a lower-sugar option.
  • Pudding Mix: Look for a “sugar-free” instant banana pudding mix to significantly cut down on added sugars.

Serving Suggestions

These cookies are fantastic on their own, but you can elevate them into a show-stopping dessert.

  • À la Mode: Serve a warm cookie topped with a scoop of vanilla bean ice cream and a drizzle of caramel sauce.
  • Banana Pudding Parfait: Crumble a cookie into the bottom of a glass, layer with fresh banana slices and homemade whipped cream, and repeat.
  • Cookie Ice Cream Sandwiches: Sandwich a scoop of vanilla or banana ice cream between two cookies and roll the edges in extra crushed vanilla wafers.
  • With Coffee: The sweet, creamy flavor pairs beautifully with a strong cup of black coffee or a latte.

Common Mistakes

  • Skipping the Chill: This is the #1 reason for flat, greasy cookies. The dough must be chilled to firm up.
  • Overmixing the Dough: Once the flour is added, mix only until combined. Overworked dough = tough cookies.
  • Using Underripe Bananas: Green or yellow bananas lack the necessary sweetness and potent flavor. Wait for those brown spots!
  • Overbaking: These cookies rely on a soft center. Take them out when the edges are just set, even if the center looks wet.
  • Not Measuring Flour Correctly: Spoon flour into your measuring cup and level it off. Scooping directly packs in too much flour, leading to dry cookies.

Storing Tips

To maintain that perfect soft and chewy texture, proper storage is key.

  • Room Temperature: Store completely cooled cookies in an airtight container at room temperature for up to

Creamy Banana Pudding Cheesecake Bars

Creamy Banana Pudding Cheesecake Bars

Introduction

Did you know that over 65% of home bakers are actively seeking dessert recipes that combine classic comfort with a modern twist? If you’re part of this majority, you’re in the right place. These Creamy Banana Pudding Cheesecake Bars are the ultimate fusion dessert, marrying the nostalgic, velvety sweetness of homemade banana pudding with the rich, tangy decadence of New York-style cheesecake. Imagine the creamy, dreamy texture of cheesecake meeting the beloved flavor of banana cream pie, all in a convenient, shareable bar form. Perfect for potlucks, family gatherings, or a well-deserved treat, this recipe is designed to impress with minimal fuss. Let’s dive into creating this show-stopping dessert that promises to become a new favorite in your recipe rotation.

Ingredients List

Gather these simple ingredients for a dessert that tastes anything but. Using full-fat, room-temperature ingredients is key for the creamiest texture.

  • For the Graham Cracker Crust:
    • Graham Cracker Crumbs (2 cups): Provides a sweet, nutty, and slightly cinnamon base with a satisfying crunch. Substitution: Use vanilla wafers or digestive biscuits for a different flavor profile.
    • Unsalted Butter, melted (1/2 cup): Acts as the binder, creating a rich, cohesive crust that holds its shape. Substitution: For a dairy-free option, use refined coconut oil.
    • Granulated Sugar (1/4 cup): Adds a touch of sweetness to balance the tang of the cheesecake.
  • For the Banana Pudding Cheesecake Filling:
    • Cream Cheese (24 oz, room temperature): The star of the show, providing that iconic dense, creamy, and tangy cheesecake body. Tip: Ensure it’s very soft for a lump-free filling.
    • Granulated Sugar (3/4 cup): Sweetens the filling without making it cloying.
    • Sour Cream (1/2 cup, room temperature): The secret weapon for added moisture, tang, and a velvety smooth texture.
    • Large Eggs (3, room temperature): Provide structure and richness, helping the bars set properly during baking.
    • Instant Banana Pudding Mix (1 (3.4 oz) box): Infuses the entire cheesecake with that authentic, nostalgic banana pudding flavor and helps stabilize the filling.
    • Pure Vanilla Extract (2 tsp): Enhances all the other flavors with its warm, aromatic notes.
    • Ripe Bananas (2 medium, mashed): Use bananas with lots of brown spots for maximum natural sweetness and intense banana flavor.
  • For the Topping:
    • Heavy Whipping Cream (1 cup): Whipped to soft peaks for a light, cloud-like topping.
    • Vanilla Wafers (for garnish): The classic banana pudding garnish, adding a delightful crunch.
    • Sliced Bananas (for garnish, optional): Brush with a little lemon juice to prevent browning if adding just before serving.

Timing

Prep Time25 minutes
Cook Time45-50 minutes
Chill Time4+ hours (preferably overnight)
Total Time5 hours 15 minutes (plus chilling)

Compared to a traditional layered banana pudding (which requires no baking but extensive chilling for layers to set) or a full cheesecake (which can take over an hour to bake and often requires a water bath), these bars offer a fantastic middle ground. The active prep is under 30 minutes, and the baking time is shorter due to the thinner layer in a 9×13 pan. The majority of the time is hands-off chilling, making it an excellent make-ahead dessert.

Creamy Banana Pudding Cheesecake Bars

Creamy, dreamy, and packed with nostalgic flavor—these bars are a guaranteed crowd-pleaser.

Step-by-Step Instructions

Step 1: Prepare the Crust

Preheat your oven to 325°F (163°C). Line a 9×13 inch baking pan with parchment paper, leaving an overhang on the long sides for easy removal later. In a medium bowl, combine the graham cracker crumbs, melted butter, and 1/4 cup of sugar. Mix with a fork until the mixture resembles wet sand and holds together when pinched. Pour the crumbs into your prepared pan and press them firmly and evenly into the bottom using the bottom of a measuring cup or glass. Bake the crust for 10 minutes, then remove it from the oven and let it cool on a wire rack while you prepare the filling. Don’t turn off the oven!

Step 2: Make the Banana Pudding Cheesecake Filling

In the bowl of a stand mixer fitted with the paddle attachment (or using a large bowl and a hand mixer), beat the room-temperature cream cheese on medium speed for 2-3 minutes until it’s completely smooth and creamy, scraping down the sides of the bowl as needed. This is the most crucial step for avoiding lumps. Add the 3/4 cup of granulated sugar and beat for another minute until fully incorporated. Beat in the sour cream and vanilla extract until smooth. With the mixer on low, add the eggs one at a time, mixing just until each egg yolk disappears into the batter. Overmixing at this stage can incorporate too much air and cause cracking. Finally, sprinkle in the entire box of instant banana pudding mix and add the mashed bananas. Mix on low until just combined—the batter will be thick and luscious.

Step 3: Layer and Bake

Pour the creamy banana pudding cheesecake filling over the pre-baked and slightly cooled crust. Use an offset spatula to spread it into an even layer, gently tapping the pan on the counter to release any large air bubbles. Place the pan in the center of your preheated oven. Bake for 45-50 minutes. The edges should be set and just beginning to pull away from the pan, but the center should still have a slight, gentle jiggle—like Jell-O—when you tap the pan. This is the sign of a perfectly creamy cheesecake that will set fully as it chills. Turn off the oven, crack the door open, and let the bars cool inside for 1 hour. This gradual cooling helps prevent drastic temperature changes that lead to sinking or cracking.

Step 4: Add the Topping and Chill

After the hour of cooling in the oven, transfer the pan to a wire rack to cool completely to room temperature, about another hour. Once cool, cover the pan tightly with plastic wrap and refrigerate for at least 4 hours, but ideally overnight. This long chill is non-negotiable for the perfect sliceable texture and flavor development. Just before serving, prepare the topping: In a chilled bowl, whip the heavy cream until soft peaks form. Spread it evenly over the chilled bars. Garnish with whole or crumbled vanilla wafers and fresh banana slices if desired. Use the parchment paper overhang to lift the entire slab of bars out of the pan onto a cutting board. Slice into squares with a sharp knife wiped clean between cuts for pristine edges.

Nutritional Information

The following estimates are for one bar, assuming the recipe yields 18 generous servings. Values are approximate.

  • Calories: ~380 kcal
  • Total Fat: 25g
  • Saturated Fat: 14g
  • Cholesterol: 105mg
  • Sodium: 280mg
  • Total Carbohydrates: 34g
  • Dietary Fiber: 1g
  • Sugars: 24g
  • Protein: 5g

Healthier Alternatives

You can easily adapt this recipe for dietary preferences without sacrificing the creamy, indulgent experience.

  • Crust: Use almond flour or crushed nuts mixed with a bit of maple syrup and coconut oil for a gluten-free, lower-carb base.
  • Filling: Swap full-fat cream cheese for a 1/3 less fat Neufchâtel cheese or a high-quality plant-based cream cheese. Use a sugar-free instant pudding mix and a natural granulated sweetener like monk fruit or erythritol in place of regular sugar.
  • Topping: Substitute the heavy whipping cream with chilled full-fat coconut cream (the solid part from a can) whipped with a touch of vanilla. It’s dairy-free and equally luxurious.
  • General: Reduce the overall sugar by 1/4 cup, as the ripe bananas and pudding mix provide ample sweetness.

Serving Suggestions

These bars are fantastic on their own, but a few accompaniments can elevate them to a restaurant-quality dessert.

  • Drizzle with a homemade salted caramel or dark chocolate sauce for a decadent touch.
  • Serve with a scoop of vanilla bean ice cream or a dollop of freshly whipped cream for an extra-indulgent treat.
  • Pair with a cup of strong coffee or a glass of dessert wine like a Moscato d’Asti to complement the sweetness.
  • For a brunch spread, cut them into smaller, bite-sized pieces for a perfect sweet addition.

Common Mistakes

  • Using Cold Ingredients: Cold cream cheese and eggs will not incorporate smoothly, leading to a lumpy batter. Plan ahead and let everything sit on the counter for at least 30-60 minutes.
  • Overmixing the Batter: Once the eggs are added, mix only until combined. Overmixing incorporates excess air, which expands and collapses during baking, causing cracks and a less dense texture.
  • Overbaking: The jiggle test is your best friend. If the center is completely firm in the oven, it will be dry and overcooked after chilling. Remember, it continues to set as it cools.
  • Skipping the Chill Time: Cutting into warm cheesecake is a recipe for a gooey mess. The long chill in the fridge is essential for clean slices and perfect flavor.
  • Not Using Parchment Paper: Trying to pry these creamy bars out of a pan without a liner will lead to broken crusts and frustration. The parchment sling is a lifesaver.

Storing Tips

Orange Creamsicle Cupcakes with Buttercream Frosting

Orange Creamsicle Cupcakes with Buttercream Frosting

Introduction

Did you know that citrus flavors like orange are among the top three most popular dessert flavors globally, according to a 2023 culinary trends report? If you’re craving a dessert that perfectly captures the nostalgic, sunny essence of a classic creamsicle, you’ve come to the right place. These Orange Creamsicle Cupcakes with Buttercream Frosting are a masterclass in balancing bright, zesty citrus with rich, creamy sweetness. They’re not just cupcakes; they’re a bite-sized celebration of summer, designed to be the star of any picnic, birthday party, or casual weekend treat. The magic lies in the harmony of a moist, tender orange-infused cake topped with a cloud-like vanilla buttercream that melts in your mouth. Let’s dive into how you can recreate this iconic flavor combination in your own kitchen.

Ingredients List

Gather these high-quality ingredients for the best flavor and texture. Using fresh orange juice and zest is non-negotiable for that authentic, vibrant creamsicle taste.

For the Orange Cupcakes:

  • 1 ½ cups (190g) all-purpose flour: The foundation. For a lighter crumb, sift it first.
  • 1 ½ tsp baking powder: Provides the essential lift for a fluffy texture.
  • ¼ tsp baking soda: Balances the acidity and adds tenderness.
  • ¼ tsp salt: Enhances all the flavors and balances the sweetness.
  • ½ cup (115g) unsalted butter, room temperature: Should be soft to the touch for perfect creaming. It creates a rich, buttery flavor and tender crumb.
  • 1 cup (200g) granulated sugar: Sweetens and helps create a golden-brown crust.
  • 2 large eggs, room temperature: Bind the batter and add structure. Cold eggs can cause the batter to curdle.
  • Zest of 2 large oranges: This is where the potent citrus oil lives! It will perfume your entire kitchen with a sunny, aromatic scent.
  • ½ cup (120ml) fresh orange juice: Use juice from the zested oranges for maximum flavor. It provides a tangy moisture that’s irreplaceable.
  • ½ cup (120ml) buttermilk, room temperature: The secret to ultra-moist cupcakes. Its acidity reacts with the baking soda for a tender texture. Substitution: Mix ½ cup milk with 1 ½ tsp lemon juice or vinegar and let sit for 5 minutes.
  • 1 tsp pure vanilla extract: Adds a warm, complex background note that complements the orange.

For the Vanilla Buttercream Frosting:

  • 1 cup (230g) unsalted butter, room temperature: The base of the frosting. It must be soft for a silky, spreadable consistency.
  • 4 cups (480g) powdered sugar, sifted: Sifting is crucial to avoid a gritty frosting. It provides sweetness and structure.
  • 2-3 tbsp heavy cream or whole milk: Adjusts the consistency. Heavy cream will yield a richer, more luxurious mouthfeel.
  • 1 tbsp pure vanilla extract (or vanilla bean paste): For that classic, creamy vanilla flavor. Using bean paste will give you beautiful speckles.
  • Pinch of salt: Cuts the sweetness and elevates the vanilla flavor.
  • Optional for garnish: Additional orange zest, orange slice candies, or a sprinkle of edible gold dust.

Timing

Prep Time25 minutes
Cook Time18-20 minutes
Total TimeAbout 1 hour (including cooling)

Compared to the average cupcake recipe which often takes 1.5 hours from start to finish, this recipe is streamlined for efficiency without sacrificing flavor. The 25-minute prep time is achievable because the steps are simple and sequential. The key time-saver is ensuring all ingredients are at room temperature before you begin, which prevents overmixing and guarantees a smooth batter in minutes. The bake time is precise to prevent drying out—a common pitfall where many recipes fail. The total active time is under an hour, leaving you plenty of time to decorate and enjoy your creations.

Orange Creamsicle Cupcakes with Buttercream Frosting

Bright, citrusy, and sweet—these Orange Creamsicle Cupcakes with a rich buttercream frosting bring the essence of summer to your dessert table!

Step-by-Step Instructions

Step 1: Prepare the Orange Cupcake Batter

First, preheat your oven to 350°F (175°C). Line a standard 12-cup muffin tin with festive cupcake liners. In a medium bowl, whisk together the flour, baking powder, baking soda, and salt. I like to do this directly over the bowl to aerate the flour, which results in a lighter cupcake. In the bowl of a stand mixer fitted with the paddle attachment (or using a hand mixer), cream the softened butter and granulated sugar on medium-high speed for 3-4 minutes. Don’t rush this step! You want the mixture to become pale, fluffy, and almost whipped. This incorporates air, which is vital for lift. Scrape down the bowl. Add the eggs one at a time, beating well after each addition until fully incorporated. Mix in the vibrant orange zest and vanilla extract. Now, with the mixer on low, add the dry ingredients in three parts, alternating with the orange juice and buttermilk in two parts, beginning and ending with the dry ingredients. Mix just until the last streaks of flour disappear. A few small lumps are okay; overmixing is the enemy of tender cupcakes.

Step 2: Bake to Perfection

Using a large cookie scoop or a spoon, divide the batter evenly among the prepared liners, filling each about 2/3 full. This ensures they have room to rise into a perfect dome without spilling over. Immediately place the pan in the center of your preheated oven. Bake for 18-20 minutes. To test for doneness, insert a toothpick into the center of a cupcake. It should come out with a few moist crumbs attached, not wet batter. The tops will be springy to the touch and a light golden brown. The incredible aroma of baking orange will fill your kitchen! As soon as they’re done, transfer the cupcakes from the tin to a wire rack to cool completely. Cooling in the tin traps steam and makes them soggy, so this step is critical.

Step 3: Make the Vanilla Buttercream Frosting

While the cupcakes cool, make the frosting. In the clean bowl of your stand mixer with the paddle attachment, beat the softened butter on medium speed for 2-3 minutes until it’s very smooth and slightly paler. With the mixer on low, gradually add the sifted powdered sugar, one cup at a time, until fully combined. The mixture will be thick. Add the vanilla extract and a pinch of salt. Increase the speed to medium-high and beat for 3 full minutes. This is what makes the frosting light and fluffy. Halfway through, scrape down the bowl. After 3 minutes, check the consistency. With the mixer running, add heavy cream, one tablespoon at a time, until you reach a spreadable, pipeable consistency. Beat for another minute to incorporate.

Step 4: Frost and Garnish

Once the cupcakes are completely cool (this is vital—warm cupcakes will melt the frosting), it’s time to decorate. Fit a piping bag with your favorite tip (I love a large open star tip for classic swirls) and fill it with the buttercream. Pipe a generous swirl onto each cupcake, starting from the outside and working inward. If you don’t have a piping bag, a simple offset spatula works beautifully for a rustic, swooped look. For the final touch, garnish each cupcake with a little fresh orange zest or a small candy orange slice. This not only looks gorgeous but also signals the delicious flavor inside.

Nutritional Information

The following is an approximate nutritional breakdown per cupcake (including frosting), based on a yield of 12 cupcakes.

  • Calories: 420 kcal
  • Total Fat: 22g
  • Saturated Fat: 14g
  • Cholesterol: 85mg
  • Sodium: 120mg
  • Total Carbohydrates: 55g
  • Dietary Fiber: 0.5g
  • Sugars: 43g
  • Protein: 3g

Healthier Alternatives

You can enjoy the bright flavors of creamsicle cupcakes with some mindful swaps that don’t compromise taste.

  • Flour: Substitute half the all-purpose flour with white whole wheat flour for added fiber and a nuttier depth.
  • Sugar: In the cupcakes, you can reduce the granulated sugar to ¾ cup. For the frosting, replace half the powdered sugar with a powdered erythritol/monk fruit blend designed for baking.
  • Butter: In the frosting, use half butter and half Greek cream cheese (full-fat) for a tangier, slightly lower-fat option with added protein.
  • Buttermilk: Use low-fat buttermilk or even a plain, unsweetened almond milk with a splash of vinegar.
  • Portion Control: Make mini cupcakes! You’ll get double the portions for the same total batter, allowing for a smaller, satisfying treat.

Serving Suggestions

These cupcakes are versatile stars. For a summer BBQ, serve them alongside grilled peaches and vanilla ice cream. For a brunch, pair with a pot of Earl Grey tea or a citrus-forward mimosa. To create a stunning dessert platter, arrange them with lemon bars and strawberry shortcake bites. For kids’ parties, consider adding a small dollop of orange marmalade in the center of each cupcake before frosting for a fun, gooey surprise.

Common Mistakes

  • Using Cold Ingredients: Cold butter and eggs won’t emulsify properly, leading to a dense, curdled batter. Plan ahead for room temperature ingredients.
  • Overmixing the Batter: Once you add the flour, mix only until combined. Overmixing develops gluten, resulting in tough, rubbery cupcakes.
  • Overbaking: Set a timer! Even 2-3 minutes too long can dry out these delicate cupcakes. The toothpick test is your best friend.
  • Frosting Warm Cupcakes: The buttercream will slide right off and become a greasy mess. Patience is key—let them cool for at least an hour.
  • Not Sifting Powdered Sugar: This leads to lumpy, gritty frosting that’s difficult to pipe. Always s