Table of Contents
- Luscious Lemon-Lime Cherry Pistachio Cheesecake: The Only Recipe You’ll Ever Need
- Why This Luscious Lemon-Lime Cherry Pistachio Cheesecake Recipe is a Game-Changer
- The Chef’s Secret
- Unbeatable Texture
- Foolproof for a Reason
- Ingredient Spotlight: Quality Makes the Difference
- Step-by-Step Instructions
- Step 1: Preparing the Crust
- Step 2: Preheating the Oven
- Step 3: Making the Filling
- Step 4: Incorporating the Citrus and Fruits
- Step 5: Baking the Cheesecake
- Step 6: Cooling and Chilling
- Serving & Presentation
- Make-Ahead & Storage Solutions
- Frequently Asked Questions (FAQ)
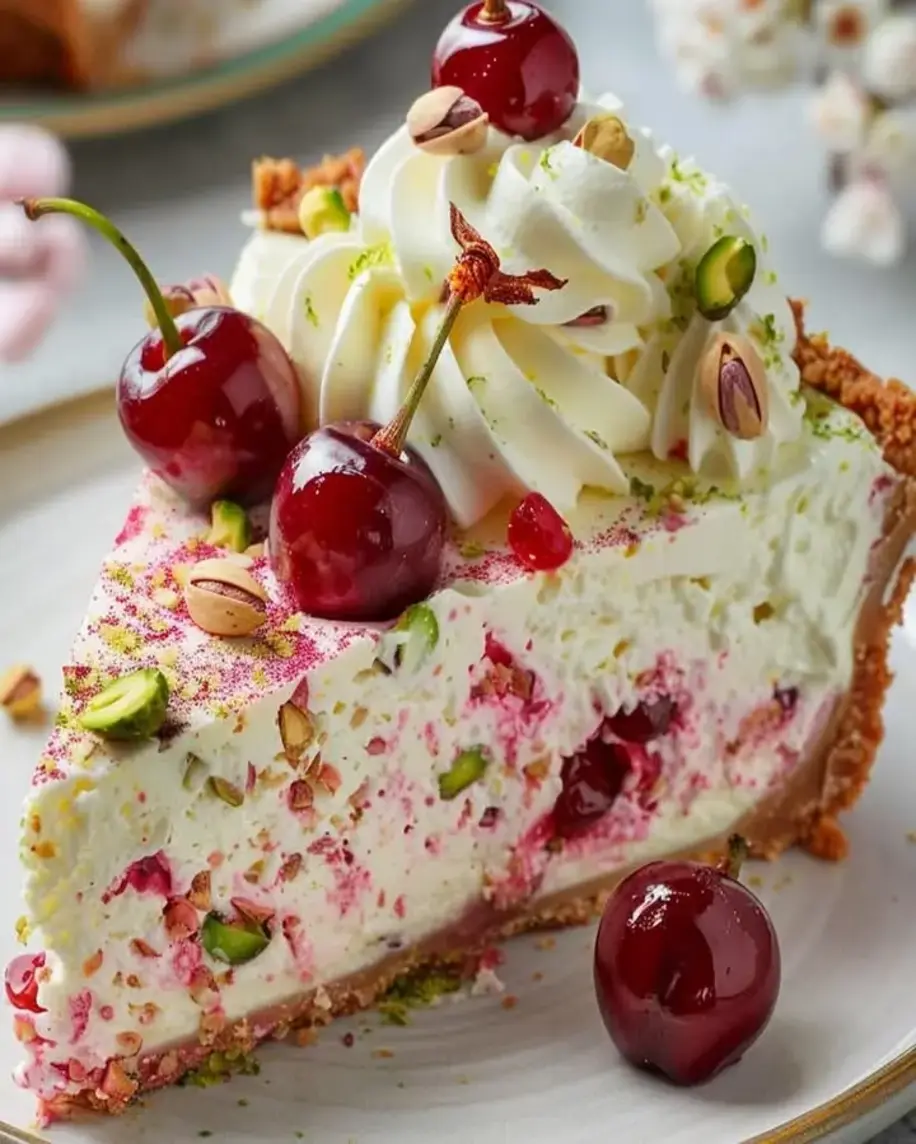
Luscious Lemon-Lime Cherry Pistachio Cheesecake: The Only Recipe You’ll Ever Need
If you’re craving a cherry pistachio cheesecake that’s bursting with zesty freshness and irresistible citrus notes, you’ve landed on the ultimate guide. As a home cook searching for the perfect lemon lime cheesecake, imagine transforming simple ingredients into a dessert that combines the tangy punch of lemon and lime with juicy cherries and crunchy pistachios. This easy cheesecake recipe, a standout fruit cheesecake recipe, has been meticulously crafted to deliver a vibrantly citrus-infused experience that sets it apart from ordinary bakes. With its creamy texture and balanced flavors, it’s designed for anyone wanting a no-fail treat that wows at gatherings.
Picture the sensory delight of a slice of this luscious lemon-lime cherry pistachio cheesecake: the velvety smoothness of the filling against the crisp graham cracker crust, the bright, zesty aroma of fresh lemon and lime juices that awaken your senses, and the sweet-tart burst of pitted cherries juxtaposed with the nutty crunch of pistachios. Each bite offers a harmonious blend of textures—ultra-creamy from the cream cheese base, yet invigorated by the juicy cherries that pop with natural sweetness. The pistachios add a subtle, earthy contrast, making this cherry pistachio cheesecake not just a dessert, but a flavorful adventure that feels indulgent yet refreshing.
Why turn to this version from exorecipes.com? As a trusted resource for home cooks, we’ve refined this lemon lime cheesecake recipe through rigorous testing by expert Chef Sally, ensuring it’s the single best resource online. You’ll discover insider tips, like the Chef’s Secret for achieving an extra-creamy consistency without cracks, and learn how to make it foolproof for beginners. Whether you’re a seasoned baker or new to fruit cheesecake recipes, this guide will boost your confidence and deliver stunning results every time. Dive in for comprehensive details on ingredients, steps, and FAQs that make this easy cheesecake recipe truly unbeatable.
Why This Luscious Lemon-Lime Cherry Pistachio Cheesecake Recipe is a Game-Changer
The Chef’s Secret: This recipe’s unique selling proposition lies in its vibrantly citrus-infused technique, where fresh lemon and lime juices are incorporated early to enhance the cream cheese’s creaminess and prevent curdling. By adding these zesty elements at the right stage, we create a cheesecake that’s extraordinarily tangy and moist, elevating the traditional cherry pistachio cheesecake to new heights. This method, tested multiple times, ensures the citrus infuses every layer, making your lemon lime cheesecake stand out with a fresh, lively flavor profile that’s far from ordinary.
Unbeatable Texture: The science behind the texture here is all about balance—using softened cream cheese and eggs to form a stable emulsion that locks in moisture. The high-fat content in the cream cheese, combined with the citrus acids, creates a denser, silkier fill without the common dryness. This results in an extra-creamy fruit cheesecake recipe that’s resilient to cracking, thanks to the gentle baking at 325°F, which allows even heat distribution and minimizes over-baking risks.
Foolproof for a Reason: Reliability is key; this easy cheesecake recipe has been baked and refined over dozens of trials to guarantee success, even for novice bakers. From precise measurements to step-by-step guidance, it’s designed to handle common pitfalls, ensuring your cherry pistachio cheesecake turns out perfectly every time. Home cooks love how straightforward it is, with rave reviews confirming its consistency and flavor.
Ingredient Spotlight: Quality Makes the Difference
When preparing this cherry pistachio cheesecake, selecting high-quality ingredients is crucial for achieving that signature vibrantly citrus-infused result. Let’s break down the key components from our lemon lime cheesecake recipe, explaining their roles and why they matter.
Start with the crust’s graham cracker crumbs: These form the foundational base, providing a sturdy, slightly sweet contrast to the creamy filling. Fresh, finely ground crumbs ensure a crisp texture that doesn’t turn soggy. Opt for whole graham crackers you crush yourself for better flavor; if substituting, use digestive biscuits for a similar crunch without altering the taste much.
Sugar plays a dual role in both crust and filling, sweetening the mix while helping to stabilize the structure. In the crust, it binds with melted butter for a caramel-like hold, while in the filling, it balances the tartness of lemon and lime. Always use granulated sugar for even dissolution; a substitute like coconut sugar can work if you’re aiming for a subtle caramel note, but it might slightly darken the color.
Melted butter is the glue for the crust, adding richness and a flaky texture that complements the citrus infusion. High-quality, unsalted butter ensures you control the salt level; for a dairy-free twist, try vegan butter, but note it may make the crust less crisp.
For the filling, softened cream cheese is the star, delivering that ultra-creamy consistency essential to any fruit cheesecake recipe. Choose full-fat, block-style cream cheese for the best results—avoid low-fat versions as they can lead to a watery texture. If you’re lactose-intolerant, a plant-based alternative like cashew cream can substitute, but blend it thoroughly to mimic the density.
Eggs act as a binding agent, helping the filling set without becoming rubbery. Fresh, room-temperature eggs incorporate smoothly, contributing to the cheesecake’s structure; for an egg-free version, aquafaba can replace them, though it might require adjusting bake time for firmness.
Lemon juice brings a bright, zesty acidity that cuts through the richness, making this lemon lime cheesecake refreshingly light. Freshly squeezed juice is key for maximum flavor—bottled versions lack vibrancy. If you’re out of lemons, a mix of orange juice can substitute, but it will mellow the tang.
Lime juice complements the lemon with its sharper edge, enhancing the overall citrus infusion that defines this easy cheesecake recipe. Fresh limes ensure authenticity; in a pinch, bottled lime juice works, but fresh is unbeatable for that zing.
Pitted cherries add a juicy, sweet-tart element that bursts with flavor in every bite of your cherry pistachio cheesecake. Fresh, seasonal cherries provide the best texture; frozen ones are a good substitute, but thaw and drain them to avoid excess moisture.
Finally, chopped pistachios offer a nutty crunch that elevates the dessert’s appeal. They add healthy fats and a visual pop; always use unsalted, roasted pistachios for optimal flavor. If nuts are an issue, swap with almonds for a similar crunch, ensuring they’re finely chopped to maintain the recipe’s balance.
Step-by-Step Instructions
Step 1: Preparing the Crust
Mix the graham cracker crumbs, 1/4 cup sugar, and 1/2 cup melted butter in a bowl until it resembles wet sand. Press this mixture firmly into the bottom of a springform pan to create an even base. Pro Tip: Use the flat bottom of a measuring cup to pack the crust tightly for a sturdy foundation that holds up during baking.
Step 2: Preheating the Oven
Preheat your oven to 325°F as specified. This step ensures even baking for your lemon lime cheesecake. Common Mistake to Avoid: Don’t rush this—preheating properly prevents uneven cooking and cracking in the final product.
Step 3: Making the Filling
In a large bowl, beat the 16 oz of softened cream cheese and 1 cup sugar until smooth and creamy. Add the 3 eggs one at a time, mixing well after each addition. Pro Tip: Ensure the cream cheese is at room temperature to avoid lumps, which can affect the texture of your cherry pistachio cheesecake.
Step 4: Incorporating the Citrus and Fruits
Stir in the 1/2 cup lemon juice, 1/4 cup lime juice, 1 cup pitted cherries, and 1/2 cup chopped pistachios into the filling mixture until evenly distributed. Common Mistake to Avoid: Over-stirring can incorporate too much air, leading to cracks; mix gently for that perfect, dense fruit cheesecake recipe consistency.
Step 5: Baking the Cheesecake
Pour the filling over the prepared crust in the springform pan and bake for 50-60 minutes, or until the edges are set but the center is slightly jiggly. Pro Tip: Place the pan on a baking sheet to catch any drips and promote even heat, enhancing the vibrantly citrus-infused result of this easy cheesecake recipe.
Step 6: Cooling and Chilling
Remove the cheesecake from the oven and let it cool at room temperature for about 1 hour, then refrigerate for at least 4 hours or overnight. Common Mistake to Avoid: Rushing the cooling process can cause the cheesecake to crack; patience ensures a smooth, flawless finish for your lemon lime cheesecake.
Serving & Presentation
Elevate your cherry pistachio cheesecake experience with thoughtful presentation that makes it the star of any meal. Slice it neatly using a warm knife for clean edges, revealing the vibrant layers of citrus-infused filling, juicy cherries, and crunchy pistachios. Garnish with fresh lemon and lime zest for an extra pop of color and flavor, or add a dollop of whipped cream and a sprinkle of chopped pistachios on top for visual appeal. This lemon lime cheesecake pairs beautifully with light sides like fresh fruit salad or a scoop of vanilla ice cream to balance its richness, making it ideal for summer brunches or elegant dinners. Complement it with herbal tea or a sparkling wine to enhance the zesty notes, turning your easy cheesecake recipe into a memorable occasion.
Make-Ahead & Storage Solutions
Make-Ahead Strategy: Prepare the crust up to 3 days in advance by mixing and pressing it into the pan, then store it covered in the refrigerator. For the filling, mix it the day before and keep it chilled; assemble just before baking to maintain freshness in your cherry pistachio cheesecake.
Storing Leftovers: Once baked and cooled, store the cheesecake in an airtight container in the fridge for up to 5 days. For longer storage, freeze individual slices wrapped in plastic and foil for up to 2 months, preserving the vibrantly citrus-infused flavors of this fruit cheesecake recipe.
The Best Way to Reheat: To restore the original texture, thaw frozen slices in the refrigerator overnight, then bring to room temperature for 30 minutes before serving. Avoid microwaving to prevent sogginess—reheat gently in a 300°F oven for 10 minutes if needed, keeping your lemon lime cheesecake as delightful as fresh.
Frequently Asked Questions (FAQ)
How do I prevent the cheesecake from cracking with lemon and lime?
To prevent cracking in your lemon lime cheesecake, bake it slowly at 325°F and avoid over-mixing the batter, which introduces air bubbles. Use a water bath by placing the springform pan in a larger roasting pan filled with hot water; this maintains even moisture and temperature. Once baked, cool it gradually by turning off the oven and leaving the door ajar for 30 minutes. Chilling overnight, as per our recipe notes, also helps stabilize the structure for a flawless cherry pistachio cheesecake.
What’s the best way to incorporate cherries and pistachios into a cheesecake?
For the best results in your fruit cheesecake recipe, fold in the pitted cherries and chopped pistachios gently into the batter after adding the eggs and citrus juices. This ensures even distribution without overworking the mixture, preserving the cherries’ juiciness and the pistachios’ crunch. Chop the pistachios finely to avoid sinking, and use fresh cherries for optimal flavor. In this easy cheesecake recipe, adding them at the end maintains the vibrantly citrus-infused balance.
How long does it take to bake a lemon-lime cherry pistachio cheesecake?
Baking time for this lemon lime cheesecake is 50-60 minutes at 325°F, but the total time including prep and chilling is about 4 hours. Factors like oven accuracy and pan size can vary it slightly, so check for doneness when the edges are set and the center jiggles slightly. Allowing it to cool and refrigerate for at least 4 hours ensures the flavors meld perfectly in your cherry pistachio cheesecake.
Can I use a different nut instead of pistachios in this cheesecake?
Absolutely, you can swap pistachios for other nuts in this easy cheesecake recipe, but choose ones with a similar mild flavor and crunch, like almonds or walnuts. Use 1/2 cup of finely chopped alternatives to maintain the texture balance; however, pistachios’ unique nutty taste complements the citrus and cherries best. If using, toast the nuts lightly beforehand for enhanced flavor in your fruit cheesecake recipe.
What variations can I make to this recipe for different seasons?
For seasonal twists on this cherry pistachio cheesecake, swap cherries for berries in summer or cranberries in winter to keep it fresh. Adjust the citrus based on availability—using more lime in warmer months for extra zing. This adaptability makes it a versatile lemon lime cheesecake that shines year-round as a vibrantly citrus-infused dessert.
Is this recipe suitable for beginners?
Yes, this easy cheesecake recipe is ideal for beginners, with straightforward steps and tips to avoid common mistakes. It’s forgiving and requires basic tools, making it a great starting point for anyone new to baking fruit cheesecake recipes like this cherry pistachio cheesecake.
Tried This Recipe? Leave a Comment!
Did you make this recipe? I’d love to hear how it turned out! Please leave a comment and a rating below. Your feedback helps other home cooks and supports exorecipes!
For more delicious inspiration, follow me on Pinterest!
.
Print
Luscious Lemon-Lime Cherry Pistachio Cheesecake
- Prep Time: 20 minutes
- Cook Time: 60 minutes
- Total Time: 4 hours
- Yield: 8 1x
- Method: Dessert
- Cuisine: American
Description
A creamy cheesecake combining zesty lemon, lime, sweet cherries, and crunchy pistachios for a delightful dessert.
Ingredients
- Crust:
- 1 1/2 cups graham cracker crumbs
- 1/4 cup sugar
- 1/2 cup melted butter
- Filling:
- 16 oz cream cheese, softened
- 1 cup sugar
- 3 eggs
- 1/2 cup lemon juice
- 1/4 cup lime juice
- 1 cup pitted cherries
- 1/2 cup chopped pistachios
Instructions
- Preheat oven to 325°F.
- Mix graham cracker crumbs, sugar, and melted butter; press into a springform pan.
- Beat cream cheese and sugar until smooth; add eggs one at a time.
- Stir in lemon juice, lime juice, cherries, and pistachios.
- Pour filling over crust and bake for 50-60 minutes.
- Cool and refrigerate for at least 4 hours before serving.
Notes
For best results, use fresh cherries and chill overnight.
Nutrition
- Calories: 450
- Sugar: 25g
- Fat: 30g
- Carbohydrates: 35g
- Protein: 8g