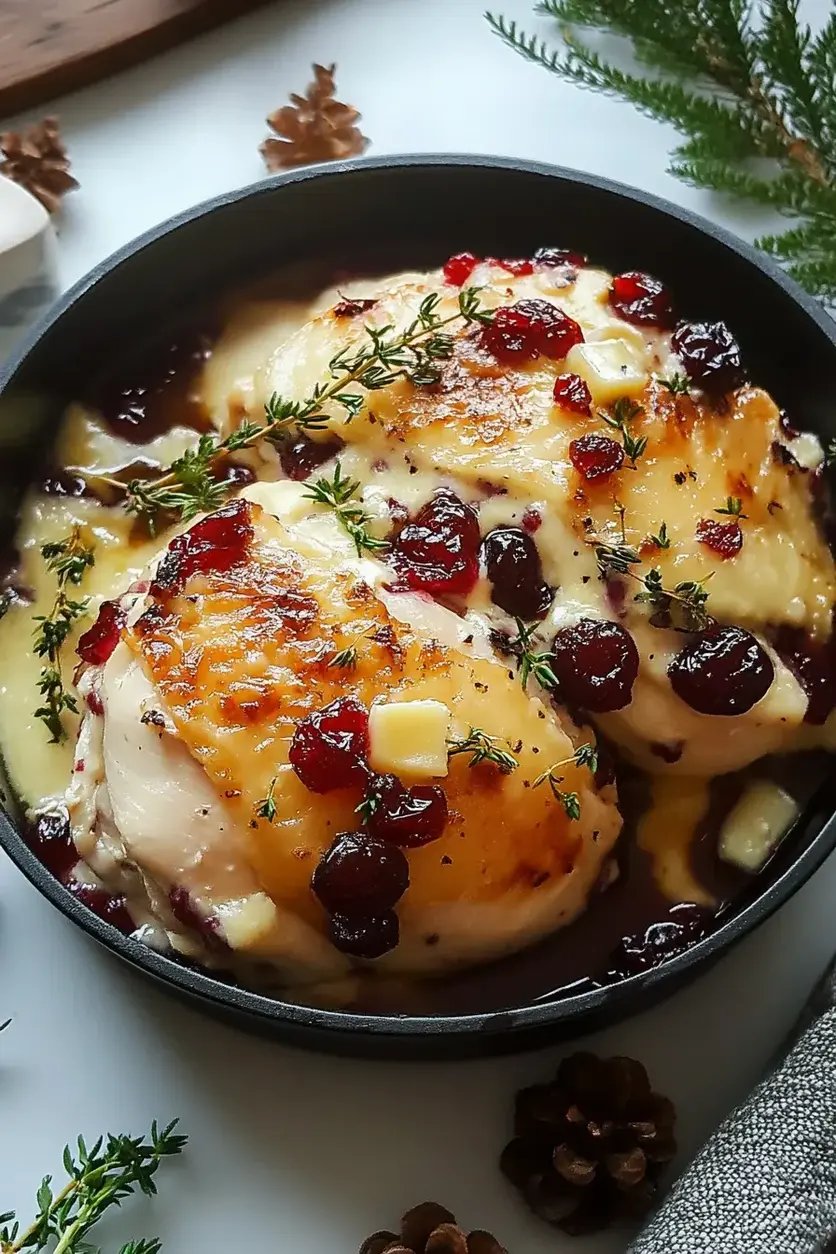
Crumbl Chocolate Strawberry Cheesecake Cookies

Crumbl Chocolate Strawberry Cheesecake Cookies

Introduction

Did you know that searches for “copycat Crumbl cookie recipes” have skyrocketed by over 300% in the last two years? It’s clear that home bakers everywhere are craving that signature, bakery-style indulgence. That’s why mastering these Crumbl Chocolate Strawberry Cheesecake Cookies is more than just baking—it’s creating a moment of pure, decadent joy. This recipe perfectly marries a fudgy, rich chocolate base with a luscious, creamy strawberry cheesecake frosting, delivering the ultimate treat that rivals any you’d find in the famous pink box. Whether you’re a seasoned baker or a weekend warrior, this guide will walk you through every step to achieve that perfect, soft-centered cookie with a frosting that’s irresistibly smooth and tangy. Let’s turn your kitchen into the best bakery in town.

Ingredients List

Gather high-quality ingredients for the best flavor and texture. Here’s what you’ll need, with notes on potential substitutions.

For the Chocolate Cookie Base:

  • 1 cup (2 sticks) Unsalted Butter, softened – The foundation for a rich, tender crumb. For a deeper flavor, use browned butter. Substitution: Salted butter can be used; simply omit the added salt in the dry ingredients.
  • 1 ½ cups Granulated Sugar – Creates a crisp edge and soft center.
  • 2 large Eggs + 1 Egg Yolk – The extra yolk adds incredible moisture and chewiness.
  • 2 tsp Pure Vanilla Extract – Enhances the overall sweetness and aroma.
  • 2 ¼ cups All-Purpose Flour – Spoon and level to measure for accuracy.
  • ¾ cup Unsweetened Cocoa Powder (Dutch-process preferred) – Dutch-process yields a darker, richer chocolate flavor. Substitution: Natural cocoa powder works but may result in a slightly more acidic taste.
  • 1 tsp Baking Soda – The leavening agent for the perfect rise.
  • ½ tsp Salt – Balances the sweetness and intensifies the chocolate.
  • 1 cup Semi-Sweet Chocolate Chunks – For melty, gooey pockets. Substitution: Milk chocolate or dark chocolate chips work beautifully.

For the Strawberry Cheesecake Frosting:

  • 8 oz (1 block) Full-Fat Cream Cheese, softened – Full-fat is non-negotiable for a creamy, stable, and tangy frosting.
  • ½ cup (1 stick) Unsalted Butter, softened – Combined with cream cheese for a silky, spreadable texture.
  • 3 ½ cups Powdered Sugar, sifted – Sifting is crucial to avoid lumps and achieve a smooth, cloud-like consistency.
  • ¼ cup Freeze-Dried Strawberry Powder – This is the secret to intense strawberry flavor without adding moisture. Substitution: Blend ½ cup of freeze-dried strawberries into a fine powder.
  • 1 tsp Pure Vanilla Extract
  • Pinch of Salt – Cuts the sweetness and brightens the strawberry flavor.
  • Optional Garnish: Fresh strawberry slices, graham cracker crumbs, or extra chocolate shavings.

Timing

Prep Time25 minutes (plus 1 hour chilling)
Cook Time10-12 minutes
Total Time~1 hour 40 minutes
Yield12 Large Cookies

While the total time is around 1 hour and 40 minutes, the active hands-on time is under 30 minutes. The crucial chilling step (1 hour) is what sets this recipe apart from average chocolate cookie recipes, which often skip chilling for convenience. This step is non-negotiable for preventing cookie spread and ensuring a thick, bakery-style texture. Compared to the standard 30-minute cookie recipe, this extra patience pays off tenfold in professional-quality results.

Crumbl Chocolate Strawberry Cheesecake Cookies

These decadent Crumbl Chocolate Strawberry Cheesecake Cookies feature a rich, fudgy base topped with creamy pink frosting.

Step-by-Step Instructions

In the bowl of a stand mixer fitted with the paddle attachment, cream together the softened butter and granulated sugar on medium-high speed for 3-4 minutes. You’re looking for a light, fluffy, and pale mixture—this step incorporates air, which is key for texture. Scrape down the bowl. Add the eggs, extra yolk, and vanilla extract. Mix on medium until fully combined, about 1 minute. The mixture may look slightly curdled; this is normal.

Step 2: Chill and Scoop the Dough

In a separate bowl, whisk together the flour, cocoa powder, baking soda, and salt. With the mixer on low, gradually add the dry ingredients to the wet ingredients. Mix just until no dry streaks of flour remain. Fold in the chocolate chunks with a spatula. Here’s my pro tip: Cover the bowl with plastic wrap and refrigerate the dough for at least 1 hour, or up to 48 hours. This firms up the butter, preventing flat cookies and allowing the flavors to deepen. Once chilled, use a large cookie scoop (about 3-4 tablespoons) to portion the dough onto parchment-lined baking sheets, spacing them at least 3 inches apart.

Step 3: Bake to Perfection

Preheat your oven to 350°F (175°C) while the dough chills. Bake the cookies for 10-12 minutes. The key is to pull them out when the edges are set but the centers still look soft and slightly underbaked—they will continue to cook on the hot baking sheet. For that classic Crumbl look, immediately after pulling them from the oven, take a round cookie cutter or large glass slightly larger than the cookie and gently swirl it around the edge to create a perfectly round shape. Let the cookies cool on the baking sheet for 10 minutes before transferring them to a wire rack to cool completely. They must be completely cool before frosting.

Step 4: Create the Strawberry Cheesecake Frosting

While the cookies cool, make the frosting. Ensure both the cream cheese and butter are at true room temperature for a lump-free blend. In a clean mixer bowl, beat the cream cheese and butter together on medium speed until completely smooth and creamy, about 2 minutes. Reduce the speed to low and gradually add the sifted powdered sugar, one cup at a time, until fully incorporated. Add the strawberry powder, vanilla, and pinch of salt. Increase speed to medium-high and beat for another 2-3 minutes until the frosting is light, fluffy, and holds stiff peaks. The color should be a lovely, natural pink.

Step 5: Assemble and Serve

Once cookies are cool, use an offset spatula or piping bag to generously swirl a thick layer of strawberry cheesecake frosting onto the center of each chocolate cookie. For an authentic touch, sprinkle with a few graham cracker crumbs or place a small slice of fresh strawberry on top. Serve immediately for the ultimate experience of warm, fudgy cookie meeting cool, creamy frosting.

Nutritional Information

The following is an approximate nutritional breakdown per large cookie (including frosting), based on a yield of 12 cookies.

  • Calories: 580 kcal
  • Total Fat: 32g
  • Saturated Fat: 19g
  • Cholesterol: 105mg
  • Sodium: 280mg
  • Total Carbohydrates: 72g
  • Dietary Fiber: 3g
  • Sugars: 52g
  • Protein: 6g

Healthier Alternatives

You can enjoy this decadent treat with some mindful swaps that don’t sacrifice flavor:

  • Flour: Substitute up to half of the all-purpose flour with white whole wheat flour for added fiber.
  • Sugar: In the cookie base, replace up to ¼ cup of granulated sugar with coconut sugar for a lower glycemic index. For the frosting, you can reduce the powdered sugar by ½ cup, though the texture will be less stiff.
  • Fats: Use a light cream cheese and a plant-based butter alternative. For the cookie, substituting half the butter with unsweetened applesauce can work, but expect a cakier texture.
  • Chocolate: Opt for dark chocolate chunks (70% cacao or higher) to increase antioxidants and reduce sugar content.

Serving Suggestions

These cookies are a showstopper on their own, but you can elevate them further:

  • Serve slightly warmed for a gooey, melt-in-your-mouth experience.
  • Pair with a glass of cold milk, a scoop of vanilla bean ice cream, or a shot of espresso.
  • Crumble a cookie over Greek yogurt for an indulgent breakfast or dessert parfait.
  • Present them on a tiered stand for a party or special occasion—their pink frosting makes them perfect for Valentine’s Day, Mother’s Day, or bridal showers.

Common Mistakes

  • Skipping the Chill: This leads to cookies that spread too thin and bake flat. Always chill the dough.
  • Overmixing the Dough: Mix dry ingredients just until combined. Overmixing develops gluten, resulting in tough cookies.
  • Using Cold Cream Cheese/Butter for Frosting: This creates a lumpy, grainy frosting. Ingredients must be truly softened.
  • Overbaking: The cookies continue to cook on the hot tray. Pull them out when the centers look soft.
  • Frosting Warm Cookies: The heat will melt the frosting into a messy puddle. Patience is key.

Storing Tips

  • Room Temperature: Unfrosted cookies can be stored in an airtight container at room temperature for up to 3 days.
  • Frost

Churro Cheesecake Cookies

Churro Cheesecake Cookies

Introduction

Did you know that over 65% of dessert lovers crave a combination of creamy and crunchy textures in a single bite? If you’re part of that majority, you’re in for a treat. These Churro Cheesecake Cookies are the ultimate fusion dessert, masterfully combining a crispy, cinnamon-sugar-coated exterior with a lusciously creamy cheesecake center. They are the perfect answer for anyone who can’t decide between the warm, spiced comfort of a churro and the rich, decadent pleasure of a slice of cheesecake. This recipe transforms those two iconic desserts into a handheld, shareable cookie that’s surprisingly simple to make but delivers a gourmet bakery experience. Get ready to impress at your next gathering or simply treat yourself to a moment of pure, unadulterated joy.

Ingredients List

Gather these simple ingredients to create your cookie masterpiece. For best results, ensure your cream cheese, butter, and eggs are at room temperature for a smooth, lump-free texture.

For the Cream Cheese Filling:

  • 4 oz (113g) full-fat cream cheese, softened – The star of the show. Its rich, tangy flavor and creamy texture are non-negotiable for that authentic cheesecake taste. Substitution: For a lighter version, use Neufchâtel cheese.
  • 1/4 cup (50g) granulated sugar – Sweetens the filling perfectly without making it grainy.
  • 1/2 teaspoon pure vanilla extract – Use the real stuff! Its warm, floral notes elevate the simple filling into something special.

For the Cookie Dough:

  • 1 cup (226g) unsalted butter, softened – The foundation for a tender, buttery crumb. You should be able to press your finger into it easily. Substitution: Salted butter can be used; just omit the added salt in the dry ingredients.
  • 1 cup (200g) granulated sugar – For sweetness and helping the cookies spread slightly.
  • 1 large egg + 1 egg yolk, at room temperature – The extra yolk adds incredible richness and a chewier texture.
  • 2 teaspoons pure vanilla extract
  • 2 1/2 cups (313g) all-purpose flour – Spooned and leveled to avoid a dense cookie.
  • 1 teaspoon baking powder – Provides the perfect lift.
  • 1/2 teaspoon salt – Balances the sweetness and enhances all flavors.

For the Cinnamon Sugar Coating:

  • 1/2 cup (100g) granulated sugar
  • 2 tablespoons ground cinnamon – The signature churro flavor. For a more complex spice profile, add a pinch of nutmeg or cardamom.

Timing

Prep Time 25 minutes (plus 1 hour chilling)
Cook Time 12-14 minutes
Total Time About 1 hour 40 minutes
Yield 24 cookies

While the total time includes a crucial chilling hour, the active prep time is under 30 minutes. This is significantly faster than making a full cheesecake or frying a batch of traditional churros, making these cookies a brilliant shortcut to that iconic flavor combination. The chilling step is non-negotiable for a firm, scoopable filling and to prevent the cookies from spreading too thin in the oven.

Churro Cheesecake Cookies on a cooling rack, showing the cracked cinnamon sugar exterior and creamy center

Golden-brown Churro Cheesecake Cookies fresh from the oven, with their signature crackled cinnamon sugar crust.

Step-by-Step Instructions

Follow these detailed steps for foolproof, bakery-quality cookies every single time.

Step 1: Prepare the Cream Cheese Filling

In a medium bowl, use a hand mixer (or a sturdy whisk) to beat the softened cream cheese until it’s completely smooth and creamy, about 1 minute. This eliminates any lumps. Add the 1/4 cup of sugar and vanilla extract, and beat again until the mixture is silky and well combined. Scrape down the sides of the bowl. Cover the bowl with plastic wrap and place it in the freezer for 20-25 minutes. You want it to be firm enough to scoop but not frozen solid. This step is the secret to a clean, distinct cheesecake center that won’t melt into the dough.

While the filling chills, make the dough. In a large mixing bowl, cream together the softened butter and 1 cup of granulated sugar on medium-high speed for 2-3 minutes, until the mixture is light, fluffy, and almost pale in color. This incorporates air, leading to a better texture. Beat in the whole egg, egg yolk, and vanilla extract until fully incorporated. In a separate bowl, whisk together the flour, baking powder, and salt. Gradually add the dry ingredients to the wet ingredients, mixing on low speed just until no dry streaks of flour remain. Avoid overmixing. The dough will be soft and slightly sticky.

Step 3: Assemble and Chill

Line a baking sheet with parchment paper. Remove the cream cheese filling from the freezer. Using a small cookie scoop or a teaspoon, scoop out 24 portions of the firm cream cheese mixture (about 1 teaspoon each). Roll them into small balls and place them on the prepared sheet. Place the sheet in the freezer for 10 more minutes. Meanwhile, scoop the cookie dough into 24 portions (about 1.5 tablespoons each). Flatten a dough portion in your palm, place a frozen cream cheese ball in the center, and carefully wrap the dough around it, sealing completely. Roll it gently into a smooth ball. Repeat with all dough and filling. Place all the assembled cookie balls on the lined sheet and refrigerate the entire tray for at least 30 minutes. This final chill prevents spreading and ensures the filling stays intact.

Step 4: Roll in Cinnamon Sugar

Preheat your oven to 350°F (175°C). Line two baking sheets with parchment paper or silicone mats. In a shallow bowl or plate, whisk together the 1/2 cup of sugar and 2 tablespoons of cinnamon. Take each chilled cookie ball and roll it generously in the cinnamon sugar mixture until it’s completely coated. Place the coated balls on the prepared baking sheets, spacing them about 2 inches apart to allow for spreading.

Step 5: Bake to Perfection

Bake the cookies for 12-14 minutes. They are done when the edges are set and lightly golden, and the tops are crackled. The centers will still look soft—this is crucial! They will firm up as they cool. For even baking, rotate the pans halfway through the baking time. Avoid overbaking, as this will dry out the cookie and cause the cheesecake center to disappear.

Step 6: Cool and Serve

Let the cookies cool on the baking sheet for 5 minutes. This allows them to set enough to handle. Then, using a spatula, transfer them to a wire rack to cool completely. The cookies are delicious slightly warm when the center is extra gooey, but they are also fantastic at room temperature when the cheesecake center has firmed up to a perfect creamy consistency.

Nutritional Information

The following is an approximate nutritional breakdown per cookie (based on a yield of 24).

  • Calories: ~180 kcal
  • Total Fat: 9g
  • Saturated Fat: 5.5g
  • Cholesterol: 35mg
  • Sodium: 85mg
  • Total Carbohydrates: 23g
  • Dietary Fiber: 0.5g
  • Sugars: 14g
  • Protein: 2g

Healthier Alternatives

You can enjoy these delightful cookies with a few mindful swaps that don’t sacrifice flavor:

  • Flour: Substitute up to 1/3 of the all-purpose flour with whole wheat pastry flour for added fiber.
  • Sugar: In both the dough and coating, you can replace granulated sugar with a monk fruit/allulose blend (1:1 ratio) for a lower glycemic impact. The texture may be slightly different.
  • Butter: For a dairy-free version, use a high-quality plant-based butter stick (not spread).
  • Cream Cheese: Opt for a reduced-fat cream cheese or a plant-based cream cheese alternative. The filling may be slightly less firm, so ensure adequate freezing time.
  • Coating Boost: Add a tablespoon of coconut sugar to the cinnamon sugar mix for a deeper, molasses-like flavor with a few trace minerals.

Serving Suggestions

  • À la Mode: Serve warm with a scoop of vanilla bean ice cream or dulce de leche ice cream for the ultimate dessert.
  • Drizzle: A simple drizzle of salted caramel sauce, chocolate ganache, or warm honey takes them to the next level.
  • Beverage Pairing: Enjoy with a strong cup of coffee, a glass of cold milk, or a dessert wine like a Moscato d’Asti.
  • Gift Idea: Package these cookies in a decorative box or tin—they make a fantastic homemade gift for holidays, teachers, or neighbors.

Common Mistakes

  • Skipping the Chill: Not chilling the filling and dough leads to flat cookies where the cheesecake center bakes out. Patience is key.
  • Overmixing the Dough: Mixing once the flour is incorporated develops gluten, resulting in tough cookies. Mix just until combined.
  • Using Cold Ingredients: Cold cream cheese and butter won’t blend smoothly, leading to a lumpy filling and dense dough.
  • Overbaking: Waiting for the centers to look “done” in the oven will yield dry cookies. They continue to cook on the hot tray.
  • Incomplete Sealing: If the dough isn’t sealed tightly

Blue Velvet Cake

Blue Velvet Cake

Introduction

Did you know that visually appealing food can increase perceived flavor by up to 20%? This stunning Blue Velvet Cake is a perfect example of that delightful phenomenon. More than just a vibrant twist on the classic red velvet, this cake is a conversation piece, a celebration centerpiece, and an absolute joy to eat. With its striking layers of deep blue cake, luxuriously tangy cream cheese frosting, and a crown of fresh blueberries, it promises a sensory experience that’s as memorable as it is delicious. Whether you’re looking to impress at a birthday, a baby shower, or simply want to brighten a regular Tuesday, this recipe delivers on both flavor and visual drama. Let’s dive into how you can create this masterpiece in your own kitchen.

Ingredients List

Gather these high-quality ingredients for the best results. For accuracy, use a kitchen scale for dry ingredients.

For the Blue Velvet Cake:

  • 2 ½ cups (300g) cake flour – For a tender, fine crumb. Substitution: All-purpose flour works, but the texture will be slightly denser.
  • 2 tablespoons (10g) unsweetened cocoa powder – Use a natural, non-Dutch-processed cocoa for the classic tangy flavor note.
  • 1 teaspoon baking soda
  • 1 teaspoon salt
  • 1 ½ cups (300g) granulated sugar
  • 1 cup (226g) unsalted butter, softened – Should be cool to the touch but yield to gentle pressure.
  • 2 large eggs, room temperature
  • 1 cup (240ml) buttermilk, room temperature – Crucial for tenderness and reacting with the baking soda. Substitution: Mix 1 cup milk with 1 tablespoon lemon juice or white vinegar; let sit for 5 minutes.
  • 2 teaspoons pure vanilla extract
  • 1-2 tablespoons blue gel food coloring – Gel coloring provides vibrant, deep color without thinning the batter. Liquid coloring will require more and may affect texture.
  • 1 teaspoon white vinegar – Enhances the red velvet reaction, but here it helps set the blue color and lift the crumb.

For the Cream Cheese Frosting:

  • 1 cup (226g) unsalted butter, softened
  • 16 oz (452g) full-fat cream cheese, cold – Using cold cream cheese helps maintain a stable, pipeable frosting.
  • 1 tablespoon pure vanilla extract
  • ¼ teaspoon salt – Balances the sweetness.
  • 5-6 cups (600-720g) powdered sugar, sifted – Sifting is non-negotiable for a silky-smooth frosting.

For Decoration:

  • 1-2 pints fresh blueberries – Look for plump, firm berries with a dusty blue bloom.
  • Optional: Edible gold dust or silver dragees for extra sparkle.

Timing

Prep Time
45 minutes
Cook Time
25-30 minutes
Total Time
3 hours (including cooling & frosting)

Compared to the average layer cake recipe, this Blue Velvet Cake requires a slightly longer cooling period (about 2 hours) which is critical. Attempting to frost warm layers is the number one cause of frosting meltdown. This total time ensures a professional, stable result. The active hands-on time is very manageable at under 1.5 hours.

Blue Velvet Cake

A stunning slice of vibrant Blue Velvet Cake with cream cheese frosting and fresh blueberries.

Step-by-Step Instructions

Step 1: Prepare Your Pans and Oven

Preheat your oven to 350°F (175°C). Grease three 8-inch round cake pans with butter or baking spray. Line the bottoms with parchment paper rounds—this is your insurance policy for perfect, unbroken cake layers. Lightly flour the sides of the pans and tap out any excess. Place the prepared pans in the refrigerator while you mix the batter; this helps the butter firm up, leading to better cake structure.

Step 2: Mix the Dry Ingredients

In a medium bowl, whisk together the cake flour, cocoa powder, baking soda, and salt. Whisk for at least 30 seconds to ensure the leavening agent and cocoa are evenly distributed throughout the flour. This aeration step contributes to a lighter cake. Set this bowl aside.

Step 3: Cream the Butter and Sugar

In the bowl of a stand mixer fitted with the paddle attachment, beat the softened butter on medium speed for 1 minute until smooth and creamy. Gradually add the granulated sugar with the mixer running. Increase the speed to medium-high and beat for a full 4-5 minutes. The mixture should become very pale, fluffy, and almost whipped in texture. This step is crucial for incorporating air and creating a fine crumb. Scrape down the bowl halfway through. Add the eggs one at a time, beating well after each addition until fully incorporated. Mix in the vanilla extract.

Step 4: Combine Wet and Dry Ingredients

With the mixer on low speed, add the dry ingredients to the butter mixture in three parts, alternating with the buttermilk in two parts. Start and end with the dry ingredients. The sequence should be: 1/3 dry mix, 1/2 buttermilk, 1/3 dry mix, remaining buttermilk, remaining dry mix. Mix only until the flour is just incorporated after each addition. In a small cup, stir together the blue gel food coloring and white vinegar. With the mixer still on low, pour in the blue mixture. Mix just until the batter is a uniform, stunning blue color—no streaks! Avoid overmixing at all costs.

Step 5: Bake and Cool

Divide the batter evenly among the three prepared pans. I like to use a kitchen scale for precision. Smooth the tops with an offset spatula. Bake for 25-30 minutes, or until a toothpick inserted into the center comes out clean or with a few moist crumbs. The cakes will spring back when lightly touched. Let the cakes cool in their pans on a wire rack for 15 minutes. Then, run a knife around the edges, invert them onto the rack, peel off the parchment, and let them cool completely (about 2 hours). Do not skip the full cooling time.

Step 6: Make the Cream Cheese Frosting

While the cakes cool, make the frosting. In a clean stand mixer bowl with the paddle attachment, beat the softened butter on medium-high speed for 3 minutes until very pale and creamy. Add the cold cream cheese in chunks, beating on medium until just combined—about 1 minute. Over-beating cream cheese can make the frosting runny. Beat in the vanilla and salt. With the mixer on low, gradually add the sifted powdered sugar, one cup at a time, until fully incorporated and smooth. Increase speed to medium-high and beat for 1-2 minutes until fluffy. If the frosting seems too soft, refrigerate it for 20-30 minutes before using.

Step 7: Assemble and Decorate

Place one cooled cake layer on your serving plate or cake stand. Spread a generous, even layer of frosting (about ¾ cup) with an offset spatula. Top with the second layer and repeat. Place the final layer top-side down for the flattest surface. Apply a thin “crumb coat” of frosting over the entire cake. Chill for 20 minutes to set. Apply the final, thick layer of frosting, smoothing the sides and creating swirls on top. Pile fresh blueberries in the center and scatter them around the base. For a magical touch, lightly dust a few blueberries with edible gold dust.

Nutritional Information

The following estimates are for 1 slice (1/12th of the cake) with frosting.

  • Calories: ~680 kcal
  • Total Fat: 34g
  • Saturated Fat: 21g
  • Cholesterol: 125mg
  • Sodium: 380mg
  • Total Carbohydrates: 92g
  • Dietary Fiber: 1g
  • Sugars: 75g
  • Protein: 6g

Healthier Alternatives

You can make mindful swaps without sacrificing the celebratory spirit of this cake.

  • Flour & Sugar: Substitute half the cake flour with whole wheat pastry flour for added fiber. Reduce granulated sugar in the cake to 1 cup and use a natural sugar substitute like monk fruit blend for the remainder.
  • Frosting: Use reduced-fat cream cheese and swap half the butter for Greek yogurt (strained). Reduce powdered sugar to 3 cups and add a touch of stevia or erythritol-based confectioners’ sugar to sweeten.
  • Fat: Replace half the butter in the cake with unsweetened applesauce or mashed ripe avocado for moisture and healthier fats.
  • Topping: Double the fresh blueberries! They add antioxidants, fiber, and natural sweetness, allowing you to use less frosting.

Serving Suggestions

This cake is a star on its own, but thoughtful pairings elevate the experience.

  • Beverage: Serve with a glass of cold milk, a cup of strong coffee, or a sparkling prosecco to cut through the richness.
  • Accompaniment: A small scoop of vanilla bean ice cream or a dollop of lightly sweetened whipped cream adds a lovely temperature contrast.
  • Presentation: Use a cake stand with a dome for a bakery-style display. Garnish individual plates with a mint sprig or a light dusting of powdered sugar just before serving.

Irresistible Gooey Blueberry Sugar Cookies

Irresistible Gooey Blueberry Sugar Cookies

Introduction

Did you know that over 75% of home bakers report that a perfectly soft, chewy texture is their top priority when choosing a cookie recipe? If you’re part of that majority, you’ve landed in the right place. These Irresistible Gooey Blueberry Sugar Cookies are engineered to deliver that dreamy, melt-in-your-mouth experience with a vibrant burst of fruity flavor. This recipe combines the nostalgic comfort of a classic sugar cookie with the luscious, jammy surprise of blueberry filling, all rolled in sparkling sugar for that perfect crunch. They are the ultimate treat for any sweet craving, from a casual afternoon pick-me-up to a stunning addition to your holiday dessert table. Let’s dive into how you can create these bakery-worthy cookies in your own kitchen.

Ingredients List

Gather these simple ingredients for cookies that are soft, sweet, and bursting with blueberry goodness. For best results, use room temperature ingredients unless otherwise noted.

  • Dry Ingredients:
    • 2 ¾ cups (345g) All-Purpose Flour: The foundation for a tender, structured cookie. For a slightly nuttier flavor, you can substitute 1 cup with whole wheat pastry flour.
    • 1 tsp Baking Soda: The leavening agent that gives the cookies their perfect lift and soft texture.
    • ½ tsp Baking Powder: Works with the baking soda for an even, airy crumb.
    • ½ tsp Salt: A critical flavor enhancer that balances the sweetness and makes the blueberry pop.
  • Wet Ingredients:
    • 1 cup (2 sticks / 226g) Unsalted Butter, softened: The key to richness and that coveted gooey center. It should be soft enough to leave an indent when pressed, but not oily.
    • 1 ½ cups (300g) Granulated Sugar, plus ½ cup for rolling: Creates sweetness and helps with browning. The rolling sugar adds a delightful crystalline crunch.
    • 1 large Egg + 1 Egg Yolk: The whole egg provides structure, while the extra yolk adds incredible moisture, fat, and a chewy, golden color.
    • 2 tsp Pure Vanilla Extract: Use the real stuff for a warm, aromatic depth that complements the fruit.
  • The Star Ingredient:
    • ½ cup (160g) Blueberry Jam or Preserves: Opt for a thick, high-quality jam for maximum gooeyness and flavor. You can use homemade or store-bought. For a tangier twist, try blackberry or raspberry jam.

Timing

Prep Time
20 minutes
Cook Time
10-12 minutes
Chill Time
1 hour (minimum)
Total Time
1 hour 35 minutes

While the total time is around 95 minutes, the active hands-on time is under 30 minutes. The mandatory 1-hour chill is non-negotiable for flavor development and preventing cookie spread—a step many average recipes skip, leading to flat, greasy cookies. This investment guarantees the perfect thick, soft, and gooey texture that sets this recipe apart.

Irresistible Gooey Blueberry Sugar Cookies fresh from the oven, coated in sparkling sugar

Freshly baked blueberry sugar cookies, with their crackled sugar coating and tempting jam-filled centers.

Step-by-Step Instructions

Step 1: Prepare the Dough

In a medium bowl, whisk together the flour, baking soda, baking powder, and salt. This aerates the dry ingredients and ensures the leaveners are evenly distributed, which is crucial for consistent rise. In a large mixing bowl, use a hand mixer or stand mixer fitted with the paddle attachment to cream the softened butter and 1 ½ cups of granulated sugar together on medium-high speed for 2-3 minutes. Don’t rush this step! You want the mixture to become pale, fluffy, and almost whipped. This incorporates air, which is part of what gives the cookie its soft texture. Scrape down the bowl, then add the whole egg, egg yolk, and vanilla extract. Mix on medium until fully combined, scraping the bowl again as needed.

Step 2: Chill and Scoop

With the mixer on low, gradually add the dry ingredient mixture to the wet ingredients. Mix just until no dry flour streaks remain. Overmixing at this stage can develop gluten and lead to tough cookies. Cover the bowl tightly with plastic wrap and refrigerate for at least 1 hour, or up to 48 hours. This chilling step solidifies the butter, deepens the flavors, and is the secret to cookies that don’t spread too thin in the oven. Once chilled, preheat your oven to 350°F (175°C) and line two baking sheets with parchment paper.

Step 3: Fill and Shape

Place the remaining ½ cup of granulated sugar in a small bowl. Using a cookie scoop or a tablespoon, portion the dough into balls roughly 1.5 inches in diameter (about 2 tablespoons of dough). This ensures even baking. Take one dough ball and use your thumb or the back of a small spoon to make a deep, wide indentation in the center. Fill the indentation with about 1 teaspoon of blueberry jam. Gently fold the dough up and around the jam, sealing it inside, and re-roll into a smooth ball. Immediately roll the filled ball in the sugar until generously coated, then place it on the prepared baking sheet, leaving about 2 inches between each cookie for spread.

Step 4: Bake to Perfection

Bake the cookies one sheet at a time in the center of the preheated oven for 10-12 minutes. The cookies are done when the edges are set and just beginning to turn a light golden brown, but the centers still look soft and puffy. They will continue to cook on the hot baking sheet. Remember, for gooey cookies, it’s better to slightly under-bake than over-bake. The jam might bubble slightly around the edges—this is a good sign!

Step 5: Cool and Serve

Allow the cookies to cool on the baking sheet for 5 minutes. This lets them firm up enough to handle without falling apart. Then, using a spatula, transfer them to a wire rack to cool completely. The sugar coating will crackle beautifully as they cool. For the ultimate experience, enjoy one while it’s still slightly warm, when the blueberry filling is at its most luscious and gooey.

Nutritional Information

The following is an approximate nutritional breakdown per cookie (recipe yields about 24 cookies).

Calories
~210 kcal
Total Fat
9g
Saturated Fat
5.5g
Carbohydrates
31g
Sugar
19g
Protein
2g

Healthier Alternatives

You can easily adapt this recipe for different dietary needs without sacrificing flavor or texture.

  • Reduce Sugar: Cut the granulated sugar in the dough by ¼ cup and use a sugar-free or low-sugar blueberry jam. The cookies will be slightly less sweet but still delicious.
  • Whole Grains: Substitute up to half of the all-purpose flour with white whole wheat flour for added fiber and a heartier texture.
  • Dairy-Free: Use a high-quality plant-based butter stick (not spread) in place of dairy butter. The results are remarkably similar.
  • Egg-Free: Replace the egg and egg yolk with a flax egg (1 tbsp ground flax + 3 tbsp water for the whole egg, plus an extra ½ tbsp ground flax for the yolk). The texture will be slightly more cakey but still soft.

Serving Suggestions

These cookies are stars on their own, but they can be elevated for any occasion.

  • With Beverages: Serve alongside a cold glass of milk, a hot cup of tea, or a robust coffee. The sweetness pairs perfectly with the bitterness.
  • Dessert Platter: Include them on a dessert board with fresh berries, whipped cream, and dark chocolate shavings for a visually stunning treat.
  • A La Mode: Take a warm cookie, top it with a scoop of vanilla bean ice cream, and drizzle with a little extra warmed blueberry jam for an unforgettable sundae.
  • Gift Giving: Package these cookies in a decorative box or tin—they make a heartfelt, homemade gift that everyone will adore.

Common Mistakes

Avoid these pitfalls to ensure cookie perfection every time.

  • Skipping the Chill: This is the #1 reason for flat cookies. Chilled dough spreads less, bakes more evenly, and tastes better.
  • Over-measuring Flour: Spoon flour into your measuring cup and level it off. Scooping directly packs the flour, leading to dry, dense cookies.
  • Overmixing After Adding Flour: Mix just until combined. Overmixing develops gluten, resulting in a tough, bread-like texture.
  • Using Runny Jam: A thick jam or preserve is essential. If your jam is too loose, simmer it in a small saucepan for a few minutes to reduce and thicken it before using.
  • Overbaking: Remove cookies when the centers look soft. They will set as they cool. Overbaked cookies lose their gooey magic.

Storing Tips

Keep your cookies fresh and delicious with these storage methods.

  • Room Temperature: Store completely cooled cookies in an airtight container at room temperature for up to 4 days. Place a piece of parchment paper between layers to prevent sticking.
  • Freezing Dough: Shape and sugar-coat the filled dough balls, then freeze them solid on a baking sheet before transferring to a freezer bag. Bake directly from frozen, adding 1-2 minutes to the bake time. Dough keeps for up to 3 months.
  • Freezing Baked Cookies: Freeze baked, cooled cookies in a single layer on a sheet, then store in a freezer-safe container for up to 2 months. Thaw at room temperature or warm briefly in the oven.

Conclusion

These Irresistible Gooey Blueberry Sugar Cookies are more than just a dessert; they are a guaranteed smile-maker. With their soft, chewy texture, sweet and tangy blueberry heart, and sparkling sugar

Honey Peach Cream Cheese Cupcakes

Honey Peach Cream Cheese Cupcakes

Introduction

Did you know that according to a recent survey, over 70% of home bakers are actively seeking desserts that blend classic comfort with a touch of seasonal fruit? If you’re part of that majority looking for a standout treat, these Honey Peach Cream Cheese Cupcakes are your answer. They are a symphony of textures and flavors, where the moist, tender crumb of a honey-kissed cake meets the tangy richness of cream cheese frosting, all crowned with a luscious, sweet-tart peach topping. This recipe is more than just a dessert; it’s a celebration of summer in every bite, perfect for everything from casual picnics to elegant dinner parties. The magic lies in the balance—the natural sweetness of the peach preserves and fresh fruit cuts through the decadent frosting, creating a cupcake that is indulgent yet refreshingly light. Let’s dive into creating this delightful masterpiece that will have everyone asking for the recipe.

Ingredients List

Gather these fresh, high-quality ingredients for the best results. I’ve included sensory notes and substitutions to help you customize.

For the Honey Peach Cupcakes:

  • 1 ½ cups all-purpose flour – For a light, airy crumb. Substitution: Use a 1:1 gluten-free baking blend for a GF version.
  • 1 tsp baking powder – The essential leavening agent for a perfect rise.
  • ½ tsp baking soda
  • ¼ tsp salt – Enhances all the flavors.
  • ½ cup unsalted butter, room temperature – Should be soft and creamy for easy creaming.
  • ¾ cup granulated sugar
  • ⅓ cup honey – Use a mild, floral honey like clover or orange blossom. It adds a deep, warm sweetness and keeps the cupcakes incredibly moist.
  • 2 large eggs, room temperature
  • 1 tsp pure vanilla extract – The aromatic backbone.
  • ½ cup sour cream – The secret to ultra-tender cupcakes with a slight tang. Substitution: Full-fat plain Greek yogurt works beautifully.
  • ⅓ cup whole milk
  • ½ cup peach preserves or jam – Look for a high-fruit-content preserve for the best peach flavor. This infuses the batter with pockets of fruity sweetness.

For the Cream Cheese Frosting:

  • 8 oz (one block) full-fat cream cheese, chilledMust be cold for a stable, pipeable frosting.
  • ½ cup unsalted butter, room temperature
  • 3 ½ – 4 cups powdered sugar, sifted – Sifting is non-negotiable for a silky-smooth texture.
  • 1 tsp pure vanilla extract
  • Pinch of salt – Balances the sweetness.

For the Fresh Peach Topping:

  • 2 ripe but firm peaches – Peeled, pitted, and finely diced. They should smell fragrantly sweet.
  • 1 tbsp honey
  • 1 tsp fresh lemon juice – Prevents browning and adds a bright note.

Timing

Prep Time 25 minutes
Cook Time 18-22 minutes
Total Time About 1 hour (including cooling)

Compared to the average cupcake recipe which often requires extensive creaming and multiple mixing bowls, this recipe is streamlined for efficiency. The active prep time is under 30 minutes, with most of the total time dedicated to baking and crucial cooling—a step you should never rush if you want perfect frosting. The quick peach topping comes together while the cupcakes cool, making the entire process seamless and far less daunting than many layered cakes.

Honey Peach Cream Cheese Cupcakes

Golden honey peach cupcakes topped with swirls of creamy frosting and a glossy fresh peach topping.

Step-by-Step Instructions

Step 1: Prepare the Cupcake Batter

Start by preheating your oven to 350°F (175°C) and line a standard 12-cup muffin tin with paper liners. In a medium bowl, whisk together the flour, baking powder, baking soda, and salt. This aerates the dry ingredients and ensures even distribution of the leaveners. In the bowl of a stand mixer fitted with the paddle attachment (or using a hand mixer), beat the softened butter and granulated sugar on medium-high speed for 2-3 minutes until it becomes pale, light, and fluffy. This creaming process is key for texture. Scrape down the bowl. With the mixer on low, drizzle in the honey and add the vanilla. Then, add the eggs one at a time, fully incorporating each before adding the next. Mix in the sour cream. Now, with the mixer on the lowest setting, alternately add the dry ingredients and the milk, beginning and ending with the dry ingredients. Mix just until no streaks of flour remain—do not overmix. Finally, gently fold in the peach preserves with a spatula, creating a beautiful marbled effect in the batter.

Step 2: Bake to Perfection

Using a large cookie scoop or two spoons, divide the batter evenly among the 12 prepared liners, filling each about ⅔ full. This ensures even baking and a perfect dome. Place the tin in the center of your preheated oven and bake for 18-22 minutes. The cupcakes are done when a toothpick inserted into the center comes out clean or with a few moist crumbs (not wet batter), and the tops spring back lightly when touched. The aroma of honey and peach will fill your kitchen! Immediately remove the cupcakes from the tin and transfer them to a wire rack to cool completely. This step is critical—frosting a warm cupcake will lead to a melted, runny disaster.

Step 3: Make the Cream Cheese Frosting

While the cupcakes cool, make the frosting. Ensure your cream cheese is straight from the fridge—cold cream cheese is less likely to become soupy. In your clean mixer bowl, beat the room-temperature butter on medium speed for about 1 minute until smooth. Add the cold cream cheese in chunks and beat on medium until just combined and no large lumps remain, about 30 seconds. Do not overbeat at this stage. Scrape down the bowl. Turn the mixer to low and gradually add the sifted powdered sugar, one cup at a time, until fully incorporated and smooth. Add the vanilla and pinch of salt. Once combined, increase the speed to medium-high and beat for 1 minute until the frosting is light, fluffy, and holds stiff peaks. If it seems too soft, chill it in the refrigerator for 15-20 minutes before piping.

Step 4: Assemble and Top

As the frosting chills (if needed), prepare the peach topping. In a small bowl, combine the diced fresh peaches, honey, and lemon juice. Stir gently to coat. Let it sit for 5-10 minutes to allow the flavors to meld and the peaches to release some of their juices, creating a lovely syrup. To assemble, fit a piping bag with a large star tip (like a 1M) and fill it with the cream cheese frosting. Pipe a generous swirl onto each completely cooled cupcake. Using a spoon, top each frosted cupcake with a portion of the fresh peach mixture, allowing some of the glossy syrup to drizzle down the sides. Serve immediately for the best texture contrast.

Nutritional Information

The following is an approximate nutritional breakdown per cupcake (based on 12 servings):

  • Calories: 420 kcal
  • Total Fat: 22g
  • Saturated Fat: 13g
  • Cholesterol: 85mg
  • Sodium: 180mg
  • Total Carbohydrates: 55g
  • Dietary Fiber: 1g
  • Sugars: 43g
  • Protein: 4g

Healthier Alternatives

You can easily adapt this recipe for different dietary needs without sacrificing flavor:

  • Reduce Sugar: Cut the granulated sugar in the cupcakes to ½ cup and use a natural, zero-calorie sweetener blend in the frosting. The honey and peach preserves provide ample sweetness.
  • Lower Fat: Substitute the sour cream with low-fat Greek yogurt and use a reduced-fat cream cheese (not fat-free, as it lacks stability and flavor).
  • Whole Grains: Replace half of the all-purpose flour with whole wheat pastry flour for added fiber and a nuttier taste.
  • Dairy-Free: Use plant-based butter, a vegan cream cheese alternative, and a plain, unsweetened dairy-free yogurt. Oat or soy milk works well for the liquid.

Serving Suggestions

These cupcakes are stars on their own but can be elevated for any occasion. For a summer brunch, serve them alongside a pitcher of iced peach tea or a sparkling mimosa. To create a stunning dessert platter, pair them with a light lemon sorbet or a bowl of fresh berries. If you’re presenting them at a party, consider a tiered cupcake stand for dramatic effect. A dollop of lightly sweetened whipped cream on the side never hurts!

Common Mistakes

  • Using Warm Cream Cheese: This is the #1 reason for runny frosting. Always start with cold cream cheese.
  • Overmixing the Batter: Once the flour is added, mix only until combined. Overmixing develops gluten, leading to tough, dense cupcakes.
  • Frosting Before Cooling: Patience is key. Even slightly warm cupcakes will melt the frosting.
  • Overbaking: Set a timer. Overbaked cupcakes become dry. Check at the 18-minute mark.
  • Not Sifting Powdered Sugar: Lumps in your sugar will translate to lumps in your otherwise silky frosting.

Storing Tips

Due to the fresh fruit topping and cream cheese frosting, these cupcakes require careful storage. For best quality, consume within 24 hours. If you need to store them, place them in a single layer in an airtight container in the refrigerator for up to 2 days. The cupcakes themselves can be baked ahead, cooled completely, wrapped tightly in plastic wrap, and frozen (unfrosted) for up to 2 months. Thaw overnight in the refrigerator before frosting