Is there anything more heartwarming than the smell of fresh strawberries wafting through your kitchen? As a busy mom myself, I know how precious those moments are, especially when you want to whip up something delightful with minimal fuss. That’s where the Strawberry French Toast Casserole comes in, ready to swoop in and save the day! It’s perfect for breakfast, brunch, or even a special holiday gathering. Trust me, your family will adore this sweet, comforting dish—and it will elevate any meal without demanding hours of your time.
Print

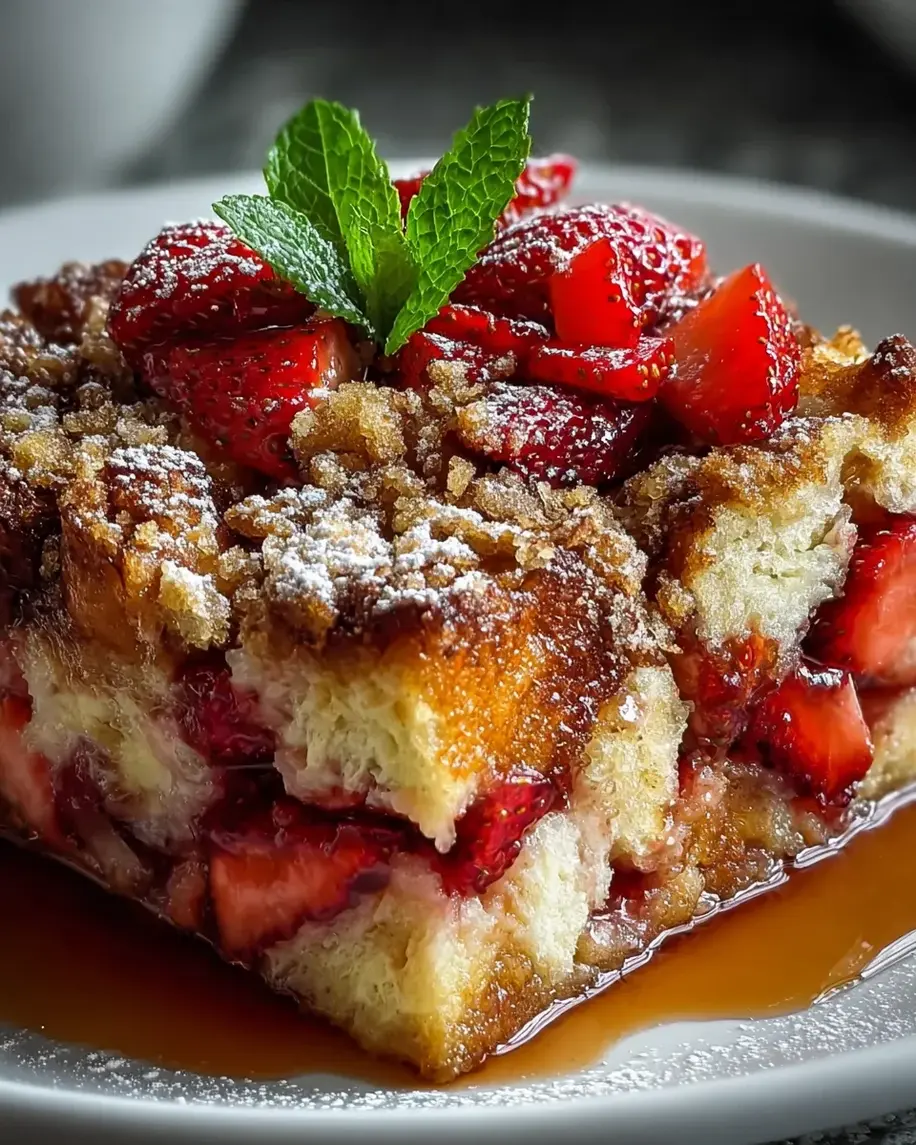
Strawberry French Toast Casserole
Description
A delicious and easy-to-make strawberry French toast casserole thats perfect for breakfast or brunch.
Ingredients
- 1 large loaf brioche or challah, cut into 1-inch cubes (about 1 lb)
- 2 cups fresh strawberries, hulled and sliced
- 6 large eggs
- 2 cups whole milk
- 1 cup heavy cream
- 1/2 cup granulated sugar
- 2 teaspoons pure vanilla extract
- 1/2 teaspoon ground cinnamon
- 1/4 teaspoon salt
- 1/3 cup packed brown sugar
- 1/3 cup all-purpose flour
- 1/2 teaspoon ground cinnamon
- 1/4 cup unsalted butter, cold and diced
- 1/4 cup sliced almonds, optional
- Powdered sugar for dusting
- Maple syrup for serving
- Additional fresh strawberries for serving
Instructions
- Prepare baking dish: Grease a 9×13-inch baking dish with butter or nonstick cooking spray.
- Layer bread and strawberries: Spread half of the bread cubes evenly in the prepared dish. Top with half the sliced strawberries. Repeat with remaining bread cubes and strawberries.
- Prepare custard mixture: In a large bowl, whisk together eggs, milk, heavy cream, granulated sugar, vanilla extract, cinnamon, and salt until well combined. Pour custard evenly over bread and strawberries, pressing down gently to ensure even soaking.
- Make streusel topping: In a small bowl, combine brown sugar, flour, and cinnamon. Cut in cold diced butter using a pastry cutter or fingertips until mixture resembles coarse breadcrumbs. Stir in almonds if desired.
- Assemble casserole: Sprinkle streusel topping evenly over the casserole. Cover dish with foil and refrigerate for at least 2 hours or overnight for optimal flavor development and texture.
- Bake covered: Preheat oven to 350°F. Remove casserole from refrigerator as oven preheats. Bake covered with foil for 30 minutes.
- Finish baking: Uncover casserole and bake for an additional 15 minutes until golden brown and center is set.
- Rest and finish: Allow casserole to cool for 10 minutes. Dust generously with powdered sugar and serve warm with maple syrup and fresh strawberries.
Notes
For best results, prepare the casserole the night before and let it sit overnight in the refrigerator.
Feel free to substitute other fruits like blueberries or raspberries.
Nutrition
- Calories: 350
- Sugar: 15g
- Protein: 8g