Creamy Avocado Street Corn Pasta Salad Recipe

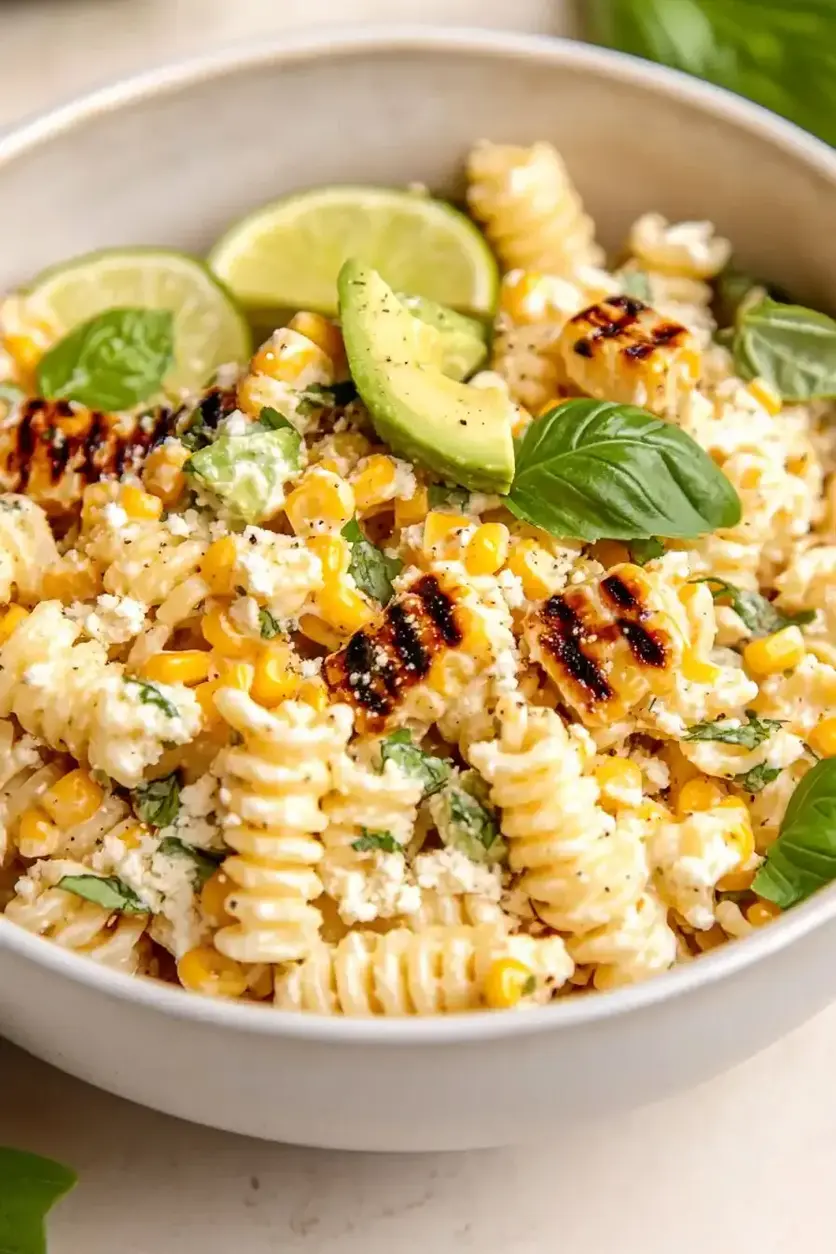
Healthy Street Corn Pasta Salad with Creamy Avocado Dressing – Your New Favorite Summer Dish

⚖️
Difficulty
Easy
⏲️
Prep Time
20 mins
🕒
Cook Time
15 mins
⏱️
Total Time
35 mins
🍽️
Servings
6

Growing up in Morocco, and then training in Paris, my culinary journey has always been about understanding and celebrating bold flavors. But living in New York City, I’ve learned the art of blending traditions and keeping things fresh and, well, healthy! That’s exactly how this healthy street corn pasta salad came to be. It’s my ode to the vibrant street food of Mexico, reimagined for a light, delicious, and easy meal. I wanted to capture that irresistible smoky, tangy, creamy goodness of elote but transform it into a substantial and incredibly satisfying pasta dish, complete with a creamy avocado dressing that you’ll absolutely adore.

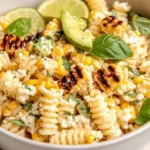
Imagine biting into al dente pasta, perfectly coated in a zesty, smoky dressing that hints at something complex and utterly delicious. The sweetness of charred corn kernels bursts in your mouth, complemented by the cool, crisp crunch of romaine lettuce. And that creamy avocado? It adds a luxurious texture and healthy fats, balancing out the spicy kick from chili powder and cayenne. It’s a symphony of textures – creamy, crunchy, tender – and a dance of flavors from tangy lime, rich smoked paprika, and fresh herbs. This isn’t just a side dish; it’s a vibrant main event for your summer gatherings, guaranteed to turn heads and tantalize taste buds.

What sets my healthy street corn pasta salad apart is a combination of traditional techniques and modern twists. Instead of heavy mayo, I opted for a lighter, yet equally indulgent, creamy avocado dressing that is both vibrant and flavorful. I’ll show you how to get that perfect char on your corn, whether you have a grill or not, a technique I picked up perfecting my roasted vegetable dishes. Plus, I’ll share a pro tip for keeping your avocado gloriously green in the salad, a common mistake many people make that I’ve learned to avoid in my bustling NYC kitchen.

Why This Healthy Street Corn Pasta Salad Recipe Is the Best

This healthy street corn pasta salad stands out because I’ve carefully balanced flavor, nutrition, and ease. Many pasta salads rely on heavy, mayonnaise-based dressings, but my version lightens things up significantly without sacrificing an ounce of flavor. By using a creamy base of cream cheese and Greek yogurt (or sour cream), combined with fresh avocado, lime, and a medley of Mexican-inspired spices like smoked paprika and chili powder, we get that signature smoky, tangy, and rich profile while keeping it incredibly fresh and vibrant.

The texture in this salad is everything. I insist on perfectly al dente pasta, which provides a satisfying chew, contrasting beautifully with the slight crunch of roasted corn and the crispness of shredded romaine. The diced avocado not only adds creaminess to the dressing but also provides lovely little pockets of buttery richness throughout the salad. Inspired by the precise attention to detail from my time in a Parisian kitchen, I ensure that each component contributes to a harmonious mouthfeel, making every bite interesting and delightful.

Beyond its incredible taste and texture, this healthy street corn pasta salad is genuinely foolproof and fast. It requires minimal cooking – just the pasta and potentially a quick char on the corn. The dressing comes together in minutes with a simple whisk, and the assembly is a breeze. It’s the kind of impressive yet easy pasta salad recipe that’s perfect for busy weeknights, last-minute potlucks, or simply whenever you crave something refreshingly delicious. It’s scalable, adaptable, and a real crowd-pleaser for any occasion.

Healthy Street Corn Pasta Salad Ingredients

When I’m shopping for ingredients, especially here in NYC, I love hitting the farmers markets. The quality of fresh corn and vibrant cilantro makes all the difference in a dish like this. But don’t worry, even your local grocery store will have everything you need to create this flavor-packed dish.

Ingredients List

  • 1 lb short pasta (like fusilli or penne)
  • 2 cups grilled or roasted corn kernels (from about 3 ears)
  • 1 head romaine lettuce, shredded
  • 1 avocado, diced
  • 1/2 cup fresh cilantro, chopped
  • 1/2 cup fresh basil, torn
  • 1/2 cup diced spicy cheddar cheese (optional)
  • 3/4 cup crumbled cotija or feta cheese
  • For the Dressing:
  • 4 oz cream cheese, room temperature
  • 1/3 cup sour cream or plain Greek yogurt
  • 2 tbsp extra virgin olive oil
  • 1-2 garlic cloves, grated
  • 2 tbsp fresh lime juice
  • 1 tbsp chopped fresh chives
  • 2 tsp smoked paprika
  • 2 tbsp chili powder
  • 1/2 to 2 tsp cayenne pepper (to taste)
  • Salt and black pepper to taste

Ingredient Spotlight

Fresh Corn: The star of our street corn pasta salad! Look for plump, smooth kernels and bright green husks. Grilling or roasting fresh corn adds an incredible smoky depth that canned corn just can’t replicate. If fresh isn’t in season, frozen corn can work in a pinch; just make sure to pan-roast it until slightly charred to develop some flavor.

Avocado: This provides creamy richness and a beautiful green hue to the salad and dressing. Choose an avocado that yields slightly to gentle pressure but isn’t mushy. If you’re out of avocado, you can increase the Greek yogurt in the dressing for creaminess, but you’ll miss out on the unique buttery texture.

Cotija or Feta Cheese: Cotija offers that classic salty, crumbly texture reminiscent of authentic street corn. If you can’t find it, a good quality feta cheese is an excellent substitute, offering a similar briny tang and crumbly texture. A little sharp parmesan could work in a pinch, but the flavor profile will shift.

Smoked Paprika & Chili Powder: These spices are non-negotiable for that signature smoky, earthy flavor. I always keep Spanish smoked paprika in my pantry. Don’t confuse smoked paprika with regular paprika; the smoky flavor is key here. If you need a substitute, a tiny pinch of liquid smoke combined with regular paprika can offer a similar essence, but use sparingly!

Fresh Lime Juice: Fresh is best! It provides the essential tang and brightness that cuts through the richness of the dressing and cheese, truly waking up the flavors. Bottled lime juice simply doesn’t compare to the zesty kick of freshly squeezed. For an emergency substitute, lemon juice could work, but it will slightly alter the classic Mexican flavor profile.

Original IngredientBest SubstitutionFlavor / Texture Impact
Cotija CheeseFeta CheeseSimilar salty, crumbly texture with a briny tang.
Sour CreamPlain Greek YogurtAdds tang and creaminess, but with less fat and more protein.
Fresh CornFrozen CornNeeds pan-roasting or grilling to mimic flavor; slightly less crisp.
Fresh CilantroFresh ParsleyDifferent flavor, but still adds herbaceous freshness.

Healthy Street Corn Pasta Salad

How to Make Healthy Street Corn Pasta Salad — Step-by-Step

Creating this vibrant salad is simpler than you might think, and I’ll guide you through each step to ensure your healthy street corn pasta salad turns out perfect every time.

Step 1: Cook the Pasta

Cook 1 lb of short pasta (like fusilli or penne) according to package directions in well-salted water until al dente. This means firm to the bite, not mushy. Once cooked, drain immediately and rinse under cold water to stop the cooking process and prevent stickiness. Set the cooled pasta aside in a large bowl.

💡 mia’s Pro Tip: Salting your pasta water generously is crucial! It’s your only chance to season the pasta itself, ensuring every bite of your healthy street corn pasta salad is flavorful. Aim for water that tastes like the sea!

Step 2: Prepare the Corn

If using fresh corn, grill or roast the ears until lightly charred on all sides. This adds an incredible smoky depth. Let them cool, then carefully cut the kernels off the cob. You should have about 2 cups. If using frozen, pan-roast them in a dry skillet over medium-high heat until they get some color and char marks.

Step 3: Assemble the Salad Base

In the large bowl with your cooled pasta, add the prepared corn kernels, 1 head of shredded romaine lettuce, diced avocado, 1/2 cup chopped fresh cilantro, 1/2 cup torn fresh basil, and the cheeses (1/2 cup diced spicy cheddar if using, and 3/4 cup crumbled cotija or feta). Toss gently to combine all the beautiful colors and textures.

⚠️ Common Mistake to Avoid: Don’t dice your avocado until just before adding to the salad! Exposure to air will cause it to brown. A squeeze of extra lime juice here also helps prevent oxidation.

Step 4: Make the Creamy Dressing

In a medium bowl, whisk together 4 oz room temperature cream cheese, 1/3 cup sour cream (or plain Greek yogurt for a lighter dressing), 2 tbsp extra virgin olive oil, 1-2 grated garlic cloves, 2 tbsp fresh lime juice, 1 tbsp chopped fresh chives, 2 tsp smoked paprika, 2 tbsp chili powder, and 1/2 to 2 tsp cayenne pepper (adjust to your heat preference). Whisk until the dressing is completely smooth and creamy. Season with salt and black pepper to taste.

Step 5: Combine and Toss

Pour the glorious, creamy dressing over the pasta salad mixture. Use a large spoon or spatula to gently toss everything until all the ingredients are evenly coated in the rich, vibrant dressing. Make sure every piece of pasta and every kernel of corn gets some love!

💡 mia’s Pro Tip: If your cream cheese is cold, microwave it for 15-20 seconds to soften it properly before whisking. This ensures a silky-smooth dressing without lumps, a technique I rely on for all my emulsified sauces.

Step 6: Season and Serve

Taste a generous spoonful of your healthy street corn pasta salad and adjust the seasoning as needed. You might want more salt, a crack of fresh pepper, or extra lime juice to brighten it up. Serve immediately for the freshest experience, or cover and refrigerate for up to 2 hours to let the flavors meld a little more. This pasta salad is best on the day it’s made due to the fresh ingredients.

StepActionDurationKey Visual Cue
1Cook Pasta10-12 minutesAl dente, rinsed cold
2Prepare Corn5-10 minutesLightly charred kernels
3Assemble Base5 minutesAll dry ingredients combined
4Make Dressing3-5 minutesSmooth, creamy consistency
5Combine & Toss2 minutesEvenly coated pasta and veg
6Season & Serve1 minuteFlavors balanced to taste

Serving & Presentation

When it comes to my healthy street corn pasta salad, presentation is almost as important as the taste! A dish so colorful deserves to be shown off. I love serving it in a beautiful wide, shallow bowl to highlight all the vibrant ingredients. For an extra touch, reserve a little chopped cilantro, a sprinkle of crumbled cotija, and perhaps an extra slice of lime to garnish just before serving. A drizzle of your favorite hot sauce or a light dusting of smoked paprika can also add a nice finishing touch.

This pasta salad is incredibly versatile and makes a fantastic side dish for almost any summer BBQ or picnic. Think grilled chicken, flaky salmon, or even juicy burgers. In my NYC apartment, sometimes I’ll serve it as a light lunch on its own, perhaps with a crusty baguette on the side. If you want to make it heartier, consider adding some grilled shrimp or shredded rotisserie chicken right into the salad.

Coming from a culinary background that values both rustic charm and refined plating, I find beauty in simplicity. The fresh herbs — basil and cilantro — are not just for flavor; they add a lovely burst of green that elevates the visual appeal. For a Moroccan touch, sometimes I’ll dust a tiny bit of sumac on top for a subtle tangy, almost lemony, finish. It’s all about making the dish inviting and exciting before the first bite even happens!

Pairing TypeSuggestionsWhy It Works
Side DishGrilled Chicken, Shrimp Skewers, BBQ RibsComplements smoky flavors, lightens heavy mains.
Sauce / DipExtra Lime Wedges, Hot Sauce, Mexican CremaAdds a final burst of zest, heat, or richness.
BeverageMargarita, Agua Fresca, Crisp White WineBalances the spice and creaminess with refreshing sips.
GarnishFresh Cilantro Sprigs, Cotija Crumbles, Paprika DustEnhances visual appeal and adds fresh aroma and texture.

Make-Ahead, Storage & Reheating

Living in NYC means a fast-paced lifestyle, and I’ve learned the importance of meals that can be prepped in advance without sacrificing quality. This healthy street corn pasta salad is fantastic for making ahead, especially if you handle your components correctly. While it’s best enjoyed relatively fresh, you can definitely do some prep work to make serving a breeze.

MethodContainerDurationReheating Tip
RefrigeratorAirtight containerUp to 2 daysServe cold, stir well before serving.
FreezerNot RecommendedN/APasta and fresh ingredients do not freeze well.
Make-AheadSeparate componentsUp to 1 day in advanceChop veggies, cook pasta, make dressing separately. Assemble just before serving.

For make-ahead success, I recommend preparing the pasta and corn, chopping your non-browning vegetables (like romaine, chives, cilantro, basil, and cheese), and making the dressing all a day in advance. Store each component separately in airtight containers in the refrigerator. Assemble the salad 1-2 hours before serving, adding the diced avocado last, and toss thoroughly. This ensures everything stays fresh, crisp, and vibrant.

Because of the fresh ingredients like avocado and romaine, this pasta salad is truly at its peak when enjoyed within a few hours of assembly. The avocado can brown over time, and the lettuce might wilt, especially if dressed for too long. If you do have leftovers, you might find the texture a little softer, but the flavors will still be delicious! There’s no reheating needed here; it’s a delightful cold salad.

Variations & Easy Swaps

Part of the joy of cooking is experimenting, and I’ve found that this healthy street corn pasta salad is a fantastic canvas for creativity. Whether you’re adapting to dietary needs or simply want to try a new flavor profile, here are some of my favorite variations.

VariationKey ChangeBest ForDifficulty Impact
Spicy Southwest KickAdd chipotle peppers or extra cayenne.Those who love heat and bold flavors.Minimal
Gluten-Free / Dairy-FreeUse GF pasta and vegan cheese/yogurt.Dietary restrictions.Minimal
Herby Summer FreshAdd dill, parsley, or mint to the fresh herbs.A lighter, brighter, more aromatic salad.Minimal

Spicy Southwest Kick

If you’re like me and appreciate a good kick, consider adding a finely minced chipotle pepper in adobo sauce to the dressing. For a North African twist, a little harissa paste would also be incredible, lending deep, smoky heat. You can also simply increase the cayenne pepper by another ½ to 1 teaspoon, or add a pinch of red pepper flakes directly to the finished salad. This makes the healthy street corn pasta salad even more exciting!

Gluten-Free and Dairy-Free

Making this recipe gluten-free is as simple as swapping traditional pasta for your favorite gluten-free short pasta variety. For a dairy-free version, use a high-quality plain unsweetened vegan cream cheese alternative and plain unsweetened vegan yogurt. There are also fantastic plant-based cotija or feta-style cheeses available now that mimic the texture and saltiness surprisingly well, making it easy to accommodate dietary needs without compromising on flavor.

Herby Summer Fresh

While cilantro and basil provide a wonderful aromatic base, feel free to experiment with other fresh herbs. Adding a quarter cup of chopped fresh dill or a bit of finely chopped mint can introduce a whole new layer of freshness and brightness, especially beautiful for a warm summer day. It’s a trick I learned in Paris, where fresh herbs are king for elevating simple dishes – they really make this street corn pasta salad sing!

How do you make a creamy sauce for healthy street corn pasta salad without mayonnaise?

To create a luscious, creamy sauce for this healthy street corn pasta salad without mayonnaise, I use a base of softened cream cheese and either sour cream or plain Greek yogurt. Whisked together with olive oil, grated garlic, fresh lime juice, and a blend of spices like smoked paprika and chili powder, it forms a rich, tangy, and flavorful dressing. The added avocado also contributes to the overall creamy texture, making it incredibly satisfying and much lighter than traditional mayo-based dressings.

Can I make street corn pasta salad ahead of time, and how should I store it?

You can certainly prepare components of this healthy street corn pasta salad ahead of time to streamline assembly. I recommend cooking the pasta, grilling or roasting the corn, and making the dressing up to a day in advance, storing each separately in airtight containers in the refrigerator. However, for the best quality, dice the avocado and toss with the romaine and other fresh herbs just before serving, then combine with the dressing. This prevents the avocado from browning and the lettuce from wilting, ensuring a vibrant and fresh salad.

What are some healthy substitutes for cotija cheese in this pasta salad?

Cotija cheese provides a distinct salty and crumbly texture. For a healthy substitute, my top recommendation is crumbled feta cheese. It offers a similar briny tang and provides a lovely counterpoint to the sweetness of the corn. If you’re looking for a non-dairy option, well-seasoned crumbled firm tofu or a good quality plant-based feta alternative would work very well. The key is to find something that brings a salty, slightly tangy element to balance the creamy dressing and sweet corn.

What type of pasta works best for a cold street corn pasta salad?

For a cold pasta salad like this healthy street corn pasta salad, short, sturdy pasta shapes are ideal. My favorites include fusilli (corkscrews), penne, rotini, or even farfalle (bowties). These shapes have nooks and crannies that perfectly capture the creamy dressing and small pieces of corn and herbs, ensuring every bite is well-coated and flavorful. Avoid long, thin pastas as they tend to stick together and become difficult to manage in a cold salad.

How do you get a good char on corn without a grill?

No grill? No problem! To achieve that rustic, smoky char on your corn kernels for this healthy street corn pasta salad, you can easily use a cast-iron skillet or a heavy-bottomed pan. Heat the dry pan over medium-high heat until it’s very hot, then add your corn kernels (fresh or thawed frozen). Toss frequently, letting them sit undisturbed for a minute or two between tosses, until they develop browned spots and some char. This technique, similar to what I’d use for sautéing vegetables in my Parisian kitchen, brings out an incredible depth of flavor.

Share Your Version!

I truly hope this healthy street corn pasta salad brightens your table as much as it does mine. I poured all my culinary heart into creating this perfectly balanced, easy pasta salad recipe, blending my NYC market finds with those beautiful smoky, tangy flavors.

I’d absolutely love to hear how it turns out for you! Please leave a star rating and a comment below to let me know your thoughts or any creative twists you added. If you snap a photo of your beautiful creation, be sure to tag @exorecipes on Instagram or Pinterest. I love seeing your culinary adventures! What’s your favorite summer side dish to pair this with?

From my NYC kitchen to yours — I hope this recipe brings as much warmth to your table as it does to mine. — mia 🧡

📌

Love This Recipe? Save It to Pinterest!

If you enjoyed this Healthy Street Corn Pasta Salad recipe, don’t let it get lost in your browser tabs! 😄 Pin it now so you can find it again anytime — and explore hundreds more tried-and-tested recipes waiting for you on my Pinterest boards.

👉 Follow mia on Pinterest @chefrecipes2

📌 Pin this recipe · 🔁 Re-pin your favorites · 💬 Tag me when you make it — I love seeing your creations!
Print

clock clock iconcutlery cutlery iconflag flag iconfolder folder iconinstagram instagram iconpinterest pinterest iconfacebook facebook iconprint print iconsquares squares iconheart heart iconheart solid heart solid icon

Healthy Street Corn Pasta Salad

  • Author: Chef Mia
  • Prep Time: 20 minutes
  • Cook Time: 15 minutes
  • Total Time: 35 minutes
  • Yield: 6 1x
  • Method: Side Dish, Salad
  • Cuisine: Mexican-American

Description

A healthy twist on Mexican street corn, this pasta salad is packed with fresh flavors from grilled corn, creamy avocado, and a zesty, smoky dressing.


Ingredients

Scale
  • 1 lb short pasta (like fusilli or penne)
  • 2 cups grilled or roasted corn kernels (from about 3 ears)
  • 1 head romaine lettuce, shredded
  • 1 avocado, diced
  • 1/2 cup fresh cilantro, chopped
  • 1/2 cup fresh basil, torn
  • 1/2 cup diced spicy cheddar cheese (optional)
  • 3/4 cup crumbled cotija or feta cheese
  • For the Dressing:
  • 4 oz cream cheese, room temperature
  • 1/3 cup sour cream or plain Greek yogurt
  • 2 tbsp extra virgin olive oil
  • 12 garlic cloves, grated
  • 2 tbsp fresh lime juice
  • 1 tbsp chopped fresh chives
  • 2 tsp smoked paprika
  • 2 tbsp chili powder
  • 1/2 to 2 tsp cayenne pepper (to taste)
  • Salt and black pepper to taste

Instructions

  1. Cook the pasta according to package directions in salted water until al dente. Drain and rinse under cold water to stop the cooking. Set aside.
  2. If using fresh corn, grill or roast the ears until lightly charred. Let cool, then cut the kernels off the cob. You should have about 2 cups.
  3. In a large bowl, combine the cooled pasta, corn, shredded romaine, diced avocado, cilantro, basil, and cheeses (if using). Toss gently.
  4. Make the dressing: In a medium bowl, whisk together the cream cheese, sour cream (or yogurt), olive oil, grated garlic, lime juice, chives, smoked paprika, chili powder, and cayenne until smooth and creamy. Season with salt and pepper.
  5. Pour the dressing over the pasta salad and toss until everything is evenly coated.
  6. Taste and adjust seasoning with more salt, pepper, or lime juice as needed.
  7. Serve immediately, or cover and refrigerate for up to 2 hours before serving for flavors to meld.

Notes

For a lighter version, use Greek yogurt instead of sour cream. You can use frozen and thawed corn if fresh isn’t available—just pan-roast it for a few minutes to get some color. The salad is best eaten the day it’s made, as the avocado may brown and the lettuce can wilt.


Nutrition

  • Calories: 420
  • Sugar: 6g
  • Fat: 22g
  • Carbohydrates: 52g
  • Protein: 14g


Healthy Street Corn Pasta Salad

k">

Tried This Recipe? Leave a Comment!

Did you make this recipe? I’d love to hear how it turned out! Please leave a comment and a rating below. Your feedback helps other home cooks and supports cheerychop.com!

For more delicious inspiration, follow me on Pinterest!
Creamy Mexican Street Corn Salad with Cotija Cheese

Mexican Corn Salad with Cotija and a Creamy Lime Kiss – The Ultimate Street Corn Salad at Home

⚖️
Difficulty
Easy
⏲️
Prep Time
15 mins
🕒
Cook Time
10 mins
⏱️
Total Time
25 mins
🍽️
Servings
6

Growing up in Morocco, the concept of street food was ingrained in me desde pequeña. The vibrant souks, the smells of spices, grilled meats, and fresh produce—it was an everyday feast for the senses. So it’s no surprise that when I first encountered Mexican street corn, or Esquites, here in New York City, I was instantly captivated. This Mexican corn salad recipe, or elote salad in a cup, felt like a culinary cousin to the bold, flavorful dishes of my childhood. But my version takes that irresistible char-grilled sweetness and the tang of lime, and marries it with a creamy, rich dressing that would make any Parisian chef tip their toque. It’s truly a can’t-stop-eating-it experience, especially with that creamy lime kiss.

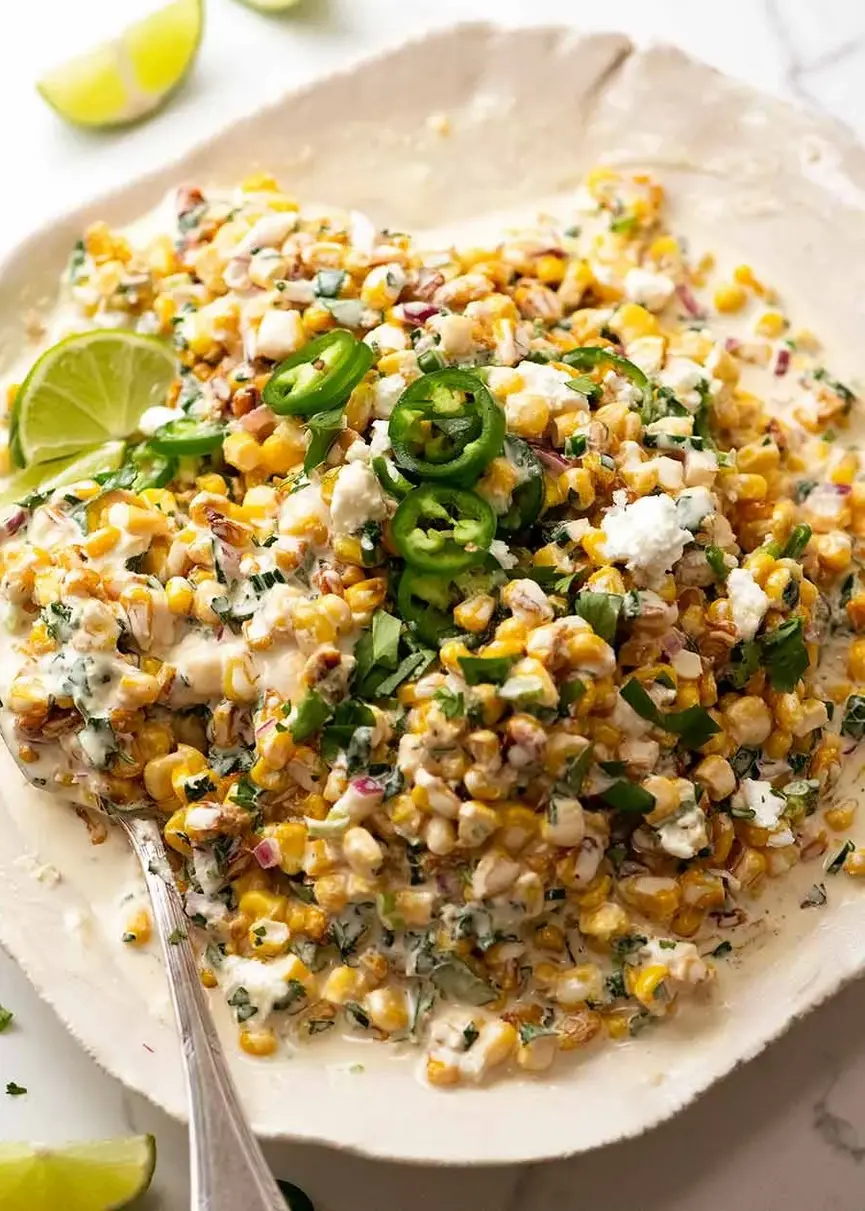
The magic of this easy corn salad recipe lies in the contrast of textures and temperatures. Imagine, if you will, perfectly browned, slightly caramelized corn kernels—each one bursting with sweet, smoky flavor—still warm from the skillet. Then, you toss them straight into a bowl with a cool, zesty dressing that’s a harmonious blend of creamy mayonnaise, tangy sour cream, and bright lime juice. The heat from the corn gently melts the dressing, creating an emulsified dream that coats every single kernel. This is where the simple becomes sublime. The fresh cilantro, punchy red onion, and subtle heat from the optional finely chopped jalapeño add layers of flavor that sing together, creating a symphony for your palate.

As a professional cook who has blended Moroccan heritage with French techniques and New York’s culinary audacity, I love finding ways to elevate humble ingredients. My secret for Mexican corn salad with cotija isn’t just about the components, but how they interact. The cotija cheese introduces a beautiful salty, crumbly texture that contrasts with the tender corn. I’ve found a special technique for getting that perfect char on the corn without overcooking it, ensuring every bite is a revelation. I’ll also share a pro tip on balancing the acidity, and point out a common mistake many home cooks make that can leave your corn salad flat. Trust me, once you try this method, you’ll never go back!

Why This Mexican Corn Salad Recipe Is the Best

The Flavor Secret: The Creamy Lime Kiss My unique angle for this Mexican corn salad is the perfect balance in the dressing. Inspired by the rich sauces I perfected in my Parisian culinary training, I’ve refined the creamy mayonnaise, sour cream, and fresh lime juice proportions. It’s not just a dressing; it’s a luxuriously tangy embrace that coats every kernel, allowing the natural sweetness of the corn to shine through while adding an irresistible zesty depth. It’s a trick I learned from balancing complex flavors in French cuisine: achieving harmony between fat, acid, and a touch of sweetness.

Perfected Texture: The Golden Brown Kernels Achieving the right texture for the corn is paramount. Many recipes just cook the corn, but I insist on getting glorious golden-brown bits. This charring process, a technique I often apply to vegetables to bring out their inherent sugars, adds an incredible depth of flavor and a slight chewiness that elevates the whole dish. It’s similar to how roasting vegetables in a tangia in Morocco brings out their best—a simple step that transforms the ordinary into extraordinary.

Foolproof & Fast: Fresh or Frozen, Always Fabulous Whether you’re grabbing fresh corn from a bustling NYC farmers market or reaching for a bag of frozen kernels, this recipe is incredibly forgiving and quick to prepare. I’ve refined the steps to ensure maximum flavor extraction with minimal effort, making it accessible for even the busiest home cook. It’s a testament to the idea that delicious, restaurant-quality food can be made simply, without fuss, and without endless hours in the kitchen.

Mexican Corn Salad Ingredients

I love scouring the markets here in NYC for the freshest produce, but truthfully, this Mexican corn salad is so adaptable you can make it sing with what you have on hand. It reminds me of my mother’s kitchen in Morocco, where ingenuity and flavor trumped strict rules about ingredients.

Ingredients List

  • 5 cups corn cut from the cob (~4 large ears) (or frozen corn, not thawed)
  • 2 tbsp butter
  • 2 garlic cloves, minced
  • 1/2 tsp each salt and pepper
  • 1/4 cup mayonnaise (can cut down to 2 tbsp)
  • 1/4 cup sour cream (or plain yogurt)
  • 1/2 cup parmesan cheese, finely grated
  • 1 tbsp Jalapeno, deseeded and finely chopped (optional)
  • 1 cup coriander / cilantro leaves, roughly chopped
  • 1 cup green onion, finely sliced (~2 stems)
  • 1/2 red onion, finely chopped
  • 2 – 3 tbsp lime juice, fresh (plus more to taste)
  • 60g / 2 oz Cotija or Feta, crumbled (optional)
  • Jalapeno slices, coriander/cilantro leaves, lime wedges (optional, for garnish)

Ingredient Spotlight

Corn: Fresh corn on the cob, especially in peak season, is absolutely divine for this Mexican corn salad recipe. Look for plump, bright green husks and moist silks. If fresh isn’t available or convenient, frozen corn works beautifully – no need to thaw! Its natural sweetness is key to the elote salad flavor profile.

Mayonnaise & Sour Cream: These form the creamy base of our dressing, reminiscent of the richness in French sauces. Use good quality full-fat mayonnaise for the best flavor and texture. For sour cream, plain Greek yogurt is a fantastic substitute, adding a similar tang with a slightly lighter feel. This creamy blend is crucial for embodying that authentic street corn salad experience.

Lime Juice: Freshly squeezed lime juice is non-negotiable for that vibrant, zesty finish. It cuts through the richness of the dairy and brightens all the flavors. Bottled lime juice simply doesn’t compare. Always keep a few limes on hand, they’re essential for Moroccan and French cooking too!

Cotija Cheese: This crumbly Mexican cheese adds a salty, slightly tangy punch that is iconic in street corn salad. If you can’t find cotija, crumbled feta cheese is an excellent, readily available substitute; its saltiness and texture are very similar. Parmesan cheese is used in the dressing for its melting quality and umami depth.

Cilantro: This herb brings a fresh, aromatic counterpoint to the creamy, sweet, and tangy flavors. Look for vibrant, unwilted bunches. If you’re not a fan of cilantro (it can be divisive!), fresh parsley or even a mix of mint and parsley can offer a different but still delicious fresh note.

Original IngredientBest SubstitutionFlavor / Texture Impact
Fresh CornFrozen Corn (not thawed)Slightly less crisp, but equally sweet and convenient.
Sour CreamPlain Full-Fat Greek YogurtSimilar tang and creaminess, slightly lighter in body.
Cotija CheeseFeta Cheese (crumbled)Similar salty and tangy profile, slightly softer texture.
CilantroFresh Italian ParsleyDifferent flavor profile, but still provides freshness.
JalapeñoPoblano Pepper (roasted)Milder heat, smoky flavor, still adds depth.

Mexican Corn Salad

How to Make Mexican Corn Salad — Step-by-Step

Don’t be intimidated by the steps; this elote salad comes together quickly and easily. Just follow along, and you’ll have a fantastic dish in no time!

Step 1: Cut off kernels

Carefully cut the corn kernels from the cob. A great trick I learned to keep kernels from flying everywhere is to stand the cob upright in the center of a bundt pan or a large bowl, and slice downwards. The pan catches all the kernels! If you’re using frozen corn, leave it frozen for this step; there’s no need to thaw it beforehand.

Step 2: Brown corn

In a large skillet, melt 2 tablespoons of butter over high heat. Once shimmering, add the minced garlic and stir for just about 10 seconds until fragrant—be careful not to burn it, as garlic can turn bitter. Now, add your corn (fresh or frozen) to the skillet. Cook for about 5 minutes, stirring occasionally. You want to see some beautiful golden-brown bits forming on the corn, indicating it’s caramelizing and getting lovely and sweet. Resist the urge to stir constantly, as minimal movement helps achieve that coveted browning. This browning step adds a depth of flavor that is non-negotiable for a truly authentic Mexican corn salad.

💡 mia’s Pro Tip: The French technique of fond (browning at the bottom of the pan) isn’t just for meat! Letting the corn get some color develops its natural sugars and creates a richer, more complex flavor in your elote salad.

Step 3: Season corn

About halfway through the corn’s cooking time, sprinkle in 1/2 teaspoon each of salt and pepper. This allows the seasoning to penetrate the corn as it cooks, rather than just coating the surface. Adjust to your taste, of course; my Moroccan mother always taught me to taste and adjust at every stage.

⚠️ Common Mistake to Avoid: Don’t over-salt initially. Cotija cheese is salty, and you can always add more at the end. It’s much harder to fix an over-salted dish!

Step 4: Toss with dressing

Transfer the warm, cooked corn into a large mixing bowl. Immediately add the mayonnaise, sour cream (or yogurt), fresh lime juice, and finely grated Parmesan cheese. Toss everything together vigorously. The residual heat from the corn will work its magic, gently “melting” and emulsifying the dressing, creating a lusciously creamy coating for every kernel. Next, add the roughly chopped cilantro, finely chopped red onion, sliced green onion, and the optional deseeded and chopped jalapeño. Toss again until all ingredients are well combined and the dressing evenly coats everything.

Step 5: Serve

Transfer your vibrant Mexican corn salad to a beautiful serving bowl. If using, crumble the cotija or feta cheese over the top. Garnish with extra jalapeño slices, fresh cilantro leaves, and perhaps a few lime wedges for a pop of color and extra zest. This street corn salad is absolutely delicious served warm, allowing the dressing to remain creamy and slightly fluid, but it’s also fantastic at room temperature. It’s a versatile dish perfect for any occasion, from a casual backyard BBQ to a more elegant dinner party.

StepActionDurationKey Visual Cue
1Cut Corn Kernels5 minsCleanly separated kernels.
2Brown Corn5-7 minsGolden brown bits on corn and fragrant aroma.
3Season Corn(during step 2)Evenly distributed salt and pepper.
4Toss with Dressing & Herbs2 minsCorn fully coated, vibrant vegetables mixed in.
5Serve & Garnish1 minVisually appealing with crumbled cheese and fresh herbs.

Serving & Presentation

This Mexican corn salad is a feast for the eyes as much as it is for the palate! When plating, I love to use a vibrant, shallow serving bowl that lets the colors of the corn, red onion, and green cilantro truly pop. A sprinkle of extra crumbled cotija cheese on top isn’t just for flavor; it adds a beautiful snowy contrast. I always finish with a few fresh cilantro sprigs and a couple of thin lime wedges on the side—it signals freshness and invites guests to add an extra squeeze of citrus if they wish. It’s a little nod to the delicate garnishing techniques I learned in Paris, making even a humble street food feel elegant.

Here in NYC, I find this elote salad pairs perfectly with so many dishes. It’s a natural sidekick to anything grilled: think juicy carne asada, marinated chicken, or even simple grilled shrimp. For a more casual meal, I often serve it alongside tacos, quesadillas, or as part of a vibrant backyard BBQ spread. The creamy, tangy, and slightly spicy notes of the street corn salad complement rich meats beautifully, offering a refreshing counterpoint.

Don’t limit yourself to main courses. This Mexican corn salad also makes a fantastic appetizer or a delightful addition to a picnic spread. I’ve even served it as a decadent dip with sturdy tortilla chips at gatherings. The key is its versatility; whether hot, warm, or room temperature, its irresistible flavor profile always shines.

Pairing TypeSuggestionsWhy It Works
Side DishCarne Asada, Grilled Chicken, Fish TacosThe creamy, tangy notes cut through rich meats and brighten spicy flavors.
Sauce / DipTortilla Chips, QuesadillasTransforms into a chunky, flavorful dip that’s incredibly addictive.
BeverageMargaritas, Iced Tea, Agua FrescaRefreshing drinks balance the richness and hint of spice in the salad.
GarnishAvocado slices, Pickled Red OnionsAdds extra creaminess, texture, and a beautiful contrasting color.

Make-Ahead, Storage & Reheating

Living in NYC as a professional cook, I’ve mastered the art of meal prepping without sacrificing flavor. This Mexican corn salad is a fantastic make-ahead option, perfect for busy weeknights or entertaining. The flavors actually meld beautifully as it sits, making it even more delicious the next day.

MethodContainerDurationReheating Tip
RefrigeratorAirtight container3-4 daysServe cold or gently warm to room temperature.
FreezerFreezer-safe bag/container (without dressing)Up to 2 monthsThaw overnight, then make fresh dressing.
Make-AheadSeparate dressing/corn elements1-2 days in advanceCombine and toss no more than a few hours before serving for optimal texture.

For best results, if you’re making the Mexican corn salad more than a day in advance, I recommend keeping the cooked corn mixture and the dressing components (mayonnaise, sour cream, lime juice, Parmesan) separate. Prepare your corn as instructed, let it cool completely, and then store it in an airtight container. Mix your dressing ingredients in a separate jar. On the day of serving, simply combine the corn, dressing, and fresh herbs (cilantro, red onion, green onion), toss, and serve. This ensures the herbs remain vibrant and the dressing maintains its fresh, creamy consistency.

If you have leftovers and prefer to enjoy it warm, you can gently reheat the salad in a skillet over low heat, stirring occasionally until just warmed through. Be careful not to let it simmer vigorously, as this can cause the creamy dressing to separate. A quick stir and a squeeze of fresh lime juice can revive it beautifully.

Variations & Easy Swaps

Part of the joy of cooking, for me, is the endless possibilities for adaptation. Just like the vibrant and varied tagines of Morocco, or the seasonal twists in French patisserie, this Mexican corn salad is a fantastic canvas for your creativity.

VariationKey ChangeBest ForDifficulty Impact
Spicy & SmokyAdd smoked paprika, chipotle powder, or roasted poblanos.Those who love heat and a deeper, richer flavor profile.Easy
Dairy-Free / VeganUse plant-based mayo, vegan sour cream, and nutritional yeast/cashew cream for cheese.Dietary restrictions, or a lighter take.Easy – Medium
Herby Summer SaladSwap cilantro for a mix of mint, parsley, and basil.Garden fresh flavor, lighter, backyard BBQs.Easy

Spicy & Smoky Mexican Corn Salad Variation

For those who like a little extra kick, you can easily transform this Mexican corn salad into a smoky and spicy delight. Add 1/2 teaspoon of smoked paprika and a pinch of chipotle powder along with the salt and pepper when you’re browning the corn. For more heat, incorporate finely diced roasted poblano peppers instead of or in addition to the jalapeño. The roasting process adds a beautiful smokiness that complements the corn’s sweetness, a technique similar to how we roast peppers in North African cuisine to intensify their flavor.

Dairy-Free Creamy Corn Salad

Creating a dairy-free version of this creamy street corn salad is absolutely achievable without sacrificing flavor. Simply swap regular mayonnaise for a good quality plant-based mayonnaise. For the sour cream, use a vegan sour cream alternative or blend raw cashews with a bit of water and lemon juice to create a rich cashew cream. Omit the Parmesan and Cotija, or use a nutritional yeast blend or vegan Parmesan substitute for that cheesy umami. I’ve tested this, and while the flavor profile is slightly different, it’s still wonderfully creamy and satisfying.

Herby Summer Corn Salad

Embrace the freshness of summer by swapping out some of the cilantro for an assortment of other herbs. A mix of fresh mint, parsley, and a hint of basil can give this easy corn salad a brighter, lighter, more garden-fresh appeal. This is especially lovely if you’re pulling herbs directly from your small NYC balcony garden or a local farmers market find. The herbaceous notes are divine when paired with grilled chicken or fish, creating a refreshing meal that tastes like pure sunshine.

How do you make Mexican corn salad with canned corn?

While fresh or frozen corn works best for the brown bits crucial to this elote salad, you can certainly adapt it for canned corn. The key is to drain the canned corn very well and then pat it dry with a paper towel. This helps remove excess moisture, allowing it to brown more effectively. Follow the same steps: melt butter in a large skillet over high heat, add the garlic, then add the dried canned corn. Stir occasionally until you achieve those lovely golden-brown, lightly caramelized kernels. The cooking time might be slightly shorter since canned corn is already cooked through. Then proceed with the dressing and other ingredients as directed. It will still be absolutely delicious!

What can I use instead of cotija cheese in Mexican corn salad?

If you can’t find cotija cheese for your Mexican corn salad, the best substitute is crumbled feta cheese. Feta offers a similar salty, tangy, and crumbly texture that mimics cotija remarkably well. Its briny flavor also complements the sweet corn and creamy dressing beautifully. Another option could be a dry, grated Parmesan cheese, though its flavor profile is distinctly different from cotija. For a dairy-free option, a mixture of nutritional yeast with a pinch of sea salt can provide a savory, cheesy flavor without the dairy. The goal is to provide a salty, umami kick and a textural contrast to the sweet, creamy corn.

Can Mexican corn salad be made ahead of time?

Absolutely, Mexican corn salad can be made ahead of time, and in fact, I often prepare it this way for parties here in NYC. The flavors tend to meld and deepen beautifully as it sits. The best approach is to cook and cool the corn, and prepare the dressing separately. You can chop all the fresh herbs and onions too, keeping them in an airtight container. Combine the corn, dressing, and fresh ingredients no more than a few hours before serving for optimal freshness and texture. If made completely ahead, the cilantro can sometimes wilt slightly and the red onions might become a bit too pungent, but it will still taste delicious for up to 3-4 days when stored in an airtight container in the refrigerator.

Is Mexican corn salad served hot or cold?

Mexican corn salad, or elote salad, is incredibly versatile and can be served either warm or at room temperature. My preferred way to serve it is warm, shortly after tossing the hot corn with the creamy dressing. This is where the magic happens, as the heat from the corn slightly melts the dressing, creating a truly luxurious, well-coated consistency, reminiscent of the traditional street corn served warm off the grill. However, it’s also absolutely fantastic at room temperature, which makes it an excellent choice for picnics, potlucks, or any gathering where keeping food hot isn’t practical. Serving it chilled directly from the fridge is also an option, though you might lose some of the creaminess, so I recommend letting it sit out for 15-20 minutes first.

Why is my Mexican corn salad bland?

If your Mexican corn salad tastes bland, there are a few likely culprits, and they often come down to a lack of proper seasoning and acidity. First, ensure you’re browning the corn sufficiently; those golden bits developed during cooking are crucial for deep, sweet, and nutty flavor. Secondly, don’t skimp on the fresh lime juice! It’s the bright, tangy kick that truly makes the dish sing and balances the richness of the mayo and sour cream. Finally, make sure you’re properly seasoning with salt and pepper, and if using, cotija cheese adds a vital salty component. Taste and adjust. A pinch of chili powder or a dash of hot sauce can also elevate the flavor significantly.

Share Your Version!

I adore seeing your culinary creations! This Mexican corn salad recipe is a true favorite in my NYC kitchen, embodying the vibrant flavors I love. If you try your hand at this creamy, zesty elote salad, please come back and leave a star rating and a comment below – your feedback means the world to me.

Even better, share a photo of your beautiful street corn salad on Instagram or Pinterest and tag @exorecipe. I love seeing how you make these recipes your own, perhaps with a touch of a Moroccan-inspired spice blend or a French culinary flair. Tell me, what’s your favorite grilled dish to serve alongside this corn salad? I’m always looking for new pairing ideas!

From my NYC kitchen to yours — I hope this recipe brings as much warmth to your table as it does to mine. — mia 🧡

📌

Love This Recipe? Save It to Pinterest!

If you enjoyed this Mexican Corn Salad recipe, don’t let it get lost in your browser tabs! 😄 Pin it now so you can find it again anytime — and explore hundreds more tried-and-tested recipes waiting for you on my Pinterest boards.

👉 Follow mia on Pinterest @chefrecipes2

📌 Pin this recipe · 🔁 Re-pin your favorites · 💬 Tag me when you make it — I love seeing your creations!

Print

clock clock iconcutlery cutlery iconflag flag iconfolder folder iconinstagram instagram iconpinterest pinterest iconfacebook facebook iconprint print iconsquares squares iconheart heart iconheart solid heart solid icon

Mexican Corn Salad

  • Author: Chef Mia

Description

Recipe video above. A Can’t-Stop-Eating-It delicious way to serve corn, this is a giant salad form of the famous Mexican Street food Esquites, a corn salad sold in cups that you can eat as you wander the streets! I love the way the creamy lime dressing melts into the hot corn as you toss it all together.I urge you to use fresh corn if you can, but this is still super made with frozen corn. Wonderful side dish, especially for Mexican or South Western themed menus!


Ingredients

Scale
  • 5 cups corn cut from the cob (~4 large ears) ((or frozen corn, not thawed, Note 1))
  • 2 tbsp / 30g butter
  • 2 garlic cloves (, minced)
  • 1/2 tsp each salt and pepper
  • 1/4 cup mayonnaise ((can cut down to 2 tbsp))
  • 1/4 cup sour cream ((or yoghurt))
  • 1/2 cup parmesan cheese (, finely grated (Note 1))
  • 1 tbsp Jalapeno (, deseeded and finely chopped (optional))
  • 1 cup coriander / cilantro leaves (, roughly chopped)
  • 1 cup green onion (, finely sliced (~2 stems))
  • 1/2 red onion (, finely chopped)
  • 23 tbsp lime juice (, fresh (plus more to taste))
  • 60g / 2 oz Cotija or Feta (, crumbled (optional) (Note 2))
  • Jalapeno slices, coriander/cilantro leaves, lime wedges (, optional)

Instructions

  1. Cut off kernels: Cut the corn off the cob (see photo in post or video for how I do this without getting corn everywhere!) If using frozen, do not thaw.
  2. Brown corn: Melt butter in a large skillet over high heat. Add garlic and stir for 10 seconds. Add corn and cook for 5 minutes, stirring every now and then, until you get lovely golden brown bits and the corn is cooked and sweet (don't stir constantly, harder to brown).
  3. Season corn: Add salt and pepper halfway through cooking corn.
  4. Toss with dressing: Transfer corn into large bowl. Add mayonnaise, sour cream, lime juice and parmesan. Toss well to combine – heat will "melt" dressing. Add coriander/cilantro, red onion, green onion and jalaepno. Toss again.
  5. Serve: Transfer to serving bowl. Crumble over cotija/feta and garnishes of choice. Serve warm or at room temperature.


Nutrition

  • Calories: 215 kcal
  • Sugar: 6 g
  • Fat: 13 g
  • Carbohydrates: 23 g
  • Protein: 6 g


Mexican Corn Salad

ph">For more delicious inspiration, follow me on Pinterest!

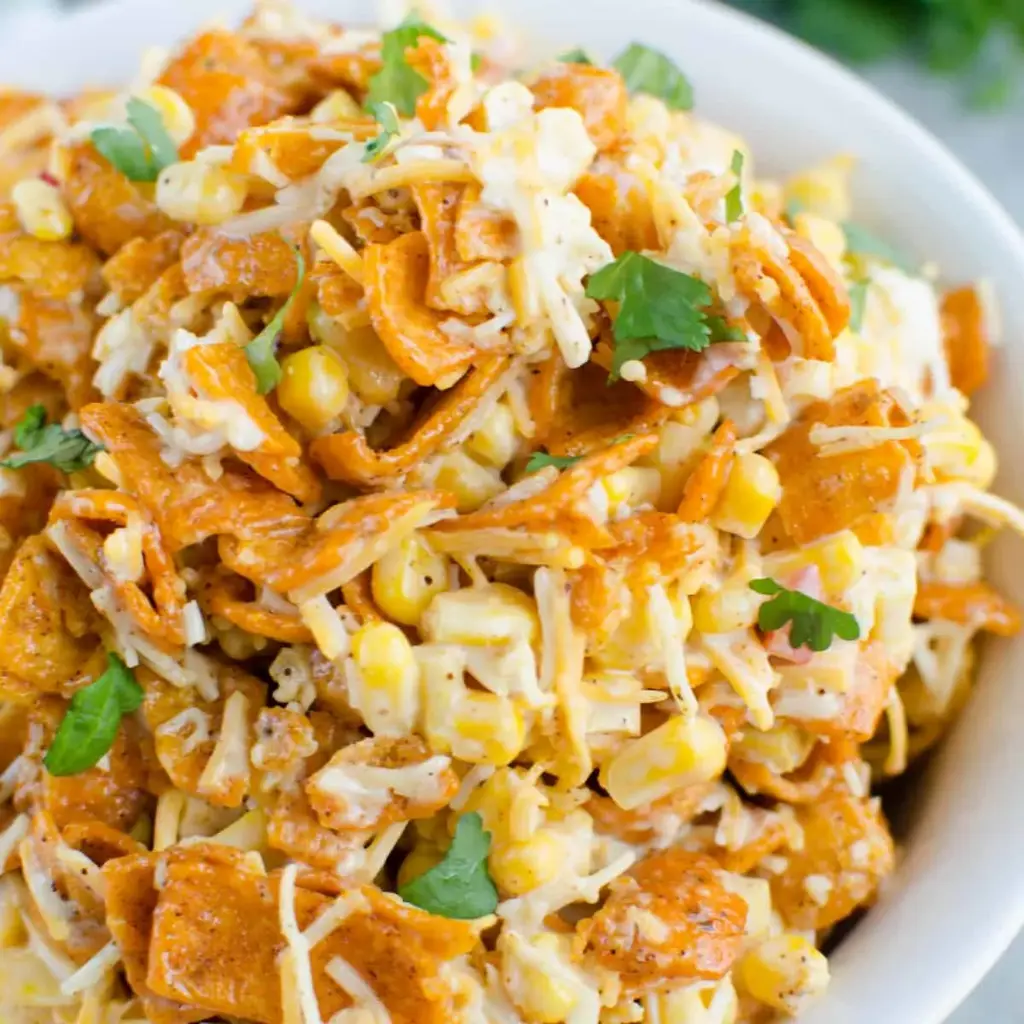
Creamy Crunchy Fritos Corn Salad for Summer

Fritos Corn Salad: The Ultimate Creamy, Crunchy Summer Side Dish

⚖️
Difficulty
Easy
⏲️
Prep Time
10 mins
🕒
Cook Time
0 mins
⏱️
Total Time
10 mins
🍽️
Servings
8

Growing up in Morocco, our salads were often vibrant, fresh, and bursting with herbs. But when I moved to New York City, I discovered a whole new world of effortless, crowd-pleasing dishes, and this Fritos corn salad quickly became a personal favorite! This isn’t your average side dish; it’s a creamy, dreamy, crunchy symphony of flavors and textures, starring the unexpected crunch of Chili Cheese Fritos. It’s hands down the perfect no-cook, super easy summer side dish for all your barbecues and potlucks, and it comes together in mere minutes.

Imagine crisp, sweet whole kernel corn mingling with finely diced red bell pepper, offering a subtle snap and a pop of color. Then, that rich, creamy dressing, coating every morsel of shredded Mexican blend cheese, bringing all the elements into a harmonious embrace. But the real star, the element that elevates this from good to utterly addictive, is the lightly crushed Chili Cheese Fritos, infusing every bite with an irresistible salty, cheesy, chili-spiced crunch. It’s a textural masterpiece, a celebration of simple ingredients creating something truly spectacular.

What makes my Fritos corn salad recipe stand out? It’s all about balancing those bold flavors and ensuring that signature crunch holds up. Through my culinary training in Paris, I learned the importance of timing and technique, even for something as seemingly simple as a corn salad. I’ll share my secret for keeping those Fritos perfectly crispy, a little pro tip I developed to avoid the common mistake of soggy chips. This recipe is designed to be foolproof, fast, and famously delicious, guaranteed to be the first empty bowl at any gathering!

Why This Fritos Corn Salad Recipe Is the Best

The secret to this Fritos corn salad’s success lies in its amazing flavor profile. It’s not just a collection of ingredients tossed together; it’s a careful balance that creates an explosion of taste. The sweetness of the corn, the subtle oniony kick from the bell pepper, the savory depth of the cheese, and the tangy creaminess of the mayo all perfectly complement the spicy, salty punch of the Chili Cheese Fritos. It’s a flavor journey that speaks to my Moroccan roots of bold spices, combined with the approachable comfort food of New York.

Texture is paramount in this dish, and I’ve perfected it to ensure that delightful crunch in every bite. The corn and bell pepper provide a fresh, slight crispness, while the shredded cheese adds a soft, yielding element. But the real game-changer is how we incorporate the Fritos. My method, refined with my culinary school precision, ensures they remain delightfully crunchy, offering that satisfying textural contrast that makes this corn salad so utterly addictive. No one likes soggy chips, and with my approach, you won’t have to worry about that!

Beyond flavor and texture, this Fritos corn salad is incredibly foolproof and fast, making it ideal for busy cooks. There’s no cooking involved, just simple assembly, which means less time in the kitchen and more time enjoying your summer gatherings. Whether you’re a seasoned chef or a beginner, you can achieve perfect results every time. It’s a recipe that delivers maximum impact with minimal effort, bringing that vibrant NYC energy to your table without the fuss.

Fritos Corn Salad Ingredients

When I’m putting together a quick summer salad, I always head to my local NYC market for the freshest produce, but the beauty of this Fritos corn salad is that many of the staples are pantry heroes! My mother taught me to always use the best quality ingredients you can find, and that applies even to canned goods and chips – they make all the difference in the final taste.

Ingredients List

  • 2 (15 ounce) cans whole kernel corn, drained
  • 1 red bell pepper, finely diced
  • 2 cups shredded Mexican blend cheese
  • 1 cup mayo (can substitute light mayo)
  • 1/4 teaspoon black pepper
  • 1 (9.25 ounce) bag Chili Cheese Fritos, lightly crushed
  • fresh cilantro, for garnish (optional)

Ingredient Spotlight

Whole Kernel Corn: For this non-cook salad, good quality canned corn is your best friend. Look for “no salt added” if you’re watching sodium, then drain it really well to prevent a watery salad. Its sweet, tender texture forms the base of our dish, perfectly balancing the bold flavors of the Fritos and cheese.

Red Bell Pepper: This isn’t just for color! Finely dicing a crisp red bell pepper adds a subtle sweetness and a refreshing crunch that contrasts beautifully with the creaminess. Select firm, glossy peppers from the produce aisle. If you don’t have red, orange or yellow will also work, but red offers the sweetest flavor.

Shredded Mexican Blend Cheese: This blend typically includes Monterey Jack, Cheddar, Asadero, and Queso Blanco, which melt into the dressing beautifully and provide a fantastic tangy, savory depth. Pre-shredded works perfectly here for convenience. If you prefer to shred your own, use a combination of cheddar and Monterey Jack for a similar flavor profile.

Mayo: The mayonnaise forms the rich, creamy binder for our salad. Its emulsified, slightly acidic nature perfectly coats every ingredient and helps to distribute the flavors evenly. I typically use full-fat mayo for the best texture and taste, but light mayo can be substituted for a slightly lighter version without compromising too much on creaminess.

Chili Cheese Fritos: This is the star of the show! The Chili Cheese Fritos bring that iconic salty, cheesy, and subtly spicy crunch that transforms this from a simple corn salad into something truly special. The flavor profile is unique and irresistible. There’s really no direct substitute if you want that exact Chili Cheese Fritos taste, but other seasoned tortilla chips could offer a similar crunch with a different flavor.

Original IngredientBest SubstitutionFlavor / Texture Impact
Canned Whole Kernel CornFrozen corn (thawed) or fresh corn (blanched)Fresher taste with fresh/frozen, but canned is convenient and works well. Ensure well-drained.
Red Bell PepperOrange or yellow bell pepper, or finely diced red onionOrange/yellow will be slightly less sweet, red onion adds a sharper, more pungent flavor.
Shredded Mexican Blend CheeseShredded sharp cheddar or Colby JackCheddar offers a more distinct cheesy flavor; Colby Jack is milder and creamier.
MayoGreek yogurt (for tang) or sour cream (for richness)Greek yogurt adds a significant tangy note and lighter texture; sour cream is richer but less sweet.
Chili Cheese FritosRegular Fritos with a pinch of chili powder, or spicy tortilla chipsWill lose the specific Chili Cheese flavor. Regular Fritos will give crunch, but need seasoning.

Fritos Corn Salad

How to Make Fritos Corn Salad — Step-by-Step

Making this Fritos corn salad is truly one of the easiest recipes you’ll ever tackle, proving that incredible flavor doesn’t always require hours in the kitchen. Let’s get started!

Step 1: Combine Base Ingredients

In a large mixing bowl, combine the two (15 ounce) cans of well-drained whole kernel corn, the finely diced red bell pepper, the two cups of shredded Mexican blend cheese, the one cup of mayo, and the 1/4 teaspoon of black pepper. Stir all these ingredients together until everything is uniformly coated in the creamy mayo. Ensure all the corn and cheese are evenly distributed. Don’t be afraid to get your hands in there if you prefer (with clean hands, of course!).

💡 mia’s Pro Tip: Make sure your corn is *very* well-drained. Any excess moisture will make your salad watery and dilute the dressing’s creaminess. I often press the corn between paper towels for an extra measure, a little trick I picked up for perfect salads from my time in Paris.

Step 2: Add Fritos Just Before Serving

This is the critical step for maintaining that amazing Fritos crunch! Right before you’re ready to serve, open the 9.25-ounce bag of Chili Cheese Fritos. Gently crush them directly in the bag to create smaller, bite-sized pieces – you want some texture, not fine crumbs. Add the crushed Fritos to the corn mixture and stir gently until just combined. Overmixing here can break them down too much.

⚠️ Common Mistake to Avoid: Adding the Fritos too early is the number one culprit for soggy corn salad! The moisture from the dressing will quickly turn them soft. Always incorporate them at the last possible minute to preserve their crisp texture.

Step 3: Garnish and Serve

If desired, garnish your Fritos corn salad with a sprinkling of fresh chopped cilantro. This adds a beautiful pop of color and a fresh, herbaceous note that brightens up the whole dish. You can also add a few extra whole Fritos on top for visual appeal and an obvious hint at what deliciousness awaits inside. Serve immediately and watch it disappear!

💡 mia’s Pro Tip: For an extra layer of flavor, toss in a tiny pinch of smoked paprika or a dash of hot sauce into the dressing mix in Step 1. It adds a subtle warmth that complements the Chili Cheese Fritos beautifully, a nod to the layered spices I grew up with in Morocco.

StepActionDurationKey Visual Cue
1Combine corn, bell pepper, cheese, mayo, pepper5 minsEverything evenly coated, uniform color.
2Stir in crushed Chili Cheese Fritos1 minFritos are mixed in but still visibly crunchy.
3Garnish with cilantro, serve immediately1 minVibrant green cilantro against creamy texture.

Serving & Presentation

Serving this Fritos corn salad is almost as much fun as eating it! I love bringing it out in a beautiful ceramic bowl, letting the vibrant colors of the corn, red bell pepper, and creamy dressing really pop. A generous sprinkle of fresh, bright green cilantro over the top adds a touch of gourmet elegance, transforming a simple dish into something truly eye-catching. You can even arrange a few whole Chili Cheese Fritos around the rim of the bowl to signal the exciting crunch within.

This salad is a quintessential summer side dish, perfect for pairing with all your outdoor grilling adventures. Think sizzling burgers, juicy grilled chicken, or even slow-smoked ribs – the creamy, crunchy texture and bold flavors of the Fritos corn salad provide a fantastic contrast to rich, savory meats. Growing up, my mother would always have a fresh, vibrant salad to accompany our tagines, and this corn salad offers that same refreshing balance to heartier main courses.

For a complete meal, consider serving it alongside classic BBQ fare like coleslaw and baked beans. The spice and crunch also make it an excellent accompaniment to tacos or as a topping for chili. When I host friends here in my tiny NYC apartment, I love to put out a spread of easy, delicious sides, and this Fritos corn salad always gets rave reviews and disappears fast. It’s simple, satisfying, and utterly delicious.

Pairing TypeSuggestionsWhy It Works
Side DishGrilled chicken, pulled pork sandwiches, chili, tacosThe creamy crunch balances rich meats and adds textural interest to soft tacos or chili.
Sauce / DipServe with extra Fritos or tortilla chips, as a hot dog toppingAdds a burst of flavor and texture as a dipper or topping for casual meals.
BeverageCrisp lager, iced sweet tea, sparkling limeadeRefreshing drinks cut through the creaminess and complement the savory chili notes.
GarnishFresh cilantro, thinly sliced scallions, a squeeze of lime juiceEnhances freshness, adds color, and brightens the overall flavor profile.

Make-Ahead, Storage & Reheating

As a busy cook in NYC, I know the importance of make-ahead dishes. This Fritos corn salad is fantastic for meal prepping, especially if you plan it right to keep that signature Fritos crunch. It’s all about strategic assembly!

MethodContainerDurationReheating Tip
RefrigeratorAirtight container3-4 days (without Fritos)Serve chilled; add fresh Fritos just before eating.
FreezerNot recommendedN/AMayo-based salads and fresh ingredients don’t freeze well.
Make-AheadSeparate container for FritosUp to 2 days for base mixtureMix base ingredients, store, then add Fritos and garnish right before serving.

The key to make-ahead success is to prepare the base of the salad (corn, bell pepper, cheese, mayo, and black pepper) and store it in an airtight container in the refrigerator for up to 2 days. This allows the flavors to meld beautifully, often enhancing the overall taste.

When you’re ready to serve, simply pull the base mixture from the fridge, give it a good stir, and then, and only then, gently fold in your lightly crushed Chili Cheese Fritos. If you add the Fritos too early, they will inevitably get soggy, and you’ll lose that fantastic textural element that makes this salad so special. Always serve it chilled, as it makes for a wonderfully refreshing side dish on a warm day.

Variations & Easy Swaps

VariationKey ChangeBest ForDifficulty Impact
Spicy Southwestern TwistAdd jalapeños, taco seasoning, black beansHeat lovers, those wanting a more robust flavor.Slightly increased prep due to chopping/draining.
Lighter & Dairy-FreeUse Greek yogurt/vegan mayo, omit cheese/use vegan cheeseHealth-conscious, those with dietary restrictions.No significant change in difficulty.
Summer Veggie BoostAdd diced cucumber, cherry tomatoes, avocadoThose wanting more fresh veggies, added nutrients.Slightly increased prep for chopping.

Spicy Southwestern Twist

For those who love a little extra kick, a Spicy Southwestern Twist is fantastic. I like to finely dice up a fresh jalapeño (remove seeds for less heat, leave them in for more!) and add it to the mix. A pinch of cumin and a dash of chili powder in the dressing also amplify those warm, earthy notes reminiscent of the spices I used in my Moroccan kitchen. Don’t be afraid to experiment with a little smoked paprika too, for an extra layer of complexity.

Lighter & Dairy-Free Version

Making this Fritos corn salad lighter or dairy-free is surprisingly easy! You can swap half or all of the mayo for plain Greek yogurt for a tangier, lower-fat dressing, or use a high-quality vegan mayonnaise for a completely dairy-free alternative. For dairy-free cheese, there are many excellent plant-based shredded cheeses available in most US grocery stores now that melt and blend beautifully into salads, maintaining that creamy cheese texture mia perfected.

Summer Veggie Boost

To make this salad even more vibrant and nutritious, especially if you’re hitting up an NYC farmers market, consider adding extra summer veggies. Diced cucumber for a refreshing crunch, halved cherry tomatoes for a burst of juicy sweetness, or even some black beans (rinsed and drained) for added protein and fiber. Just remember to add quick-to-soggy ingredients like avocado right before serving to maintain their best texture.

How do you keep Fritos from getting soggy in corn salad?

This is the absolute most important tip for Fritos corn salad! The secret to keeping your Fritos perfectly crisp is to add them right before serving, and I mean *right* before. The moisture from the creamy dressing will quickly absorb into the chips, making them soft if they sit too long. Prep all your other ingredients, mix them with the dressing, and keep that base chilled. Just as your guests arrive or you’re about to put it on the table, then gently fold in those crunchy Chili Cheese Fritos. Trust me, it makes all the difference!

Can I make Fritos corn salad ahead of time?

Yes, you absolutely can make the base of this Fritos corn salad ahead of time! This is a fantastic strategy for entertaining or meal prep. Mix together the corn, bell pepper, cheese, mayo, and black pepper. Store this mixture in an airtight container in the refrigerator for up to 2 days. The flavors will actually meld and deepen beautifully. Just remember my golden rule: the Chili Cheese Fritos only go in at the very last minute before you plan to serve it to ensure they stay wonderfully crunchy.

What can I use instead of Fritos in this salad?

While Chili Cheese Fritos give this salad its signature flavor and crunch, you can certainly experiment with other options if you’re feeling adventurous or simply don’t have them on hand. Regular Fritos would work, though you might want to add a pinch of chili powder or paprika to the dressing to compensate for the lost flavor. Alternatively, spicy tortilla chips, Doritos, or even crushed hot Cheetos could offer interesting variations. Just be prepared for a slightly different flavor profile, but still a fantastic crunch!

Is Fritos corn salad served cold or at room temperature?

Fritos corn salad is definitely best served chilled. The cold temperature enhances the refreshing crispness of the corn and bell pepper, and the creamy dressing is much more enjoyable when cool. While it’s okay for it to sit out at room temperature for a potluck or barbecue for an hour or two (if it’s not too hot outside), I always recommend keeping it refrigerated until just before serving. This ensures optimal flavor, texture, and food safety, especially with the mayonnaise base.

Can I use fresh or frozen corn instead of canned?

Absolutely! While canned corn makes this recipe incredibly quick and easy, fresh or frozen corn can absolutely be used. If using fresh corn, you’ll want to blanch it quickly in boiling water for about 2-3 minutes, then cool it completely before adding it to the salad. This will ensure it’s tender-crisp. For frozen corn, simply thaw it completely and drain any excess water thoroughly. Either option will bring a lovely fresh sweetness to your corn salad, sometimes even more vibrant than canned.

Share Your Version!

I truly hope you adore this Fritos Corn Salad as much as I do. It’s a recipe that perfectly blends easy comfort with exciting flavors, ideal for any gathering. If you give it a try, please come back and leave a star rating and a comment below – your feedback means the world to me!

Don’t forget to share a photo of your culinary masterpiece on Instagram or Pinterest! Tag @exorecipes so I can see your beautiful creations and celebrate with you. I’m always curious: what’s your favorite unexpected crunchy topping for a salad?

From my NYC kitchen to yours — I hope this recipe brings as much warmth to your table as it does to mine. — mia 🧡

📌

Love This Recipe? Save It to Pinterest!

If you enjoyed this Fritos Corn Salad recipe, don’t let it get lost in your browser tabs! 😄 Pin it now so you can find it again anytime — and explore hundreds more tried-and-tested recipes waiting for you on my Pinterest boards.

👉 Follow mia on Pinterest @chefrecipes2

📌 Pin this recipe · 🔁 Re-pin your favorites · 💬 Tag me when you make it — I love seeing your creations!

Print

clock clock iconcutlery cutlery iconflag flag iconfolder folder iconinstagram instagram iconpinterest pinterest iconfacebook facebook iconprint print iconsquares squares iconheart heart iconheart solid heart solid icon

Fritos Corn Salad

  • Author: Chef Mia

Description

Crisp corn, bell pepper, cheese, and Chili Cheese Fritos in a creamy dressing. The perfect no cook, super easy summer side dish for all your barbecues!


Ingredients

Scale
  • 2 (15 ounce) cans whole kernel corn, drained
  • 1 red bell pepper, finely diced
  • 2 cups shredded Mexican blend cheese
  • 1 cup mayo (can substitute light mayo)
  • 1/4 teaspoon black pepper
  • 1 (9.25 ounce) bag Chili Cheese Fritos, lightly crushed
  • fresh cilantro, for garnish

Instructions

  1. In a large mixing bowl, stir together corn, diced bell pepper, shredded cheese, mayo, and black pepper.
  2. Right before serving, stir in crushed Chili Cheese Fritos.
  3. Garnish with fresh cilantro if desired.


Nutrition

  • Calories: 258 calories
  • Sugar: 1 grams sugar
  • Fat: 24 grams fat
  • Carbohydrates: 5 grams carbohydrates
  • Protein: 6 grams protein


Fritos Corn Salad

k">

Tried This Recipe? Leave a Comment!

Did you make this recipe? I’d love to hear how it turned out! Please leave a comment and a rating below. Your feedback helps other home cooks and supports cheerychop.com!

For more delicious inspiration, follow me on Pinterest!

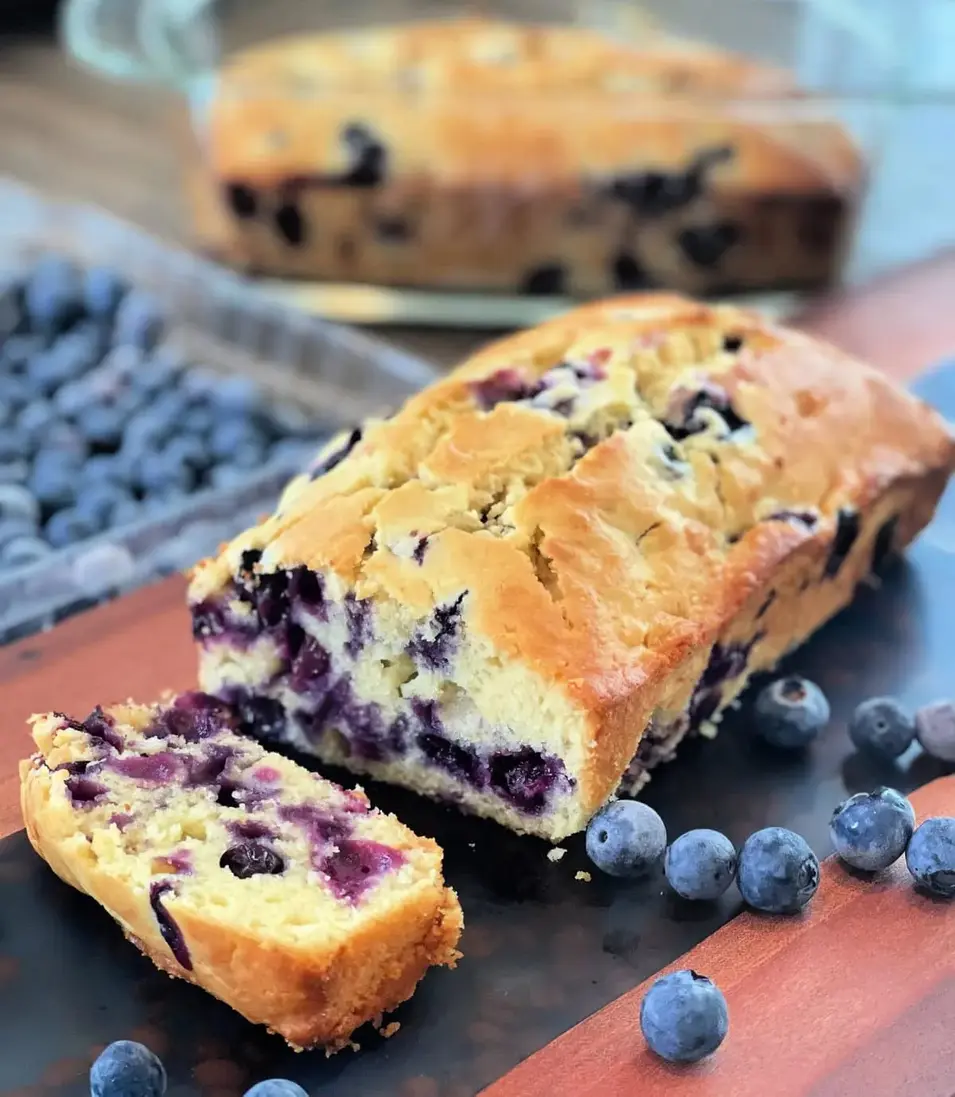
Moist Blueberry Cream Cheese Bread You’ll Love

Blueberry Cream Cheese Bread: Easy, Moist, and Flavor-Packed

⚖️
Difficulty
Easy
⏲️
Prep Time
20 mins
🕒
Cook Time
50 mins
⏱️
Total Time
70 mins
🍽️
Servings
12

Growing up in my mother’s bustling kitchen in Morocco, the aromas of citrus and spices were a daily symphony. While we didn’t have blueberry cream cheese bread on our traditional tables, the love for baking and creating sweet, comforting treats was deeply ingrained. When I moved to Paris for culinary school, I discovered the rich world of French patisserie, where cream and butter reign supreme, adding unparalleled richness to every bite. This blueberry cream cheese bread recipe brings together that European indulgence with the simple comfort of home, creating something truly special that you’ll want to bake again and again. It’s an easy blueberry bread that truly captures the essence of homemade goodness.

Imagine biting into a slice of this moist blueberry cream cheese bread: the delicate crust giving way to an incredibly tender crumb, studded with bursts of juicy, plump blueberries. Each mouthful is infused with the subtle tang of cream cheese, perfectly balancing the sweetness of the sugar and the warmth of vanilla. The texture is what truly sets it apart – thanks to the cream cheese, it’s not just moist, it’s decadently soft, almost melting in your mouth. The blueberries, coated ever-so-slightly in flour, stay suspended throughout the loaf, ensuring every slice is a painter’s palette of purple and gold.

As a chef based here in New York City, I’m always looking for ways to elevate classic recipes with a touch of professional finesse, yet keep them accessible. This homemade blueberry bread is my perfected version, designed for both seasoned bakers and beginners. I’ll share my secret for achieving that perfectly moist texture, a crucial tip to prevent those precious blueberries from sinking, and even guide you on a common mistake that can turn your beautiful loaf into a dense disappointment. Get ready to bake the best blueberry cream cheese bread you’ve ever tasted!

Why This Blueberry Cream Cheese Bread Recipe Is the Best

The secret to this blueberry cream cheese bread’s unparalleled flavor lies in the use of both butter and cream cheese. From my French pastry training, I learned the magic of rich dairy to create depth. The cream cheese not only adds a delightful tang but also ensures an incredibly moist crumb that lasts for days, far beyond what butter alone could achieve. It’s like a little taste of Parisian indulgence, but right in your kitchen.

Achieving the perfect texture in a quick bread can be tricky, but I’ve perfected a method that yields loaves that are tender and airy, never dense or dry. The gentle folding of ingredients, especially ensuring not to overmix after adding the flour, is a technique I brought from my Moroccan kitchen where careful handling of dough is key. This attention to detail results in a crumb that’s soft, uniform, and lets those fresh blueberries shine.

This easy blueberry bread recipe is designed to be foolproof, whether you’re a baking novice or a seasoned pro. With straightforward steps and readily available ingredients, you’ll be able to create two perfect loaves without any fuss. I’ve broken down each stage to ensure success, allowing you to confidently bake a delicious homemade blueberry bread that tastes like it came from a gourmet bakery.

Blueberry Cream Cheese Bread Ingredients

The beauty of this recipe starts with fresh, quality ingredients, many of which I pick up from the vibrant farmers markets here in NYC. But even from your local grocery store, choosing the right components makes all the difference in this incredible blueberry bread.

Ingredients List

  • 1 cup butter (softened, unsalted)
  • 8 oz cream cheese (softened)
  • 3/4 cup sugar
  • 2 tsp vanilla extract
  • 4 eggs
  • 2 cups flour (all-purpose)
  • 1 1/2 tsp baking powder
  • 1/2 tsp salt
  • 2 cups blueberries (fresh, tossed in 1 tbsp flour)

Ingredient Spotlight

When selecting your butter, always opt for unsalted so you can control the salt content in your recipe, a foundational principle in French pastry. Make sure it’s properly softened, not melted, for that perfect creaming texture. For cream cheese, full-fat block cream cheese is your best friend for an ultra-moist and rich blueberry cream cheese bread. The softened state ensures it blends seamlessly into the batter, avoiding lumps. If you only have whipped cream cheese, it’s not ideal for baking as it contains too much air and moisture.

All-purpose flour forms the structure of our quick bread. While specialty flours have their place, for a tender, moist blueberry bread like this, standard all-purpose works beautifully. For optimal lightness, ensure your baking powder is fresh; an old, inactive leavening agent can result in a flat, dense loaf. To test its freshness, simply add a spoonful to hot water – it should bubble vigorously. If you’re out of baking powder, you can use 1/4 teaspoon baking soda for every 1/2 teaspoon of baking powder, but you’ll need an added acidic ingredient like buttermilk or lemon juice to activate it, which would alter the recipe slightly.

Lastly, the stars of the show – fresh blueberries! They offer the best burst of flavor and texture. Don’t skip tossing them in a tablespoon of flour; this simple trick from my mother’s baking wisdom prevents them from sinking to the bottom of your loaf, ensuring an even distribution of fruit. If fresh are out of season, frozen blueberries can be used (do not thaw!), but they might bleed a bit more color into the batter and may require an extra minute or two of baking.

Original IngredientBest SubstitutionFlavor / Texture Impact
Unsalted ButterSalted Butter (reduce added salt by 1/4 tsp)Slightly Saltier overall flavor, but still works well.
Cream Cheese (block)Mascarpone (for a richer, less tangy flavor)Richer, less tangy profile; slightly softer-textured bread.
All-Purpose Flour1:1 Gluten-Free Flour Blend (with xanthan gum)May result in a slightly denser loaf, but still delicious.
Fresh BlueberriesFrozen Blueberries (unthawed and tossed in flour)May bleed more color into batter; possibly a slightly longer bake time.

BLUEBERRY CREAM CHEESE BREAD

How to Make Blueberry Cream Cheese Bread — Step-by-Step

Making this easy blueberry cream cheese bread is simpler than you think! Just follow these clear steps, and you’ll have two perfect loaves ready to enjoy.

Step 1: Preheat and Prep

Preheat your oven to 350°F (175°C). This is crucial for even baking, as a properly preheated oven prevents your bread from turning out dense. Grease and flour two 9×5 inch loaf pans, or use parchment paper slings for easy removal. This preparation ensures your beautiful blueberry cream cheese bread comes out flawlessly without sticking.

💡 mia’s Pro Tip: Don’t just grease, flour too! Even if your pans are non-stick, a light coating of flour creates a perfect release barrier, especially important for high-moisture breads like this one.

Step 2: Cream the Base

In a large mixing bowl, combine the softened butter, softened cream cheese, and sugar. Using an electric mixer, cream them together on medium speed until the mixture is light, fluffy, and pale in color. This process incorporates air, which is vital for a tender, moist blueberry bread. Scrape down the sides of the bowl often to ensure everything is well combined.

Step 3: Add Wet Ingredients

Beat in the vanilla extract, then add the eggs one at a time, mixing well after each addition. Be patient here; each egg should be fully incorporated into the butter and cream cheese mixture before adding the next. This creates a stable emulsion that will contribute to the bread’s superior texture.

⚠️ Common Mistake to Avoid: Adding all the eggs at once can cause the mixture to curdle. This doesn’t ruin the bread, but it makes for a less smooth batter and can affect the final texture. Beat them in one by one for best results.

Step 4: Mix Dry Ingredients

In a separate bowl, whisk together the all-purpose flour, baking powder, and salt. This step ensures that the leavening agents and salt are evenly distributed throughout the dry ingredients, preventing pockets of unmixed flour or uneven rising. Slowly add the dry mixture to the wet mixture, mixing on low speed until just combined. Overmixing at this stage develops the gluten too much, leading to a tough bread.

Step 5: Fold in Blueberries

Carefully fold in the fresh blueberries that have been tossed in 1 tablespoon of flour. The flour coating is key to preventing the blueberries from sinking to the bottom during baking, a trick I learned from preparing fruit tarts in Paris. Use a spatula and gentle movements to distribute them evenly without crushing them.

💡 mia’s Pro Tip: Freezing your floured blueberries for 10-15 minutes before folding them in can further help prevent sinking, especially if your batter feels a little thinner than expected.

Step 6: Fill Loaf Pans

Divide the thick batter evenly between the two prepared loaf pans. Don’t worry if the batter seems quite thick; this is perfectly normal and contributes to the dense, moist texture of the bread. Use a spatula to spread it evenly and smooth the tops.

Step 7: Bake to Perfection

Place the loaf pans into the preheated oven and bake for about 50 minutes. Baking time can vary slightly depending on your oven, so keep an eye on them. The bread is done when a wooden toothpick or skewer inserted into the center comes out clean or with only a few moist crumbs attached. The tops should be golden brown.

Step 8: Cool and Serve

Remove the pans from the oven and let the bread cool in the pans for about 10-15 minutes. This allows the loaves to firm up and makes them easier to remove. After resting, carefully invert the pans onto a wire rack to cool completely. Slicing too early can result in crumbling and a less clean cut for your moist blueberry bread.

⚠️ Common Mistake to Avoid: Slicing this blueberry cream cheese bread while it’s still warm. While tempting, it’s prone to crumbling and can seem gummy. Patience will reward you with perfect slices!

StepActionDurationKey Visual Cue
1Preheat oven, grease pans10-15 minsOven reaches 350°F; pans buttered/floured
2Cream butter, cream cheese, sugar3-5 minsLight, fluffy, pale mixture
3Add vanilla, eggs (one by one)2-3 minsMixture smooth, no curdling
4Mix dry ingredients, combine with wet1-2 minsJust combined, no dry streaks
5Fold in floured blueberries1 minBlueberries evenly distributed
6Pour batter into pans1 minPans evenly filled
7Bake50 minsGolden brown, toothpick comes out clean
8Cool10-15 mins (in pan), 30+ mins (wire rack)Bread firm enough to slice without crumbling

Serving & Presentation

This blueberry cream cheese bread is a star on its own, but a little presentation can turn it into a showstopper. After slicing, I love to arrange the pieces on a rustic wooden board or a beautiful ceramic platter. For a touch of Provençal elegance, a light dusting of powdered sugar adds a delicate sweetness and visual appeal, reminiscent of my early days in French culinary school. The vibrant purple of the blueberries peeking through the golden crumb is already afeast for the eyes, so it doesn’t need much!

For an elevated experience, consider serving slices with a dollop of fresh whipped cream, perhaps infused with a hint of lemon zest to complement the blueberries. Or, for a more Moroccan-inspired twist, a drizzle of warm honey or a sprinkle of finely chopped pistachios adds a delightful textural contrast and subtle nutty flavor. It’s the kind of comforting, homemade blueberry bread that adapts beautifully to any occasion, from a casual breakfast to a delightful afternoon tea.

In my NYC kitchen, I often enjoy a thick slice of this bread with my morning coffee, but it also makes an excellent light dessert. The cream cheese ensures it’s rich enough to satisfy, yet the fruit keeps it from feeling too heavy. It’s truly versatile – perfect for a quick breakfast on the go, an afternoon snack, or even a simple contribution to a brunch spread.

Pairing TypeSuggestionsWhy It Works
Side DishGreek yogurt, fruit salad, a side of crispy baconAdds creamy texture, freshness, or savory contrast.
Sauce / DipLemon glaze, honey drizzle, a dollop of clotted creamEnhances sweetness and moisture; adds a bright citrus note.
BeverageMorning coffee, black tea, a cold glass of milkClassic pairings that complement the bread’s sweetness and richness.
GarnishPowdered sugar, lemon zest, fresh mint leavesAdds visual appeal, extra sweetness, and a fresh aroma.

Make-Ahead, Storage & Reheating

Living and working in New York City means my schedule can be quite demanding, so I’ve learned to appreciate the art of make-ahead baking. This blueberry cream cheese bread is fantastic for meal prepping, allowing me to enjoy a homemade treat throughout the week without extra effort. Whether it’s for busy mornings or a quick snack, knowing how to properly store and even freeze it will save you time and ensure every slice is as delicious as the first.

MethodContainerDurationReheating Tip
RefrigeratorAirtight container or wrapped tightly in plastic wrapUp to 5 daysBring to room temp, or microwave 15-20 seconds.
FreezerDouble-wrapped in plastic wrap then foil or freezer bagUp to 3 monthsThaw at room temp, then toast or microwave briefly.
Make-AheadFully baked, cooled loavesPrepare up to 2-3 days in advance and store at room temperatureReady to slice and serve!

When storing at room temperature, it’s best to keep this moist blueberry bread well-wrapped. The cream cheese helps it stay fresh longer than typical quick breads, usually for about 2-3 days on the counter. If you notice it getting a little firm, a quick 10-15 second pop in the microwave will bring back that fresh-baked tenderness.

For longer storage, freezing is your friend! I often bake a double batch and freeze one loaf (or slices, separated by parchment) for future cravings. Just make sure it’s completely cooled before wrapping tightly to prevent freezer burn. Thaw slices on the counter for about 30 minutes, or you can even pop them straight into a toaster oven for a warm, slightly crispy edge.

Variations & Easy Swaps

VariationKey ChangeBest ForDifficulty Impact
Lemon Blueberry Dream BreadAdd lemon zest and juice to batter + lemon glazeBright, vibrant citrus flavor loversEasy, minimal extra steps
Gluten-Free Blueberry BreadSwap all-purpose flour for GF 1:1 blendThose with gluten sensitivities/allergiesEasy, no technical changes needed
Spiced Blueberry Nut BreadAdd cinnamon, nutmeg, and chopped pecans/walnutsWarm, cozy flavors, extra textureEasy, simple additions

Lemon Blueberry Dream Bread

To add a bright, zesty twist, I often incorporate the zest of one lemon and 2 tablespoons of fresh lemon juice into the batter. This enhances the blueberry flavor beautifully, giving it a vibrant lift that reminds me of summery fruit tarts from my Parisian days. A simple lemon glaze (powdered sugar, lemon juice, and a tiny bit of milk) drizzled over the cooled loaf takes this variation to another level of deliciousness.

Gluten-Free Blueberry Bread

For those with dietary restrictions, this blueberry cream cheese bread can easily be made gluten-free. Simply swap the all-purpose flour for a good quality 1:1 gluten-free baking blend that contains xanthan gum. I’ve tested several in my NYC kitchen, and many blends work seamlessly without altering the moist texture too much. The bread will still be incredibly flavorful and tender, allowing everyone to enjoy a slice of this homemade goodness.

Spiced Blueberry Nut Bread

Embrace warm, comforting flavors by adding 1 teaspoon of ground cinnamon and a pinch of nutmeg to your dry ingredients. For extra texture and nutty depth, fold in 1/2 cup of toasted chopped pecans or walnuts along with the blueberries. This variation gives a cozy, autumnal feel to the quick bread, perfect for cooler New York days, and the spices complement the cream cheese beautifully.

How do you keep blueberries from sinking in blueberry cream cheese bread?

This is a classic baker’s dilemma, but it’s easily solved with a simple trick I learned early in my culinary journey! Before adding your fresh blueberries to the batter, gently toss them with one tablespoon of all-purpose flour. The thin coating of flour creates friction, allowing the blueberries to “stick” to the batter and distribute themselves more evenly throughout the loaf as it bakes. This ensures every slice of your moist blueberry bread is studded with those gorgeous, juicy berries, rather than having them all sink to the bottom.

Can I use frozen blueberries instead of fresh in this bread recipe?

Absolutely, you can! If fresh blueberries aren’t in season or easily available, frozen blueberries are a perfectly good substitute for this easy blueberry bread. The most important thing is not to thaw them before adding them to the batter. Keep them frozen and toss them with that tablespoon of flour just like you would with fresh berries. Be aware that frozen berries may release more moisture and color into the batter, potentially giving your bread a slightly more purple hue, but the flavor will still be wonderful. You might also need to add an extra 5-10 minutes to the baking time.

What is the best way to incorporate the cream cheese into the batter?

The key to seamlessly incorporating cream cheese into this blueberry cream cheese bread is to ensure it’s properly softened to room temperature. This is crucial for a smooth, lump-free batter. When you cream it with the butter and sugar, make sure both are soft enough to blend into a light and fluffy mixture. If your cream cheese is too cold, it will be difficult to mix, leading to lumps and an uneven texture. I always take mine out an hour or two before I plan to bake, a simple step that makes a world of difference in the final product.

How long should blueberry cream cheese bread cool before slicing?

Patience is truly a virtue when it comes to quick breads, especially one as moist and tender as this blueberry cream cheese bread! I recommend letting the loaves cool in their pans for at least 10-15 minutes after coming out of the oven. This allows them to firm up slightly and ensures they don’t fall apart when you remove them. Then, transfer them to a wire rack to cool completely for at least another 30 minutes, or even an hour. Slicing warm bread, while tempting, can lead to a gummy texture and crumbly slices. Trust me, the wait is worth it for perfectly neat and delicious portions.

Why is my blueberry bread dense?

A dense blueberry cream cheese bread can usually be traced back to one common issue: overmixing. Once you add the dry ingredients to the wet, it’s crucial to mix only until just combined – meaning no streaks of dry flour remain. Overmixing develops the gluten in the flour too much, which leads to a tough, dense, and sometimes even rubbery texture. Another factor could be inactive baking powder, so always check its freshness! Ensuring your softened butter and cream cheese are adequately creamed also helps incorporate enough air for a lighter crumb.

Can I add a streusel topping to this blueberry bread?

Absolutely! A streusel topping would be a delightful addition to this homemade blueberry bread. To make one, combine 1/2 cup all-purpose flour, 1/4 cup granulated sugar, 1/4 cup brown sugar, 1/2 teaspoon ground cinnamon, and 1/4 cup cold, unsalted butter cut into small pieces. Use your fingertips or a pastry blender to mix until crumbly. Sprinkle this mixture evenly over the batter in the loaf pans before baking. It will add a wonderful textural crunch and extra sweetness that complements the moist blueberry cream cheese loaf beautifully.

How do I know when the bread is fully baked?

The best way to tell if your blueberry cream cheese bread is fully baked is by using a simple toothpick test. Insert a wooden toothpick or a thin skewer into the very center of the loaf. If it comes out clean or with only a few moist crumbs attached, your bread is done. If it comes out with wet batter clinging to it, continue baking for another 5-10 minutes and retest. The top should also be golden brown and the edges should start to pull away slightly from the pan. Don’t rely solely on visual cues as ovens can vary.

Can I make this recipe into muffins or mini loaves?

Yes, this versatile blueberry cream cheese bread batter can certainly be adapted for muffins or mini loaves! For muffins, divide the batter among a 12-cup standard muffin tin (lined with paper liners) and bake for about 20-25 minutes. For mini loaves, divide the batter among 4-6 mini loaf pans, and bake for approximately 25-35 minutes. Always perform the toothpick test to ensure they are fully baked. Adjusting to smaller formats makes these treats ideal for portion control, gifting, or a quick grab-and-go snack from your NYC kitchen!

Share Your Version!

I truly hope this recipe for moist blueberry cream cheese bread brings a little joy and warmth to your home. There’s nothing quite like the smell of homemade bread baking, is there? I love hearing about your culinary adventures!

Please leave a star rating and comment below to let me know how your blueberry cream cheese bread turned out. Did you try a fun variation? Share your creation on Instagram or Pinterest and tag @exorecipes – I love seeing your beautiful bakes! And tell me, what’s your absolute favorite way to enjoy a slice of this easy blueberry bread?

From my NYC kitchen to yours — I hope this recipe brings as much warmth to your table as it does to mine. — mia 🧡

📌

Love This Recipe? Save It to Pinterest!

If you enjoyed this Blueberry Cream Cheese Bread recipe, don’t let it get lost in your browser tabs! 😄 Pin it now so you can find it again anytime — and explore hundreds more tried-and-tested recipes waiting for you on my Pinterest boards.

👉 Follow mia on Pinterest @chefrecipes2

📌 Pin this recipe · 🔁 Re-pin your favorites · 💬 Tag me when you make it — I love seeing your creations!

Print

clock clock iconcutlery cutlery iconflag flag iconfolder folder iconinstagram instagram iconpinterest pinterest iconfacebook facebook iconprint print iconsquares squares iconheart heart iconheart solid heart solid icon

Blueberry Cream Cheese Bread

  • Author: Chef Mia

Description

Blueberry Cream Cheese Bread is a quick and simple recipe that comes together in no time! Moist and flavor packed with juicy, plump, fresh blueberries throughout! This easy Blueberry Bread pairs perfectly with your morning coffee, or as an anytime snack!


Ingredients

Scale
  • 1 cup butter (*softened/unsalted)
  • 8 oz cream cheese (*softened)
  • 3/4 cup sugar
  • 2 tsp vanilla extract
  • 4 eggs
  • 2 cups flour (*all purpose)
  • 1 1/2 tsp baking powder
  • 1/2 tsp salt
  • 2 cups blueberries (*fresh, tossed in 1 tbsp flour)

Instructions

  1. Preheat oven to 350 degrees and grease 2 loaf pans (9×5)
  2. In a large bowl, cream together the butter, cream cheese, and sugar.
  3. Add in the vanilla extract and eggs.
  4. Slowly add in the flour, baking powder, and salt.
  5. Once combined, carefully fold in the fresh blueberries.
  6. Pour batter (it will be quite thick, that is okay) into the prepared pans evenly.
  7. Place into preheated oven and bake for about 50 minutes, or until toothpick comes out clean once inserted in center of bread.
  8. Remove from oven and allow to cool slightly before removing from pan and slicing!


Nutrition

  • Calories: 363 kcal
  • Sugar: 16 g
  • Fat: 24 g
  • Carbohydrates: 33 g
  • Protein: 6 g


BLUEBERRY CREAM CHEESE BREAD

k">

Tried This Recipe? Leave a Comment!

Did you make this recipe? I’d love to hear how it turned out! Please leave a comment and a rating below. Your feedback helps other home cooks and supports cheerychop.com!

For more delicious inspiration, follow me on Pinterest!

Fluffy Greek Yogurt Blueberry Protein Muffins Recipe

Healthy Greek Yogurt Blueberry Protein Muffins with a Low Sugar Delight – Your New Favorite Breakfast

⚖️
Difficulty
Easy
⏲️
Prep Time
15 mins
🕒
Cook Time
20 mins
⏱️
Total Time
35 mins
🍽️
Servings
12

Finding a protein-packed breakfast that actually tastes good can feel like searching for a needle in a haystack. I remember the same struggle in my early NYC days, trying to balance my demanding chef’s schedule with the need for nourishing, delicious food. Back in my mother’s bustling kitchen in Morocco, breakfast was often rich and hearty, but not always focused on protein in the same way modern diets are. These healthy Greek yogurt blueberry protein muffins are my bridge between those worlds: incorporating the richness of yogurt with the power of protein, all while keeping the sugar low. This recipe, inspired by a simple idea from my Parisian culinary school days—the magic of using yogurt for moisture—delivers a fluffy, satisfying muffin that will keep you energized longer than any sugar-laden pastry.

Imagine biting into a soft, tender muffin, bursting with the sweet-tart pockets of fresh blueberries. The aroma that fills your kitchen while these bake is simply intoxicating – a hint of vanilla, the warmth of baking flour, and that unmistakable fruity sweetness. What truly sets these healthy Greek yogurt protein muffins apart is their incredible texture: remarkably moist thanks to the Greek yogurt and olive oil, with a delicate crumbs that melts in your mouth. It’s a sensory experience that rivals any bakery muffin, yet without the guilt. I’ve always believed that healthy food doesn’t have to compromise on flavor or feel like a chore, and this recipe is a testament to that philosophy, balancing wholesome ingredients with pure indulgence.

Over the years, I’ve refined countless muffin recipes, but these low sugar blueberry muffins really hit the sweet spot for nutrition and taste. My secret? It’s all about how Greek yogurt and olive oil interact, creating a tender crumb and incredible moisture that stands the test of time. I’ll share my pro tip for ensuring your blueberries stay plump and evenly distributed, along with a common mistake bakers often make when incorporating protein powder. This isn’t just another healthy muffin recipe; this is a chef-tested, family-approved way to enjoy a genuinely delicious and truly healthy breakfast or snack. You’ll be surprised at how easy it is to achieve bakery-quality muffins right in your own kitchen.

Why This Healthy Greek Yogurt Blueberry Protein Muffins Recipe Is the Best

The flavor secret of these muffins lies in the pairing of rich, tangy Greek yogurt with pure vanilla extract, a combination I often used in Parisian patisserie to add depth without relying on excessive sugar. This ensures each bite of these healthy blueberry protein muffins offers a sophisticated sweetness, enhanced by the natural burst of blueberries, rather than an overpowering sugary hit. It’s a balance I learned through years of culinary experimentation, creating a taste profile that is both comforting and refreshingly light.

Achieving the perfect texture in a healthy muffin can be tricky, but my method ensures a consistently tender and moist crumb, a technique I perfected during my culinary training. The combination of thick Greek yogurt and a touch of extra-virgin olive oil keeps these muffins from becoming dry, a common pitfall with high-protein baked goods. It’s like the delicate balance needed in a classic French soufflé, where every ingredient plays a crucial role in achieving that ethereal softness.

I’ve designed this recipe to be foolproof and fast, truly making it the best option for busy mornings, even in the fast-paced environment of NYC. The steps are straightforward, making it accessible for even beginner bakers, but the results taste like they came from a gourmet bakery. From the moment you mix to the time they emerge golden brown from your oven, you’ll appreciate the simplicity and efficiency without compromising on delicious, wholesome easy protein muffins.

Healthy Blueberry Protein Muffins Ingredients

When I head to the farmers market in Union Square here in NYC, I always look for the plumpest, most vibrant blueberries. There’s something special about sourcing quality ingredients, just like my mother did in Morocco for her own baking. For these healthy blueberry protein muffins, the freshness truly makes a difference, but I’ve also got you covered with substitution tips straight from my chef’s pantry.

Ingredients List

  • 10 oz fresh blueberries (about 1.5 cups)
  • 1 cup plain all-purpose flour
  • 1/2 cup vanilla-flavored protein powder (whey or plant-based)
  • 3/4 cup thick Greek yogurt (full-fat or 2%)
  • 1/2 cup extra-virgin olive oil
  • 2 tbsp honey (or maple syrup for vegan)
  • 1 large egg (at room temperature)
  • 1 tsp baking powder
  • 1 tsp baking soda
  • 1 tsp pure vanilla extract

Ingredient Spotlight

Fresh Blueberries: These little gems are the star, providing natural sweetness, moisture, and a burst of antioxidant goodness. When selecting, look for firm, plump berries with a dusty bloom. If fresh aren’t available, frozen blueberries can be used; just don’t thaw them first – add them directly to the batter to prevent a muddy color. The flavor might be slightly less vibrant than fresh, but they’ll still be delicious.

Vanilla-flavored Protein Powder: This is crucial for the “protein” in our muffins. I prefer a high-quality vanilla whey or plant-based protein powder (like pea or brown rice protein) for a smooth texture and balanced flavor. The vanilla flavor saves you from adding extra extract, and it complements the blueberries beautifully. If you only have unflavored protein, add an extra 1/2 tsp vanilla extract and perhaps a pinch more sweetener to taste.

Thick Greek Yogurt: This is my secret weapon for moisture and tang in these greek yogurt protein muffins. It replaces much of the fat often found in traditional muffin recipes while adding a lovely texture. I recommend using full-fat or 2% Greek yogurt for the best results. If you need a dairy-free option, a thick unsweetened plant-based yogurt (like almond or coconut) can work, though the texture might be slightly denser.

Extra-Virgin Olive Oil: While butter is often used in muffins, I opt for EVOO for its delicate flavor, heart-healthy fats, and incredible moistness. It contributes to the tender crumb without making the muffins greasy. A light, fruity olive oil works best here. A neutral oil like avocado oil or melted coconut oil (liquid form) can be substituted if you prefer, but you’ll miss the subtle complexity of the olive oil.

Original IngredientBest SubstitutionFlavor / Texture Impact
Fresh BlueberriesFrozen Blueberries (unthawed)Slightly less vibrant flavor, may “bleed” more color into batter.
Vanilla Protein PowderUnflavored Protein Powder + 1/2 tsp vanilla extractRequires additional vanilla, potentially slight taste difference.
Thick Greek YogurtThick unsweetened plant-based yogurtMay result in a slightly denser muffin, ensure it’s truly thick.
Extra-Virgin Olive OilAvocado oil or melted coconut oilNeutral flavor, misses “green” notes of olive oil.
HoneyMaple Syrup or Agave NectarSimilar sweetness, maple adds a distinct flavor note. Adjust to taste.

Healthy Greek Yogurt Blueberry Protein Muffins

How to Make Healthy Greek Yogurt Blueberry Protein Muffins — Step-by-Step

Don’t be intimidated by baking a “healthy” muffin; this process is incredibly straightforward and designed for success, regardless of your baking experience. You’ve got this!

Step 1: Prepare Your Wet Ingredients

In a large mixing bowl, whisk together the 3/4 cup Greek yogurt, 1/2 cup extra-virgin olive oil, 2 tablespoons honey, 1 large egg, and 1 teaspoon pure vanilla extract until thoroughly combined and smooth. This forms the moist base of your greek yogurt protein muffins, ensuring a tender crumb.

💡 mia’s Pro Tip: Ensure your egg and yogurt are at room temperature. This helps them emulsify better with the oil, creating a smoother batter and a more evenly textured muffin. A quick trick for cold eggs: place them in a bowl of warm water for 5 minutes.

Step 2: Combine the Dry Ingredients

In a separate medium bowl, whisk together 1 cup plain flour, 1/2 cup vanilla-flavored protein powder, 1 teaspoon baking powder, and 1 teaspoon baking soda. Make sure there are no lumps, and the leavening agents are distributed evenly. This is key for your healthy blueberry protein muffins to rise beautifully.

⚠️ Common Mistake to Avoid: Don’t skip sifting your dry ingredients, especially the protein powder. Protein powder can sometimes clump, and sifting ensures a smooth batter without pockets of unmixed powder, leading to a perfectly consistent texture.

Step 3: Gently Mix Wet into Dry

Pour the wet ingredients into the dry ingredients. Using a spatula, gently fold until just combined. The batter should look a little lumpy and shaggy; overmixing will develop the gluten in the flour, resulting in tough muffins. We’re aiming for light and fluffy easy protein muffins!

Step 4: Fold in the Blueberries

Gently fold in the 10 oz of fresh blueberries. Be very careful not to crush them. Once the blueberries are distributed, stop mixing immediately. Remember, minimal handling is crucial for tender muffins.

💡 mia’s Pro Tip: Toss your fresh (or frozen, unthawed) blueberries with a tablespoon of flour before adding them to the batter. This slight coating helps prevent them from sinking to the bottom of the muffin cups during baking, ensuring even distribution.

Step 5: Bake to Golden Perfection

Preheat your oven to 375°F (190°C). Line a 12-cup muffin tin with paper liners or grease them thoroughly. Divide the batter evenly among the muffin cups, filling each about two-thirds full. Bake for 18-22 minutes, or until a wooden skewer inserted into the center of a muffin comes out clean. The tops should be golden brown and spring back when lightly touched. Let them cool in the tin for 5 minutes before transferring to a wire rack to cool completely. Enjoy your perfect low sugar blueberry muffins!

⚠️ Common Mistake to Avoid: Filling muffin cups too full can cause overflow or uneven baking. Aim for about two-thirds full to give the muffins room to dome beautifully. Adjusting oven temperature can also lead to undercooked centers or burnt tops, so keep an eye on them.

StepActionDurationKey Visual Cue
1Prepare Wet Ingredients3-5 minsSmooth, homogenized mixture
2Combine Dry Ingredients2-3 minsNo lumps, uniformly mixed
3Gently Mix Wet into Dry1-2 minsJust combined, slightly lumpy batter
4Fold in Blueberries1 minBlueberries evenly distributed, batter not overmixed
5Bake Muffins18-22 minsGolden brown tops, toothpick comes out clean

Serving & Presentation

These healthy Greek yogurt blueberry protein muffins are wonderful just as they are, fresh from the oven, filling your kitchen with an aroma that transports me back to the bakeries of Paris in the mornings. For an extra touch of warmth and flavor, I often split one open and spread a thin layer of my homemade apricot jam, a recipe passed down from my mother’s Moroccan kitchen.

To elevate them for a brunch or a more substantial breakfast, consider pairing them with a dollop of extra Greek yogurt and a sprinkle of toasted slivered almonds or a drizzle of a light maple glaze. The contrasting textures and subtle nutty crunch really make them sing. Living in NYC, I love putting together a spread, and these muffins are perfect alongside fresh fruit, a small bowl of granola, or even a savory element like scrambled eggs or a veggie frittata. Think simple, elegant, and wholesome.

Pairing TypeSuggestionsWhy It Works
Side DishBowl of fresh berries, sliced avocado, handful of walnutsAdds more nutrients, healthy fats, and contrasting textures without heavy calories.
Sauce / DipExtra Greek yogurt, light lemon glaze, homemade berry compoteComplements the tanginess of the yogurt and sweetness of blueberries.
BeverageGreen tea, black coffee, almond milk latte, fresh orange juiceClassic breakfast pairings that cleanse the palate and enhance the meal.
GarnishToasted slivered almonds, a sprinkle of lemon zest, light dusting of powdered sugarAdds visual appeal, a textural crunch, or a subtle flavor lift.

Make-Ahead, Storage & Reheating

Living in NYC means life moves fast, and meal prepping is essential for me. These healthy Greek yogurt blueberry protein muffins are fantastic for making ahead, ensuring I always have a nutritious option even on the busiest mornings. They’re a lifesaver for those grab-and-go breakfasts.

MethodContainerDurationReheating Tip
RefrigeratorAirtight container with paper towelUp to 5 daysPop in microwave for 15-20 seconds, or briefly in a toaster oven.
FreezerFreezer-safe bag or containerUp to 3 monthsThaw at room temperature for an hour, then follow reheating tips.
Make-AheadStore baked muffins as aboveBatch bake and freezeConvenient for busy weeks, simply grab and reheat.

When reheating, avoid over-microwaving as it can make them rubbery. A quick 15-20 seconds in the microwave is usually enough to warm them through without drying them out. For a crispier exterior, I sometimes slice them in half and quickly toast them in my toaster oven – a trick I learned from a Parisian café owner to revive day-old pastries. They’ll taste almost as good as fresh out of the oven!

Variations & Easy Swaps

VariationKey ChangeBest ForDifficulty Impact
Citrus Zest & SpiceAdd lemon/orange zest, pinch of cardamomFans of brighter, exotic flavors.Minimal.
Gluten-Free & Dairy-FreeUse GF flour blend, plant-based yogurtDietary restrictions.Moderate, requires careful substitution.
Seasonal Fruit TwistSwap blueberries for cherries, raspberries, or diced applesSeasonal ingredient enthusiasts.Minimal.

Citrus Zest and Spice Variation

To add a zingy twist to your healthy Greek yogurt blueberry protein muffins, try adding 1 tablespoon of fresh lemon or orange zest to the wet ingredients. For a more exotic flavor profile reminiscent of my Moroccan heritage, incorporate a quarter teaspoon of ground cardamom or nutmeg into the dry ingredients. These subtle additions will brighten the blueberry flavor and add a layer of warmth and complexity without overshadowing the main ingredients.

Gluten-Free and Dairy-Free Options

Making these muffins gluten-free is simple: swap the plain flour for a 1:1 gluten-free baking flour blend. Ensure your blend contains xanthan gum for structure. For a dairy-free version, replace the Greek yogurt with an equal amount of thick, unsweetened plant-based yogurt (almond or coconut yogurt work well). I’ve tested this in my NYC kitchen multiple times; the texture might be slightly denser but still incredibly moist and delicious.

Seasonal Fruit Twist

While blueberries are classic, feel free to experiment with other seasonal fruits. In the spring, I love using raspberries or chopped strawberries from the NYC farmers market. In the fall, diced apples or pears with a pinch of cinnamon make a delightful change. Just ensure any fruit you use is finely diced if larger than blueberries to maintain an even distribution and cooking time. The cooking time may vary slightly with different fruits due to their water content.

FAQ

Can I use frozen blueberries instead of fresh in these Greek yogurt protein muffins?

Absolutely, yes! Frozen blueberries work wonderfully in these healthy Greek yogurt protein muffins. The key is NOT to thaw them before adding to the batter. Tossing them directly into the dry ingredients while still frozen helps them maintain their shape and prevents them from bleeding too much color into the batter, which can make your muffins look a bit purple. Just be aware that adding frozen berries might slightly increase the baking time by a minute or two, so always do a toothpick test to ensure they are fully cooked through.

How can I make these blueberry protein muffins gluten-free?

Making these healthy blueberry protein muffins gluten-free is quite simple. You can substitute the plain all-purpose flour with an equal amount of a 1:1 gluten-free baking flour blend. Most reputable gluten-free blends are formulated to work cup-for-cup with traditional flour in recipes like this and often already contain xanthan gum, which is essential for structure in gluten-free baking. Make sure to choose a blend that is specifically designed for baking to achieve the best texture. The rest of the ingredients and instructions will remain the same.

What is the best protein powder to use for baking healthy blueberry muffins?

For these healthy blueberry muffins, I recommend using a high-quality vanilla-flavored whey protein powder or a neutral-tasting plant-based protein powder (like pea protein or a blend of rice and pea protein). Vanilla flavored powders add a lovely depth of flavor without needing extra vanilla extract. Avoid protein powders with very strong artificial flavors or those that are extremely thick, as they can alter the muffin’s texture and moisture content. The goal is to choose a powder that blends well and enhances the overall nutritional profile discreetly.

How do I store Greek yogurt blueberry muffins to keep them moist?

To keep your Greek yogurt blueberry muffins moist, proper storage is key. Once they’ve cooled completely to room temperature, store them in an airtight container. I like to place a paper towel at the bottom of the container, then lay the muffins, and place another paper towel on top before sealing. This helps absorb any excess moisture, preventing them from becoming soggy while keeping them fresh. They’ll stay moist and delicious at room temperature for up to 3 days, or in the refrigerator for up to 5 days. For longer storage, freeze them!

Can I reduce the amount of honey even further in these low sugar blueberry muffins?

Yes, you can absolutely reduce the amount of honey in these low sugar blueberry muffins if you prefer them even less sweet. The recipe currently uses a minimal 2 tablespoons of honey, which primarily serves to balance the tanginess of the Greek yogurt and enhance the natural sweetness of the blueberries. If you cut it out entirely, the muffins will be quite tart. I suggest reducing it by half to 1 tablespoon first, tasting the batter (if safe, i.e., without raw eggs if you were doing a quick taste test), and seeing if that meets your preference for sweetness. You might also find that using very ripe, sweet blueberries allows you to reduce the honey more significantly.

What’s the best way to ensure my healthy protein muffins rise well and are fluffy?

Achieving fluffy healthy protein muffins requires a few careful steps, as I learned in culinary school. First, ensure your baking powder and baking soda are fresh and active. Second, do not overmix the batter; mixing until just combined and still a bit lumpy is crucial to avoid developing gluten, which leads to tough muffins. Third, make sure your wet ingredients are at room temperature. Lastly, preheating your oven correctly and not opening the oven door too early will ensure the leavening agents do their job properly, giving you that perfect dome and light texture.

Share Your Version!

I hope these healthy Greek yogurt blueberry protein muffins become a staple in your kitchen, just like they have in mine. I poured my heart into perfecting this recipe, blending my Moroccan roots, French techniques, and the vibrant spirit of NYC to create something truly special and nourishing.

If you bake these, please come back and leave a star rating and a comment below – I absolutely love hearing about your experiences! And if you share a photo on Instagram or Pinterest, don’t forget to tag @exorecipes so I can see your beautiful creations. Tell me, what’s your favorite way to enjoy these muffins: warm from the oven, or perfectly chilled for a grab-and-go delight?

From my NYC kitchen to yours — I hope this recipe brings as much warmth to your table as it does to mine. — mia 🧡

📌

Love This Recipe? Save It to Pinterest!

If you enjoyed this Healthy Greek Yogurt Blueberry Protein Muffins recipe, don’t let it get lost in your browser tabs! 😄 Pin it now so you can find it again anytime — and explore hundreds more tried-and-tested recipes waiting for you on my Pinterest boards.

👉 Follow mia on Pinterest @chefrecipes2

📌 Pin this recipe · 🔁 Re-pin your favorites · 💬 Tag me when you make it — I love seeing your creations!

Print

clock clock iconcutlery cutlery iconflag flag iconfolder folder iconinstagram instagram iconpinterest pinterest iconfacebook facebook iconprint print iconsquares squares iconheart heart iconheart solid heart solid icon

Healthy Greek Yogurt Blueberry Protein Muffins

  • Author: Chef Mia

Description

Finding a protein-packed breakfast that actually tastes good can feel like searching for a needle in a haystack.


Ingredients

Scale
  • 10 oz fresh blueberries
  • 1 cup plain flour
  • 1/2 cup vanilla-flavored protein powder
  • 3/4 cup thick greek yogurt
  • 1/2 cup extra-virgin olive oil
  • 2 tbsp honey
  • 1 large egg
  • 1 tsp baking powder
  • 1 tsp baking soda
  • 1 tsp pure vanilla extract

Instructions


    Healthy Greek Yogurt Blueberry Protein Muffins

    ph">For more delicious inspiration, follow me on Pinterest!