Dairy Free Butter Chicken: Creamy Coconut Indian Curry — Extra Saucy & Paleo-Friendly
⚖️
Difficulty
Medium
⏲️
Prep Time
30 mins
🕒
Cook Time
45 mins
⏱️
Total Time
1 hr 15 mins
🍽️
Servings
6 servings
There are some dishes that feel like a warm hug from the inside out, and this dairy free butter chicken recipe is exactly that. I’m mia, and I’ve spent years perfecting this creamy, extra saucy version in my tiny NYC kitchen. Growing up in Morocco, I learned early on that bold spices and slow-simmered sauces are the heart of any great meal. Later, training at a French culinary school in Paris taught me the precision behind a silky sauce — technique that now makes my dairy free chicken curry so luscious you won’t believe it’s cream-free. This isn’t just another vegan butter chicken substitute; it’s a dish where coconut milk steps in to create richness that rivals the original. The first time I served it to my New York friends, they asked for seconds before I could even sit down.
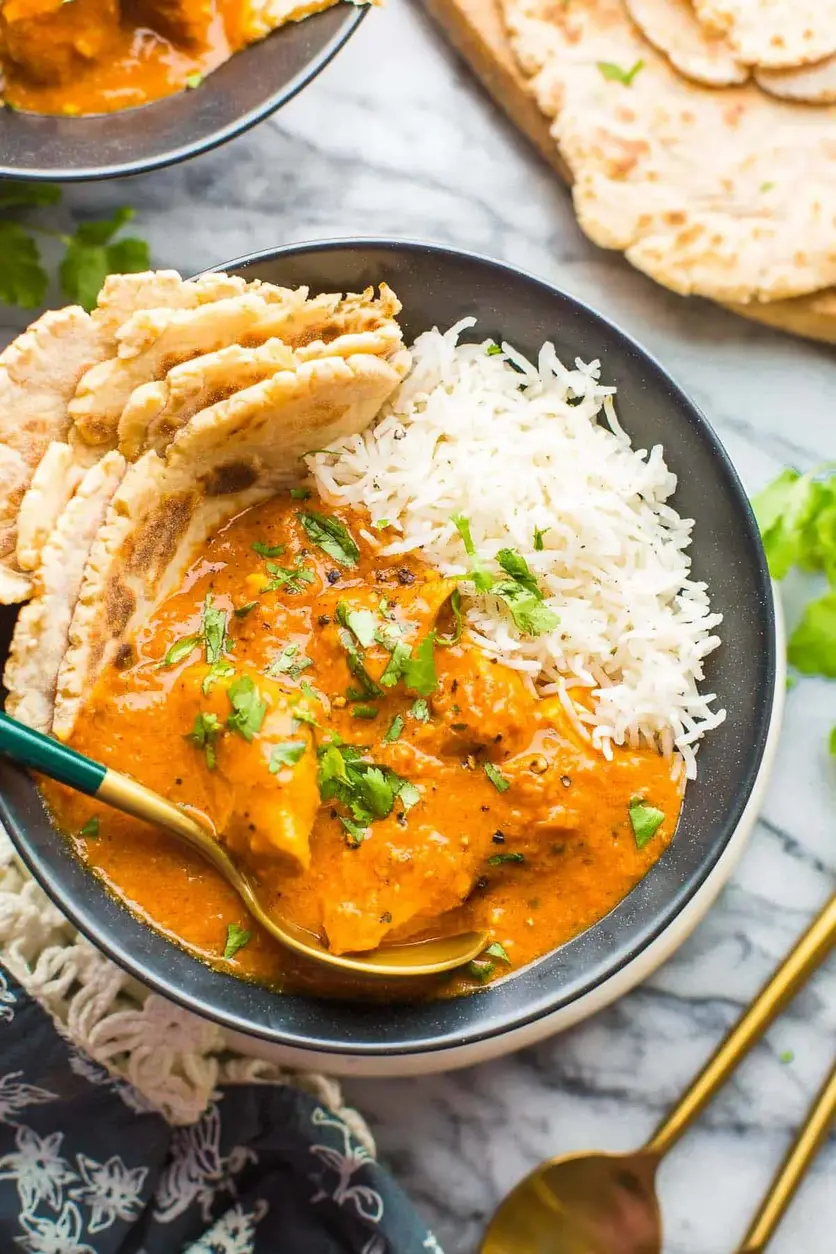
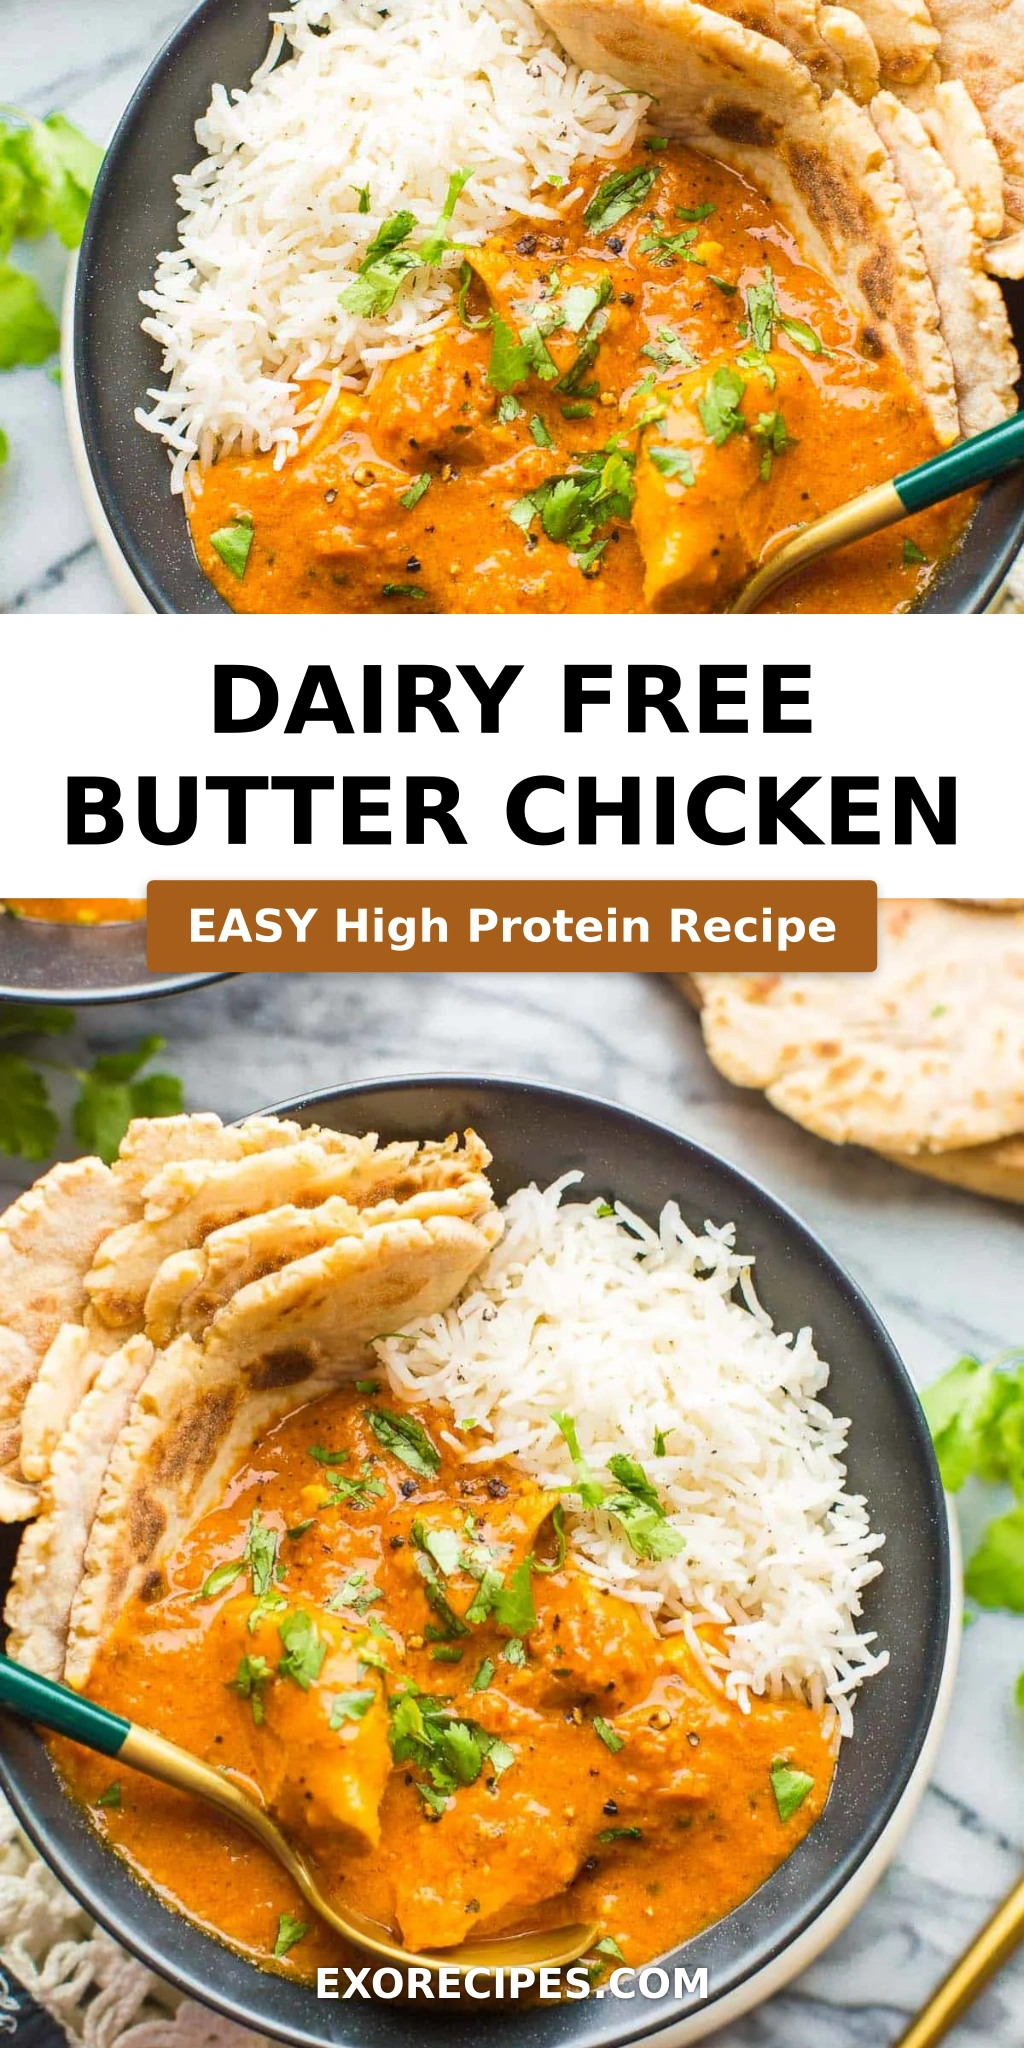
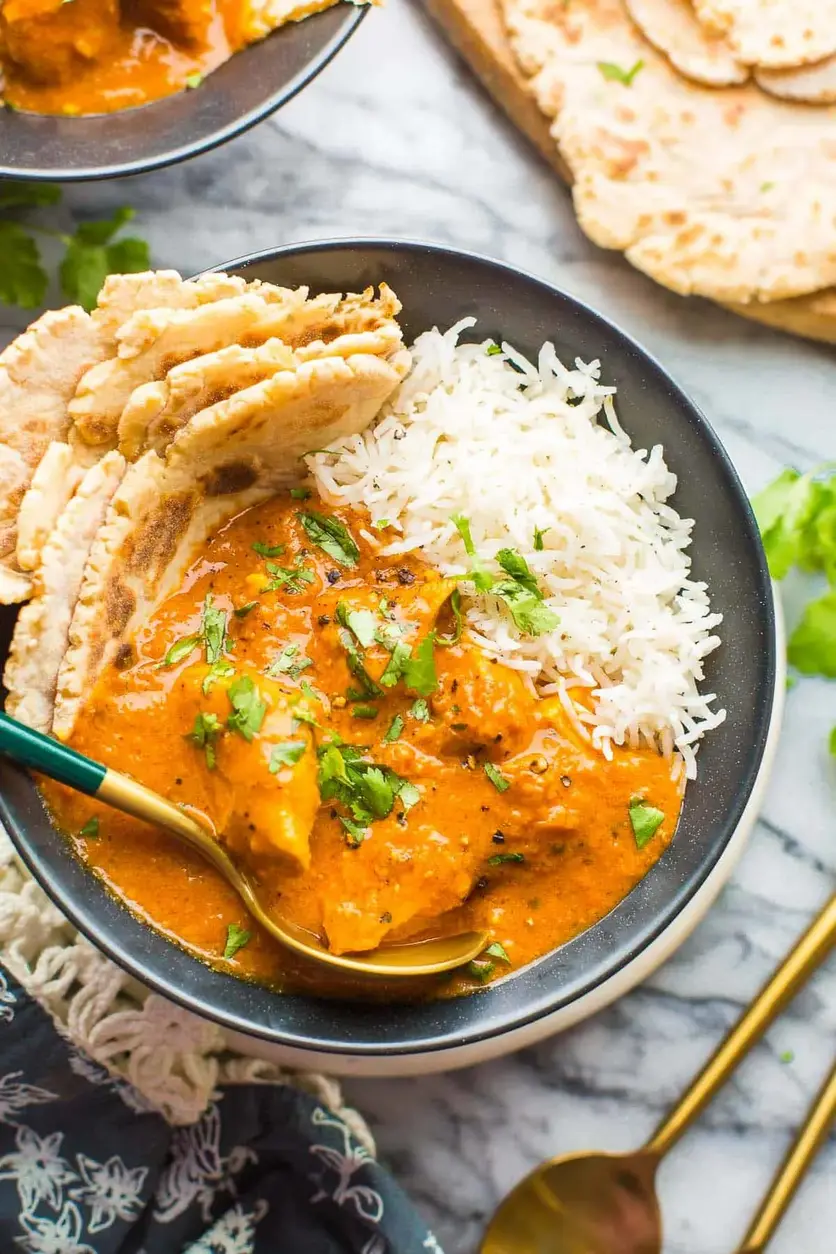
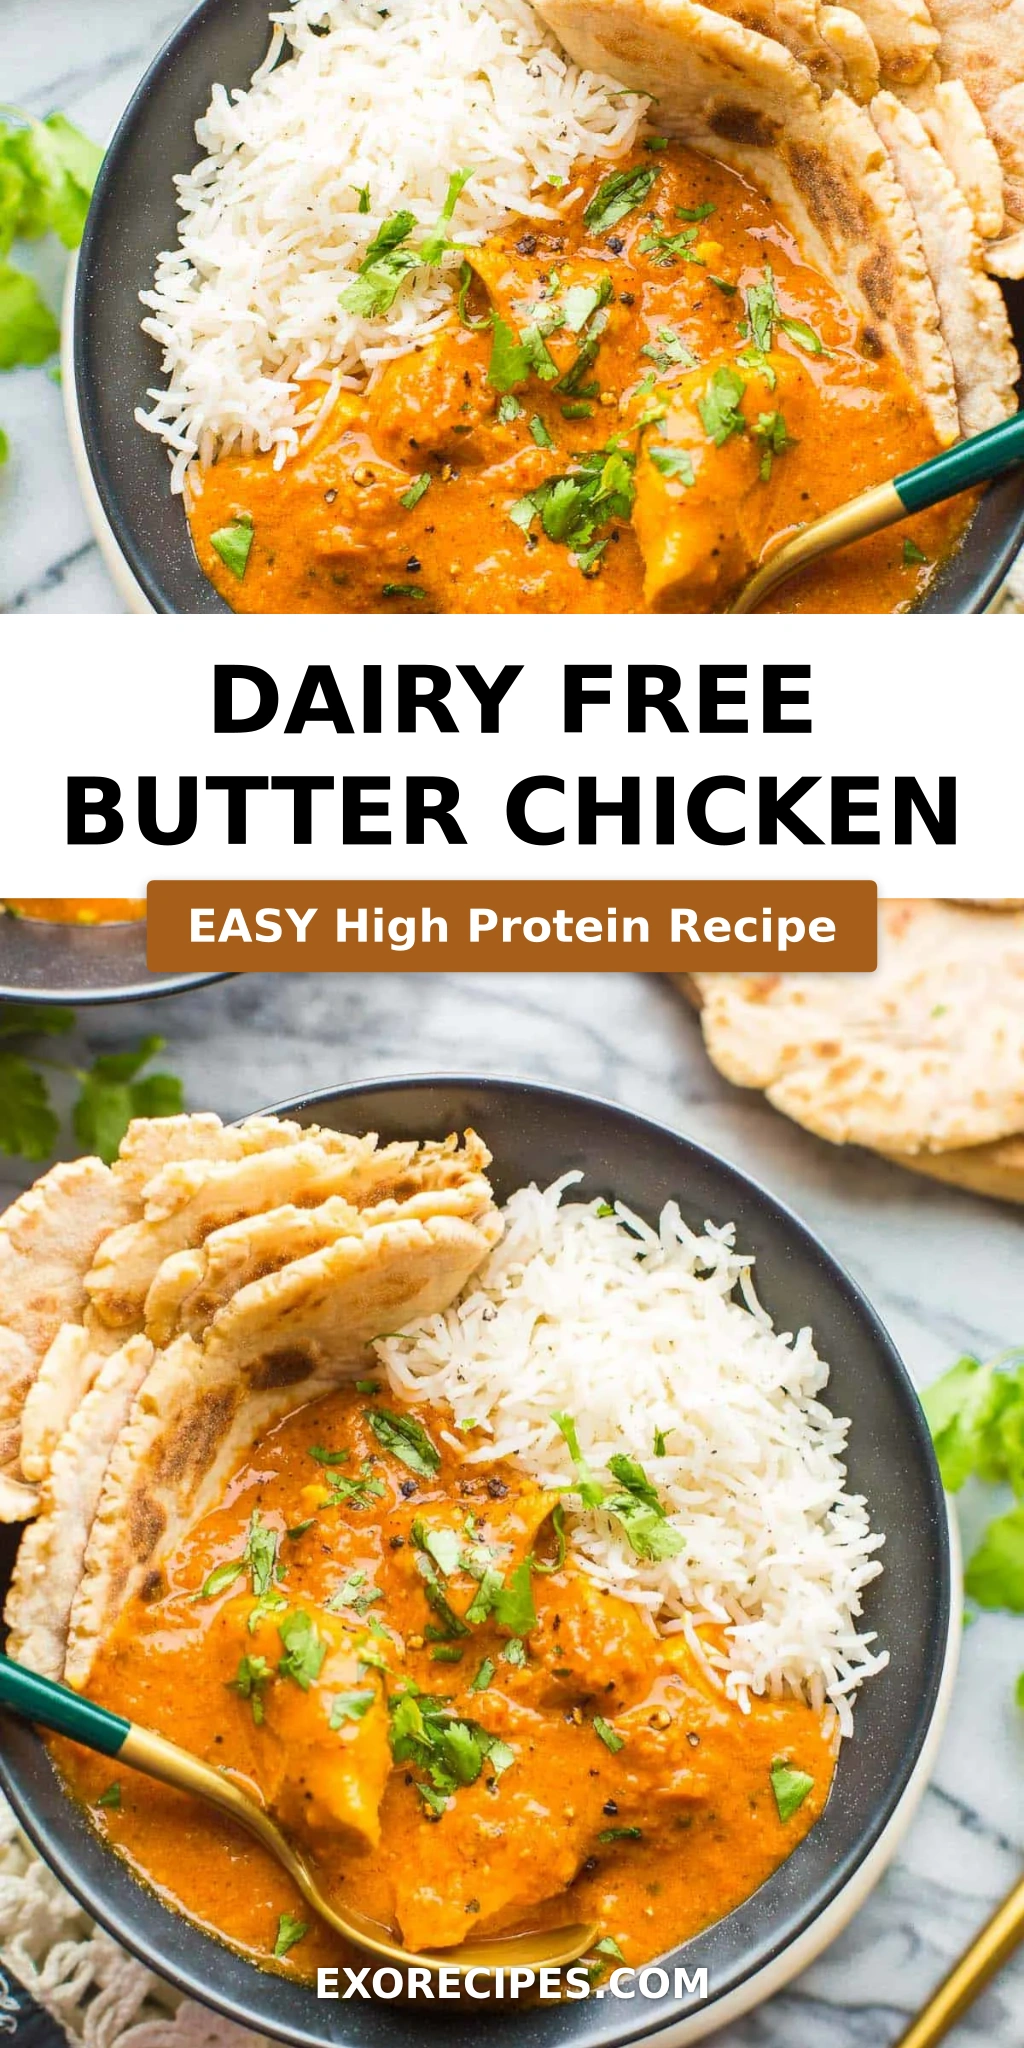
Imagine tender pieces of chicken, marinated in a fragrant blend of turmeric and garam masala, then seared until golden. The sauce is a deep, reddish-brown tapestry woven with caramelized onions, garlic, ginger, and a touch of heat from a fresh chili. When you add the full-fat coconut milk, it transforms into a velvety, luxurious broth that clings to every piece of chicken. The aroma of fenugreek — or kasoori methi as we call it — adds an earthy, slightly nutty note that makes this dish unmistakably Indian. Each spoonful is a balance of tangy tomato, warm spices, and creamy coconut, with a hint of sweetness from a little sugar. It’s the kind of meal that makes you close your eyes and sigh with contentment.
What sets my dairy free Indian curry apart from others is the careful technique I brought from Paris — specifically, how I build and blend the sauce to achieve a restaurant-quality finish. Many recipes skip the step of browning the chicken in batches, but that sear adds depth you simply can’t get otherwise. I also insist on blending the sauce until smooth, a trick that gives it that velvety texture without any cream or yogurt. My biggest advice? Don’t rush the simmering time. Letting the sauce cook for a full 15 minutes allows the tomato paste to caramelize and the spices to meld. And a common mistake I see is overcrowding the pan when searing the chicken — that steams it instead of browning it. This recipe is forgiving but rewards patience with incredible flavor.
Why This Dairy Free Butter Chicken Recipe Is the Best
The Flavor Secret: My background in Moroccan cooking taught me that spice blends are an art. In this dairy free butter chicken recipe, I use a double dose of garam masala — once in the marinade and once in the sauce — to build layers of warmth. The addition of fenugreek leaves at the end adds an authentic, slightly bittersweet note that you’ll find in the best Indian restaurants. It’s a small detail that makes a big difference.
Perfected Texture: The key to this coconut milk butter chicken is the two-step sauce. First, you caramelize the tomato paste with the spices, then you simmer it for at least 15 minutes before blending. This deepens the color and intensifies the flavor. Finally, stirring in the remaining coconut milk off the heat keeps the sauce creamy and prevents it from curdling. The result is a sauce that’s both rich and light, with a silky mouthfeel that rivals any traditional butter chicken.
Foolproof & Fast: Despite its complex flavor, this dairy free chicken curry is designed for home cooks. The ingredients are easy to find at any US grocery store — no need for specialty shops. And while it looks impressive, the steps are straightforward: marinate, sear, build the sauce, blend, and finish. I’ve even streamlined the process by allowing you to use an immersion blender directly in the pot, saving you from extra dishes. It’s the kind of recipe that becomes a weekly staple once you try it.
Dairy Free Butter Chicken Ingredients
When I lived in Paris, I’d spend Saturday mornings at the Marché d’Aligre, gathering fresh spices and herbs. Now, I do the same at the Union Square Greenmarket in Manhattan. For this dairy free butter chicken recipe, the ingredients are simple but purposeful. Full-fat coconut milk is the star, replacing both heavy cream and yogurt. I use canned coconut milk for its thickness and richness. The spices — garam masala, turmeric, cumin, and coriander — form the backbone of the flavor. And the fresh ginger and garlic bring a sharp, aromatic bite that’s essential.
Ingredients List
½ cup full fat coconut milk, coconut cream or coconut yoghurt (114g) -see notes*
1 chili, stemmed, seeded and minced (see notes for type)
1 tbsp garam masala
1 tsp ground coriander
½ tsp ground cumin
½ tsp black pepper
1 ½ cups water (360ml)
½ cup tomato paste (64g)
1 tbsp sugar
1 tsp salt
½ tsp dried fenugreek or kasoori methi (see notes)
1 cup unsweetened full fat coconut milk or coconut cream from a can (228g)
Ingredient Spotlight
Full-Fat Coconut Milk: This is the non-negotiable ingredient for a dairy free butter chicken. Look for cans without guar gum or stabilizers — the texture is smoother. I recommend Thai Kitchen or Aroy-D brands. If you want a lighter version, coconut cream works even better but is higher in fat. Avoid light coconut milk; it’s too thin and won’t create that velvety sauce.
Garam Masala: This spice blend is the soul of the dish. I make mine fresh from a mix of cardamom, cloves, cinnamon, and black pepper. For store-bought, choose a brand like MDH or Shan for authentic flavor. My pro tip: toast the garam masala in the pan for 30 seconds before adding liquids — it releases essential oils and deepens the aroma.
Fenugreek Leaves (Kasoori Methi): These dried leaves are what give butter chicken its signature earthy, slightly sweet flavor. It’s a classic ingredient in Indian cooking. If you can’t find it, dried oregano is a decent substitute, though the flavor will be different. I buy mine from Kalustyan’s in NYC — a spice lover’s paradise. Rub the leaves between your palms before adding to release their fragrance.
Original Ingredient
Best Substitution
Flavor / Texture Impact
Full-Fat Coconut Milk (marinade)
Coconut yoghurt
Slightly tangier, thinner marinade
Coconut Oil
Avocado oil or ghee (if not strictly dairy-free)
Avocado oil neutral; ghee adds butter flavor
Fenugreek Leaves
Dried oregano + pinch of maple syrup
Earthy note replaced by herbaceous, sweeter profile
Chicken
Cauliflower or chickpeas (for vegan version)
Less protein, but still hearty and absorbs sauce well
How to Make Dairy Free Butter Chicken — Step-by-Step
Making this dairy free butter chicken recipe is easier than you think. Follow these steps, and you’ll have a restaurant-quality curry in about an hour. I’ve included my personal tips to ensure every element shines.
Step 1: Marinate the Chicken
In a large mixing bowl, whisk together the marinade ingredients: coconut milk, lemon juice, minced garlic, ginger, garam masala, black pepper, turmeric, and salt. Add the chicken pieces and toss until fully coated. Cover and refrigerate for at least 30 minutes, or up to 24 hours for deeper flavor.
💡 mia’s Pro Tip: Don’t skip the lemon juice — it helps tenderize the chicken and brightens the spices. If marinating overnight, use coconut yoghurt instead of coconut milk for a thicker, more tangy marinade.
Step 2: Sear the Chicken
Heat 2 tablespoons of coconut oil in a large pot or skillet over medium-high heat. Working in 2-3 batches, add the chicken pieces without overcrowding. Cook for about 3 minutes per side until nicely browned. Remove and set aside. The chicken will finish cooking in the sauce later.
⚠️ Common Mistake to Avoid: Adding all the chicken at once. This lowers the pan temperature and steams the meat instead of searing it. Brown in batches for that golden crust.
Step 3: Build the Aromatic Base
Add the remaining 2 tablespoons of coconut oil to the same pot. Cook the diced onion over medium heat for 5-7 minutes until translucent. Stir in the minced garlic, ginger, and chili pepper. Cook for about 1 minute until fragrant. This base is crucial for the sauce’s depth.
💡 mia’s Pro Tip: Use a serrano chili for medium heat or a Thai bird chili for more spice. Remove seeds and membranes if you prefer a milder curry.
Step 4: Cook the Spice Paste
Reduce heat to medium-low. Add the tomato paste, garam masala, ground coriander, cumin, and black pepper. Cook for 2-3 minutes, stirring constantly. If the pan looks dry, add 1-2 tablespoons of water. This step caramelizes the tomato paste and blooms the spices.
⚠️ Common Mistake to Avoid: Cooking the spices on high heat. They can burn quickly, turning bitter. Keep the heat low and stir constantly.
Step 5: Simmer the Sauce
Stir in the water, sugar, and salt. Bring to a simmer over medium heat and cook for at least 15 minutes, until the sauce thickens and deepens to a reddish-brown color. Stir occasionally to prevent sticking. This is where the magic happens — the flavors concentrate and meld.
💡 mia’s Pro Tip: Taste the sauce after 10 minutes. If it’s too acidic, add a pinch more sugar. If it’s too salty, add a splash of water. Adjust to your preference.
Step 6: Blend the Sauce
Remove the pot from heat. Transfer the sauce to a blender or food processor in batches (don’t fill more than halfway). Blend until completely smooth, then pour the puree back into the pot. Alternatively, use an immersion blender directly in a heat-safe bowl for fewer dishes.
⚠️ Common Mistake to Avoid: Blending hot liquid in a sealed blender. Always remove the center cap to let steam escape, and cover with a towel to prevent splatters.
Step 7: Finish with Coconut Milk and Chicken
Stir in the remaining 1 cup of full-fat coconut milk until combined. Add the seared chicken pieces back to the pot. Simmer over medium-low heat for 10 minutes, until the chicken is cooked through and the sauce is thickened. Stir in the dried fenugreek or kasoori methi if using.
💡 mia’s Pro Tip: Add the fenugreek leaves off the heat and let them steep for a minute before serving. This preserves their delicate flavor.
Step 8: Serve and Store
Serve topped with fresh cilantro and a side of basmati rice or cauliflower rice. For leftovers, store in an airtight container in the fridge for up to five days. The curry tastes even better the next day as the flavors continue to develop.
Step
Action
Duration
Key Visual Cue
1
Marinate Chicken
30 mins – 24 hrs
Chicken fully coated in golden-yellow marinade
2
Sear Chicken
6 mins per batch
Golden-brown crust on both sides
3
Cook Onions & Aromatics
6-8 mins
Onions translucent, garlic fragrant
4
Cook Spice Paste
2-3 mins
Paste darkens to deep brick-red
5
Simmer Sauce
15 mins
Sauce thickens, turns reddish-brown
6
Blend Sauce
2-3 mins
Smooth, velvety consistency
7
Finish Cooking
10 mins
Chicken cooked through, sauce coats spoon
8
Serve
Immediate
Garnished with cilantro
Serving & Presentation
This dairy free butter chicken recipe is a showstopper when it comes to the table. I love serving it family-style in a large, shallow bowl so everyone can see that rich, creamy sauce. Spoon it over a bed of fluffy basmati rice — the grains soak up every drop. For a low-carb option, try cauliflower rice or even
Rich, creamy and extra saucy this Dairy Free Butter Chicken is a must make! Coconut milk replace the heavy cream and yoghurt make for a more allergy friendly dish thats just as delicious and satisfying as the original. | Paleo + Whole30 Friendly
Ingredients
Scale
½ cup full fat coconut milk, coconut cream or coconut yoghurt (114g) -see notes*
1 chili, stemmed, seeded and minced (see notes for type)
1 tbsp garam masala
1 tsp ground coriander
½ tsp ground cumin
½ tsp black pepper
1 ½ cups water (360ml)
½ cup tomato paste (64g)
1 tbsp sugar
1 tsp salt
½ tsp dried fenugreek or kasoori methi (see notes)
1 cup unsweetened full fat coconut milk or coconut cream from a can (228g)
Instructions
In a large mixing bowl: mix together the marinade ingredients: coconut milk, lemon juices, garlic, ginger and spices until combined.
Add the chicken pieces to the marinade and mix until fully coated in the marinade. Set aside and let marinate and least 30 minutes. This can also be done 24 hours in advance.
In a large pot or skillet, add 2 tablespoons of coconut oil and warm over a medium-high heat. When the oil is hot enough (it sizzles if you flick a few drops of water on it) begin adding the chicken pieces to the pot/skillet. Do this is 2-3 batches so you don't over crowd the pan. Cook the chicken pieces about 3 minutes on each side to brown, then remove from the pot and set aside for the time. The chicken will finish cooking in the sauce in a later step.
Add the remaining oil to the same pot along with the onions. Cook about 5-7 minutes over a medium until the onions start to turn translucent. Add the garlic, ginger and chili pepper. Cook for about 1 minute until fragrant.
Turn the heat down to a medium-low. Add the tomato paste, garam masala, ground coriander, cumin, black pepper. Cook about 2-3 seconds, stirring the whole time. If the pan/pot looks too dry at any point, add 1-2 tablespoons of water.
Stir in the water, sugar and salt. Let simmer over a medium heat for at least 15 minutes until the sauce thickens and deepens into a reddish-brown color.
Remove the pot/pan from the heat. In a blender or food process: Transfer the sauce to a blender or food processor. Make sure not to fill up your blending container more than halfway full. Do this in batches if needed. Blend the sauce until smooth then pour it back into the pot/pan. With an immersion blender: Pour the sauce into a medium-sized heat safe bowl and blend with a handheld blender until smooth. Once smooth, pour it back into the original pan.
Stir in the remaining coconut milk/cream until combined then add the chicken pieces to the sauce. Mix and let simmer over a medium-low heat a final 10 minutes. Stir in the dried fenugreek or kasoori methi if using.
Serve topped with fresh cilantro along with a side of rice/cauliflower rice and enjoy.
Keep leftovers stored in an airtight container in the fridge up to five days.
Tried This Recipe? Leave a Comment!
Did you make this recipe? I’d love to hear how it turned out! Please leave a comment and a rating below. Your feedback helps other home cooks and supports cheerychop.com!
For more delicious inspiration, follow me on Pinterest!
Easy Dairy Free Butter Chicken Recipe
Table of Contents
Dairy Free Butter Chicken – A Creamy, Allergy-Friendly Indian Classic
⚖️
Difficulty
Easy
⏲️
Prep Time
20 mins
🕒
Cook Time
45 mins
⏱️
Total Time
1 hr 5 mins
🍽️
Servings
6
Growing up in Morocco, my mother’s kitchen was a symphony of warm spices and slow-cooked stews. Years later, training at Le Cordon Bleu in Paris taught me the precision behind velvety sauces. And now, living in New York City, I’m always looking for ways to bring those global flavors to a table that works for everyone. This dairy free butter chicken recipe is my answer to that craving — a rich, creamy, and extra-saucy curry that uses coconut milk instead of heavy cream and yogurt, making it perfect for anyone avoiding dairy. The best part? You don’t lose a single bit of that signature luscious texture or depth of flavor. This easy dairy free butter chicken is the Indian comfort food you’ve been searching for, and it’s about to become a weeknight favorite.
Imagine a bowl of this dairy free butter chicken — the sauce is a deep, reddish-brown, silky and thick, clinging to every piece of tender chicken. The aroma hits you first: a heady blend of garam masala, coriander, and cumin, with a subtle warmth from fresh ginger and chili. Then comes the taste — a perfect balance of tangy tomato, a hint of sweetness from sugar, and the rich, nutty undertone of coconut milk. Each bite is smooth, satisfying, and surprisingly light for something so decadent. I love how the fenugreek adds that slightly bitter, aromatic finish that makes butter chicken so distinctive. This isn’t just a substitute; it’s a version that stands proudly on its own, proving that you can have incredible depth without a drop of dairy.
What sets this recipe apart is the technique I brought back from Paris — a simple but crucial step of blending the sauce until perfectly smooth after simmering. It gives the curry an almost velvety finish that’s usually achieved with cream. As a trained chef, I’ve tested this with dozens of home cooks, and I’ve found that the secret lies in properly browning the chicken in batches and letting the sauce simmer long enough to deepen. A common mistake is rushing the browning step or skipping the marinade — trust me, those 30 minutes make all the difference. Let me show you how to make a dairy free Indian curry that’s foolproof, flavorful, and completely irresistible.
Why This Dairy Free Butter Chicken Recipe Is the Best
The Flavor Secret: This isn’t just a dairy-free swap — it’s a reimagining. By using full-fat coconut milk, we get a richness that mimics heavy cream without the lactose. The marinade, inspired by my mother’s Moroccan spice blends, includes turmeric, ginger, and lemon juice that tenderize the chicken while infusing it with flavor. I also use a blend of garam masala twice — once in the marinade and once in the sauce — to build layers of warmth that develop as the dish cooks. This ensures every bite is deeply flavorful, not just the sauce.
Perfected Texture: The key to a creamy, non-grainy sauce is blending it until it’s absolutely smooth. After simmering the onion-tomato-spice base for 15 minutes, I transfer it to a blender (or use an immersion blender) and puree it until it’s silky. This French technique eliminates any stringy onion bits and creates a uniform, luxurious consistency. Then, adding the remaining coconut milk at the end and simmering the chicken gently for just 10 minutes ensures the sauce stays creamy and doesn’t separate. The result is a dairy free butter chicken that’s every bit as indulgent as the original.
Foolproof & Fast: I’ve designed this recipe for busy weeknights, even though it tastes like a weekend project. The active cooking time is only about 30 minutes, and the rest is hands-off simmering. The ingredients are all easy to find at any US grocery store — coconut milk, tomato paste, and basic spices. Plus, the marinade can be done a day ahead, making dinner prep a breeze. Even if you’re new to Indian cooking, the step-by-step instructions and visual cues (like when the sauce turns a reddish-brown) make it impossible to mess up.
Dairy Free Butter Chicken Ingredients
When I’m shopping for this dairy free butter chicken at my local farmers market in NYC, I always look for the best quality spices. I remember my mother grinding her own garam masala in Morocco, but here, a good store-bought brand works beautifully. The key is using full-fat coconut milk — not the light version — to get that creamy consistency. Let me walk you through everything you’ll need.
Ingredients List
½ cup full fat coconut milk, coconut cream or coconut yoghurt (114g) – see notes*
1 chili, stemmed, seeded and minced (see notes for type)
1 tbsp garam masala
1 tsp ground coriander
½ tsp ground cumin
½ tsp black pepper
1 ½ cups water (360ml)
½ cup tomato paste (64g)
1 tbsp sugar
1 tsp salt
½ tsp dried fenugreek or kasoori methi (see notes)
1 cup unsweetened full fat coconut milk or coconut cream from a can (228g)
Ingredient Spotlight
Coconut Milk: This is the star of the dairy-free substitution. Full-fat coconut milk from a can provides the same richness as heavy cream, with a subtle sweetness that complements the spices beautifully. When selecting, look for cans without guar gum or stabilizers for the best texture. If you prefer a thicker sauce, use coconut cream instead.
Garam Masala: This warm spice blend is the heart of the dish. I use it twice — once in the marinade to infuse the chicken, and again in the sauce for depth. For the best flavor, buy it from a spice shop that rotates stock frequently, or make your own by toasting and grinding cumin, coriander, cardamom, cloves, and cinnamon.
Dried Fenugreek (Kasoori Methi): This herb adds a slightly bitter, nutty, and maple-like aroma that’s essential for authentic butter chicken. It’s available in the international aisle of most US grocery stores or online. If you can’t find it, you can omit it, but it won’t taste quite the same. Crush it between your palms before adding to release the oils.
Original Ingredient
Best Substitution
Flavor / Texture Impact
Full-fat coconut milk
Coconut cream (from a can)
Richer, thicker sauce; less sweet
Tomato paste
½ cup tomato puree (reduce water by ½ cup)
Slightly thinner sauce, brighter flavor
Coconut oil
Ghee (if not strictly dairy-free) or avocado oil
Ghee adds nutty richness; avocado oil is neutral
Dried fenugreek
Maple syrup (¼ tsp) + pinch of celery seed
Adds sweetness and slight bitterness; not identical
How to Make Dairy Free Butter Chicken — Step-by-Step
This easy dairy free butter chicken comes together in just over an hour, and I promise it’s worth every minute. Follow these steps carefully, and you’ll have a restaurant-quality curry at home.
Step 1: Make the Marinade
In a large mixing bowl, combine the ½ cup coconut milk, lemon juice, minced ginger, minced garlic, 2 tsp garam masala, ½ tsp black pepper, 1 tsp turmeric, and ½ tsp salt. Whisk until smooth and well combined. This marinade is the foundation of the flavor, so make sure the spices are fully incorporated.
💡 mia’s Pro Tip: For the best results, use freshly grated ginger and garlic — they release more oils and flavor than the jarred versions. I always keep a knob of ginger in my freezer for easy grating.
Step 2: Marinate the Chicken
Add the chicken pieces to the bowl and toss until every piece is fully coated. Cover the bowl with plastic wrap or a lid and refrigerate for at least 30 minutes. For even deeper flavor, you can let it marinate up to 24 hours in advance. This step tenderizes the chicken and ensures every bite is infused with spice.
⚠️ Common Mistake to Avoid: Don’t skip the marinating time! Even 30 minutes makes a huge difference. Without it, the chicken will be less flavorful and the sauce won’t have that same depth.
Step 3: Brown the Chicken
In a large pot or skillet, warm 2 tablespoons of coconut oil over medium-high heat. When the oil is hot enough to sizzle a drop of water, add the chicken pieces in 2-3 batches — don’t overcrowd the pan. Cook each batch for about 3 minutes per side, until golden brown. The chicken won’t be fully cooked through yet; it will finish in the sauce. Remove the browned pieces to a plate and set aside.
💡 mia’s Pro Tip: Searing the chicken in batches ensures it gets a nice crust instead of steaming. This adds a layer of caramelized flavor that you can’t get any other way.
Step 4: Sauté the Aromatics
Add the remaining 2 tablespoons of coconut oil to the same pot. Add the finely diced onion and cook over medium heat for 5-7 minutes, until the onions are soft and translucent. Stir occasionally to prevent sticking. Add the minced garlic, grated ginger, and minced chili pepper, and cook for about 1 minute until fragrant. The smell at this point is incredible — it’s the soul of the dish.
⚠️ Common Mistake to Avoid: Don’t rush the onions! They need a full 5-7 minutes to soften properly. If they start to brown, reduce the heat slightly — you want them sweet and translucent, not browned.
Step 5: Cook the Spice Base
Turn the heat down to medium-low. Add the tomato paste, 1 tbsp garam masala, ground coriander, ground cumin, and ½ tsp black pepper. Stir constantly for about 2-3 seconds — yes, seconds! The paste can burn quickly. If the pan looks too dry, add 1-2 tablespoons of water to keep it from sticking. This step blooms the spices in the oil, deepening their flavor.
💡 mia’s Pro Tip: Cooking the tomato paste with the spices for just a few seconds is a classic French technique called “pincer” — it removes the raw taste and adds a rich, umami depth to the sauce.
Step 6: Simmer the Sauce
Stir in the water, sugar, and salt. Bring the sauce to a simmer over medium heat, then let it cook for at least 15 minutes. During this time, the sauce will thicken and deepen into a beautiful reddish-brown color. Stir occasionally to prevent sticking. This is where the magic happens — the flavors meld and concentrate.
⚠️ Common Mistake to Avoid: Don’t shorten the simmer time! The full 15 minutes is essential for the tomato paste to cook down and the spices to mellow. A short simmer results in a sauce that tastes raw and thin.
Step 7: Blend the Sauce
Remove the pot from the heat. You have two options here: For a blender, carefully transfer the sauce to a blender or food processor in batches (don’t fill more than halfway) and blend until completely smooth, then pour it back into the pot. For an immersion blender, pour the sauce into a medium heat-safe bowl and blend with a handheld blender until smooth, then return it to the pot. This step is what gives the dairy free butter chicken its signature velvety texture.
💡 mia’s Pro Tip: Let the sauce cool for 2-3 minutes before blending to avoid steam explosions. If using a blender, remove the center cap and cover with a towel to let steam escape.
Step 8: Finish the Dish
Stir in the remaining 1 cup of coconut milk or coconut cream until fully combined. Add the browned chicken pieces back to the pot, along with any juices that accumulated on the plate. Mix well, then let it simmer over medium-low heat for a final 10 minutes, until the chicken is cooked through and tender. Stir in the dried fenugreek or kasoori methi, if using, and cook for 1 more minute.
⚠️ Common Mistake to Avoid: Don’t add the fenugreek too early — it can become bitter if cooked for too long. Crush it between your palms just before adding to release its aromatic oils.
Step 9: Serve and Store
Serve the dairy free butter chicken hot, topped with fresh cilantro, alongside rice or cauliflower rice. For storage, let the dish cool completely, then transfer to an airtight container. It will keep in the fridge for up to five days, and the flavors actually deepen overnight. Reheat gently on the stovetop or in the microwave, adding a splash of water if the sauce has thickened too much.
💡 mia’s Pro Tip: This dairy free butter chicken tastes even better the next day! I love making a double batch for meal prep — it’s a lifesaver on busy NYC weeknights.
Step
Action
Duration
Key Visual Cue
1
Make marinade
5 mins
Smooth, golden paste
2
Marinate chicken
30+ mins
Fully coated pieces
3
Brown chicken
6-9 mins total
Golden brown crust
4
Sauté aromatics
6-8 mins
Translucent onions, fragrant
5
Cook spice base
2-3 secs
Dark, fragrant paste
6
Simmer sauce
15 mins
Reddish-brown, thickened
7
Blend sauce
Tried This Recipe? Leave a Comment!
Did you make this recipe? I’d love to hear how it turned out! Please leave a comment and a rating below. Your feedback helps other home cooks and supports cheerychop.com!
For more delicious inspiration, follow me on Pinterest!
Moist Low Carb Almond Flour Banana Bread
Table of Contents
Low Carb Almond Flour Banana Bread – The Ultimate Guide
⚖️
Difficulty
Easy
⏲️
Prep Time
10 mins
🕒
Cook Time
50 mins
⏱️
Total Time
60 mins
🍽️
Servings
12 slices
I still remember the first time I tried to make a low carb almond flour banana bread that actually tasted like the real thing. It was a rainy Sunday in my tiny New York City apartment, and I was missing the warm, fragrant banana bread my mother used to bake in our kitchen in Morocco. She would mash the bananas with a fork, add a pinch of cinnamon, and the whole house would smell like comfort. But I was on a low carb journey, and traditional banana bread was off the table. That’s when I started experimenting with almond flour. I wanted a keto banana bread that was moist, not dry; sweet, not bland; and easy enough for a busy weekday morning. After countless batches, I finally nailed it. This low carb almond flour banana bread recipe is the result of those early failures — and it’s become a staple in my gluten free banana bread repertoire.
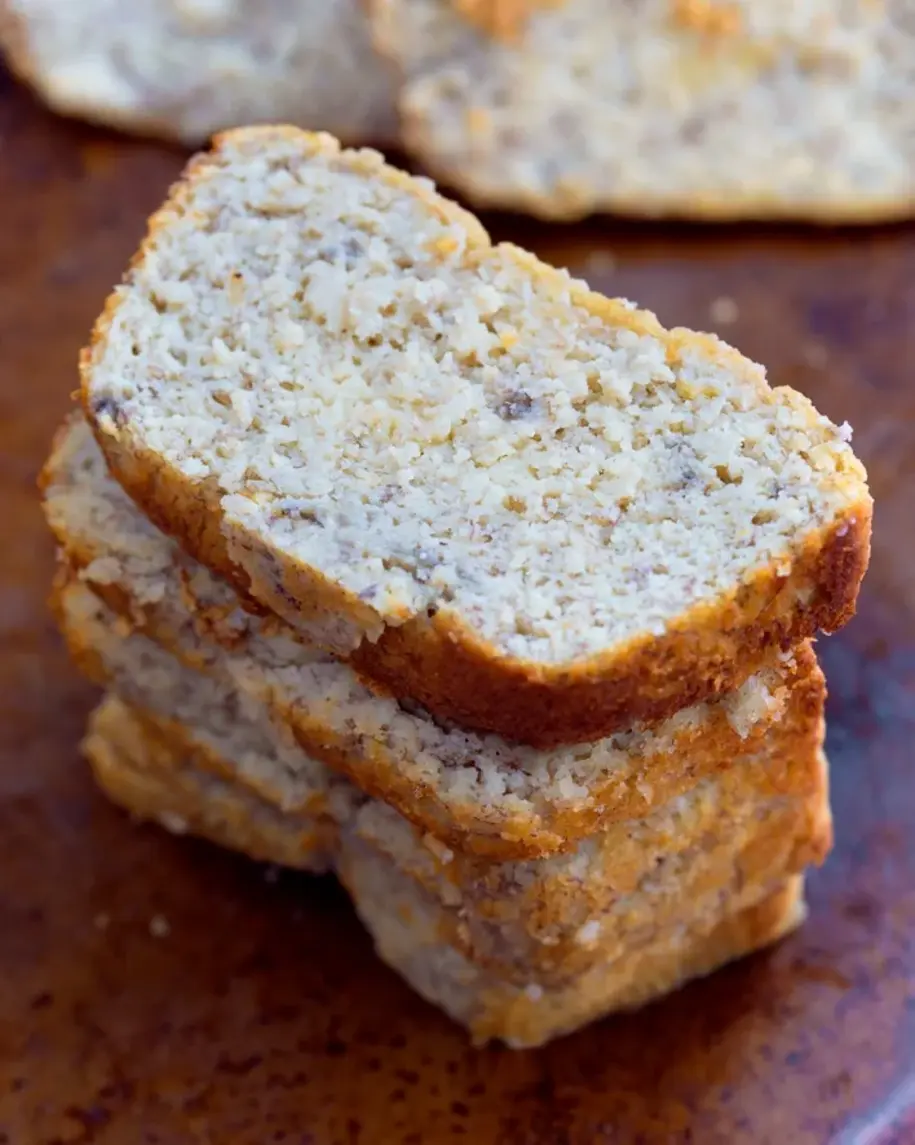
The texture of this sugar free banana bread is what truly sets it apart. It’s incredibly moist and fudgy, almost like a dense pound cake, with a tender crumb that melts in your mouth. The aroma of ripe bananas fills your kitchen as it bakes, and the golden-brown crust offers a slight crunch before giving way to that soft, luscious interior. I add a whisper of vanilla and a touch of salt to balance the sweetness — a trick I learned in pastry school in Paris. The first slice, still slightly warm, with a pat of butter melting on top? Pure bliss. It’s the kind of breakfast that feels indulgent but fits perfectly into a low carb lifestyle.
What makes my version different is the technique. Most recipes for almond flour banana bread turn out dry or crumbly because almond flour behaves so differently from wheat flour. I spent months testing ratios, oven temperatures, and resting times to get it right. The secret? Using overripe bananas (the spottier, the better) and a lower oven temperature to prevent the edges from burning while the center stays undercooked. Plus, I always let the loaf cool completely before slicing — this is the step most people skip, and it makes all the difference. Trust me, if you follow this guide, you’ll never go back to a dry keto banana bread again. 💡 mia’s Pro Tip: For the best flavor, use bananas that are so ripe they’re almost black — that’s when they’re sweetest and easiest to mash.
Why This Low Carb Almond Flour Banana Bread Recipe Is the Best
The Flavor Secret: Growing up in Morocco, my mother taught me that the best dishes come from the best ingredients. For this almond flour banana bread recipe, I use fine blanched almond flour — not almond meal — because it gives a smoother, more delicate crumb. The overripe bananas provide natural sweetness, so you don’t need any added sugar. A pinch of salt and a splash of pure vanilla extract elevate the flavors without overpowering the banana. It’s a simple, honest combination that lets each ingredient shine.
Perfected Texture: During my training at Le Cordon Bleu in Paris, I learned that texture is as important as taste. Almond flour lacks gluten, so it can’t develop the same structure as wheat flour. To compensate, I rely on eggs (or flax eggs for a vegan option) to bind the batter and create that soft, fudgy texture. Baking at 325°F instead of 350°F ensures the loaf cooks evenly without drying out. The result is a bread that’s dense yet tender, with a moist crumb that stays fresh for days.
Foolproof & Fast: This recipe is designed for anyone — from a busy mom in Brooklyn to a college student in Ohio. You don’t need a stand mixer or any fancy equipment. Just one bowl, a spatula, and a loaf pan. The batter comes together in under 10 minutes, and the oven does the rest. Even if you’ve never baked with almond flour before, you’ll get perfect results every time. I’ve tested it more times than I can count, and I’m confident it will work for you.
Low Carb Almond Flour Banana Bread Ingredients
I love shopping for ingredients at the Union Square Greenmarket in NYC. The smell of fresh herbs and ripe fruit always takes me back to the bustling souks of Marrakech. For this recipe, you only need a handful of pantry staples, but choosing the right ones matters. Here’s what you’ll need:
Ingredients List
2 cups fine almond flour (blanched, not almond meal)
3 overripe bananas (the spottier, the better — about 1½ cups mashed)
2 large eggs (or 2 flax eggs for a vegan option)
1 tbsp baking powder
½ tsp salt
½ tsp pure vanilla extract
Ingredient Spotlight
Almond Flour: The star of this keto banana bread. Fine blanched almond flour has a light, powdery texture that mimics wheat flour better than coarse almond meal. Look for it in the baking aisle or online — brands like Bob’s Red Mill or Blue Diamond work wonderfully. Store it in the fridge or freezer to keep it fresh longer.
Overripe Bananas: This is non-negotiable for a sugar free banana bread that’s naturally sweet. The darker the peel, the more sugar the bananas contain, which means you can skip any added sweetener. I often buy extra bananas just to let them ripen on my counter for this recipe.
Eggs: Eggs provide structure and moisture. For a vegan version, I use flax eggs (1 tbsp ground flaxseed + 3 tbsp water per egg). The flax adds a subtle nuttiness that pairs beautifully with the almond flour. If you’re not vegan, pasture-raised eggs give the richest flavor.
Original Ingredient
Best Substitution
Flavor / Texture Impact
Almond Flour
Coconut Flour (use ½ cup + 2 extra eggs)
Drier, more absorbent; adds a light coconut flavor
Bananas
Pumpkin purée (1 cup) + ¼ cup erythritol
Less sweet, more vegetal; denser texture
Eggs
Flax eggs (2 tbsp flax + 6 tbsp water)
Nutty flavor; slightly denser but still moist
How to Make Low Carb Almond Flour Banana Bread — Step-by-Step
Making this low carb almond flour banana bread is almost too easy. But there are a few tricks I’ve learned along the way that will guarantee a perfect loaf every time. Let’s walk through each step together.
Step 1: Prepare Your Pan and Oven
Grease a 9×5-inch loaf pan with butter or coconut oil, or line it with parchment paper. I prefer parchment because it makes lifting the bread out so much easier. Preheat your oven to 325°F (163°C). This lower temperature is crucial for almond flour — it bakes more slowly and evenly, preventing the crust from burning while the inside stays raw.
💡 mia’s Pro Tip: Use a light-colored metal loaf pan. Dark pans absorb more heat and can over-brown the edges before the center is done.
Step 2: Mix the Wet Ingredients
In a large bowl, mash the 3 overripe bananas with a fork until mostly smooth — a few small chunks are fine. Add the 2 eggs and ½ teaspoon vanilla extract. Whisk everything together until well combined. The mixture should look like a thick, lumpy batter.
⚠️ Common Mistake to Avoid: Don’t over-mash the bananas into a puree. Leaving a few lumps adds texture and little pockets of intense banana flavor throughout the bread.
Step 3: Combine Dry Ingredients
Add the 2 cups almond flour, 1 tablespoon baking powder, and ½ teaspoon salt to the wet mixture. Stir with a spatula until just combined. Don’t overmix — almond flour can get gummy if you work it too much. The batter will be thick and slightly sticky, similar to a traditional banana bread batter.
💡 mia’s Pro Tip: Sift the almond flour before adding it to the bowl. This aerates it and removes any clumps, resulting in a lighter, fluffier bread.
Step 4: Bake to Perfection
Pour the batter into the prepared loaf pan and spread it evenly with a spatula. Bake on the center rack for 50-55 minutes. Start checking at 45 minutes — insert a toothpick into the center; if it comes out clean or with a few moist crumbs, it’s done. The top should be golden brown and spring back when lightly pressed.
⚠️ Common Mistake to Avoid: Don’t open the oven door during the first 40 minutes. The sudden temperature drop can cause the bread to sink in the middle.
Step 5: Cool and Unmold
Let the loaf sit in the pan for 10-15 minutes, then run a knife around the edges and carefully pop it out. Place it on a wire rack to cool completely — this is essential! If you slice it while warm, it will crumble. Patience here pays off with clean, beautiful slices.
💡 mia’s Pro Tip: For extra moist bread, wrap the cooled loaf in plastic wrap and refrigerate overnight. The flavors meld together, and the texture becomes even more fudgy.
Step
Action
Duration
Key Visual Cue
1
Prepare pan & oven
5 mins
Oven at 325°F, pan greased
2
Mix wet ingredients
3 mins
Smooth, lumpy banana mixture
3
Combine dry ingredients
2 mins
Thick, sticky batter
4
Bake
50-55 mins
Golden top, toothpick clean
5
Cool & unmold
1 hour+
Completely cool to touch
Serving & Presentation
This low carb almond flour banana bread is incredibly versatile. I love serving it for breakfast with a hot cup of Moroccan mint tea — the sweetness of the bread balances the tea’s fresh, herbaceous notes. For a decadent brunch, toast a slice and top it with a dollop of grass-fed butter or cream cheese. The contrast of the warm, fudgy bread and the cool, tangy spread is pure heaven.
When I’m hosting friends in my NYC apartment, I slice the bread and arrange it on a wooden board with fresh berries and a drizzle of sugar-free honey. It’s an elegant, low-effort dessert that always impresses. You can also crumble it over yogurt parfaits or use it as a base for a quick bread pudding. The possibilities are endless!
Pairing Type
Suggestions
Why It Works
Side Dish
Fresh berries, sliced strawberries
Adds brightness and acidity to balance the richness
Sauce / Dip
Cream cheese, butter, sugar-free honey
Enhances the moist, fudgy texture with creamy contrast
Beverage
Mint tea, black coffee, unsweetened almond milk
Clean, non-sweet drinks let the banana flavor shine
Garnish
Toasted coconut flakes, crushed almonds
Adds crunch and a nutty aroma that complements almond flour
Make-Ahead, Storage & Reheating
As a busy food blogger in NYC, I rely on make-ahead recipes to keep my mornings smooth. This low carb almond flour banana bread stores beautifully, making it perfect for meal prep. I often bake a double batch on Sunday and enjoy slices all week. Here’s how to store and reheat it for the best results.
Method
Container
Duration
Reheating Tip
Refrigerator
Airtight container or wrapped in plastic
Tried This Recipe? Leave a Comment!
Did you make this recipe? I’d love to hear how it turned out! Please leave a comment and a rating below. Your feedback helps other home cooks and supports cheerychop.com!
For more delicious inspiration, follow me on Pinterest!
Keto Lemon Bread – Moist, Fluffy, and Perfectly Tart
Table of Contents
Keto Lemon Bread – Moist, Fluffy, and Perfectly Tart
⚖️
Difficulty
Easy
⏲️
Prep Time
10 mins
🕒
Cook Time
50 mins
⏱️
Total Time
60 mins
🍽️
Servings
8 slices
The first time I made this keto lemon bread recipe, I was standing in my tiny NYC kitchen with a pile of lemons from the Union Square Greenmarket and a memory of my mother’s bright, tangy lemon cake from our home in Morocco. She would zest lemons over the countertop while singing, and the whole house smelled like sunshine. That aroma is what I chased when I developed this low carb lemon bread — a loaf that’s moist, tender, and bursting with citrus, but with zero sugar and just 3g net carbs per slice. It’s the perfect healthy breakfast alongside your morning coffee or a guilt-free dessert after dinner.
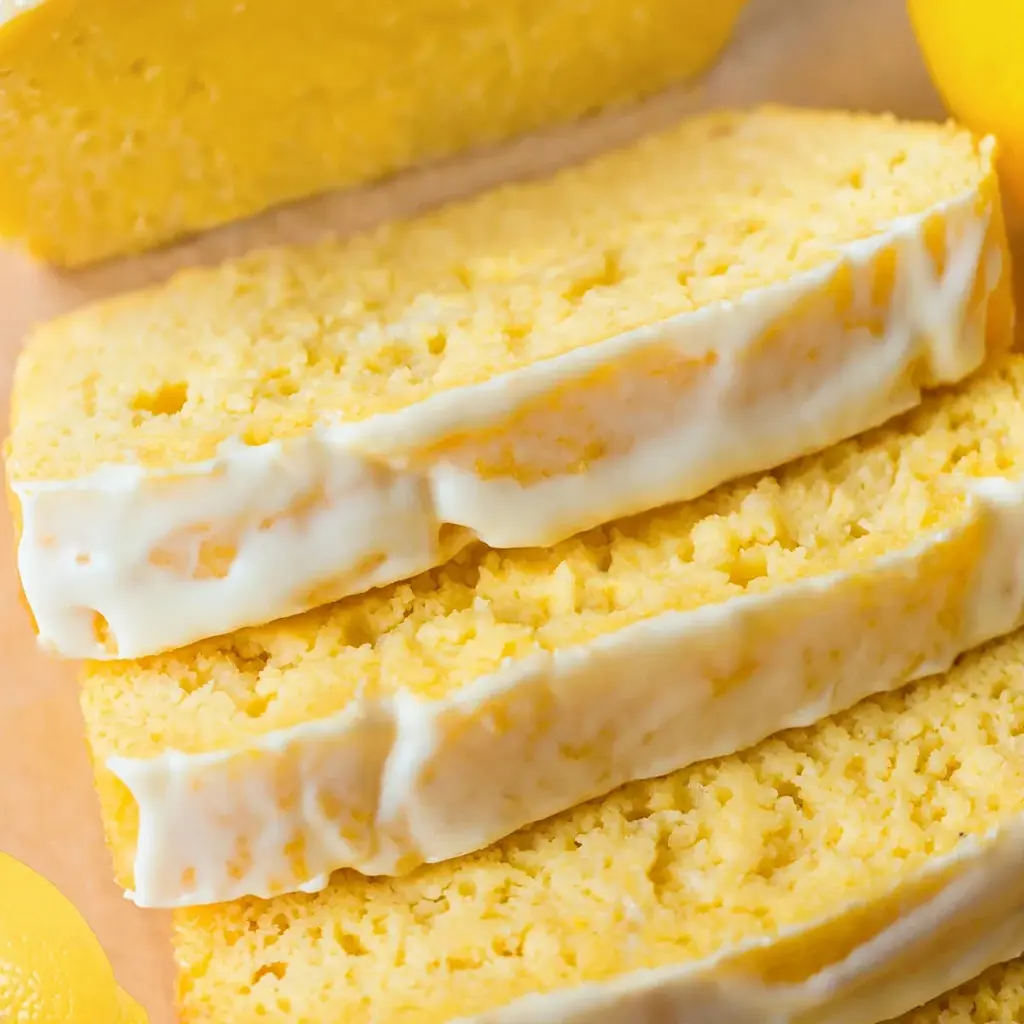
When you slice into this loaf, the crumb is golden and fine, flecked with bright lemon zest. The first bite gives you that instant zing of lemon, followed by a gentle sweetness from the sugar-free sweetener. The almond flour base keeps it incredibly moist, almost like a pound cake, without any grittiness. I love serving it warm with a dollop of whipped coconut cream — the cool creaminess balances the tartness beautifully. My Parisian pastry training taught me the importance of balance, and this loaf nails it: bright but not sour, sweet but not cloying, light yet satisfying.
What makes this my go-to sugar free lemon bread is the texture — I’ve perfected the ratio of almond flour to yogurt so it never turns out dry or dense. A common mistake people make with keto baking is over-mixing the batter, which develops the gluten (even from almond flour) and makes the loaf tough. I’ll show you my trick for folding just until combined, plus how to tell when it’s perfectly baked without overdoing it. Whether you’re new to keto or a seasoned pro, this gluten free lemon loaf is foolproof and fast. Let’s bake!
Why This Keto Lemon Bread Recipe Is the Best
The Flavor Secret: Growing up in Morocco, my mother taught me to always use both the juice and zest of lemons — never one without the other. The zest carries the essential oils that give lemon its perfume, while the juice provides acidity. For this keto lemon bread, I use freshly squeezed lemon juice and a full tablespoon of zest. That double hit creates a layered citrus flavor that’s miles better than any extract. I source my lemons from a local farm upstate whenever I can — they’re juicier and more aromatic than supermarket varieties.
Perfected Texture: My French culinary training at Le Cordon Bleu Paris taught me that moisture in gluten-free baking comes from fat and liquid working together. Here, the yogurt (or coconut cream) provides moisture while the almond flour gives structure. The trick is to let the batter rest for five minutes before baking — this allows the almond flour to fully hydrate, resulting in a tender crumb instead of a gritty one. I also use baking powder as the sole leavener, which reacts with the lemon juice to create tiny air bubbles for lift.
Foolproof & Fast: This low carb lemon bread comes together in one bowl with a whisk — no electric mixer needed. That means less cleanup and more time enjoying your day. I’ve tested it with flax eggs for a vegan option, and with coconut cream instead of yogurt for a dairy-free version. Both work beautifully without sacrificing texture. Whether you’re a beginner baker or a seasoned cook, this recipe delivers consistent results every time. Just follow the visual cues I share, and you’ll have a perfect loaf.
Keto Lemon Bread Ingredients
I picked up my almond flour from a bulk bin at the Park Slope Food Co-op — it’s finely ground and blanched, which makes all the difference for a smooth crumb. The lemons come from my friend’s backyard tree in New Jersey; they’re so fragrant I can smell them from across the kitchen. In Morocco, we used preserved lemons for everything, but for this sugar free lemon bread, fresh is best.
Ingredients List
2 cups almond flour (blanched, finely ground)
1/3 cup granulated sweetener (for sugar free, I like Lakanto)
1 tbsp baking powder
1/2 tsp salt
2/3 cup plain yogurt or coconut cream
1/4 cup lemon juice (freshly squeezed)
3 eggs or flax eggs
1 tbsp lemon zest
Ingredient Spotlight
Almond Flour: The backbone of this gluten free lemon loaf. Always use blanched almond flour (not almond meal) for a fine, even crumb. Store it in the fridge to prevent rancidity. Substitution: 1 1/2 cups sunflower seed flour plus 1/2 cup coconut flour — but expect a denser, slightly nuttier loaf.
Yogurt or Coconut Cream: This provides moisture and acidity. Full-fat Greek yogurt works best for a tangy flavor. For dairy-free, use full-fat coconut cream (the solid part from a can of coconut milk). Substitution: 2/3 cup sour cream — it’s richer but equally delicious.
Lemon Juice & Zest: Fresh is non-negotiable. Bottled lemon juice lacks the essential oils and brightness. Zest the lemons before juicing them — it’s easier and you get every bit of flavor. Substitution: In a pinch, use 2 tbsp lemon extract plus 1/4 cup water, but reduce the sweetener by 1 tbsp since extract is more potent.
Eggs or Flax Eggs: Eggs provide structure and richness. For a vegan version, mix 3 tbsp ground flaxseed with 9 tbsp water, let sit for 5 minutes until gelled. Substitution: 3/4 cup unsweetened applesauce — but the loaf will be slightly denser and less tender.
Original Ingredient
Best Substitution
Flavor / Texture Impact
Almond Flour
Sunflower seed flour + coconut flour
Denser, nuttier, slightly darker crumb
Yogurt
Full-fat sour cream
Richer, more tender, less tangy
Lemon Juice
Lemon extract + water
More concentrated flavor, less acidity
Eggs
Flax eggs
Slightly denser, more tender, nutty note
How to Make Keto Lemon Bread — Step-by-Step
Trust me, this is one of the easiest keto bakes you’ll ever make. Just follow these steps, and you’ll have a gorgeous, fragrant loaf in about an hour.
Step 1: Prep the Pan
Grease a 9×5-inch loaf pan with butter or coconut oil, or line it with parchment paper. Make sure the parchment extends over the sides — this makes lifting the bread out a breeze. Preheat your oven to 325°F.
💡 mia’s Pro Tip: If you use parchment, lightly grease the paper too. This prevents the loaf from sticking to the paper, especially around the edges.
Step 2: Mix the Dry Ingredients
In a large bowl, whisk together the almond flour, granulated sweetener, baking powder, and salt. Make sure there are no lumps — a whisk works better than a spoon here.
⚠️ Common Mistake to Avoid: Using a metal spoon can compress the almond flour. Always use a whisk or a fork to aerate the dry ingredients.
Step 3: Combine Wet Ingredients
In a separate bowl, whisk the yogurt (or coconut cream), lemon juice, eggs (or flax eggs), and lemon zest until smooth. The mixture should be pale yellow and smell wonderfully citrusy.
💡 mia’s Pro Tip: If using flax eggs, let the mixture sit for 5 minutes until it thickens before whisking with the other wet ingredients.
Step 4: Stir Everything Together
Pour the wet ingredients into the dry ones and stir with a spatula until just combined. Do not over-mix — a few small lumps are fine. The batter will be thick and slightly fluffy. Pour it into the prepared pan and smooth the top with a spatula.
⚠️ Common Mistake to Avoid: Over-mixing activates the starch in almond flour, making the bread dense and gummy. Stir only until you see no more dry flour.
Step 5: Bake and Cool
Bake for 50 minutes at 325°F. The top should be golden brown and a toothpick inserted into the center should come out clean or with a few moist crumbs. Let the loaf cool in the pan for 15 minutes, then run a knife around the sides and lift it out using the parchment. Cool completely on a wire rack before slicing.
💡 mia’s Pro Tip: If the top browns too quickly (after 35 minutes), tent the pan loosely with aluminum foil for the remaining 15 minutes.
Step
Action
Duration
Key Visual Cue
1
Prep pan & oven
5 mins
Parchment overhangs by 2 inches
2
Whisk dry ingredients
2 mins
No lumps, light and fluffy
3
Whisk wet ingredients
2 mins
Pale yellow, smooth, fragrant
4
Combine & pour
2 mins
Thick, fluffy batter; no dry streaks
5
Bake & cool
50 mins + 15 mins cool
Golden top; clean toothpick; loaf releases easily
Serving & Presentation
I love serving this keto lemon loaf slightly warm, straight from the oven, with a drizzle of a simple sugar-free glaze (1/4 cup powdered erythritol + 1 tbsp lemon juice, whisked until smooth). The glaze sets into a crackly, sweet shell that contrasts beautifully with the tender crumb. For a Moroccan touch, I sometimes sprinkle a pinch of ground cinnamon over the glaze — it adds warmth and depth that surprises everyone.
In Paris, we’d serve this with a dollop of crème fraîche and a side of fresh berries. In NYC, I often slice it thick and toast it lightly in a skillet with a bit of butter — the edges become crispy while the inside stays soft. It’s fantastic alongside a cup of Earl Grey or a cold glass of unsweetened iced tea. For a brunch spread, arrange slices on a wooden board with a bowl of lemon curd (sugar-free, of course) and fresh mint leaves.
Pairing Type
Suggestions
Why It Works
Side Dish
Fresh berries, sliced strawberries
Brightness complements the tart lemon
Sauce / Dip
Sugar-free lemon curd, whipped cream
Adds richness and extra citrus flavor
Beverage
Earl Grey tea, unsweetened iced tea, coffee
Tea’s tannins cut through sweetness; coffee balances acidity
Garnish
Mint leaves, edible flowers, lemon zest
Adds color, freshness, and visual appeal
Make-Ahead, Storage & Reheating
Between recipe testing for the blog and running around NYC, I’m all about make-ahead meals. This low carb lemon bread is a lifesaver: I bake it on Sunday, and it stays fresh for weekday breakfasts or snacks. Here’s how to store it for best results.
Method
Container
Duration
Reheating Tip
Refrigerator
Tried This Recipe? Leave a Comment!
Did you make this recipe? I’d love to hear how it turned out! Please leave a comment and a rating below. Your feedback helps other home cooks and supports cheerychop.com!
For more delicious inspiration, follow me on Pinterest!
Two Ingredient Sweet Potato Tortillas – Easy Paleo Recipe
Table of Contents
Two Ingredient Sweet Potato Tortillas – Easy Paleo Tortillas from My Moroccan Kitchen
⚖️
Difficulty
Easy
⏲️
Prep Time
15 mins
🕒
Cook Time
15 mins
⏱️
Total Time
30 mins
🍽️
Servings
8 tortillas
I still remember the first time I made these two ingredient sweet potato tortillas in my tiny NYC apartment. It was a rainy Tuesday, and I was craving the soft, pliable breads my mother used to make in our kitchen in Morocco, but I didn’t have any gluten flour on hand. I had just come home from the Union Square farmers market with a bag of organic sweet potatoes, and in my pantry sat a bag of cassava flour I’d been experimenting with. On a whim, I mashed the sweet potato, stirred in the cassava flour, and pressed out a tortilla. The moment it hit the hot skillet, that earthy, slightly sweet aroma filled my kitchen — and I knew I’d stumbled onto something special. This sweet potato tortillas recipe is proof that the simplest ingredients can create the most satisfying food.
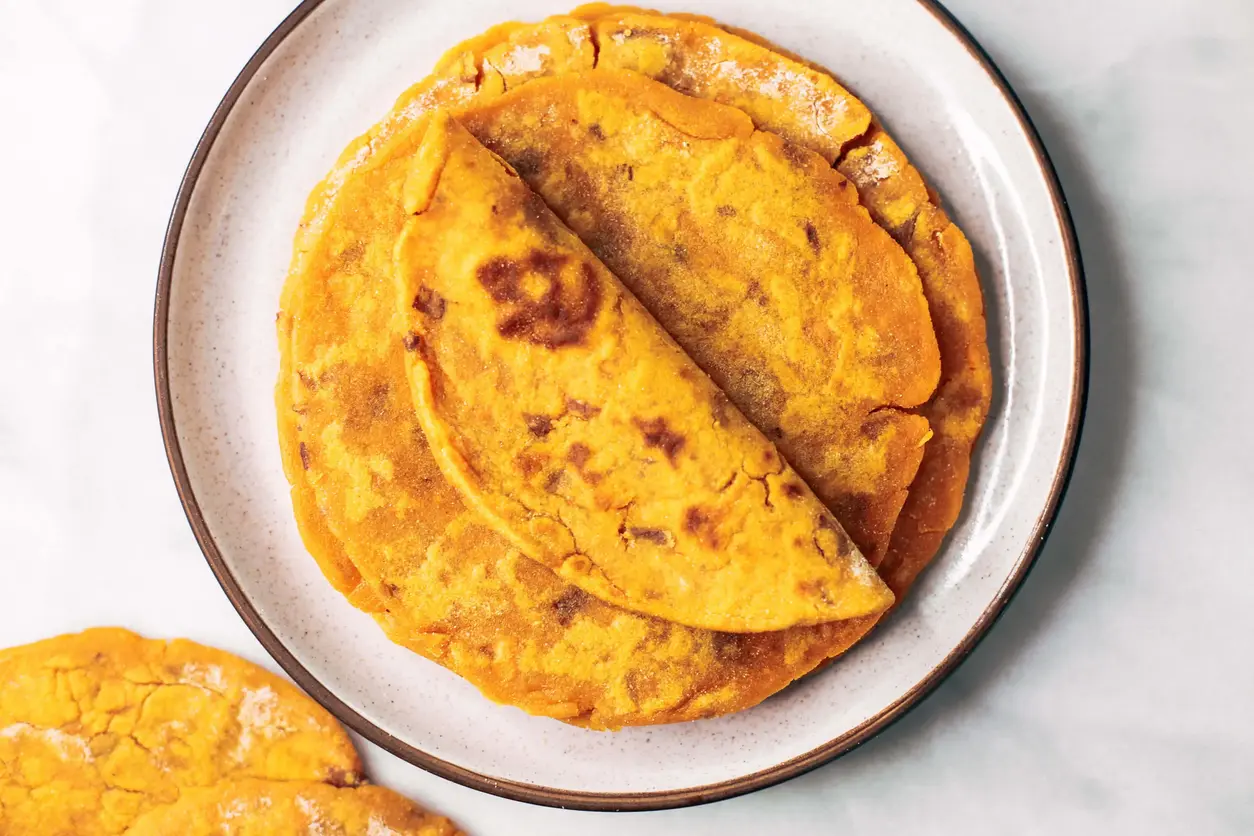
The texture of these tortillas is what truly sets them apart. They’re soft and pliable, with a slight chew that reminds me of the Moroccan msemen I grew up eating — but without any of the complicated folding or resting time. The sweet potato gives them a natural sweetness and a gorgeous golden-orange hue, while the cassava flour keeps them light and flexible. When you cook them in a lightly oiled skillet, they develop beautiful golden-brown spots, and the edges get just a little crispy. I love how versatile they are — you can stuff them with spiced lamb, drizzle them with honey, or simply wrap them around some roasted vegetables and tahini sauce.
I’ve tested this paleo tortillas recipe dozens of times, tweaking the ratio of sweet potato to cassava flour until I got it just right. The key, I discovered, is to make sure your mashed sweet potato isn’t too wet — you want it to be dry enough that the dough comes together without sticking to your hands. In Paris, I learned that the best breads and pastries often come from the simplest techniques, and these 2 ingredient tortillas are a perfect example. My pro tip? Don’t skip pressing the tortillas thin — about ¼ inch is ideal for that perfect balance of soft and sturdy. And the most common mistake I see is using sweet potatoes that are too watery, which makes the dough sticky and hard to roll out.
Why This Two Ingredient Sweet Potato Tortillas Recipe Is the Best
The flavor secret here is all about the sweet potato. Growing up in Morocco, my mother always told me that the best food comes from the earth, and sweet potatoes are one of nature’s sweetest gifts. Their natural sugars caramelize beautifully in the skillet, giving these tortillas a rich, almost nutty flavor without any added sweetener. My French culinary training taught me to respect ingredients — and cassava flour, with its neutral flavor and fine texture, lets the sweet potato shine. It’s a match made in heaven, and it’s what makes these gluten free tortillas taste anything but boring.
Texture is everything when it comes to tortillas, and I’ve perfected the technique through countless trials. The trick is to cook the sweet potato until it’s very tender — almost falling apart — so it mashes into a smooth, silky puree. Then, you mix it with just the right amount of cassava flour to create a dough that’s soft but not sticky. When you press it out, the dough holds together perfectly, and once it hits the hot skillet, it develops that beautiful golden-brown crust while staying tender inside. I call it “chef’s touch” — the same precision I learned in Paris, applied to the humble tortilla.
This recipe is foolproof, even for beginners. You don’t need any special equipment — just a pot for steaming the sweet potato, a bowl for mixing, and a skillet for cooking. There’s no kneading, no rising time, and no complicated shaping. The dough comes together in minutes, and you can have fresh, warm tortillas on the table in under 30 minutes. It’s the kind of recipe that makes you feel like a confident cook, whether you’re a seasoned home chef or someone who’s never made a tortilla before. And because it’s naturally paleo tortillas and gluten free tortillas, it fits into so many dietary needs without sacrificing flavor or texture.
Two Ingredient Sweet Potato Tortillas Ingredients
When I shop for ingredients at the farmers market in NYC, I always look for sweet potatoes that are firm and heavy for their size — that’s a sign they’re fresh and full of moisture. My mother in Morocco used to say that the best vegetables are the ones that feel like they still have the sun in them. For the cassava flour, I prefer brands like Otto’s or Anthony’s — they’re consistently fine and don’t have any bitter aftertaste. I always keep a bag in my pantry because it’s so versatile for paleo tortillas and other grain-free baking.
Ingredients List
2 cups sweet potato (mashed) — about 1 large or 2 medium sweet potatoes
1 cup cassava flour — plus extra for dusting
1/4 teaspoon sea salt (optional) — but I highly recommend it for flavor balance
Ingredient Spotlight
Sweet potatoes are the heart of this recipe. They provide natural sweetness, moisture, and a soft, pliable texture that makes these tortillas so satisfying. When selecting sweet potatoes, look for ones that are firm with smooth skin — avoid any that are soft or have wrinkled spots. The orange-fleshed varieties are best because they’re naturally sweeter and mash more smoothly than the white or purple ones. If you can’t find sweet potatoes, you can substitute butternut squash or pumpkin, but the flavor and texture will be slightly different — still delicious, but not quite the same.
Cassava flour is the magic ingredient that makes these tortillas work. It’s made from the whole cassava root, so it’s grain-free, nut-free, and gluten-free, making it perfect for paleo and gluten-free diets. Unlike other gluten-free flours, cassava flour has a very fine texture and a neutral flavor that doesn’t overpower the sweet potato. It also absorbs moisture well, which helps the dough come together without being sticky. If you don’t have cassava flour, you can try using arrowroot flour or tapioca flour, but the texture will be more delicate and less sturdy — cassava flour is really the best choice for this sweet potato tortillas recipe.
Sea salt is optional but highly recommended. A pinch of salt enhances the natural sweetness of the sweet potato and balances the flavors beautifully. I like using fine sea salt because it dissolves evenly into the dough. If you’re on a low-sodium diet, you can omit it, but I think it makes a noticeable difference in the overall taste. It’s a small addition that elevates these 2 ingredient tortillas from good to great.
Original Ingredient
Best Substitution
Flavor / Texture Impact
Sweet potato (mashed)
Butternut squash or pumpkin puree
Slightly less sweet; more fibrous texture
Cassava flour
Arrowroot flour or tapioca flour
More delicate, less sturdy; may crack
Sea salt (optional)
Himalayan pink salt or kosher salt
Same flavor; adjust quantity for kosher salt
How to Make Two Ingredient Sweet Potato Tortillas — Step-by-Step
Making these tortillas is so simple — I promise you’ll be amazed at how easy it is. Just follow these steps, and you’ll have warm, pliable, delicious tortillas in no time.
Step 1: Prepare the Sweet Potato
Start by peeling and cubing your sweet potato. Cut it into roughly 1-inch cubes so they cook evenly. Place the cubes in a saucepan with about 1 inch of water, cover, and steam over medium heat for 10-12 minutes, until the sweet potato is very tender — you should be able to easily pierce it with a fork. Drain the sweet potato well and let it sit in the colander for a minute or two to release any excess steam. Then mash it with a fork or potato masher until smooth. You want it to be as smooth as possible — no lumps.
💡 mia’s Pro Tip: Don’t overcook the sweet potato — it should be tender but not waterlogged. If it’s too wet, the dough will be sticky and hard to work with. Let it drain thoroughly before mashing.
Step 2: Mix the Dough
In a large bowl, combine the mashed sweet potato, cassava flour, and sea salt (if using). Stir everything together with a spatula or your hands until a smooth dough forms. It should be soft and slightly sticky but not wet — if it’s too sticky, add a little more cassava flour, one tablespoon at a time. If it’s too dry, add a teaspoon of water. The dough should come together easily and hold its shape when pressed.
⚠️ Common Mistake to Avoid: Adding too much cassava flour. Start with the full cup, but if the dough feels dry and crumbly, you’ve added too much. The dough should be soft and pliable, not dry.
Step 3: Divide and Shape
Divide the dough into 8 equal pieces. Dust a clean work surface with a little cassava flour, and place one piece of dough on it. Using your hands or a rolling pin, press or roll the dough out into a circle about 1/4 inch thick. Don’t worry if they’re not perfectly round — rustic tortillas are beautiful! Repeat with the remaining dough pieces.
💡 mia’s Pro Tip: If the dough sticks to your rolling pin or hands, dust them lightly with cassava flour. A little goes a long way — you don’t want to dry out the dough.
Step 4: Cook the Tortillas
Heat a large skillet over medium heat. Drizzle lightly with olive oil — about 1 teaspoon per batch. Place one tortilla in the skillet and cook for 2-3 minutes on each side, until golden brown spots appear. The tortilla should puff up slightly and be cooked through. Remove from the skillet and keep warm under a clean kitchen towel while you cook the remaining tortillas.
⚠️ Common Mistake to Avoid: Cooking the tortillas over too high heat. If the heat is too high, the outside will burn before the inside is cooked through. Medium heat is perfect — you want a gentle sizzle, not a furious one.
Step
Action
Duration
Key Visual Cue
1
Steam and mash sweet potato
10-12 mins
Tender when pierced with fork
2
Mix dough
2-3 mins
Smooth, soft, holds shape
3
Divide and press into circles
5-8 mins
1/4-inch thick, even circles
4
Cook in skillet
2-3 mins per side
Golden brown spots, puffed slightly
Serving & Presentation
These tortillas are incredibly versatile and can be used just like traditional tortillas — for tacos, wraps, quesadillas, or even as a side bread. I love serving them warm with a drizzle of tahini sauce, some pickled red onions, and fresh cilantro. The natural sweetness of the tortilla pairs beautifully with savory fillings like spiced ground lamb or grilled chicken. In my NYC kitchen, I often make a quick black bean and avocado filling for a vegetarian option that’s both satisfying and healthy.
For a Moroccan-inspired meal, I stuff these tortillas with my mother’s recipe for kefta — spiced meatballs — and top them with a sprinkle of cumin and a squeeze of lemon. The combination of the soft, slightly sweet tortilla with the savory, aromatic meat is absolutely divine. I also love serving them alongside a bowl of harira soup for a comforting, hearty meal that reminds me of home. And if you’re feeling fancy, you can use them as a base for a sweet treat — fill them with cinnamon-spiced apples and a dollop of coconut cream for a paleo-friendly dessert.
As a busy food blogger and cook in NYC, I rely on make-ahead recipes to keep my weeknights stress-free. These tortillas are perfect for meal prep — you can make them ahead and have them ready to go for quick lunches or dinners. Here’s my tested system for storing and reheating them so they stay soft and pliable.
Two ingredient sweet potato paleo tortillas. An easy gluten free and paleo tortilla recipe. These tortillas are pliable, delicious, and easy to make!
Ingredients
Scale
2 cups sweet potato (mashed)
1 cup cassava flour
1/4 teaspoon sea salt (optional)
Instructions
Make mashed sweet potato (cut sweet potato into cubes, steam in a saucepan with 1" water until soft, then drain and use). Stir mashed sweet potato together with cassava flour in a bowl until smooth.
Divide dough into 8 equal pieces, dust a clean surface with cassava flour, and press/roll out into 1/4" thick tortillas.
Heat a skillet over medium heat, drizzle lightly with olive oil, and cook on each side until golden brown.
Nutrition
Calories:92 kcal
Sugar:3 g
Fat:0.1 g
Carbohydrates:22 g
Protein:1 g
Tried This Recipe? Leave a Comment!
Did you make this recipe? I’d love to hear how it turned out! Please leave a comment and a rating below. Your feedback helps other home cooks and supports cheerychop.com!
For more delicious inspiration, follow me on Pinterest!
Method
Container
Duration
Reheating Tip
Refrigerator
Airtight container or zip-top bag
Up to 5 days
Reheat in a dry skillet over medium heat for 1-2 mins per side