Deep Dish Apple Crumble Pie – Perfect Fall Dessert

Deep Dish Apple Crumble Pie – A Perfectly Layered Fall Dessert

⚖️
Difficulty
Medium
⏲️
Prep Time
60 mins
🕒
Cook Time
75 mins
⏱️
Total Time
135 mins
🍽️
Servings
8-10

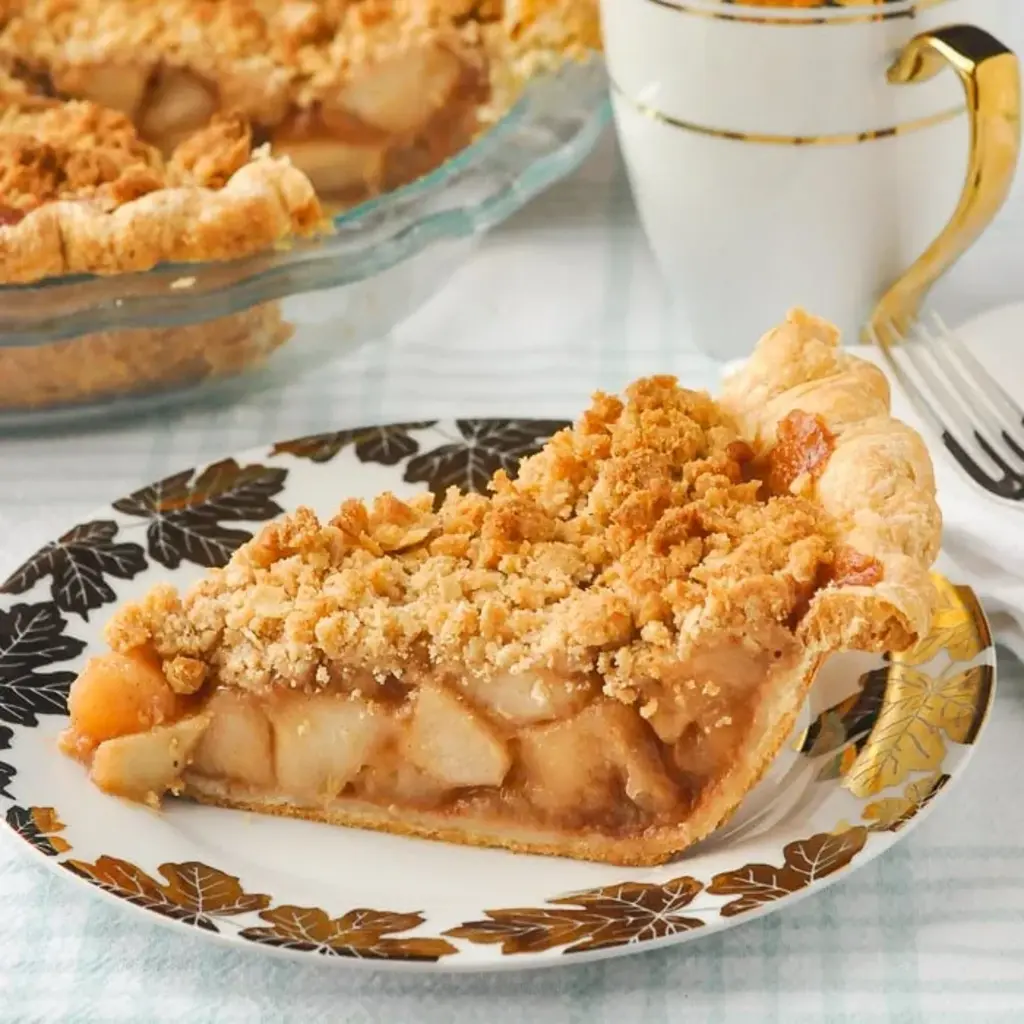
I’ll never forget the first time I made a deep dish apple crumble pie in my tiny Parisian apartment. I was a young culinary student, missing the warm spices of my mother’s Moroccan kitchen and the huge, juicy apples I’d grab from the Union Square Greenmarket back home. I wanted something that combined that comforting apple crumble dessert I loved with the elegance of a proper French pie crust. So, I started cooking each part separately — the flaky bottom, the tender barely-cooked apples, and the impossibly buttery crumble — and then bringing them together for a final bake. This deep dish apple crumble pie recipe was born from that craving, and it’s been my signature fall bake ever since.

Imagine this: a tall, golden crust that shatters at the touch of a fork. Underneath, a thick layer of perfectly spiced apples — not mushy, but tender and swimming in a rich, cinnamon-kissed syrup. And on top, a crisp, crumbly blanket of oats, brown sugar, and butter. Each bite is a study in texture: the sandy shortbread-like topping, the silky apples, and the sturdy, flaky foundation. It’s the kind of apple crumble pie recipe you bring to a Friendsgiving and everyone goes silent after the first bite. The aroma alone — warm nutmeg, caramelizing sugar, and baked butter — will make your kitchen feel like the coziest NYC bistro.

As a trained chef who still cooks with my hands and heart, I believe a great deep dish apple pie is about respecting each element. Many recipes just throw everything into a raw crust, but that leads to a soggy bottom and a mediocre filling. My approach treats the crust, the filling, and the crumble as individual stars before assembling them. I’m going to show you my foolproof technique for a blind-baked bottom crust, a sautéed filling that concentrates flavor, and a crumble that stays crisp for days. 💡 mia’s Pro Tip: The secret to a non-soggy bottom is starting with a blind-baked crust, and I’ll show you exactly how to do it.

Why This Deep Dish Apple Crumble Pie Recipe Is the Best

The Flavor Secret: This isn’t just a dessert; it’s a layered flavor experience. I use five pounds of apples — a mix of firm, tart (like Granny Smith) and sweet (like Honeycrisp) — so every bite has complexity. The filling is sautéed on the stovetop before baking, a technique I learned in Paris that deepens the apple flavor and creates a rich, almost caramelized syrup. The crumble topping uses cold butter and a touch of cinnamon, echoing the warm spices my mother used in her Moroccan sweets like sheetah. It’s a global hug in a pie plate.

Perfected Texture: The three-component method is a game-changer. The bottom crust gets a head start with a blind bake, ensuring it stays crisp after the wet filling is added. The apples are only partially cooked on the stove — just until they start to soften — so they retain their shape and bite during the final hour in the oven. The crumble is mixed by hand to create those perfect clumps of buttery, oat-y goodness. This apple crumble dessert is engineered for texture perfection.

Foolproof & Fast for a Deep Dish: I’ve designed this best apple pie recipe to be approachable for home bakers, even with its deep dish scale. The pâte brisée (the crust) uses a mix of butter and shortening for the ultimate flake, and the food processor makes it a breeze. The instructions are detailed, with visual cues for each step. Whether you’re a beginner or a seasoned baker, you’ll be able to pull this off. I’ve even included tips on using store-bought crust, making this a truly accessible deep dish apple crumble pie.

Deep Dish Apple Crumble Pie Ingredients

I buy my apples from the Union Square Greenmarket — that’s where you find the strongest, most flavorful fruit, and the farmers always have the best tips on which varieties to use for baking. My butter comes from a local dairy upstate, but any unsalted, high-fat butter will work. The cinnamon and nutmeg I use are from a spice shop in the East Village — they’re freshly ground and incredibly aromatic. But don’t worry, grocery store spices are fantastic, too! Here’s what you’ll need to gather for this apple crumble pie recipe.

Ingredients List

  • For the Crust: 2 ¼ cups flour, 1 tbsp brown sugar, ½ tsp salt, 1/2 cup shortening (very cold, cubed), 1/2 cup butter (very cold, cubed), 6 tbsp ice water + 1 tbsp white vinegar (mixed)
  • For the Apple Filling: 5 lbs apples (peeled, cored, cut in large wedges), 2 tsp cinnamon, 1/2 tsp fresh ground nutmeg, 1/2 cup brown sugar, 1/2 cup white sugar, 1 ½ tbsp corn starch (dissolved in a little water)
  • For the Crumble Topping: 1 cup flour, 1/3 cup brown sugar, 1/3 cup cold butter (cubed), 1 tsp baking powder, 1/2 tsp cinnamon, 1/3 cup rolled oats, 1/3 cup melted butter

Ingredient Spotlight

Let’s talk about the key players in this deep dish apple pie. Choosing the right ingredients can make or break your bake.

Original IngredientBest SubstitutionFlavor / Texture Impact
Apples (mixed firm/tart & sweet)Granny Smith + Fuji or GalaGranny holds shape well; Fuji adds sweetness. Texture remains slightly firmer vs. Honeycrisp.
Shortening (in crust)All-butter (increase butter to 1 cup total, omit shortening)Flakier but still tender; may be slightly less sturdy for deep dish. Fine if chilled well.
Rolled Oats (in crumble)Quick oats (not instant)Slightly less textured crumble; still delicious. Do not use steel-cut oats — they stay hard.
Cornstarch (for filling)All-purpose flour (2 tbsp, whisked into cold water)Slightly cloudier gel, but works well. Cornstarch gives a clearer, shinier filling.
Brown Sugar (filling & crumble)Coconut sugar (for filling) or muscovadoCoconut sugar is less sweet, slightly more caramel flavor. Muscovado is very moist, rich molasses flavor.

How to Make Deep Dish Apple Crumble Pie — Step-by-Step

Alright, let’s get baking! I’ve broken this down into manageable steps. Trust the process, and you’ll be rewarded with the most incredible apple crumble dessert you’ve ever made.

Step 1: Make the Pie Crust

Pulse the cold butter and shortening into the flour, brown sugar, and salt using a food processor until the fat is reduced to pea-sized pieces. You’re looking for a sandy texture with visible chunks of butter. Don’t over-process! Remove to a large bowl.

💡 mia’s Pro Tip: Keep your butter and shortening very cold. If they soften, pop them back in the freezer for 10 minutes. Cold fat creates steam pockets, which make the crust flaky.

Step 2: Assemble the Dough

Sprinkle the ice water and vinegar mixture over the surface of the flour mixture. Toss with a fork until the water is just incorporated. The dough should hold together when pinched, but not be wet or sticky. Handle it as little as possible. Separate into 2 balls, wrap in plastic, and chill for at least 30 minutes (or up to 3 days). You can freeze one ball for another deep dish apple pie later!

⚠️ Common Mistake to Avoid: Adding all the water at once or over-mixing. A shaggy dough is a good dough! If you overwork it, the crust will be tough.

Step 3: Blind Bake the Crust

On a lightly floured surface, roll one dough ball into a 12-inch round. Place it into a 9-inch deep dish pie plate. Tuck the excess pastry under the edges and flute them with your fingers or a fork. Wrap an aluminum foil strip around the outside of the crust to prevent burning. Line the inside with parchment paper and fill with baking weights (I use dried kidney beans!). Bake at 375°F for 15 minutes. Remove the weights and paper, and set the crust aside to cool.

💡 mia’s Pro Tip: The foil strip and blind bake are non-negotiable for a deep dish apple crumble pie. They ensure your bottom crust is fully cooked and won’t get soggy from the juicy apple filling.

Step 4: Sauté the Apple Filling

In a large sauté pan (or a very large skillet), add all the apple wedges, cinnamon, nutmeg, brown sugar, and white sugar. Sauté over medium-high heat, stirring gently, until the apples just start to soften and release their juice — about 5-7 minutes. They should still have a bit of resistance to a fork. Add the dissolved cornstarch and stir well, cooking for another minute. The juices will thicken into a beautiful, glossy syrup. Let the apples cool a little before adding them to the blind-baked crust.

⚠️ Common Mistake to Avoid: Overcooking the apples at this stage. They will continue to cook in the oven. You want them to be just starting to soften, so they retain their shape and texture in the final deep dish apple pie.

Step 5: Make the Crumble

In a medium bowl, rub all the crumble ingredients together with your fingertips until the cold butter is fully incorporated into the flour and oats. You’re aiming for a mixture that looks like wet sand with some larger clumps. Don’t overwork it; you want those buttery chunks to create a crisp, textured topping. Set aside.

💡 mia’s Pro Tip: Squeeze some of the mixture in your fist to create larger clumps. These little clusters will bake into the most wonderful, crunchy bits on top of your apple crumble pie recipe.

Step 6: Assemble and Bake

Pour the slightly cooled apple filling into the blind-baked pie shell, spreading it evenly. Sprinkle the crumble mixture generously over the top. Place the deep dish apple crumble pie on a baking sheet to catch any drips. Bake at 350°F for about an hour, or until the filling is bubbly and the topping is a deep golden brown. If the outer crust begins to get too dark, tent it with a strip of aluminum foil.

⚠️ Common Mistake to Avoid: Cutting into the pie too soon. It needs at least 30 minutes to cool! The filling is lava-hot right out of the oven, and it needs time to set so you get clean, beautiful slices.

StepActionDurationKey Visual Cue
1Make crust10 min + chillPea-sized butter pieces
2Blind bake crust15 minLight golden edges
3Sauté filling10 minApples just softened, glossy syrup
4Make crumble5 minWet sand with clumps
5Assemble & bake~60 minBubbly filling, golden top

Serving & Presentation

This apple crumble dessert is a showstopper on its own, but a few simple additions make it truly memorable. I love serving it warm — not hot — so the flavors have a chance to meld. A generous scoop of high-quality vanilla ice cream is the classic pairing, and for good reason. The cold, creamy ice cream melting over the warm, buttery crumble and spiced apples is one of life’s greatest pleasures. I often drizzle a little salted caramel sauce on top for extra indulgence, a trick I picked up from a patisserie in Paris.

For a more sophisticated presentation, you can dust the plate with a little cinnamon sugar and place a slice of the deep dish apple pie right in the center. A dollop of lightly sweetened whipped cream flavored with a drop of orange blossom water (a nod to my Moroccan heritage) is another lovely option. If you’re feeling particularly indulgent, a side of warm custard is fantastic, too. Whatever you choose, don’t forget to serve it in a beautiful deep dish — this pie deserves to be the star of the table.

Pairing TypeSuggestionsWhy It Works
Side DishVanilla ice cream, whipped creamClassic cool contrast to warm pie
Sauce / DipSalted caramel, warm custard, orange blossom creamAdds depth and richness
BeverageCoffee, dark hot chocolate, hard ciderComplements and contrasts sweetness
GarnishCinnamon stick, star anise, mint sprigVisual appeal and aromatic touch

Make-Ahead, Storage & Reheating

In my busy NYC life, make-ahead options are essential. The beauty of this deep dish apple crumble pie recipe is that most

Print

clock clock iconcutlery cutlery iconflag flag iconfolder folder iconinstagram instagram iconpinterest pinterest iconfacebook facebook iconprint print iconsquares squares iconheart heart iconheart solid heart solid icon

Deep Dish Apple Crumble Pie

  • Author: Chef Mia

Description

What looks like an old fashioned pie really treats all three components separately, then bakes them together at the end for a perfect bottom crust, filling sand buttery crumble topping.


Ingredients

Scale
  • 1 cup flour
  • 1/3 cup brown sugar
  • 1/3 cup cold butter
  • 1 tsp baking powder
  • 1/2 tsp cinnamon
  • 1/3 cup rolled oats
  • 1/3 cup butter, melted
  • 5 lbs apples, peeled, cored and cut in large wedges
  • 2 tsp cinnamon
  • 1/2 tsp fresh ground nutmeg
  • 1/2 cup brown sugar
  • 1/2 cup white sugar
  • 1 1/2 tbsp corn starch dissolved in a little water
  • 2 ¼ cups flour
  • 1 tbsp brown sugar
  • ½ tsp salt
  • 1/2 cup shortening, Very cold and cut in cubes
  • 1/2 cup butter, Very cold and cut in cubes
  • 6 tbsp ice water + 1 tbsp white vinegar, mixed

Instructions

  1. Pulse the cold butter & shortening into the flour sugar and salt using a food processor until the shortening & butter is reduced to pea sized pieces.
  2. Remove to a large bowl.
  3. Sprinkle the water & vinegar mixture over the surface and toss with a fork until the water is just incorporated into the dough. Do not over work the dough; handle it only enough so that the dough stays together.
  4. Separate the dough into 2 balls and wrap in plastic. Place in the fridge to chill well. You can freeze one for another time.
  5. Roll out into a 12 inch round and place into a 9 inch deep dish pie plate. Tuck the excess pastry under the edges and flute the edges with your fingers or a fork.
  6. Wrap an aluminum foil strip around the outside of the crust and blind bake the pastry using baking weights in parchment paper for about 15 minutes at 375 degrees F. (I reuse dried kidney beans for baking weights all the time) Remove the baking weights and parchment paper.
  7. Add all the ingredients except the cornstarch to a large saute pan.
  8. Saute until the apples are just begging to soften and some of the juice is released,
  9. Add the dissolved corn starch and stir well continuing to cook for one minute or so. Set the apples aside to cool a little before adding them to the blind baked pastry shell.
  10. Rub all the ingredients together with your hands until the butter is fully incorporated into the flour, then sprinkle the crumble mixture over the apples.
  11. Bake at 350 degrees F for about an hour or until the filling is bubbly. You may need to use another strip of aluminium foil over the outer crust if it begins to get too dark during the baking time.
  12. Cool for at least a half hour before cutting and serving. Don't forget the vanilla ice cream!


Deep Dish Apple Crumble Pie

k">

Tried This Recipe? Leave a Comment!

Did you make this recipe? I’d love to hear how it turned out! Please leave a comment and a rating below. Your feedback helps other home cooks and supports cheerychop.com!

For more delicious inspiration, follow me on Pinterest!
Best Soft & Chewy Chocolate Chip Cookies Recipe

The Best Chocolate Chip Cookies: The Secret to Soft, Chewy, Ooey-Gooey Perfection

⚖️
Difficulty
Easy
⏲️
Prep Time
15 mins
🕒
Cook Time
7 mins
⏱️
Total Time
22 mins
🍽️
Servings
18 cookies

I still remember the first time I baked chocolate chip cookies in my tiny Parisian apartment, the scent of browned butter and vanilla drifting out the window into the cobblestone street below. That was the moment I knew this wasn’t just a recipe—it was a connection. Back home in Morocco, my mother’s kitchen was always filled with the warm, comforting aroma of butter and sugar, though she used it for kaab el ghazal, not cookies. This chocolate chip cookies recipe is the culmination of those worlds: my mother’s instinct for perfect sweetness, the precision of French pastry school, and the bold, unfussy energy of New York City. I’m sharing my absolute best, soft chocolate chip cookies recipe—the one that answers the question of what is the most popular chocolate chip cookie? It’s all about a high-heat technique and the perfect ratio of cornstarch for that signature chew.

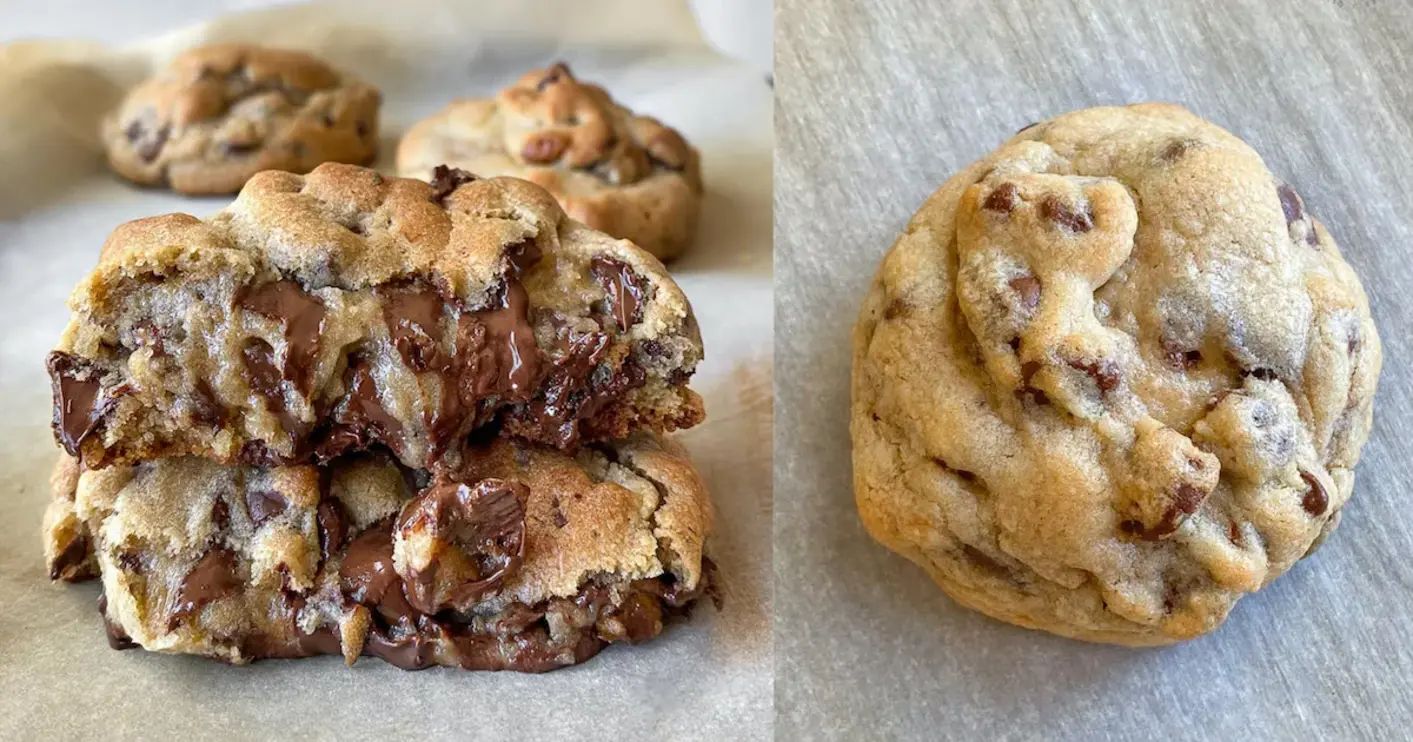
Imagine a cookie that cracks just slightly on top, revealing a landscape of melted chocolate chips nestled in a golden, buttery dough. The edges are crisp enough to give a satisfying snap, but the center yields to the gentlest pressure, releasing a soft, almost-gooey interior. Each bite is a harmony of salty and sweet, with pockets of semi-sweet chocolate that melt on your tongue. The secret? A really hot oven—475°F—which sets the outside while keeping the center tender. My easy chocolate chip cookies rely on cornstarch for tenderness and cold butter for structure, a French patisserie trick I learned while perfecting sablé dough. No resting overnight needed, no fussy ingredients—just pure, irresistible homemade chocolate chip cookies.

What sets my best chocolate chip cookies recipe apart is a single, game-changing technique: baking at an exceptionally high temperature for a very short time. While most recipes call for 350°F, my method at 475°F creates a caramelized exterior and a miraculously soft center in just 6–7 minutes. It’s a lesson I brought back from a bakery in the East Village, where the pastry chef swore by blistering heat for the perfect texture. This easy chocolate chip cookies version also uses cold butter (not softened), which slows gluten development and yields a thicker, chewier cookie. In this post, I’ll guide you through every step, share my 💡 Pro Tip for getting that bakery-style crinkle, and warn you about the one common mistake that can make your cookies flat. Let’s bake!

Why This Chocolate Chip Cookies Recipe Is the Best

The Flavor Secret. My approach to this easy chocolate chip cookies recipe starts with a flavor base that’s both simple and deeply satisfying. I use a combination of granulated and brown sugars—exactly equal parts—which gives the cookies a toffee-like depth without being overly sweet. The brown sugar provides moisture and a hint of molasses, a trick I learned from watching my mother caramelize honey for Moroccan pastries. The cold butter, cut into small pieces, distributes evenly and creates little pockets of rich, melt-in-your-mouth goodness. It’s a soft chocolate chip cookies recipe that delivers on big, nostalgic flavor.

Perfected Texture. The texture is where French training really shines. The cornstarch is my secret weapon—it tenderizes the dough by inhibiting gluten formation, ensuring every cookie is soft and chewy, never tough. The high oven temperature sets the edges while the center stays soft, a technique I perfected at Le Cordon Bleu for making perfect sablés. You get a cookie that’s slightly crisp on the outside, with a gooey, almost molten center. This is the hallmark of the best chocolate chip cookies—texture that makes you close your eyes with the first bite.

Foolproof & Fast. I’ve tested this homemade chocolate chip cookies recipe countless times, and it works every time for bakers of all skill levels. No need to chill the dough overnight or use specialty equipment. The ingredients are pantry staples, and the instructions are straightforward. From my busy NYC kitchen, I can assure you that you can have warm, fresh cookies on the table in under 25 minutes. My💡 Pro Tip: use a cookie scoop for uniform baking, and you’ll always get perfect results. This is the ultimate easy chocolate chip cookies recipe for a quick, satisfying treat.

Best Chocolate Chip Cookies Ingredients

I pick up my flour from a small Italian market in Chelsea Market, and my chocolate chips from a specialty shop in Brooklyn. Every ingredient in this chocolate chip cookies recipe is chosen for its role—each one brings something essential to the cookie’s final texture and flavor. Let’s look at what you’ll need.

Ingredients List

  • 1¼ cups all-purpose flour
  • 3 tablespoons cornstarch
  • ½ teaspoon salt
  • ½ teaspoon baking soda
  • ½ cup cold unsalted butter (1 stick is ½ cup)
  • 6 tablespoons granulated sugar
  • 6 tablespoons packed brown sugar (light or dark)
  • 1 large egg
  • ½ teaspoon vanilla extract
  • 1 bag (10–11 oz) semi-sweet chocolate chips (or ½ bag for less chocolate)
  • ¼ cup chopped walnuts (optional)

Ingredient Spotlight

Butter. Cold butter is non-negotiable for this soft chocolate chip cookies recipe. It creates steam pockets during baking, giving the cookies lift and a tender crumb. I use unsalted to control the salt level. Substitution: You can use European-style butter for a richer flavor—it has a higher fat content and less water, which makes the cookies even more tender.

Cornstarch. This is the ingredient that makes the cookies magically soft. It’s a starch that absorbs moisture and prevents gluten from forming a tough network. Look for it in the baking aisle—I prefer Argo brand. Substitution: You can substitute 2 tablespoons of potato starch or 1 tablespoon of arrowroot powder, but cornstarch gives the most reliable results for the best chocolate chip cookies.

Chocolate chips. I use semi-sweet chips (about 60% cacao) because they’re not too sweet and balance the dough perfectly. For a richer flavor, try dark chocolate (70% cacao). Substitution: You can swap with chopped chocolate bars—I love using a Guittard dark chocolate bar from Whole Foods. This gives you larger, irregular chocolate pockets.

Brown sugar. The molasses in brown sugar adds moisture and a deep, caramel-like flavor. I use light brown sugar because it’s milder, but dark brown sugar works too and will give a more intense molasses note. Substitution: If you’re out of brown sugar, combine 6 tablespoons granulated sugar with 1½ teaspoons molasses.

Original IngredientBest SubstitutionFlavor / Texture Impact
Cold butterEuropean-style butterRicher, more tender
CornstarchPotato starch (2 tbsp)Slightly less tender, similar softness
Semi-sweet chipsChopped dark chocolateMore intense, melty chocolate pockets
Brown sugarGranulated sugar + molassesGood substitute, less molasses depth

How to Make Chocolate Chip Cookies — Step-by-Step

Follow these steps for perfect soft chocolate chip cookies every time. I’ll share my chef’s tips as we go.

Step 1: Preheat & Prep

Preheat your oven to 475°F—yes, very hot! Line two baking sheets with parchment paper for easy release and cleanup. This high heat is the key to getting the crispy edges and gooey center that define the best chocolate chip cookies.

💡 mia’s Pro Tip: Make sure your oven is fully preheated. An oven thermometer is a tiny investment that ensures accuracy. If your oven runs cool, the cookies won’t spread correctly.

⚠️ Common Mistake to Avoid: Don’t use a dark, non-stick baking sheet—it absorbs more heat and can burn the bottoms of your cookies. A light-colored, aluminum sheet works best.

Step 2: Mix Dry Ingredients

In a smaller mixing bowl, whisk together the all-purpose flour, cornstarch, salt, and baking soda. Whisking for 30 seconds ensures the cornstarch is evenly distributed, which is crucial for a consistent soft texture.

💡 mia’s Pro Tip: Sift the dry ingredients if you have a sifter—it removes any lumps and aerates the flour, making the cookies even lighter.

Step 3: Prep the Butter

Cut the stick of cold butter into small, pea-sized pieces. This ensures the butter remains cold and distributes evenly during mixing. Cold butter creates steam in the oven, leading to a taller, chewier cookie—a signature of my homemade chocolate chip cookies.

⚠️ Common Mistake to Avoid: Don’t microwave the butter to soften it. Using melted or overly soft butter will make your cookies spread into thin, crispy pancakes.

Step 4: Combine Wet Ingredients

In your larger mixing bowl, combine the cold butter pieces, granulated sugar, brown sugar, the egg, and vanilla extract. Mix with a wooden spoon or electric mixer on low until just combined. You don’t want to over-cream—that adds too much air, which can cause the cookies to puff up and then deflate.

💡 mia’s Pro Tip: Use a flexible spatula to scrape down the sides of the bowl once during mixing. This ensures everything is evenly incorporated without overmixing.

Step 5: Combine Wet and Dry Mixtures

Gently stir the dry ingredients into the larger bowl with the butter-egg-sugar mixture. Mix only until the flour streaks disappear—overmixing develops gluten and will make your soft chocolate chip cookies tough. The dough will look a bit shaggy; that’s perfect.

⚠️ Common Mistake to Avoid: Stop mixing the second you no longer see white flour. If you mix until the dough is completely smooth, you’ve overworked it.

Step 6: Add Chips and Nuts

Add the semi-sweet chocolate chips and the optional walnut pieces. Fold everything together gently with a spatula or wooden spoon until the add-ins are evenly distributed. About 10–12 gentle folds should be enough.

💡 mia’s Pro Tip: Reserve a handful of chocolate chips to press onto the tops of the dough balls right before baking. This gives the cookies a picture-perfect, chunky appearance.

Step 7: Portion the Dough

Using a full-size spoon (a standard tablespoon works perfectly), scoop out rounded balls of dough. Place them on the prepared baking sheets, about 2 inches apart—they will spread, but not too much. For even baking, make each ball roughly the same size.

⚠️ Common Mistake to Avoid: Don’t flatten the dough balls. Keeping them round helps them bake up thick and soft—spreading happens naturally in the oven.

Step 8: Bake to Perfection

Bake for 6–7 minutes, or until the tops of the cookies turn a light golden brown. The high heat works fast, so keep a close eye on them. They’ll look slightly underdone in the middle—that’s exactly what you want. The residual heat will finish cooking them as they cool.

💡 mia’s Pro Tip: Bake one tray at a time in the center of the oven for the most even heat. Switching racks halfway can also help if your oven has hot spots.

Step 9: Cool and Enjoy

Remove from the oven and let the cookies cool on the baking sheet for 5–7 minutes. They’ll continue to cook from the residual heat inside the sheet. For the softest, most indulgent cookies, eat them while they’re still warm. This is the moment these best chocolate chip cookies truly shine.

⚠️ Common Mistake to Avoid: Don’t move the cookies to a cooling rack too soon. They are fragile when hot and can break. Let them set on the sheet first.

StepActionDurationKey Visual Cue
1Preheat & prep10–15 minsOven thermometer reads 475°F
2Mix dry ingredients1 minEvenly combined, no lumps
3Cut butter1 minPea-sized, cold pieces
4Combine wet ingredients2 minsButter pieces still visible, no creaming
5Combine wet & dry1 minShaggy, just-combined dough
6Add chips & nuts1 minEvenly distributed add-ins
7Portion dough3 minsRounded balls, 2 inches apart
8Bake6–7 minsGolden edges, soft center
9Cool & enjoy5–7 minsCookies firm up on sheet


Chocolate Chip Cookies

Soft & Chewy Chocolate Chip Peanut Butter Cookies

The Best Chocolate Chip Peanut Butter Cookies – Soft and Chewy

⚖️
Difficulty
Easy
⏲️
Prep Time
15 mins
🕒
Cook Time
10 mins
⏱️
Total Time
25 mins
🍽️
Servings
24 cookies

I still remember the first time I made chocolate chip peanut butter cookies in my tiny Paris apartment, a world away from my mother’s bustling kitchen in Morocco. She would make a simple peanut butter cookie with just a few pantry staples, but I knew I could elevate it. After years of perfecting techniques in Paris and bringing them to my NYC kitchen, I’ve created what I believe is the best peanut butter chocolate chip cookies recipe—one that stays soft and chewy for days.

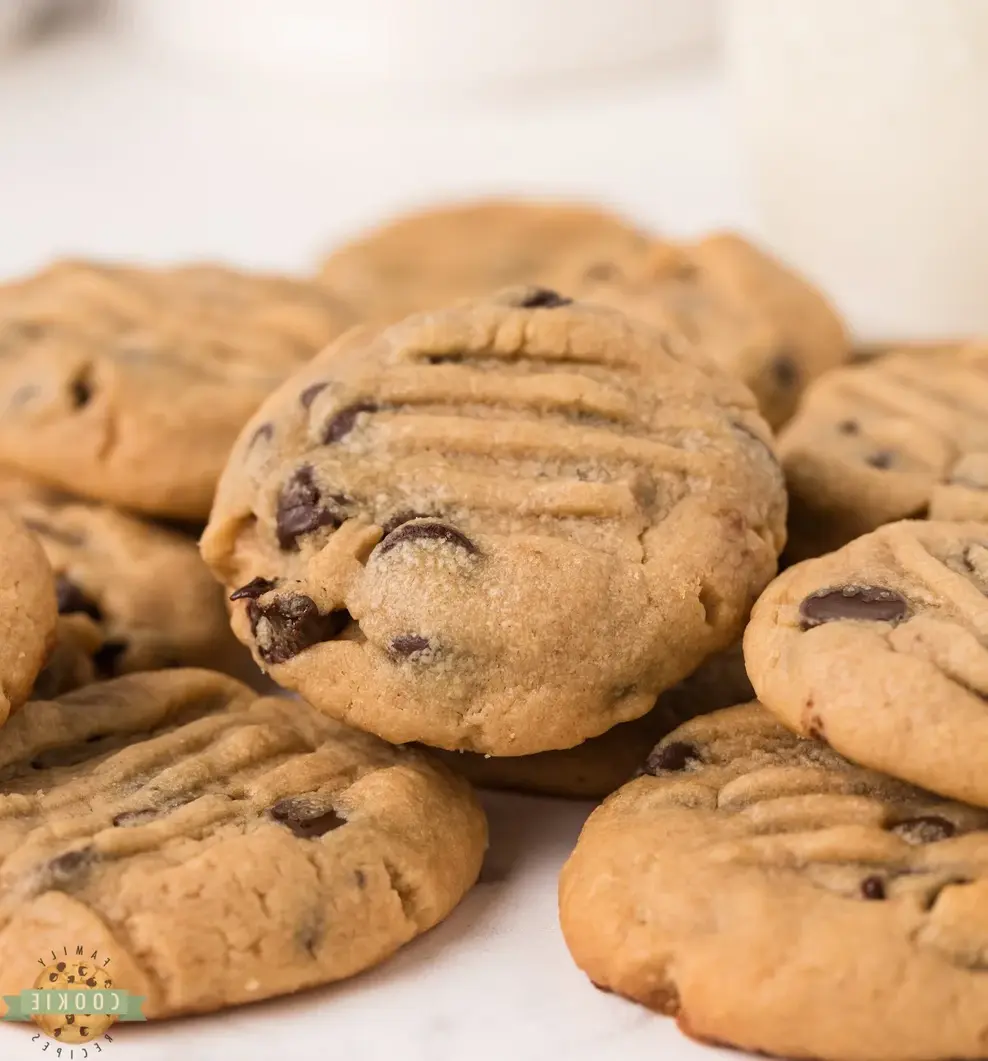
Imagine pulling a tray from the oven: the warm scent of peanut butter mingling with melting chocolate chips fills your kitchen. These cookies have a slightly crisp edge that gives way to a tender, almost melt-in-your-mouth center. Each bite delivers the rich, savory depth of peanut butter balanced by the sweetness of semi-sweet chocolate. I use a touch of milk and a careful creaming method—a trick I learned in Paris to ensure a perfectly tender crumb without any dryness.

These easy peanut butter chocolate chip cookies are not just delicious—they’re foolproof. I’ve tested them for home bakers across the US, and the key is in the precise baking time. Overbaking is the most common mistake, and I’ll show you exactly how to avoid it. With a few pro tips from my years as a professional cook, you’ll have a batch of soft peanut butter cookies recipe that rivals any bakery.

Why This Chocolate Chip Peanut Butter Cookies Recipe Is the Best

The Flavor Secret – The unique angle here is using a full cup of creamy peanut butter, which provides deep roasted flavor. I never use shortening; butter adds richness and helps create that signature chewy texture. Growing up in Morocco, my mother always used a local peanut paste that inspired my approach. The combination of white and brown sugar adds caramel notes, while the milk ensures the dough stays moist without becoming greasy.

Perfected Texture – Achieving a soft and chewy cookie is a science I mastered in Paris. The trick is to cream the butter and sugars thoroughly, then add the egg and milk slowly. This emulsifies the mixture, trapping air for a light crumb. Baking at 375°F for exactly 8-10 minutes—no more—ensures the centers set just enough to hold shape while staying tender. Pulling them out when they look slightly underdone is crucial; they continue baking on the hot sheet.

Foolproof & Fast – These cookies come together in just 25 minutes, with no chilling required. The single-bowl mixing process is straightforward, and using parchment paper prevents burning even on dark pans. This is the best peanut butter chocolate chip cookies recipe for beginners because there’s no special equipment needed—just a hand mixer and a baking sheet. I’ve made these countless times in my NYC apartment, and they always come out perfect.

Best Peanut Butter Chocolate Chip Cookies Ingredients

I pick up my peanut butter from the Union Square Greenmarket, where local brands offer the creamiest texture. The chocolate chips I source from a small shop in Brooklyn that imports French chocolate—a nod to my Paris training. These ingredients are all available at any US grocery store, making this recipe accessible.

Ingredients List

  • 1 cup creamy peanut butter (not natural; use processed for best texture)
  • ½ cup unsalted butter, softened
  • ½ cup white sugar
  • ½ cup packed brown sugar
  • 1 large egg
  • 3 tablespoons whole milk
  • 1 teaspoon vanilla extract
  • 1½ cups all-purpose flour
  • ¾ teaspoon baking powder
  • ¼ teaspoon salt
  • 1½ cups semi-sweet chocolate chips

Ingredient Spotlight

Peanut Butter – Creamy processed peanut butter (like Jif or Skippy) is essential for the best texture. It contains stabilizers that prevent oil separation, ensuring a consistent, soft cookie. Natural peanut butter will result in a drier, crumblier cookie. If you only have natural, add 1 tablespoon of extra butter or oil to compensate.

Butter – Unsalted butter gives you control over salt. Softening it to room temperature is key; cold butter won’t cream properly, leading to dense cookies. I tested this with margarine once in Paris, and the cookies spread too much—use real butter for the best chewy texture.

Sugars – The combination of white and brown sugar is my secret. Brown sugar adds moisture from molasses, creating chewiness, while white sugar helps with spreading and crisping the edges. You can use all brown sugar for an even softer cookie, but the edges will be less defined.

Chocolate Chips – Semi-sweet chips balance the sweetness of the peanut butter. I prefer Guittard or Ghirardelli for intense flavor. You can substitute milk chocolate for a sweeter cookie or dark chocolate (60% cacao) for a more grown-up taste. Avoid mini chips; they melt too quickly.

Original IngredientBest SubstitutionFlavor / Texture Impact
Creamy Peanut ButterChunky Peanut ButterAdds crunch; texture is less uniform but still delicious.
Unsalted ButterSalted Butter (reduce added salt to ⅛ tsp)Slightly saltier flavor; use caution with salt adjustments.
Whole Milk2% Milk or Almond MilkSlightly less tender but still fine; avoid skim milk for dry dough.
Semi-Sweet Chocolate ChipsDark Chocolate Chunks or Milk Chocolate ChipsRicher or sweeter flavor; texture remains similar.

How to Make Easy Peanut Butter Chocolate Chip Cookies — Step-by-Step

These easy peanut butter chocolate chip cookies come together quickly. Follow these steps for soft, chewy success every time.

Step 1: Cream the Butter and Sugars

In a large bowl with a hand mixer, beat the peanut butter, softened butter, white sugar, and brown sugar on medium speed until light and fluffy, about 2 minutes. The mixture should be smooth and pale. This creaming step incorporates air, which helps the cookies rise slightly.

💡 mia’s Pro Tip: Use room-temperature butter for best creaming. If your butter is cold, microwave it in 5-second intervals until soft but not melted.

Step 2: Mix In Wet Ingredients

Add the egg, milk, and vanilla extract. Beat on medium speed for 2-3 minutes until the mixture is well-combined and slightly thickened. The milk adds moisture without making the dough sticky—a trick I learned in Paris for tender cookies.

⚠️ Common Mistake to Avoid: Do not overbeat after adding flour. Overmixing develops gluten, making cookies tough.

Step 3: Combine Dry Ingredients

In a separate bowl, whisk together the flour, baking powder, and salt. Gradually add the dry mixture to the wet ingredients, mixing on low speed just until no streaks of flour remain. Stir in the chocolate chips with a spatula. The dough will be soft but not sticky.

💡 mia’s Pro Tip: For extra-fluffy cookies, sift the flour mixture through a fine-mesh strainer before adding. This aerates the flour and removes any lumps.

Step 4: Form Dough and Bake

Preheat the oven to 375°F. Scoop tablespoon-sized portions of dough and roll into balls. Place them 2 inches apart on an ungreased cookie sheet lined with parchment paper. Press each ball once with the back of a fork to flatten slightly and create a classic crisscross pattern. Bake for 8-10 minutes, until the edges are set and lightly golden but the centers look slightly underdone.

⚠️ Common Mistake to Avoid: Do not overbake! These cookies continue cooking on the sheet after removal. The centers should appear soft and puffed when you pull them out. Overbaking leads to dry, hard cookies.

StepActionDurationKey Visual Cue
1Cream butter and sugars2 minutesLight and fluffy, pale color
2Add wet ingredients2-3 minutesSlightly thickened, smooth
3Mix dry ingredients30 secondsNo streaks of flour left
4Bake8-10 minutesEdges golden, centers soft

Serving & Presentation

Serve these soft peanut butter cookies recipe cookies warm from the oven for the ultimate experience. I love to arrange them on a simple wooden board, dusted with a pinch of flaky sea salt (like Maldon) to enhance the chocolate and peanut butter flavors. In my NYC apartment, I pair them with a cold glass of whole milk or a strong cup of coffee—a throwback to the cafés in Paris where they served cookies with espresso.

For a Moroccan-inspired twist, I sometimes sprinkle a little cinnamon and a drizzle of honey over the cookies just before serving. This brings back memories of my mother’s kitchen. You can also serve them with a side of vanilla ice cream for an indulgent dessert.

Pairing TypeSuggestionsWhy It Works
Side DishFresh fruit (apple slices, strawberries)Bright acidity cuts richness
Sauce / DipChocolate ganache, caramel sauce, peanut butter drizzleAmplifies chocolate and nutty flavors
BeverageCold milk, hot coffee, chai latteClassic contrasts; coffee balances sweetness
GarnishFlaky sea salt, chopped peanuts, a dusting of cocoa powderAdds texture and visual appeal

Make-Ahead, Storage & Reheating

In my busy NYC life, I often prep a batch of these cookies on Sunday for the week. The dough can be made ahead and baked fresh, which saves time without sacrificing quality. I’ve tested storing both baked and unbaked dough, and here’s what works best.

MethodContainerDurationReheating Tip
RefrigeratorAirtight containerUp to 5 daysMicrowave 10 seconds for a soft, warm cookie
FreezerZiplock bag (remove as much air as possible)Up to 3 monthsThaw at room temp 15 mins, then warm in oven at 300°F for 5 mins
Make-AheadRefrigerate dough in a covered bowlUp to 48 hours in advanceBake directly from fridge; add 1 minute to baking time Print
clock clock iconcutlery cutlery iconflag flag iconfolder folder iconinstagram instagram iconpinterest pinterest iconfacebook facebook iconprint print iconsquares squares iconheart heart iconheart solid heart solid icon

THE BEST CHOCOLATE CHIP PEANUT BUTTER COOKIES

  • Author: Chef Mia

Description

Soft and chewy Peanut Butter Chocolate Chip Cookies made with pantry staples—easy to make, full of flavor, and perfect every time!


Ingredients

Scale
  • 1 cup peanut butter*
  • ½ cup butter (softened)
  • ½ cup white sugar
  • ½ cup brown sugar
  • 1 egg
  • 3 Tbsp milk
  • 1 tsp vanilla extract
  • 1 ½ cups flour
  • ¾ tsp baking powder
  • ¼ tsp salt
  • 1 ½ cups semi-sweet chocolate chips

Instructions

  1. Preheat oven to 375°.
  2. With a hand mixer, cream together the peanut butter, butter, white sugar and brown sugar until blended. Beat in the egg, milk, and vanilla for 2-3 minutes.
  3. Combine the flour, baking powder and salt in a separate bowl.
  4. Add flour mixture to the peanut butter mixture and mix together, just until combined.
  5. Stir in chocolate chips.
  6. Scoop tablespoonfuls of dough and roll into balls. Place cookies 2 inches apart on ungreased cookie sheets (I used parchment paper since my cookies tend to burn on my darker pans). Press each ball once with the back of a fork.
  7. Bake for 8-10 minutes. Don't overcook! These cookies are much better soft and just barely cooked all the way through! Let the cookies cool for a few minutes on the baking sheets and then transfer to a wire rack to cool completely.


Nutrition

  • Calories: 229 kcal
  • Sugar: 14 g
  • Fat: 14 g
  • Carbohydrates: 23 g
  • Protein: 4 g


THE BEST CHOCOLATE CHIP PEANUT BUTTER COOKIES

Easy Cilantro Lime Chicken Recipe Bursting with Fresh Flavor

Cilantro Lime Chicken: Zesty Marinade Perfect Weeknight Dinner

⚖️
Difficulty
Easy
⏲️
Prep Time
10 mins
🕒
Cook Time
30 mins
⏱️
Total Time
40 mins
🍽️
Servings
4 servings

Growing up in my mother’s kitchen in Morocco, I learned that the best meals often come from the simplest ingredients. This easy cilantro lime chicken recipe is a love letter to that philosophy. I remember the scent of fresh cilantro and citrus drifting through our courtyard, a promise of something bright and satisfying. Now, here in my New York City kitchen, I recreate that magic with a dish that’s low in carbs, perfect for keto, paleo, and whole30 diets, yet bursting with flavor. This cilantro lime chicken dinner is my go-to when I need a meal that feels both special and effortlessly doable after a long day.

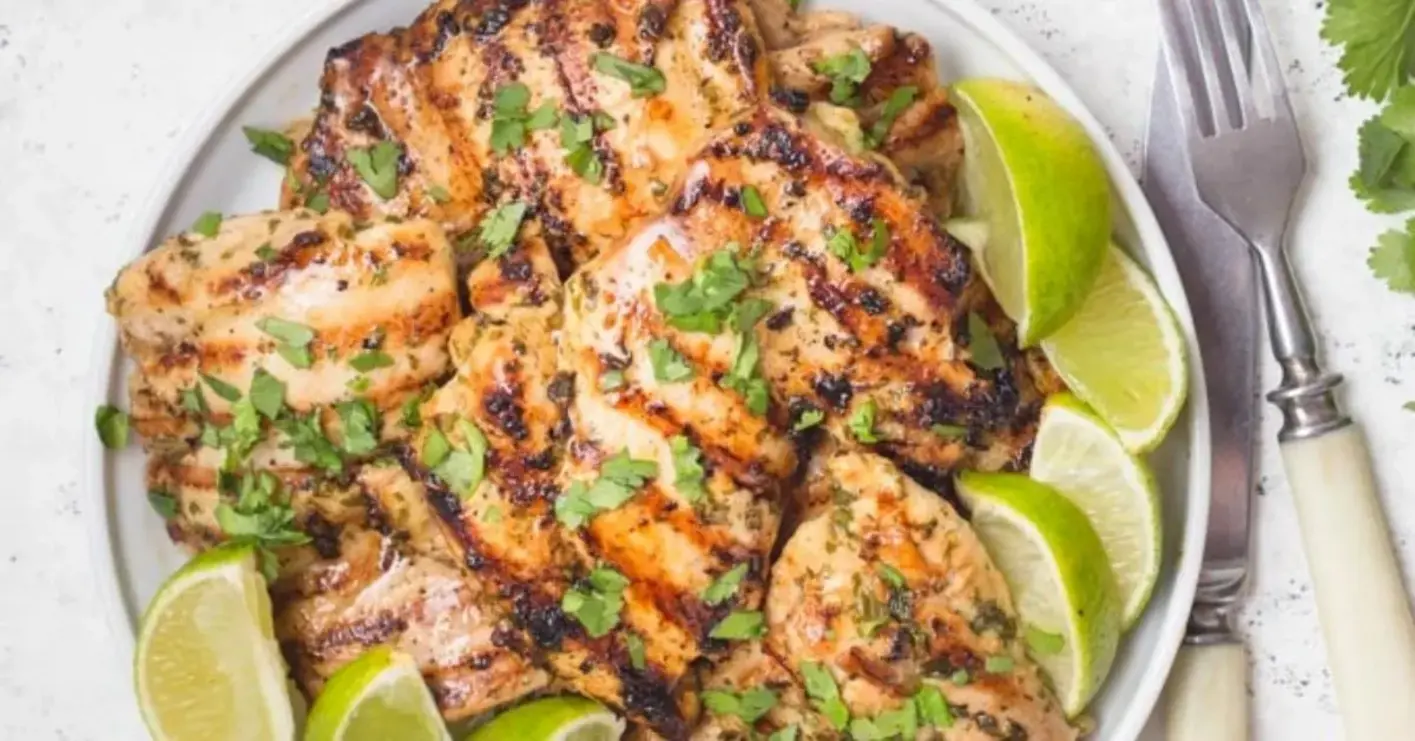
The first bite is a symphony: the tangy, fresh lime juice hits your tongue, followed by the herbal warmth of cilantro and a hint of earthy cumin. The chicken — I use boneless skinless thighs for maximum juiciness — sears to a beautiful golden brown, its edges slightly caramelized from the marinade. A whisper of garlic rounds everything out, making each mouthful deeply savory and impossibly fragrant. It’s the kind of dish that fills your home with an aroma that has everyone asking, “What’s for dinner?” before they even walk through the door.

What sets my cilantro lime chicken skillet apart is the technique I brought back from culinary school in Paris: a quick blitz of the marinade in a blender. This emulsifies the olive oil with the lime juice and cilantro, creating a creamy, clingy sauce that coats every piece of chicken perfectly. 💡 mia’s Pro Tip: Don’t skip the lime zest — it packs a concentrated citrus punch that juice alone can’t deliver. The key to tender, never-dry chicken is a short, 30-minute marinade and a hot sear, which I’ll walk you through below. Trust me, this will become your new favorite easy cilantro lime chicken recipe.

Why This Cilantro Lime Chicken Recipe Is the Best

The Flavor Secret: It’s all about the balance. My Moroccan roots taught me to layer flavors — here, the brightness of lime and cilantro plays against the warmth of cumin, while a touch of garlic adds depth. Blending the marinade creates an emulsion that doesn’t just sit on the surface; it works its way into the meat, ensuring every bite is infused with flavor. This isn’t just a marinade; it’s a flavor bath.

Perfected Texture: Cooking chicken can be tricky, but this method is foolproof. Using boneless skinless thighs is a cheat code for juiciness — they have a higher fat content than breasts, so they stay moist even if you’re a minute off on the timer. A hot cast-iron skillet (or grill pan) gives you that gorgeous, flavorful crust in minutes, locking in all those juices. I check for an internal temperature of 165°F with a digital thermometer, which is your guarantee of perfectly cooked chicken every single time.

Foolproof & Fast: With just 10 minutes of active prep and a 30-minute marinate, this is a recipe that fits seamlessly into a busy weeknight. There’s no complicated technique, no long list of hard-to-find ingredients. It’s the kind of easy cilantro lime chicken dinner that looks and tastes impressive but is secretly one of the simplest things you can make. Even if you’ve never grilled a chicken thigh before, this recipe will make you feel like a pro.

Cilantro Lime Chicken Ingredients

When I’m at the Union Square Greenmarket in NYC, I always pick up my cilantro and limes first. The smell takes me right back to the spice souks of Marrakech. For this cilantro lime chicken breast or thigh recipe, fresh ingredients really do make all the difference. Let me walk you through what you need.

Ingredients List

  • 8 Boneless skinless chicken thighs (about 2lb)
  • 1 cup cilantro leaves, packed (measure un-chopped leaves, about 1/2 bunch)
  • 1 tsp lime zest
  • 1/4 cup lime juice (about 3 limes)
  • 3 cloves garlic (chopped)
  • 1 tsp cumin
  • 1 tsp salt
  • 1 tsp black pepper
  • 3 tbsp olive oil
  • cilantro leaves (for garnish)
  • lime wedges (for serving)

Ingredient Spotlight

Cilantro: The star of the show. Look for bright green, perky leaves with no yellowing or wilting. The stems are also full of flavor, so don’t be shy about including them in the blender — they’ll get pulverized. For those who think cilantro tastes like soap (it’s genetic!), you can substitute flat-leaf parsley for a completely different but still delicious herbaceous note.

Lime: For the best flavor, use fresh, firm limes that feel heavy for their size — they yield more juice. A good lime should have a smooth, shiny skin. Never use bottled lime juice here; it lacks the bright, floral quality of fresh. The zest is non-negotiable for that deep citrus punch.

Chicken Thighs: I almost always choose boneless, skinless thighs for this easy cilantro lime chicken recipe. They’re more forgiving than breasts and stay incredibly juicy. If you want to use chicken breasts, pound them to an even thickness (about 1/2 inch) so they cook quickly and evenly without drying out.

Original IngredientBest SubstitutionFlavor / Texture Impact
CilantroFlat-leaf parsleyMilder, grassier flavor; still fresh and green.
Lime juiceLemon juiceSlightly less floral, more acidic; still works beautifully.
Chicken thighsBoneless skinless chicken breastLeaner, can dry out if overcooked; reduce cook time by 3-4 minutes per side.
CuminSmoked paprika or chili powderAdds smokiness or heat; changes the flavor profile entirely.

How to Make Cilantro Lime Chicken — Step-by-Step

Alright, let’s get cooking! I promise, this is as easy as it gets. Follow these steps, and you’ll have a restaurant-quality cilantro lime chicken dinner on the table in no time.

Step 1: Make the Marinade

Add the cilantro leaves, lime zest, lime juice, chopped garlic, cumin, salt, black pepper, and olive oil to a blender. The lime zest is the secret weapon here — it adds an aromatic intensity that juice alone can’t match. Pulse until the mixture is completely smooth, about 30 seconds. You should have a vibrant green, slightly thick liquid.

⚠️ Common Mistake to Avoid: Over-blending the marinade. You just want it smooth, not hot. A quick 30-second pulse is all it needs. Over-blending can make the olive oil turn bitter.

Step 2: Marinate the Chicken

Place the boneless skinless chicken thighs in a large bowl or a resealable zip-top bag. Pour the marinade over the chicken and toss well to ensure every piece is evenly coated. Seal the bag (or cover the bowl) and place it in the refrigerator. Let it marinate for at least 30 minutes, or up to 4 hours for a deeper flavor.

💡 mia’s Pro Tip: Marinating for longer than 4 hours can actually start to break down the chicken’s protein too much, making it mushy. 30 minutes to 4 hours is the sweet spot for the best texture and flavor.

Step 3: Sear the Chicken

Heat a large cast-iron skillet or grill pan over medium-high heat. Brush it lightly with olive oil. Once the pan is hot (a drop of water should sizzle and evaporate instantly), place the chicken thighs in a single layer, being careful not to crowd the pan. Sear for about 5 minutes per side, until the chicken is deeply golden brown and has a nice crust. The chicken is done when it reaches an internal temperature of 165°F in the thickest part, checked with a digital meat thermometer.

⚠️ Common Mistake to Avoid: Moving the chicken too early. Let it sear undisturbed for the full 5 minutes on the first side. If you try to flip it and it sticks, it’s not ready yet. A good sear will release naturally.

Step 4: Finish in Oven (Optional)

If using bone-in thighs or for extra thick pieces, finish them in the oven. Preheat your oven to 375°F. Transfer the seared chicken to a baking dish and bake for 10-15 minutes, or until the internal temperature reaches 165°F. This ensures even cooking without burning the outside.

💡 mia’s Pro Tip: For the most foolproof results, especially with bone-in thighs, I always recommend searing on the stovetop and then finishing in the oven. It gives you a perfect crust and guarantees juicy, fully cooked meat every time.

StepActionDurationKey Visual Cue
1Make Marinade30 secondsSmooth, bright green liquid forms.
2Marinate Chicken30 min – 4 hoursChicken turns pale green from marinade.
3Sear~10 minutes totalDeep golden brown crust forms.
4Bake (if needed)10-15 minutesInternal temp hits 165°F.

Serving & Presentation

The way you serve this easy cilantro lime chicken can take it from a simple weeknight meal to a show-stopping dinner. I like to let the chicken rest for 5 minutes after cooking, then slice it against the grain for the most tender presentation. A final squeeze of fresh lime and a shower of torn cilantro leaves over the top just before serving is essential — it wakes up all the flavors and adds a beautiful pop of green.

In my NYC apartment, I often serve this with a side of simple roasted vegetables — think asparagus or broccoli — and a bed of fluffy rice or quinoa to soak up any extra juices. If I’m feeling nostalgic for my mother’s table, I’ll pair it with a cool, herby cucumber salad and warm flatbread for a meal that bridges two worlds. The bright, tangy chicken is incredibly versatile.

Pairing TypeSuggestionsWhy It Works
Side DishCilantro lime rice, roasted corn & black bean salad, cauliflower rice for low-carbGrain or veggie base soaks up the zesty juices; complements the citrus.
Sauce / DipAvocado crema, Greek yogurt with lime, salsa verdeCool, creamy contrast to the bright, savory chicken.
BeverageMargarita on the rocks, crisp Sauvignon Blanc, cold Mexican lagerThe acidity and citrus notes in the drinks echo the dish perfectly.
GarnishFresh cilantro leaves, lime wedges, sliced jalapeño, crumbled cotija cheeseAdds freshness, color, and a final layer of flavor and texture.

Make-Ahead, Storage & Reheating

When I’m prepping for a busy week, I love that this recipe fits into my meal-prep routine so beautifully. You can marinate the chicken up to 4 hours in advance, or even cook the whole batch on Sunday to enjoy all week long. Here’s how I do it to keep the chicken tender and flavorful.

MethodContainerDurationReheating Tip
RefrigeratorAirtight containerUp to 4 daysReheat in a 350°F oven for 10 minutes, or in a covered skillet with a splash of chicken broth to keep it moist.
FreezerFreezer-safe bag or containerUp to 3 monthsThaw overnight in the fridge. Reheat in a skillet over medium heat until warmed through and the skin crisps up again.
Make-AheadBowl or zip-top bag
Cilantro Lime Chicken

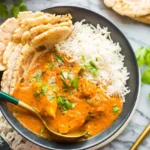
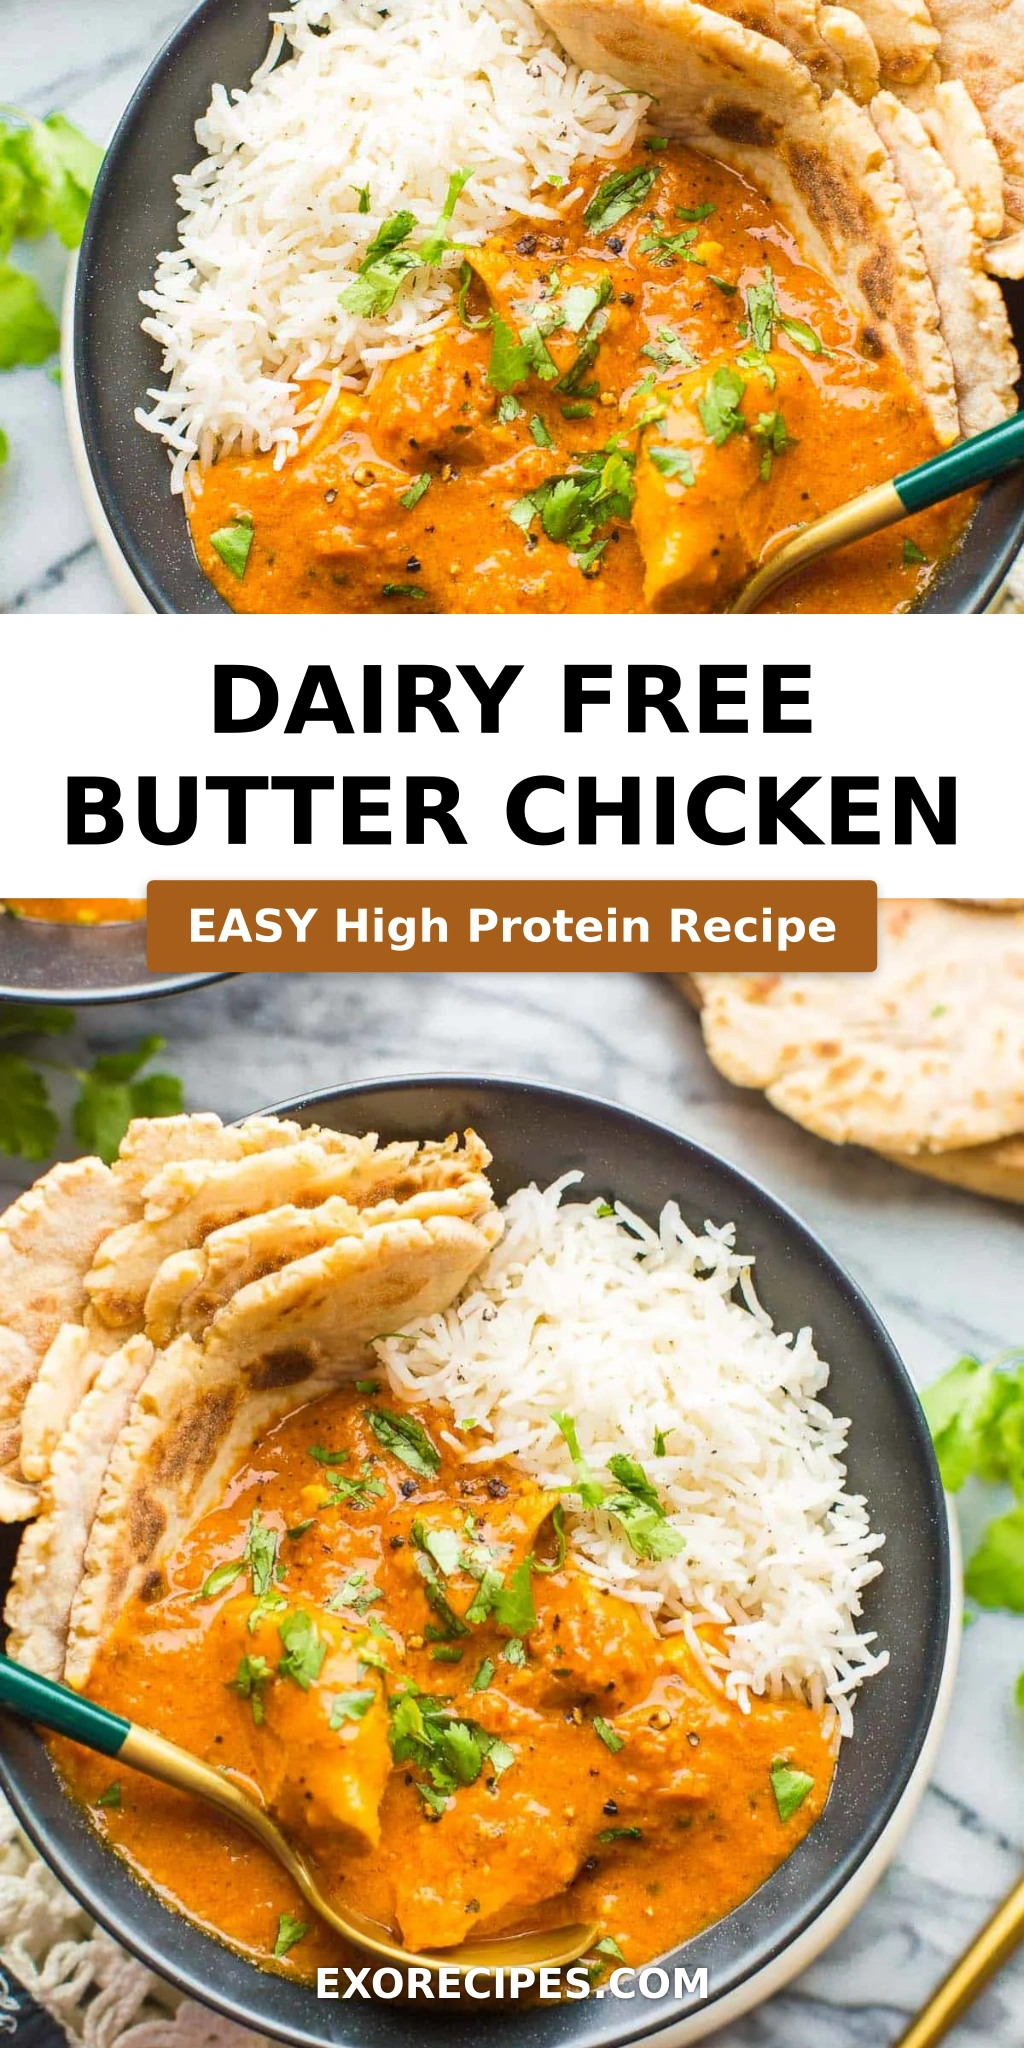
Dairy Free Butter Chicken Recipe – Creamy Coconut Curry

Dairy Free Butter Chicken: Creamy Coconut Indian Curry — Extra Saucy & Paleo-Friendly

⚖️
Difficulty
Medium
⏲️
Prep Time
30 mins
🕒
Cook Time
45 mins
⏱️
Total Time
1 hr 15 mins
🍽️
Servings
6 servings

There are some dishes that feel like a warm hug from the inside out, and this dairy free butter chicken recipe is exactly that. I’m mia, and I’ve spent years perfecting this creamy, extra saucy version in my tiny NYC kitchen. Growing up in Morocco, I learned early on that bold spices and slow-simmered sauces are the heart of any great meal. Later, training at a French culinary school in Paris taught me the precision behind a silky sauce — technique that now makes my dairy free chicken curry so luscious you won’t believe it’s cream-free. This isn’t just another vegan butter chicken substitute; it’s a dish where coconut milk steps in to create richness that rivals the original. The first time I served it to my New York friends, they asked for seconds before I could even sit down.

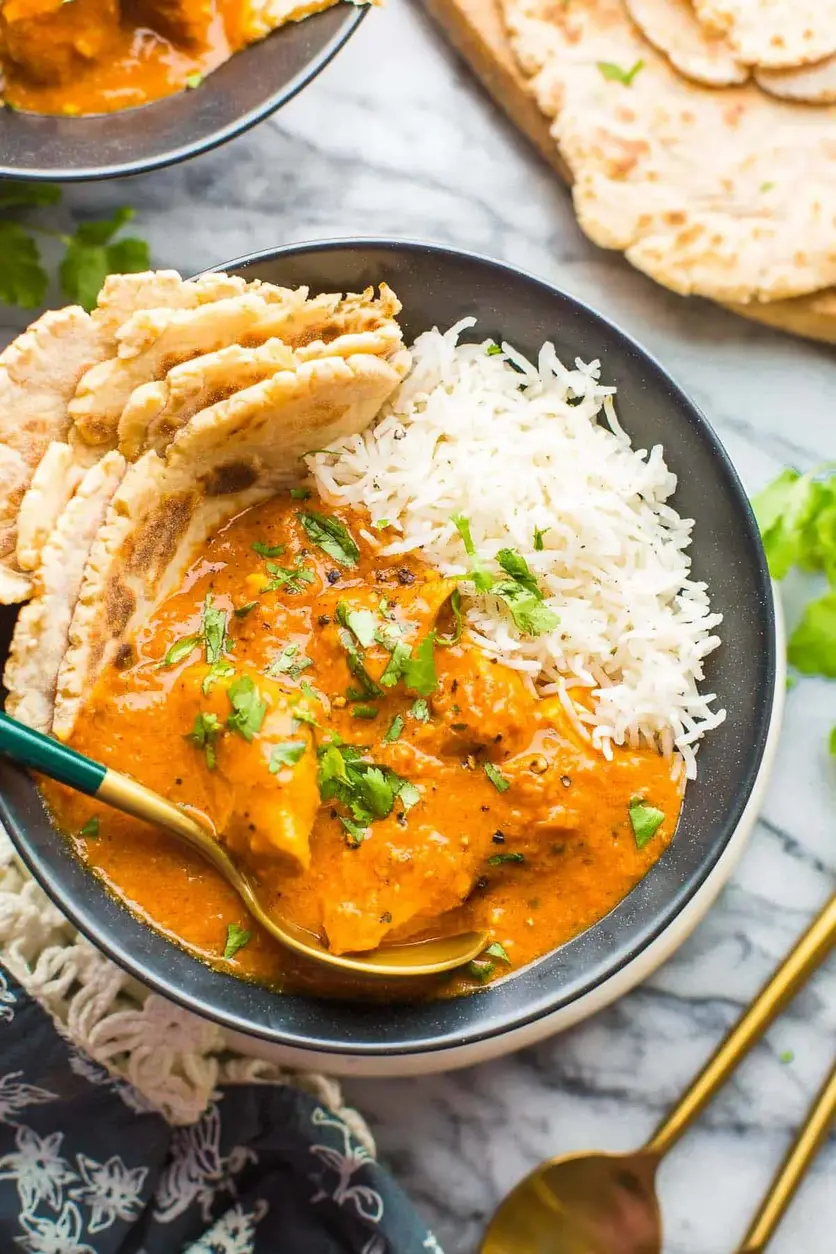
Imagine tender pieces of chicken, marinated in a fragrant blend of turmeric and garam masala, then seared until golden. The sauce is a deep, reddish-brown tapestry woven with caramelized onions, garlic, ginger, and a touch of heat from a fresh chili. When you add the full-fat coconut milk, it transforms into a velvety, luxurious broth that clings to every piece of chicken. The aroma of fenugreek — or kasoori methi as we call it — adds an earthy, slightly nutty note that makes this dish unmistakably Indian. Each spoonful is a balance of tangy tomato, warm spices, and creamy coconut, with a hint of sweetness from a little sugar. It’s the kind of meal that makes you close your eyes and sigh with contentment.

What sets my dairy free Indian curry apart from others is the careful technique I brought from Paris — specifically, how I build and blend the sauce to achieve a restaurant-quality finish. Many recipes skip the step of browning the chicken in batches, but that sear adds depth you simply can’t get otherwise. I also insist on blending the sauce until smooth, a trick that gives it that velvety texture without any cream or yogurt. My biggest advice? Don’t rush the simmering time. Letting the sauce cook for a full 15 minutes allows the tomato paste to caramelize and the spices to meld. And a common mistake I see is overcrowding the pan when searing the chicken — that steams it instead of browning it. This recipe is forgiving but rewards patience with incredible flavor.

Why This Dairy Free Butter Chicken Recipe Is the Best

The Flavor Secret: My background in Moroccan cooking taught me that spice blends are an art. In this dairy free butter chicken recipe, I use a double dose of garam masala — once in the marinade and once in the sauce — to build layers of warmth. The addition of fenugreek leaves at the end adds an authentic, slightly bittersweet note that you’ll find in the best Indian restaurants. It’s a small detail that makes a big difference.

Perfected Texture: The key to this coconut milk butter chicken is the two-step sauce. First, you caramelize the tomato paste with the spices, then you simmer it for at least 15 minutes before blending. This deepens the color and intensifies the flavor. Finally, stirring in the remaining coconut milk off the heat keeps the sauce creamy and prevents it from curdling. The result is a sauce that’s both rich and light, with a silky mouthfeel that rivals any traditional butter chicken.

Foolproof & Fast: Despite its complex flavor, this dairy free chicken curry is designed for home cooks. The ingredients are easy to find at any US grocery store — no need for specialty shops. And while it looks impressive, the steps are straightforward: marinate, sear, build the sauce, blend, and finish. I’ve even streamlined the process by allowing you to use an immersion blender directly in the pot, saving you from extra dishes. It’s the kind of recipe that becomes a weekly staple once you try it.

Dairy Free Butter Chicken Ingredients

When I lived in Paris, I’d spend Saturday mornings at the Marché d’Aligre, gathering fresh spices and herbs. Now, I do the same at the Union Square Greenmarket in Manhattan. For this dairy free butter chicken recipe, the ingredients are simple but purposeful. Full-fat coconut milk is the star, replacing both heavy cream and yogurt. I use canned coconut milk for its thickness and richness. The spices — garam masala, turmeric, cumin, and coriander — form the backbone of the flavor. And the fresh ginger and garlic bring a sharp, aromatic bite that’s essential.

Ingredients List

  • ½ cup full fat coconut milk, coconut cream or coconut yoghurt (114g) -see notes*
  • 1 tbsp fresh lemon juice (15 ml)
  • 1 tbsp ginger, minced
  • 1 ½ tbsp minced garlic
  • 2 tsp garam masala
  • ½ tsp black pepper
  • 1 tsp turmeric
  • ½ tsp salt
  • 2 lbs boneless, skinless chicken breasts and/or thighs cut into bite-sized pieces (900g)
  • 4 tbsp coconut oil, divided (60g)
  • 1 onion, finely diced
  • 5 garlic cloves, minced
  • 4 tsp freshly grated ginger
  • 1 chili, stemmed, seeded and minced (see notes for type)
  • 1 tbsp garam masala
  • 1 tsp ground coriander
  • ½ tsp ground cumin
  • ½ tsp black pepper
  • 1 ½ cups water (360ml)
  • ½ cup tomato paste (64g)
  • 1 tbsp sugar
  • 1 tsp salt
  • ½ tsp dried fenugreek or kasoori methi (see notes)
  • 1 cup unsweetened full fat coconut milk or coconut cream from a can (228g)

Ingredient Spotlight

Full-Fat Coconut Milk: This is the non-negotiable ingredient for a dairy free butter chicken. Look for cans without guar gum or stabilizers — the texture is smoother. I recommend Thai Kitchen or Aroy-D brands. If you want a lighter version, coconut cream works even better but is higher in fat. Avoid light coconut milk; it’s too thin and won’t create that velvety sauce.

Garam Masala: This spice blend is the soul of the dish. I make mine fresh from a mix of cardamom, cloves, cinnamon, and black pepper. For store-bought, choose a brand like MDH or Shan for authentic flavor. My pro tip: toast the garam masala in the pan for 30 seconds before adding liquids — it releases essential oils and deepens the aroma.

Fenugreek Leaves (Kasoori Methi): These dried leaves are what give butter chicken its signature earthy, slightly sweet flavor. It’s a classic ingredient in Indian cooking. If you can’t find it, dried oregano is a decent substitute, though the flavor will be different. I buy mine from Kalustyan’s in NYC — a spice lover’s paradise. Rub the leaves between your palms before adding to release their fragrance.

Original IngredientBest SubstitutionFlavor / Texture Impact
Full-Fat Coconut Milk (marinade)Coconut yoghurtSlightly tangier, thinner marinade
Coconut OilAvocado oil or ghee (if not strictly dairy-free)Avocado oil neutral; ghee adds butter flavor
Fenugreek LeavesDried oregano + pinch of maple syrupEarthy note replaced by herbaceous, sweeter profile
ChickenCauliflower or chickpeas (for vegan version)Less protein, but still hearty and absorbs sauce well

How to Make Dairy Free Butter Chicken — Step-by-Step

Making this dairy free butter chicken recipe is easier than you think. Follow these steps, and you’ll have a restaurant-quality curry in about an hour. I’ve included my personal tips to ensure every element shines.

Step 1: Marinate the Chicken

In a large mixing bowl, whisk together the marinade ingredients: coconut milk, lemon juice, minced garlic, ginger, garam masala, black pepper, turmeric, and salt. Add the chicken pieces and toss until fully coated. Cover and refrigerate for at least 30 minutes, or up to 24 hours for deeper flavor.

💡 mia’s Pro Tip: Don’t skip the lemon juice — it helps tenderize the chicken and brightens the spices. If marinating overnight, use coconut yoghurt instead of coconut milk for a thicker, more tangy marinade.

Step 2: Sear the Chicken

Heat 2 tablespoons of coconut oil in a large pot or skillet over medium-high heat. Working in 2-3 batches, add the chicken pieces without overcrowding. Cook for about 3 minutes per side until nicely browned. Remove and set aside. The chicken will finish cooking in the sauce later.

⚠️ Common Mistake to Avoid: Adding all the chicken at once. This lowers the pan temperature and steams the meat instead of searing it. Brown in batches for that golden crust.

Step 3: Build the Aromatic Base

Add the remaining 2 tablespoons of coconut oil to the same pot. Cook the diced onion over medium heat for 5-7 minutes until translucent. Stir in the minced garlic, ginger, and chili pepper. Cook for about 1 minute until fragrant. This base is crucial for the sauce’s depth.

💡 mia’s Pro Tip: Use a serrano chili for medium heat or a Thai bird chili for more spice. Remove seeds and membranes if you prefer a milder curry.

Step 4: Cook the Spice Paste

Reduce heat to medium-low. Add the tomato paste, garam masala, ground coriander, cumin, and black pepper. Cook for 2-3 minutes, stirring constantly. If the pan looks dry, add 1-2 tablespoons of water. This step caramelizes the tomato paste and blooms the spices.

⚠️ Common Mistake to Avoid: Cooking the spices on high heat. They can burn quickly, turning bitter. Keep the heat low and stir constantly.

Step 5: Simmer the Sauce

Stir in the water, sugar, and salt. Bring to a simmer over medium heat and cook for at least 15 minutes, until the sauce thickens and deepens to a reddish-brown color. Stir occasionally to prevent sticking. This is where the magic happens — the flavors concentrate and meld.

💡 mia’s Pro Tip: Taste the sauce after 10 minutes. If it’s too acidic, add a pinch more sugar. If it’s too salty, add a splash of water. Adjust to your preference.

Step 6: Blend the Sauce

Remove the pot from heat. Transfer the sauce to a blender or food processor in batches (don’t fill more than halfway). Blend until completely smooth, then pour the puree back into the pot. Alternatively, use an immersion blender directly in a heat-safe bowl for fewer dishes.

⚠️ Common Mistake to Avoid: Blending hot liquid in a sealed blender. Always remove the center cap to let steam escape, and cover with a towel to prevent splatters.

Step 7: Finish with Coconut Milk and Chicken

Stir in the remaining 1 cup of full-fat coconut milk until combined. Add the seared chicken pieces back to the pot. Simmer over medium-low heat for 10 minutes, until the chicken is cooked through and the sauce is thickened. Stir in the dried fenugreek or kasoori methi if using.

💡 mia’s Pro Tip: Add the fenugreek leaves off the heat and let them steep for a minute before serving. This preserves their delicate flavor.

Step 8: Serve and Store

Serve topped with fresh cilantro and a side of basmati rice or cauliflower rice. For leftovers, store in an airtight container in the fridge for up to five days. The curry tastes even better the next day as the flavors continue to develop.

StepActionDurationKey Visual Cue
1Marinate Chicken30 mins – 24 hrsChicken fully coated in golden-yellow marinade
2Sear Chicken6 mins per batchGolden-brown crust on both sides
3Cook Onions & Aromatics6-8 minsOnions translucent, garlic fragrant
4Cook Spice Paste2-3 minsPaste darkens to deep brick-red
5Simmer Sauce15 minsSauce thickens, turns reddish-brown
6Blend Sauce2-3 minsSmooth, velvety consistency
7Finish Cooking10 minsChicken cooked through, sauce coats spoon
8ServeImmediateGarnished with cilantro

Serving & Presentation

This dairy free butter chicken recipe is a showstopper when it comes to the table. I love serving it family-style in a large, shallow bowl so everyone can see that rich, creamy sauce. Spoon it over a bed of fluffy basmati rice — the grains soak up every drop. For a low-carb option, try cauliflower rice or even

Print

clock clock iconcutlery cutlery iconflag flag iconfolder folder iconinstagram instagram iconpinterest pinterest iconfacebook facebook iconprint print iconsquares squares iconheart heart iconheart solid heart solid icon

Dairy Free Butter Chicken

  • Author: Chef Mia

Description

Rich, creamy and extra saucy this Dairy Free Butter Chicken is a must make! Coconut milk replace the heavy cream and yoghurt make for a more allergy friendly dish thats just as delicious and satisfying as the original. | Paleo + Whole30 Friendly


Ingredients

Scale
  • ½ cup full fat coconut milk, coconut cream or coconut yoghurt (114g) -see notes*
  • 1 tbsp fresh lemon juice (15 ml)
  • 1 tbsp ginger, minced
  • 1 ½ tbsp minced garlic
  • 2 tsp garam masala
  • ½ tsp black pepper
  • 1 tsp turmeric
  • ½ tsp salt
  • 2 lbs boneless, skinless chicken breasts and/or thighs cut into bite-sized pieces (900g)
  • 4 tbsp coconut oil, divided (60g)
  • 1 onion, finely diced
  • 5 garlic cloves, minced
  • 4 tsp freshly grated ginger
  • 1 chili, stemmed, seeded and minced (see notes for type)
  • 1 tbsp garam masala
  • 1 tsp ground coriander
  • ½ tsp ground cumin
  • ½ tsp black pepper
  • 1 ½ cups water (360ml)
  • ½ cup tomato paste (64g)
  • 1 tbsp sugar
  • 1 tsp salt
  • ½ tsp dried fenugreek or kasoori methi (see notes)
  • 1 cup unsweetened full fat coconut milk or coconut cream from a can (228g)

Instructions

  1. In a large mixing bowl: mix together the marinade ingredients: coconut milk, lemon juices, garlic, ginger and spices until combined.
  2. Add the chicken pieces to the marinade and mix until fully coated in the marinade. Set aside and let marinate and least 30 minutes. This can also be done 24 hours in advance.
  3. In a large pot or skillet, add 2 tablespoons of coconut oil and warm over a medium-high heat. When the oil is hot enough (it sizzles if you flick a few drops of water on it) begin adding the chicken pieces to the pot/skillet. Do this is 2-3 batches so you don't over crowd the pan. Cook the chicken pieces about 3 minutes on each side to brown, then remove from the pot and set aside for the time. The chicken will finish cooking in the sauce in a later step.
  4. Add the remaining oil to the same pot along with the onions. Cook about 5-7 minutes over a medium until the onions start to turn translucent. Add the garlic, ginger and chili pepper. Cook for about 1 minute until fragrant.
  5. Turn the heat down to a medium-low. Add the tomato paste, garam masala, ground coriander, cumin, black pepper. Cook about 2-3 seconds, stirring the whole time. If the pan/pot looks too dry at any point, add 1-2 tablespoons of water.
  6. Stir in the water, sugar and salt. Let simmer over a medium heat for at least 15 minutes until the sauce thickens and deepens into a reddish-brown color.
  7. Remove the pot/pan from the heat. In a blender or food process: Transfer the sauce to a blender or food processor. Make sure not to fill up your blending container more than halfway full. Do this in batches if needed. Blend the sauce until smooth then pour it back into the pot/pan. With an immersion blender: Pour the sauce into a medium-sized heat safe bowl and blend with a handheld blender until smooth. Once smooth, pour it back into the original pan.
  8. Stir in the remaining coconut milk/cream until combined then add the chicken pieces to the sauce. Mix and let simmer over a medium-low heat a final 10 minutes. Stir in the dried fenugreek or kasoori methi if using.
  9. Serve topped with fresh cilantro along with a side of rice/cauliflower rice and enjoy.
  10. Keep leftovers stored in an airtight container in the fridge up to five days.


Dairy Free Butter Chicken