Table of Contents
Cheesy Garlic Cruffin Recipe – A Savory Delight in 30 Minutes
I still remember the first time I bit into a cruffin at a tiny café in the Marais district of Paris — layers of buttery, flaky pastry twisted into a muffin shape, dusted with sugar. It was everything a pastry should be: crisp, tender, and impossibly light. But my heart belongs to savory flavors — the kind that remind me of my mother’s kitchen in Morocco, where garlic and cheese were woven into nearly every meal. That’s how this Cheesy Garlic Cruffin was born: a mash-up of French technique, North African soul, and New York City’s love for bold, handheld bites.
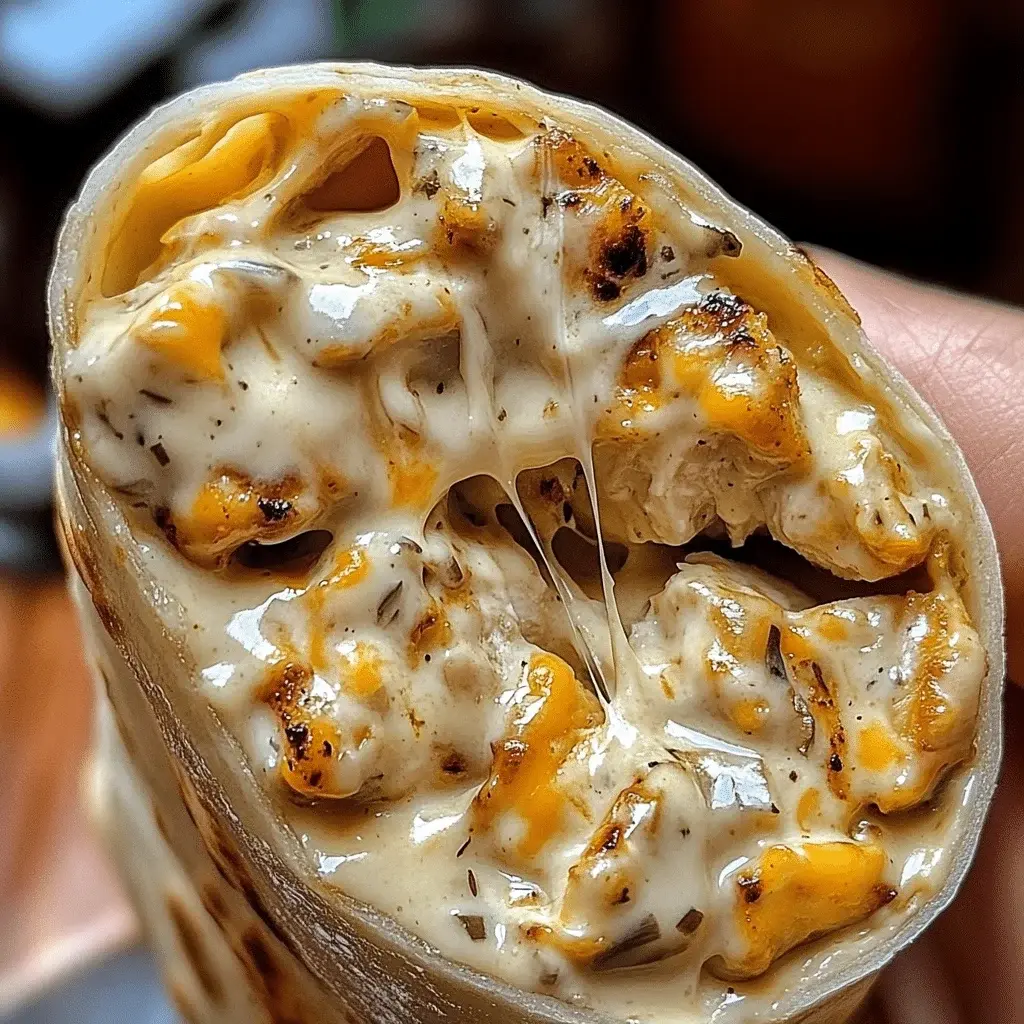
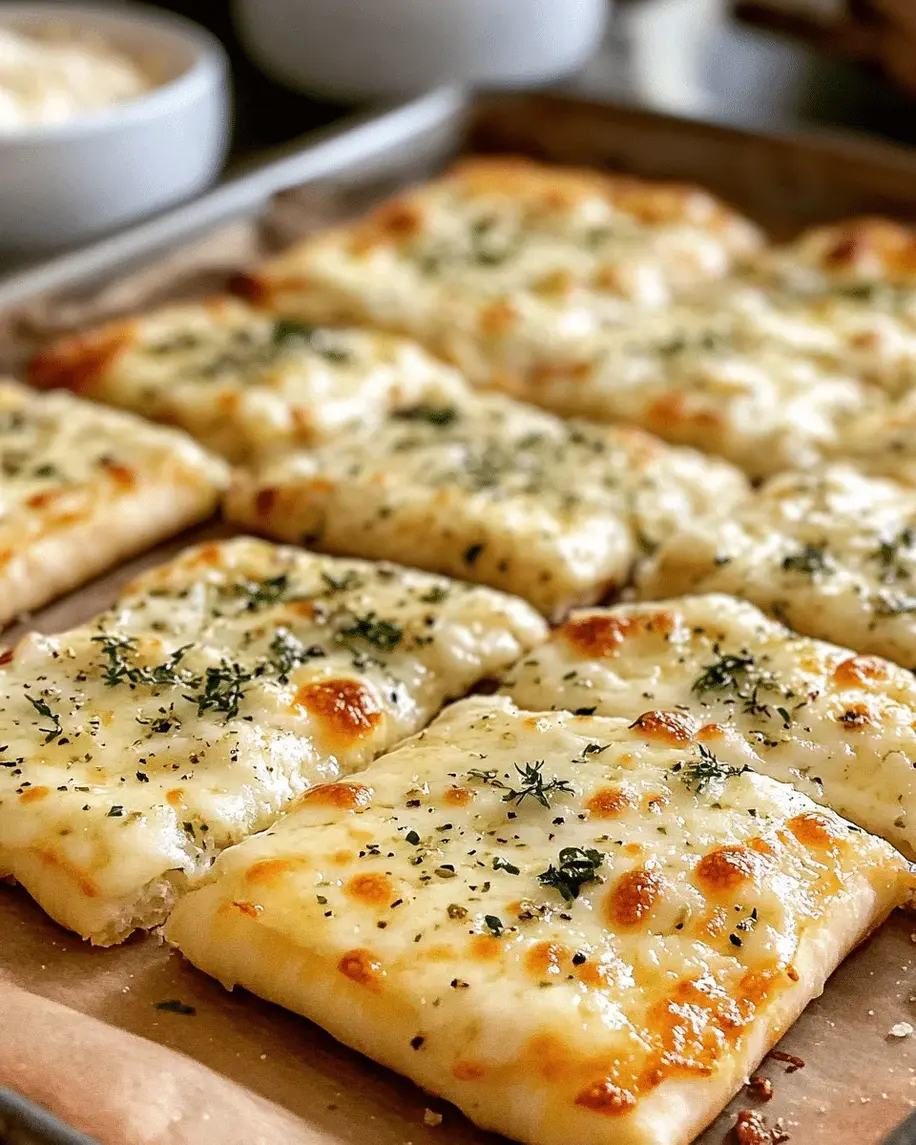
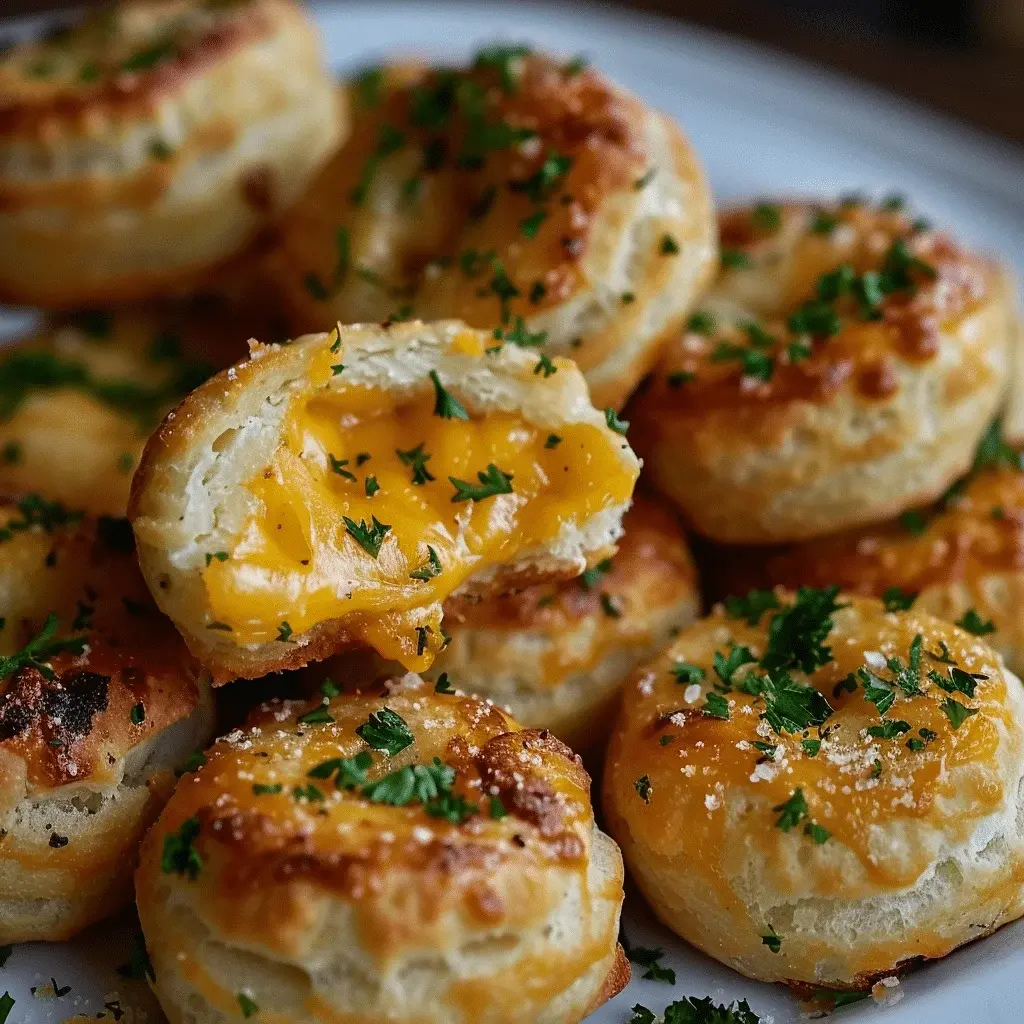
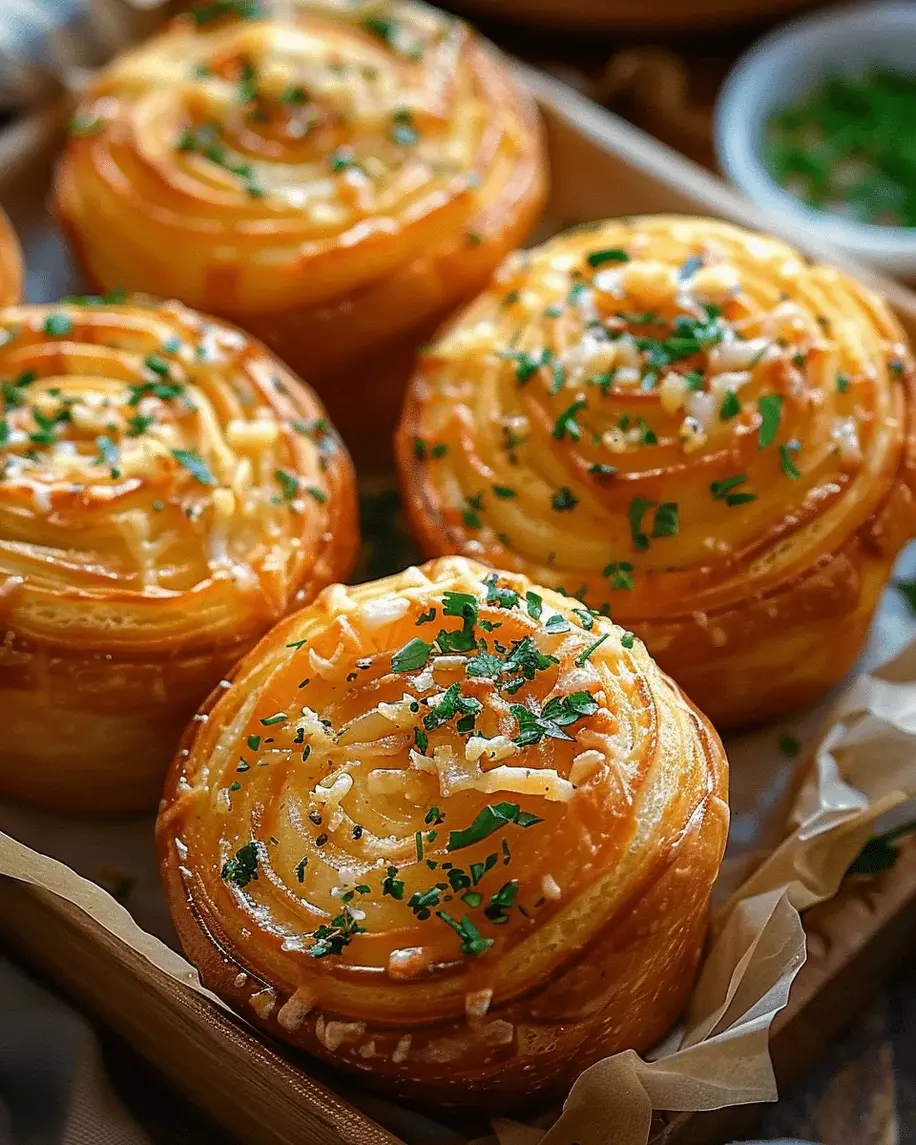
Imagine the aroma of garlic butter melting into flaky puff pastry, mingling with the nutty richness of Parmesan and the stretchy pull of mozzarella. The cruffin bakes up golden and puffed, each spiral revealing a ribbon of melted cheese and fragrant garlic. The outside shatters slightly when you bite into it, giving way to a soft, cheesy interior that’s pure comfort. I brush the pastry with a garlic butter that’s infused with fresh parsley — a trick I picked up in Paris — and the result is a savory cruffin that’s as beautiful as it is delicious.
I’ve tested this garlic cruffin recipe dozens of times in my tiny NYC apartment kitchen, tweaking the garlic-to-cheese ratio and the rolling technique until it was foolproof. The key? A tight roll and a hot oven. In this post, I’ll share my best tips to keep the filling inside, the layers distinct, and the flavor absolutely dialed in. Plus, a common mistake that can turn your cruffins into buttery puddles — and how to avoid it. Let’s bake!
Why This Cheesy Garlic Cruffin Recipe Is the Best
The Flavor Secret: Most savory cruffin recipes rely on just cheese, but I add a double dose of garlic — minced fresh garlic brushed onto the pastry plus a garlic butter that infuses every layer. The parsley adds a fresh herbal note that cuts through the richness, a trick I learned from my Moroccan mother’s chermoula. This cheesy garlic cruffin is savory and aromatic, never greasy.
Perfected Texture: I spent weeks perfecting the roll-and-cut method. Unlike sweet cruffins that need a cinnamon-sugar coating, this savory version relies on a tight spiral to create those delicate, flaky layers. Brushing the puff pastry with garlic butter before adding cheese prevents the pastry from becoming soggy and ensures each bite has a crisp exterior and a soft, cheesy center.
Foolproof & Fast: With only 10 minutes of prep and a handful of ingredients, this recipe is perfect for weeknight appetizers, brunch surprises, or game-day snacks. Even if you’ve never worked with puff pastry before, the step-by-step instructions will guide you to a perfect result. It’s the kind of recipe that makes you look like a pro with minimal effort.
Cheesy Garlic Cruffin Ingredients
I pick up my puff pastry from the freezer aisle at Whole Foods near Union Square, but any brand works — just make sure it’s all-butter for the best flavor and flakiness. The garlic I buy fresh from the farmers market in Chelsea, where the purple-tinged cloves are small but intensely fragrant. It reminds me of the garlic my mother would crush in her mortar back in Marrakech. For the cheeses, I use whole-milk mozzarella for melt and aged Parmesan for that salty, nutty punch.
Ingredients List
- 1 sheet puff pastry, thawed
- 1 cup shredded mozzarella cheese
- 1/2 cup grated Parmesan cheese
- 2 cloves garlic, minced
- 2 tablespoons butter, melted
- 1 tablespoon chopped fresh parsley
- 1/2 teaspoon salt
- 1/4 teaspoon black pepper
Ingredient Spotlight
Puff Pastry: The star of the show. It provides the flaky, buttery layers that make a cruffin distinct. Look for all-butter puff pastry (like Dufour or Pepperidge Farm). If using store-brand, check that it contains butter, not shortening, for the best flavor and rise. One standard sheet (about 10×10 inches) yields 6 cruffins.
Mozzarella: Choose low-moisture, whole-milk mozzarella for the best stretch and melt. Fresh mozzarella is too watery and can make the pastry soggy. If you only have fresh, pat it dry with paper towels and shred it yourself.
Parmesan: Use finely grated Parmesan, not the shaker-style powder. The fine texture melts evenly and adds a savory depth without clumping. Grana Padano is a good substitute if you want a slightly milder flavor.
Garlic: Fresh garlic is non-negotiable. Minced cloves release their essential oils into the melted butter, creating an aromatic base. Garlic powder won’t give the same punch. If you’re sensitive, use one clove instead of two.
| Original Ingredient | Best Substitution | Flavor / Texture Impact |
|---|---|---|
| Mozzarella | Provolone or fontina | Slightly sharper, still melts well |
| Parmesan | Pecorino Romano | More salty, more pungent |
| Butter | Olive oil (use 1.5 tbsp) | Less buttery, more fruity, still works |
| Fresh parsley | Chives or oregano (half amount) | Different herbal note, still bright |
How to Make Cheesy Garlic Cruffin — Step-by-Step
Follow these easy steps, and you’ll have golden, cheesy, garlicky cruffins that rival any bakery. I’ve included my pro tips to ensure success every time — especially for keeping that filling inside where it belongs.
Step 1: Preheat and Prep the Tin
Preheat your oven to 375°F (190°C). Generously grease a 6-cavity cruffin pan or standard muffin tin with butter or non-stick spray. If using a muffin tin, the cruffins will be slightly squatter but still delicious.
💡 mia’s Pro Tip: Use a silicone muffin pan for the easiest release. Metal pans work too, but make sure to grease every nook and cranny — puff pastry sticks like a dream.
Step 2: Make the Garlic Butter
In a small bowl, combine 2 tablespoons melted butter, 2 minced garlic cloves, and 1 tablespoon chopped fresh parsley. Stir well and set aside. Let it sit for a minute to infuse.
⚠️ Common Mistake to Avoid: Don’t let the butter be too hot — it can cook the garlic slightly, losing that raw garlic punch. Melt it gently in the microwave (15-20 seconds) or on the stovetop, then let it cool for a minute before adding garlic.
Step 3: Prepare the Pastry
Unfold the thawed puff pastry sheet on a lightly floured work surface. If the pastry cracks at the folds, gently press it back together with your fingers. Brush the entire surface with the garlic butter mixture, reserving a tiny bit for the tops (about 1 teaspoon).
💡 mia’s Pro Tip: Don’t over-brush — a thin, even layer is all you need. Too much butter can make the pastry soggy and flatten the layers.
Step 4: Add the Cheese
Sprinkle the shredded mozzarella and grated Parmesan evenly over the buttered pastry. Season with 1/2 teaspoon salt and 1/4 teaspoon black pepper. Gently press the cheese into the pastry with your palms so it sticks.
⚠️ Common Mistake to Avoid: Don’t pile the cheese too high near the edge you’ll roll — it will squeeze out during rolling. Keep a 1/2-inch border at the long end opposite from where you start rolling.
Step 5: Roll and Cut
Starting from the long edge closest to you, roll the pastry tightly into a log, keeping even pressure. Pinch the seam to seal. Using a sharp knife, cut the log into 6 equal slices — each about 1.5 inches wide.
💡 mia’s Pro Tip: For clean cuts, chill the log in the freezer for 5 minutes before slicing. This firms up the butter and cheese, giving you neat spirals.
Step 6: Place and Bake
Place each slice cut-side up into the prepared muffin or cruffin tin. Gently press down to flatten slightly. Bake for 18-20 minutes, until the cruffins are golden brown and puffed, and the cheese is bubbling.
⚠️ Common Mistake to Avoid: Don’t open the oven door during the first 12 minutes — the steam needed for puff pastry to rise will escape, resulting in dense cruffins.
Step 7: Cool and Serve
Let the cruffins cool in the pan for 5 minutes. Then run a knife around the edges to loosen, and transfer to a wire rack. Brush with the reserved garlic butter for extra shine and flavor. Serve warm.
💡 mia’s Pro Tip: If any cheese bubbled over, don’t worry — it’ll crisp up into delicious bits. Scrape them off and garnish the cruffins with them for added crunch.
| Step | Action | Duration | Key Visual Cue |
|---|---|---|---|
| 1 | Preheat & grease tin | 5 min | Oven ready, pan coated |
| 2 | Make garlic butter | 1 min | Butter melted, garlic fragrant |
| 3 | Brush pastry | 2 min | Even coating, no pools |
| 4 | Add cheese & season | 2 min | Cheese evenly scattered |
| 5 | Roll & cut | 3 min | Tight spiral, clean slices |
| 6 | Place & bake | 18-20 min | Golden, puffed, bubbly |
| 7 | Cool & serve | 5 min | Warm, cheese stretchy |
Serving & Presentation
These cruffins are best served warm, straight from the oven, when the cheese is still gooey and the pastry is at its crispiest. I love to arrange them on a wooden board, sprinkled with a little extra fresh parsley and a pinch of flaky sea salt — it makes them look as good as they taste. In my New York kitchen, they often disappear within minutes at brunch or as a side to a bowl of tomato soup.
For a Moroccan touch, serve them with a side of harissa-spiked yogurt or a drizzle of honey — the sweetness cuts through the savory garlic beautifully. In Paris, I’d pair them with a crisp, dry white wine like Sauvignon Blanc. Here in NYC, a cold IPA does the trick just as well.
If you’re making these for a party, keep them warm on a baking sheet in a 200°F oven for up to 30 minutes. They’ll stay crisp and inviting.
| Pairing Type | Suggestions | Why It Works |
|---|---|---|
| Side Dish | Tomato soup, mixed green salad, roasted vegetables | Balances richness with acidity or freshness |
| Sauce / Dip | Marinara, garlic aioli, harissa yogurt | Extra flavor punch and creamy contrast |
| Beverage | Sauvignon Blanc, IPA, iced tea | Crisp drinks cut through the butter and cheese |
| Garnish | Fresh parsley, flaky sea salt, red pepper flakes | Enhances color, texture, and heat |
Make-Ahead, Storage & Reheating
I’m all about smart meal prep in my busy New York life, and these cruffins adapt beautifully. You can assemble them the night before and bake them fresh in the morning — they’ll taste like you spent hours in the kitchen. Here’s how to store them properly so every bite stays flaky and delicious.
| Method | Container | Duration | Reheating Tip |
|---|---|---|---|
| Refrigerator | Airtight container | Up to 3 days | Reheat at 350°F for 5-7 minutes until crisp |
| Freezer | Freezer-safe bag or container | Up to 2 months | Reheat directly from frozen at 375°F for 12-15 minutes |
| Make-Ahead | Covered pan in fridge | Up to 12 hours before baking | Add 2-3 minutes to bake time if starting cold |
To reheat, the oven is your best friend — it restores the crispiness that the microwave kills. I’ve learned this the hard way after a soggy cruffin disaster in my early NYC days. For a quick lunch, pop them in a toaster oven at 350°F for 5 minutes. If you’re freezing baked cruffins, wrap each individually in plastic wrap, then place in a freezer bag. Thaw in the fridge overnight before reheating.
Variations & Easy Swaps
| Variation | Key Change | Best For | Difficulty Impact |
|---|---|---|---|
| Spicy Chorizo & Cheddar | Add 1/4 cup cooked crumbled chorizo, swap cheddar for mozzarella | Game-day snacks, brunch with a kick | Easy |
| Herb & Goat Cheese | Replace mozzarella with 1/2 cup crumbled goat cheese, add 1 tsp dried thyme | Easter brunch, light appetizer | Easy |
| Gluten-Free Version | Use gluten-free puff pastry (like Schar) and check cheese for fillers | Gluten-sensitive guests | Medium (pastry can be trickier) |
Spicy Chorizo & Cheddar
This variation reminds me of the smoky street food I loved in Paris at a little Spanish tapas bar. Cook 1/4 cup crumbled chorizo until crispy, let it cool, and sprinkle it over the cheese before rolling. Replace mozzarella with shredded sharp cheddar for a punchier flavor. The spicy, smoky notes pair beautifully with the garlic butter and make these cruffins a standout at any game-day gathering.
Herb & Goat Cheese
For a lighter, tangier cruffin, swap the mozzarella for 1/2 cup crumbled fresh goat cheese and add 1 teaspoon dried thyme (or 1 tablespoon fresh). The goat cheese melts into creamy pockets, while the thyme adds an earthy herbal note. This version is wonderful served alongside a fresh arugula salad with lemon vinaigrette — a combination I love making after a visit to the Union Square Greenmarket.
Gluten-Free Version
I’ve tested this with gluten-free puff pastry from Schar, and while it’s a bit more delicate, it works beautifully if handled gently. Let the pastry thaw in the fridge overnight (not at room temperature) and roll it between two sheets of parchment paper to avoid tearing. The garlic butter and cheese filling remain the same. Bake time may need an extra 2-3 minutes — look for the same golden-brown color. I developed this version for a gluten-intolerant friend who now requests them for every party.
What is the best type of cheese to use in a cheesy garlic cruffin?
The best cheese for a cheesy garlic cruffin is a combination of low-moisture whole-milk mozzarella for stretch and Parmesan for salty, nutty depth. Mozzarella melts beautifully without releasing excess water, keeping the pastry crisp. Parmesan adds that savory “umami” punch. If you want to experiment, provolone, fontina, or even Gruyère work well. Avoid fresh mozzarella (too wet) and pre-shredded blends (they often contain anti-caking agents that can affect melt). For a bolder flavor, add a handful of crumbled feta or blue cheese — but reduce the salt accordingly.
Can I make cheesy garlic cruffins ahead of time and reheat them?
Absolutely! You have two great options: First, assemble the cruffins completely, place them in the greased pan, cover tightly with plastic wrap, and refrigerate for up to 12 hours. When ready to bake, just pop them in the oven straight from the fridge — add 2 to 3 minutes to the baking time. Second, you can bake them fully, let them cool, and store in an airtight container in the fridge for up to 3 days or freeze for up to 2 months. To reheat, use the oven at 350°F for about 5-7 minutes (or 12-15 minutes from frozen). Avoid the microwave — it will make the pastry soggy.
How do I get the garlic butter filling to stay inside the cruffin while baking?
The key to keeping the garlic butter (and cheese) inside is a tight roll and proper sealing. After brushing the butter onto the pastry, roll it very tightly from the long edge, keeping even tension. Pinch the final seam firmly to seal. When you cut the log into slices, place each slice cut-side up in the pan and gently press down to flatten — this tucks the spiral layers together. Also, avoid overfilling: use a thin layer of garlic butter (about 2 tablespoons for the whole sheet) and don’t overload with cheese. If any filling tries to escape during baking, it will crisp into delicious bits that you can easily scrape off and serve as garnish.
What can I substitute for puff pastry if I don’t have any on hand?
If you don’t have puff pastry, your best substitute is crescent roll dough (from a can) — it’s similar in buttery flakiness but won’t puff as high. Unroll the dough, press the perforations together to form a single sheet, then proceed with the garlic butter and cheese. The texture will be more like a soft roll than a flaky cruffin, but still delicious. Another option is phyllo dough: brush 5-6 layers with butter, stack them, and use as a sheet. It will be much crisper and more delicate. For a gluten-free alternative, you can use gluten-free puff pastry (brands like Schar). Avoid using pie dough or pizza dough — they lack the layering needed for the cruffin shape.
Can I add other ingredients like vegetables or meat to this garlic cruffin recipe?
Yes, you can definitely customize these cheesy cruffins! For vegetables, finely chopped spinach (squeezed dry), sun-dried tomatoes, or roasted red peppers work well — just make sure they’re not too wet. For meat, crumbled cooked bacon, Italian sausage, or diced ham are great additions. Keep the total amount of add-ins to about 1/4 cup per sheet of pastry, otherwise the cruffins won’t roll tightly and may leak. I love adding a pinch of red pepper flakes or a drizzle of honey for a sweet-heat twist. Just remember to pat any wet ingredients dry before adding them to keep the pastry crisp.
Why did my cruffins turn out soggy instead of flaky?
Soggy cruffins are usually the result of too much moisture or not enough heat. The most common culprit is over-brushing the puff pastry with garlic butter — use just a thin, even layer. Another cause is using wet cheese — opt for low-moisture mozzarella and pat it dry with paper towels if needed. Also, make sure your oven is fully preheated to 375°F before baking; a lower temperature won’t create enough steam to puff the layers. Finally, don’t overcrowd the pan — leave a little space between cruffins so steam can escape. If you follow these tips, your cruffins will be golden and flaky every time.
Can I use garlic powder instead of fresh garlic?
I don’t recommend substituting garlic powder for fresh minced garlic in this recipe. Fresh garlic releases allicin and essential oils when minced, creating a pungent, aromatic base that infuses the butter and pastry. Garlic powder is more mild and can taste dusty when baked. If you’re in a pinch, you can use 1/2 teaspoon of garlic paste (from a tube) — it has a similar intensity to fresh. For a milder garlic flavor, roast a few garlic cloves in olive oil until soft, then mash them into the melted butter. That roasted garlic version is absolutely divine and less sharp.
How do I store leftover cheesy garlic cruffins?
Let leftover cruffins cool completely on a wire rack (about 30 minutes). Place them in an airtight container, layering with parchment paper if stacking, and store in the refrigerator for up to 3 days. For longer storage, wrap each cruffin individually in plastic wrap, then place them in a freezer-safe bag for up to 2 months. To reheat, place them on a baking sheet in a 350°F oven for 5-7 minutes (refrigerated) or 12-15 minutes (frozen). The oven method restores the crisp exterior. Avoid storing them at room temperature, as the cheese can spoil.
Can I make this garlic cruffin recipe dairy-free?
Yes, you can make a dairy-free version by substituting the butter with a plant-based butter (like Miyoko’s or Earth Balance) and using dairy-free mozzarella and Parmesan shreds (violife or Follow Your Heart work well). The puff pastry is often already dairy-free (check the label — many brands use vegetable oils instead of butter). If you use a plant-based puff pastry, proceed as directed. The texture will be slightly less flaky but still delicious. I tested this version for a friend’s dairy allergy and it held up beautifully — just be sure to brush the plant-based butter a little thicker to compensate for its lower fat content.
What size pan should I use for cruffins?
The ideal pan is a 6-cavity cruffin pan, which has a flared, spiraled shape that creates the classic cruffin look. If you don’t have one, a standard 12-cup muffin tin works perfectly — just use 6 of the cups (skip every other cup to allow even heat circulation). The cruffins will be shorter and more squat but just as delicious. For larger cruffins, you can use a jumbo muffin tin (bake for about 22-24 minutes). Avoid using mini muffin tins, as the pastry will be too thin and may burn. Grease the pan generously, especially the bottom corners, to prevent sticking.
Share Your Version!
I absolutely love seeing how you put your own spin on this Cheesy Garlic Cruffin recipe. Did you go the classic route, or did you add something wild like chorizo or goat cheese? Drop a comment below and let me know — I read every single one and often feature my favorites in stories! If you snap a photo, tag me on Instagram @exorecipes or on Pinterest — I want to see those golden, cheesy spirals.
And hey, if there’s a specific twist you’re curious about (like making them vegan or using a different pastry dough), just ask in the comments. I test reader suggestions all the time! Your feedback helps me create recipes that truly work in home kitchens across the country — from tiny NYC apartments to sprawling suburban kitchens.
From my NYC kitchen to yours — I hope this recipe brings as much warmth to your table as it does to mine. — mia 🧡
Love This Recipe? Save It to Pinterest!
If you enjoyed this Cheesy Garlic Cruffin recipe, don’t let it get lost in your browser tabs! 😄 Pin it now so you can find it again anytime — and explore hundreds more tried-and-tested recipes waiting for you on my Pinterest boards.
👉 Follow mia on Pinterest @chefrecipes2
📌 Pin this recipe · 🔁 Re-pin your favorites · 💬 Tag me when you make it — I love seeing your creations!

Cheesy Garlic Cruffin Recipe: A Flavorful Twist on a Classic Favorite
- Prep Time: 10 minutes
- Cook Time: 20 minutes
- Total Time: 30 minutes
- Yield: 6 1x
- Method: Appetizer
- Cuisine: American
Description
A savory cruffin filled with gooey cheese and aromatic garlic, offering a delightful twist on the classic sweet pastry.
Ingredients
- 1 sheet puff pastry, thawed
- 1 cup shredded mozzarella cheese
- 1/2 cup grated Parmesan cheese
- 2 cloves garlic, minced
- 2 tablespoons butter, melted
- 1 tablespoon chopped fresh parsley
- 1/2 teaspoon salt
- 1/4 teaspoon black pepper
Instructions
- Preheat oven to 375°F (190°C). Grease a cruffin or muffin tin.
- In a small bowl, combine melted butter, minced garlic, and parsley.
- Unfold puff pastry sheet on a lightly floured surface. Brush with garlic butter mixture.
- Sprinkle mozzarella and Parmesan cheeses evenly over the pastry.
- Roll the pastry tightly into a log, then cut into 6 equal slices.
- Place each slice cut-side up into the prepared tin.
- Bake for 18-20 minutes until golden and puffed.
- Let cool for 5 minutes before serving.
Notes
For extra flavor, add a pinch of red pepper flakes or substitute cheddar for mozzarella.
Nutrition
- Calories: 320
- Sugar: 1 g
- Fat: 24 g
- Carbohydrates: 18 g
- Protein: 9 g
Tried This Recipe? Leave a Comment!
Did you make this recipe? I’d love to hear how it turned out! Please leave a comment and a rating below. Your feedback helps other home cooks and supports cheerychop.com!