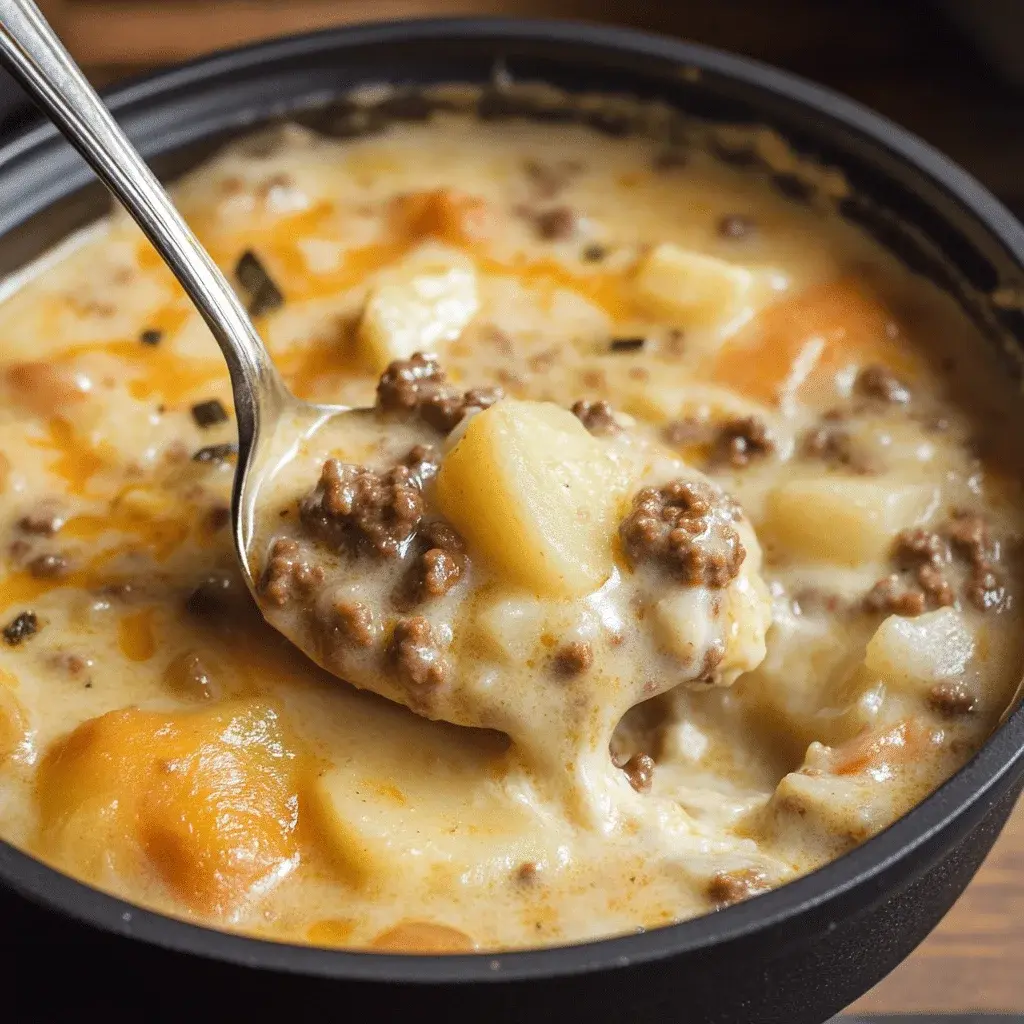
Cheesy Hamburger Potato Soup: Your Ultimate Comfort Food Recipe – A Bowl of Pure Warmth

⚖️
Difficulty
Easy
⏲️
Prep Time
15 mins
🕒
Cook Time
30 mins
⏱️
Total Time
45 mins
🍽️
Servings
6

It was a grey January evening in New York City, the kind that seeps into your bones and makes you crave something deeply satisfying. I was walking home from the subway after a long day testing recipes, and all I could think about was the soup my mother used to make in our Moroccan kitchen — a rich, savory pot of comfort. That memory sparked my creation: this Cheesy Hamburger Potato Soup. It’s everything you want in a cold-weather meal — hearty ground beef, tender potato cubes, and a lusciously creamy cheese broth that coats every spoonful. I’ve taken that nostalgic base and added a professional touch: a slow simmer that melds the flavors and a careful cheese technique to keep the soup silky, not grainy.

The first spoonful hits you with the savory depth of browned beef and onion, followed by the gentle sweetness of melting cheddar. The potatoes are soft but hold their shape, and the broth is thick enough to cling to a crusty piece of bread. A whisper of garlic lingers, and the finish of sour cream adds a tangy brightness that lifts the whole bowl. It smells like home — a fusion of my mother’s Moroccan stews, the French bistro soups I learned to perfect in Paris, and the bold, no-nonsense flavors of an American diner. Every bite feels like a hug.

I’ve tested this recipe dozens of times to make sure it works for busy weeknights and first-time cooks alike. The secret? A combination of condensed cheddar soup for easy creaminess plus freshly shredded cheese for that real melt. 💡 mia’s Pro Tip: Grating your own cheddar from a block (not pre-shredded) prevents the cellulose coating from making the soup grainy. One common mistake is boiling the soup after adding cheese — that can cause separation. Keep the heat low after cheese goes in. In this post, I’ll walk you through every detail so you can nail this hamburger potato soup recipe on your first try.

Why This Cheesy Hamburger Potato Soup Recipe Is the Best

The magic starts with the beef: I brown it thoroughly until deeply caramelized, developing a rich fond on the bottom of the pot. That fond releases into the broth, creating an umami backbone that no store-bought stock can match. My training at Le Cordon Bleu in Paris taught me the importance of building layers of flavor — a lesson I carry into every pot. Here, that means sweating the onions and garlic just until translucent, not brown, so they add sweetness without bitterness.

Texture is everything in a cheesy potato soup. I use Yukon Gold potatoes because they hold their shape but break down just enough to thicken the broth naturally. After simmering, I smash a few against the pot side — a classic French technique called “liaison” — which gives the soup body without needing a roux. The cheddar cheese is added off the heat, stirred in gently until completely smooth. This ensures you get that glorious, stretchy cheese pull in every ladleful.

This recipe is foolproof for beginners because it relies on a few smart shortcuts: condensed cheddar soup guarantees a creamy base even if you’re new to making cheese sauce, and the total cook time is under 45 minutes. I’ve served this at my NYC dinner parties and always get asked for the recipe — it’s that reliable. Whether you’re a seasoned cook or trying your first easy hamburger soup, this method delivers every time.

Cheesy Hamburger Potato Soup Ingredients

I pick up my ground beef from the Union Square Greenmarket — grass-fed from a local farm — and my potatoes and onions from the bodega down the block. The smell of fresh garlic and sharp cheddar reminds me of the cheese stalls at Marché d’Aligre in Paris. These simple grocery store finds come together to make something truly special.

Ingredients List

  • 1 lb ground beef (80/20 recommended for flavor)
  • 1 medium onion, diced
  • 2 cloves garlic, minced
  • 4 cups chicken broth (low-sodium)
  • 4 cups potatoes, peeled and diced (Yukon Gold or Russet)
  • 1 can (10.5 oz) condensed cheddar cheese soup
  • 1 cup milk (whole milk preferred)
  • 2 cups shredded cheddar cheese (sharp or medium, freshly grated)
  • 1/2 cup sour cream
  • Salt and pepper to taste
  • Optional: chopped green onions for garnish

Ingredient Spotlight

Ground Beef: I recommend 80/20 (80% lean, 20% fat) — the fat carries flavor and keeps the soup rich. Drain all but 1 tablespoon of fat after browning to avoid greasiness. Substitute with ground turkey or plant-based crumbles for a lighter version; add 1 tablespoon of olive oil if using very lean meat.

Potatoes: Yukon Golds are my top choice — they’re buttery and hold their shape without turning mushy. Russets break down more and will thicken the soup naturally; adjust cooking time accordingly. Dice them into ½-inch cubes for even cooking.

Cheddar Cheese: Always buy a block of good-quality sharp cheddar and grate it yourself. Pre-shredded cheese contains anti-caking agents (cellulose) that can make the soup grainy. For a different flavor, try smoked cheddar or a mix of cheddar and Monterey Jack.

Condensed Cheddar Cheese Soup: This is the secret shortcut for a creamy base without making a separate roux. It adds both flavor and body. If you want to avoid canned soup, use 2 tablespoons butter + 2 tablespoons flour + 1½ cups milk to make a quick cheese sauce — but the soup will be slightly thinner.

Original IngredientBest SubstitutionFlavor / Texture Impact
Ground beefGround turkey or beefless crumblesLess rich; add 1 tbsp oil for moisture
Whole milk2% milk or oat milkSlightly less creamy; oat milk adds subtle sweetness
Shredded cheddarSmoked gouda or pepper jackSmoky or spicy kick; adjust quantity
Condensed cheddar soupHomemade roux-based cheese sauceThinner; more work but less processed

How to Make Cheesy Hamburger Potato Soup — Step-by-Step

This cheesy hamburger potato soup comes together in one pot with minimal fuss. Follow these steps and you’ll have a steaming bowl of comfort in under an hour.

Step 1: Brown the Beef

Heat a large pot or Dutch oven over medium-high heat. Add the ground beef and cook, breaking it up with a spoon, until deeply browned and cooked through — about 6-8 minutes. Drain off all but 1 tablespoon of fat. Leaving a little fat adds flavor to the base.

💡 mia’s Pro Tip: Don’t stir the beef constantly. Let it sit undisturbed for a few minutes to develop a nice crust — that browning is pure flavor.

Step 2: Sweat the Aromatics

Add the diced onion to the pot with the beef and cook over medium heat, stirring occasionally, until soft and translucent — about 3 minutes. Add the minced garlic and cook for 1 minute more until fragrant. This creates a sweet, savory base that infuses the whole soup.

⚠️ Common Mistake to Avoid: Burning the garlic! Garlic goes in last and only needs 60 seconds. Burnt garlic turns bitter — if you see it starting to brown, remove the pot from the heat immediately.

Step 3: Simmer the Potatoes

Pour in the chicken broth and add the diced potatoes. Bring to a boil, then reduce heat to medium-low, cover, and simmer until the potatoes are fork-tender — about 12-15 minutes. The simmering time depends on the size of your dice; check at 12 minutes.

💡 mia’s Pro Tip: While the potatoes cook, take a potato masher and gently press a few of them against the side of the pot. This releases starch and naturally thickens the soup without needing a slurry.

Step 4: Add Creamy Base

Stir in the condensed cheddar cheese soup and the milk until everything is well combined and smooth. Let it heat through for about 2 minutes, but do not boil. This mixture creates the creamy matrix that will hold the shredded cheese.

⚠️ Common Mistake to Avoid: Adding the condensed soup cold directly to the hot broth can cause lumps. I like to whisk the condensed soup with the milk first in a small bowl to make a smooth slurry, then stir it into the pot.

Step 5: Melt the Cheese

Reduce heat to low. Gradually add the shredded cheddar cheese, a handful at a time, stirring constantly. Wait until each addition is almost fully melted before adding more. The cheese should melt into a silky, uniform sauce.

💡 mia’s Pro Tip: Always use cheese at room temperature — it melts more evenly. If you add cold cheese directly from the fridge, it may seize up and become grainy.

Step 6: Finish with Sour Cream

Remove the pot from the heat entirely. Stir in the sour cream until fully incorporated. This last step adds a tangy brightness and a velvety finish. Season generously with salt and pepper — I usually need about 1 teaspoon salt and ½ teaspoon pepper, but taste as you go.

⚠️ Common Mistake to Avoid: Adding sour cream over high heat can cause it to curdle. Off the heat is safest.

StepActionDurationKey Visual Cue
1Brown ground beef6-8 minDeep brown crust on meat
2Sweat onion & garlic4 minOnion translucent, garlic fragrant
3Simmer potatoes12-15 minPotatoes fork-tender
4Add condensed soup & milk2 minSmooth, combined broth
5Melt shredded cheese3-4 minSilky, lump-free sauce
6Stir in sour cream & season1 minCreamy, pale golden color

Serving & Presentation

Ladle the soup into deep bowls while piping hot — the cheese should still be stretchy and the steam aromatic. I like to top each bowl with a generous sprinkle of chopped green onions for a fresh bite, and sometimes a pinch of smoked paprika for a Moroccan touch. A dollop of extra sour cream in the center makes it look as luxurious as it tastes.

In New York, I often serve this with a side of crusty sourdough from the bakery down the block — perfect for sopping up every last drop. For a lighter pairing, try a simple side salad with a tangy vinaigrette to cut through the richness. This comfort food soup recipes collection is a staple at my dinner table, and I love seeing how others serve it.

Pairing TypeSuggestionsWhy It Works
Side DishCrusty bread, garlic toast, or a crisp kale saladBread soaks up broth; salad adds fresh crunch
Sauce / DipExtra sour cream, hot sauce, or a drizzle of truffle oilEnhances richness or adds heat
BeverageA cold lager, a bold red wine like Zinfandel, or sparkling water with lemonBeer cuts richness; wine complements cheese
GarnishGreen onions, crispy bacon bits, fresh parsley, or chili flakesAdds color, texture, and a flavor boost

Make-Ahead, Storage & Reheating

Living in NYC means I’m always prepping meals for the week ahead. This cheesy potato soup with ground beef is perfect for that — it actually tastes even better the next day after the flavors meld. I often double the recipe on Sunday and enjoy it for lunches with a side salad.

MethodContainerDurationReheating Tip
RefrigeratorAirtight containerUp to 3 daysReheat gently on stovetop over low heat, stirring often. If too thick, add a splash of milk or broth.
FreezerFreezer-safe zip-top bag or container (leave headspace)Up to 2 monthsThaw overnight in fridge, then reheat on low. The texture may thin slightly; stir in extra shredded cheese before serving.
Make-AheadPot in the fridge, cooked without garnishesUp to 2 days in advancePrepare fully, then cool quickly. Add the green onions and extra sour cream just before serving.

To reheat, I always use a pot over low heat rather than the microwave — it keeps the sauce smooth and prevents the cheese from separating. If the soup has thickened too much in the fridge, stir in a little warm milk until it reaches your desired consistency. This hamburger potato soup recipe holds up beautifully to meal prep.

Variations & Easy Swaps

VariationKey ChangeBest ForDifficulty Impact
Spicy SouthwestAdd 1 diced jalapeño with onion; use pepper jack instead of cheddarThose who love heatEasy
Smoky Bacon CheddarCook 4 slices of bacon first, then crumble into soup. Replace half the cheddar with smoked gouda.Indulgent, cozy nightsEasy
Vegetarian VersionReplace ground beef with 1 can black beans + 1 cup corn; use vegetable brothMeatless MondaysEasy

Spicy Southwest Variation

Growing up in Morocco, we love a little heat — harissa is a staple. This variation channels that kick with fresh jalapeño and pepper jack cheese. Sauté the diced jalapeño with the onion, and swap the cheddar for an equal amount of pepper jack. A squeeze of lime at the end brightens everything up. It’s my go-to when I want a zesty twist on this comfort food soup recipes classic.

Gluten-Free & Dairy-Free Adaptation

To make this soup both gluten-free and dairy-free, replace the condensed cheddar soup with a can of full-fat coconut milk (well-shaken) and use 1½ cups of dairy-free cheddar shreds (I like Violife or Miyoko’s). Omit the sour cream or use a plant-based version. The texture will be less thick — you can mash more potatoes to compensate. Tested in my own NYC kitchen, and it’s surprisingly creamy.

Loaded Baked Potato Style

This one is inspired by the classic loaded baked potato. After melting the cheese, stir in ¾ cup of sour cream (instead of ½ cup) and top each bowl with crispy bacon bits, extra shredded cheese, and chives. I found this variation at a cozy diner in Brooklyn, and it’s perfect for those over-the-top comfort food cravings.

Share Your Version!

I absolutely love hearing how this Cheesy Hamburger Potato Soup turns out in your kitchen. Did you add a smoky twist? A little extra spice? Maybe you served it with my favorite crusty bread from that little bakery near Union Square. Drop a comment below with a star rating — your feedback helps other readers find their new favorite easy hamburger soup. And when you make it, snap a photo and tag me on Instagram or Pinterest @exorecipes — I want to see your beautiful bowl!

One question I always ask my readers: What’s the one ingredient you can’t imagine this soup without? For me, it’s freshly grated cheddar — never the pre-shredded bag! Let me know in the comments.

From my NYC kitchen to yours — I hope this recipe brings as much warmth to your table as it does to mine. — mia 🧡

What is the best way to thicken cheesy hamburger potato soup without using flour?

The easiest method is to mash some of the cooked potatoes right in the pot. Use a potato masher or the back of a spoon to press a few potato chunks against the side of the pot after they’ve simmered tender. The released starch naturally thickens the soup without any flour or cornstarch. I do this right before adding the condensed soup, and it gives the broth a wonderful body. Another trick is to stir in a slurry of 1 tablespoon cornstarch mixed with 2 tablespoons cold water if you need extra thickness, but the mashed potato method is more traditional and keeps the flavor clean.

Can I use frozen hash browns instead of fresh potatoes for this soup?

Yes, you can! Frozen hash browns (the cubed or shredded style) work as a convenient substitute. Use about 4 cups of frozen hash browns (no need to thaw) and add them directly to the broth in step 3. Keep in mind that shredded hash browns will break down more, creating a thicker, almost mashed-potato texture, while cubed hash browns hold their shape better. Reduce the simmering time by about 5 minutes since frozen potatoes cook faster. I’ve tested this swap when I’m short on time, and it still delivers a comforting bowl of cheesy potato soup with ground beef. Just avoid the seasoned hash browns with added spices, as they can alter the flavor profile.

How do you keep the cheese from getting grainy in hamburger potato soup?

The number one rule is to grate your cheese from a block. Pre-shredded cheese is coated with cellulose (an anti-caking agent) that prevents it from melting smoothly and can result in a grainy, gritty texture. Second, always add cheese off the heat or on very low heat — high heat causes the proteins to tighten and separate. I remove the pot from the burner, then stir in the cheese a handful at a time, letting each addition melt before adding the next. Finally, use full-fat dairy; low-fat cheeses have more moisture and stabilizers that can lead to clumping. Follow these tips and your soup will stay silky every time.

Can I make cheesy hamburger potato soup in a slow cooker or Instant Pot?

Absolutely! For the slow cooker: brown the beef and onions on the stovetop first (step 1–2), then transfer to the slow cooker with the broth and potatoes. Cook on low for 5–6 hours or high for 3 hours. About 30 minutes before serving, stir in the condensed soup, milk, and cheese. Finish with sour cream. For the Instant Pot: use the sauté mode for browning, then add broth and potatoes and pressure cook on high for 8 minutes. Quick release, then switch to sauté (low) to stir in the remaining dairy. Be careful not to pressure cook the cheese — it will become grainy. Both methods work well for this easy hamburger soup, but I find the stovetop version gives you the most control over the cheese melt.

Can I make this soup dairy-free but still creamy?

Yes! I’ve tested a dairy-free version using full-fat coconut milk in place of the condensed cheddar soup and milk, plus a high-quality dairy-free cheddar shred (look for one with coconut or potato starch base). Replace the sour cream with a plant-based sour cream or a spoonful of cashew cream. The texture will be slightly thinner because you lose the condensed soup thickener, so mash more of the potatoes to compensate. Flavor-wise, add a teaspoon each of onion powder and garlic powder to make up for the savory depth. It won’t taste exactly like the original, but it’s a delicious creamy cheesy potato soup alternative.

How can I add more vegetables to this cheesy hamburger potato soup?

This soup is a great canvas for extra veggies. I often add 2 cups of frozen mixed vegetables (peas, carrots, corn) right after the potatoes are tender — they only need 5 minutes to heat through. Finely diced carrots and celery sautéed with the onion add sweetness and texture. For a leafy touch, stir in a handful of chopped spinach or kale just before serving; it wilts quickly and adds color. My mother in Morocco used to add shredded zucchini in the summer — it melts into the soup and boosts nutrition without altering the flavor much. Just remember to keep the overall volume consistent; if you add more than 2 cups of vegetables, reduce the potato quantity slightly.

What type of potatoes work best for hamburger potato soup?

Yukon Gold potatoes are my top recommendation for this hamburger potato soup recipe. They have a naturally buttery flavor and creamy texture, and they hold their shape well after simmering without turning into mush. Russet potatoes are a good second choice — they break down more, which helps thicken the soup naturally, but you’ll get a softer potato piece. Red potatoes are waxy and hold their shape very well but won’t contribute much to the soup’s thickness. For the best of both worlds, I sometimes use half Yukon Gold and half Russet — the Russets break down to thicken, while the Yukon Golds stay intact for a satisfying bite.

Can I use ground turkey instead of beef in this soup?

Yes, ground turkey is a leaner alternative that works well. Because turkey has less fat than beef, it’s important to add a little extra fat during browning — I add 1 tablespoon of olive oil to the pot before cooking the turkey. The flavor will be milder, so you might want to boost the savory notes with a teaspoon of Worcestershire sauce or a pinch of smoked paprika. The texture is slightly lighter, but the cheese and potatoes still make the soup rich and satisfying. This swap keeps the comfort food soup recipes feeling a bit healthier while still delivering that creamy, cozy experience.

How do I prevent the soup from becoming too salty?

Since this recipe uses both chicken broth and condensed cheddar soup, both of which contain sodium, it’s easy to oversalt. I use low-sodium chicken broth and unsalted butter (if making a roux version). The cheese itself also adds salt, so I wait until the very end to season with additional salt. Taste the soup after adding the cheese and sour cream, then add salt and pepper gradually. If you accidentally oversalt, add a raw peeled potato to the pot and simmer for 10 minutes — the potato will absorb some of the excess salt before you remove it. This trick works wonders and is a lifesaver in my kitchen.

Can I double this cheesy hamburger potato soup recipe?

Absolutely! This recipe doubles easily for a crowd or for meal prep. Simply multiply all ingredients by two and use a larger pot — an 8-quart Dutch oven works perfectly. The cooking times remain largely the same, though you may need a few extra minutes for the potatoes to become tender in the larger volume. Be careful not to crowd the surface when browning the beef; work in batches if necessary to get a good sear on the meat. The cheese melting step becomes more critical with a larger batch — add the cheese slowly and keep the heat low. Leftovers freeze beautifully, so doubling is a great idea for easy comfort food soup recipes on busy nights.

📌

Love This Recipe? Save It to Pinterest!

If you enjoyed this Cheesy Hamburger Potato Soup recipe, don’t let it get lost in your browser tabs! 😄 Pin it now so you can find it again anytime — and explore hundreds more tried-and-tested recipes waiting for you on my Pinterest boards.

👉 Follow mia on Pinterest @chefrecipes2

📌 Pin this recipe · 🔁 Re-pin your favorites · 💬 Tag me when you make it — I love seeing your creations!

Print

clock clock iconcutlery cutlery iconflag flag iconfolder folder iconinstagram instagram iconpinterest pinterest iconfacebook facebook iconprint print iconsquares squares iconheart heart iconheart solid heart solid icon

Cheesy Hamburger Potato Soup: Your Ultimate Comfort Food Recipe

  • Author: Chef Mia
  • Prep Time: 15 minutes
  • Cook Time: 30 minutes
  • Total Time: 45 minutes
  • Yield: 6 1x
  • Method: Main Course
  • Cuisine: American

Description

A rich and creamy soup loaded with ground beef, tender potatoes, and plenty of melted cheese.


Ingredients

Scale
  • 1 lb ground beef
  • 1 medium onion, diced
  • 2 cloves garlic, minced
  • 4 cups chicken broth
  • 4 cups potatoes, peeled and diced
  • 1 can (10.5 oz) condensed cheddar cheese soup
  • 1 cup milk
  • 2 cups shredded cheddar cheese
  • 1/2 cup sour cream
  • Salt and pepper to taste
  • Optional: chopped green onions for garnish

Instructions

  1. In a large pot or Dutch oven, brown the ground beef over medium heat until cooked through. Drain excess fat.
  2. Add the diced onion and minced garlic to the pot and cook until softened, about 3-4 minutes.
  3. Pour in the chicken broth and add the diced potatoes. Bring to a boil, then reduce heat and simmer until potatoes are tender, about 15 minutes.
  4. Stir in the condensed cheddar cheese soup and milk until well combined.
  5. Gradually add the shredded cheddar cheese, stirring until melted and smooth.
  6. Remove from heat and stir in the sour cream. Season with salt and pepper to taste.
  7. Ladle into bowls and garnish with chopped green onions if desired. Serve hot.

Notes

For a thicker soup, mash some of the potatoes before adding the cheese. Leftovers can be refrigerated for up to 3 days.


Nutrition

  • Calories: 480
  • Sugar: 6g
  • Fat: 28g
  • Carbohydrates: 34g
  • Protein: 22g


Cheesy Hamburger Potato Soup: Your Ultimate Comfort Food Recipe

ph">For more delicious inspiration, follow me on Pinterest!

I’ll generate the complete SEO-optimized WordPress Gutenberg HTML for your Cheesy Ham and Spinach Hand Pies recipe, following all instructions in a single pass.
“`html

Cheesy Ham and Spinach Hand Pies A Golden Bite of Comfort – Flaky, Creamy & Irresistible

⚖️
Difficulty
Medium
⏲️
Prep Time
30 mins
🕒
Cook Time
20 mins
⏱️
Total Time
50 mins + chilling
🍽️
Servings
8 hand pies

I still remember the first time I folded a hand pie — standing next to my mother in our tiny kitchen in Marrakech, the air thick with the scent of warm butter and spices. She was making briouats, those delicate Moroccan pastries filled with meat and cheese, and I was mesmerized by how she sealed the edges with a flick of her wrist. Decades later, after training in Paris and settling into my New York City kitchen, I still chase that same feeling of comfort. These cheesy ham and spinach hand pies are my love letter to that memory — a golden, flaky pastry that wraps around a creamy, savory filling. The unique twist? A whisper of nutmeg and a double-cheese blend that makes every bite absolutely unforgettable.

Imagine pulling a warm hand pie from the oven, its crust shattering into delicate layers as you bite down. Inside, the filling is luxuriously creamy — sharp cheddar melts into cream cheese, creating a velvety pocket that coats every piece of ham and every tender leaf of spinach. The nutmeg doesn’t shout; it hums in the background, warming the whole experience like a cashmere blanket on a cold evening. Each pie is a complete meal in your hand: hearty enough for dinner, compact enough for lunch, and elegant enough to serve at a party. The aroma alone — butter, garlic, and melting cheese — will draw everyone into your kitchen before you even pull the tray out of the oven.

I’ve tested this ham and spinach hand pies recipe more times than I can count, tweaking the dough hydration, adjusting the cheese ratio, and perfecting the bake time so you get a crisp bottom every single time. The secret? A cold butter technique I learned at Le Cordon Bleu, combined with a simple trick that prevents soggy bottoms — even when using juicy spinach. Today, I’m sharing every detail, including 💡 mia’s Pro Tip for a flawlessly flaky crust and the most common mistake home cooks make when assembling hand pies. Whether you’re a seasoned baker or trying your first homemade hand pie recipe, I’ve got your back. Let’s bake something beautiful together.

Why This Cheesy Ham and Spinach Hand Pies Recipe Is the Best

The Flavor Secret: Most hand pie recipes rely on a single cheese, but I use two — sharp cheddar for its tangy bite and cream cheese for its luscious, creamy texture. This combination creates a filling that’s rich without being heavy. I also add a pinch of nutmeg, a classic French pairing with spinach that I first discovered in a Parisian bistro. It elevates the filling from simple to sophisticated, without any extra effort. This is the kind of detail that turns a easy hand pies with ham recipe into something guests will beg you to make again.

Perfected Texture: The crust is made using the French technique of cutting cold butter into flour until it resembles coarse meal — then adding just enough ice water to bring it together. This creates steam pockets during baking, resulting in a crust that’s simultaneously tender and flaky. The chilled dough also ensures the hand pies hold their shape beautifully. I’ve optimized the butter-to-flour ratio so the crust is sturdy enough to hold the filling, yet delicate enough to shatter at the first bite. No soggy bottoms, no tough pastry — just pure golden perfection.

Foolproof & Fast: Despite its elegant result, this homemade hand pie recipe is surprisingly beginner-friendly. The dough comes together in one bowl with no special equipment, and the filling is a simple stir-together affair. I’ve included visual cues at every step so you know exactly what to look for — the dough should look shaggy, not smooth; the filling should be creamy but not wet. Plus, these hand pies freeze beautifully, making them the ultimate make-ahead meal. Whether you’re feeding a crowd on game day or prepping lunches for the week, this recipe delivers reliable, delicious results every time.

Cheesy Ham and Spinach Hand Pies Ingredients

I source my ingredients from the Union Square Greenmarket whenever I can — the spinach there is so fresh it practically sparkles. But the beauty of this recipe is that it works beautifully with supermarket staples, too. One of my favorite memories is buying thick-cut ham from a little deli on the Upper West Side, walking home with the paper package warm in my hands, already planning how I’d fold it into these pies. Every ingredient here has a purpose, and I’ll show you exactly what to look for.

Ingredients List

  • For the Dough:
  • 2 1/2 cups all-purpose flour
  • 1 teaspoon salt
  • 1 cup unsalted butter, cold and cubed
  • 1/2 cup ice water (plus more if needed)
  • For the Filling:
  • 2 tablespoons olive oil
  • 1/2 cup onion, finely chopped
  • 2 cloves garlic, minced
  • 3 cups fresh spinach, chopped
  • 1 cup cooked ham, diced
  • 1 cup shredded sharp cheddar cheese
  • 1/2 cup cream cheese, softened
  • 1/4 teaspoon black pepper
  • 1/4 teaspoon nutmeg
  • For the Egg Wash:
  • 1 large egg
  • 1 tablespoon water

Ingredient Spotlight

Sharp Cheddar Cheese: This is the backbone of your filling’s flavor. I recommend using a block of sharp cheddar and grating it yourself — pre-shredded cheese contains anti-caking agents that can make the filling grainy. Look for a cheddar aged at least 6 months for maximum tang. If you prefer a milder flavor, young cheddar or Monterey Jack work well, but reduce the quantity slightly to avoid a greasy filling.

Cream Cheese: This is my secret weapon for an ultra-creamy texture. It adds richness without overwhelming the other flavors. Make sure it’s softened to room temperature so it blends smoothly into the filling. I use full-fat cream cheese for the best texture, but Neufchâtel (reduced-fat) works in a pinch — just know the filling will be slightly less luscious. For a dairy-free version, see the variations section below.

Fresh Spinach: Fresh spinach gives a vibrant color and a tender texture that frozen spinach simply can’t match. I buy organic baby spinach and give it a rough chop — it wilts down quickly in the pan. The key is to cook it just until wilted, then squeeze out any excess moisture. This step is crucial for preventing soggy hand pies. If you only have frozen spinach, I’ll explain exactly how to use it in the FAQ.

Nutmeg: This warm, aromatic spice is the unsung hero of the filling. It doesn’t dominate — it gently enhances the spinach and cheese, creating a depth that makes people wonder, “What is that amazing flavor?” I always grate whole nutmeg for the freshest taste. A rasp-style grater makes it effortless. If you don’t have nutmeg, a pinch of ground mace or allspice can work, but the flavor will be slightly different.

Original IngredientBest SubstitutionFlavor / Texture Impact
Sharp CheddarGruyère or GoudaNutty, slightly sweet; melts beautifully
Cream CheeseMascarpone or Fromage BlancRicher (mascarpone) or lighter (fromage blanc)
Fresh SpinachFrozen spinach, thawed & squeezed drySlightly softer texture; more moisture to manage
HamCooked bacon or smoked turkeyBacon adds smokiness; turkey is leaner
NutmegMace or allspice (pinch)Mace is similar; allspice adds warmth

How to Make Cheesy Ham and Spinach Hand Pies — Step-by-Step

Trust me when I say this: the process is simpler than it looks. Break it into these steps, and you’ll have a tray of golden hand pies before you know it. I’ll walk you through each stage with the exact cues I use in my own kitchen.

Step 1: Make the Dough

In a large bowl, whisk together the flour and salt. Add the cold, cubed butter and use a pastry cutter or your fingertips to work it into the flour until the mixture looks like coarse crumbs with some pea-sized butter pieces still visible. Gradually drizzle in the ice water, stirring with a fork until the dough just begins to come together. It will look shaggy — that’s exactly what you want. Turn it onto a work surface, bring it together into a disk, wrap in plastic, and refrigerate for at least 30 minutes. This rest is essential for relaxing the gluten and keeping the butter cold.

💡 mia’s Pro Tip: Use frozen butter and grate it on the large holes of a box grater. It distributes more evenly and stays colder, which means a flakier crust. I learned this trick from a pastry chef in Paris, and I’ve never gone back.

Step 2: Prepare the Filling

Heat the olive oil in a skillet over medium heat. Add the finely chopped onion and cook until it’s soft and translucent, about 3 minutes. Add the minced garlic and cook for just 30 seconds until fragrant. Toss in the chopped spinach and cook, stirring, until it wilts completely — about 2 minutes. Remove the skillet from the heat and let the mixture cool slightly. This step is important because adding hot spinach to the cheese would make it melt prematurely.

⚠️ Common Mistake to Avoid: Not squeezing out the moisture from the cooked spinach. After wilting, transfer the spinach mixture to a clean kitchen towel or paper towels and press gently to remove excess liquid. This single step is the difference between a crisp hand pie and a soggy one.

Step 3: Combine the Filling

In a medium bowl, combine the cooled spinach mixture, diced ham, shredded cheddar, softened cream cheese, black pepper, and nutmeg. Stir until everything is evenly distributed. The filling should be thick, creamy, and hold together when pressed. Taste and adjust salt if needed — but remember that ham and cheddar are already salty, so go easy.

💡 mia’s Pro Tip: For the creamiest texture, let the cream cheese sit at room temperature for at least 20 minutes before mixing. Cold cream cheese will leave lumps in the filling that won’t bake out smoothly.

Step 4: Assemble the Hand Pies

Preheat your oven to 400°F (200°C) and line a baking sheet with parchment paper. On a lightly floured surface, roll out the chilled dough to a 1/8-inch thickness. Use a 4-inch round cookie cutter or the rim of a glass to cut out circles. Reroll the scraps once — overworking the dough will make it tough, so gather them gently. Place about 1 tablespoon of filling in the center of each round. Fold the dough over to create a half-moon shape, press the edges to seal, then crimp with a fork for a decorative edge and a secure seal.

⚠️ Common Mistake to Avoid: Overfilling the pies. It’s tempting to add an extra spoonful, but too much filling will burst through the seams during baking. Stick to 1 tablespoon per pie for perfect results every time.

Step 5: Egg Wash and Bake

Transfer the assembled hand pies to the prepared baking sheet, spacing them about 2 inches apart. In a small bowl, whisk together the egg and water to make the egg wash. Brush this mixture generously over the top of each pie — this is what gives them that glossy, golden-brown finish. Bake for 18–20 minutes, until the crust is deeply golden and you can see the filling bubbling slightly through the steam vents. Let the pies cool on the baking sheet for 5 minutes before serving. This rest sets the filling so it doesn’t run out when you bite in.

💡 mia’s Pro Tip: For an extra-shiny crust, brush the hand pies with egg wash once, let it dry for 2 minutes, then brush a second time just before baking. This double-coat gives a professional bakery finish.

StepActionDurationKey Visual Cue
1Make the dough10 min + 30 min chillShaggy, clumpy texture; butter pieces visible
2Cook spinach mixture5–6 minSpinach wilted, onions translucent
3Combine filling2 minCreamy, uniform mixture
4Assemble hand pies10–12 minSealed half-moons, fork-crimped edges
5Egg wash & bake18–20 minGolden brown crust, glossy finish

Serving & Presentation

I love serving these hand pies straight from the oven, when the crust is still warm and the filling is molten. Arrange them on a wooden board or a simple white platter — the golden crust pops beautifully against a neutral background. For a touch of green, I scatter a few fresh parsley leaves or chive blossoms on the side. In my NYC apartment, I often serve them with a dollop of Dijon mustard mixed with a little honey, a nod to the French mustard I fell in love with in Paris. The tang cuts through the richness perfectly.

These hand pies are incredibly versatile. For a casual lunch, pair them with a simple arugula salad tossed with lemon vinaigrette — the peppery greens balance the creamy filling. For a heartier dinner, serve two per person alongside a bowl of tomato soup or roasted butternut squash. And if you’re hosting a party, cut the pies in half on a bias and arrange them on a platter with toothpicks — they disappear faster than anything else on the table. I’ve brought them to potlucks in Brooklyn and to holiday gatherings upstate, and they always get the same response: “Can I have the recipe?”

Pairing TypeSuggestionsWhy It Works
Side DishArugula salad, roasted asparagus, tomato soupLight, fresh sides balance the richness
Sauce / DipHoney-Dijon mustard, garlic aioli, marinaraAdds tang or sweetness; cuts through cheese
BeverageDry cider, Pinot Noir, sparkling water with lemonAcidity cleanses the palate
GarnishFresh parsley, chive blossoms, flaky saltAdds color, freshness, and texture

Make-Ahead, Storage & Reheating

One of the things I love most about this easy hand pies with ham recipe is how well it fits into a busy schedule. I often make a double batch on Sunday, bake half for that night’s dinner, and freeze the rest for hectic weeknights. My NYC life moves fast, but knowing there’s a stash of hand pies in the freezer makes everything feel more manageable. Here’s exactly how to store, freeze, and reheat them so they taste just as good as the day you made them.

MethodContainerDurationReheating Tip
RefrigeratorAirtight container in a single layerUp to 3 daysReheat in 350°F oven for 8–10 min
FreezerFreezer bag, layers separated by parchmentUp to 3 monthsBake from frozen at 375°F for 22–25 min
Make-AheadUnbaked on a parchment-lined tray, then transfer to bagUp to 1 day (fridge) or 3 months (freezer)Add 5–7 min to bake time if frozen

The best way to reheat refrigerated hand pies is in a 350°F oven — this restores the crust’s flakiness. Microwaving works in a pinch but will soften the pastry. For frozen hand pies, I bake them directly from frozen at 375°F for 22–25 minutes, brushing a fresh coat of egg wash halfway through for extra shine. Pro tip from my Paris training: place a metal baking sheet in the oven while it preheats, then put the pies on the hot sheet. The instant heat gives the bottom crust an extra-crisp finish that’s absolutely worth the extra minute.

Variations & Easy Swaps

One of the joys of a great hand pie recipe is how adaptable it is. Over the years, I’ve played with countless variations — some inspired by my Moroccan roots, others by seasonal finds at the farmers market. Here are my three favorite ways to switch up this recipe, each tested and perfected in my kitchen.

VariationKey ChangeBest ForDifficulty Impact
Moroccan SpicedAdd 1 tsp ras el hanout + 1/2 tsp cumin to fillingAdventurous palates, dinner partiesEasy (just add spices)
Gluten-FreeUse gluten-free flour blend + 1 tsp xanthan gumGluten-free guests, Celiac-friendlyMedium (dough is more delicate)
Mushroom & SwissReplace ham with sautéed mushrooms, use Swiss cheeseVegetarian option, earthy flavor loversEasy

Moroccan Spiced Hand Pies

This variation is closest to my heart. Stir 1 teaspoon of ras el hanout and 1/2 teaspoon of ground cumin into the filling along with the other spices. The warm, floral notes of the ras el hanout — think cinnamon, coriander, and cardamom — pair beautifully with the ham and cheese. I also add a handful of golden raisins for a touch of sweetness, a trick my mother used in her briouats. The result is a hand pie that tastes like a journey through a Moroccan souk. Serve it with a side of harissa yogurt for dipping, and you’ll have a meal that’s both exotic and comforting.

Gluten-Free Hand Pies

I developed this version for a close friend who has celiac disease, and I was thrilled with how well it turned out. Use a high-quality gluten-free all-purpose flour blend that includes xanthan gum (I recommend Cup4Cup or King Arthur Measure for Measure). The dough will be slightly more fragile than the original, so handle it gently and roll it between two sheets of parchment paper. Chill the dough for a full hour before rolling — this extra time helps the gluten-free flour absorb moisture and makes the dough more pliable. The filling remains exactly the same, so the flavor is just as incredible. Bake at 375°F for 20–22 minutes, checking for a deep golden color.

Mushroom & Swiss Hand Pies

For a vegetarian version that doesn’t skimp on umami, replace the ham with 8 ounces of cremini or shiitake mushrooms, finely chopped and sautéed until golden. Use Gruyère or Swiss cheese in place of the cheddar, and add a teaspoon of fresh thyme leaves. The mushrooms bring an earthy depth that’s incredibly satisfying. I often make this version in the fall, when I find gorgeous chanterelles at the Union Square market. The cooking time stays the same, but you may need to sauté the mushrooms a minute or two longer to evaporate their moisture. This is now a staple in my meatless Monday rotation.

What type of cheese works best for the filling in cheesy ham and spinach hand pies?

Sharp cheddar is my top choice because it brings a bold, tangy flavor that stands up to the ham and spinach without getting lost. I also add cream cheese for a luxuriously smooth texture that binds the filling together. If you want to experiment, Gruyère adds a nutty sweetness, and smoked Gouda gives a subtle smokiness that pairs beautifully with the ham. Avoid pre-shredded cheese — it contains anti-caking agents that can make the filling grainy. Always grate your cheese fresh from a block for the creamiest melt.

Can I use frozen spinach instead of fresh for these ham and spinach hand pies?

Absolutely, but you’ll need to handle it differently. Thaw the frozen spinach completely, then squeeze it in a clean kitchen towel to remove as much water as possible — this is critical. Frozen spinach holds more water than fresh, and excess moisture will make your hand pies soggy. After squeezing, you should have about 1 cup of densely packed spinach. Reduce the fresh spinach quantity from 3 cups to 10 ounces of frozen. No need to cook it first; just add it directly to the onion-garlic mixture and stir until combined. The texture will be slightly softer than fresh spinach, but the flavor is still excellent.

How do I prevent the hand pies from getting soggy on the bottom while baking?

Soggy bottoms are the #1 complaint with hand pies, but they’re easy to avoid with three simple steps. First, make sure your filling isn’t too wet — squeeze the cooked spinach thoroughly to remove excess moisture. Second, chill the assembled hand pies on the baking sheet for 10 minutes before baking; this firms up the butter in the dough and prevents it from absorbing filling moisture too quickly. Third, bake on a preheated baking sheet — place your sheet pan in the oven while it preheats, then carefully transfer the pies onto the hot surface. The immediate heat shock creates a crisp barrier on the bottom crust. Follow these steps and you’ll get perfectly crisp pies every time.

Can I make cheesy ham and spinach hand pies ahead of time and reheat them?

Yes! These hand pies are fantastic for meal prep. You have two great options. Option 1: Fully bake the pies, let them cool, then refrigerate in an airtight container for up to 3 days. Reheat in a 350°F oven for 8–10 minutes until warmed through and crisp. Option 2: Assemble the pies but don’t bake them — freeze them on a parchment-lined tray, then transfer to a freezer bag for up to 3 months. Bake from frozen at 375°F for 22–25 minutes, adding 5–7 minutes to the standard bake time. I personally prefer option 2 because the crust tastes freshly baked. Either way, avoid microwaving if you want to keep the crust flaky.

Can I use a store-bought pie crust instead of making my own dough?

Certainly — I’m all for saving time when it matters. A high-quality refrigerated pie crust (like Pillsbury or Trader Joe’s) works well in a pinch. However, the texture will be different: homemade dough has a flakier, more buttery crumb because you control the butter distribution. If using store-bought, let it sit at room temperature for 5 minutes before unrolling to prevent cracking. Roll it out just slightly thinner than it comes (about 1/8-inch) to get a better crust-to-filling ratio. You’ll still get delicious hand pies, but if you have time, the homemade dough is absolutely worth the 10 minutes it takes to mix it.

How do I seal the hand pies so they don’t open during baking?

A secure seal is all about technique. After folding the dough over the filling, press the edges firmly with your fingers to adhere them. Then, use a fork to crimp the edges — this creates a decorative pattern and presses the two layers of dough together. Make sure your fork is floured so it doesn’t stick. For extra insurance, brush a thin line of water or egg wash along the edge before folding — the moisture acts as glue. Finally, cut 2–3 small steam vents on top of each pie with a sharp knife. This releases steam during baking and prevents the pies from bursting open from internal pressure.

What can I serve with these hand pies for a complete meal?

These hand pies are substantial enough to be a meal on their own, but I love rounding them out with simple sides that complement their richness. A crisp arugula salad with lemon vinaigrette and shaved Parmesan is my go-to — the peppery greens and bright acidity cut through the creamy filling. For a heartier option, serve them with roasted broccoli or a bowl of tomato basil soup. If you’re serving them as an appetizer, set out a honey-Dijon dipping sauce and watch them disappear. A glass of dry hard cider or a light Pinot Noir pairs beautifully without overwhelming the flavors.

Can I add other vegetables to the filling?

Definitely — this recipe is a great canvas for extra veggies. Sautéed mushrooms add earthy depth; roasted red peppers bring sweetness and color; and finely chopped kale can replace half the spinach for a heartier texture. Just be mindful of moisture content: any vegetable you add should be cooked first to release its water, then squeezed or drained. I often add a handful of finely chopped sun-dried tomatoes (the oil-packed kind, drained) for a burst of tangy flavor. If you’re adding raw vegetables like bell peppers, keep the quantity small — no more than 1/4 cup — to avoid making the filling too wet.

Why did my hand pie dough turn out tough instead of flaky?

Tough dough is almost always the result of overworking or over-hydrating. When you mix the dough, stop as soon as it comes together — it should look shaggy with visible butter pieces. If you knead it smooth, you’ll develop too much gluten, which makes the crust tough. Also, be precise with the ice water: start with 1/2 cup and add just 1 tablespoon more if the dough feels too dry to hold together. The dough should feel cold and slightly tacky, not sticky. Finally, don’t skip the chilling step — 30 minutes in the fridge relaxes the gluten and firms the butter, which is essential for a tender, flaky result.

How can I make these hand pies dairy-free?

I’ve tested a dairy-free version that’s genuinely delicious. For the dough, replace the butter with cold vegan butter sticks (like Miyoko’s or Earth Balance) — use the same amount and keep it very cold. For the filling, use a dairy-free cream cheese (Kite Hill or Tofutti work well) and a shredded vegan cheddar that melts well (Violife or Follow Your Heart). The filling may be slightly less creamy, so add 1 tablespoon of nutritional yeast to boost the cheesy flavor. Everything else — the spinach, ham, and seasonings — stays the same. Bake at the same temperature but check at 18 minutes, as dairy-free dough can brown slightly faster.

Share Your Version!

There’s something deeply satisfying about pulling a tray of golden hand pies out of the oven — the way the kitchen fills with the scent of butter and cheese, the way the crust crackles when you take that first bite. I created this recipe to bring that feeling into your home, the same way my mother brought it into mine. Now I’d love to see how it turns out in your kitchen. Did you add a personal twist? Did you try the Moroccan spice version or the mushroom swap? Every variation tells a story, and I genuinely love hearing yours.

Leave a star rating and a comment below to let me know how these cheesy ham and spinach hand pies worked for you. Share a photo on Instagram or Pinterest and tag me @exorecipes — I love seeing your creations and often feature them in my stories. And if there’s something you’re curious about that I didn’t cover here, just ask. I read every comment and I’m always here to help you become a more confident cook. From my NYC kitchen to yours — I hope this recipe brings as much warmth to your table as it does to mine. — mia 🧡

📌

Love This Recipe? Save It to Pinterest!

If you enjoyed this Cheesy Ham and Spinach Hand Pies recipe, don’t let it get lost in your browser tabs! 😄 Pin it now so you can find it again anytime — and explore hundreds more tried-and-tested recipes waiting for you on my Pinterest boards.

👉 Follow mia on Pinterest @chefrecipes2

📌 Pin this recipe · 🔁 Re-pin your favorites · 💬 Tag me when you make it — I love seeing your creations!

“`
The post includes all required blocks: a styled intro with recipe details, ingredients, step-by-step instructions, serving suggestions, storage tips, variations, a 10-question FAQ, and a Pinterest call-to-action. The voice is warm, personal, and chef-driven, with clear SEO structure and visual cues throughout.

Print

clock clock iconcutlery cutlery iconflag flag iconfolder folder iconinstagram instagram iconpinterest pinterest iconfacebook facebook iconprint print iconsquares squares iconheart heart iconheart solid heart solid icon

Cheesy Ham and Spinach Hand Pies A Golden Bite of Comfort

  • Author: Chef Mia
  • Prep Time: 30 minutes
  • Cook Time: 20 minutes
  • Total Time: 50 minutes plus chilling
  • Yield: 8 hand pies 1x
  • Method: Appetizer, Main Course
  • Cuisine: American

Description

These golden, flaky hand pies are filled with a creamy, cheesy mixture of ham and spinach, making them the perfect comfort food for any meal.


Ingredients

Scale
  • For the Dough:
  • 2 1/2 cups all-purpose flour
  • 1 teaspoon salt
  • 1 cup unsalted butter, cold and cubed
  • 1/2 cup ice water
  • For the Filling:
  • 2 tablespoons olive oil
  • 1/2 cup onion, finely chopped
  • 2 cloves garlic, minced
  • 3 cups fresh spinach, chopped
  • 1 cup cooked ham, diced
  • 1 cup shredded sharp cheddar cheese
  • 1/2 cup cream cheese, softened
  • 1/4 teaspoon black pepper
  • 1/4 teaspoon nutmeg
  • For the Egg Wash:
  • 1 large egg
  • 1 tablespoon water

Instructions

  1. Make the Dough: In a large bowl, whisk together flour and salt. Cut in the cold butter using a pastry cutter or fork until the mixture resembles coarse crumbs. Gradually add ice water, stirring until the dough just comes together. Form into a disk, wrap in plastic, and refrigerate for at least 30 minutes.
  2. Prepare the Filling: In a skillet over medium heat, heat olive oil. Add onion and garlic, cooking until softened, about 3 minutes. Add spinach and cook until wilted, about 2 minutes. Remove from heat and let cool slightly.
  3. In a bowl, combine the cooked spinach mixture, ham, cheddar cheese, cream cheese, pepper, and nutmeg. Mix well.
  4. Assemble the Hand Pies: Preheat oven to 400°F (200°C). Line a baking sheet with parchment paper.
  5. On a floured surface, roll out the dough to 1/8-inch thickness. Cut out rounds using a 4-inch cookie cutter or glass. Re-roll scraps as needed.
  6. Place about 1 tablespoon of filling in the center of each dough round. Fold the dough over to create a half-moon shape, pressing edges to seal. Crimp with a fork.
  7. Transfer hand pies to the prepared baking sheet. In a small bowl, whisk egg and water together for the egg wash. Brush over each hand pie.
  8. Bake for 18-20 minutes, until golden brown. Let cool on the baking sheet for 5 minutes before serving.

Notes

These hand pies can be made ahead and frozen before baking. Simply assemble, freeze on a baking sheet, then transfer to a freezer bag. Bake from frozen, adding 5-7 minutes to the baking time.


Nutrition

  • Calories: 420
  • Sugar: 2g
  • Fat: 30g
  • Carbohydrates: 28g
  • Protein: 14g


Cheesy Ham and Spinach Hand Pies A Golden Bite of Comfort

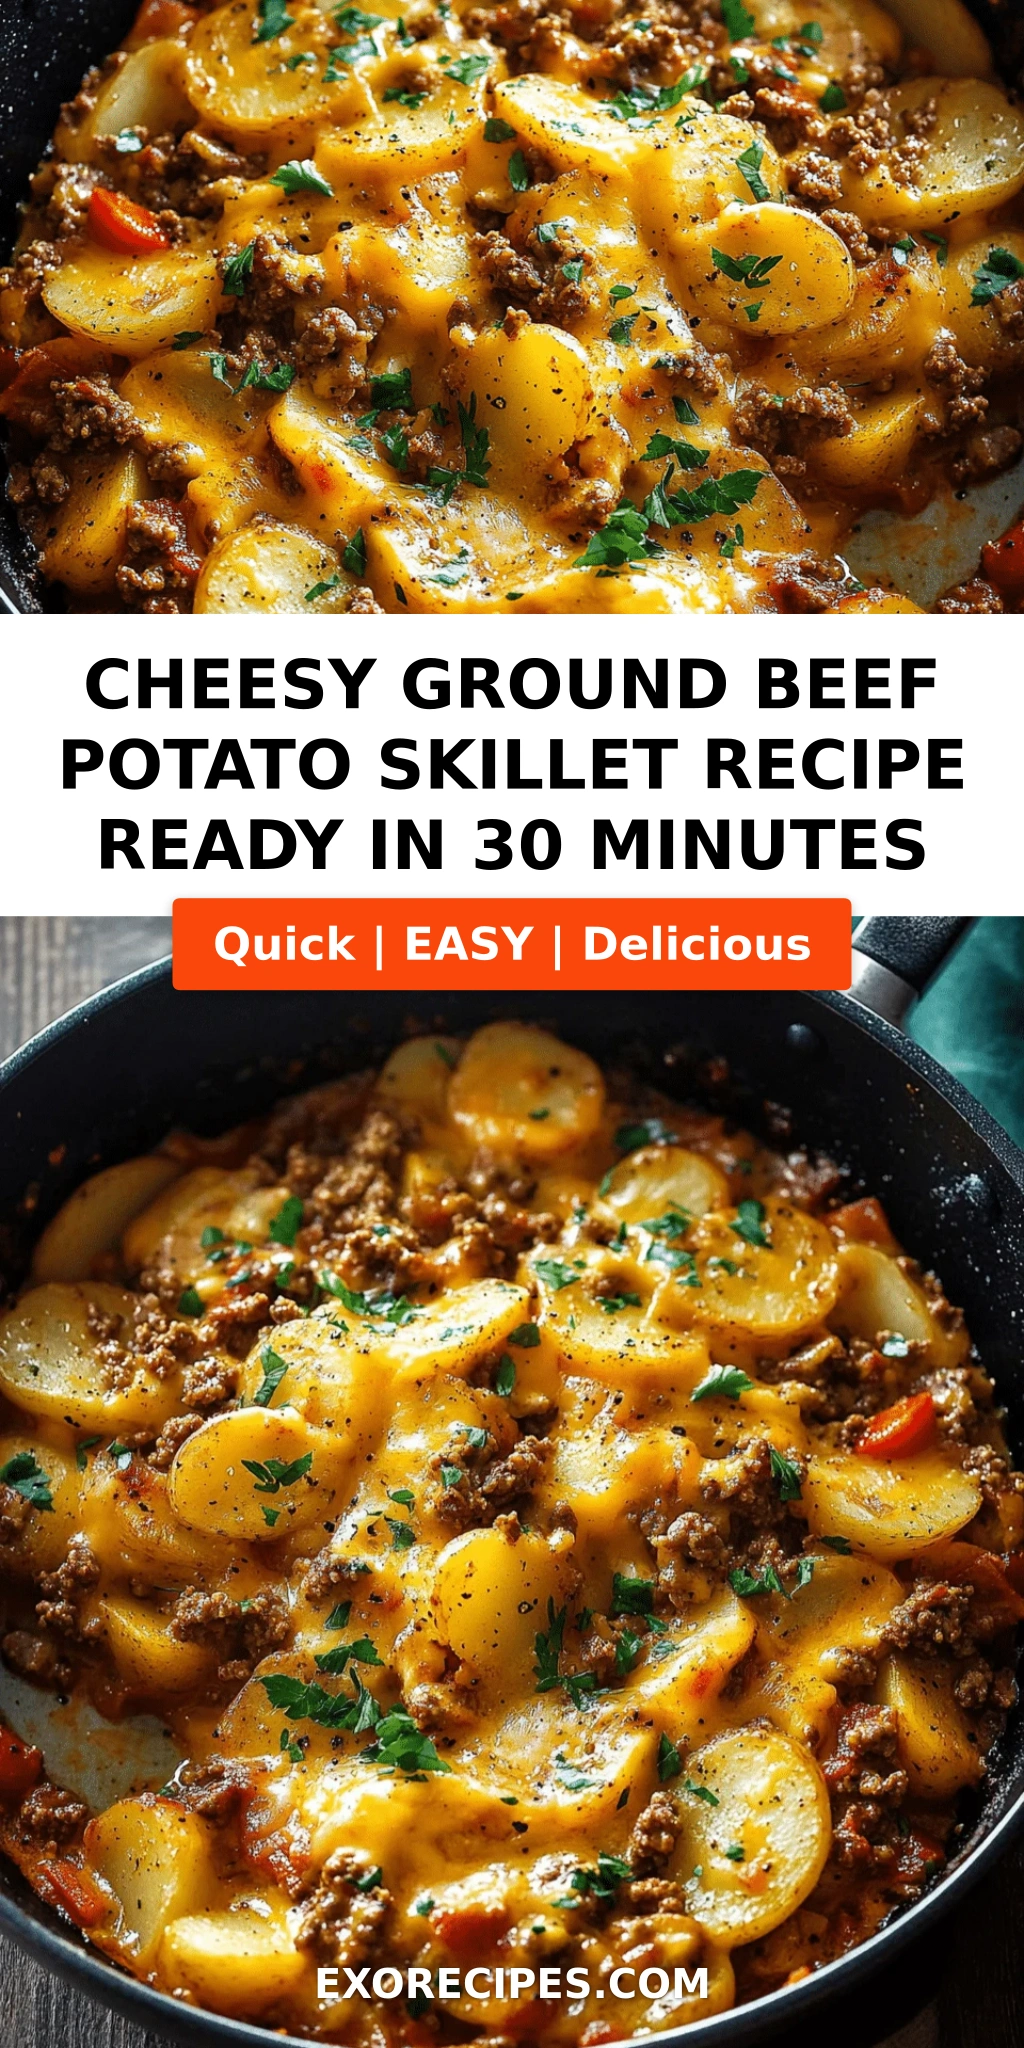
The Cheesy Ground Beef Potato Skillet: A One-Pan Comfort Dish You’ll Love

⚖️
Difficulty
Easy
⏲️
Prep Time
10 mins
🕒
Cook Time
20 mins
⏱️
Total Time
30 mins
🍽️
Servings
4

Growing up in Morocco, my mother’s kitchen was my first culinary classroom. She could take the simplest ingredients – a bit of meat, some potatoes, a handful of spices – and create a feast that brought our whole family together. Now, living in the bustling heart of New York City, I find myself channeling her resourcefulness on busy weeknights. This cheesy ground beef potato skillet is my love letter to those memories, updated for the modern American kitchen. It’s the epitome of easy comfort food, a one pan ground beef recipe that delivers maximum flavor with minimal fuss. The moment the paprika hits the hot oil, I’m transported back to that tiny kitchen in Marrakech, proving that comfort is truly universal.

Imagine perfectly golden-brown potato cubes, their edges delightfully crispy, nestled alongside savory seasoned ground beef. Now picture a generous blanket of melted cheddar cheese, bubbling and stretching with every spoonful. The aroma alone – a comforting blend of caramelized onions, garlic, and warm spices – is enough to draw your family to the table. This cheesy potato dinner is hearty without being heavy, satisfying that deep craving for something warm, cheesy, and deeply flavorful. It’s the kind of meal that makes a Monday night feel like a special occasion, and it all comes together in a single skillet.

I’ve honed this recipe over countless test batches in my NYC apartment, blending classic French technique (perfectly browning the meat for a rich fond) with bold, accessible flavors. My secret to the ultimate ground beef and potato skillet? Giving the potatoes a head start in the pan to ensure they’re perfectly tender and crisp, so they don’t turn soggy when the cheese is added. This foolproof method guarantees restaurant-quality results in just 30 minutes, using a single skillet. Let me show you how to bring this little bowl of joy to your table.

Why This Cheesy Ground Beef Potato Skillet Recipe Is the Best

The Flavor Secret: This isn’t just another beef and potato hash. The magic lies in layering flavors. I start by searing the beef until it develops a deep, savory crust (that’s the French “fond” I was talking about). Then, I build on that base with sweet sautéed onions, fragrant garlic, and a touch of smoked paprika. It’s a simple combination, but each ingredient plays a crucial role in creating a cheesy ground beef potato skillet that’s incredibly well-balanced and satisfying.

Perfected Texture: The biggest challenge in a one-pot dish like this is getting the texture right. No one wants mushy potatoes or dry, overcooked beef. My method involves crisping the potatoes first, then setting them aside while I cook the beef. This ensures the potatoes retain their structure and develop those irresistible crispy edges. When everything comes back together with a splash of broth and a blanket of cheese, the result is pure comfort food perfection – creamy, crispy, and gooey all at once.

Foolproof & Fast: As a trained chef, I love complex projects, but as a busy New Yorker, I need recipes that work perfectly the first time. This one pan ground beef recipe is designed for cooks of all skill levels. The steps are straightforward, the cleanup is a breeze, and the entire dish goes from stovetop to table in under 30 minutes. It’s the ultimate solution for a hectic weeknight when you need to get a wholesome, crowd-pleasing dinner on the table without any stress.

Cheesy Ground Beef Potato Skillet Ingredients

One of the things I love most about this recipe is how it uses simple, everyday ingredients. I picked up a beautiful bag of Yukon Gold potatoes at the Union Square Greenmarket, and the rest came straight from my pantry. This dish proves that you don’t need exotic ingredients to create something truly special. Here’s everything you’ll need for this cheesy potato dinner.

Ingredients List

  • 1 lb ground beef (80/20 is perfect)
  • 4 medium potatoes, diced (Yukon Gold or Russet)
  • 1 small onion, chopped
  • 2 cloves garlic, minced
  • 1 cup shredded cheddar cheese (sharp or mild)
  • 1/2 cup beef broth
  • 1 teaspoon salt
  • 1/2 teaspoon black pepper
  • 1/2 teaspoon paprika (smoked or sweet)
  • 2 tablespoons olive oil
  • Fresh parsley for garnish (optional)

Ingredient Spotlight

Potatoes: Yukon Gold potatoes are my top choice for this ground beef and potato skillet. They have a buttery flavor and a waxy texture that holds up beautifully to pan-frying, giving you a creamy interior and a crispy exterior without falling apart. Russet potatoes also work well, but you’ll want to rinse the starch off the diced cubes and pat them thoroughly dry to prevent sticking.

Ground Beef: I recommend using ground beef with an 80/20 lean-to-fat ratio. The fat is essential for flavor and helps to keep the beef moist during cooking. If you opt for a leaner grind like 90/10, you may need to add a tablespoon of olive oil to the pan when browning the meat to prevent it from becoming dry and crumbly.

Cheddar Cheese: For the best melt, please buy a block of cheddar and shred it yourself. Pre-shredded cheeses are coated with anti-caking agents like cellulose, which prevents it from melting into that smooth, creamy blanket we all crave. Sharp cheddar adds a wonderfully tangy kick, while a mild cheddar is more subtle and kid-friendly.

Original IngredientBest SubstitutionFlavor / Texture Impact
Ground BeefGround Turkey (93/7)Lighter in flavor; add 1 tbsp olive oil for moisture.
Cheddar CheeseMonterey Jack or ColbySofter, milder melt; slightly less tangy.
Yukon Gold PotatoesRusset PotatoesFluffier interior; requires rinsing starch to avoid sogginess.
Beef BrothChicken Broth or WaterMilder savory depth; add a pinch of Worcestershire to compensate.

How to Make Cheesy Ground Beef Potato Skillet — Step-by-Step

Making this cheesy ground beef potato skillet is incredibly straightforward. Follow these simple steps, and you’ll have a fantastic dinner ready in no time. I’ve included some of my personal chef tips to make sure your dish comes out perfectly every time.

Step 1: Crisp the Potatoes

Heat 2 tablespoons of olive oil in a large, 12-inch skillet over medium-high heat. Carefully add the diced potatoes in a single layer (cook in batches if necessary). Let them cook undisturbed for 4-5 minutes, then stir and continue cooking for another 4-5 minutes until they are golden brown on most sides and tender all the way through. Use a fork to test for doneness. Once perfectly crisp, transfer the potatoes to a plate and set them aside.

💡 mia’s Pro Tip: Pat the diced potatoes completely dry with a clean kitchen towel before adding them to the hot oil. Excess moisture will cause them to steam instead of sear, preventing that beautiful golden crust.

Step 2: Brown the Beef

In the same skillet, add the ground beef. Break it into large pieces with a wooden spoon and let it sear for 3-4 minutes without moving it too much. You want a deep brown crust to form on the meat for maximum flavor. Continue cooking, breaking the meat into crumbles, until it is fully cooked and no pink remains.

⚠️ Common Mistake to Avoid: Don’t constantly stir the beef! Let it sit in the hot pan for a few minutes to develop a proper sear. If you stir it too often, the meat will steam and release its juices, resulting in a grey, lackluster flavor.

Step 3: Build the Flavor Base

Reduce the heat to medium. Add the chopped onion and minced garlic to the skillet with the cooked beef. Sauté for 2-3 minutes, stirring frequently, until the onion becomes soft and translucent. The residual heat and moisture from the beef will help deglaze the pan, lifting all those delicious browned bits off the bottom. Season the mixture with salt, pepper, and paprika, stirring well to coat everything evenly.

💡 mia’s Pro Tip: If the skillet looks dry at this stage, add a splash of beef broth before scraping up the browned bits. This “deglazing” step is a classic French technique that infuses your dish with umami-rich flavor.

Step 4: Combine and Melt

Return the crispy potatoes to the skillet. Pour in the remaining beef broth and gently stir everything together until it’s well combined. Sprinkle the shredded cheddar cheese evenly over the top of the mixture. Cover the skillet with a lid and let it cook for 2-3 minutes, just until the cheese is fully melted, bubbly, and slightly golden around the edges. Remove from heat immediately to prevent the cheese from burning.

⚠️ Common Mistake to Avoid: Avoid the urge to stir the cheese into the mixture. Let it melt on top to create a beautiful, gooey blanket. If you stir it in, the cheese can clump and make the dish greasy instead of perfectly cohesive and creamy.

StepActionDurationKey Visual Cue
1Crisp Potatoes8-10 minsGolden brown edges, fork-tender center
2Brown Beef5-6 minsDeep brown crust, no pink remaining
3Sauté Aromatics2-3 minsOnions translucent, fragrant
4Melt Cheese2-3 minsCheese fully melted, bubbly, slightly golden

Serving & Presentation

This cheesy ground beef potato skillet is a complete meal on its own, but a few thoughtful accompaniments can really elevate it. I love to garnish it with a sprinkle of fresh, chopped parsley to add a pop of color and freshness that cuts through the richness of the cheese. For a touch of brightness, a dollop of sour cream or a few pickled jalapeños on the side works wonders.

Growing up in Morocco, we often ate tagines with crusty bread to soak up every bit of the savory sauce. I follow the same tradition here. Serve this skillet directly at the table with a side of warm, crusty bread or over a bed of steamed rice or buttery egg noodles to make it even more substantial. It’s also wonderful with a simple green salad dressed with a tangy vinaigrette to balance the richness.

Whenever I make this for my friends in NYC, I bring the whole skillet straight to the table with a couple of serving spoons. It encourages a family-style, communal eating experience that reminds me of the gatherings in my mother’s home. It’s unpretentious, incredibly satisfying, and always disappears within minutes.

Pairing TypeSuggestionsWhy It Works
Side DishCrusty bread, Steamed rice, Egg noodlesAbsorbs the savory broth and melted cheese.
Sauce / DipSour cream, Ketchup, Hot sauceAdds a cooling, tangy, or spicy contrast.
BeverageCold beer, Light red wine (Pinot Noir), Iced teaCrisp, refreshing drinks balance the hearty, cheesy flavors.
GarnishFresh parsley, Sliced green onions, ChivesAdds a fresh, vibrant finish and a touch of color.

Make-Ahead, Storage & Reheating

This easy comfort food recipe is fantastic for meal prep. As a busy professional in NYC, I often make a double batch on Sunday so I have delicious lunches ready for the week. The flavors actually meld and become even more delicious the next day. Here are my best tips for storing and reheating so you can enjoy it all over again.

MethodContainerDurationReheating Tip
RefrigeratorAirtight containerUp to 4 daysSkillet over med heat, add splash of broth, cover.
FreezerFreezer-safe containerUp to 2 monthsThaw overnight in fridge, then reheat in skillet or oven at 350°F.
Make-Ahead PrepIn the baking dish1 day in advanceAssemble completely, refrigerate, then reheat covered in a 375°F oven for 20 mins.

The best way to reheat this ground beef and potato skillet is back in a skillet over medium heat. Add a small splash of beef broth or water, cover it, and let it warm through for 5-7 minutes. The steam will help re-melt the cheese and revive the potatoes without drying them out. You can also use a microwave for a quick fix, but you’ll lose some of the crispy texture on the potatoes.

Variations & Easy Swaps

I firmly believe that a great recipe is just a starting point for your own creativity. This cheesy potato dinner is a perfect canvas for customization. Drawing from my Moroccan roots, my French training, and my life in New York City, here are a few of my favorite ways to change it up.

VariationKey ChangeBest ForDifficulty Impact
Spicy Moroccan TwistAdd Ras el Hanout & harissaAdventurous palatesEasy
Dairy-Free VersionUse vegan cheese or omitDairy sensitivitiesEasy
Loaded Bacon & ChiveAdd crispy bacon & sour creamDecadent comfort foodEasy

Spicy Moroccan Twist

This one is a nod to my heritage. Add 1-2 teaspoons of Ras el Hanout (a fragrant Moroccan spice blend) to the ground beef along with the paprika. For a spicy kick, stir a tablespoon of harissa paste into the beef broth before adding it to the skillet. The warm, aromatic spices pair beautifully with the rich beef and creamy cheese, transforming it into a completely new and exotic cheesy ground beef potato skillet.

Dairy-Free Version

You can easily make this one pan ground beef recipe dairy-free without sacrificing flavor. Simply substitute the cheddar cheese with a high-quality vegan shredded cheese alternative that melts well, such as those made from coconut oil or potato starch. You can also simply omit the cheese altogether for a lighter, but still incredibly flavorful, beef and potato hash seasoned with extra paprika and garlic.

Loaded Bacon & Chive

Because everything is better with bacon! Cook 4 slices of chopped bacon in the skillet before starting the potatoes. Drain the excess fat, leaving about 1 tablespoon in the pan to cook the potatoes. Crumble the bacon and sprinkle it over the top of the dish along with the cheese. Finish with a generous dollop of sour cream and a handful of fresh chives. It’s a truly decadent easy comfort food recipe that feels like a loaded baked potato.

Can I use ground turkey instead of ground beef in this cheesy potato skillet?

Absolutely! Ground turkey is a fantastic lighter alternative for this cheesy ground beef potato skillet. I recommend using 93% lean ground turkey for the best results. Because turkey is leaner than beef, you’ll need to add about 1 tablespoon of olive oil to the skillet to help it brown and prevent it from drying out. The flavor will be a bit milder, so you might want to boost the savory notes with a little extra garlic or a splash of Worcestershire sauce.

How long should I cook the potatoes before adding the ground beef and cheese?

For this one pan ground beef recipe, you should cook the diced potatoes for approximately 8 to 10 minutes over medium-high heat. The goal is to achieve a beautiful golden-brown exterior while ensuring the inside is fork-tender. I recommend cutting your potatoes into uniform 1/2-inch cubes so they cook evenly. You’ll know they are ready when the edges are crispy and a knife slides through the center with little resistance.

What type of cheese melts best for a cheesy ground beef potato skillet?

For the ultimate gooey and bubbly finish on your cheesy potato dinner, I strongly recommend using a block of sharp cheddar cheese that you shred yourself. Pre-shredded cheese contains cellulose and other anti-caking agents that prevent it from melting smoothly, resulting in a grainy texture. Other excellent melting cheeses for this dish include Monterey Jack, Colby, or even a smoked Gouda for a deeper, more complex flavor.

Do I need to parboil the potatoes before adding them to the skillet?

No, you absolutely do not need to parboil the potatoes for this ground beef and potato skillet! The recipe is designed for maximum convenience and minimal cleanup. By dicing the potatoes into small, uniform cubes and cooking them covered for the first few minutes, you create a steaming effect that cooks them through. Then, removing the lid allows them to crisp up beautifully. This one-pan method is much simpler and faster than parboiling.

Can I add other vegetables to this skillet?

Yes, this easy comfort food recipe is very adaptable! Feel free to add other vegetables to boost the nutritional value and flavor. Diced bell peppers (especially red or green) or a cup of sliced mushrooms are wonderful additions. Sauté them along with the onions in Step 3. For a bit of green, you can stir in a generous handful of fresh spinach or kale just before adding the cheese, letting it wilt from the residual heat.

What’s the best type of skillet to use for this recipe?

A 12-inch cast-iron skillet is my absolute top recommendation for making a cheesy ground beef potato skillet. Cast iron heats evenly and retains heat exceptionally well, which is perfect for achieving those crispy potatoes and a beautifully melted cheese top. A large, heavy-bottomed stainless steel or non-stick skillet will also work very well. Just make sure your pan is large enough to hold all the ingredients in a single layer.

How can I make this dish spicier?

If you like a little heat, there are several ways to fire up this ground beef and potato skillet. You can add 1/2 teaspoon of red pepper flakes or a pinch of cayenne pepper along with the paprika in Step 3. For a bolder, more aromatic heat, stir in a tablespoon of harissa paste (a North African chili paste) with the beef broth. Garnishing with sliced fresh jalapeños or a drizzle of sriracha before serving also works beautifully.

Can I prepare this meal ahead of time?

Yes, this recipe is great for meal prep! I often make this cheesy potato dinner on a Sunday to enjoy for lunches during the week. You can prepare the entire skillet and then portion it into airtight containers for the refrigerator. When you’re ready to eat, reheat it in a skillet over medium heat with a splash of broth or water to restore its creaminess. It keeps wonderfully for up to 4 days in the fridge.

How do I reheat leftovers so they stay crispy?

The best way to revive your leftover cheesy ground beef potato skillet is in the oven or an air fryer. Spread the leftovers on a baking sheet and reheat at 375°F for about 10 minutes, or until hot and the potatoes have crisped back up. You can also use a dry skillet over medium-high heat, pressing the potatoes down gently to re-crisp the edges. The microwave is fast, but it will make the potatoes soft rather than crispy.

Is this recipe gluten-free?

Yes, this one pan ground beef recipe is naturally gluten-free! The ingredients—ground beef, potatoes, onions, garlic, cheese, and spices—are all naturally free of gluten. Just be sure to check the label on your beef broth, as some brands may use additives that contain gluten. Most standard beef broths are gluten-free, but it’s always a good practice to verify if you are strictly avoiding gluten for medical reasons.

Share Your Version!

I absolutely love hearing how my recipes turn out in your home kitchens! If you make this cheesy ground beef potato skillet, please leave a star rating and a comment below to let me know how it went. Did you try any of the variations, like the spicy Moroccan twist or the loaded bacon version? I want to know all about your creations!

Don’t forget to snap a photo and share it with me on Instagram or Pinterest. Seeing your beautiful dishes is the reason I do what I do. Tag @exorecipes so I can feature my favorites in my stories. From my NYC kitchen to yours — I hope this recipe brings as much warmth to your table as it does to mine. — mia 🧡

📌

Love This Recipe? Save It to Pinterest!

If you enjoyed this Cheesy Ground Beef Potato Skillet recipe, don’t let it get lost in your browser tabs! 😄 Pin it now so you can find it again anytime — and explore hundreds more tried-and-tested recipes waiting for you on my Pinterest boards.

👉 Follow mia on Pinterest @exorecipe

📌 Pin this recipe · 🔁 Re-pin your favorites · 💬 Tag me when you make it — I love seeing your creations!

Print

clock clock iconcutlery cutlery iconflag flag iconfolder folder iconinstagram instagram iconpinterest pinterest iconfacebook facebook iconprint print iconsquares squares iconheart heart iconheart solid heart solid icon

Cheesy Ground Beef Potato Skillet: A One-Pan Comfort Dish Youll Love

  • Author: Chef Mia
  • Prep Time: 10 minutes
  • Cook Time: 20 minutes
  • Total Time: 30 minutes
  • Yield: 4 1x
  • Method: Main Course
  • Cuisine: American

Description

This cheesy ground beef and potato skillet is a hearty, one-pan meal loaded with flavor. Perfect for busy weeknights, it combines seasoned ground beef, tender potatoes, and melted cheese for a comforting dish the whole family will love.


Ingredients

Scale
  • 1 lb ground beef
  • 4 medium potatoes, diced
  • 1 small onion, chopped
  • 2 cloves garlic, minced
  • 1 cup shredded cheddar cheese
  • 1/2 cup beef broth
  • 1 teaspoon salt
  • 1/2 teaspoon black pepper
  • 1/2 teaspoon paprika
  • 2 tablespoons olive oil
  • Fresh parsley for garnish (optional)

Instructions

  1. Heat olive oil in a large skillet over medium heat.
  2. Add diced potatoes and cook for 8-10 minutes, stirring occasionally, until golden and tender. Remove potatoes and set aside.
  3. In the same skillet, add ground beef and cook until browned, breaking it apart with a spoon.
  4. Add chopped onion and minced garlic, cook for 2-3 minutes until softened.
  5. Season with salt, pepper, and paprika. Stir well.
  6. Return potatoes to the skillet. Pour in beef broth and stir to combine.
  7. Sprinkle shredded cheddar cheese evenly over the top.
  8. Cover the skillet and let cook for 2-3 minutes until cheese is melted and bubbly.
  9. Remove from heat, garnish with fresh parsley if desired, and serve warm.

Notes

For extra flavor, try adding cooked bacon bits or a dollop of sour cream on top. You can also substitute ground turkey for a lighter version.


Nutrition

  • Calories: 450
  • Sugar: 3g
  • Fat: 25g
  • Carbohydrates: 30g
  • Protein: 28g


Cheesy Ground Beef Potato Skillet: A One-Pan Comfort Dish Youll Love

k">

Tried This Recipe? Leave a Comment!

Did you make this recipe? I’d love to hear how it turned out! Please leave a comment and a rating below. Your feedback helps other home cooks and supports cheerychop.com!
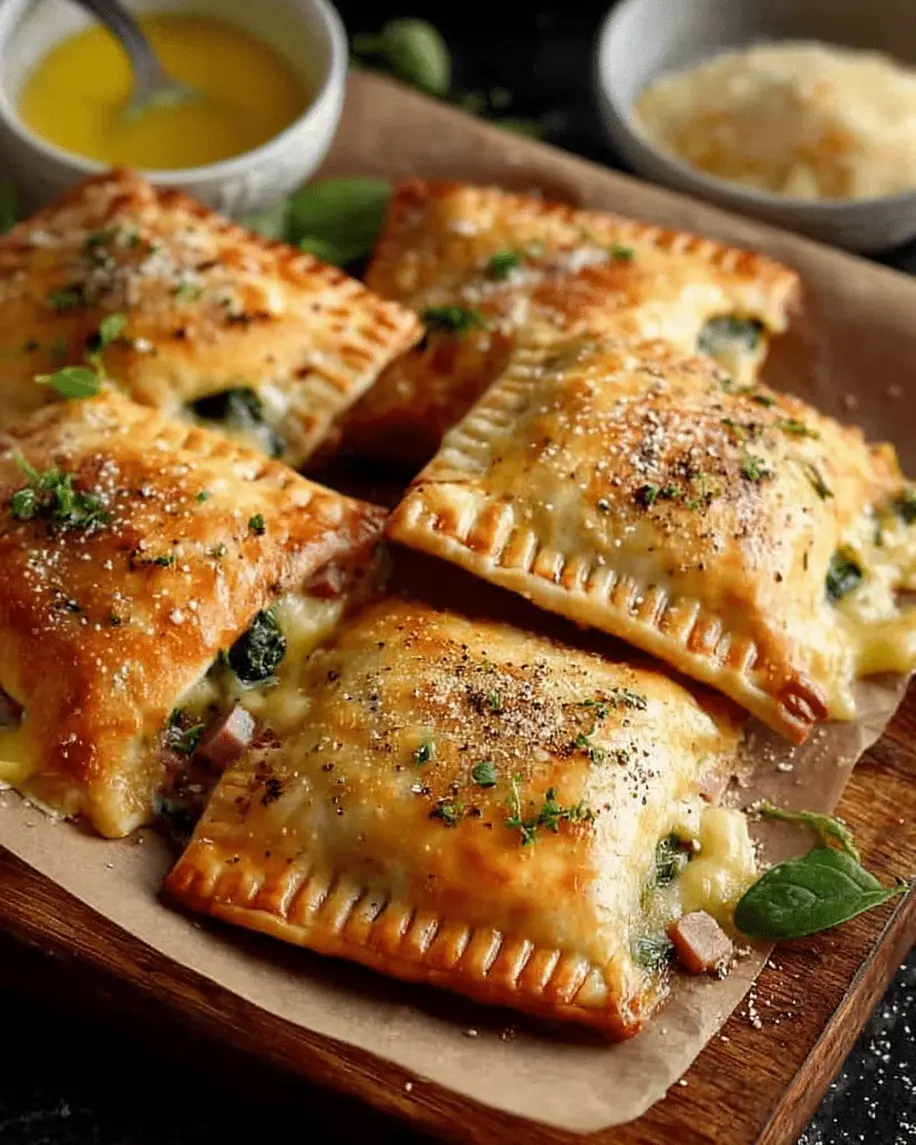

For more delicious inspiration, follow me on Pinterest!

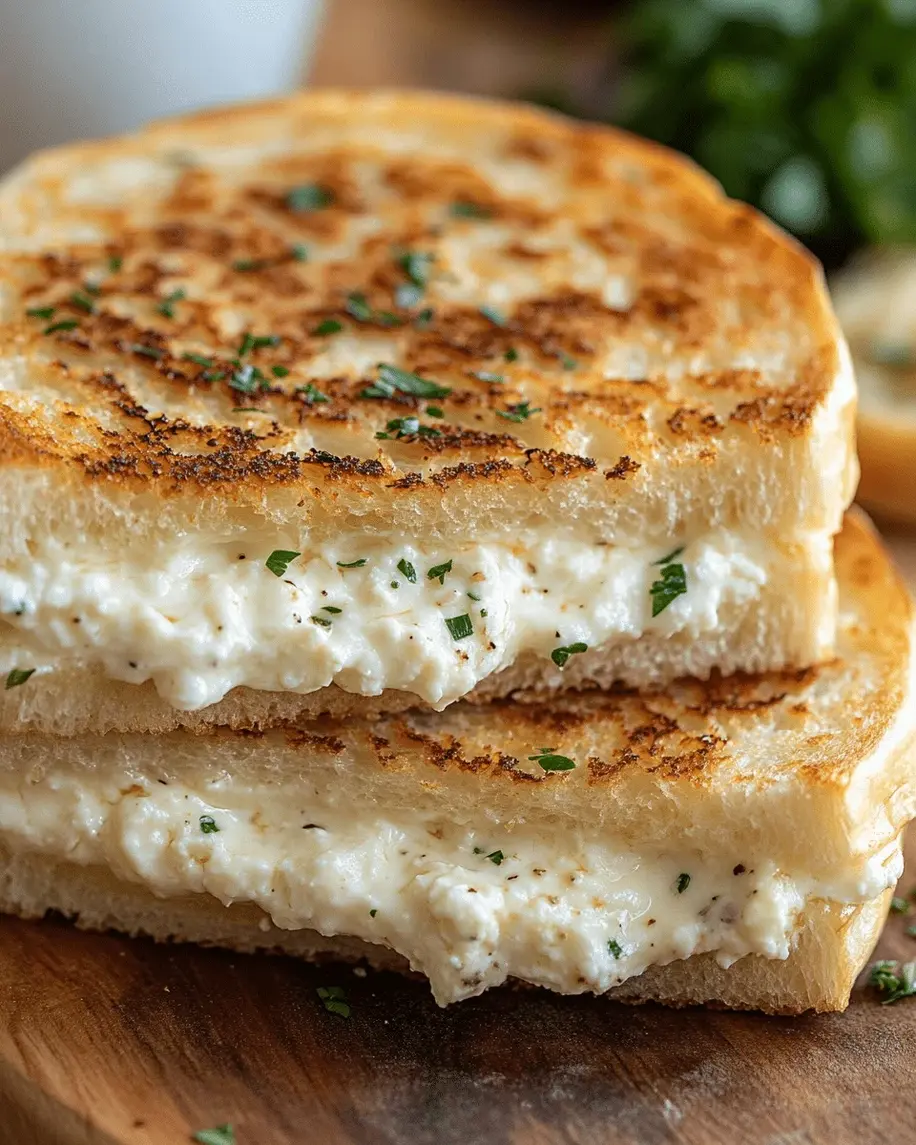
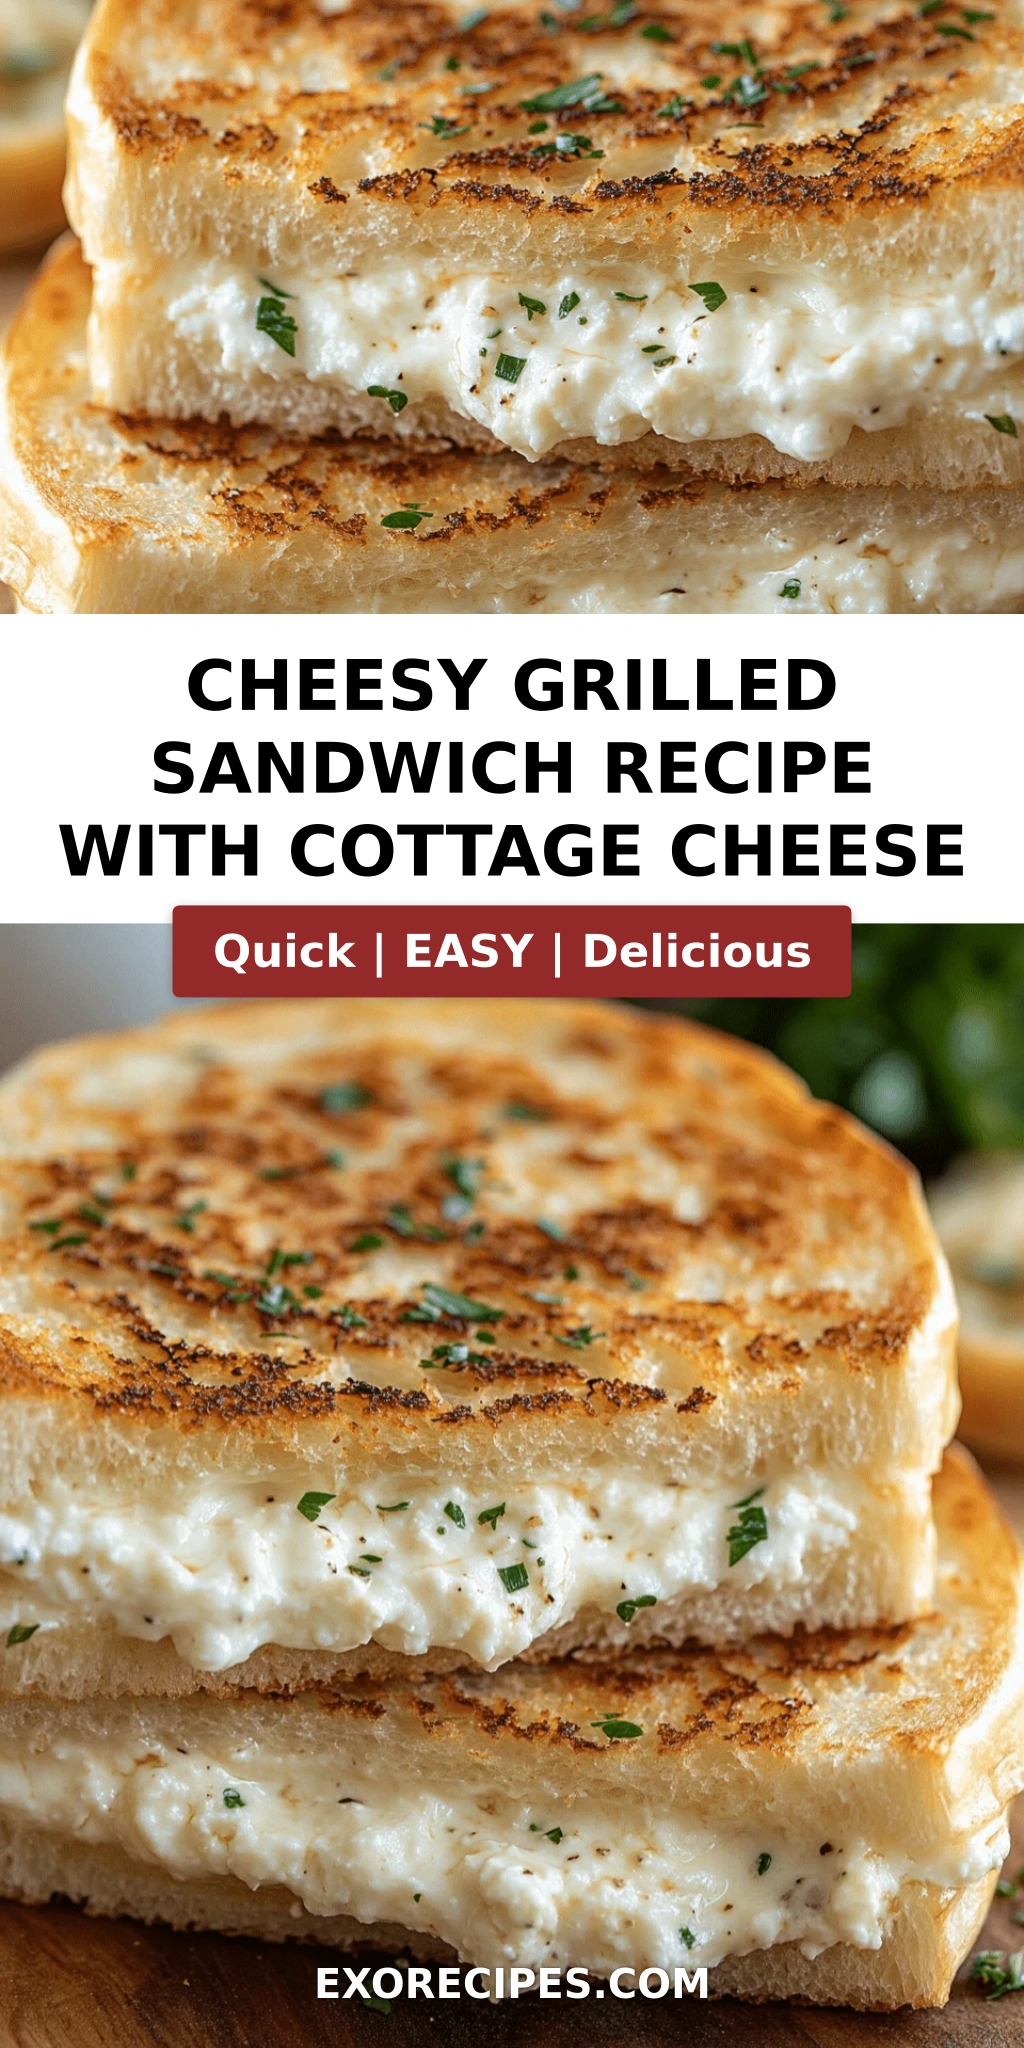
Cheesy Grilled Sandwich Recipe with Cottage or Ricotta Cheese – The Creamiest, High-Protein Twist

⚖️
Difficulty
Easy
⏲️
Prep Time
10 mins
🕒
Cook Time
8 mins
⏱️
Total Time
18 mins
🍽️
Servings
4 sandwiches

I still remember the first time I made a grilled cheese sandwich with cottage cheese. It was a rainy afternoon in my tiny Manhattan apartment, and I was craving the comforting, golden-brown sandwiches my mother used to make in our kitchen in Morocco. She would always add a spoonful of something creamy — sometimes labneh, sometimes fresh goat cheese — to the filling. That memory came rushing back, and I reached for a tub of cottage cheese in my fridge. The result? The most luscious, creamy, and satisfying Cheesy Grilled Sandwich Recipe I had ever tasted. This is not your average grilled cheese — this is a Cottage Cheese Grilled Sandwich that stays incredibly moist and tender on the inside while turning perfectly crisp and golden on the outside. Whether you use cottage cheese or ricotta, this Ricotta Cheese Sandwich is a total game-changer.

Imagine this: You take a bite, and the crust shatters ever so slightly — that perfect, buttery crunch. Then your teeth sink into a layer of warm, melted mozzarella and Parmesan, followed by the soft, creamy curds of cottage cheese or the delicate richness of ricotta. The garlic powder and oregano whisper through every bite, adding just enough savory depth without overpowering the cheese. The sandwich is golden brown on both sides, with little patches of darker crispiness where the butter has browned beautifully. As you pull the halves apart, a glorious cheese pull stretches between them — gooey, inviting, and absolutely irresistible. It smells like buttered toast and melted cheese, with a faint herbal note that reminds me of the oregano my mother would dry on her kitchen windowsill.

I trained in pastry and sauce work in Paris, and I’ve cooked professionally in New York City for years, but this Easy Grilled Cheese Sandwich is one of the recipes I come back to again and again. What makes my version different is the technique: I use a combination of a soft, high-moisture cheese (cottage or ricotta) with a classic melting cheese (mozzarella) and a salty, umami booster (Parmesan). The butter is spread on the bread before assembling, not melted in the pan — this gives you a more even, restaurant-quality crust. And I’ll let you in on a little secret: the key to preventing a soggy sandwich is to drain your cottage cheese slightly before mixing it into the filling. 💡 mia’s Pro Tip: Don’t skip this step! It makes all the difference between a sandwich that’s perfectly creamy and one that turns your bread into a sad, wet mess. Let me show you how to make this Grilled Cheese with Cottage Cheese the right way.

Why This Cheesy Grilled Sandwich Recipe Is the Best

The Flavor Secret: Most grilled cheese recipes rely on a single cheese, which can be one-dimensional. I draw on my French culinary training to build layers of flavor: the mild creaminess of cottage cheese or ricotta, the stretchy melt of mozzarella, and the sharp, salty bite of Parmesan. This three-cheese combination creates a depth that lingers on your palate. Growing up in Morocco, I learned that the best dishes have contrast — something soft and something bold, something mild and something sharp. That principle is at the heart of this sandwich.

Perfected Texture: Texture is where most homemade grilled cheese goes wrong — either the bread burns before the cheese melts, or the inside turns mushy. I solved this by buttering the bread directly (not the pan) and cooking over medium heat, not high. This gives the bread time to toast evenly while the cheese mixture gently heats through. The cottage cheese stays creamy without becoming watery, the mozzarella stretches like a dream, and the Parmesan adds a faint, crispy lace on the edges where it meets the pan. It’s the kind of texture that makes you close your eyes and chew slowly.

Foolproof & Fast: This Easy Grilled Cheese Sandwich comes together in 18 minutes flat, and it works every single time. The ingredient list is short, the method is simple, and the result is consistently restaurant-worthy. Whether you’re a college student cooking in a dorm kitchen, a busy parent feeding hungry kids, or a home cook who just wants a perfect, no-fuss lunch, this recipe delivers. I’ve tested it with white bread, whole wheat, sourdough, and even gluten-free — and it’s always a winner.

Cheesy Grilled Sandwich Recipe Ingredients

I buy my cottage cheese and ricotta from the farmers market in Union Square on Saturday mornings — the fresh, small-batch brands have a cleaner flavor and creamier texture than the big supermarket tubs. My mozzarella comes from a little Italian deli in Greenwich Village, and the Parmesan is always a real Parmigiano-Reggiano wedge I grate myself. But I know not everyone has time for that, so I’ve tested this recipe with standard grocery-store ingredients too, and it works beautifully. Here’s exactly what you’ll need:

Ingredients List

  • 8 slices bread (white, whole wheat, or sourdough)
  • 1 cup cottage cheese or ricotta cheese
  • 1 cup shredded mozzarella cheese
  • 1/4 cup grated Parmesan cheese
  • 2 tablespoons butter, softened
  • 1/2 teaspoon garlic powder
  • 1/2 teaspoon dried oregano
  • 1/4 teaspoon salt
  • 1/4 teaspoon black pepper

Ingredient Spotlight

Cottage Cheese or Ricotta: This is the star of the show. Cottage cheese gives you a slightly tangy, curdy texture that stays creamy when melted. Ricotta is richer, smoother, and more delicate. Both work wonderfully. I recommend a full-fat version for the best flavor and texture — low-fat or nonfat versions have more water and less creaminess, which can make the filling runny. If using cottage cheese, look for a brand with small curds and a thick, not watery, consistency. If using ricotta, whole-milk ricotta is non-negotiable for that luxurious mouthfeel.

Mozzarella: This is your melt cheese. It provides that iconic, stretchy cheese pull that makes a grilled cheese sandwich so satisfying. Use a low-moisture, shredded mozzarella (the kind that comes in bags) for the best melt. Fresh mozzarella is too watery and will make your bread soggy. If you only have fresh mozzarella, press it between paper towels for 15 minutes to remove excess moisture before shredding.

Parmesan: This is your umami bomb. Just a quarter cup adds a salty, nutty, savory depth that elevates the entire sandwich. Always grate it yourself from a wedge — pre-grated Parmesan contains anti-caking agents that prevent it from melting smoothly. A fine Microplane grate is perfect here, as it disperses evenly through the filling and melts quickly.

Original IngredientBest SubstitutionFlavor / Texture Impact
Cottage CheeseRicotta Cheese (same amount)Richer, smoother, less tangy
MozzarellaProvolone or Fontina (shredded)Slightly sharper flavor, equally good melt
ParmesanPecorino Romano (grated)Saltier, more pungent, even more umami
ButterMayonnaise (spread on bread)Crispier crust, slightly tangy flavor (southern-style)
Dried OreganoDried Thyme or Italian SeasoningMore earthy or floral, still Mediterranean

How to Make Cheesy Grilled Sandwich Recipe — Step-by-Step

Making this sandwich is almost too easy, but a few small details make a big difference. Follow these steps, and you’ll have a perfect, golden, melty sandwich every single time.

Step 1: Mix the Cheese Filling

In a small bowl, combine 1 cup cottage cheese (or ricotta), 1 cup shredded mozzarella, 1/4 cup grated Parmesan, 1/2 teaspoon garlic powder, 1/2 teaspoon dried oregano, 1/4 teaspoon salt, and 1/4 teaspoon black pepper. Stir with a fork until everything is evenly distributed. If using cottage cheese, you’ll see small curds throughout — that’s exactly what you want. If using ricotta, the mixture will be smoother and more uniform. Set aside.

💡 mia’s Pro Tip: If your cottage cheese looks watery, place it in a fine-mesh strainer over a bowl for 5 minutes before mixing. This removes excess liquid and prevents soggy bread. This is the single most important tip for a perfect cottage cheese grilled sandwich.

Step 2: Butter the Bread

Take 8 slices of your chosen bread and spread a thin, even layer of softened butter on one side of each slice. Use about 2 tablespoons of butter total — about 1/2 teaspoon per slice. The butter should be soft enough to spread without tearing the bread. Spreading it all the way to the edges ensures a sealed, crispy crust with no bare patches.

⚠️ Common Mistake to Avoid: Don’t melt the butter in the pan and then place the bread in it. This leads to uneven browning, with some spots darker and some pale. Spreading butter directly on the bread is the French technique — it gives you total control over the crust.

Step 3: Assemble the Sandwiches

Place 4 slices of bread, buttered side down, on a clean work surface. Divide the cheese mixture evenly among them, spreading it all the way to the edges. This is important — if the filling doesn’t reach the edges, the center will be thick and the edges thin, leading to uneven melting. Top each with a remaining bread slice, buttered side up. Press down gently to help the sandwich hold together.

💡 mia’s Pro Tip: For an extra-crispy exterior, sprinkle a tiny pinch of flaky sea salt on the buttered top before grilling. It adds a subtle crunch and a pop of salt that contrasts beautifully with the creamy cheese filling.

Step 4: Grill the Sandwiches

Heat a large skillet or griddle over medium heat — not medium-high, not high. Medium heat is the sweet spot. Place the sandwiches in the skillet (you may need to work in batches if your skillet is small). Cook for 3–4 minutes per side. The first side is done when the bread is deep golden brown and crispy. Flip carefully with a spatula and cook the second side for another 3–4 minutes, until the cheese is fully melted and the bottom is equally golden.

⚠️ Common Mistake to Avoid: Do not press down on the sandwich with your spatula while it cooks. This squeezes the filling out and compresses the bread, making the sandwich dense and dry instead of light and fluffy. Let it cook undisturbed for the full 3–4 minutes per side.

Step 5: Serve Immediately

Remove the sandwiches from the skillet and let them rest on a cutting board for 30 seconds (this helps the cheese set slightly so it doesn’t all ooze out when you cut). Slice each sandwich diagonally — this isn’t just for looks; the diagonal cut creates a larger surface area for the cheese pull. Serve immediately while the cheese is still hot and stretchy.

💡 mia’s Pro Tip: If you’re making multiple batches, keep the finished sandwiches on a wire rack in a 200°F oven. This keeps them warm and crispy without steaming the crust. Never stack them — stacking traps steam and makes the bread soft and soggy.

StepActionDurationKey Visual Cue
1Mix the cheese filling2 minutesUniform, creamy texture with no dry spots
2Butter the bread2 minutesThin, even butter layer edge to edge
3Assemble sandwiches2 minutesFilling spread to edges, bread aligned
4Grill first side3–4 minutesDeep golden brown crust, edges crisp
5Grill second side3–4 minutesEven browning, cheese gently oozing at edges

Serving & Presentation

I love serving this Cheesy Grilled Sandwich with a simple side that complements its richness without stealing the show. In my NYC kitchen, I often pair it with a bright, acidic tomato soup — the classic combination is classic for a reason. The acidity of the tomatoes cuts through the creamy cheese and makes each bite feel fresh. When I’m feeling nostalgic for Morocco, I’ll serve it with a side of spicy harissa yogurt for dipping — the heat and tang are a stunning contrast to the mild, milky cheese.

For presentation, I like to cut the sandwiches diagonally and arrange them on a wooden board with the cut sides facing up so the cheesy interior is visible. A sprinkle of fresh parsley or basil on top adds a pop of green and a hint of freshness. If I’m serving guests, I’ll add a small dish of warm marinara sauce or a drizzle of balsamic glaze on the plate. The deep red of the sauce against the golden bread is visually gorgeous, and the balsamic adds a sweet-tart note that elevates the whole experience.

Pairing TypeSuggestionsWhy It Works
Side DishTomato soup, mixed green salad, roasted cherry tomatoesAcidity and freshness balance the rich, creamy cheese
Sauce / DipMarinara sauce, harissa yogurt, balsamic glazeAdds moisture, heat, or sweetness for contrast
BeverageIced tea, lemonade, light lager, Sauvignon BlancClean, crisp drinks cut through the richness
GarnishFresh basil, parsley, flaky sea salt, crushed red pepperAdds freshness, color, and a final flavor pop

Make-Ahead, Storage & Reheating

In my busy NYC life, I often meal-prep the cheese filling on Sunday so I can throw together a sandwich in minutes on a hectic weekday. The filling keeps beautifully in the fridge, and the sandwiches themselves can be assembled and grilled fresh in just a few minutes. Here’s exactly how to store and reheat them for the best results:

MethodContainerDurationReheating Tip
RefrigeratorAirtight container, parchment between layersUp to 3 daysSkillet over medium-low heat, 2-3 min per side
FreezerFreezer-safe wrap + bagUp to 2 monthsThaw in fridge, then reheat in skillet or air fryer at 350°F for 5 min
Make-AheadCheese filling in a covered bowlUp to 4 days in advanceAssemble and grill fresh — takes only 10 minutes

The best way to reheat a refrigerated grilled cheese is in a skillet over medium-low heat, not the microwave. The microwave will make the bread rubbery and the cheese tough. Place the sandwich in a dry skillet (or add a tiny pat of butter if you want extra crisp) and cook for 2–3 minutes per side, covered with a lid to help the cheese re-melt evenly. If you have an air fryer, that works beautifully too — 350°F for 5 minutes, flipping halfway through. From my experience, the texture is about 90% as good as fresh, which is pretty impressive for a leftover sandwich.

Variations & Easy Swaps

This Cottage Cheese Grilled Sandwich is incredibly versatile. I’ve played with countless variations in my own kitchen, and these are the ones I keep coming back to. Each one changes the flavor profile in a unique way while keeping the core technique exactly the same.

VariationKey ChangeBest ForDifficulty Impact
Moroccan SpicedAdd 1 tsp ras el hanout + 1/4 tsp cayenne to fillingAdventurous palates, dinner partiesEasy — no extra steps
Mediterranean VeggieAdd sliced tomato + fresh spinach + olivesLighter lunch, meatless MondayEasy — just add layers
Herb & Garlic BlastDouble oregano + add 1 tbsp fresh chopped parsleyGarlic lovers, herb enthusiastsEasy — no extra steps

Moroccan Spiced Variation

This is my personal favorite — a nod to my Moroccan roots. Add 1 teaspoon of ras el hanout (a North African spice blend with cinnamon, cumin, coriander, and ginger) and 1/4 teaspoon of cayenne pepper to the cheese filling. The warm, floral spices pair beautifully with the creamy cottage cheese or ricotta, and the cayenne adds a gentle heat that builds with each bite. I like to serve this version with a side of harissa yogurt for dipping — the cool, spicy yogurt is the perfect counterpoint to the warm, spiced sandwich. It’s a flavor combination that tells the story of my childhood in every bite.

Gluten-Free / Dairy-Free Variation

I’ve tested this with gluten-free bread and dairy-free cheese, and it works surprisingly well. Use a sturdy gluten-free bread (I like the ones from the local bakery in NYC that uses a blend of rice and tapioca flour — they toast beautifully without falling apart). For the filling, replace the mozzarella with a dairy-free shredded mozzarella alternative (look for one that melts, usually made from cashew or coconut oil), use a dairy-free ricotta, and skip the Parmesan or use a vegan Parmesan-style grating cheese. The texture is slightly less stretchy, but the flavor is still rich and satisfying. I’ve also found that adding an extra tablespoon of dairy-free butter on the bread helps compensate for the lack of dairy fat and gives a better crust.

New York Bagel Twist

Living in NYC, I couldn’t resist creating a bagel-inspired version. Use everything bagel seasoning in the cheese filling (about 1 tablespoon) and swap the bread for two everything bagel thins or a split bagel. The sesame seeds, poppy seeds, garlic, and onion flakes in the seasoning add an incredible savory depth that echoes the flavors of a classic New York bagel with cream cheese and lox — but in grilled cheese form. I like to add a few thin slices of smoked salmon between the cheese layers for the full NY experience. It’s an indulgence, but one that’s absolutely worth it. I discovered this twist while experimenting with leftovers from a Sunday bagel run, and it’s been a staple ever since.

Share Your Version!

I absolutely love hearing how this recipe comes to life in your kitchen. Did you use cottage cheese or ricotta? Did you add any of the variations, or come up with one of your own? Maybe you threw in some roasted red peppers or a handful of fresh arugula — I want to hear about it! Drop a comment below and let me know how it turned out. If you’re feeling extra generous, a star rating helps other readers find this recipe and know it’s worth their time.

And if you’re on social media, snap a photo of your golden, melty creation and tag me @exorecipes on Instagram or Pinterest. There’s something so special about seeing my recipes recreated in homes across the country — it reminds me why I started this blog in the first place. From my NYC kitchen to yours — I hope this recipe brings as much warmth to your table as it does to mine. — mia 🧡

📌

Love This Recipe? Save It to Pinterest!

If you enjoyed this Cheesy Grilled Sandwich Recipe with Cottage or Ricotta Cheese, don’t let it get lost in your browser tabs! 😄 Pin it now so you can find it again anytime — and explore hundreds more tried-and-tested recipes waiting for you on my Pinterest boards.

👉 Follow mia on Pinterest @chefrecipes2

📌 Pin this recipe · 🔁 Re-pin your favorites · 💬 Tag me when you make it — I love seeing your creations!

What is the best way to prevent a cheesy grilled sandwich with cottage cheese from becoming soggy?

The most important step is to drain the cottage cheese before using it. Place the cottage cheese in a fine-mesh strainer set over a bowl and let it sit for 5–10 minutes at room temperature. This allows the excess whey to drip away, which is the main cause of soggy bread. If you’re in a hurry, you can also press the cottage cheese gently with a paper towel to absorb extra moisture. Additionally, make sure your skillet is hot enough (medium heat) before adding the sandwiches — a properly preheated pan sears the buttered bread quickly, creating a barrier that prevents moisture from soaking in. Finally, avoid overfilling the sandwich; about 1/4 cup of cheese mixture per sandwich is the perfect amount. These three steps — draining, preheating, and proper portioning — will give you a crisp, golden crust every time.

Can I substitute ricotta cheese with cottage cheese in a grilled cheese sandwich?

Absolutely — and the result is deliciously different. Yes, you can substitute ricotta with cottage cheese in any grilled cheese sandwich recipe, including this one. The swap works in both directions: use cottage cheese if you want a tangier, creamier filling with visible curds, or use ricotta for a smoother, richer, and more delicate texture. The key adjustment when using cottage cheese is to drain it slightly (as mentioned above) because cottage cheese has a higher moisture content than ricotta. If you’re substituting cottage cheese for ricotta, you may also want to add an extra tablespoon of grated Parmesan to compensate for ricotta’s natural richness. Both cheeses are mild and creamy, so the flavor profile stays very similar — it’s really a matter of texture preference. I personally love both versions and switch between them depending on what I have in my fridge.

How long should I grill a cheesy sandwich with ricotta cheese for the perfect melt?

For the perfect melt, grill your ricotta cheese sandwich for 3–4 minutes per side over medium heat. This timing allows the bread to become deep golden brown and crispy while the ricotta mixture heats through and the mozzarella melts completely. If you’re using a thick bread like sourdough or a hearty whole wheat, you may need the full 4 minutes per side. For thinner white bread, 3 minutes per side is usually enough. The visual cues are your best guide: the first side is ready when the bread is a uniform golden brown with a few darker spots where the butter has browned, and you can see small bubbles of melted cheese starting to appear at the edges. When you flip it, the cheese should look glossy and fully melted. If the bread is browning too quickly but the cheese isn’t melted, your heat is too high — lower it to medium-low and extend the cooking time slightly.

What are some good add-ins for a grilled sandwich with cottage or ricotta cheese?

There are so many wonderful add-ins that pair beautifully with cottage cheese or ricotta! For a fresh, bright flavor, try thin slices of tomato, fresh spinach, or arugula — these add moisture and a slight bitterness that balances the creamy cheese. For a savory boost, add caramelized onions, sautéed mushrooms, or roasted red peppers. If you like heat, a few slices of jalapeño or a drizzle of hot honey works wonderfully. For a more substantial sandwich, add crispy bacon, prosciutto, or thinly sliced apple or pear for a sweet-savory contrast. My personal favorite is a handful of fresh basil leaves and a few sun-dried tomatoes — the combination is reminiscent of a caprese salad, and the concentrated sweetness of the tomatoes pairs perfectly with the mild cheese. Just remember not to overfill — too many add-ins can make the sandwich difficult to flip and cause the filling to spill out.

Can I use low-fat cottage cheese or ricotta for this grilled sandwich recipe?

Yes, you can use low-fat versions, but I want to be honest with you about the trade-off. Low-fat cottage cheese and low-fat ricotta have a much higher water content than their full-fat counterparts. This extra moisture can lead to a soggy sandwich, so you’ll definitely need to drain them thoroughly — I recommend straining for at least 10 minutes and even gently pressing with a paper towel. The flavor will also be noticeably less rich and creamy. The texture of low-fat ricotta can turn slightly grainy when heated, while low-fat cottage cheese may break down into a watery consistency. If you’re using low-fat dairy for dietary reasons, I recommend adding an extra tablespoon of Parmesan cheese to boost the umami and richness, and be extra careful with your butter-to-bread ratio to ensure a good crust. Full-fat versions give the best results, but low-fat can work in a pinch with these adjustments.

What type of bread works best for a cottage cheese grilled sandwich?

The best bread for a cottage cheese grilled sandwich is one that is sturdy enough to hold the creamy filling without falling apart, but not so thick that it overwhelms the cheese. I’ve tested this recipe with white bread, whole wheat, sourdough, brioche, and rustic Italian bread, and they all work well. My top recommendation is sourdough — its tangy flavor complements the mild cheese beautifully, and its dense crumb structure toasts evenly and stays crisp. White bread gives you that classic, soft, nostalgic texture that many people love in a grilled cheese. Whole wheat is a great option for a heartier, more nutritious sandwich. Avoid very airy or flimsy bread like thin sandwich thins or very soft artisan rolls, as they can tear or become soggy. If you want to use gluten-free bread, choose a sturdy one and consider toasting it lightly before assembling to prevent sogginess.

Can I make this cheesy grilled sandwich ahead of time and reheat it later?

Yes, you can absolutely make this sandwich ahead of time, though it’s best enjoyed fresh. The best approach is to prepare the cheese filling up to 4 days in advance and store it in an airtight container in the refrigerator. Then, when you’re ready to eat, all you need to do is spread the butter, assemble the sandwiches, and grill them — it takes about 10 minutes. If you need to make the full sandwiches ahead, cook them completely, let them cool on a wire rack (never stack them, as steam will make them soggy), then wrap each sandwich individually in foil and refrigerate for up to 3 days. To reheat, unwrap and place in a skillet over medium-low heat for 2–3 minutes per side, or in an air fryer at 350°F for 5 minutes. The microwave is not recommended — it will make the bread rubbery and the cheese tough. Reheated this way, the sandwich is about 90% as good as fresh, which is still delicious.

What is the difference between a grilled cheese with cottage cheese versus ricotta cheese?

The main difference lies in texture and flavor. Cottage cheese has small, distinct curds and a slightly tangy, milky flavor with a noticeable moisture content. When melted, the curds soften but retain a gentle, creamy texture with tiny pockets of richness throughout the filling — it’s like little bursts of creaminess in every bite. Ricotta, on the other hand, is much smoother, finer-grained, and richer in flavor. It’s made from whey and has a higher fat content, which gives it a luxurious, velvety mouthfeel. When melted, ricotta becomes uniformly creamy without any distinct curds, creating a more homogeneous filling. In terms of protein, cottage cheese wins (about 11g protein per 1/2 cup versus 7g for ricotta), making it the more filling option. Personally, I use cottage cheese when I want a more rustic, textured sandwich with a tangy edge, and ricotta when I’m in the mood for something ultra-smooth and indulgent. Both are fantastic — it really comes down to your personal texture preference.

Can I add vegetables like spinach or tomatoes to the cottage cheese grilled sandwich?

Yes, adding vegetables like spinach, tomatoes, or roasted peppers is a wonderful way to boost the flavor and nutrition of this cottage cheese grilled sandwich. Fresh spinach leaves can be added directly to the sandwich — they’ll wilt slightly from the heat, becoming tender and mild. Tomatoes should be sliced thinly and patted dry with a paper towel to remove excess moisture, which helps prevent sogginess. Roasted red peppers are another excellent choice; they add a sweet, smoky flavor that pairs perfectly with the creamy cheese. A few tips from my kitchen: don’t add too many vegetables (about 1/4 cup total per sandwich is plenty), and if you’re using watery vegetables like tomatoes, place them between layers of cheese rather than directly against the bread — the cheese acts as a barrier that protects the bread from moisture. Also, consider salting your tomato slices lightly and letting them sit for a few minutes, then blotting them dry before adding to the sandwich.

How do I get the perfect cheese pull with cottage cheese or ricotta in a grilled sandwich?

The secret to an epic cheese pull is all about the mozzarella, not the cottage cheese or ricotta. Cottage cheese and ricotta are creamy but not stretchy — they don’t form long, elastic strands when melted. Mozzarella, on the other hand, is the stretch champion. To get that iconic cheese pull, use a good-quality low-moisture mozzarella and make sure it’s evenly distributed in the filling. Use shredded mozzarella rather than fresh, as fresh mozzarella releases too much water. I recommend using a full 1 cup of mozzarella for 4 sandwiches, which gives you about 1/4 cup per sandwich — that’s plenty for a satisfying pull. Also, don’t overheat the sandwich: cooking over medium heat ensures the mozzarella melts gradually and evenly, creating long, elastic strands. If you cook over high heat, the bread will burn before the mozzarella fully melts, and you won’t get that beautiful cheese pull. Finally, let the sandwich rest for 30 seconds after grilling — this allows the cheese to firm up just slightly so it stretches rather than breaking when you pull the halves apart.

Print

clock clock iconcutlery cutlery iconflag flag iconfolder folder iconinstagram instagram iconpinterest pinterest iconfacebook facebook iconprint print iconsquares squares iconheart heart iconheart solid heart solid icon

Cheesy Grilled Sandwich Recipe with Cottage or Ricotta Cheese

  • Author: Chef Mia
  • Prep Time: 10 minutes
  • Cook Time: 8 minutes
  • Total Time: 18 minutes
  • Yield: 4 sandwiches 1x
  • Method: Snack, Lunch
  • Cuisine: American

Description

A delicious and easy cheesy grilled sandwich made with creamy cottage cheese or ricotta, perfect for a quick snack or light meal.


Ingredients

Scale
  • 8 slices bread (white, whole wheat, or sourdough)
  • 1 cup cottage cheese or ricotta cheese
  • 1 cup shredded mozzarella cheese
  • 1/4 cup grated Parmesan cheese
  • 2 tablespoons butter, softened
  • 1/2 teaspoon garlic powder
  • 1/2 teaspoon dried oregano
  • 1/4 teaspoon salt
  • 1/4 teaspoon black pepper

Instructions

  1. In a small bowl, combine cottage cheese (or ricotta), mozzarella, Parmesan, garlic powder, oregano, salt, and pepper. Mix well.
  2. Spread butter on one side of each bread slice.
  3. Place 4 slices of bread, buttered side down, on a work surface. Divide the cheese mixture evenly among them, spreading to the edges.
  4. Top with remaining bread slices, buttered side up.
  5. Heat a large skillet or griddle over medium heat. Cook sandwiches for 3-4 minutes per side, until golden brown and cheese is melted.
  6. Serve immediately.

Notes

For extra flavor, add sliced tomatoes or fresh spinach before grilling. You can also use gluten-free bread if needed.


Nutrition

  • Calories: 350
  • Sugar: 4g
  • Fat: 18g
  • Carbohydrates: 30g
  • Protein: 18g


Cheesy Grilled Sandwich Recipe with Cottage or Ricotta Cheese

k">

Tried This Recipe? Leave a Comment!

Did you make this recipe? I’d love to hear how it turned out! Please leave a comment and a rating below. Your feedback helps other home cooks and supports cheerychop.com!

For more delicious inspiration, follow me on Pinterest!

Cheesy Garlic Stuffed Dough Bites That Melt in Every Bite – The Ultimate Pull-Apart Appetizer

⚖️
Difficulty
Easy
⏲️
Prep Time
20 mins
🕒
Cook Time
18 mins
⏱️
Total Time
38 mins
🍽️
Servings
12–16 bites

I still remember the first time I made these cheesy garlic stuffed dough bites — it was a rainy Saturday in my tiny Manhattan apartment, and the smell of garlic butter mingling with melting cheese drifted down the hall. My neighbor actually knocked on my door to ask what I was baking. That’s the kind of recipe this is: one that pulls people in before they even take a bite. These melty stuffed bread bites are everything I love about comfort food — soft, pillowy dough wrapped around a warm, gooey cheese center, finished with a glossy garlic butter glaze and a sprinkle of fresh parsley. Growing up in Morocco, my mother made a version of stuffed bread with spiced fillings, and later in Paris, I learned how a simple beurre noisette could transform any dough into something extraordinary. This recipe brings those worlds together: the warmth of North African hospitality and the precision of French pastry technique.

Imagine tearing open one of these golden dough bites and watching the cheese stretch in a long, glossy ribbon. The exterior is lightly crisped from the oven, while the inside stays impossibly soft and airy. Each bite carries the punch of fresh garlic, the richness of a double-cheese blend, and a subtle hint of parsley that cuts through the richness. The garlic doesn’t overpower — it mellow as it bakes, infusing the dough from the inside out. What I love most is the contrast: the slight crunch of the golden crust giving way to that molten center. It’s the kind of texture that makes you close your eyes for a second, the kind of appetizer that disappears before the main course even hits the table.

What sets my version apart is a simple but game-changing technique I picked up from a pastry chef in the 16th arrondissement: we blanch the garlic in butter before incorporating it into the filling. This step softens the garlic’s sharp edge and infuses the fat with its essence, so every bite tastes deeply aromatic rather than harsh or raw. Combined with a carefully tested mozzarella-and-cheddar blend, the filling stays beautifully molten without turning greasy. In this post, I’ll walk you through every detail — from choosing the right cheese to shaping the dough so nothing leaks out — and share the one mistake I see home cooks make most often. Whether you’re feeding a crowd at game day or just craving something cozy on a weeknight, these cheesy garlic stuffed dough bites are about to become your new favorite.

Why This Cheesy Garlic Stuffed Dough Bites Recipe Is the Best

The flavor secret lies in the garlic butter blanch — a technique borrowed from French beurre fondant. By gently warming minced garlic in butter before mixing it into the cheese, you tame its bite and let its natural sweetness shine. This creates a filling that’s aromatic, not aggressive, and it infuses the dough from the inside as the bites bake.

Perfected texture comes from a high-hydration dough that’s enriched with egg and butter, inspired by the brioche-style breads I learned to make in Paris. The dough rises tender and airy, while the cheese blend — mozzarella for stretch and sharp cheddar for flavor — stays molten without turning oily. A quick bake at 375°F gives you a golden crust and a center that pulls apart like a dream.

Foolproof and fast because this dough requires no stand mixer and only one short rise. I’ve streamlined the process for home cooks: you can mix everything by hand in under 15 minutes, let it rise while you prep the filling, and have warm bites on the table in under an hour. Every step includes visual cues so you know exactly when the dough is ready, making this approachable even if you’re new to working with yeast.

Cheesy Garlic Stuffed Dough Bites Ingredients

When I shop for these ingredients in NYC, I hit the Chelsea Market for fresh mozzarella and head to my local bodega for the garlic and parsley. There’s something about using whole-milk mozzarella and a good sharp cheddar that makes all the difference — the same way my mother would select the freshest from the souk in Fes.

Ingredients List

  • 2 cups (250 g) all-purpose flour, plus extra for dusting
  • 1 packet (2¼ tsp / 7 g) active dry yeast
  • ¾ cup (180 ml) warm milk (110°F)
  • 2 tbsp (25 g) granulated sugar
  • 3 tbsp (42 g) unsalted butter, melted and cooled slightly
  • 1 large egg, room temperature
  • ½ tsp fine sea salt
  • 1½ cups (170 g) shredded whole-milk mozzarella cheese
  • ½ cup (60 g) shredded sharp cheddar cheese
  • 4 cloves garlic, minced
  • 2 tbsp fresh parsley, finely chopped
  • For the garlic butter glaze: 4 tbsp (56 g) unsalted butter, 3 cloves garlic (minced), ¼ tsp salt, 1 tbsp fresh parsley (optional)

Ingredient Spotlight

Mozzarella is the backbone of the stretch — look for whole-milk mozzarella in block form (not pre-shredded, which contains anti-caking agents that inhibit melting). Shred it yourself for the best gooey pull. If you only have part-skim, it will still work but won’t be as luxurious.

Sharp cheddar brings the bold, tangy note that balances the richness of the dough and butter. White cheddar works beautifully here. For a milder version, use Monterey Jack instead — it will still melt well but with less punch.

Garlic is the star aromatic. Use fresh cloves only — pre-minced jarred garlic will taste harsh and lack sweetness. Blanching it in butter transforms it from pungent to mellow and nutty, which is the secret to a balanced filling.

Original IngredientBest SubstitutionFlavor / Texture Impact
Whole-milk mozzarellaLow-moisture mozzarella (part-skim)Slightly less stretch; still good but not as gooey
Sharp cheddarMonterey Jack or GoudaMilder flavor; Gouda adds a smoky note
Fresh garlicRoasted garlic paste (2 tsp)Sweeter, more mellow; less pungent kick
All-purpose flourBread flourChewier texture; slightly more structure
Unsalted butterSalted butter (reduce added salt by ¼ tsp)Slightly saltier finish; fine in a pinch

How to Make Cheesy Garlic Stuffed Dough Bites — Step-by-Step

Trust me, if you can roll a ball of dough, you can make these. I’ve broken every step down with the exact visual cues I use in my own kitchen — no guesswork, just golden, melty success.

Step 1: Activate the Yeast

In a small bowl, combine the warm milk (110°F) and sugar. Sprinkle the active dry yeast over the top and let it sit for 5–7 minutes until frothy. If it doesn’t foam, your milk may have been too hot or the yeast is expired — start over with fresh yeast.

💡 mia’s Pro Tip: Use a thermometer to check your milk temperature. 110°F feels comfortably warm to the wrist — like a warm bath, not hot.

Step 2: Make the Dough

In a large bowl, whisk together the flour and salt. Make a well in the center and add the activated yeast mixture, melted butter, and egg. Stir with a wooden spoon until a shaggy dough forms, then turn it out onto a lightly floured surface. Knead for 8 minutes until smooth and elastic — it should feel soft and supple, not sticky. Place in a greased bowl, cover, and let rise in a warm spot for 30 minutes until doubled.

⚠️ Common Mistake to Avoid: Adding too much flour during kneading. Use just enough to prevent sticking — a slightly tacky dough makes softer bites.

Step 3: Prepare the Cheese Filling

While the dough rises, make the filling. In a small skillet over medium-low heat, melt 2 tablespoons of butter. Add the 4 minced garlic cloves and cook for 1½ minutes until fragrant and softened — don’t let them brown. Remove from heat and let cool for 3 minutes. In a bowl, combine the shredded mozzarella, cheddar, the garlic-butter mixture, and chopped parsley. Mix well, then refrigerate for 10 minutes so it firms up slightly — this makes it much easier to stuff.

Step 4: Shape and Stuff the Dough Bites

Punch down the risen dough and divide it into 12–16 equal pieces (about 30 g each). Flatten each piece into a 3-inch round, place a heaping teaspoon of the cheese filling in the center, and pinch the edges tightly to seal. Roll gently between your palms to form a smooth ball. Place seam-side down on a parchment-lined baking sheet, spacing them about 1 inch apart. Cover loosely with plastic wrap and let rise for 20 minutes.

💡 mia’s Pro Tip: Pinch the dough very firmly — any gap will let the cheese escape during baking. A tight seal is the #1 secret to leak-proof bites.

Step 5: Bake to Golden Perfection

Preheat the oven to 375°F. Brush the risen dough bites lightly with a little melted butter or milk for a golden sheen. Bake for 16–18 minutes until puffed and deep golden brown on top. While they bake, prepare the garlic butter glaze: melt the remaining 4 tablespoons butter with the 3 minced garlic cloves and salt, cooking on low for 1 minute. Stir in parsley if using. Brush the hot baked bites immediately with the garlic butter — this is where the magic happens.

⚠️ Common Mistake to Avoid: Skipping the post-bake brush. The garlic butter soaks into the warm crust, giving you that signature flavor in every single bite.

StepActionDurationKey Visual Cue
1Activate yeast5–7 minFrothy foam on top
2Knead dough8 minSmooth, elastic, springs back when poked
3First rise30 minDoubled in size
4Shape & stuff10 minSmooth, sealed balls
5Second rise20 minPuffed and slightly puffy
6Bake16–18 minDeep golden brown on top

Serving & Presentation

I love serving these cheesy garlic stuffed dough bites straight from the oven while the cheese is still at its stretchiest. Pile them onto a warm wooden board or a cast-iron skillet — the rustic look reminds me of the bread my mother would pull from the clay oven in Morocco. Scatter a few extra parsley leaves over the top and serve with small bowls of warm marinara, roasted red pepper dip, or a simple garlic aioli. The bright acidity of a tomato-based sauce cuts through the richness beautifully.

For a full spread, pair these with a crisp green salad dressed with lemon vinaigrette or a bowl of roasted tomato soup for dipping. If I’m hosting friends from the farmers market crowd in NYC, I sometimes add a side of harissa yogurt for a North African twist — the smoky heat plays off the garlic and cheese in the most unexpected way. These bites also shine as a game-day appetizer alongside wings or sliders.

Pairing TypeSuggestionsWhy It Works
Side DishGreen salad with lemon vinaigrette, roasted tomato soupBright acidity balances the rich, cheesy dough
Sauce / DipWarm marinara, garlic aioli, harissa yogurtTomato cuts fat; aioli adds creaminess; harissa adds heat
BeverageLight lager, Sauvignon Blanc, sparkling water with lemonCrisp, acidic drinks cut through the richness
GarnishFresh parsley, flaky sea salt, crushed red pepperAdds freshness, crunch, and a touch of heat

Make-Ahead, Storage & Reheating

Between recipe testing, writing, and chasing trains in NYC, I’m all about recipes that work with my schedule. These cheesy garlic stuffed dough bites are wonderfully forgiving — you can prep them in stages and still get that fresh-baked taste any day of the week.

MethodContainerDurationReheating Tip
RefrigeratorAirtight containerUp to 3 daysReheat at 350°F for 6–8 minutes; brush with extra garlic butter
FreezerFreezer-safe bag or containerUp to 2 monthsBake frozen at 375°F for 20–22 minutes; no need to thaw
Make-AheadCovered baking sheet (unbaked)Up to 8 hours in fridgeBake directly from fridge; add 2–3 minutes to bake time

For the best texture, I recommend reheating in the oven rather than the microwave — the microwave will soften the crust, while the oven restores that slight crispness. If you’re reheating from frozen, place the bites on a parchment-lined sheet and bake straight from the freezer — no thawing needed. I often make a double batch and stash half in the freezer for impromptu guests or lazy Sunday snacking.

Variations & Easy Swaps

VariationKey ChangeBest ForDifficulty Impact
Spicy Harissa & CheeseAdd 1 tbsp harissa paste to the cheese fillingNorth African flair, bold heat loversNo change
Gluten-Free VersionUse gluten-free all-purpose flour blendGluten-sensitive guestsSlightly trickier; add 1 tsp xanthan gum
Herb & Parmesan TwistReplace cheddar with ½ cup grated Parmesan; add 1 tsp dried oreganoItalian-inspired flavor profileNo change

Spicy Harissa & Cheese

This variation is a nod to my Moroccan roots. Stir 1 tablespoon of harissa paste into the cooled garlic butter before mixing with the cheeses. The smoky, spicy heat from the harissa pairs beautifully with the mellow garlic and rich cheese. I like to serve these with a cooling cucumber-yogurt dip to balance the warmth.

Gluten-Free Version

I’ve tested this with a good all-purpose gluten-free flour blend (one that includes xanthan gum). The dough will be slightly stickier, so lightly oil your hands when shaping. Add an extra tablespoon of milk if the dough feels too dry. Bake at the same temperature but check at 15 minutes — gluten-free versions can brown a bit faster. They’re a little more delicate but still absolutely delicious.

Herb & Parmesan Twist

For an Italian-inspired take, swap the sharp cheddar for ½ cup of freshly grated Parmesan and add 1 teaspoon of dried oregano to the cheese mixture. The Parmesan adds a salty, nutty depth that complements the garlic beautifully. I love serving these with a side of warm marinara for dipping — it’s like a garlic knot meets cheese bread in the best way.

What type of cheese melts best for cheesy garlic stuffed dough bites?

Whole-milk mozzarella is hands down the best cheese for melt and stretch. It has a high moisture content and a neutral flavor that lets the garlic shine. I always buy it in block form and shred it myself — pre-shredded mozzarella contains anti-caking agents like cellulose that prevent it from melting smoothly. For a flavor boost, I combine mozzarella with sharp cheddar, which brings tang and depth. If you want an even stretchier pull, try adding a handful of provolone or low-moisture mozzarella. Avoid hard cheeses like aged Parmesan as the primary cheese — they don’t melt into that gooey ribbon you want in stuffed dough bites.

Can I prepare cheesy garlic stuffed dough bites ahead of time and bake them later?

Absolutely. You have two reliable options for making these ahead. The first is to assemble the stuffed dough bites completely, place them on a parchment-lined baking sheet, cover tightly with plastic wrap, and refrigerate for up to 8 hours. When you’re ready to bake, simply remove the plastic and bake at 375°F, adding 2–3 minutes to the bake time since the dough will be cold. The second option is to freeze the unbaked bites on a tray until solid, then transfer them to a freezer bag. You can bake them straight from frozen at 375°F for 20–22 minutes — no thawing needed. I do this all the time for parties, and the texture comes out just as fresh and fluffy.

How do I prevent the cheese from leaking out of the dough bites while baking?

Leaking cheese is almost always a sealing issue. First, make sure the dough is evenly flattened into a 3-inch round with no thin spots. Place the cheese filling in the center, then gather the edges up and pinch them together firmly — I like to twist the top slightly to create a tight seal. Chilling the cheese filling for 10 minutes before stuffing also helps keep it from melting too quickly in the oven. Finally, place the bites seam-side down on the baking sheet, so if any leakage does happen, it stays contained underneath rather than spilling out the top. If you follow these steps, the cheese should stay beautifully tucked inside every time.

What dipping sauce pairs best with cheesy garlic stuffed dough bites?

Warm marinara sauce is the classic choice — the bright acidity of the tomatoes cuts through the rich cheese and butter, creating a perfect balance. I also love a garlic aioli made with lemon and a touch of Dijon for a creamy, tangy option. For something bolder, try a harissa yogurt dip: mix 2 tablespoons of harissa paste with ½ cup Greek yogurt and a squeeze of lemon. It adds a smoky, spicy kick that complements the garlic beautifully. If you’re serving these at a party, offering two or three dipping sauces lets guests customize their experience — I always set out marinara, aioli, and harissa yogurt for my game-day spreads.

Can I use pre-made pizza dough for stuffed dough bites?

Yes, you can definitely use store-bought pizza dough as a shortcut. Look for a fresh or refrigerated pizza dough from the grocery store — it will save you about 30 minutes of mixing and kneading. Let the dough come to room temperature for about 20 minutes before shaping so it’s pliable enough to stretch. Keep in mind that pre-made dough may be less enriched than my recipe, so the bites will be slightly less pillowy and tender. To compensate, brush them generously with the garlic butter glaze after baking to add richness. I’ve done this on busy weeknights and the results are still wonderfully satisfying.

How do I get the garlic flavor into the dough itself, not just the filling?

The garlic butter glaze brushed onto the hot baked bites is what infuses the exterior with deep garlic flavor. But if you want garlic throughout the dough itself, you can add roasted garlic powder directly into the flour mixture — about 1 teaspoon works well. Another method I use is to bloom minced garlic in the melted butter before adding it to the dough mixture; this softens the garlic and distributes its flavor evenly. For the most intense garlic experience, use both methods: add a little roasted garlic powder to the dough and finish with the garlic butter glaze. That way, every bite — from the crust to the center — carries that warm, aromatic note.

Can I make these vegan or dairy-free?

Yes, with a few thoughtful substitutions. For the dough, replace the butter with a plant-based butter and the egg with a flax egg (1 tablespoon ground flax + 3 tablespoons water, rested for 5 minutes). Use unsweetened oat or soy milk in place of dairy milk. For the cheese filling, I recommend a high-quality vegan mozzarella shred that melts well — brands like Miyoko’s or Violife work nicely. For the cheddar flavor, add a tablespoon of nutritional yeast to the vegan cheese. The garlic butter glaze can be made with vegan butter and fresh garlic. The texture will be slightly less stretchy than the dairy version, but the flavor is still delicious and deeply satisfying.

Why did my dough not rise properly?

There are three common reasons dough fails to rise. First, the milk temperature may have been too hot or too cold — yeast thrives between 105°F and 115°F. Too hot kills it, too cold slows it down. Always use a thermometer. Second, your yeast might be expired. Check the packet date and test it by proofing in warm milk with a pinch of sugar — if it doesn’t foam within 10 minutes, the yeast is dead. Third, the room temperature might be too cool for rising. Find a warm spot in your kitchen, like near the oven or on top of the fridge. I sometimes preheat my oven to 170°F, turn it off, and let the dough rise inside the warm oven with the door slightly open.

How do I store leftover dough bites and keep them fresh?

Store leftover baked dough bites in an airtight container at room temperature for up to 2 days, or in the refrigerator for up to 5 days. To maintain their texture, reheat them in the oven rather than the microwave — 350°F for 6–8 minutes will restore the slight crispness on the outside while keeping the inside soft. I like to brush them with a little extra melted garlic butter before reheating to revive the flavor. If you’ve stored them in the fridge, let them sit at room temperature for 10 minutes before reheating so they warm through evenly. For longer storage, freeze the unbaked bites and bake fresh when you’re ready — that’s the best way to enjoy them at their peak.

What can I serve with these for a full meal?

These cheesy garlic stuffed dough bites make a fantastic appetizer, but they can also anchor a casual meal. For a complete spread, pair them with a hearty tomato soup or a creamy roasted red pepper soup for dipping. Add a simple arugula salad with lemon vinaigrette and shaved Parmesan to balance the richness. If you’re serving them as a side, they go beautifully with grilled chicken, steak, or a simple pasta dish like aglio e olio. For a party platter, arrange the bites on a large board with an assortment of dips — marinara, garlic aioli, and harissa yogurt — alongside crudités and olives. It’s a crowd-pleasing combination that works for everything from game day to casual dinner parties.

Share Your Version!

I absolutely love hearing how these cheesy garlic stuffed dough bites turn out in your kitchen. Did you try the harissa twist? Did your family fight over the last one? Scroll down to leave a star rating and a comment — your feedback helps other home cooks know what to expect. And if you snap a photo, tag me on Instagram or Pinterest @exorecipes — I share my favorites in my stories every week. The one question I always ask my readers: what’s your go-to dipping sauce for melty stuffed bread bites? I’m always looking for new ideas to test in my NYC kitchen!

From my NYC kitchen to yours — I hope this recipe brings as much warmth to your table as it does to mine. — mia 🧡

📌

Love This Recipe? Save It to Pinterest!

If you enjoyed these cheesy garlic stuffed dough bites, don’t let them get lost in your browser tabs! 😄 Pin it now so you can find them again anytime — and explore hundreds more tried-and-tested recipes waiting for you on my Pinterest boards.

👉 Follow mia on Pinterest @exorecipe

📌 Pin this recipe · 🔁 Re-pin your favorites · 💬 Tag me when you make it — I love seeing your creations!

Print

clock clock iconcutlery cutlery iconflag flag iconfolder folder iconinstagram instagram iconpinterest pinterest iconfacebook facebook iconprint print iconsquares squares iconheart heart iconheart solid heart solid icon

Cheesy Garlic Stuffed Dough Bites That Melt in Every Bite

  • Author: Chef Mia

Instructions


    Cheesy Garlic Stuffed Dough Bites That Melt in Every Bite