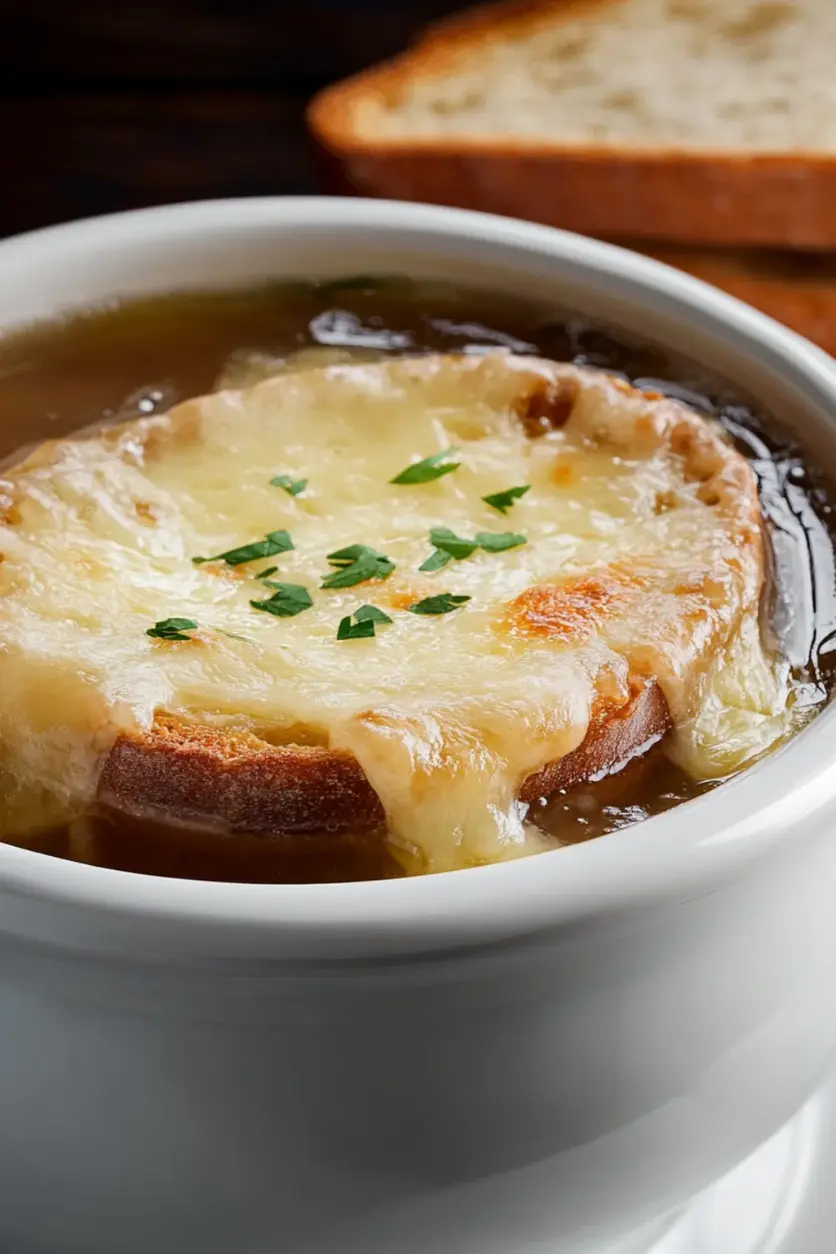
Gordon Ramsay French Onion Soup Recipe with Gruyère Croutons
Table of Contents
Gordon Ramsay French Onion Soup Recipe – Perfect Caramelized Umami
⚖️
Difficulty
Medium
⏲️
Prep Time
15 mins
🕒
Cook Time
70 mins
⏱️
Total Time
85 mins
🍽️
Servings
6
I still remember the first bowl of French onion soup I made after my apprenticeship in Paris — it was a cold February night, and I was living in a tiny studio near the Marais. That soup, deeply caramelized with a rich beef broth and a golden blanket of Gruyère, tasted like everything I had learned in culinary school: patience, technique, and the magic of humble ingredients. This Gordon Ramsay French Onion Soup recipe captures that same magic, but with a few tweaks I’ve developed over my years cooking in New York City. The secret to this version? It’s a perfect balance of slow-cooked sweetness and bold umami — a technique I first picked up in my mother’s kitchen in Morocco, where we would caramelize onions for hours for tagines. This Gordon Ramsay-inspired recipe is not just about following steps; it’s about understanding the process that makes it the best French onion soup. Let me guide you through it.
Imagine the scent filling your kitchen as butter and olive oil melt together, and the onions begin to soften and release their sugary aroma. After thirty to forty minutes of patient stirring, those slices turn a rich mahogany brown, sweet and almost jammy. Then, the dry white wine hits the hot pot with a satisfying sizzle, releasing all the browned bits stuck to the bottom — that’s pure flavor. The beef stock, with its deep, savory notes, joins in, along with bay leaves and fresh thyme from the Union Square Greenmarket. As it simmers, the broth becomes rich, complex, and soul-warming. When you ladle it into a bowl and top it with that cheesy, bubbling Gruyère toast, every spoonful is a moment of pure comfort. My version brings a touch of French technique and a whisper of Moroccan warmth — it’s an easy French onion soup recipe that feels extraordinary.
As a professional cook trained in Paris and now cooking in NYC, I’ve refined this recipe so that anyone can nail it at home. I’m not just sharing ingredients; I’m giving you the pro secrets that make this soup stand out from any other. The key is how you treat the onions — not just with heat, but with a pinch of sugar at the right moment to encourage deep, even browning without burning. I’ll also show you why quality beef stock is non-negotiable for that homemade French onion soup flavor, and I’ll share a common mistake that can turn this easy recipe into a watery mess. Plus, I’ll reveal my trick for the perfect Gruyère crouton — a crispy, cheesy crown that’s the hallmark of the best French onion soup. Trust me, once you make this version, you’ll never go back to a canned soup again. This is the classic French onion soup reimagined with a chef’s touch.
Why This Gordon Ramsay French Onion Soup Recipe Is the Best
The flavor secret of this Gordon Ramsay French onion soup recipe lies in how we build layers of umami. In Paris, I learned that caramelizing onions is not about brute force — it’s about patience and letting the natural sugars do the work. I start with a heavy-bottomed pot and let the onions sweat slowly, which draws out their moisture and concentrates their sweetness. Then, ten minutes in, I add a teaspoon of sugar to kick-start the browning process, a trick I adapted from my mother’s Moroccan kitchen where we’d use honey for a similar effect. The result is a depth of flavor that’s both sweet and savory, with a complexity that makes every spoonful memorable. This technique transforms a simple easy French onion soup recipe into something truly special, elevating it to the best French onion soup you’ll ever make at home.
Perfected texture is the hallmark of any classic French onion soup. The broth should be rich but not heavy, with a velvety mouthfeel that coats the tongue. I achieve this by deglazing the pan with dry white wine — scraping up the caramelized fond from the bottom — before adding the beef stock. That fond, packed with browned onion particles, is the secret to a broth with real body. Then, a gentle 30-minute simmer allows the flavors to meld without clouding the soup. The final touch is the baguette crouton: I toast it until it’s dry and crisp, so when it’s topped with Gruyère and broiled, it stays crunchy on the outside while soaking up the broth from below. This perfect contrast in textures — a soft, sweet soup, a chewy crouton, and a bubbly, salty cheese crust — is what makes this homemade French onion soup unforgettable.
Foolproof and fast? Absolutely. Even with the longer caramelization time, this recipe is designed for home cooks who want restaurant-quality results without stress. I’ve tested it for years in my NYC kitchen — yes, even when I’m rushing between farmers market trips and dinner with friends. The key is to set a timer for the onions so you don’t forget them, and to use a large enough pot to prevent overcrowding. I also recommend prep-freezing your sliced onions for even quicker assembly next time. This version is forgiving: if your caramelization takes an extra ten minutes, that’s fine — the soup will only taste better. So whether you’re a seasoned cook or a beginner looking for an easy French onion soup recipe, this method gives you a rich, reliable classic French onion soup that tastes like you spent all day in the kitchen.
Gordon Ramsay French Onion Soup Recipe Ingredients
Shopping for ingredients is one of my favorite parts of cooking. When I’m in New York City, I head to the Fairway on the Upper West Side for their amazing selection of Gruyère — it’s always nutty and perfectly aged. I remember in Morocco, we’d use local sheep’s milk cheese for a similar richness, but Gruyère is the classic choice for this soup. For the onions, I grab a mix of yellow and sweet onions from the farmers market; they caramelize beautifully and give the broth a natural sweetness. Here’s your complete list of everything you need for this Gordon Ramsay French onion soup recipe.
120 ml (1/2 cup) dry white wine, such as Sauvignon Blanc
2 bay leaves
2 sprigs fresh thyme
Salt and freshly ground black pepper, to taste
1 large baguette, sliced into 1-inch pieces, then toasted
170g (about 1 1/2 cups) Gruyère cheese, grated
Fresh parsley, finely chopped (optional, for garnish)
Ingredient Spotlight
Understanding your ingredients is key to making this the best French onion soup. Here’s what I want you to know about each main component. The onions are the star — choose yellow ones for the deepest flavor. In the US, you can find them at any grocery store; just make sure they’re firm and heavy. My tested substitution is sweet onions (like Vidalia) for a milder, sweeter soup, but they may take slightly longer to caramelize. The Gruyère should be a firm, aged type from Switzerland; its nuttiness is non-negotiable for that classic French onion soup topping. If you can’t find it, Swiss or Emmental cheese work well, but they’re milder and less complex. Finally, the beef stock: always use a quality brand (try Better Than Bouillon for convenience) or homemade stock for the richest flavor. Chicken stock can be used in a pinch, but the soup will be less savory.
Original Ingredient
Best Substitution
Flavor / Texture Impact
Yellow onions
Sweet Vidalia onions
Milder, slightly sweeter broth; may caramelize faster but less depth
Gruyère cheese
Swiss or Emmental cheese
Less nutty, more mild flavor; similar melt but less complex
Dry white wine
Dry vermouth or additional stock + 1 tbsp lemon juice
Less complex acidity; broth will be slightly less balanced
Beef stock
Chicken stock + 1 tbsp soy sauce
Lighter flavor; soy adds umami but soup lacks beefy richness
How to Make Gordon Ramsay French Onion Soup Recipe — Step-by-Step
Don’t be intimidated by the caramelization time! This easy French onion soup recipe is all about letting time do the work for you. Just grab a big pot, a wooden spoon, and follow these steps. I promise, the smell alone will make every minute worth it.
Step 1: Prepare and Caramelize the Onions
Heat the butter and olive oil in a large pot (at least 5 quarts) over medium-low heat. Add the sliced onions and stir to coat them evenly. Cook for 30–40 minutes, stirring every 5 minutes or so, until the onions are a deep, rich brown color. After the first 10 minutes, sprinkle in the sugar and stir well — this kick-starts the browning process. Be patient; if the onions start to stick, add a splash of water instead of cranking up the heat. 💡 mia’s Pro Tip: A wide-bottomed pot gives the onions more surface area for even caramelization. Use a stainless steel or enameled cast iron pot for best results — nonstick pans don’t develop as much fond.
Step 2: Add Garlic and Deglaze
Add the minced garlic to the caramelized onions and stir for about 2 minutes until fragrant. Then, pour in the dry white wine. Use a wooden spoon to scrape up all the browned bits from the bottom of the pot — that’s pure flavor. Let the wine cook down for about 1 minute until it’s almost evaporated. ⚠️ Common Mistake to Avoid: Don’t skip the deglazing! The brown fond (called “sucs” in French) is where most of the savory flavor lives. If you leave it behind, your broth will be thin and pale.
Step 3: Simmer the Broth
Add the beef stock, bay leaves, fresh thyme sprigs, and a generous pinch of salt and pepper. Bring the soup to a gentle simmer, then uncover it and let it cook for 30 minutes. This allows the flavors to meld and the broth to slightly reduce. 💡 mia’s Pro Tip: For an even richer broth, let the soup simmer for up to 45 minutes. Just be careful not to boil it hard, or the stock can become cloudy. A gentle bubble is all you need.
Step 4: Toast Bread and Prep Cheese
While the soup simmers, preheat your broiler. Slice the baguette into 1-inch thick rounds and arrange them on a baking sheet. Toast them under the broiler for 1–2 minutes per side, until golden and dry. Set them aside. Grate the Gruyère cheese if you haven’t already. ⚠️ Common Mistake to Avoid: Do not over-toast the bread! It should be dry but not hard. If it’s too crisp, it will not soak up the soup properly and will be crunchy rather than chewy.
Step 5: Assemble and Broil
Ladle the hot soup into oven-safe bowls. If you have individual bowls, place them on a baking sheet. Float a toasted baguette slice in each bowl — push it down slightly so it starts absorbing the broth. Pile a generous amount of grated Gruyère over each crouton, covering it completely. Place the baking sheet under the broiler and broil for 2–4 minutes, until the cheese is melted, bubbly, and golden brown. Watch carefully to avoid burning. 💡 mia’s Pro Tip: For the perfect cheese crust, pile the Gruyère high — about 1/4 cup per bowl. Don’t skimp! The cheese should drip over the sides of the crouton and melt into the soup.
Step 6: Serve and Garnish
Carefully remove the bowls from the oven (they will be very hot!). Garnish each bowl with a sprinkle of fresh parsley if desired. Serve immediately, warning your guests that the bowls are hot. The soup should be eaten right away, while the cheese is still stretchy and the crouton is soft and soaked in broth. 💡 mia’s Pro Tip: If you don’t have oven-safe bowls, you can top each serving with a cheesy crouton made in the broiler separately and floated on top after. It’s still delicious!
Step
Action
Duration
Key Visual Cue
1
Caramelize onions
30–40 minutes
Deep mahogany brown, soft and jammy
2
Add garlic, deglaze
3–5 minutes
Garlic fragrant, wine nearly evaporated
3
Simmer broth
30 minutes
Broth slightly reduced, deep brown, aromatic
4
Toast bread, prep cheese
5 minutes
Bread golden and dry, cheese grated
5
Assemble and broil
2–4 minutes
Cheese melted, bubbly, golden brown
6
Serve and garnish
Immediate
Steaming hot, parsley flecks, cheesy pull
Serving & Presentation
This classic French onion soup is a meal in itself, but I love to serve it as part of a cozy dinner. Ladle the soup into sturdy ceramic bowls — I found a beautiful set at a stall in the Chelsea Market. The contrast of the dark, rich broth against the white bowl is stunning. Don’t forget to warn everyone that the bowls are hot right out of the broiler! For garnish, a small sprinkle of fresh parsley adds a bright green pop, but I sometimes add a pinch of smoked paprika for a subtle Moroccan heat. My Parisian grandmother would always serve it with a side of crusty bread for dipping into the broth, but the cheesy crouton really does the job. When I’m hosting friends in my NYC apartment, I pair this soup with a glass of dry rosé or a full-bodied red wine, like a Côtes du Rhône — the acidity cuts through the richness beautifully. It’s the perfect starter or a main course for a cold winter night.
For a more casual presentation, you can skip the individual bowls and assemble the soup in a large oven-safe dish. Top it with several baguette slices and a generous blanket of Gruyère, and broil until bubbly. Then ladle into bowls at the table — it’s dramatic and fun. I also like to add a small drizzle of extra virgin olive oil over the cheese just before serving for a silky finish. And if you’re feeling extra, a few pickled red onions on the side add a tangy contrast. This is homemade
Deeply caramelized onions, rich beef broth, and golden Gruyère toaststhis is French onion soup done right.
Ingredients
Scale
500g onions, thinly sliced
2 cloves garlic, minced
55g unsalted butter
2 tbsp olive oil
1 tsp sugar
2L quality beef stock
120ml dry white wine
2 bay leaves
2 sprigs fresh thyme
Salt + pepper
1 baguette, sliced + toasted
170g Gruyère, grated
Fresh parsley (optional)
Instructions
Heat butter + olive oil in a large pot. Add onions. Cook on medium-low for 3040 minutes, stirring often, until deeply caramelized.
Add garlic. Stir for 2 minutes. Add sugar 10 minutes in to help browning.
Deglaze with wine, scraping the bottom. Add stock, bay, thyme, salt, and pepper.
Simmer uncovered 30 minutes. Taste and adjust seasoning.
Toast baguette slices. Top with Gruyère. Broil until golden.
Serve soup in bowls. Float a cheesy crouton on top. Garnish with parsley.
Nutrition
Calories:376 cal
Tried This Recipe? Leave a Comment!
Did you make this recipe? I’d love to hear how it turned out! Please leave a comment and a rating below. Your feedback helps other home cooks and supports cheerychop.com!
ph">For more delicious inspiration, follow me on Pinterest!
Best French Onion Soup Recipe – Rich & Cheesy
Table of Contents
Classic French Onion Soup with Triple Cheese Crust – The Ultimate Comfort Bowl
⚖️
Difficulty
Medium
⏲️
Prep Time
15 mins
🕒
Cook Time
75 mins
⏱️
Total Time
90 mins
🍽️
Servings
5 bowls
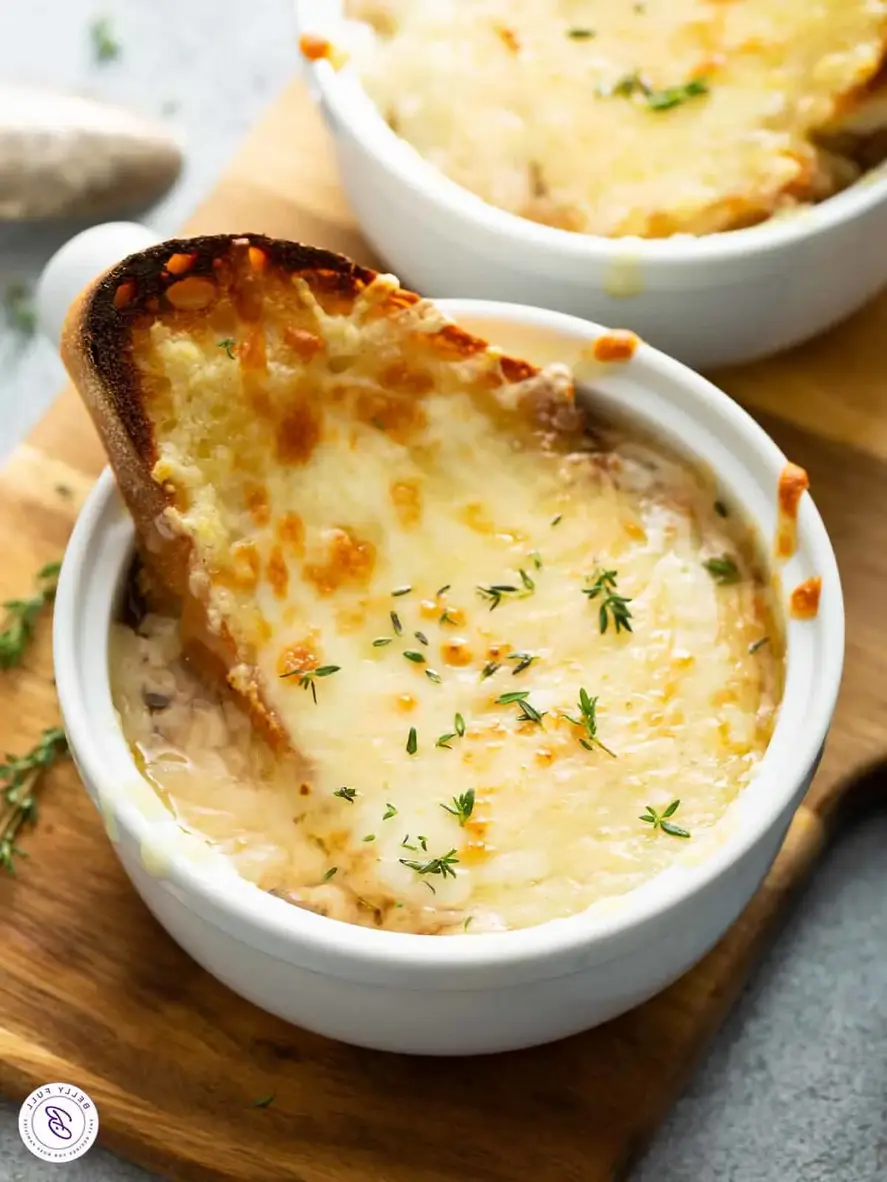
I’ll never forget the first time I tasted a truly great French onion soup. It was a chilly winter evening in Paris, during my years at culinary school. I had just finished a brutal eight-hour shift in a pastry kitchen, and a friend dragged me to a tiny bistro in the 6th arrondissement. The waiter brought out a crock of bubbling soup, and when I broke through that gloriously golden Gruyère crust with my spoon, the aroma of deeply caramelized onions and rich beef broth hit me like a warm hug. This classic French onion soup recipe is my tribute to that night. It combines everything I learned in Paris with the bold flavors I grew up with in my mother’s Moroccan kitchen, resulting in the best French onion soup you can make at home.
What makes this recipe so special is the depth of flavor in every single layer. The onions are cooked low and slow until they become almost jammy, releasing their natural sugars and turning a deep mahogany brown. The broth is a blend of beef and chicken stocks, enriched with a splash of red wine and a hint of balsamic vinegar for brightness. And then there’s the cheese topping — a triple threat of nutty Gruyère, stretchy mozzarella, and salty Parmesan that melts into a crispy, bubbly, irresistible crust. The texture is everything: the soft, silky onions, the savory broth, the crunchy toast, and the gooey cheese. It’s pure alchemy.
I’ve perfected this easy French onion soup over years of testing, and I’m so excited to share my secrets with you. My version is foolproof for home cooks, but it includes a few pro-level touches — like deglazing with wine and using a combination of broths — that elevate it from good to unforgettable. In the recipe below, I walk you through each step with detailed visual cues. I also reveal one common mistake that can ruin your caramelized onions and how to avoid it. Whether you’re a beginner or a seasoned cook, this recipe will give you the most incredible bowl of onion soup with Gruyère.
Why This French Onion Soup Recipe Is the Best
The Flavor Secret: The heart of this classic French onion soup is the caramelized onions. I learned in Paris that patience is not just a virtue — it’s the only way. Cooking the onions for nearly 45 minutes with salt and sugar breaks them down completely, concentrating their sweetness. But the real game-changer? Deglazing the pot with a dry red wine, which lifts all those browned bits (the fond) from the bottom and adds a subtle, fruity complexity that no store-bought broth can mimic. It’s a technique I use in Moroccan tagines too, and it works beautifully here.
Perfected Texture: I insist on a triple-cheese topping. Many recipes use only Gruyère, but I find that adding mozzarella gives that iconic stretch, and Parmesan brings a salty, nutty punch. The bread must be a thick, crusty French loaf, brushed with olive oil and broiled until golden before it even touches the soup. This ensures it stays crisp under the cheese and doesn’t turn into a soggy mess. The final broil creates a seal that traps all the steamy goodness inside.
Foolproof & Fast: Despite its gourmet taste, this is an easy French onion soup recipe. I use a mix of low-sodium broths to control the salt level, and the steps are straightforward. Even if you’ve never made onion soup before, my detailed timing and visual cues will guide you. The active work is minimal — most of the time the onions are just cooking themselves. This is the kind of recipe that looks and tastes like you spent hours slaving away, but it’s simple enough for a weeknight dinner or a cozy weekend meal.
French Onion Soup Recipe Ingredients
Let’s talk about what you’ll need. I source most of my ingredients from the Union Square Greenmarket in NYC — the sweet yellow onions from upstate New York are incredible this time of year. The memory of my mother caramelizing onions in our small kitchen in Marrakech, using just butter and patience, is what inspired this exact list. Every ingredient here plays a crucial role in building the best French onion soup.
Ingredients List
4 tablespoons unsalted butter
5 large yellow onions (thinly sliced)
1 teaspoon salt
1 teaspoon granulated sugar
2 cloves garlic (minced)
1/2 cup dry red wine
32 ounces low-sodium beef broth
24 ounces low-sodium chicken broth
1 tablespoon Worcestershire sauce
2 sprigs fresh thyme
1 bay leaf
1/2 tablespoon balsamic vinegar
Pinch of salt and freshly ground black pepper (to taste)
Onions: Yellow onions are the gold standard here. They have the perfect balance of sweetness and pungency. When caramelized, they become incredibly sweet and mellow. Avoid sweet onions like Vidalia — they can turn mushy. Look for firm, heavy onions with tight, papery skins. A great substitution is a mix of yellow and red onions for a slightly more complex flavor.
Red Wine: A dry red wine like a Pinot Noir or Merlot works beautifully. It adds acidity and depth. Do not use cooking wine — it’s salty and artificial. If you don’t drink alcohol, you can substitute with an equal amount of additional beef broth plus 1 tablespoon of red wine vinegar, but the flavor won’t be quite as rich.
Cheese: Gruyère is non-negotiable for that classic, nutty, melting cheese top. It’s the star. Mozzarella adds the stretch, and Parmesan adds a salty kick. Make sure all cheeses are at room temperature before broiling — cold cheese won’t melt evenly and can become greasy. If you can’t find Gruyère, Swiss Emmental is the best substitute, though it’s slightly milder.
Original Ingredient
Best Substitution
Flavor / Texture Impact
Yellow Onions
Mix of Red & Yellow Onions
Slightly sharper, more complex sweetness.
Dry Red Wine
Beef broth + 1 tbsp red wine vinegar
Less rich, but still acidic and deep.
Gruyère Cheese
Swiss Emmental
Milder, still melts well, but less nutty.
French Bread
Sourdough or Ciabatta
Sourdough adds tang; ciabatta is less absorbent.
How to Make French Onion Soup — Step-by-Step
We’re going to take this step by step. Trust me, the process is meditative and so rewarding. Just follow my timing and cues, and you’ll have the best French onion soup of your life.
Step 1: Caramelize the Onions
In a large, heavy-bottomed pot (I love my Dutch oven for this), melt the butter over medium-high heat. Add all the sliced onions and sauté, stirring often, until they soften and become translucent, about 10 minutes. Don’t rush this — you want them to sweat, not brown yet.
💡 mia’s Pro Tip: The salt and sugar you add in the next step aren’t just for seasoning — salt draws out moisture, and sugar helps kickstart the caramelization process. This is a classic French technique I learned in Paris.
Step 2: Low and Slow
Reduce the heat to medium. Stir in the salt and sugar. Now, cook for another 35 minutes, stirring every 5 minutes or so. You are looking for the onions to turn a deep, golden brown and become almost syrupy. Be patient — this is where the magic happens.
⚠️ Common Mistake to Avoid: Do not crank up the heat to speed this up. High heat will burn the sugar before the onions have a chance to caramelize, leaving you with bitter, blackened onions. If you see dark spots forming, lower the heat immediately and add a splash of water.
Step 3: Deglaze and Build the Broth
Add the minced garlic and cook for 20 seconds until fragrant. Then, pour in the red wine. Use a wooden spoon to scrape up every browned bit stuck to the bottom of the pot — this is pure flavor. Let the wine bubble for about 30 seconds. Then add the beef broth, chicken broth, Worcestershire sauce, fresh thyme sprigs, and bay leaf. Stir to combine.
💡 mia’s Pro Tip: Using both beef and chicken broth is my secret for a balanced, rich broth. Beef alone can be too heavy; chicken adds a lighter, savory backbone. Always use low-sodium so you control the salt.
Step 4: Simmer and Finish
Bring the soup to a gentle simmer over medium/medium-low heat. Cook for about 20 minutes, stirring occasionally. Remove and discard the thyme sprigs and bay leaf. Stir in the balsamic vinegar. Taste and season with a pinch of pepper and more salt if needed. Reduce heat to low, cover, and keep hot while you prepare the bread.
⚠️ Common Mistake to Avoid: Skipping the balsamic vinegar! It’s a tiny amount, but it adds a crucial brightness and depth that balances the richness of the broth. Don’t leave it out.
Step 5: Toast the Bread
Preheat your oven broiler with the rack about 6 inches from the heat source. Arrange the bread slices on a baking sheet and brush both sides with olive oil. Broil for 2-3 minutes total, flipping once, until well toasted and golden on both sides. Keep your eye on it — broilers vary wildly and bread can go from perfect to charcoal in seconds.
💡 mia’s Pro Tip: Use a 1-inch thick slice of bread. Thinner slices will get too soggy under the cheese. A good crusty French baguette cut on a bias is ideal.
Step 6: Assemble and Broil
Arrange oven-safe bowls or crocks on a rimmed baking sheet (this catches any drips). Fill each bowl about 2/3 full with the hot soup. Place one toasted bread slice on top of each bowl. Generously sprinkle the Swiss, mozzarella, and Parmesan cheeses over the bread and the edges of the bowl. Broil for 2-4 minutes, until the cheese is bubbly and golden brown. The cheese will melt over the sides of the crock, creating that wonderful crusty seal. Serve immediately and enjoy!
Step
Action
Duration
Key Visual Cue
1
Sauté Onions
10 mins
Onions are translucent and soft.
2
Caramelize Onions
35 mins
Deep golden brown, syrupy consistency.
3
Deglaze & Add Broth
5 mins
All brown bits lifted, liquid bubbling.
4
Simmer Broth
20 mins
Steam rising, broth slightly reduced.
5
Toast Bread
2-3 mins
Golden brown, edges slightly darker.
6
Broil with Cheese
2-4 mins
Cheese bubbly, golden, and melted over edges.
Serving & Presentation
French onion soup is a meal in itself, but it’s even better with the right accompaniments. I love serving it with a simple green salad dressed with a sharp vinaigrette — the acidity cuts through the richness of the cheese and broth. A crusty baguette on the side for dipping is never a bad idea either. When I make this for friends in my NYC apartment, I always set the crocks on a trivet in the center of the table and let everyone crack through their own cheese crust. It’s a beautiful, interactive dish.
For a touch of elegance, you can garnish each bowl with a few fresh thyme leaves or a small sprinkle of flaky sea salt right after broiling. I also sometimes add a very light dusting of smoked paprika — a nod to my Moroccan roots — which adds a subtle warmth and a pop of color. Pair this soup with a glass of the same dry red wine you used in the recipe, or for a non-alcoholic option, a sparkling water with a slice of lemon.
Pairing Type
Suggestions
Why It Works
Side Dish
Simple Green Salad, Roasted Asparagus
Acidity and freshness balance the rich, cheesy soup.
This homemade French Onion Soup recipe will knock your socks off! Made with the richest broth, perfect caramelized onions, and topped with three different types of melted cheese!Step-by-step photos can be seen below the recipe card.
Ingredients
Scale
4 tablespoons unsalted butter
5 large yellow onions (thinly sliced)
1 teaspoon salt
1 teaspoon granulated sugar
2 cloves garlic (minced)
1/2 cup dry red wine ((see note))
32 ounces low-sodium beef broth
24 ounces low-sodium chicken broth
1 tablespoon Worcestershire sauce
2 sprigs fresh thyme
1 bay leaf
1/2 tablespoon balsamic vinegar
pinch of salt and freshly ground black pepper (to taste)
In a large pot over medium-high heat, melt the butter. Add in the onions and sauté, stirring often, until softened, about 10 minutes.
Reduce heat to medium, stir in the salt and sugar; cook for another 35 minutes, stirring occasionally (every 5 minutes or so), until onions are caramelized and almost syrupy.
Add in the garlic and cook until fragrant, about 20 seconds.
Pour in the red wine to deglaze the pot, scraping up any brown bits on the bottom and sides.
Add in the beef broth, chicken broth, Worcestershire sauce, thyme, and bay leaf.
Gently simmer over medium/medium-low heat for about 20 minutes, stirring occasionally.
Remove and discard the herbs.
Mix in balsamic vinegar and taste. Season with additional salt and pepper, if necessary.
Reduce heat to low, cover to keep hot while you prepare the bread.
Preheat oven broiler, with rack 6 inches from the heat source. Arrange bread slices on a baking sheet and brush both sides with the olive oil. Broil 2-3 minutes total, flipping once, until well toasted on both sides. (NOTE: keep an eye on the bread the entire time to ensure it doesn't burn. Every oven is different.) Remove from heat; leave broiler on.
Arrange oven safe bowls or crocks on a rimmed baking sheet. Fill each bowl 2/3 full with hot soup. Top each bowl with 1 slice toasted bread, and sprinkle with the Swiss, Mozzarella, and Parmesan cheeses.
Broil until bubbly and golden brown. As it softens, the cheese will fall over the sides of the crock and form a wonderful crusty seal.
Serve and enjoy!
Nutrition
Calories:378 kcal
Sugar:9 g
Fat:24 g
Carbohydrates:21 g
Protein:18 g
Tried This Recipe? Leave a Comment!
Did you make this recipe? I’d love to hear how it turned out! Please leave a comment and a rating below. Your feedback helps other home cooks and supports cheerychop.com!
For more delicious inspiration, follow me on Pinterest!
Iconic French Onion Soup from Famous and Barr
Table of Contents
French Onion Soup from Famous and Barr – A Rich, Classic Comfort
⚖️
Difficulty
Medium
⏲️
Prep Time
30 mins
🕒
Cook Time
240 mins
⏱️
Total Time
270 mins
🍽️
Servings
8
I remember the first time I tasted a truly great French onion soup. I was in Paris, training at Le Cordon Bleu, and a chef took us to a tiny bistro near the Palais Royal. The soup arrived in a deep crock, bubbling with Gruyère and a dark, savory broth. But this recipe here, this French onion soup from Famous and Barr, takes me right back to my mother’s kitchen in Morocco, where onions were always the heart of a slow-cooked meal. It’s a classic French onion soup that’s been perfected by a beloved St. Louis department store, and I’m sharing it with you today as the best homemade French onion soup you’ll ever make.
The magic of this soup is in the deep, rich flavor that develops over hours of gentle cooking. The onions are cooked low and slow for nearly two hours until they are meltingly tender and sweet, then the whole pot is simmered for another two hours with beef broth, white wine, and a touch of paprika. The result is a broth that is practically velvet on the tongue. When you spoon it up, the aroma is intoxicating—earthy from the broth, sweet from the caramelized onions, and subtly smoky from the paprika. It’s everything you want from a comforting bowl.
I’ve made this exact recipe countless times in my NYC kitchen, and I’ve learned a thing or two along the way. The secret weapon here is the overnight rest in the fridge—it’s the step that truly deepens the flavor into something unforgettable. In this post, I’m going to walk you through every step, from slicing the onions to broiling the cheese, and I’ll share my best pro tips so you get that perfect, rich result every time. One common mistake I see is rushing the initial sauté of the onions—patience is key here, and I’ll show you why.
Why This French Onion Soup Recipe Is the Best
The flavor secret of this classic French onion soup lies in the technique passed down from the Famous and Barr retail stores. It’s not just about caramelizing onions; it’s about developing a deeply savory, almost umami-rich broth that has a beautiful complexity. My culinary training in Paris taught me the importance of a proper fond (the browned bits at the bottom of the pot), and while this recipe doesn’t rely on browning the onions heavily, the long, slow cooking with flour and paprika creates a unique, velvety body that is both luxurious and comforting.
The texture of this best French onion soup is what sets it apart. The refined method of whisking flour into a portion of the broth prevents lumps and ensures a smooth, silky consistency from the very start. The two-hour simmer melds every flavor together, while the overnight rest allows the soup to mature, creating a depth you simply cannot achieve in a single day. The toasted, Parmesan-dusted baguette slices provide a satisfying crunch that softens beautifully under the broiled Gruyère, offering a perfect contrast to the rich broth.
Homemade French onion soup can seem intimidating, but this recipe is designed to be foolproof for home cooks of all levels. The step-by-step instructions are clear, and the make-ahead component means you can prepare the soup base at your own pace. Once you’ve done the overnight rest, it’s just a matter of assembly and a quick broil. I’ve made this for dinner parties on busy NYC weeknights, and it’s always a showstopper. Trust me, this is a recipe that will make you feel like a professional cook in your own kitchen.
French Onion Soup Recipe Ingredients
Whenever I make this classic French onion soup, I think of my trips to the Union Square Greenmarket in NYC. I pick up the sweetest white onions I can find, always with a little dirt still clinging to them, and a fresh baguette from a neighborhood bakery. The smell of the butter melting in my big pot takes me back to my mother’s kitchen in Morocco, where she’d start every slow-cooked dish the same way. Here is everything you’ll need for this best French onion soup recipe from Famous and Barr.
Ingredients List
5 pounds white onions (medium size)
1/2 cup butter
1 1/2 teaspoon pepper
2 tablespoons paprika
1-2 bay leaves
3/4 cup flour
96 ounces beef broth (3-32 oz containers)
1 cup white wine
Salt to season
1 loaf French baguette (sliced)
3 tablespoons olive oil
1/4 cup Parmesan cheese (grated)
16 ounces Gruyère cheese (can substitute Swiss which I often do)
Ingredient Spotlight
The secret to this soup’s depth is the paprika. It’s an unexpected addition that gives the broth a subtle, earthy warmth. When shopping, look for high-quality Hungarian or Spanish paprika from a spice shop; it makes all the difference. In a pinch, you can use sweet paprika, but avoid smoked paprika here as it will overpower the delicate onion flavor.
The white wine is crucial for deglazing and adding acidity. Use a dry white wine like Sauvignon Blanc or a Pinot Grigio. Avoid anything sweet like Riesling. If you don’t have wine on hand, you can substitute with an equal amount of apple cider vinegar combined with an extra cup of beef broth. The result will be slightly less complex, but still delicious.
Gruyère is the traditional choice for the topping, and with good reason—it melts into a beautiful, stretchy, and nutty crust. However, I often use Swiss cheese as a substitute because it’s more affordable and melts similarly. For the very best results, always grate your own cheese from a block; pre-shredded cheese contains anti-caking agents that prevent it from melting as smoothly.
Original Ingredient
Best Substitution
Flavor / Texture Impact
Gruyère Cheese
Swiss Cheese
Milder, slightly less nutty, but melts beautifully.
White Wine
Apple cider vinegar + broth
More acidic, less complex, but still tenderizes onions.
White Onions
Yellow Onions
Slightly sweeter, deeper flavor after cooking.
How to Make French Onion Soup from Famous and Barr — Step-by-Step
I’m going to walk you through every single step of this famous recipe, so you can feel confident in your kitchen. The key is to embrace the slow cooking process—it rewards you with the most incredible flavor. Let’s get started.
Step 1: Slowly Sauté the Onions
Slice the onions 1/8 inch thick. This is important—too thick and they won’t soften properly. Melt the butter in a large, heavy-bottomed pot over low heat. Add the sliced onions and sauté for 1 1/2 to 2 hours. Stir every 10–15 minutes. They should be meltingly tender and translucent but not browned. This long, slow process develops the sweetness.
💡 mia’s Pro Tip: To get even slices without crying, chill the onions in the fridge for 15 minutes before slicing. Using a sharp knife also releases fewer tear-inducing compounds.
Step 2: Add the Seasonings
Add the pepper, paprika, and bay leaves to the softened onions. Mix well and cook for 2-3 minutes on low, stirring constantly. This blooms the spices, making them more aromatic. The paprika will create a beautiful rust color.
⚠️ Common Mistake to Avoid: Don’t add the paprika over high heat, as it can burn and turn bitter. Keep the heat low and stir constantly during this step.
Step 3: Build the Broth
Add 2/3 of the beef broth (about 64 ounces) to the pot and stir well. In a separate bowl or measuring cup, whisk the flour into the remaining 32 ounces of broth until completely smooth. Pour this flour mixture into the pot, stirring constantly to incorporate it evenly. Add the cup of white wine and stir. Bring the soup to a gentle simmer, then reduce heat and simmer for 2 hours, stirring occasionally.
💡 mia’s Pro Tip: Whisking the flour into cold broth before adding it to the pot is the foolproof way to avoid lumps. This technique, called a slurry, ensures a silky-smooth broth every time.
Step 4: The Overnight Rest
This is the secret step! Once the 2-hour simmer is done, let the soup cool to room temperature. Then, cover the pot and refrigerate it overnight. This allows the flavors to meld and mature, giving you a depth of flavor you simply can’t achieve in one day. It’s like the soup is resting and concentrating its goodness.
⚠️ Common Mistake to Avoid: Don’t skip this step! It’s the key to the “famous” flavor. If you’re short on time, at minimum let it rest for 4-6 hours in the fridge before serving.
Step 5: Toast the Bread
The next day, turn your oven to the broil setting. Arrange the baguette slices on a baking sheet. Brush each slice with olive oil and sprinkle lightly with grated Parmesan cheese. Broil until golden and lightly crisp, watching very carefully—this takes only 1-2 minutes. Set aside.
💡 mia’s Pro Tip: Check on the bread every 30 seconds while broiling. The line between perfectly golden and burnt is very thin. If you have a convection setting, use it for more even browning.
Step 6: Assemble and Broil
Heat the chilled soup on the stove top until hot. Ladle the hot soup into ovenproof bowls. Place one or two slices of the Parmesan toast on top of the soup in each bowl. Generously pile on the grated Gruyère (or Swiss) cheese. Place the bowls on a baking sheet and broil for 3-5 minutes, until the cheese is melted, bubbling, and has golden spots. Watch carefully!
⚠️ Common Mistake to Avoid: Over-broiling will burn the cheese and make it tough. Keep a close eye on it, and rotate the baking sheet halfway through for even melting.
Step 7: Cool and Serve
Let the soup cool for a couple of minutes before serving. The broth and cheese are extremely hot straight out of the oven. Use a long spoon to ensure you get a bit of everything—broth, bread, and cheese—in each bite. Enjoy immediately!
💡 mia’s Pro Tip: The bowls will be very hot. Place them on small plates or trivets to protect your table. I always warn my guests to be careful with the hot crockery!
Step
Action
Duration
Key Visual Cue
1
Sauté onions
1.5–2 hours
Onions translucent, soft, no browning
2
Add spices
2–3 minutes
Onions turn rust color from paprika
3
Simmer soup
2 hours
Broth slightly thickens, aroma deepens
4
Refrigerate overnight
8–12 hours
Flavors meld, soup thickens further
5
Broil bread
1–2 minutes
Bread golden brown edges
6
Broil assembled soup
3–5 minutes
Cheese melts, bubbles, golden spots
Serving & Presentation
Serving this French onion soup is almost as important as making it. I like to pull out my favorite ovenproof bowls—the ones with handles, if you have them, make it easier for guests to handle. Set the table with soup spoons and warn everyone that the bowls will be very hot. In my NYC apartment, I often serve this with a simple green salad dressed with a sharp vinaigrette to cut through the richness of the cheese.
For a special touch, I sometimes sprinkle a tiny bit of chopped fresh thyme or a pinch of flaky sea salt on top of the melted cheese. It adds a pop of color and a final layer of flavor. And while this is a classic French dish, I love serving it with a crusty end of the baguette for dipping. It’s a simple pleasure that always makes me think of the bread my mother would bake in Morocco.
Pairing Type
Suggestions
Why It Works
Side Dish
Simple green salad, roasted asparagus
Adds freshness and acidity to balance rich soup
Beverage
Dry red wine (Pinot Noir), light beer
Complementary earthiness without overpowering
Garnish
Fresh thyme, flaky sea salt, extra black pepper
Adds aroma, texture, and a finishing flourish
Make-Ahead, Storage & Reheating
This is my go-to recipe for busy weeks. The soup base can be made entirely ahead of time, and the overnight rest is actually part of the process. On a busy NYC weeknight, I love knowing that I have a rich, aromatic soup waiting for me in the fridge. The key is to store the components separately for the best texture.
Tried This Recipe? Leave a Comment!
Did you make this recipe? I’d love to hear how it turned out! Please leave a comment and a rating below. Your feedback helps other home cooks and supports cheerychop.com!
For more delicious inspiration, follow me on Pinterest!
Easy Homemade Hoisin Sauce Recipe – A Pantry-Friendly Twist for Deep, Sweet-Savory Flavor
⚖️
Difficulty
Easy
⏲️
Prep Time
5 mins
🕒
Cook Time
5 mins
⏱️
Total Time
10 mins
🍽️
Servings
About 1/2 cup
I still remember the first time I tasted real hoisin sauce — not the overly sweet, gloppy stuff from a jar, but a deeply savory, slightly funky, and perfectly balanced version that my French chef instructor in Paris used to glaze duck legs. He called it “Chinese barbecue sauce,” but I knew it was so much more: a velvety, dark elixir of soy, spice, and sweetness. This homemade hoisin sauce recipe is my take on that memory — an easy hoisin sauce that comes together in under 10 minutes with pantry staples. Growing up in Morocco, my mother would layer sweet and savory in her tagines with honey, cinnamon, and preserved lemons. That same principle of balancing bold flavors lives in this sauce, and it’s a trick I carried from my mother’s kitchen in Marrakech to my tiny NYC apartment. Whether you’re prepping stir-fry, glazing ribs, or looking for a hoisin sauce substitute that actually works, this one delivers every time.
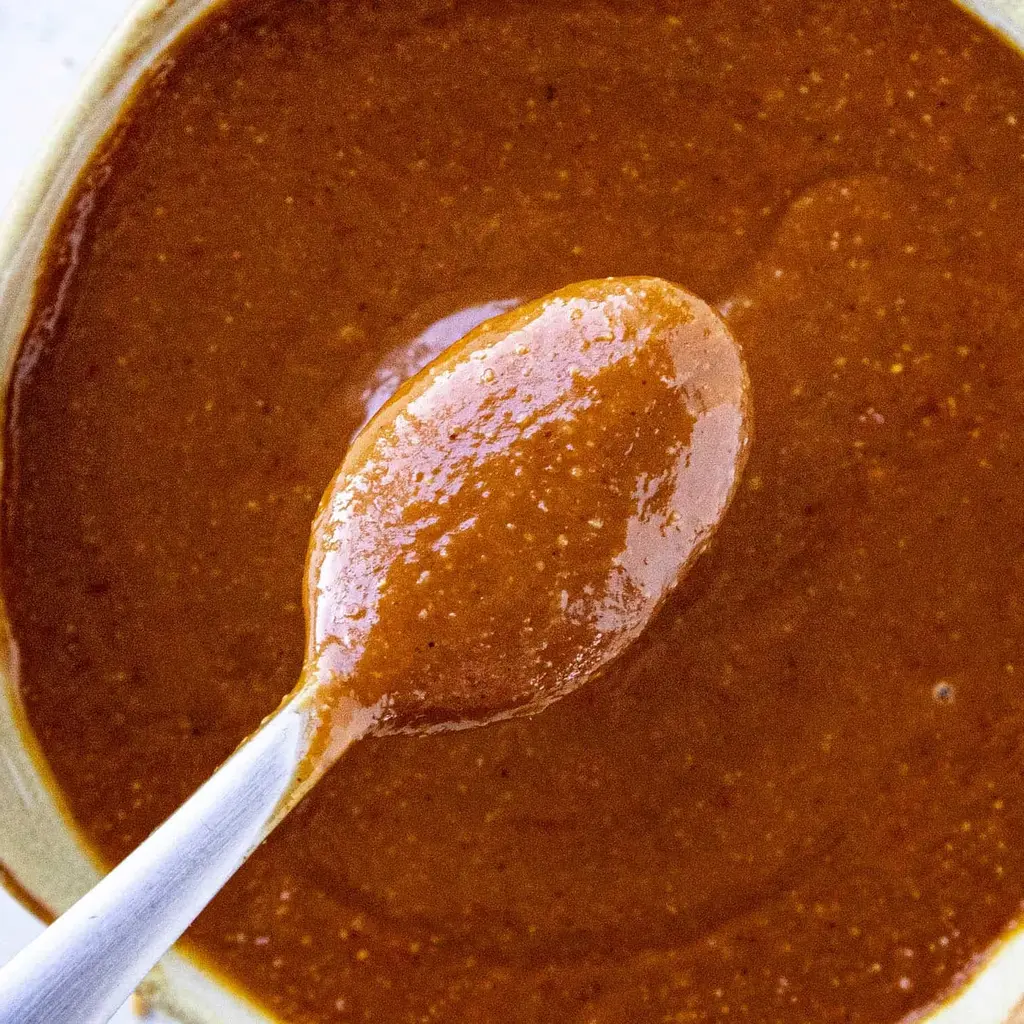
Imagine the aroma: garlic and five-spice powder blooming in a warm pot, mingling with the nutty richness of peanut butter and the tang of rice vinegar. The sauce starts thin and translucent, then as the cornstarch slurry hits, it transforms into a glossy, almost lacquer-like consistency — the kind that clings perfectly to a brush or a spoon. The color is a deep mahogany, and the taste? It’s savory first, then sweet, with a subtle heat from sriracha that you can adjust to your liking. It’s the kind of sauce that makes even simple steamed broccoli feel like a celebration. I love how it brings together my French training in balancing acidity and sweetness with the bold, warming spices I grew up with in Morocco — like a tiny taste of three culinary worlds in a single jar.
What makes this Chinese hoisin sauce recipe different from others you’ll find online is my use of peanut butter as the base. Most traditional recipes call for fermented bean paste, which can be hard to find in a standard US grocery store. Peanut butter is not only easier to source, it adds a velvety texture and a subtle nuttiness that makes the sauce incredibly moreish. Plus, because I’m always looking for short cuts without compromising flavor, I kept the ingredient list tight and the process foolproof. My secret trick? I temper the garlic in the warm sauce before adding the thickener to release its full aroma — a classic French technique for building layers of flavor. One common mistake people make is adding too much cornstarch too quickly, which creates lumps, but I’ll show you exactly how to avoid that. This is truly the how to make hoisin sauce guide you can turn to again and again, whether you’re in a rush or planning a feast.
Why This Homemade Hoisin Sauce Recipe Is the Best
The Flavor Secret: Every time I make this, I’m reminded of the lesson I learned in Paris: deep flavor comes from balanced layers. Here, the natural sweetness of honey plays against the saltiness of soy sauce, while the Chinese five-spice powder adds warmth without overwhelming. What makes this easy hoisin sauce stand out is the peanut butter — it adds a subtle richness that traditional versions often lack. It’s a trick I borrowed from Moroccan cuisine, where nuts are used to thicken and enrich savory sauces. This gives the sauce a body that clings beautifully to meats and veggies, making it perfect for glazing, dipping, or stir-frying.
Perfected Texture: In culinary school, we spent weeks mastering sauces — and I learned that texture matters as much as taste. This sauce starts thin but finishes with a luxurious, glossy consistency. The key is the cornstarch slurry: whisked with cold water until completely smooth before adding to the warm pot, it ensures a lump-free, silky finish. I also cook it just long enough to activate the slurry without losing the fresh garlic punch. This isn’t a sauce you need to simmer for hours — it’s ready in minutes, but it tastes like it simmered all day.
Foolproof & Fast: This really is the most approachable homemade hoisin sauce recipe out there. I’ve tested it with beginner cooks in my NYC cooking classes, and everyone gets perfect results on the first try. The ingredients are all pantry-friendly — you probably already have soy sauce, rice vinegar, and garlic. You don’t need any special equipment beyond a whisk and a small pot, and the whole process takes about 10 minutes. It’s the kind of recipe that makes you feel like a seasoned chef without any of the stress.
Homemade Hoisin Sauce Recipe Ingredients
When I make this sauce in my little NYC kitchen, I love using ingredients I find at the Union Square farmers market — fresh garlic from a local farm and honey from upstate New York. It reminds me of how my mother in Morocco would use the best local honey from the Atlas Mountains to sweeten her dishes. For the soy sauce and rice vinegar, I usually grab a bottle from the Asian market in Chinatown, where the selection is unmatched. Every ingredient here is chosen for its ability to create a complex, restaurant-quality sauce from simple cupboard staples. Let’s dive into what you’ll need.
Ingredients List
4 tablespoons soy sauce
2 tablespoons rice vinegar
2 tablespoons peanut butter (or try it with tahini or black bean sauce – peanut butter is more readily available and easier)
3 cloves garlic, minced (1 teaspoon garlic powder is a good alternative)
2 tablespoons honey (you can substitute brown sugar if you prefer)
½ teaspoon Chinese Five Spice Powder (use more as desired)
2 teaspoons Sriracha (or any Chinese hot sauce, red chili sauce, chili paste, or your favorite hot sauce)
1 teaspoon cornstarch
Ingredient Spotlight
Soy Sauce: This is the backbone of the sauce, providing deep umami and saltiness. I recommend a good-quality all-purpose soy sauce — look for one that lists only soybeans, wheat, salt, and water. For a gluten-free version, use tamari. The salt level can vary, so taste before adding extra. If you need a substitute, coconut aminos will work, but expect a slightly sweeter, less salty result.
Peanut Butter: This is my secret weapon! Traditional hoisin uses fermented bean paste, but peanut butter is a fantastic, accessible substitute. It adds creaminess, a subtle nutty flavor, and helps thicken the sauce. Use a smooth, unsweetened natural peanut butter for the best result. If you have a nut allergy, tahini (sesame seed paste) is an excellent alternative with a slightly different but equally delicious flavor profile.
Chinese Five-Spice Powder: This fragrant spice blend is the soul of the sauce. It typically includes star anise, cloves, cinnamon, Sichuan peppercorns, and fennel seeds. The warm, aromatic notes it adds are irreplaceable. Look for it in the spice aisle of any well-stocked grocery store. If you don’t have it, a mix of cinnamon, cloves, and a pinch of anise will mimic the flavor, but it won’t be exactly the same. Store it in a cool, dark place to keep it fresh.
Honey: I use honey for its floral sweetness and smooth texture. It balances the saltiness of the soy and the acidity of the rice vinegar beautifully. If you’re vegan or just out of honey, light brown sugar works perfectly — just dissolve it completely in the warm sauce. The sugar version will be slightly less viscous but just as tasty.
Rice Vinegar: This adds a mild, clean acidity that brightens the whole sauce. Don’t substitute with distilled white vinegar — it’s too harsh. Apple cider vinegar is the next best option, but use a teaspoon less as it’s more potent. The acidity is crucial for cutting through the richness of the peanut butter and honey, keeping the sauce balanced.
Original Ingredient
Best Substitution
Flavor / Texture Impact
Soy Sauce
Tamari or Coconut Aminos
Tamari: identical flavor. Coconut aminos: sweeter, less salty.
Peanut Butter
Tahini or Black Bean Sauce
Tahini: nutty, slightly bitter. Black Bean: salty, more umami.
Chinese Five-Spice
Cinnamon + Cloves + Star Anise
Approximate but less complex; adjust to taste.
Honey
Light Brown Sugar
Slightly less floral, but texture remains similar.
Rice Vinegar
Apple Cider Vinegar (use 1 tsp less)
More assertive acidity; balances well but adjust amount.
How to Make Homemade Hoisin Sauce — Step-by-Step
Making your own hoisin sauce at home is incredibly simple, and I promise you’ll never go back to the jarred stuff. Just follow these easy steps, and you’ll have a beautiful, glossy sauce ready to use in minutes.
Step 1: Combine the Base
Add all of the ingredients to a small pot, except for the cornstarch. That means your soy sauce, rice vinegar, peanut butter, minced garlic, honey, Chinese five-spice powder, and sriracha all go in together. Don’t worry if the peanut butter seems stiff — it will melt as the sauce warms.
💡 mia’s Pro Tip: Use a whisk from the start to break up the peanut butter and ensure a smooth base before heating.
Step 2: Warm Through
Place the pot over medium heat and warm everything through, stirring frequently, until the ingredients are fully combined and the sauce is smooth and fragrant. This should take about 2-3 minutes. You’ll see the peanut butter dissolve and the garlic release its aroma.
⚠️ Common Mistake to Avoid: Don’t let the sauce boil — medium heat is perfect. Boiling can make the garlic bitter and the honey too caramelized.
Step 3: Prepare the Slurry
In a small bowl, whisk the cornstarch with 2 tablespoons of cold water until the cornstarch is completely dissolved. This is your slurry, and it’s the key to getting a silky, lump-free thickness. Ensure there are no white specks of cornstarch visible.
💡 mia’s Pro Tip: Always use cold water for the slurry. Hot water will cause the cornstarch to clump before it even hits the pot.
Step 4: Thicken the Sauce
Pour the cornstarch and water mixture into the hoisin sauce pot and whisk until well combined. You’ll see the sauce start to thicken almost immediately. Keep whisking as you heat for another 1-2 minutes until it reaches your desired consistency — it should coat the back of a spoon.
⚠️ Common Mistake to Avoid: Don’t dump the slurry in all at once without stirring. Pour it in a steady stream while whisking vigorously to prevent lumps.
Step 5: Serve or Store
Once thickened, remove the pot from the heat. Use the sauce immediately as a glaze or dipping sauce, or let it cool completely before transferring to an airtight container for storage. That’s it! You’ve just made a restaurant-quality condiment from scratch.
💡 mia’s Pro Tip: The sauce will thicken a bit more as it cools. If you prefer a thinner sauce, add a tablespoon of water or rice vinegar after removing from heat.
Step
Action
Duration
Key Visual Cue
1
Combine base ingredients
N/A
All ingredients in pot
2
Warm on medium heat
2–3 mins
Peanut butter fully dissolved
3
Prepare cornstarch slurry
30 secs
No lumps in bowl
4
Add slurry and thicken
1–2 mins
Sauce coats the back of a spoon
5
Serve or cool to store
N/A
Glossy, lacquer-like finish
Serving & Presentation
This sauce is incredibly versatile, just like the tagines my mother would make in Morocco — it can dress up anything from simple rice to a fancy roast. For a classic Chinese takeout experience at home, brush this homemade hoisin sauce over grilled chicken thighs or pork ribs during the last 10 minutes of cooking. The sugars in the honey will caramelize, creating a gorgeous sticky glaze. I love serving it with steamed jasmine rice and a side of garlic bok choy. The sauce also shines as a dipping sauce for spring rolls, dumplings, or even crispy tofu.
When I was training in Paris, my chef taught me that a sauce should be presented with intention. For a stunning visual, drizzle the hoisin over a white plate and drag a spoon through it to create a swoosh. Place your main protein or vegetables on top and garnish with toasted sesame seeds and thinly sliced green onions. A sprinkle of crushed red pepper flakes adds a pop of color and a hint of heat. This dish reminds me of the vibrant street food in New York City’s Chinatown — simple ingredients, elevated with care.
For a Moroccan twist, I sometimes add a pinch of ground cumin and a splash of orange juice to the sauce before serving — it echoes the sweet-savory balance of my mother’s cooking. Serve it with lamb meatballs or roasted eggplant for an unexpected but delicious fusion. The key is to let the sauce shine. Its deep, glossy appearance and complex flavor will make any dish feel special.
Pairing Type
Suggestions
Why It Works
Side Dish
Steamed jasmine rice, garlic bok choy, stir-fried snap peas
Neutral backgrounds let the sauce’s complexity shine.
Sauce / Dip
Glaze for ribs, chicken, or tofu; dip for egg rolls, dumplings, or fresh spring rolls
Sticky sweetness and umami coat and enhance proteins.
Beverage
Green tea, crisp lager beer, or a light Riesling
Clean, refreshing drinks balance the rich, spicy sauce.
Tried This Recipe? Leave a Comment!
Did you make this recipe? I’d love to hear how it turned out! Please leave a comment and a rating below. Your feedback helps other home cooks and supports cheerychop.com!
For more delicious inspiration, follow me on Pinterest!
My first taste of a truly great comeback sauce was at a tiny dive bar in Jackson, Mississippi, on a road trip years ago. I was with a chef friend from culinary school in Paris, and we were supposed to be seeking out fine dining, but instead, we found ourselves elbow-deep in fried catfish, dunking every bite into a creamy, slightly spicy, utterly addictive sauce. This Classic Southern Comeback Sauce recipe is my homage to that night. It’s a creamy comeback sauce that balances richness with a gentle heat, and it’s become a staple in my New York City kitchen for everything from chicken tenders to crispy fries. This is the Comeback Sauce recipe you’ll make again and again.
The magic of this Southern dipping sauce lies in its perfect harmony of flavors. It starts with a creamy mayonnaise base that’s enriched with tangy ketchup and a touch of sweet honey. Then comes a punch of heat from hot sauce and a deep, savory complexity from Cajun seasoning and Worcestershire sauce. The aroma is a beautiful reminder of spicy Southern kitchens, and the flavor is both familiar and exciting. It’s a creamy comeback sauce that’s bold enough to stand up to fried foods but nuanced enough to elevate a simple veggie platter.
As a trained chef who grew up with the bright, complex sauces of Morocco and later mastered the fundamental sauces of France, I believe in the power of a well-made condiment. My version of this Mississippi Comeback Sauce is designed to be foolproof for the home cook while delivering professional-level flavor. I use just the right amount of Cajun seasoning — a trick I learned from a spice vendor at the Union Square Greenmarket — to ensure the sauce is perfectly balanced. One common mistake is adding too much hot sauce at once; you want a gentle warmth, not a fiery burn.
Why This Classic Southern Comeback Sauce Recipe Is the Best
The Flavor Secret: The unique angle of this recipe is the careful balance of sweet, tangy, and spicy. While many Southern dipping sauces rely on a lot of chili sauce, I use a combination of ketchup and hot sauce for a more nuanced heat that builds slowly. This is a trick I borrowed from my mother’s Moroccan kitchen, where spice is always layered, not just dumped in.
Perfected Texture: A great creamy comeback sauce should be thick enough to cling to food but not so thick that it feels heavy. By using a full-fat mayonnaise and not adding any extra liquids, this sauce achieves a luxurious, dippable consistency every single time. It’s perfect for coating every nook and cranny of a crispy chicken tender.
Foolproof & Fast: This is truly a 5-minute recipe. No cooking, no blending, no complicated techniques. Simply whisk everything together in a bowl, and you have a delicious, restaurant-quality Mississippi Comeback Sauce ready to go. It’s a perfect recipe for beginner cooks looking to impress or busy families who need a quick, flavor-packed meal solution.
Classic Southern Comeback Sauce Ingredients
I find these ingredients at my local bodega in Brooklyn, but for the best flavor, I pick up a high-quality mayonnaise and a good Cajun seasoning blend. The key is using ingredients you trust, as each one plays a crucial role in this creamy comeback sauce.
Ingredients List
1 cup mayonnaise
2 tbsp ketchup
1 tbsp honey
1 tbsp hot sauce (*this is where you can add more or cut it down depending on preference)
2 tsp Cajun Seasoning (*we love using Slap Ya Mama)
1 1/2 tsp Worcestershire sauce
Ingredient Spotlight
The Heart of the Sauce: Mayonnaise. This is the backbone of the Classic Southern Comeback Sauce, providing the creamy base and richness. I recommend a full-fat, store-bought brand like Duke’s or Hellmann’s. For a lighter version, you can substitute half of the mayo with plain Greek yogurt, though the texture will be tangier and slightly less rich.
The Southern Soul: Cajun Seasoning. This is the spice blend that gives the sauce its signature Southern character. Look for a blend that includes paprika, garlic powder, onion powder, and cayenne. Slap Ya Mama is a fantastic, widely available brand. If you need a substitute, make your own blend or use a Creole seasoning. The flavor profile will change but still be delicious.
The Tangy Twist: Worcestershire Sauce. This ingredient adds a deep, umami-rich savoriness that you can’t get from anything else. It’s fermented and slightly tangy, and it perfectly balances the sweetness of the honey and ketchup. There is no good substitute for its complex, fermented flavor.
How to Make Classic Southern Comeback Sauce — Step-by-Step
Trust me when I say this is the easiest, most rewarding sauce you’ll whip up this week. Here’s exactly how to do it.
Step 1: Combine the Base
In a medium-sized bowl, add the 1 cup of mayonnaise. Use a whisk or a rubber spatula to stir it gently until it’s smooth and loosened up a bit. This will make it easier to incorporate the other ingredients evenly.
💡 mia’s Pro Tip: For the smoothest sauce, let your mayonnaise come to room temperature for 10 minutes before you start. It mixes much more easily!
Step 2: Season and Adjust
Add the 2 tbsp ketchup, 1 tbsp honey, 1 tbsp hot sauce, 2 tsp Cajun seasoning, and 1 1/2 tsp Worcestershire sauce to the bowl. Stir everything together until the color is uniform and there are no streaks of ketchup or seasoning. Taste the creamy comeback sauce now and adjust the hot sauce. This is where you can make it mild or spicy!
⚠️ Common Mistake to Avoid: Adding all the hot sauce at once without tasting first. Start with the recommended 1 tablespoon, then add more, 1/4 teaspoon at a time, until it reaches your perfect heat level.
Step 3: Chill and Serve
Transfer the finished Classic Southern Comeback Sauce to a serving bowl or an airtight container. While you can serve it immediately, it’s even better after chilling for at least 30 minutes. This allows the flavors to meld and deepen. Give it a good stir before serving.
💡 mia’s Pro Tip: Chilling the sauce for an hour or even overnight transforms it. The Cajun seasoning and Worcestershire sauce really bloom, creating a much more complex and cohesive flavor.
Step
Action
Duration
Key Visual Cue
1
Combine all ingredients in a bowl
1 minute
Smooth, uniform color
2
Taste and adjust seasoning
1 minute
Balanced sweet and spicy flavor
3
Chill until ready to serve
30 mins+
Thickened, flavors melded
Serving & Presentation
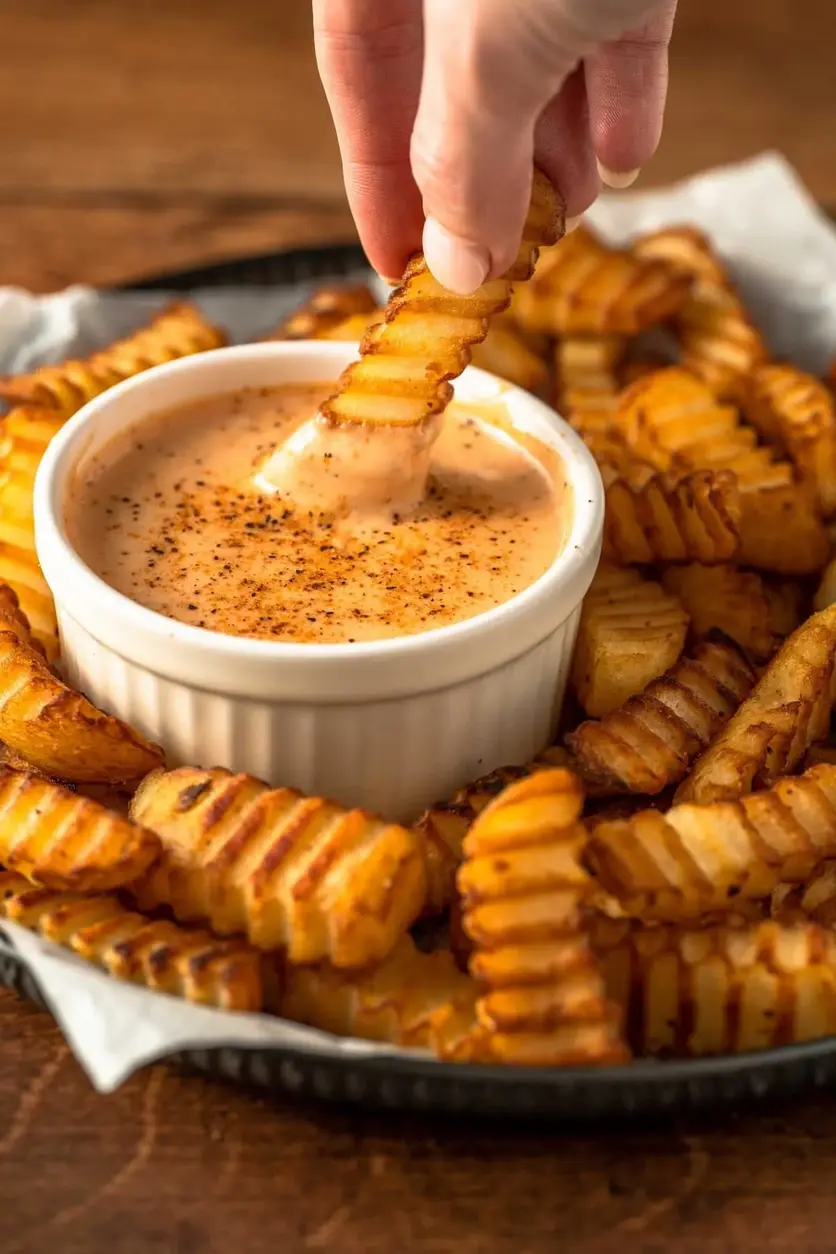
This Classic Southern Comeback Sauce is incredibly versatile. I love serving it in a beautiful small bowl as the star of a dipping platter, surrounded by crispy chicken tenders, golden french fries, or crunchy onion rings. It also makes a phenomenal dipping sauce for fried shrimp, fish sticks, or even fresh raw vegetables like celery and carrot sticks.
For a classic Southern touch, set the sauce out alongside fried green tomatoes, hush puppies, or a basket of fried catfish. It’s also fantastic as a spread for burgers, sliders, or grilled chicken sandwiches. My favorite way to eat it is with a big pile of crispy, salty curly fries — the creamy, spicy, tangy sauce is the perfect contrast to the crunch.
Pairing Type
Suggestions
Why It Works
Side Dish / Main
Chicken tenders, fries, onion rings, fried shrimp, fried fish
The creamy texture and spicy kick cut through the richness of fried foods.
Adds moisture, flavor, and a tangy-spicy kick to any sandwich.
Beverage
Iced tea, lemonade, light beer (lager), crisp white wine
The acidity and crispness of these drinks balance the creamy, spicy sauce.
Garnish
A sprinkle of chopped chives or a pinch of smoked paprika
Adds color and a fresh, or smoky, aroma right before serving.
Make-Ahead, Storage & Reheating
This Southern dipping sauce is a dream for meal prep. As a busy professional cook in NYC, I always have a batch of this in my fridge. It’s a lifesaver for quick snacks or to elevate a simple weeknight dinner. The flavors only get better with time, so making it a day ahead is always a great idea. It does not need reheating, but proper storage is key.
Method
Container
Duration
Reheating Tip
Refrigerator
Airtight container (glass or plastic)
Up to 1 week
Serve cold or at room temperature. Stir well before serving.
Freezer
Freezer-safe container (leave headspace)
Up to 3 months
Thaw overnight in the fridge. Whisk thoroughly to re-emulsify.
Make-Ahead
Same as refrigerator
Up to 3 days in advance
Perfect for parties; just give it a good stir and serve.
This sauce is best served cold or at room temperature, so there’s no reheating required. If it thickens too much in the fridge, just let it sit at room temperature for 10-15 minutes and give it a good stir. If you freeze it, be sure to whisk it very well after thawing to bring back its smooth, creamy consistency.
Variations & Easy Swaps
Variation
Key Change
Tried This Recipe? Leave a Comment!
Did you make this recipe? I’d love to hear how it turned out! Please leave a comment and a rating below. Your feedback helps other home cooks and supports cheerychop.com!
For more delicious inspiration, follow me on Pinterest!