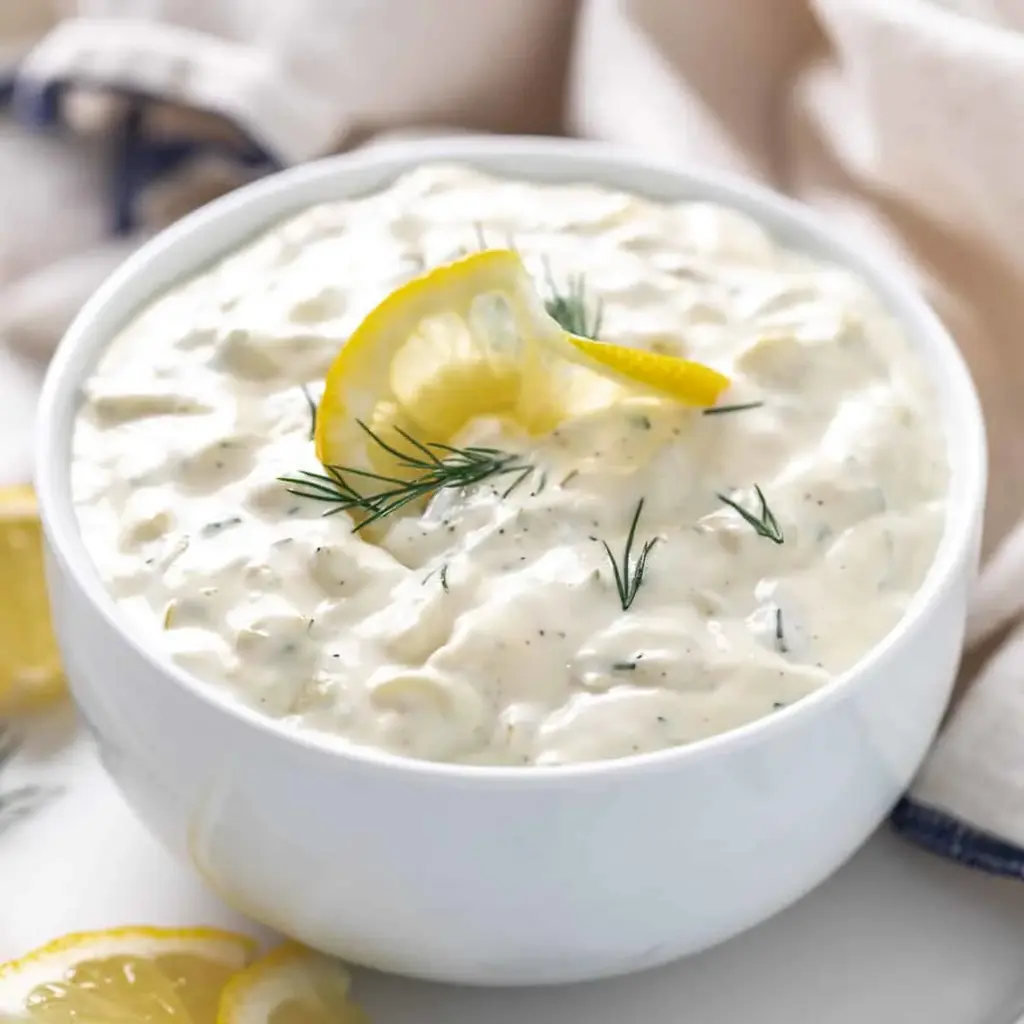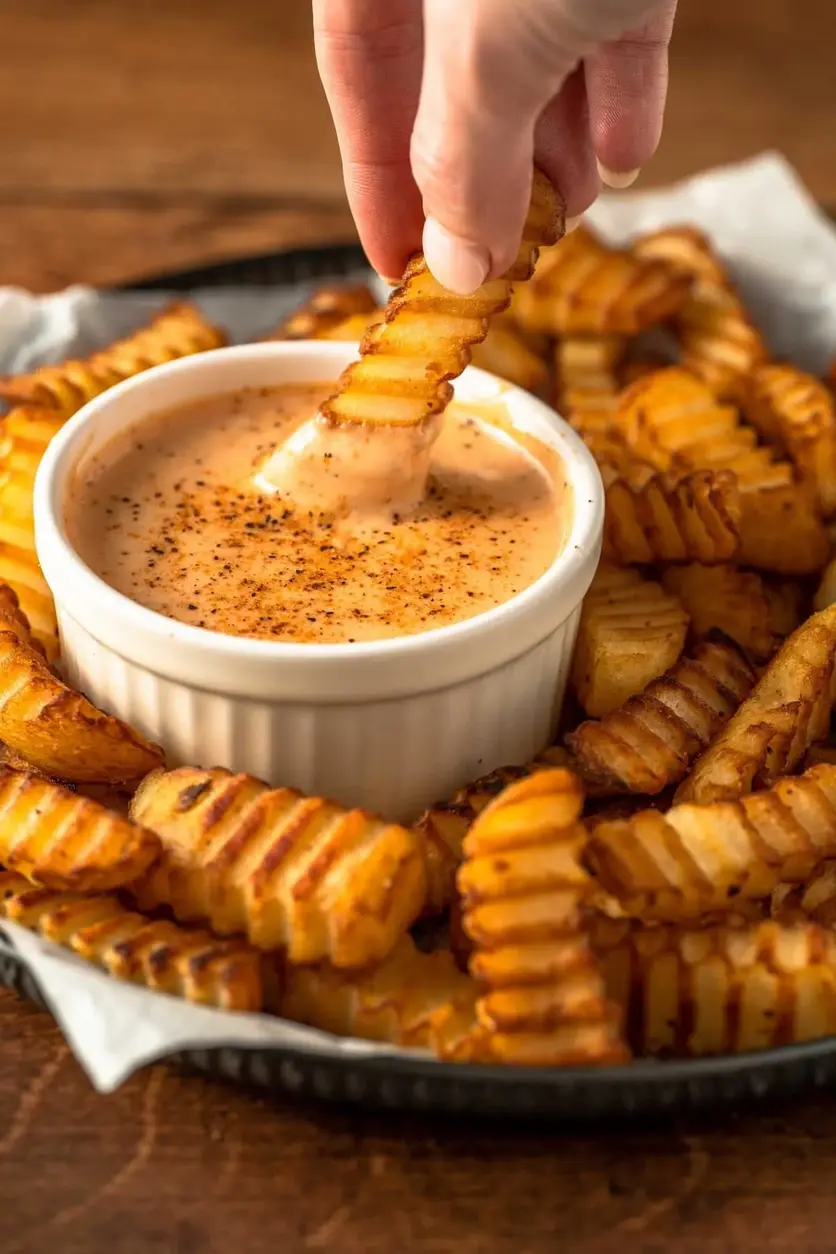
Classic Southern Comeback Sauce – Easy & Creamy Dip

Classic Southern Comeback Sauce — A Creamy Southern Dipping Sauce Classic

⚖️
Difficulty
Easy
⏲️
Prep Time
5 mins
🕒
Cook Time
0 mins
⏱️
Total Time
5 mins
🍽️
Servings
Approx. 1 cup

My first taste of a truly great comeback sauce was at a tiny dive bar in Jackson, Mississippi, on a road trip years ago. I was with a chef friend from culinary school in Paris, and we were supposed to be seeking out fine dining, but instead, we found ourselves elbow-deep in fried catfish, dunking every bite into a creamy, slightly spicy, utterly addictive sauce. This Classic Southern Comeback Sauce recipe is my homage to that night. It’s a creamy comeback sauce that balances richness with a gentle heat, and it’s become a staple in my New York City kitchen for everything from chicken tenders to crispy fries. This is the Comeback Sauce recipe you’ll make again and again.

The magic of this Southern dipping sauce lies in its perfect harmony of flavors. It starts with a creamy mayonnaise base that’s enriched with tangy ketchup and a touch of sweet honey. Then comes a punch of heat from hot sauce and a deep, savory complexity from Cajun seasoning and Worcestershire sauce. The aroma is a beautiful reminder of spicy Southern kitchens, and the flavor is both familiar and exciting. It’s a creamy comeback sauce that’s bold enough to stand up to fried foods but nuanced enough to elevate a simple veggie platter.

As a trained chef who grew up with the bright, complex sauces of Morocco and later mastered the fundamental sauces of France, I believe in the power of a well-made condiment. My version of this Mississippi Comeback Sauce is designed to be foolproof for the home cook while delivering professional-level flavor. I use just the right amount of Cajun seasoning — a trick I learned from a spice vendor at the Union Square Greenmarket — to ensure the sauce is perfectly balanced. One common mistake is adding too much hot sauce at once; you want a gentle warmth, not a fiery burn.

Why This Classic Southern Comeback Sauce Recipe Is the Best

The Flavor Secret: The unique angle of this recipe is the careful balance of sweet, tangy, and spicy. While many Southern dipping sauces rely on a lot of chili sauce, I use a combination of ketchup and hot sauce for a more nuanced heat that builds slowly. This is a trick I borrowed from my mother’s Moroccan kitchen, where spice is always layered, not just dumped in.

Perfected Texture: A great creamy comeback sauce should be thick enough to cling to food but not so thick that it feels heavy. By using a full-fat mayonnaise and not adding any extra liquids, this sauce achieves a luxurious, dippable consistency every single time. It’s perfect for coating every nook and cranny of a crispy chicken tender.

Foolproof & Fast: This is truly a 5-minute recipe. No cooking, no blending, no complicated techniques. Simply whisk everything together in a bowl, and you have a delicious, restaurant-quality Mississippi Comeback Sauce ready to go. It’s a perfect recipe for beginner cooks looking to impress or busy families who need a quick, flavor-packed meal solution.

Classic Southern Comeback Sauce Ingredients

I find these ingredients at my local bodega in Brooklyn, but for the best flavor, I pick up a high-quality mayonnaise and a good Cajun seasoning blend. The key is using ingredients you trust, as each one plays a crucial role in this creamy comeback sauce.

Ingredients List

  • 1 cup mayonnaise
  • 2 tbsp ketchup
  • 1 tbsp honey
  • 1 tbsp hot sauce (*this is where you can add more or cut it down depending on preference)
  • 2 tsp Cajun Seasoning (*we love using Slap Ya Mama)
  • 1 1/2 tsp Worcestershire sauce

Ingredient Spotlight

The Heart of the Sauce: Mayonnaise. This is the backbone of the Classic Southern Comeback Sauce, providing the creamy base and richness. I recommend a full-fat, store-bought brand like Duke’s or Hellmann’s. For a lighter version, you can substitute half of the mayo with plain Greek yogurt, though the texture will be tangier and slightly less rich.

The Southern Soul: Cajun Seasoning. This is the spice blend that gives the sauce its signature Southern character. Look for a blend that includes paprika, garlic powder, onion powder, and cayenne. Slap Ya Mama is a fantastic, widely available brand. If you need a substitute, make your own blend or use a Creole seasoning. The flavor profile will change but still be delicious.

The Tangy Twist: Worcestershire Sauce. This ingredient adds a deep, umami-rich savoriness that you can’t get from anything else. It’s fermented and slightly tangy, and it perfectly balances the sweetness of the honey and ketchup. There is no good substitute for its complex, fermented flavor.

Original IngredientBest SubstitutionFlavor / Texture Impact
MayonnaiseHalf mayo + half Greek yogurtTangier, slightly less rich, lower fat
Hot SauceSriracha or 1/2 tsp cayenne powderSriracha adds sweetness; cayenne adds pure heat
Cajun SeasoningCreole seasoning or 1 tsp paprika + 1/2 tsp garlic powder + 1/2 tsp onion powder + 1/4 tsp cayenneSlightly different spice blend, still delicious
HoneyMaple syrup or agave nectarSweeter, with a distinct maple or agave flavor

How to Make Classic Southern Comeback Sauce — Step-by-Step

Trust me when I say this is the easiest, most rewarding sauce you’ll whip up this week. Here’s exactly how to do it.

Step 1: Combine the Base

In a medium-sized bowl, add the 1 cup of mayonnaise. Use a whisk or a rubber spatula to stir it gently until it’s smooth and loosened up a bit. This will make it easier to incorporate the other ingredients evenly.

💡 mia’s Pro Tip: For the smoothest sauce, let your mayonnaise come to room temperature for 10 minutes before you start. It mixes much more easily!

Step 2: Season and Adjust

Add the 2 tbsp ketchup, 1 tbsp honey, 1 tbsp hot sauce, 2 tsp Cajun seasoning, and 1 1/2 tsp Worcestershire sauce to the bowl. Stir everything together until the color is uniform and there are no streaks of ketchup or seasoning. Taste the creamy comeback sauce now and adjust the hot sauce. This is where you can make it mild or spicy!

⚠️ Common Mistake to Avoid: Adding all the hot sauce at once without tasting first. Start with the recommended 1 tablespoon, then add more, 1/4 teaspoon at a time, until it reaches your perfect heat level.

Step 3: Chill and Serve

Transfer the finished Classic Southern Comeback Sauce to a serving bowl or an airtight container. While you can serve it immediately, it’s even better after chilling for at least 30 minutes. This allows the flavors to meld and deepen. Give it a good stir before serving.

💡 mia’s Pro Tip: Chilling the sauce for an hour or even overnight transforms it. The Cajun seasoning and Worcestershire sauce really bloom, creating a much more complex and cohesive flavor.

StepActionDurationKey Visual Cue
1Combine all ingredients in a bowl1 minuteSmooth, uniform color
2Taste and adjust seasoning1 minuteBalanced sweet and spicy flavor
3Chill until ready to serve30 mins+Thickened, flavors melded

Serving & Presentation

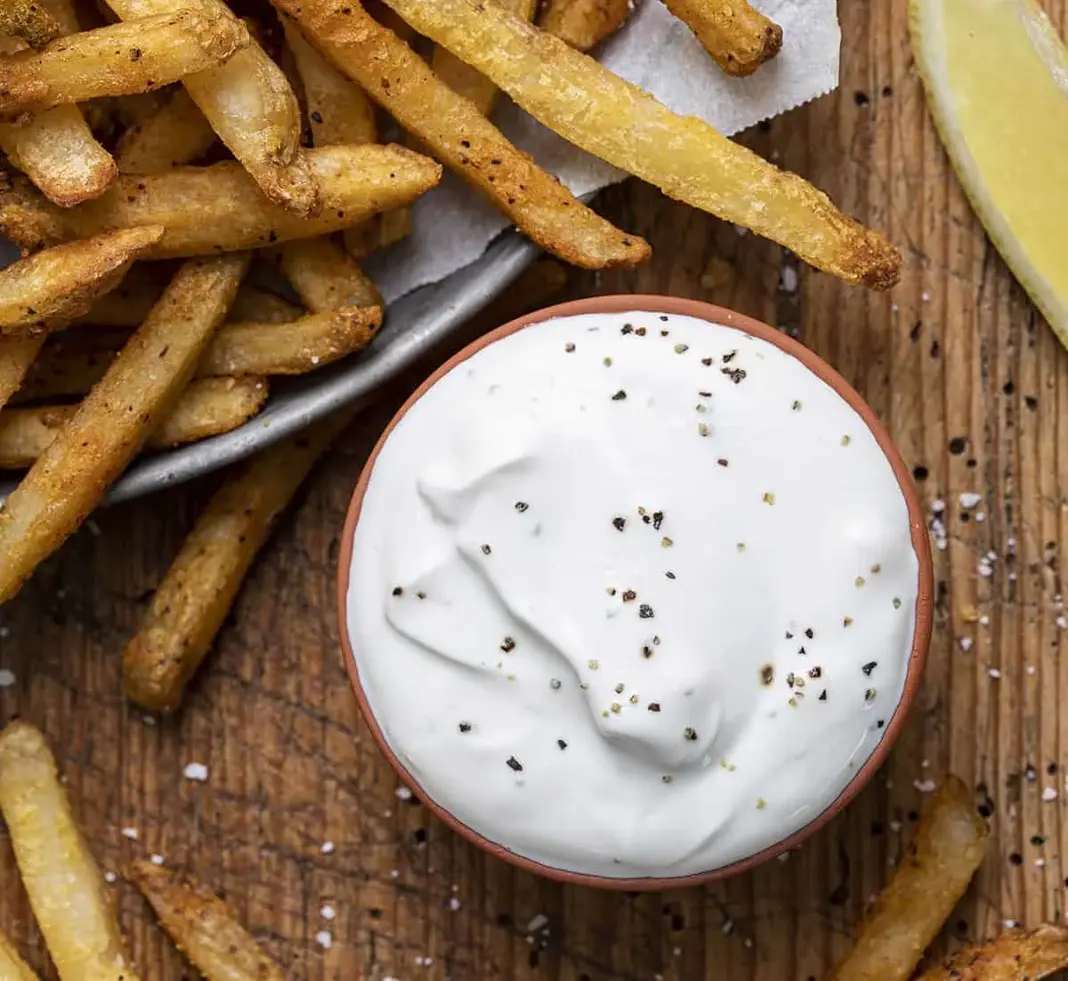
This Classic Southern Comeback Sauce is incredibly versatile. I love serving it in a beautiful small bowl as the star of a dipping platter, surrounded by crispy chicken tenders, golden french fries, or crunchy onion rings. It also makes a phenomenal dipping sauce for fried shrimp, fish sticks, or even fresh raw vegetables like celery and carrot sticks.

For a classic Southern touch, set the sauce out alongside fried green tomatoes, hush puppies, or a basket of fried catfish. It’s also fantastic as a spread for burgers, sliders, or grilled chicken sandwiches. My favorite way to eat it is with a big pile of crispy, salty curly fries — the creamy, spicy, tangy sauce is the perfect contrast to the crunch.

Pairing TypeSuggestionsWhy It Works
Side Dish / MainChicken tenders, fries, onion rings, fried shrimp, fried fishThe creamy texture and spicy kick cut through the richness of fried foods.
Sandwich SpreadBurgers, sliders, grilled chicken, pulled pork sandwichesAdds moisture, flavor, and a tangy-spicy kick to any sandwich.
BeverageIced tea, lemonade, light beer (lager), crisp white wineThe acidity and crispness of these drinks balance the creamy, spicy sauce.
GarnishA sprinkle of chopped chives or a pinch of smoked paprikaAdds color and a fresh, or smoky, aroma right before serving.

Make-Ahead, Storage & Reheating

This Southern dipping sauce is a dream for meal prep. As a busy professional cook in NYC, I always have a batch of this in my fridge. It’s a lifesaver for quick snacks or to elevate a simple weeknight dinner. The flavors only get better with time, so making it a day ahead is always a great idea. It does not need reheating, but proper storage is key.

MethodContainerDurationReheating Tip
RefrigeratorAirtight container (glass or plastic)Up to 1 weekServe cold or at room temperature. Stir well before serving.
FreezerFreezer-safe container (leave headspace)Up to 3 monthsThaw overnight in the fridge. Whisk thoroughly to re-emulsify.
Make-AheadSame as refrigeratorUp to 3 days in advancePerfect for parties; just give it a good stir and serve.

This sauce is best served cold or at room temperature, so there’s no reheating required. If it thickens too much in the fridge, just let it sit at room temperature for 10-15 minutes and give it a good stir. If you freeze it, be sure to whisk it very well after thawing to bring back its smooth, creamy consistency.

Variations & Easy Swaps

VariationKey Change
Classic Southern Comeback Sauce

Easy Homemade Sweet and Sour Sauce Recipe
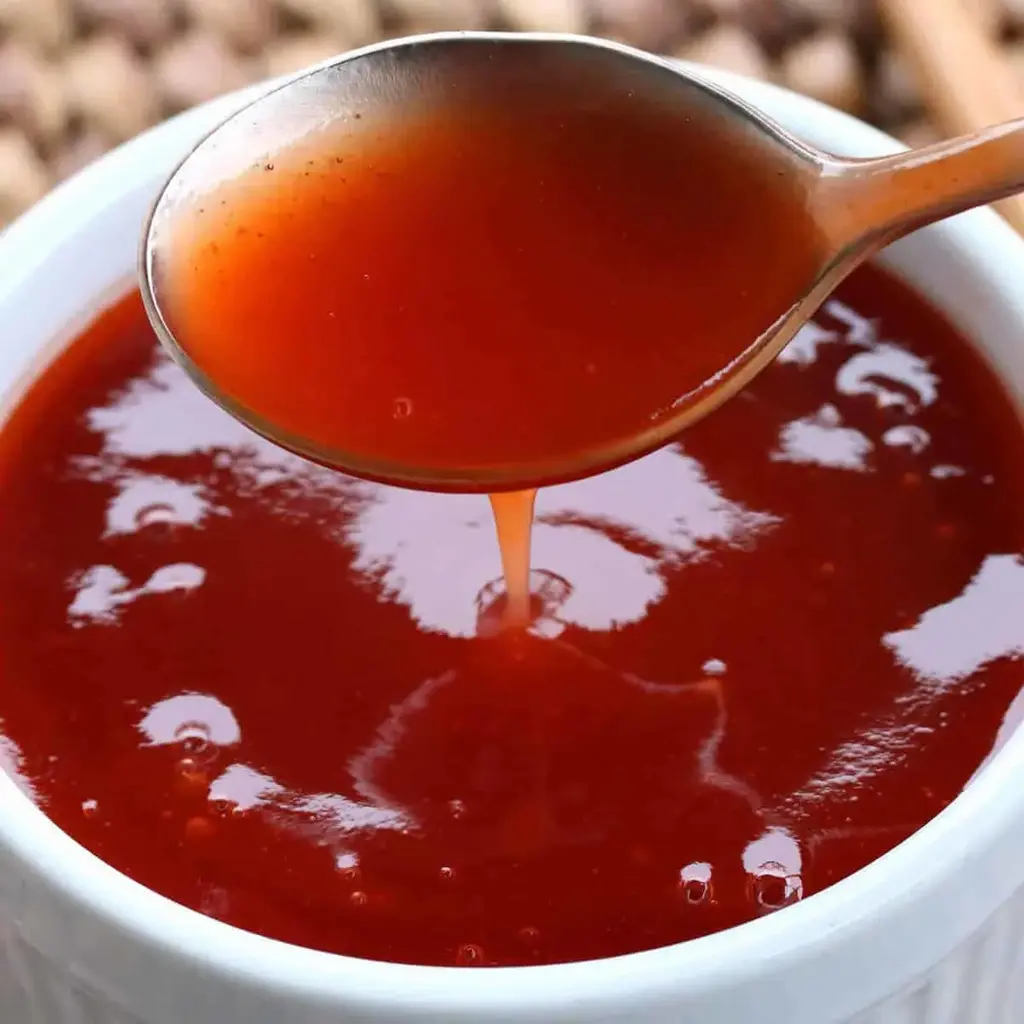
BEST Sweet and Sour Sauce From Scratch – Better Than Takeout!

⚖️
Difficulty
Easy
⏲️
Prep Time
5 mins
🕒
Cook Time
5 mins
⏱️
Total Time
10 mins
🍽️
Servings
1.5 cups

I still remember the first time I made this best sweet and sour sauce recipe in my tiny Parisian apartment kitchen. I was a culinary student then, missing the bright, tangy flavors of the Moroccan markets I grew up with in Marrakech. My mother would always make a similar sweet-tart sauce to drizzle over her lamb tagine, using preserved lemons and honey. That memory came flooding back when I moved to New York City and found myself craving that perfect balance of sweet and sour for my weeknight stir-fries. This easy sweet and sour sauce is my homage to those flavors — simpler, faster, and absolutely packed with clean, pure taste.

The magic of this homemade sweet and sour sauce lies in its simplicity. You get a glossy, ruby-red sauce that clings perfectly to every piece of chicken or crispy tofu. The first whiff hits you with the bright scent of pineapple and rice vinegar — fruity, sharp, and inviting. A spoonful reveals layers: the deep caramel sweetness from brown sugar, the subtle umami from soy sauce, and the gentle tang that lingers on your tongue. It’s not cloying like some bottled versions; it’s balanced, vibrant, and utterly addictive. I love watching it bubble on the stove, thickening into a silky, smooth sauce that looks almost too beautiful to eat.

What makes my best sweet and sour sauce recipe truly special is that I trained professionally in Paris — I know how to build a sauce from the ground up. The secret here is using cornstarch slurry for the perfect consistency, avoiding lumps or a pasty finish. Plus, we skip all the artificial preservatives and high-fructose corn syrup you’d find in store-bought versions. In just 10 minutes, you’ll have a jar of this delicious sweet and sour dipping sauce that will revolutionize your homemade takeout nights. 💡 mia’s Pro Tip: Always use fresh pineapple juice — it makes a world of difference in flavor depth.

Why This BEST Sweet and Sour Sauce Recipe Is the Best

The Flavor Secret — My professional cooking background in Paris taught me that great sauces are built on balance, not just ingredients. In this homemade sweet and sour sauce, I use pineapple juice as the base — it provides natural sweetness and a bright acidity that bottled versions can’t replicate. The brown sugar adds a deep, almost molasses-like richness, while rice vinegar brings a clean, sharp tang. The ketchup rounds everything out with a touch of tomato sweetness and color. It’s the same principle my mother used in Morocco with her honey-lemon dressings — a dance of contrasts that wakes up your palate.

Perfected Texture — The key to the best sweet and sour sauce is that luscious, clingy texture that doesn’t feel gluggy or gluey. My technique comes straight from classic French sauce work: using a cornstarch slurry (not just adding starch directly) ensures the sauce thickens evenly without lumps. I simmer the mixture just long enough for the cornstarch to activate, but not so long that it breaks down. The result is a glossy, velvety sauce that coats a spoon beautifully and stays suspended on your chicken or vegetables without pooling.

Foolproof & Fast — This easy sweet and sour sauce recipe is perfect for beginners because it only requires five main ingredients plus water, and the whole process takes ten minutes from start to finish. There’s no chopping, no blending, no complicated reductions. I’ve tested this countless times in my NYC apartment, and it works every single time. Even if you’ve never made a sauce from scratch before, you’ll get a perfect result. The only thing to watch is the whisk — keep it moving so the sauce doesn’t scorch on the bottom of the pan.

BEST Sweet and Sour Sauce Recipe Ingredients

When I make this sweet and sour sauce for chicken or as a dipping sauce for egg rolls, I always grab my ingredients from Union Square Greenmarket or my local Asian grocery store in Manhattan. The pineapple juice should be canned (unsweetened) — I like Dole or a good store brand. For rice vinegar, look for Marukan or Nakano brands — they’re available in any regular supermarket’s Asian section. The soy sauce should be a good quality one like Kikkoman or San-J for tamari if you’re going gluten-free. These ingredients are pantry staples in my kitchen, but each plays a crucial role in the final flavor.

Ingredients List

  • 1 cup canned pineapple juice (see note)
  • 3/4 cup packed light brown sugar, OR brown sugar alternative (for low sugar option)
  • 1/3 cup rice vinegar (found in the Asian or general vinegar section, or substitute apple cider vinegar)
  • 3 tablespoons ketchup
  • 2 tablespoons soy sauce or tamari (GF)
  • For the Cornstarch Slurry: 1 1/2 tablespoons cornstarch dissolved in 2 tablespoons water
  • Optional: 2-3 drops natural red food coloring

Ingredient Spotlight

Pineapple Juice — This is the backbone of the sauce. Use canned pineapple juice for consistency — fresh pineapple can vary in sweetness and acidity. It provides the sweet base and a tropical note that defines this sauce. I always choose juice with no added sugar for the best control over the final flavor.

Light Brown Sugar — This adds a deep, caramel-like sweetness that white sugar can’t match. It also contributes to the glossy sheen of the sauce. For a low-sugar version, I’ve tested Swerve brown sugar alternative — it works well, though the sauce won’t be quite as thick or shiny.

Rice Vinegar — This is the “sour” in sweet and sour. It’s milder and cleaner than white vinegar, with a subtle sweetness. Never substitute white vinegar directly — it’s too harsh. Apple cider vinegar works in a pinch but will add a slightly fruity note.

Soy Sauce — This adds the umami depth that balances the sweet and sour. I use regular soy sauce for most batches, but tamari is perfect for gluten-free diets. Low-sodium soy sauce works too — just add a pinch of salt if needed.

Original IngredientBest SubstitutionFlavor / Texture Impact
Pineapple JuiceOrange juice + 1 tsp lemon juiceMore citrusy, less tropical; still works
Rice VinegarApple cider vinegarSlightly fruitier, but very close
Brown SugarCoconut sugar (use 1 cup)Less sweet, more caramel notes
Soy SauceCoconut aminosMilder, slightly sweeter; gluten-free

How to Make BEST Sweet and Sour Sauce — Step-by-Step

Trust me, making this sweet and sour dipping sauce is easier than ordering takeout. Follow these simple steps and you’ll have a restaurant-quality sauce in under 10 minutes.

Step 1: Combine and Boil

Place all of the ingredients, except for the cornstarch slurry, in a small saucepan and bring to a boil over medium-high heat. Stir occasionally as the sugar dissolves — you’ll see the mixture go from cloudy to clear as it heats. The aroma will fill your kitchen with a sweet-and-tangy promise.

💡 mia’s Pro Tip: Use a heavy-bottomed saucepan to prevent scorching. My Le Creuset is perfect for this — it distributes heat evenly so the sugar doesn’t burn on the bottom.

Step 2: Thicken and Cool

Once the mixture is boiling, stir in the cornstarch slurry (make sure it’s well-dissolved first) and simmer for another minute until thickened, stirring constantly. You’ll see the sauce transform from a thin liquid to a glossy, syrupy consistency. If using red food coloring, stir it in at the very end. Remove from heat.

⚠️ Common Mistake to Avoid: Adding the slurry without dissolving it first — you’ll get lumps in your sauce. Always whisk the cornstarch with cold water in a small bowl until completely smooth before adding.

Let the sauce cool completely and store in an airtight container in the refrigerator where it will keep for 2-3 weeks.

StepActionDurationKey Visual Cue
1Combine all ingredients except slurry3-4 minutesMixture goes from cloudy to bubbling
2Add slurry and simmer1 minuteSauce thickens and turns glossy

Serving & Presentation

This sweet and sour sauce for chicken is a star — just toss crispy fried chicken pieces in the warm sauce right before serving. The sauce clings beautifully and creates that iconic glossy finish you see in Chinese takeout. I also love it as a sweet and sour dipping sauce for spring rolls, wontons, or even drizzle it over a bowl of steamed jasmine rice with roasted vegetables. When I’m hosting friends in my Brooklyn apartment, I pour it into a small ceramic bowl and set it out next to crispy tofu — the color alone makes the table look special.

For garnish, a sprinkle of thinly sliced scallions or toasted sesame seeds adds a nice contrast. If you’re serving it with chicken, try a side of steamed broccoli or a simple cucumber salad to cut through the richness. In my home, we often serve it alongside the chicken and broccoli stir-fry we grew up eating in Morocco — a fusion that always gets compliments.

Pairing TypeSuggestionsWhy It Works
Side DishSteamed jasmine rice, stir-fried vegetables, egg rollsAbsorbs the sauce and balances the sweetness
Sauce / DipCrispy chicken, fried tofu, spring rollsCoat evenly and add savory flavor
BeverageIced green tea, jasmine tea, crisp white wineCleanses the palate between bites
GarnishScallions, toasted sesame seeds, chili flakesAdds freshness and visual appeal

Make-Ahead, Storage & Reheating

As a busy NYC food blogger, I’m all about meal prep that works hard for me. This best sweet and sour sauce is a perfect make-ahead item — I usually double the batch every Sunday and keep it in the fridge for the week. It’s great for quick weeknight dinners when I need to add instant flavor to chicken, shrimp, or tofu.

MethodContainerDurationReheating Tip
RefrigeratorAirtight glass jar or container2-3 weeksWarm in a saucepan over low heat, stirring
FreezerFreezer-safe bag or container3 monthsThaw in fridge overnight, then reheat gently
Make-AheadStore in fridgeUp to 1 week in advanceUse as needed — no assembly required

When reheating, you might notice the sauce thickens a bit as it sits. That’s perfectly normal — just add a tablespoon of water or pineapple juice while gently warming it up, and whisk until smooth. Never microwave it straight from the fridge, as it can break and become grainy. I find a small saucepan over low heat works best, stirring for just a minute or two until it’s pourable again.

Variations & Easy Swaps

Over the years, I’ve experimented with many variations of this sauce for different dishes. Here are some of my favorites that I’ve developed in my NYC kitchen.


BEST Sweet and Sour Sauce

Easy Homemade Tartar Sauce Recipe Ready in 5 Minutes

Homemade Tartar Sauce Recipe – The Best 5-Minute Classic

⚖️
Difficulty
Easy
⏲️
Prep Time
5 mins
🕒
Cook Time
0 mins
⏱️
Total Time
5 mins
🍽️
Servings
8 servings (about 1.5 cups)

I’ll never forget the first time I made homemade tartar sauce from scratch. I was standing in my tiny Parisian kitchen, fresh out of culinary school, staring at a bowl of mayonnaise I had just emulsified by hand. My instructor had challenged us to make a classic French sauce gribiche, but my mind kept wandering to the bright, briny tartar sauce I grew up eating with fried fish at my mother’s table in Morocco. That night, I decided to create my own version—one that captured the tangy, creamy, herby essence of the best tartar sauce recipe I knew, but with a chef’s precision. This easy tartar sauce recipe is the result: a perfect balance of sweet relish, fresh dill, and a hint of horseradish, ready in just 5 minutes. The key is using high-quality mayonnaise and fresh lemon juice—simple tartar sauce ingredients that make all the difference.

The first spoonful of this homemade tartar sauce takes me right back to that little kitchen. The creamy, luscious base melts on your tongue, followed by bright pops of pickle and a whisper of heat from the horseradish. The fresh dill adds an herby, almost floral note that dances with the tangy lemon—every bite is a little explosion of flavor and texture. It’s the kind of sauce that makes even a simple piece of fried cod feel like a celebration. Since I moved to New York City, I’ve made this classic tartar sauce for countless dinners—from summer fish fries on the rooftop to elegant dinners with pan-seared salmon. It always gets the same reaction: “Wait, you made this?” Yes, I did—and you can too.

What makes this the best tartar sauce recipe out there? It’s not just the ingredients—it’s the technique. As a professionally trained chef, I know that a great sauce is all about balance and freshness. My twist? I use dill relish for that perfect sweet-tart crunch, but I also add a touch of granulated sugar to round out the acidity, and a teaspoon of prepared horseradish for a subtle kick that elevates the whole sauce. One thing I see home cooks get wrong is using Miracle Whip or low-fat mayo—that changes the whole texture and flavor. Stick with full-fat mayonnaise for the creamiest, most authentic result. And here’s a pro tip: let the sauce sit in the fridge for 15 minutes before serving—the flavors will meld together beautifully. From my NYC kitchen to yours, this recipe is foolproof and fast.

Why This Homemade Tartar Sauce Recipe Is the Best

The Flavor Secret: The magic of this homemade tartar sauce lies in the interplay of tangy, sweet, and savory. Growing up in Morocco, I learned that even the simplest condiments need layers of flavor. Here, the dill relish provides a sweet-sour pop, while the fresh dill and lemon juice add brightness. A touch of horseradish gives a subtle warmth that doesn’t overpower—it just makes everything taste more complex. This balance is what sets this easy tartar sauce apart from anything you can buy in a jar.

Perfected Texture: In Paris, my chef drilled into me that a good sauce must have a velvety, luxurious texture. That’s why I insist on full-fat mayonnaise—its richness creates a perfect canvas for the chunky pickle bits. The key is to not overmix; you want the relish to remain distinct, offering little bursts of texture in every bite. This is the hallmark of a classic tartar sauce made with care.

Foolproof & Fast: This best tartar sauce recipe is designed for everyone—from busy weeknights to elegant dinner parties. There’s no cooking involved, just stirring. Even if you’re a beginner, you can nail this sauce on your first try. The ingredients are pantry-friendly, and the entire process takes less time than preheating your oven. It’s my go-to proof that homemade is always better.

Tartar Sauce Ingredients

Every ingredient in this easy tartar sauce is chosen with intention. I pick up my dill and lemons from the Union Square Greenmarket when they’re in season—the freshness is unbeatable. The mayonnaise is always a full-fat brand, like Hellmann’s or Duke’s. And the dill relish? I prefer a good-quality brand like B&G or Mt. Olive, which isn’t too sweet or too sour. It’s a simple lineup, but each component plays a vital role in creating the best tartar sauce recipe you’ll ever taste.

Ingredients List

  • 1 cup mayonnaise (not Miracle Whip)
  • ½ cup dill relish
  • 1 tablespoon freshly chopped dill
  • 1 tablespoon freshly squeezed lemon juice
  • 1 teaspoon horseradish (or stone ground mustard)
  • 1 teaspoon granulated sugar (or more to taste)
  • ¼ teaspoon black pepper

Ingredient Spotlight

Mayonnaise is the backbone of this sauce—it provides the creamy, rich base that carries all the other flavors. I always use full-fat mayonnaise; low-fat versions contain stabilizers that can make the sauce watery and less flavorful. Don’t opt for Miracle Whip either—it’s tangier and sweeter, and it will throw off the balance entirely.

Dill relish is the star textural component. It’s finely chopped pickles that add sweet, tangy bursts throughout. If you only have sweet pickle relish, that works too (just reduce the sugar). For a less sweet version, use finely chopped dill pickles instead. The dill flavor is essential for that authentic taste.

Fresh dill brings a bright, herbaceous flavor that dried dill simply can’t replicate. It’s what makes this sauce taste vibrant and fresh. If you’re substituting with dried dill, use only 1 teaspoon, and know that the flavor will be less pronounced. Horseradish adds a gentle heat and a bit of sharpness; if you don’t have it, stone ground mustard is a wonderful alternative that adds a different but equally delicious kick.

Original IngredientBest SubstitutionFlavor / Texture Impact
Mayonnaise (1 cup)Full-fat Greek yogurt (plain) – not recommendedMuch thinner and tangier; sauce becomes less rich and separates over time
Dill relish (½ cup)Finely chopped dill pickles + ½ tsp sugarSimilar crunch but less sweetness; adjust sugar to taste
Fresh dill (1 tbsp)Dried dill (1 tsp)Less vibrant, more earthy; still works in a pinch
Horseradish (1 tsp)Stone ground mustard (1 tsp)Milder heat; adds a tangy, seedy texture

How to Make Homemade Tartar Sauce — Step-by-Step

Making the best tartar sauce at home is so simple you’ll wonder why you ever bought it at the store. Just follow these easy steps and you’ll have a creamy, tangy sauce in minutes.

Step 1: Combine the Base

In a medium bowl, add 1 cup of full-fat mayonnaise, ½ cup of dill relish, and 1 tablespoon of freshly chopped dill. Stir gently with a spoon until everything is well incorporated. Don’t overmix—you want the relish pieces to stay intact. The sauce will look a bit rustic and chunky, which is exactly what you want.

💡 mia’s Pro Tip: Use a rubber spatula instead of a whisk to avoid breaking down the relish too much. A gentle folding motion keeps the texture perfect.

Step 2: Season and Adjust

Add 1 tablespoon of fresh lemon juice, 1 teaspoon of horseradish (or mustard), 1 teaspoon of granulated sugar, and ¼ teaspoon of black pepper to the bowl. Stir gently again until everything is evenly distributed. Taste the sauce—you can adjust the lemon juice, sugar, or pepper to your preference. If you want it tangier, add a little more lemon. For a sweeter finish, add a pinch more sugar. Serve immediately, or for the best flavor, cover and refrigerate for at least 15 minutes.

⚠️ Common Mistake to Avoid: Adding all the lemon juice at once without tasting first can make the sauce too acidic. Start with the recommended amount and adjust slowly—you can always add more, but you can’t take it out.

StepActionDurationKey Visual Cue
1Combine mayo, relish, and dill1 minuteChunky, uniform mixture
2Add lemon, horseradish, sugar, pepper1 minuteSmooth, well-blended sauce

Serving & Presentation

This classic tartar sauce is incredibly versatile. I love serving it with crispy fried fish—think beer-battered cod or catfish—for a classic fish fry. In the summer, I pair it with grilled salmon or shrimp skewers from my rooftop barbecue. In winter, it’s perfect alongside baked fish or even as a dip for roasted vegetables. For a touch of elegance, spoon it into a small bowl and garnish with a sprig of fresh dill and a lemon wedge. It also adds a bright, creamy note to crab cakes or as a spread on a fish sandwich. Growing up, my mother would sometimes swirl in a bit of harissa for a Moroccan twist—a spicy kick that’s unforgettable.

When I’m hosting a dinner party, I set out the sauce in a beautiful ceramic bowl with a side of crispy panko-crusted fish fillets. The creamy, tangy dollop against the crunchy fish is a textural dream. At the Union Square Greenmarket, I always buy the freshest lemons and dill for this sauce—the quality really shines through. To my Moroccan family, this sauce reminds them of the fresh seafood we’d eat in Essaouira, but with a little French refinement. It’s a little bit of my heritage in every bite.

Pairing TypeSuggestionsWhy It Works
Side DishCrispy french fries, onion rings, coleslawThe creamy sauce complements fried, salty textures
Sauce / DipFried fish, crab cakes, shrimp cocktailClassic seafood pairing that adds tang and richness
BeverageCrisp lager, Sauvignon Blanc, iced teaLight, acidic drinks cut through the creamy sauce
GarnishFresh dill sprig, lemon wedge, paprikaAdds visual appeal and a pop of freshness

Make-Ahead, Storage & Reheating

This homemade tartar sauce is the ultimate make-ahead condiment for busy weeknights. I often double the batch on Sunday evenings so I have it ready for fish dinners throughout the week. Since it’s a no-cook sauce, it’s perfect for meal prep—just store it properly, and you’ll have fresh-tasting sauce for days. As a New York City food blogger, I rely on this kind of efficiency to keep my weeknight dinners delicious without stress.

MethodContainerDurationReheating Tip
RefrigeratorAirtight glass jar or containerUp to 1 weekServe cold directly from fridge; no reheating needed
FreezerFreezer-safe airtight containerUp to 3 monthsThaw overnight in fridge, then stir gently; may separate slightly
Make-AheadSame as refrigeratorMake up to 3 days in advanceStir well before serving; flavors meld beautifully

For the best texture and flavor, I always recommend storing this sauce with a layer of plastic wrap pressed directly onto the surface before sealing the lid. This prevents a skin from forming and keeps the sauce creamy. If you freeze it, know that after thawing it might be a little thinner—just give it a good stir and add a tiny pinch of sugar to bring the flavor back to life. But honestly, with a shelf life of a whole week in the fridge, you’ll likely finish it long before freezing becomes necessary.

Variations & Easy Swaps


Tartar Sauce Recipe

Easy Homemade Creamy Garlic Sauce Recipe for Dipping

Garlic Sauce – Creamy, Garlicky, and Absolutely Addictive

⚖️
Difficulty
Easy
⏲️
Prep Time
5 mins
🕒
Cook Time
0 mins
⏱️
Total Time
5 mins
🍽️
Servings
8

I still remember the first time I made a batch of garlic sauce that truly tasted like home. It was a rainy afternoon in my tiny New York City apartment, and I was missing my mother’s kitchen in Morocco, where the scent of garlic and fresh herbs always filled the air. This creamy garlic sauce is my way of bridging those worlds—it’s a simple, foolproof garlic sauce recipe that brings the bold, comforting flavors of North Africa right to your table. Whether you’re looking for a garlic dipping sauce for crispy fries or a creamy garlic sauce to drizzle over grilled chicken, this homemade garlic sauce is the answer.

The texture is pure luxury: silky, thick, and lusciously smooth, with a bright punch of fresh garlic that lingers just enough. Each spoonful carries a gentle tang from the sour cream, balanced by the richness of mayonnaise and a whisper of lemon juice. The aroma alone—garlic, creamy dairy, a hint of salt—will have everyone wandering into the kitchen asking what’s for dinner. This is not a shy sauce; it’s a confident, vibrant condiment that wakes up every bite it touches.

I’ve tested this garlic sauce recipe a hundred times to get it just right, and I can promise you it’s foolproof. My version skips the raw-garlic burn by smashing the cloves first—a classic French technique I learned in Paris—which mellows the heat while keeping the flavor bold. You’ll also find my secret for the perfect consistency, plus a common mistake I see all the time that makes sauces watery. Follow these steps, and you’ll have a creamy garlic sauce that rivals any restaurant version.

Why This Garlic Sauce Recipe Is the Best

The flavor secret here lies in how you treat the garlic. Instead of mincing it fine and throwing it in raw, I smash each clove with the flat side of my knife—a trick from my Paris culinary training. This releases the oils gently, so you get that unmistakable garlicky depth without the harsh, pungent bite that can overwhelm. Combined with a splash of lemon juice, the sharpness is tamed into something utterly addictive. It’s the difference between a good garlic sauce and an unforgettable homemade garlic sauce.

The texture is where this garlic sauce recipe really shines. I use a 3:1 ratio of sour cream to mayonnaise, which gives you a rich, creamy base that clings beautifully to everything from pizza crusts to roasted vegetables. The water helps loosen it just enough to drizzle, while the salt and pepper build layers of savory flavor. No weird gelatinous consistency here—just a perfectly balanced, dip-ready sauce that feels indulgent but is incredibly easy to make.

This is a no-cook, five-minute recipe that anyone can master. No special equipment, no complex techniques—just a bowl and a whisk. I’ve made this for busy weeknights when I need a quick sauce to elevate a simple meal, and I’ve also served it at dinner parties where guests begged for the recipe. It’s foolproof and forgiving, which is exactly what a weeknight warrior needs. Trust me, once you learn how to make garlic sauce this way, you’ll never buy store-bought again.

Garlic Sauce Recipe Ingredients

I love picking up fresh garlic from the Union Square Greenmarket in NYC—the aroma is so much more vibrant than the stuff you find in supermarkets. It reminds me of the garlic braids my mother would hang in her kitchen in Morocco. For this creamy garlic sauce, you only need a handful of ingredients, and each one plays a vital role.

Ingredients List

  • 2 cloves garlic, (peeled and smashed)
  • 1½ cups (345 g) sour cream
  • ½ cup (116 g) mayonnaise
  • 1 teaspoon water
  • 1 teaspoon kosher salt
  • ½ teaspoon pepper
  • 1 teaspoon lemon juice

Ingredient Spotlight

Garlic: This is the star of the sauce. Use fresh cloves, not pre-minced jarred garlic—the flavor is worlds apart. Smashing the clove releases its oils without turning it into a paste, giving you a gentle garlic kick. If you only have pre-minced, use about 1 teaspoon and expect a sharper, more pungent result.

Sour Cream: The backbone of this creamy garlic sauce. Full-fat sour cream gives the richest, silkiest texture. If you’re watching calories, a light version works but will be slightly thinner. I prefer the full-fat for a truly decadent garlic dipping sauce. Greek yogurt can substitute for a tangier, thicker sauce with less fat.

Mayonnaise: This adds creaminess and a little tang, plus it stabilizes the sauce so it doesn’t separate. I use a good-quality mayo like Hellmann’s or a homemade one. For a swap, you can use full-fat Greek yogurt, but the sauce will be tangier and slightly less rich.

Lemon Juice: A bright note that cuts through the richness and balances the garlic. Fresh lemon juice is ideal—bottled juice can taste flat. Just a teaspoon is enough to lift the whole sauce.

VariationKey ChangeBest ForDifficulty Impact
Original IngredientBest SubstitutionFlavor / Texture Impact
Sour CreamFull-fat Greek yogurtTangier, slightly thicker, lower fat
MayonnaiseGreek yogurtTangier, less rich, thinner consistency
Fresh GarlicRoasted garlic (2-3 cloves)Milder, sweeter, caramelized flavor
Lemon JuiceWhite wine vinegarSimilar acidity, slightly different tang

How to Make Garlic Sauce — Step-by-Step

Making this homemade garlic sauce is as easy as it gets—just a few minutes and a bowl. Let me walk you through it so you get perfect results every time.

Step 1: Prepare the Garlic

Peel the two cloves of garlic. Place them on a cutting board and smash each one with the flat side of a chef’s knife. This releases the essential oils without turning them into a paste, which keeps the garlic flavor bold but not harsh.

💡 mia’s Pro Tip: Smashing instead of mincing gives you a mellower garlic kick. If you want a punchier sauce, mince the garlic finely with a pinch of salt.

Step 2: Combine the Ingredients

In a medium bowl, add the sour cream, mayonnaise, water, kosher salt, pepper, and lemon juice. Add the smashed garlic cloves. Whisk everything together until the sauce is creamy and smooth. Make sure the garlic is evenly distributed but there’s no need to break it up completely—it will infuse as it sits.

⚠️ Common Mistake to Avoid: Don’t over-whisk! Mix just until combined—overmixing can cause the sauce to thin out too much. A few gentle strokes are all you need.

Step 3: Chill and Serve

Cover the bowl and transfer to the refrigerator. Let it chill for at least 30 minutes before serving. This allows the garlic flavor to meld with the dairy, creating a more balanced, creamy garlic sauce. Give it a quick stir before using.

💡 mia’s Pro Tip: For the best flavor, make this garlic sauce a few hours ahead or even the night before. It only gets better as it sits in the fridge!

StepActionDurationKey Visual Cue
1Smash garlic cloves1 minClove is flattened, oils released
2Whisk all ingredients together2 minsSmooth, creamy, no lumps
3Chill in refrigerator30+ minsSauce thickens slightly, flavors meld

Serving & Presentation

This creamy garlic sauce is incredibly versatile—it works as a garlic dipping sauce for fries, chips, or fresh bread, as a spread for sandwiches and wraps, or as a drizzling sauce for grilled chicken, steak, or roasted vegetables. I love serving it in a small bowl with a drizzle of olive oil and a sprinkle of fresh parsley on top for a pop of color. The presentation is simple but elegant, just the way I learned in Paris.

Pair this homemade garlic sauce with just about anything. In my NYC kitchen, I use it as a quick dip for pizza crusts, a creamy topping for baked potatoes, or even as a marinade base for chicken thighs. The garlic flavor is bold enough to stand up to strong dishes but gentle enough not to overpower delicate ones. It’s the kind of sauce that makes everyone ask, “What’s in this?”—and then they can’t stop dipping.

Pairing TypeSuggestionsWhy It Works
Side DishFrench fries, roasted potatoes, steamed broccoliCreamy dip adds richness to simple sides
Sauce / DipGrilled chicken, steak, fish tacosBalances savory and garlicky flavors
BeverageIced tea, light beer, lemon waterRefreshing drinks cut the creaminess
GarnishFresh parsley, chives, paprikaAdds color and a fresh finish

Make-Ahead, Storage & Reheating

This garlic sauce recipe is perfect for meal prep—I often make a double batch on Sundays to have on hand for the week ahead. It keeps beautifully in the fridge, and the flavors only deepen over time. Just be sure to stir it well before serving, as the ingredients can separate slightly as it sits.

MethodContainerDurationReheating Tip
RefrigeratorAirtight glass jar or container5-7 daysServe cold; stir before use
FreezerFreezer-safe containerUp to 3 monthsThaw in fridge overnight; whisk to re-emulsify
Make-AheadAirtight containerUp to 3 days in advanceAdd a splash of water if too thick after chilling

💡 mia’s Pro Tip: If your sauce thickens too much after chilling (the sour cream does that), stir in a teaspoon of milk or water to bring it back to drizzly consistency. I always keep a tiny splash handy for this reason.

Variations & Easy Swaps

This creamy garlic sauce is a perfect base for endless variations. I love playing around with it based on what I find at the farmers market or what I’m craving from my Moroccan roots.

VariationKey ChangeBest ForDifficulty Impact
Spicy HarissaAdd 1

Print
clock clock iconcutlery cutlery iconflag flag iconfolder folder iconinstagram instagram iconpinterest pinterest iconfacebook facebook iconprint print iconsquares squares iconheart heart iconheart solid heart solid icon

Garlic Sauce

  • Author: Chef Mia

Description

Garlic Sauce is a creamy, garlicky, sour cream-based sauce that can be used as a dipping sauce or as a flavorful kick that would be delicious on everything from bread to chicken to pizza!


Ingredients

Scale
  • 2 cloves garlic, (peeled and smashed)
  • 1½ cups (345 g) sour cream
  • ½ cup (116 g) mayonnaise
  • 1 teaspoon water
  • 1 teaspoon kosher salt
  • ½ teaspoon pepper
  • 1 teaspoon lemon juice

Instructions

  1. In a medium bowl, combine all the ingredients until creamy and smooth. Store in the refrigerator.


Nutrition

  • Calories: 123 kcal


Garlic Sauce

Easy Homemade Dragon Sauce Sweet Spicy Tangy

Dragon Sauce Recipe – A Bold, Sweet, and Spicy Sauce

⚖️
Difficulty
Easy
⏲️
Prep Time
5 mins
🕒
Cook Time
5 mins
⏱️
Total Time
10 mins
🍽️
Servings
8 servings (about 1 cup)

Growing up in Morocco, my mother had a way with sauces that could transform any meal. Her harissa was fiery and complex, while her charmoula was bright and herbaceous. But this dragon sauce recipe is something entirely my own — born from late nights in my tiny Parisian apartment kitchen, where I was training at Le Cordon Bleu and craving something that reminded me of home but felt completely new. I wanted a sauce that captured that same bold spirit: sweet from honey, tangy from rice vinegar, and with a slow-building heat from sriracha that lingers just enough to keep you coming back for more. It’s a versatile, all-purpose sauce that has become a staple in my New York City kitchen.

When you make this spicy dragon sauce, the aroma is the first thing that hits you — garlic and ginger sizzling in a hot pan, their fragrance filling the air with warmth and promise. Then comes the soy sauce, deep and savory, followed by the honey that caramelizes and glazes the pan. The sriracha adds that beautiful red hue, like a sunset on your stovetop. The texture is glossy and thick, coating the back of a spoon perfectly. It’s a sauce that clings to everything it touches — chicken wings, roasted broccoli, or even a simple plate of rice — and elevates it into something crave-worthy. This dragon sauce recipe is my go-to when I want to impress guests with minimal effort.

What sets this best dragon sauce apart from others is a simple French technique I learned in Paris: tempering cornstarch with cold water before adding it to the hot sauce. This prevents lumps and gives you a silky, professional finish every time. I also toast the garlic and ginger in a dry pan for just 30 seconds before adding the liquids — it unlocks their natural oils and adds a layer of depth you don’t get from just simmering them. One common mistake is adding the cornstarch slurry too early or too late; I’ll show you exactly when to do it. From my NYC kitchen to yours, I promise this dragon sauce will become your new secret weapon.

Why This Dragon Sauce Recipe Is the Best

The Flavor Secret: The magic of this how to make dragon sauce recipe lies in balance. Soy sauce gives umami depth, honey adds floral sweetness, and rice vinegar cuts through with tangy brightness. Sriracha brings the heat, but it’s measured so the sauce is spicy without being overwhelming. I grew up with Moroccan spices, trained in French sauce work, and now shop at NYC farmers markets — this sauce is the marriage of those worlds. The key is using freshly grated ginger and garlic, which have a vibrant punch that jarred versions can’t match.

Perfected Texture: Getting the perfect consistency for spicy dragon sauce ingredients is all about the cornstarch slurry. I mix 1 tablespoon of cornstarch with 2 tablespoons of cold water until it’s smooth, then add it to the simmering sauce while whisking constantly. This French-style liaison creates a sauce that’s thick enough to coat a spoon but still pours easily. It clings beautifully to proteins without being pasty. In Paris, my chef taught me to always let the sauce boil for at least 30 seconds after adding the slurry to fully activate the starch — a step I never skip.

Foolproof & Fast: This dragon sauce uses uses comes together in under 10 minutes, with just 8 pantry-friendly ingredients. You don’t need any special equipment — just a small saucepan and a whisk. It’s forgiving: too thick? Add a splash of water. Too thin? Let it simmer a minute longer. I’ve made this for busy weeknights and fancy dinner parties, and everyone always asks for the recipe. It’s the perfect introduction to making your own sauces at home.

Dragon Sauce Ingredients

Every time I make this dragon sauce recipe, I’m transported back to the spice souks of Marrakech, where vendors would heap dried chilies into fragrant mountains. But here in NYC, I grab my soy sauce from a Korean market in Koreatown and my honey from the Union Square Greenmarket. The ingredients are simple, but each one plays a crucial role in creating a sauce that’s bold, balanced, and unforgettable. Here’s what you’ll need.

Ingredients List

  • ½ cup soy sauce
  • ¼ cup honey
  • 2 tbsp rice vinegar
  • 2 cloves garlic, minced
  • 1 tsp fresh ginger, grated
  • 1 tbsp sriracha sauce (adjust to spice preference)
  • 1 tbsp cornstarch
  • 2 tbsp water

Ingredient Spotlight

Soy Sauce is the backbone of this spicy dragon sauce — it provides deep, savory umami and a dark, appetizing color. I recommend using a naturally brewed soy sauce like Kikkoman or Pearl River Bridge. Avoid “light” soy sauces as they lack the depth needed here. For a gluten-free version, tamari works perfectly without altering the flavor.

Honey adds sweetness that balances the soy sauce and heat. I prefer a mild wildflower honey or clover honey — avoid strong-flavored honeys like buckwheat that can overpower the sauce. If you’re vegan, use maple syrup or agave, but note that maple syrup will add a subtle woody note that I personally love.

Sriracha is the star of this best dragon sauce, providing heat with a hint of garlic and tang. The standard Huy Fong brand sriracha is ideal. Adjust the amount to your heat tolerance — 1 tablespoon gives a medium kick, while 2 teaspoons is milder. For a different heat profile, try sambal oelek or gochujang.

Fresh Ginger and Garlic are non-negotiable for the best flavor. Grated ginger (using a Microplane or fine grater) releases more juice and flavor than chopped. Pre-minced garlic from a jar lacks the pungency of fresh. I always store fresh ginger in the freezer — it grates easily without peeling!

Original IngredientBest SubstitutionFlavor / Texture Impact
Soy SauceTamari (gluten-free)Virtually identical; slightly less salty
HoneyMaple syrup or agaveMaple adds woody notes; agave is neutral but thinner
Rice VinegarApple cider vinegarSlightly fruitier; use a bit less (1.5 tbsp)
SrirachaSambal oelek or gochujangSambal is more garlicky; gochujang adds sweetness

How to Make Dragon Sauce — Step-by-Step

This dragon sauce recipe is so simple, you’ll memorize it after one try. Just follow these steps, and you’ll have a restaurant-quality sauce ready in minutes.

Step 1: Prep the Aromatics

Start by mincing 2 cloves of garlic and grating 1 teaspoon of fresh ginger. I use a Microplane for the ginger — it creates a fine paste that melts into the sauce. Set them aside together. In a small bowl, whisk 1 tablespoon of cornstarch with 2 tablespoons of cold water until completely smooth. This is your slurry.

💡 mia’s Pro Tip: Grate the ginger on a Microplane with the peel on — the fibers catch on the teeth, so you get only the juicy pulp. No need to peel!

Step 2: Toast the Aromatics

Place a small saucepan over medium heat. Add the minced garlic and grated ginger to the dry pan. Stir constantly for about 30 seconds — just until they become fragrant and golden at the edges. Do not let them burn, or the sauce will taste bitter. This quick toast unlocks their essential oils and adds a nutty depth.

⚠️ Common Mistake to Avoid: Adding the garlic and ginger to oil instead of the dry pan. Oil can make the sauce greasy. Toasting them dry is the French technique that gives a cleaner flavor.

Step 3: Build the Base

Immediately after toasting, pour in ½ cup soy sauce, ¼ cup honey, 2 tablespoons rice vinegar, and 1 tablespoon sriracha. Stir everything together. Increase the heat to medium-high and bring the mixture to a gentle simmer. You’ll see small bubbles forming around the edges. Let it simmer for 2 minutes, allowing the flavors to meld and the honey to fully dissolve.

💡 mia’s Pro Tip: For a deeper, more complex flavor, add a pinch of red pepper flakes or a star anise pod while simmering. Remove the star anise before serving.

Step 4: Thicken the Sauce

Whisk the cornstarch slurry again (it settles quickly), then slowly pour it into the simmering sauce while whisking constantly. Continue whisking for 30–60 seconds as the sauce thickens. You’ll see it go from watery to glossy and thick enough to coat the back of a spoon. Once it reaches your desired consistency, remove the pan from the heat.

⚠️ Common Mistake to Avoid: Adding the slurry to a cold or barely simmering sauce. The cornstarch won’t activate properly, leaving you with a thin sauce. Always wait for a full simmer.

Step 5: Cool and Store

Let the sauce cool in the pan for 5 minutes, then transfer it to a heatproof jar or airtight container. It will continue to thicken slightly as it cools. Use immediately or refrigerate for later. The sauce is now ready to be drizzled, dipped, or glazed!

💡 mia’s Pro Tip: If the sauce gets too thick after cooling, simply whisk in a teaspoon of warm water at a time until it loosens. For a thinner dipping sauce, reduce cornstarch to 1.5 teaspoons.

StepActionDurationKey Visual Cue
1Prep aromatics & slurry2 minsSlurry is smooth, no lumps
2Toast garlic & ginger30 secGolden edges, fragrant
3Simmer sauce base2 minsSmall bubbles at edges
4Add slurry & thicken30–60 secSauce coats spoon
5Cool & store5 minsSauce thickens further

Serving & Presentation

This dragon sauce recipe is incredibly versatile. I use it as a glaze for chicken wings or salmon — brush it on during the last 5 minutes of cooking for a sticky, caramelized finish. As a dipping sauce, it’s perfect for spring rolls, dumplings, or tempura veggies. I even drizzle it over roasted broccoli or cauliflower for an instant upgrade. In Paris, I’d serve this alongside a delicate sole meunière; in NYC, it’s my go-to for game-day wings.

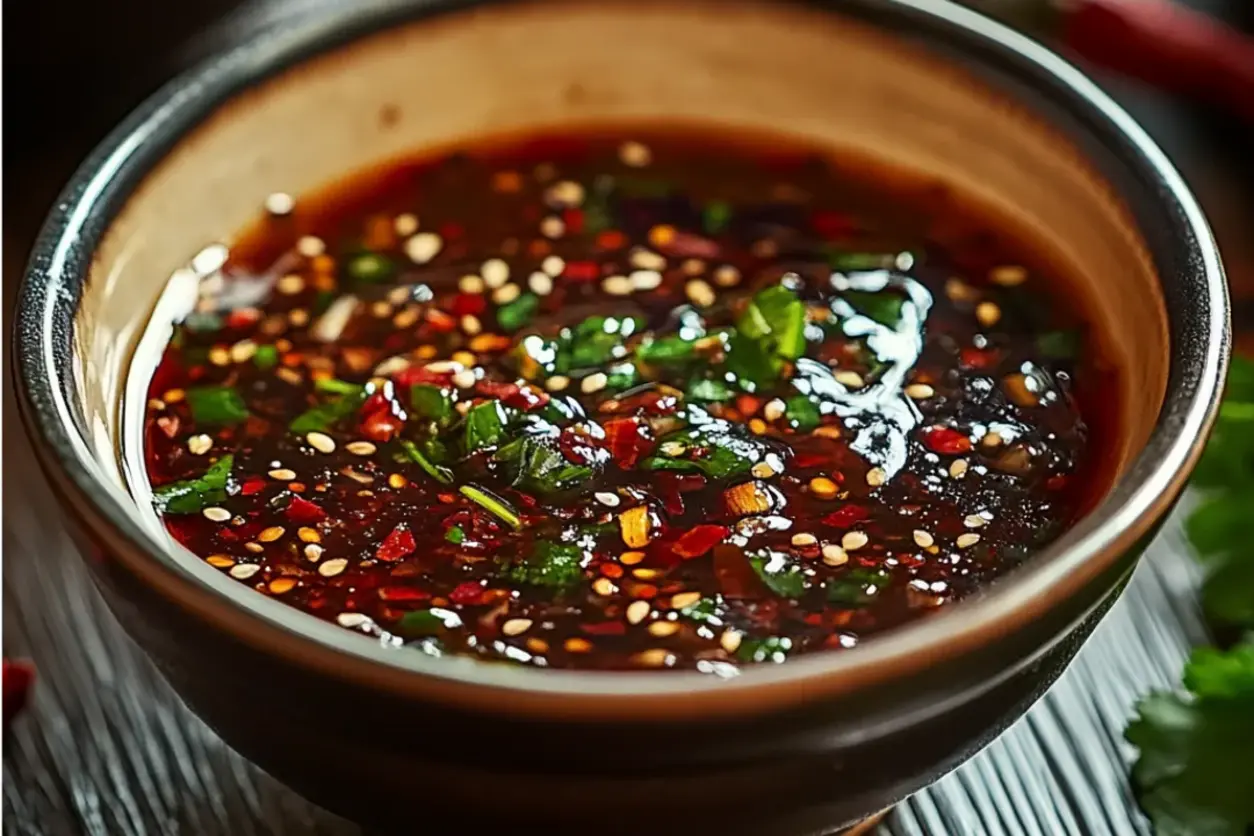
For presentation, I love to serve this spicy dragon sauce in a small bowl with a sprinkle of sesame seeds and sliced green onions on top. The red sauce against the white sesame seeds is striking. If I’m feeling fancy, I add a drizzle of sesame oil for extra aroma. This sauce also makes a wonderful marinade — just toss chicken or tofu in it and let it sit for 30 minutes before cooking.

Pairing TypeSuggestionsWhy It Works
ProteinChicken wings, salmon, tofu, shrimpSticky glaze; balances richness
VeggiesRoasted broccoli, cauliflower, green beansAdds savory-sweet depth
StarchesSteamed rice, noodles, fried riceSauce coats evenly; elevates plain grains
DippingSpring rolls, dumplings, potstickers, tempuraTangy-spicy contrast to fried foods

Make-Ahead, Storage & Reheating

As a busy mom and food blogger in NYC, I’m all about meal prep. This dragon sauce is a lifesaver — I make a double batch on Sunday and use it all week. It stores beautifully and the flavors actually deepen overnight. Here’s my tested system for keeping it fresh.

MethodContainerDurationReheating Tip
RefrigeratorAirtight glass jarUp to 2 weeksWarm in a saucepan over low heat, whisking
FreezerFreezer-safe jar (leave ½-inch headspace)Up to 3 monthsThaw overnight in fridge; reheat gently

Dragon Sauce