Vegan Flan with Coconut Cream – The Best Dairy-Free & Eggless Crème Caramel
⚖️
Difficulty
Easy
⏲️
Prep Time
15 mins
🕒
Cook Time
10 mins
⏱️
Total Time
25 mins + 3 hrs chill
🍽️
Servings
4 ramekins
I still remember the first time I tasted a perfect crème caramel in a little Parisian patisserie near my culinary school. The silky custard, the liquid gold caramel pooling around the plate — it was pure magic. But when I went vegan years later, I thought that dream was over. That is, until I started experimenting in my NYC kitchen with coconut milk and agar. This vegan flan recipe is the result of countless tests, and it finally delivers that same creamy, melt-in-your-mouth texture without a single egg or drop of dairy. The secret? A perfect balance of full-fat coconut milk and agar powder, which mimics the custard set of traditional flan.
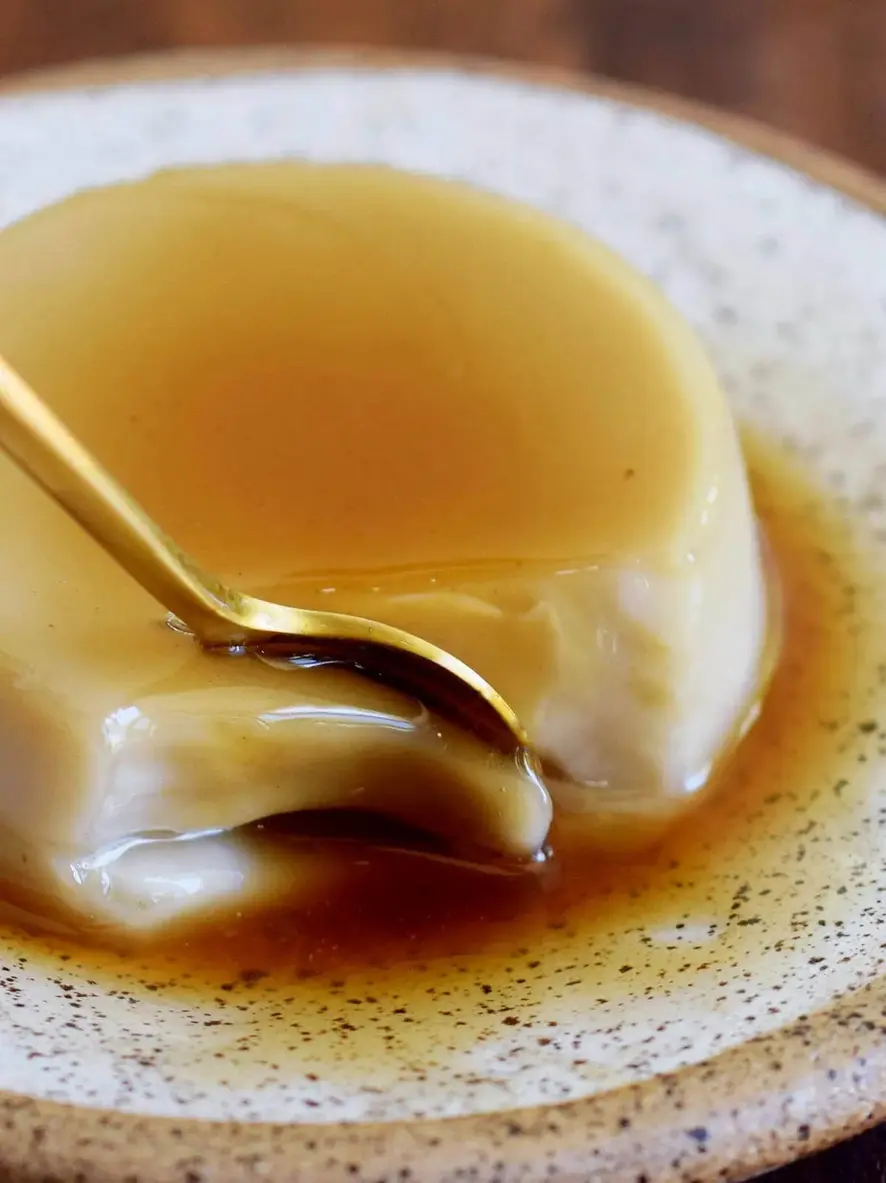
When you unmold this vegan caramel flan, the caramel sauce cascades down the sides like a golden waterfall. The first bite is a revelation: it’s impossibly smooth, with a rich coconut undertone that complements the deep, bittersweet caramel. The texture is exactly what you want from a classic flan — firm yet tender, almost pudding-like, but with a clean slice through the custard. I love the way the sweetness from the maple syrup plays against the caramel’s smoky notes. It’s a dessert that feels both indulgent and surprisingly light.
What sets this eggless flan apart is my French-trained approach to the custard base. After years working in pastry kitchens in Paris, I learned that the key to a flawless crème caramel is patience with the caramel and precision with the setting agent. Here, I use agar powder — a plant-based gelatin from seaweed — to get that perfect wobble. My pro tip? Simmer the custard for a full two minutes after boiling to fully activate the agar. A common mistake is undercooking it, which leads to a runny flan. This recipe is foolproof if you follow that step.
Why This Vegan Flan Recipe Is the Best
The flavor secret here is using high-quality canned coconut milk (full-fat, shaken well) combined with just the right amount of maple syrup. Growing up in Morocco, my mother taught me to layer sweetness — a pinch of sea salt in the custard brings out the caramel’s complexity. It’s the same technique I use in my NYC bakery for all my custards. The result is a dairy-free flan that doesn’t taste “healthy” — it tastes like a classic French dessert, but entirely plant-based.
Texture is everything in a vegan flan, and I’ve perfected it by pairing cornstarch with agar powder. Cornstarch gives a silky mouthfeel, while agar provides the firm structure needed for unmolding. I simmer the mixture for exactly two minutes after it boils — this activates the agar properly. In my early tests, I found that simmering too long can break the agar’s set, and not enough leaves the flan too soft. Trust the timing.
This recipe is also incredibly beginner-friendly. You don’t need a water bath or an oven — it’s completely no-bake. You just need a saucepan, ramekins, and a refrigerator. The active prep time is only 15 minutes, making it perfect for busy weeknights or when you need an impressive dessert with minimal effort. Plus, it’s soy-free, gluten-free, and naturally sweetened with maple syrup.
Vegan Flan Ingredients
I source my ingredients from the Union Square Greenmarket in NYC — the coconut milk from a local Asian grocery, the maple syrup from a farm in Vermont. For the caramel, I use organic cane sugar. The simplicity of the list means every ingredient matters.
Ingredients List
1/3 cup sugar (for caramel — use organic cane sugar)
1-2 tbsp water
2 cups canned coconut milk (full-fat, shake the can well before opening)
3-4 tbsp maple syrup (adjust to your sweetness preference)
2 tbsp cornstarch
2/3 tsp agar powder (ensure it’s powder, not flakes)
Pinch of sea salt
2 1/2 tsp vanilla extract
Ingredient Spotlight
Canned Coconut Milk: This is the backbone of your custard. Full-fat is non-negotiable — light coconut milk will yield a thin, watery flan. Shake the can vigorously before opening because the cream separates. I recommend Thai brands like Chaokoh or Aroy-D for their high fat content. Substitution: you can use cashew cream (soaked cashews blended with water) for a milder flavor, but the texture will be slightly less rich.
Agar Powder: This is the vegan substitute for eggs and gelatin. It comes from seaweed and creates a firm, sliceable set. It must be boiled for at least 2 minutes to activate. Substitution: if you use agar flakes, you’ll need 1 tablespoon, but the texture may be grainier. For a softer set, you can try 1.5 teaspoons of arrowroot powder mixed with the cornstarch, but the flan will be more pudding-like.
Maple Syrup: I use Grade A dark amber for its robust flavor. It adds depth without being overly sweet. Substitution: agave nectar works but will make the flan slightly thinner. Date syrup is a great option but will darken the color.
Original Ingredient
Best Substitution
Flavor / Texture Impact
Canned Coconut Milk (full-fat)
Cashew cream (equal amount)
Milder flavor, slightly less rich texture
Agar Powder
1 tbsp agar flakes
Grainier texture; needs longer simmer
Maple Syrup
Agave nectar
Slightly thinner custard, milder sweetness
How to Make Vegan Flan — Step-by-Step
Follow these steps carefully, and you’ll have a perfect vegan flan every time. Watch the video in the post for visual guidance.
Step 1: Make the Caramel
Add 1/3 cup sugar and 1-2 tablespoons water to a small saucepan. Bring to a simmer over medium heat, stirring frequently with a heatproof spatula. Once it starts boiling, reduce the heat to low and let it simmer undisturbed until it turns a dark golden brown and thickens slightly. This should take about 5-7 minutes. Don’t stir once it’s boiling — swirl the pan instead. Turn off the heat as soon as it reaches a deep amber color.
💡 mia’s Pro Tip: Use a light-colored saucepan to monitor the caramel’s color. It goes from golden to burnt very fast, so watch closely.
Step 2: Pour and Set the Caramel
Quickly pour the hot caramel into 4 small ramekins (about 4-ounce size). Tilt each ramekin to coat the bottom evenly, or use a spoon to spread it. The caramel will harden as it cools — that’s fine. Set aside while you make the custard.
⚠️ Common Mistake to Avoid: Don’t let the caramel sit in the pan too long after turning off the heat — it will harden and become impossible to pour. Work fast.
Step 3: Make the Custard
In a medium saucepan, whisk together 2 cups coconut milk (shake the can first), 3-4 tablespoons maple syrup, 2 tablespoons cornstarch, 2/3 teaspoon agar powder, 2 1/2 teaspoons vanilla extract, and a pinch of sea salt. Whisk until smooth and no lumps remain.
Step 4: Cook the Custard
Place the saucepan over medium-high heat and bring to a boil, whisking frequently. As soon as it starts boiling (you’ll see bubbles), reduce the heat to low and let it simmer gently for exactly 2 minutes, whisking constantly. This step is crucial to activate the agar. Remove from heat.
💡 mia’s Pro Tip: Set a timer for 2 minutes when you lower the heat. Don’t guess — undercooking the agar means a runny flan.
Step 5: Fill Ramekins and Chill
Pour the custard evenly into the 4 ramekins over the hardened caramel. Tap each ramekin gently on the counter to release any air bubbles. Refrigerate for at least 3-4 hours, or overnight for best results. The flan must be fully chilled and firm before unmolding.
Step 6: Unmold and Serve
To unmold, run a thin knife around the edge of each ramekin. Place a serving plate upside down on top of the ramekin, then flip the whole thing over. Shake gently to release the flan. The caramel will pool around it. Check the step-by-step photos in the blog post for reference.
⚠️ Common Mistake to Avoid: Don’t skip running the knife around the edge — the agar creates a firm seal that needs to be broken gently.
Step
Action
Duration
Key Visual Cue
1
Make caramel
5-7 mins
Dark golden amber color
2
Pour caramel into ramekins
1 min
Coats bottom evenly
3
Make custard
5 mins
Smooth, no lumps
4
Cook custard
2 mins simmer
Thickens slightly
5
Chill
3-4 hrs minimum
Firm to touch
6
Unmold
2 mins
Slides out cleanly
Serving & Presentation
When I serve this vegan flan at dinner parties in my Brooklyn apartment, I like to make it look as elegant as the classic French version. Unmold each flan onto a small plate, letting the caramel pool naturally around it. Garnish with a few fresh raspberries or edible flowers for a pop of color — the tartness of berries cuts through the sweetness beautifully.
For a Moroccan twist, I sometimes sprinkle a pinch of ground cinnamon or cardamom on top before serving. It’s a touch my mother would add when making desserts for Eid. In NYC, I’ve seen people pair it with a dollop of coconut whipped cream or a side of espresso for an after-dinner treat.
Pairing Type
Suggestions
Why It Works
Side Dish
Fresh berries, sliced mango
Tangy fruit balances caramel sweetness
Sauce / Dip
Coconut whipped cream, chocolate drizzle
Adds richness and texture
Beverage
Espresso, mint tea, dark rum
Coffee cuts sweetness; rum echoes caramel
Garnish
Mint leaves, cinnamon, edible flowers
Adds aroma and visual appeal
Make-Ahead, Storage & Reheating
This vegan flan is perfect for meal prep, especially when I’m planning a busy week in NYC. I make it up to 2 days ahead and keep it refrigerated in the ramekins. It actually tastes better the next day as the flavors meld.
Method
Container
Duration
Reheating Tip
Refrigerator
Covered ramekins
Up to 3 days
Serve cold or at room temp
Freezer
Airtight container (unmolded)
Tried This Recipe? Leave a Comment!
Did you make this recipe? I’d love to hear how it turned out! Please leave a comment and a rating below. Your feedback helps other home cooks and supports cheerychop.com!
For more delicious inspiration, follow me on Pinterest!
Brigadeirao (Brazilian Chocolate Fudge Flan) – The Ultimate Decadent Dessert
⚖️
Difficulty
Easy
⏲️
Prep Time
10 mins
🕒
Cook Time
40 mins
⏱️
Total Time
50 mins
🍽️
Servings
10
I remember the first time I tasted brigadeirao at a Brazilian friend’s house in Queens, and I was absolutely blown away. This amazing chocolate fudge flan combines the rich, truffle-like flavor of brigadeiro candies with the silky smooth texture of a baked flan. My twist? I add a touch of French technique from my Paris training—a little cornstarch for structure and a bain-marie bath for that perfect jiggly center. This is not your average Brazilian chocolate flan; it’s a decadent, fudgy, and addictive dessert that will win your heart.
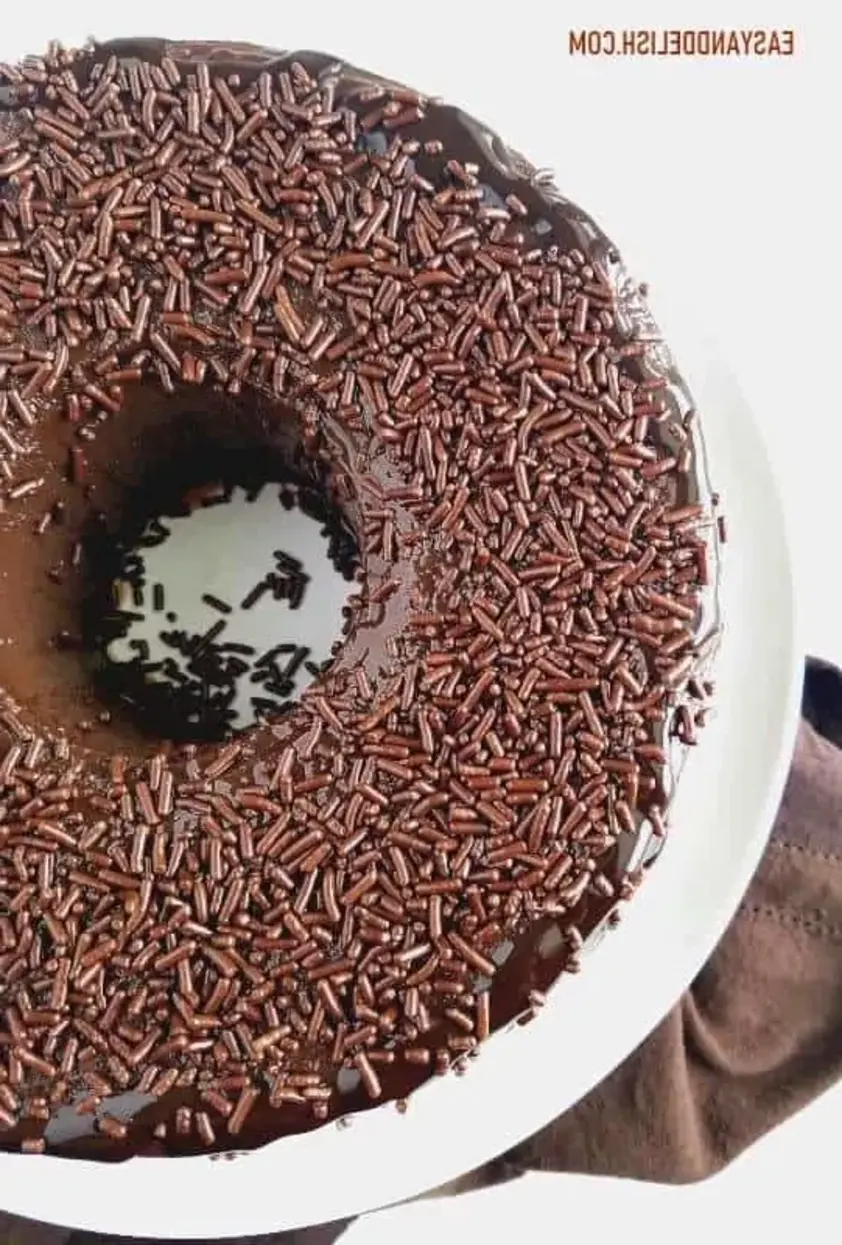
The moment you slice into this brigadeirao, you’ll see that beautiful, dense, fudgy texture. The aroma is pure chocolate heaven—deep, dark, and slightly sweet. Each spoonful melts on your tongue, with layers of creamy richness and delicate sweetness. The chocolate sprinkles on top add that irresistible crunch, making every bite a textural adventure. It’s the kind of dessert you serve when you want to impress but still keep it relaxed.
As a trained chef who now calls NYC home, I’ve perfected this easy family-size dessert to work effortlessly in any home kitchen. Unlike traditional flan which can be tricky with caramel, this brigadeirao is made entirely in a blender. My secret pro tip is to let it chill overnight for the best texture. One common mistake? Not using room-temperature eggs, which can create a lumpy batter. Trust me, follow these steps and you’ll be the hero of your next dinner party.
Why This Brigadeirao Recipe Is the Best
The flavor secret lies in the high-quality cocoa powder. Growing up in Morocco, my mother taught me to always use the best chocolate—a lesson I carried to Paris and now to my NYC kitchen. This brigadeirao recipe uses unsweetened cocoa powder that doesn’t get lost in the sweetness; it creates a deep, sophisticated chocolate flavor that balances the condensed milk beautifully.
Perfected texture is everything with this chocolate fudge flan. The bain-marie technique, a classic from my French pastry training, ensures gentle, even heat that prevents curdling and gives you that amazingly smooth, silky finish. The cornstarch adds just enough structure to make slicing a dream, without making it dense like a cake.
This is a foolproof and fast recipe, perfect for beginners. I’ve streamlined everything to a single blender step. You don’t need to caramelize sugar or worry about a water bath depth. I’ve tested this with my toughest critics—my NYC friends who have zero patience for complicated desserts—and every time, they ask for seconds. It’s truly the easiest way to make a show-stopping Brazilian dessert.
Brigadeirao Recipe Ingredients
I love picking up sweetened condensed milk at my local bodega in Brooklyn. It brings me right back to my mother’s kitchen in Morocco, where she’d use it for quick, magical desserts. The rest of the ingredients are kitchen staples—eggs, milk, sugar—that make this recipe so accessible. Let’s look at each one.
Ingredients List
28 oz sweetened condensed milk ((or two 14-oz cans))
1 cup whole milk
1 cup unsweetened cocoa powder
½ cup sugar (plus extra to sprinkle the pan)
½ tbsp cornstarch
1 tsp pure vanilla extract
4 large eggs (at room temperature)
1/4 cup chocolate sprinkles (good quality)
Ingredient Spotlight
Sweetened Condensed Milk: This is the backbone of brigadeirao, providing sweetness and that incredible, fudgy texture. Look for cans without any dents at the grocery store. A tested substitution is using 1½ cups heavy cream plus ½ cup sugar, but the texture will be slightly less dense and more custard-like.
Unsweetened Cocoa Powder: The star of the show. I recommend using Dutch-processed for a milder, smoother chocolate flavor, but natural works well too. My favorite brand is Valrhona—a little splurge from a French pastry shop uptown. In a pinch, you can use dark chocolate cocoa powder, but reduce the sugar by 2 tablespoons.
Whole Milk: Essential for achieving the right consistency. It helps the blender whir everything together into a smooth, silky batter. Avoid low-fat or skim milk, as they can make the texture slightly watery. Oat milk works well as a dairy substitute, but it may add a subtle oat flavor.
Original Ingredient
Best Substitution
Flavor / Texture Impact
Sweetened condensed milk
1½ cups heavy cream + ½ cup sugar
Less dense, more custard-like, sweeter
Whole milk
Oat milk (unsweetened)
Slightly thinner, subtle oat flavor
Unsweetened cocoa powder
Dark chocolate cocoa powder
Deeper, more intense chocolate, reduce sugar by 2 tbsp
Cornstarch
Arrowroot powder
Same structure, slightly glossier finish
How to Make Brigadeirao — Step-by-Step
Follow these simple steps to make the most delicious Brazilian chocolate flan you’ve ever had. I’ll walk you through every detail so you get a perfect, fudgy, and silky-smooth result every time.
Step 1: Prepare the Pan
Preheat your oven to 350°F (180°C). Grease an 8-inch (20 cm) ring pan generously with butter or non-stick cooking spray. Sprinkle sugar all over the greased surface, tilting the pan to coat evenly. This sugary coating creates a delicate crust that releases beautifully after baking.
💡 mia’s Pro Tip: Use a ring pan (tube pan) for even cooking—the center hole helps heat distribute, giving you a perfectly set flan. If you only have a loaf pan, increase baking time by 10-15 minutes.
Step 2: Blend the Batter
Add all ingredients except the chocolate sprinkles to a blender: sweetened condensed milk, whole milk, unsweetened cocoa powder, sugar, cornstarch, vanilla extract, and eggs. Blend on medium speed for about 30 seconds until perfectly smooth. Scrape down the sides once if needed.
⚠️ Common Mistake to Avoid: Over-blending! Blending too long can incorporate air and create a spongy texture rather than a dense, fudgy one. Stop as soon as the mixture is smooth.
Step 3: Bake in Bain-Marie
Place your prepared pan inside a larger roasting pan. Pour the blended batter into the sugared pan. Carefully pour hot water (about 1-2 inches deep) into the roasting pan, being careful not to splash any water into the batter. Bake for 40 minutes, or until the top is set and the center jiggles slightly like a cheesecake.
💡 mia’s Pro Tip: The water bath (bain-marie) is non-negotiable for that silky texture. It prevents the eggs from curdling and ensures a super smooth result. If you’re in a rush, skip the water bath at your own risk—the texture will be denser and more cake-like.
Step 4: Cool and Unmold
Remove the pan from the water bath and place it on a wire rack to cool for about 1 hour. Run a knife carefully around the edges to loosen the flan. Cover with plastic wrap and refrigerate for at least 4 hours, or overnight. Once fully chilled, run a knife around again, place a serving plate on top, and invert quickly. You may need to tap the bottom of the pan to release it.
⚠️ Common Mistake to Avoid: Unmolding too early! The flan needs a solid 4 hours in the fridge to set properly. If it’s still warm, it will collapse. Patience is key—I’ve learned this the hard way in my Paris kitchen!
Step
Action
Duration
Key Visual Cue
1
Prepare pan
2 mins
Even sugar coating
2
Blend batter
30 sec
Smooth, no lumps
3
Bake
40 mins
Set top, jiggly center
4
Cool & refrigerate
4+ hours
Firm, chilled through
Serving & Presentation
Once your brigadeirao is unmolded, it’s time to dress it up. I love to pile chocolate sprinkles generously on top, just like traditional brigadeiro candies. For an extra decadent touch, drizzle warm chocolate fudge sauce around the edges—it pools beautifully on the plate.
In my NYC home, I serve this at dinner parties with a dollop of whipped cream and a sprinkle of sea salt to cut through the sweetness. The contrast of the cold, creamy flan with crunchy sprinkles is divine. It’s perfect for parties, potlucks, or a quiet night when you need a serious chocolate fix.
Pairing Type
Suggestions
Why It Works
Side Dish
Fresh berries, whipped cream
The tartness cuts the richness
Sauce / Dip
Warm chocolate fudge, caramel sauce
Adds gooey texture and sweetness
Beverage
Coffee, espresso, cold milk
Bitterness balances sweetness
Garnish
Chocolate sprinkles, sea salt, gold leaf
Crunch, contrast, and elegance
Make-Ahead, Storage & Reheating
Brigadeirao is a dream for busy NYC cooks like me—it actually tastes better the next day! I always make mine a day ahead for parties. The chilling time allows the flavors to meld and the texture to set perfectly.
Method
Container
Duration
Reheating Tip
Refrigerator
Airtight container or covered in pan
Up to 5 days
Serve cold, no reheating needed
Freezer
Wrap tightly in plastic wrap + foil
Up to 2 months
Thaw in fridge overnight
Make-Ahead
Bake, cool, cover in pan
1-2 days in advance
Unmold just before serving
For meal prep, I often bake the brigadeirao, let it cool, and keep it in the pan in the fridge. When I’m ready to serve, I run a knife around the edge and invert it onto a plate. If you have leftovers (unlikely, but possible!), keep them covered in the fridge. I don’t recommend microwaving—cold brigadeirao is the best way to enjoy it. The texture changes if warmed.
Variations & Easy Swaps
Tried This Recipe? Leave a Comment!
Did you make this recipe? I’d love to hear how it turned out! Please leave a comment and a rating below. Your feedback helps other home cooks and supports cheerychop.com!
For more delicious inspiration, follow me on Pinterest!
French Antilles Coconut Flan – Silky & Tropical
Table of Contents
French Antilles Coconut Flan (Flan Coco) – A Melt-in-Your-Mouth Tropical Treasure
⚖️
Difficulty
Medium
⏲️
Prep Time
15 mins
🕒
Cook Time
55 mins
⏱️
Total Time
4 hrs 10 mins
🍽️
Servings
8
I remember the first time I tasted a truly great flan coco. It was during a whirlwind trip to Martinique, a place where the air smells like salt and frangipani. I had just moved to New York City from Paris, and my palate was still reeling from culinary school. But this French Antilles Coconut Flan — it stopped me in my tracks. The silky custard, laced with coconut, was unlike any flan I’d had in France. It was lighter, more fragrant, and carried a whisper of the Caribbean sun. The caramel pooled like liquid gold around the edges. That dessert became an obsession, a perfect blend of French technique and tropical soul. Today, I’m sharing my version — a Flan Coco recipe that brings that island warmth to your American kitchen.
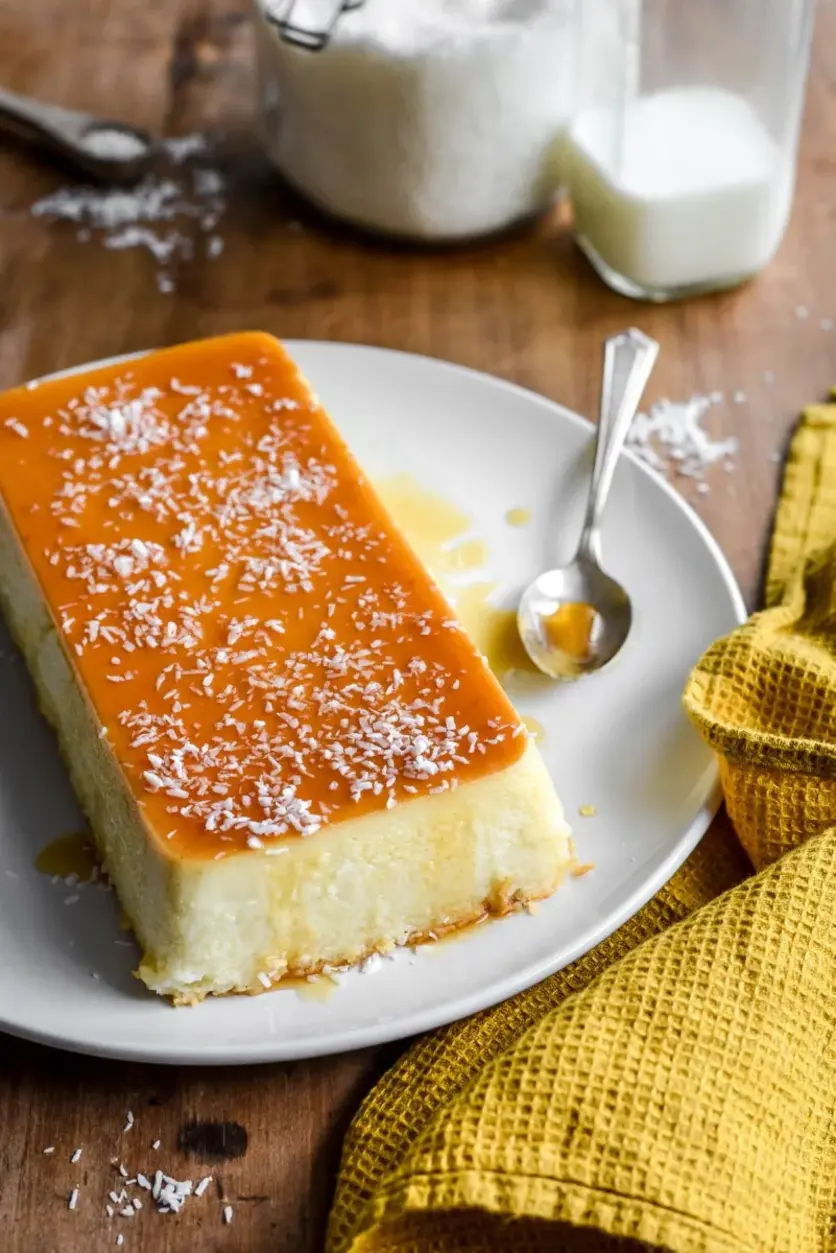
This isn’t your grandmother’s flan. The difference lies in the texture: a gentle, quivering custard that cuts like butter, with tiny specks of toasted coconut throughout. Each bite offers a sweet, milky richness from the condensed milk, balanced by the deep, nutty notes of the caramel. The aroma is pure comfort — vanilla, warm sugar, and that unmistakable tropical scent of coconut. When you unmold it onto a plate, the caramel cascades down the sides, creating a shimmering, amber pool. It’s a showstopper, yet it’s humble. It’s the kind of dessert that feels fancy enough for a dinner party but is simple enough for a weeknight treat. The secret, as I learned in Paris, is the water bath — a gentle, slow cooking that prevents curdling and ensures a custard as smooth as silk.
I’ve adapted this classic Caribbean coconut flan for the home cook, making it foolproof without sacrificing any of the flavor. My version uses sweetened condensed milk, which guarantees a creamy, stable custard every time. It’s a trick I learned from a patissier in the 7th arrondissement, who swore by it for his crème caramel. The key is to not overbake — we’re looking for a tender jiggle, not a firm set. And don’t be afraid of the caramel! I’ll guide you through it, so you get a perfect amber syrup without a bitter taste. This traditional French Caribbean dessert is more approachable than you think. Let’s make it together.
Why This French Antilles Coconut Flan Recipe Is the Best
The Flavor Secret: The magic of this French Antilles Coconut Flan lies in the perfect marriage of sweetened condensed milk and pure coconut milk. The condensed milk provides a silky richness that is the hallmark of a great crème caramel, while the coconut milk adds a floral, tropical undertone that makes this a genuine traditional French Caribbean dessert. I add a full cup of unsweetened shredded coconut, which toasts slightly during the long bake, infusing the custard with little bursts of texture and flavor. It’s a nod to my mother’s kitchen in Morocco, where coconut was always a star ingredient in sweet pastries, but executed with the precision I learned in Paris.
Perfected Texture: The texture of a coconut custard flan is everything. Not too firm, not too loose — it should tremble like a leaf in the wind. My method achieves this by using a precise ratio of eggs to liquid and a gentle water bath (bain-marie). The water bath insulates the custard, ensuring it cooks slowly and evenly, preventing the dreaded “scrambled egg” texture. I also insist on chilling the flan for at least three hours — overnight is even better. This allows the custard to set completely and the flavors to meld. A quick dip in warm water before unmolding loosens the caramel, making for a dramatic, beautiful presentation every time.
Foolproof & Fast: I know that making caramel from scratch can intimidate even experienced cooks. That’s why I’ve developed a “hands-off” caramel method: simply let the sugar melt on its own without stirring. You just shake the pan occasionally and watch for the color. It’s a technique from a pastry chef in Paris who told me, “Trust the sugar.” It works every time. This Flan Coco recipe is also forgiving — if you overbake it by a few minutes, the water bath will still keep it moist. And with just 15 minutes of active prep time, you can have this stunning dessert in the oven before you even start dinner.
French Antilles Coconut Flan Ingredients
I source my ingredients from a mix of places here in NYC. The coconut milk comes from the bodega on my corner in Brooklyn, the same one where the owner, José, always has the best ripe plantains. The eggs are from the Union Square Greenmarket — farm-fresh, with bright orange yolks that give the flan a beautiful golden hue. And the vanilla extract? That’s my secret weapon, brought back from a trip to Madagascar, though a good-quality Mexican or Tahitian vanilla works beautifully too. Growing up in Morocco, my mother always had a jar of home-candied citrus and a stash of vanilla beans from her travels. This French Antilles Coconut Flan is a tribute to that blend of global flavors.
Ingredients List
1 1/2 cup + 1 tbsp (400ml/14oz) sweetened condensed milk
1 1/4 cup (300ml /10.15 fl oz) coconut milk (can)
3 large eggs
1 tsp vanilla extract (or seeds of ½ vanilla bean)
1 cup (95g) unsweetened shredded coconut (plus extra for garnish)
For the caramel:
½ cup (100g) sugar
Ingredient Spotlight
Sweetened Condensed Milk: This is the backbone of the custard, providing sweetness and a luscious, velvety texture. Look for a can that says “sweetened condensed milk” — do not confuse it with evaporated milk, which is unsweetened and thinner. I prefer the brand Eagle Brand for its consistency. If you want a slightly less sweet flan, you can use a 14-ounce can of unsweetened condensed milk (found in specialty stores) and add ½ cup of sugar, but the texture won’t be exactly the same.
Coconut Milk: Use full-fat coconut milk from a can, not the “light” version or the carton coconut milk for drinking. The fat is essential for that rich, creamy texture. Shake the can well before opening to ensure the cream and water are combined. A good brand like Chaokoh or Thai Kitchen will have a thick, creamy consistency. If all you have is cream of coconut (like Coco López), it’s much sweeter and thicker — you’ll need to dilute it with water and reduce the condensed milk slightly. I’ll cover that in the FAQ!
Unsweetened Shredded Coconut: This adds texture and concentrated coconut flavor. Make sure it’s unsweetened, or the flan will become cloyingly sweet. You can find it in the baking aisle or bulk bins at Whole Foods. I’ve also used desiccated coconut, which is finer — just use the same amount. For a more intense flavor, you can toast the shredded coconut in a dry pan for 2-3 minutes before adding it to the batter. This is a trick I picked up in Paris for a coconut financier.
Original Ingredient
Best Substitution
Flavor / Texture Impact
Sweetened Condensed Milk
Unsweetened condensed milk + ½ cup sugar
Less sweet, slightly firmer texture
Coconut Milk (can)
Half cream of coconut + half water
Sweeter, thicker, more intense coconut
Unsweetened Shredded Coconut
Desiccated coconut or toasted coconut flakes
Finer texture if desiccated; nuttier if toasted
3 Large Eggs
5 large egg yolks
Richer, more custardy flavor; less set
How to Make French Antilles Coconut Flan — Step-by-Step
I’ll walk you through each step, just as I would if you were standing next to me in my kitchen on the Upper West Side. The key is to be patient and trust the process — this French Antilles Coconut Flan is worth every minute.
Step 1: Make the Caramel
Place the ½ cup of sugar in a small, heavy-bottomed saucepan over medium heat. Do not stir! Just let it be. You can occasionally shake the pan gently to distribute the sugar. After a few minutes, you’ll see the sugar start to melt around the edges. Let it continue until it turns a deep amber color — like honey. This should take about 5-7 minutes. As soon as it reaches that rich amber hue, remove it from the heat immediately. Pour it evenly into your ungreased loaf pan, tilting the pan to cover the bottom. Set it aside to cool and harden — this takes about 10 minutes.
💡 mia’s Pro Tip: Caramel continues to cook after you remove it from the heat, so take it off the stove when it’s just a shade lighter than the color you want. I aim for a medium amber — dark enough for depth, but not so dark it turns bitter. If you see white crystals forming on the sides of the pan, don’t panic — just brush them down with a wet pastry brush.
Step 2: Mix the Flan Batter
In a large mixing bowl, whisk together the sweetened condensed milk, coconut milk, and eggs until smooth. Add the vanilla extract and the unsweetened shredded coconut. Whisk gently — you want to avoid incorporating too much air, which can create bubbles in the flan. The mixture will be a pale, creamy yellow with flecks of coconut. Pour it gently over the cooled caramel in the loaf pan. The caramel will crackle a little — that’s normal.
⚠️ Common Mistake to Avoid: Over-whisking the batter! This incorporates air and can create a foamy, porous texture instead of the silky, dense custard we want. Whisk just until combined, using a gentle hand. If you see bubbles on the surface, tap the pan on the counter a few times to release them.
Step 3: Water Bath and Bake
Preheat your oven to 350°F (180°C). Place the loaf pan into a larger baking dish — a 9×13 inch roasting pan works perfectly. Carefully pour hot water into the larger dish until it reaches about 1/4 up the sides of the loaf pan. The water should be hot, not boiling. This is the water bath. Bake for 50-55 minutes. The flan is done when the top is lightly golden and firm to the touch, but it still has a slight jiggle in the center when you gently shake the pan. It will continue to set as it cools. Remove the loaf pan from the water bath and place it on a wire rack to cool completely to room temperature.
💡 mia’s Pro Tip: The water bath is non-negotiable for a perfect texture. It creates a gentle, humid heat that prevents the eggs from curdling. Make sure the water level stays below the rim of the loaf pan — if it’s too high, the top of the flan can get watery. I also cover the loaf pan loosely with foil for the first 30 minutes to prevent a thick skin from forming on top.
Step 4: Chill and Unmold
Once the flan has cooled to room temperature, transfer it to the refrigerator and chill for at least 3 hours — but overnight is best. When you’re ready to serve, fill a large baking dish with about 2 inches of fairly warm water. Place the loaf pan in the warm water for 1-2 minutes. This loosens the caramel from the bottom of the pan. Run a thin knife around the edges of the pan to release the flan. Place a serving plate upside down over the pan. Holding both the plate and pan tightly together, invert quickly and decisively. Lift the pan off — the flan should slide out gracefully, surrounded by a pool of golden caramel. Sprinkle with extra shredded coconut before serving.
⚠️ Common Mistake to Avoid: Skipping the warm water bath before unmolding! The caramel hardens as it cools, forming a seal at the bottom of the pan. If you try to unmold it without loosening the caramel, the flan can stick or crack. A brief dip in warm water makes all the difference.
Step
Action
Duration
Key Visual Cue
1
Make Caramel
5-7 mins
Deep amber color, like honey
2
Mix Batter
2-3 mins
Pale yellow, smooth, no lumps
3
Bake in Water Bath
50-55 mins
Top golden, center jiggles
4
Chill & Unmold
3 hrs +
Clean release, caramel pool
Serving & Presentation
This traditional French Caribbean dessert is best served cold, straight from the fridge. I like to slice it with a warm, wet knife for picture-perfect slices. The contrast of the silky custard against the liquid caramel is stunning. For a touch of elegance, I top each slice with a generous sprinkle of toasted coconut flakes (just toast them in a dry skillet for 2 minutes until golden). A few edible flowers, like orchids or pansies, add a pop of color that reminds me of the tropical gardens in Martinique.
In my home in New York City, I often serve this after a spicy Moroccan tagine — the cool, creamy custard is the perfect palate cleanser. It’s also wonderful alongside a strong cup of black coffee or a tart, fruity cocktail. For a truly indulgent dessert, I sometimes serve it with a dollop of lightly sweetened whipped cream and a sprinkle of lime zest. The acidity cuts through the richness perfectly, a trick I learned from a pastry chef in Paris who always balanced his desserts with citrus.
Pairing Type
Suggestions
Why It Works
Side Dish
Fresh mango salsa, passion fruit drizzle
Tropical fruits enhance the coconut flavor
Tried This Recipe? Leave a Comment!
Did you make this recipe? I’d love to hear how it turned out! Please leave a comment and a rating below. Your feedback helps other home cooks and supports cheerychop.com!
For more delicious inspiration, follow me on Pinterest!
Classic French Onion Soup with Caramelized Onions
Table of Contents
Classic French Onion Soup with Perfectly Caramelized Onions – Rich, Cheesy, and Warming
⚖️
Difficulty
Medium
⏲️
Prep Time
20 mins
🕒
Cook Time
180 mins
⏱️
Total Time
200 mins
🍽️
Servings
6
My journey with this classic French onion soup recipe began in a tiny bistro kitchen in Paris, where I learned that patience is the true secret ingredient. As a young cook fresh out of culinary school, I spent hours watching the chef coax deep, almost jammy sweetness from ordinary onions. Now, living in New York City and blending my Moroccan heritage with classic French techniques, I’ve perfected this homemade French onion soup to be both deeply traditional and utterly foolproof. This is not just a soup; it’s a bowl of pure, comforting magic.
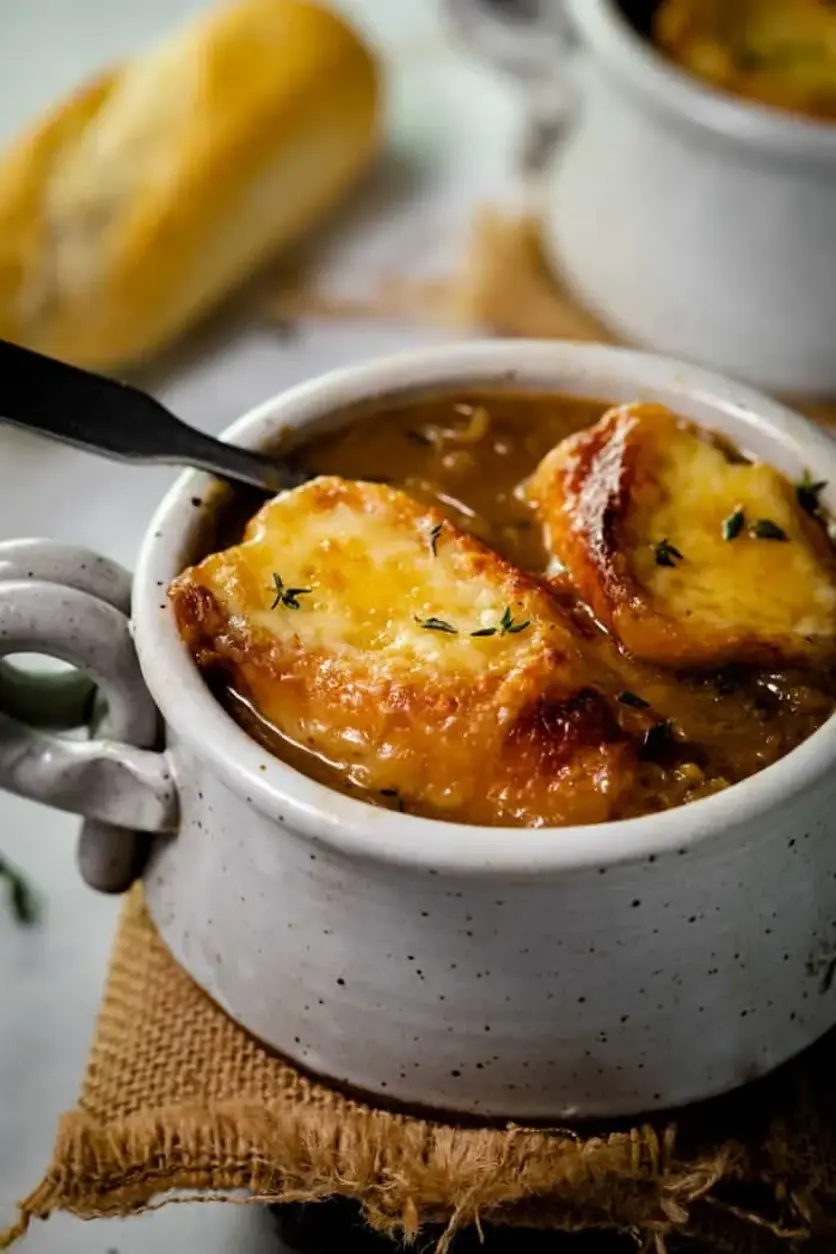
Imagine a rich, dark amber broth, redolent with the sweet perfume of slowly caramelized onions and fresh thyme. The first spoonful is a revelation: savory, slightly sweet, with a subtle depth from a splash of wine. Then comes the crown — a thick slice of toasted baguette, completely smothered in bubbling, golden-brown Gruyère cheese. The cheese pulls into long, irresistible strings as you lift it from the bowl. The aroma alone will fill your kitchen with the kind of warmth that says, “Everything is going to be just fine.”
After years of testing, I can tell you that the best French onion soup comes down to three things: a blend of yellow and sweet onions for layered flavor, high-quality beef broth as the backbone, and the patience to let those onions caramelize slowly, for up to two hours. In this easy French onion soup recipe, I’ll walk you through my chef-tested technique, including my secret for deglazing the pot with wine to build incredible flavor without any burnt bits. Stick with me, and I’ll show you how to avoid a common mistake that makes many home versions of this soup taste bitter or flat.
Why This French Onion Soup Recipe Is the Best
The Flavor Secret: My training in Paris taught me that caramelizing onions is not just about cooking them down; it’s about building layers of flavor. I use a mix of yellow and sweet Vidalia onions, which creates a more complex sweetness than either alone. The key is to deglaze the pot repeatedly with small splashes of dry white wine, lifting the fond (those browned bits) back into the onions. This single technique, straight from a French chef’s playbook, is the difference between a good soup and a truly spectacular one.
Perfected Texture: Many recipes end up with a thin, watery broth. Mine doesn’t. I use a light sprinkle of flour (optional) at the end of the caramelization process, which gives the final broth a silky, velvety body without making it heavy. The croutons are toasted separately, then baked with the cheese, so they stay perfectly crisp until the moment they meet the broth. There’s nothing sadder than a soggy, mushy bread topping, and we’re avoiding that entirely here.
Foolproof & Fast: While the whole process takes time, the active cooking time is surprisingly minimal. The onions do all the work on a gentle heat, requiring just a stir every 10-15 minutes. This easy French onion soup is perfect for a cozy Sunday afternoon. I often prep the base a day ahead, because like all great soups, this one is even better the next day. It’s a low-effort, high-reward recipe that anyone can master, even on a busy weeknight if you start early enough.
Best French Onion Soup Ingredients
The beauty of this classic French onion soup is its simplicity. I buy my onions from the Union Square Greenmarket here in NYC, where the sweet Vidalias are a summer treasure. The key is to use the best ingredients you can find, because each one plays a starring role. My mother’s kitchen in Morocco taught me that good food starts with good ingredients, and this soup is no exception.
Ingredients List
4 large yellow onions
2 large sweet onions (Vidalia)
6 Tablespoons butter
2 sprigs fresh thyme
2 Bay leaves
¾ cup dry white wine (Chardonnay or Pinot Grigio)
3 tablespoons flour (optional, for thickening)
4 cups beef broth (high quality is key)
1 beef bouillon cube (or 1 tsp Better Than Bouillon)
1.5 cups chicken broth
1 teaspoon Worcestershire sauce
Salt/Pepper (to taste)
1 baguette
3 Tablespoons olive oil (optional, for brushing bread)
6 slices Gruyere cheese
Ingredient Spotlight
Onions: The foundation of the entire dish. Yellow onions provide a balanced, savory depth, while sweet Vidalias add a higher sugar content for that signature caramelized sweetness. Do not use red or white onions alone; they won’t caramelize as well. Look for firm, heavy onions with no soft spots.
Gruyère Cheese: This Swiss cheese is the classic choice for its incredible meltability and nutty, slightly salty flavor. It browns beautifully under the broiler without becoming greasy. For a substitute, you can use Comté or a mix of Gruyère and a little bit of sharp Provolone, but the texture will be slightly different.
Beef Broth: This is where you cannot skimp. The broth is the soul of the soup. Use a high-quality, low-sodium store-bought broth, or better yet, homemade. I always add a beef bouillon cube (or Better Than Bouillon paste) to boost the savory, umami notes. It makes a world of difference.
Original Ingredient
Best Substitution
Flavor / Texture Impact
Gruyère Cheese
Comté
Slightly milder, melts just as well.
Dry White Wine
Dry Sherry
Adds a nuttier, more complex flavor.
Butter
Olive Oil
Lighter, less rich, but still works for a dairy-free version.
Baguette
Sourdough bread
Slightly tangier, holds up well.
How to Make French Onion Soup — Step-by-Step
Don’t be intimidated by the time — this is a relaxing, almost meditative process. I promise you, the reward is absolutely worth the wait.
Step 1: Prepare the Onions
Slice the onions into ¼-inch slices. It is important not to go thinner than this, as they will reduce significantly and you don’t want them to become stringy. I highly recommend using a mandoline slicer for this — it makes the job fast, easy, and ensures uniform slices that will cook evenly.
💡 mia’s Pro Tip: Chill the onions for 15 minutes before slicing. This helps reduce the tear-inducing fumes!
Step 2: Melt Butter and Start Caramelizing
Melt the butter in a large soup pot or Dutch oven over medium-low heat. Wait for it to begin to foam — this is important because it allows the water to evaporate out, leaving the butter more clarified and smooth, which prevents it from burning. Once foaming, add all the sliced onions. Use tongs to toss and coat them in the butter. Leave the pot uncovered as they cook.
⚠️ Common Mistake to Avoid: Don’t rush the heat! Cooking onions on medium-high to speed up the process will only burn the sugars, resulting in a bitter taste. Keep it low and slow.
Step 3: Caramelize Slowly and Deglaze
The onions will caramelize slowly, taking up to 2 hours or longer. Stir them every 10-15 minutes. As they cook, they will leave a brown residue (the fond) at the bottom of the pot. This is pure flavor. Add a splash of the dry white wine and use a silicone spatula to ‘clean’ the bottom of the pot, scraping up all those delicious brown bits. Repeat this deglazing process as needed throughout the entire caramelization.
💡 mia’s Pro Tip: If you run out of wine, use a splash of water or broth to deglaze. The goal is to prevent the fond from burning, not to add liquid all at once.
Step 4: Finish Onions and Add Flour
When the onions are a deep, rich mahogany brown and smell incredibly sweet, they are nearly done. Sprinkle the flour (if using) over them and cook for 2 minutes, stirring constantly. This will cook out the raw flour taste and help thicken the soup. Add any remaining wine and increase the heat to medium-high. Toss the onions more frequently for about 1-2 minutes.
⚠️ Common Mistake to Avoid: Adding the flour too early or at too low a heat can create lumps. Make sure the onions are hot and you stir vigorously.
Step 5: Build the Broth
Add the beef broth, beef bouillon, chicken broth, Worcestershire sauce, bay leaves, and fresh thyme sprigs. Give everything a good stir. Simmer over medium heat for 45 minutes with the lid cracked. This allows the broth to reduce slightly and the flavors to meld beautifully.
Step 6: Prepare the Croutons
While the soup simmers, preheat your oven to 350°F. Slice the baguette into ½-inch thick slices. Brush the tops with olive oil (optional) and bake for about 5 minutes, or until they are light golden and just starting to crisp. Do not over-toast them, as they will bake again with the cheese.
Step 7: Assemble and Brown
Increase the oven temperature to 450°F. Place a toasted baguette slice on top of each serving of soup (or in the bowls). Top each baguette with a slice of Gruyère cheese. Place the bowls on a baking sheet and bake in the oven until the cheese melts, bubbles, and begins to turn a deep golden brown, about 5-8 minutes. Keep a close eye on it so it doesn’t burn.
💡 mia’s Pro Tip: For an extra bubbly, browned top, you can switch the oven to broil for the last 1-2 minutes. Watch it like a hawk!
Step 8: Season and Serve
Carefully remove the bay leaves and the woody stems of the thyme from the soup pot. Season the soup to taste with salt and pepper. Keep in mind that the cheese and broth already have salt, so taste first. Ladle the warm soup into your serving bowls and carefully top each with the cheesy baguette. Serve immediately!
Step
Action
Duration
Key Visual Cue
1
Slice Onions
10 mins
Uniform ¼-inch slices
2
Melt Butter & Start
5 mins
Butter foaming
3
Caramelize Onions
1.5 – 2 hours
Deep mahogany brown
4
Add Flour
2 mins
Flour fully incorporated
5
Add Broth & Simmer
45 mins
Broth fragrant and slightly reduced
6
Bake Croutons
5 mins
Lightly golden
7
Assemble & Brown
5-8 mins
Cheese bubbly and golden brown
Serving & Presentation
The magic of this soup is in its presentation. Serve it in deep, oven-safe bowls that can go from oven to table. The classic French way is to use a large soup bowl, but small, individual crocks are also perfect. Place the bowl on a saucer or plate to catch any cheesy drips. A sprinkle of fresh thyme leaves over the bubbly cheese adds a beautiful pop of green and a final whisper of aroma.
I love to serve this soup as a hearty starter for a winter dinner party, or as the main event alongside a simple green salad with a sharp vinaigrette to cut the richness. In my NYC home, we often pair it with a crusty baguette (of course!) and a glass of the same dry white wine used in the cooking.
Pairing Type
Suggestions
Why It Works
Side Dish
Simple green salad, roasted vegetables
The freshness and acidity cut through the rich, cheesy soup.
Beverage
Dry white wine (Chardonnay), light red (Pinot Noir)
Wine complements the savory depth and cuts through the fat.
Garnish
Fresh thyme leaves, a sprinkle of black pepper
Adds freshness and visual appeal.
Make-Ahead, Storage & Reheating
This homemade French onion soup is a dream for meal prep. As a busy cook in NYC, I often make the soup base a day or two in advance. The flavor actually deepens
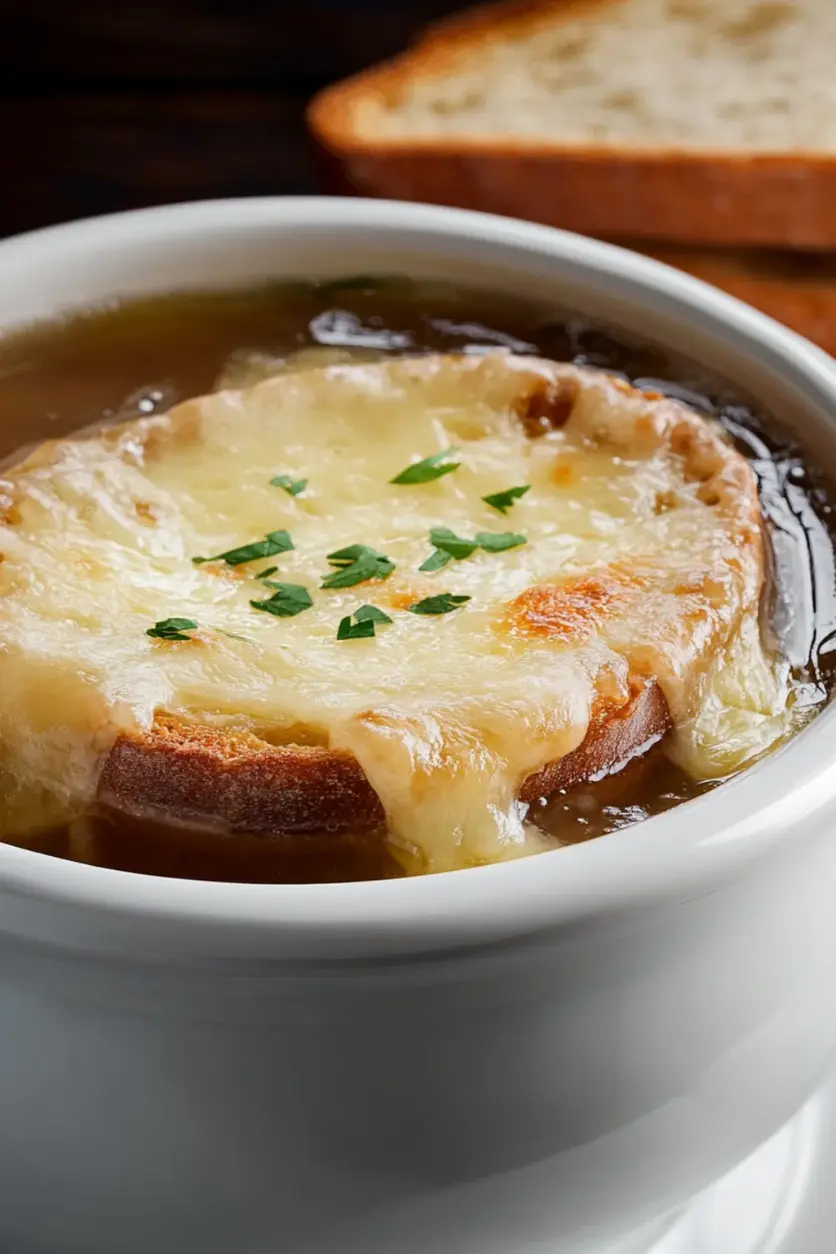
This traditional French Onion Soup has warm baguettes topped with hot, melted Gruyere cheese. High quality beef broth, a splash of wine, and perfectly caramelized onions are the secrets to this classic recipe.
Ingredients
Scale
4 large yellow onions, (see notes for pound conversion)
2 large sweet onions (Vidalia)
6 Tablespoons butter
2 sprigs fresh thyme
2 Bay leaves
¾ cup dry white wine (Chardonnay or Pinot Grigio)
3 tablespoons flour (optional)
4 cups beef broth (high quality is key)
1 beef bouillon cube (or 1 tsp Better Than Bouillon)
1.5 cups chicken broth
1 teaspoon Worcestershire sauce
Salt/Pepper (to taste)
1 baguette
3 Tablespoons olive oil (optional)
6 slices Gruyere cheese
Instructions
Slice the onions into ¼-inch slices, (no thinner). They'll reduce in size quite a bit and you dont want them to be too stringy. (Using a mandoline slicer makes this much easier).
Melt the butter in a large soup pot or dutch oven over medium-low heat. Wait until it begins to foam, this allows water to evaporate out, leaving the butter more clarified and smooth.
Add the onions and use tongs to toss and coat them in the butter. Leave them uncovered as they cook.
The onions will caramelize slowly, up to 2 hours or longer. Stir them every 10-15 minutes. As the onions caramelize, they may leave some brown residue at the bottom of the pot. Add a splash of wine and use a silicone spatula to 'clean' the bottom of the pot. Repeat as needed throughout the cooking process
When the onions are nearly done, sprinkle flour over them and cook for 2 minutes. Add any remaining wine and increase the heat to medium-high. Toss the onions more frequently. They are done when they are richly brown and sweet.
Add the beef broth, beef bouillon, chicken broth, Worcestershire sauce, bay leaves and thyme. Simmer over medium heat for 45 minutes with the lid cracked.
While the soup simmers, preheat the oven to 350° F.
Slice the baguette into ½ inch thick slices. Brush the tops with olive oil and bake for about 5 minutes.
Increase the oven temperature to 450° F. Top each baguette with cheese and bake in the oven until the cheese melts and begins to bubble and brown.
Remove the bay leaves and thyme stems. Season to taste with salt and pepper.
Ladle the warm soup into each bowl and top each of them with the warm baguettes. Serve!
Nutrition
Calories:509 kcal
Sugar:10 g
Fat:30 g
Carbohydrates:40 g
Protein:16 g
Tried This Recipe? Leave a Comment!
Did you make this recipe? I’d love to hear how it turned out! Please leave a comment and a rating below. Your feedback helps other home cooks and supports cheerychop.com!
For more delicious inspiration, follow me on Pinterest!
Gordon Ramsay French Onion Soup Recipe with Gruyère Croutons
Table of Contents
Gordon Ramsay French Onion Soup Recipe – Perfect Caramelized Umami
⚖️
Difficulty
Medium
⏲️
Prep Time
15 mins
🕒
Cook Time
70 mins
⏱️
Total Time
85 mins
🍽️
Servings
6
I still remember the first bowl of French onion soup I made after my apprenticeship in Paris — it was a cold February night, and I was living in a tiny studio near the Marais. That soup, deeply caramelized with a rich beef broth and a golden blanket of Gruyère, tasted like everything I had learned in culinary school: patience, technique, and the magic of humble ingredients. This Gordon Ramsay French Onion Soup recipe captures that same magic, but with a few tweaks I’ve developed over my years cooking in New York City. The secret to this version? It’s a perfect balance of slow-cooked sweetness and bold umami — a technique I first picked up in my mother’s kitchen in Morocco, where we would caramelize onions for hours for tagines. This Gordon Ramsay-inspired recipe is not just about following steps; it’s about understanding the process that makes it the best French onion soup. Let me guide you through it.
Imagine the scent filling your kitchen as butter and olive oil melt together, and the onions begin to soften and release their sugary aroma. After thirty to forty minutes of patient stirring, those slices turn a rich mahogany brown, sweet and almost jammy. Then, the dry white wine hits the hot pot with a satisfying sizzle, releasing all the browned bits stuck to the bottom — that’s pure flavor. The beef stock, with its deep, savory notes, joins in, along with bay leaves and fresh thyme from the Union Square Greenmarket. As it simmers, the broth becomes rich, complex, and soul-warming. When you ladle it into a bowl and top it with that cheesy, bubbling Gruyère toast, every spoonful is a moment of pure comfort. My version brings a touch of French technique and a whisper of Moroccan warmth — it’s an easy French onion soup recipe that feels extraordinary.
As a professional cook trained in Paris and now cooking in NYC, I’ve refined this recipe so that anyone can nail it at home. I’m not just sharing ingredients; I’m giving you the pro secrets that make this soup stand out from any other. The key is how you treat the onions — not just with heat, but with a pinch of sugar at the right moment to encourage deep, even browning without burning. I’ll also show you why quality beef stock is non-negotiable for that homemade French onion soup flavor, and I’ll share a common mistake that can turn this easy recipe into a watery mess. Plus, I’ll reveal my trick for the perfect Gruyère crouton — a crispy, cheesy crown that’s the hallmark of the best French onion soup. Trust me, once you make this version, you’ll never go back to a canned soup again. This is the classic French onion soup reimagined with a chef’s touch.
Why This Gordon Ramsay French Onion Soup Recipe Is the Best
The flavor secret of this Gordon Ramsay French onion soup recipe lies in how we build layers of umami. In Paris, I learned that caramelizing onions is not about brute force — it’s about patience and letting the natural sugars do the work. I start with a heavy-bottomed pot and let the onions sweat slowly, which draws out their moisture and concentrates their sweetness. Then, ten minutes in, I add a teaspoon of sugar to kick-start the browning process, a trick I adapted from my mother’s Moroccan kitchen where we’d use honey for a similar effect. The result is a depth of flavor that’s both sweet and savory, with a complexity that makes every spoonful memorable. This technique transforms a simple easy French onion soup recipe into something truly special, elevating it to the best French onion soup you’ll ever make at home.
Perfected texture is the hallmark of any classic French onion soup. The broth should be rich but not heavy, with a velvety mouthfeel that coats the tongue. I achieve this by deglazing the pan with dry white wine — scraping up the caramelized fond from the bottom — before adding the beef stock. That fond, packed with browned onion particles, is the secret to a broth with real body. Then, a gentle 30-minute simmer allows the flavors to meld without clouding the soup. The final touch is the baguette crouton: I toast it until it’s dry and crisp, so when it’s topped with Gruyère and broiled, it stays crunchy on the outside while soaking up the broth from below. This perfect contrast in textures — a soft, sweet soup, a chewy crouton, and a bubbly, salty cheese crust — is what makes this homemade French onion soup unforgettable.
Foolproof and fast? Absolutely. Even with the longer caramelization time, this recipe is designed for home cooks who want restaurant-quality results without stress. I’ve tested it for years in my NYC kitchen — yes, even when I’m rushing between farmers market trips and dinner with friends. The key is to set a timer for the onions so you don’t forget them, and to use a large enough pot to prevent overcrowding. I also recommend prep-freezing your sliced onions for even quicker assembly next time. This version is forgiving: if your caramelization takes an extra ten minutes, that’s fine — the soup will only taste better. So whether you’re a seasoned cook or a beginner looking for an easy French onion soup recipe, this method gives you a rich, reliable classic French onion soup that tastes like you spent all day in the kitchen.
Gordon Ramsay French Onion Soup Recipe Ingredients
Shopping for ingredients is one of my favorite parts of cooking. When I’m in New York City, I head to the Fairway on the Upper West Side for their amazing selection of Gruyère — it’s always nutty and perfectly aged. I remember in Morocco, we’d use local sheep’s milk cheese for a similar richness, but Gruyère is the classic choice for this soup. For the onions, I grab a mix of yellow and sweet onions from the farmers market; they caramelize beautifully and give the broth a natural sweetness. Here’s your complete list of everything you need for this Gordon Ramsay French onion soup recipe.
120 ml (1/2 cup) dry white wine, such as Sauvignon Blanc
2 bay leaves
2 sprigs fresh thyme
Salt and freshly ground black pepper, to taste
1 large baguette, sliced into 1-inch pieces, then toasted
170g (about 1 1/2 cups) Gruyère cheese, grated
Fresh parsley, finely chopped (optional, for garnish)
Ingredient Spotlight
Understanding your ingredients is key to making this the best French onion soup. Here’s what I want you to know about each main component. The onions are the star — choose yellow ones for the deepest flavor. In the US, you can find them at any grocery store; just make sure they’re firm and heavy. My tested substitution is sweet onions (like Vidalia) for a milder, sweeter soup, but they may take slightly longer to caramelize. The Gruyère should be a firm, aged type from Switzerland; its nuttiness is non-negotiable for that classic French onion soup topping. If you can’t find it, Swiss or Emmental cheese work well, but they’re milder and less complex. Finally, the beef stock: always use a quality brand (try Better Than Bouillon for convenience) or homemade stock for the richest flavor. Chicken stock can be used in a pinch, but the soup will be less savory.
Original Ingredient
Best Substitution
Flavor / Texture Impact
Yellow onions
Sweet Vidalia onions
Milder, slightly sweeter broth; may caramelize faster but less depth
Gruyère cheese
Swiss or Emmental cheese
Less nutty, more mild flavor; similar melt but less complex
Dry white wine
Dry vermouth or additional stock + 1 tbsp lemon juice
Less complex acidity; broth will be slightly less balanced
Beef stock
Chicken stock + 1 tbsp soy sauce
Lighter flavor; soy adds umami but soup lacks beefy richness
How to Make Gordon Ramsay French Onion Soup Recipe — Step-by-Step
Don’t be intimidated by the caramelization time! This easy French onion soup recipe is all about letting time do the work for you. Just grab a big pot, a wooden spoon, and follow these steps. I promise, the smell alone will make every minute worth it.
Step 1: Prepare and Caramelize the Onions
Heat the butter and olive oil in a large pot (at least 5 quarts) over medium-low heat. Add the sliced onions and stir to coat them evenly. Cook for 30–40 minutes, stirring every 5 minutes or so, until the onions are a deep, rich brown color. After the first 10 minutes, sprinkle in the sugar and stir well — this kick-starts the browning process. Be patient; if the onions start to stick, add a splash of water instead of cranking up the heat. 💡 mia’s Pro Tip: A wide-bottomed pot gives the onions more surface area for even caramelization. Use a stainless steel or enameled cast iron pot for best results — nonstick pans don’t develop as much fond.
Step 2: Add Garlic and Deglaze
Add the minced garlic to the caramelized onions and stir for about 2 minutes until fragrant. Then, pour in the dry white wine. Use a wooden spoon to scrape up all the browned bits from the bottom of the pot — that’s pure flavor. Let the wine cook down for about 1 minute until it’s almost evaporated. ⚠️ Common Mistake to Avoid: Don’t skip the deglazing! The brown fond (called “sucs” in French) is where most of the savory flavor lives. If you leave it behind, your broth will be thin and pale.
Step 3: Simmer the Broth
Add the beef stock, bay leaves, fresh thyme sprigs, and a generous pinch of salt and pepper. Bring the soup to a gentle simmer, then uncover it and let it cook for 30 minutes. This allows the flavors to meld and the broth to slightly reduce. 💡 mia’s Pro Tip: For an even richer broth, let the soup simmer for up to 45 minutes. Just be careful not to boil it hard, or the stock can become cloudy. A gentle bubble is all you need.
Step 4: Toast Bread and Prep Cheese
While the soup simmers, preheat your broiler. Slice the baguette into 1-inch thick rounds and arrange them on a baking sheet. Toast them under the broiler for 1–2 minutes per side, until golden and dry. Set them aside. Grate the Gruyère cheese if you haven’t already. ⚠️ Common Mistake to Avoid: Do not over-toast the bread! It should be dry but not hard. If it’s too crisp, it will not soak up the soup properly and will be crunchy rather than chewy.
Step 5: Assemble and Broil
Ladle the hot soup into oven-safe bowls. If you have individual bowls, place them on a baking sheet. Float a toasted baguette slice in each bowl — push it down slightly so it starts absorbing the broth. Pile a generous amount of grated Gruyère over each crouton, covering it completely. Place the baking sheet under the broiler and broil for 2–4 minutes, until the cheese is melted, bubbly, and golden brown. Watch carefully to avoid burning. 💡 mia’s Pro Tip: For the perfect cheese crust, pile the Gruyère high — about 1/4 cup per bowl. Don’t skimp! The cheese should drip over the sides of the crouton and melt into the soup.
Step 6: Serve and Garnish
Carefully remove the bowls from the oven (they will be very hot!). Garnish each bowl with a sprinkle of fresh parsley if desired. Serve immediately, warning your guests that the bowls are hot. The soup should be eaten right away, while the cheese is still stretchy and the crouton is soft and soaked in broth. 💡 mia’s Pro Tip: If you don’t have oven-safe bowls, you can top each serving with a cheesy crouton made in the broiler separately and floated on top after. It’s still delicious!
Step
Action
Duration
Key Visual Cue
1
Caramelize onions
30–40 minutes
Deep mahogany brown, soft and jammy
2
Add garlic, deglaze
3–5 minutes
Garlic fragrant, wine nearly evaporated
3
Simmer broth
30 minutes
Broth slightly reduced, deep brown, aromatic
4
Toast bread, prep cheese
5 minutes
Bread golden and dry, cheese grated
5
Assemble and broil
2–4 minutes
Cheese melted, bubbly, golden brown
6
Serve and garnish
Immediate
Steaming hot, parsley flecks, cheesy pull
Serving & Presentation
This classic French onion soup is a meal in itself, but I love to serve it as part of a cozy dinner. Ladle the soup into sturdy ceramic bowls — I found a beautiful set at a stall in the Chelsea Market. The contrast of the dark, rich broth against the white bowl is stunning. Don’t forget to warn everyone that the bowls are hot right out of the broiler! For garnish, a small sprinkle of fresh parsley adds a bright green pop, but I sometimes add a pinch of smoked paprika for a subtle Moroccan heat. My Parisian grandmother would always serve it with a side of crusty bread for dipping into the broth, but the cheesy crouton really does the job. When I’m hosting friends in my NYC apartment, I pair this soup with a glass of dry rosé or a full-bodied red wine, like a Côtes du Rhône — the acidity cuts through the richness beautifully. It’s the perfect starter or a main course for a cold winter night.
For a more casual presentation, you can skip the individual bowls and assemble the soup in a large oven-safe dish. Top it with several baguette slices and a generous blanket of Gruyère, and broil until bubbly. Then ladle into bowls at the table — it’s dramatic and fun. I also like to add a small drizzle of extra virgin olive oil over the cheese just before serving for a silky finish. And if you’re feeling extra, a few pickled red onions on the side add a tangy contrast. This is homemade
Deeply caramelized onions, rich beef broth, and golden Gruyère toaststhis is French onion soup done right.
Ingredients
Scale
500g onions, thinly sliced
2 cloves garlic, minced
55g unsalted butter
2 tbsp olive oil
1 tsp sugar
2L quality beef stock
120ml dry white wine
2 bay leaves
2 sprigs fresh thyme
Salt + pepper
1 baguette, sliced + toasted
170g Gruyère, grated
Fresh parsley (optional)
Instructions
Heat butter + olive oil in a large pot. Add onions. Cook on medium-low for 3040 minutes, stirring often, until deeply caramelized.
Add garlic. Stir for 2 minutes. Add sugar 10 minutes in to help browning.
Deglaze with wine, scraping the bottom. Add stock, bay, thyme, salt, and pepper.
Simmer uncovered 30 minutes. Taste and adjust seasoning.
Toast baguette slices. Top with Gruyère. Broil until golden.
Serve soup in bowls. Float a cheesy crouton on top. Garnish with parsley.
Nutrition
Calories:376 cal
Tried This Recipe? Leave a Comment!
Did you make this recipe? I’d love to hear how it turned out! Please leave a comment and a rating below. Your feedback helps other home cooks and supports cheerychop.com!
ph">For more delicious inspiration, follow me on Pinterest!