Million Dollar Chicken Casserole – Easy & Creamy

Million Dollar Chicken Casserole: The Easy & Creamy Bake

⚖️
Difficulty
Easy
⏲️
Prep Time
15 mins
🕒
Cook Time
35 mins
⏱️
Total Time
50 mins
🍽️
Servings
6

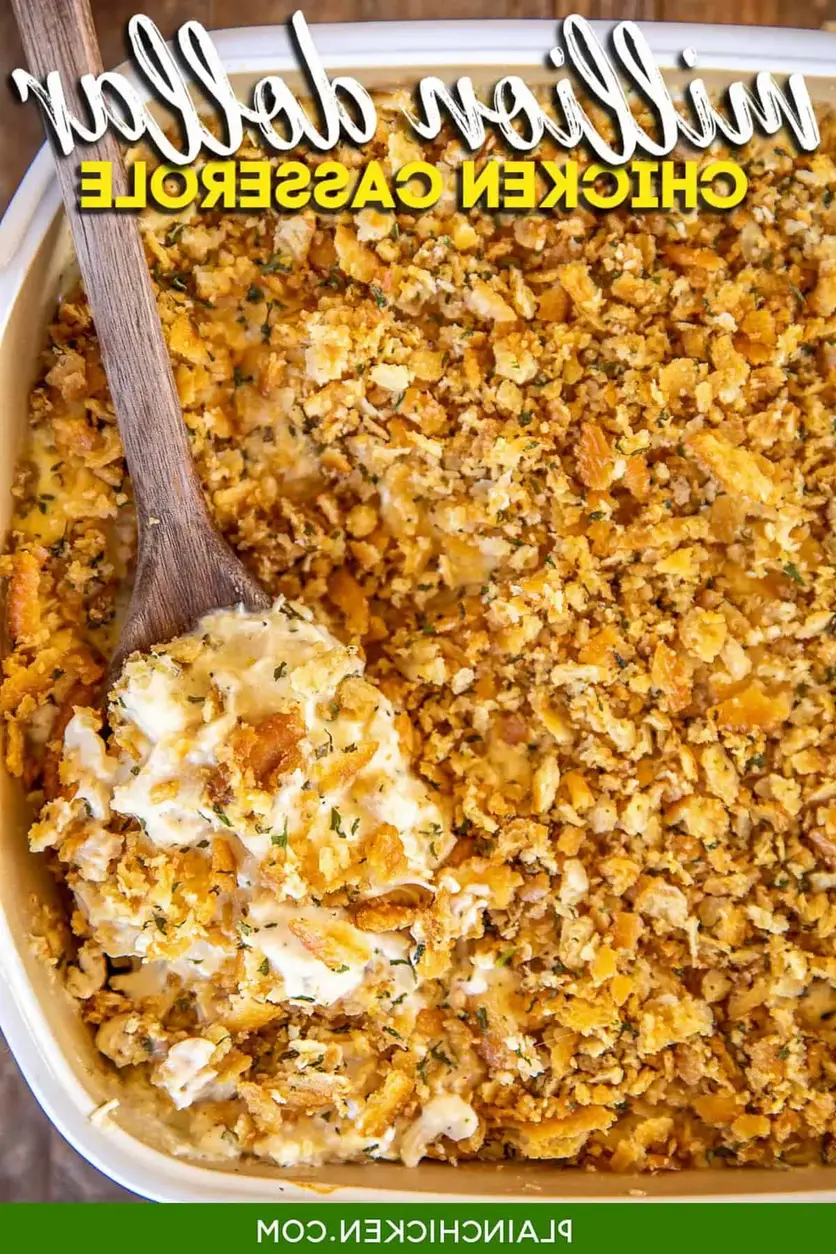
Oh, this Million Dollar Chicken Casserole! It instantly transports me back to my mother’s kitchen in Morocco, where simple ingredients were transformed into feasts. While she perfected tagines with fragrant spices, I’ve learned to appreciate the comforting magic of a truly delicious casserole. This recipe isn’t just easy; it’s a warm hug in a dish, perfect for those hectic weeknights in my New York City life. It’s so incredibly simple, yet the flavors are complex and satisfying, making it taste like a million bucks – hence the name! It’s become my go-to, the kind of meal that everyone asks for the recipe to, and I’m thrilled to share this cheesy chicken casserole perfection with you all.

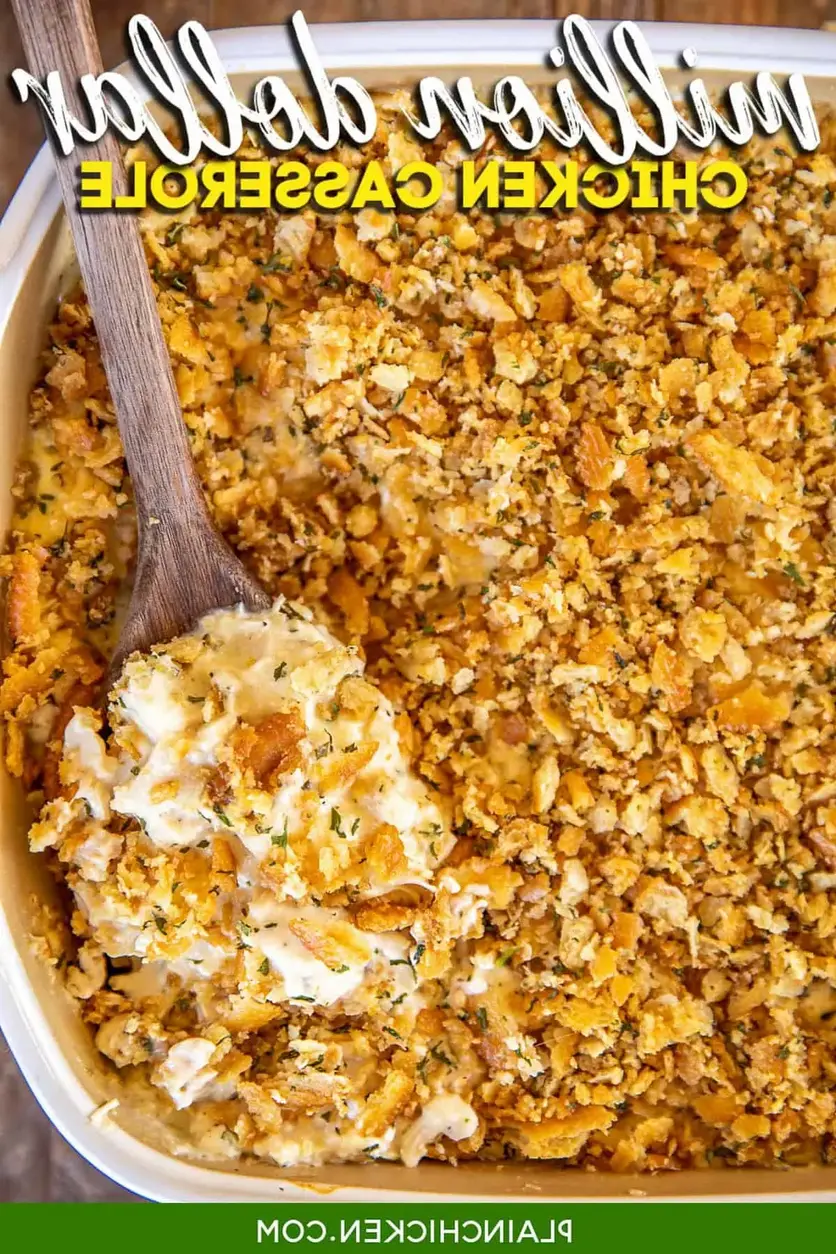
Imagine this: tender, shredded chicken bathed in a velvety, creamy sauce that hits every savory note. It’s rich with the tangy cream cheese, the mellow sweetness of cottage cheese, and the subtle depth of sour cream. Hints of garlic and onion powder weave through, creating a savory base that’s utterly irresistible. And the topping? Oh, the topping! Crispy, buttery Ritz crackers provide the perfect crunchy counterpoint to the smooth filling. It’s a symphony of textures and flavors that makes this easy chicken casserole dinner a true winner, a dish I could easily serve to friends visiting from Paris or a quick weeknight meal for myself.

What sets this dish apart is not just its incredible flavor, but its delightful simplicity. I’ve refined this recipe over years of testing, drawing on my French culinary training to ensure perfect balance and texture, while keeping the Moroccan spirit of making the most of humble ingredients. Many recipes call for more complex steps, but I’ve found that this “million dollar chicken bake” excels through its very ease. I’ll be sharing a few of my favorite “mia’s Pro Tips” to elevate it even further, and highlighting a very common mistake that can make your casserole just… okay, instead of truly spectacular.

Why This Million Dollar Chicken Casserole Recipe Is the Best

The secret to this Million Dollar Chicken Casserole’s success lies in its masterful union of creamy dairy elements. My French culinary training taught me the importance of building flavor layers through sauces, and here, the cream cheese, cottage cheese, and sour cream create a luxurious, tangy base that perfectly complements the chicken. It’s a simple yet sophisticated blend that delivers that “million dollar” taste without a fuss. I’ve also used my experience with flavor balancing to ensure the garlic and onion powder are just right, enhancing the savory notes without overpowering them—a delicate dance akin to creating a perfect béchamel.

Achieving that perfect texture is key to any great casserole. For this dish, the combination of room temperature cream cheese and the specific ratios of cottage cheese and sour cream are crucial. This ensures a smooth, cohesive filling that bakes up beautifully without becoming watery or greasy. The Ritz cracker topping, applied just before baking, offers a signature crunch that’s both delightful and iconic. It’s the simple, elegant solutions that chefs strive for, making this cheesy chicken casserole recipe reliably delicious every time.

This recipe is a lifesaver for busy home cooks, foodies and beginners alike. It’s a fantastic example of an easy chicken casserole dinner that requires minimal prep and uses readily available ingredients found in any US grocery store. You can even prepare it entirely ahead of time, making it a perfect make-ahead meal for those days when you have guests or just want to take it easy. The combination of simplicity and gourmet flavor means you can impress without spending hours in the kitchen – a true New York City cooking philosophy!

Million Dollar Chicken Casserole Ingredients

When I developed this recipe, I wanted to use ingredients that were easy to find in my local NYC markets, often stopping by Zabar’s or even just my neighborhood grocery store. The beauty of this dish is its simplicity and reliance on pantry staples, proving you don’t need exotic ingredients for an extraordinary meal. It reminds me of the resourcefulness my mother taught me back in Morocco; making deliciousness from everyday items.

Ingredients List

  • 4½ cups chopped cooked chicken
  • 4 oz cream cheese, (room temperature)
  • 1 cup cottage cheese
  • ½ cup sour cream
  • 1 (10.5-oz) can Unsalted Cream of Chicken Soup
  • ¼ tsp garlic powder
  • ¼ tsp dried onion powder
  • 1 sleeve Ritz crackers, (crushed)
  • 5 Tbsp butter, (melted)

Ingredient Spotlight

Cooked Chicken: This is the star, and using pre-cooked chicken is the ultimate shortcut. Rotisserie chicken from your local market is my absolute favorite for its flavor and convenience. You can also boil or bake chicken breasts or thighs specifically for this recipe. The key is that it’s cooked and shredded or diced into bite-sized pieces, ensuring tenderness throughout the casserole.

Cream Cheese: Full-fat cream cheese is essential here as it forms the rich, creamy foundation of the casserole. Make sure it’s softened to room temperature. This makes it incredibly easy to blend smoothly with the other ingredients, preventing lumps and ensuring a velvety texture. If you forget to soften it, a quick hack is to grate it before mixing!

Cottage Cheese: I love cottage cheese for its mild tang and creamy texture that melts beautifully into the sauce. It adds a subtle richness and body without being overpowering. If you’re not a fan of cottage cheese, or looking for a substitute, thick Greek yogurt or ricotta cheese can work, though they will slightly alter the flavor profile. Ensure you use full-fat for the best results in this cheesy chicken casserole.

Original IngredientBest SubstitutionFlavor / Texture Impact
Cottage CheeseRicotta Cheese or Full-Fat Greek YogurtRicotta will be slightly smoother and milder. Greek yogurt will add a bit more tang and thickness.
Ritz CrackersCrushed saltines, buttery crackers, or panko breadcrumbsSaltines will be less rich. Panko will be crispier and less buttery.
Sour CreamPlain Full-Fat Yogurt or Crème FraîcheYogurt adds similar tang. Crème fraîche offers a richer, silkier mouthfeel.

How to Make Million Dollar Chicken Casserole — Step-by-Step

Making this chicken casserole is genuinely a breeze, perfect for any night of the week. Even my Parisian chef friends are impressed by how simple it is to achieve such delicious results!

Step 1: Preheat Oven and Prepare Baking Dish

Preheat your oven to 350ºF (175ºC). Lightly spray a 9×9-inch baking dish with cooking spray. This simple step ensures that your delicious casserole won’t stick and makes for easier cleanup later.

💡 mia’s Pro Tip: If you don’t have cooking spray, a thin layer of butter or oil works just as well to grease the dish for this easy chicken casserole dinner.

Step 2: Combine the Casserole Filling

In a large bowl, combine the 4½ cups of chopped cooked chicken, 4 oz of room-temperature cream cheese, 1 cup of cottage cheese, ½ cup of sour cream, ¼ tsp garlic powder, ¼ tsp dried onion powder, and 1 (10.5-oz) can of Unsalted Cream of Chicken Soup. Mix everything together until well combined and creamy. Spread this mixture evenly into your prepared baking dish.

⚠️ Common Mistake to Avoid: Ensure your cream cheese is truly at room temperature. Cold cream cheese can lead to a lumpy filling. Give it at least 30-60 minutes on the counter, or use the microwave trick of heating it in very short bursts (5-10 seconds) while stirring frequently.

Step 3: Prepare and Sprinkle the Cracker Topping

Take about 1 sleeve of Ritz crackers and crush them finely – you can do this in a zip-top bag with a rolling pin or in a food processor. In a small bowl, combine the crushed crackers with 5 Tbsp of melted butter. Toss until the crackers are evenly moistened. Sprinkle this buttery cracker mixture evenly over the chicken mixture in the baking dish.

Step 4: Bake the Casserole

Bake the casserole uncovered in the preheated oven for 30 to 40 minutes, or until the filling is bubbly and the cracker topping is golden brown and crisp. The aroma filling your kitchen will be heavenly!

💡 mia’s Pro Tip: For an extra golden and crispy topping on your million dollar chicken bake, you can broil it for the last 1-2 minutes, watching it very carefully to prevent burning!

StepActionDurationKey Visual Cue
1Preheat & Prep Dish~5 minsOven at temp, dish greased
2Mix Filling~5 minsSmooth, creamy, uniform mixture
3Prepare Topping~3 minsCracked crackers evenly coated in butter
4Bake30-40 minsBubbly filling, golden-brown, crisp topping

Serving & Presentation

This Million Dollar Chicken Casserole is a comfort food classic that shines on its own. I love serving it piping hot, straight from the oven. The golden, buttery cracker topping is quite attractive on its own, but a sprinkle of fresh chives or parsley adds a lovely pop of color and freshness. Think of it as a simple garnish, much like the fresh mint I’d add to a Moroccan salad, to brighten the dish visually and palate-wise.

For a complete meal, I often pair this creamy chicken casserole recipe with a crisp green salad tossed with a light vinaigrette. The freshness of the salad cuts beautifully through the richness of the casserole. Another favorite of mine, especially given my French training, is to serve it alongside some crusty baguette to sop up any extra creamy sauce. It’s simple, elegant, and incredibly satisfying, proving these classic American comfort foods have a place even in a NYC foodie’s heart.

Pairing TypeSuggestionsWhy It Works
Side DishSimple Green Salad, Steamed Broccoli, Roasted AsparagusThe freshness and slight bitterness of greens cut through the richness. Steamed or roasted vegetables offer a healthy, balanced contrast.
Sauce / DipExtra Sour Cream, Ranch DipA dollop of sour cream offers extra creamy tang. Ranch dip enhances the savory, familiar flavors.
BeverageChardonnay, Crisp Lager, Iced TeaA medium-bodied white wine complements the creaminess. A lager offers a refreshing balance. Iced tea is a classic non-alcoholic choice.
GarnishFresh Chives, Parsley, a pinch of PaprikaAdds a touch of color and mild oniony flavor. Paprika offers a hint of smokiness and visual appeal.

Make-Ahead, Storage & Reheating

As a busy New Yorker, meal prep is my secret weapon! This Million Dollar Chicken Casserole is a dream for make-ahead meals. You can assemble the entire casserole, without the cracker topping, a day or two in advance and keep it refrigerated. This is especially helpful when hosting, as it frees you up to mingle rather than cook.

MethodContainerDurationReheating Tip
RefrigeratorAirtight container or tightly covered baking dish3-4 daysReheat in oven at 325°F until hot, or microwave. For a crisper topping, add fresh crackers before reheating.
FreezerFreezer-safe container or aluminum foil, then plastic wrap2-3 monthsThaw overnight in the refrigerator. Reheat in the oven at 350°F until heated through. The topping might be softer after freezing.
Make-Ahead9×9 baking dish (uncovered filling)Up to 1 day in advancePrepare topping just before baking for best crunch. Add it to the casserole when ready to bake.

When reheating leftovers, I prefer using the oven. It helps to ‘re-crisp’ the Ritz cracker topping and ensures the casserole is heated through evenly, maintaining that wonderful texture. If you’ve frozen portions, remember to thaw them completely in the refrigerator before reheating to avoid uneven cooking. A little patience goes a long way in preserving the integrity of this delicious cheesy chicken casserole.

Variations & Easy Swaps

VariationKey ChangeBest ForDifficulty Impact
Spicy KickAdd diced jalapeños or a pinch of cayenne pepper to the filling.Those who love a little heat.Easy
Vegetable BoostMix in sautéed mushrooms, peas, or finely chopped broccoli.Adding more veggies to the meal.Easy
Herb InfusionAdd fresh herbs like dill, parsley, or tarragon to the filling.Adding fresh flavor dimensions.Easy

Herby Parmesan Variation

For a touch of sophistication reminiscent of my time in Paris, I love adding a generous handful of freshly chopped parsley and chives to the chicken mixture. I also swap out half the Ritz crackers for grated Parmesan cheese mixed with a little melted butter. This adds a lovely salty, nutty note that elevates the entire dish. It’s a simple twist that makes this cheesy chicken casserole feel extra special.

Gluten-Free & Dairy-Free Options

To make this easily gluten-free, simply substitute the Ritz crackers with gluten-free crackers or use a gluten-free breadcrumb mixture, perhaps seasoned with herbs and garlic powder. For a dairy-free version, I’ve experimented with using a dairy-free cream cheese alternative and a plant-based sour cream. You can also replace the cottage cheese with a dairy-free ricotta substitute or a thicker, plain plant-based yogurt. The texture might be slightly different, but the flavor profile will still be wonderfully comforting.

Smoked Paprika and Cheddar Twist

Drawing inspiration from the bold flavors found at NYC’s farmers markets, I sometimes add a tablespoon of smoked paprika to the chicken mixture. It imparts a subtle smokiness that’s incredibly addictive. For an extra layer of cheesy goodness in this million dollar chicken bake, I’ll also mix in about ½ cup of shredded sharp cheddar cheese into the filling before baking. It creates a more decadent, gooey result that’s always a crowd-pleaser.

What is in million dollar chicken casserole?

This Million Dollar Chicken Casserole is packed with tender cooked chicken, a creamy sauce made from cream cheese, cottage cheese, sour cream, and cream of chicken soup, all seasoned with garlic and onion powders. It’s finished with a crunchy topping of buttered, crushed Ritz crackers. It’s a delicious and easy chicken casserole dinner that offers a rich, comforting flavor profile.

Can I make million dollar chicken casserole ahead of time?

Absolutely! This is one of my favorite make-ahead recipes for busy weeks in New York City. You can assemble the casserole (without the cracker topping) up to a day in advance and store it covered in the refrigerator. When ready to bake, add the cracker topping and bake as directed, possibly adding a few extra minutes to account for it being chilled. It’s a fantastic way to simplify weeknight dinners.

What can I substitute for cottage cheese in million dollar chicken casserole?

If cottage cheese isn’t your favorite, you have a few excellent substitutes. Full-fat ricotta cheese is a great option for a smoother texture, or you can use thick, plain Greek yogurt for a bit more tang. Both will create a wonderfully creamy filling for your cheesy chicken casserole. Ensure they are full-fat for the best flavor and texture, as low-fat versions can sometimes be too watery.

How long do you bake million dollar chicken casserole?

You should bake the Million Dollar Chicken Casserole uncovered in a preheated oven at 350ºF (175ºC) for approximately 30 to 40 minutes. The goal is for the casserole filling to be hot and bubbly, and for the crushed Ritz cracker topping to turn a beautiful golden brown and achieve a delightful crispiness. Keep an eye on it, as oven temperatures can vary.

Can I freeze Million Dollar Chicken Casserole?

Yes, you can freeze this delicious cheesy chicken casserole! It’s best to freeze it before baking, or freeze leftovers. If freezing unbaked, assemble it in a freezer-safe dish, cover tightly with plastic wrap and then foil, and freeze for up to 2 months. Thaw overnight in the refrigerator before baking as usual, potentially adding a few extra minutes. If freezing leftovers, ensure they are properly stored in an airtight container for up to 2-3 months. The cracker topping may be softer after freezing and reheating.

What kind of chicken should I use for this casserole?

The easiest and most flavorful option for this Million Dollar Chicken Casserole is to use pre-cooked chicken, such as rotisserie chicken from your local market – I pick mine up at Whole Foods or my neighborhood butcher! You want about 4.5 cups of chopped or shredded cooked chicken. You can also cook your own chicken breasts or thighs by boiling or baking them until thoroughly cooked, then shredding or dicing them.

Can I make this recipe without Ritz crackers?

Certainly! While Ritz crackers provide a distinct buttery crispness, you can absolutely substitute them. Crushed saltines or buttery round crackers work well. For a different texture, consider using panko breadcrumbs tossed with melted butter and maybe a pinch of garlic powder. You could even mix in some grated Parmesan cheese with the breadcrumbs for an extra flavor boost in this million dollar chicken bake.

Why is my chicken casserole watery?

A watery chicken casserole can stem from a few issues. Firstly, ensure your dairy components (cream cheese, cottage cheese, sour cream) are not low-fat versions which tend to release more liquid. Make sure your cooked chicken isn’t overly moist. Sometimes, over-mixing or adding too much liquid can also contribute. For this specific recipe, sticking to the ingredient ratios and using full-fat dairy should prevent excessive liquid.

Share Your Version!

I genuinely love seeing how my recipes come to life in your kitchens! If you’ve tried this Million Dollar Chicken Casserole, please leave a star rating and your thoughts in the comments below. It helps other cooks know what to expect, and I always enjoy reading your feedback. If you snap a photo on Instagram or Pinterest, tag me @exorecipe – I can’t wait to see your delicious creations!

From my NYC kitchen to yours — I hope this recipe brings as much warmth to your table as it does to mine. — mia 🧡

📌

Love This Recipe? Save It to Pinterest!

If you enjoyed this Million Dollar Chicken Casserole recipe, don’t let it get lost in your browser tabs! 😄 Pin it now so you can find it again anytime — and explore hundreds more tried-and-tested recipes waiting for you on my Pinterest boards.

👉 Follow mia on Pinterest @chefrecipes2

📌 Pin this recipe · 🔁 Re-pin your favorites · 💬 Tag me when you make it — I love seeing your creations!
Print

clock clock iconcutlery cutlery iconflag flag iconfolder folder iconinstagram instagram iconpinterest pinterest iconfacebook facebook iconprint print iconsquares squares iconheart heart iconheart solid heart solid icon

Million Dollar Chicken Casserole

  • Author: Chef Mia

Description

Million Dollar Chicken Casserole – This is our go-to chicken casserole! SO easy to make and tastes like a million bucks! Chicken, cream cheese, cottage cheese, sour cream, onion, garlic, cream of chicken soup, topped with crushed Ritz crackers and butter. Can make this casserole in advance and refrigerate or freeze for later. #chicken #casserole #chickencasserole #ritzcrackers


Ingredients

Scale
  • 4½ cups chopped cooked chicken
  • 4– oz cream cheese, (room temperature)
  • 1 cup cottage cheese
  • ½ cup sour cream
  • 1 (10.5-oz) can Unsalted Cream of Chicken Soup
  • ¼ tsp garlic powder
  • ¼ tsp dried onion powder
  • 1 sleeve Ritz crackers, (crushed)
  • 5 Tbsp butter, (melted)

Instructions

  1. Preheat oven to 350ºF. Lightly spray a 9×9-inch baking dish with cooking spray and set aside.
  2. Combine chicken, cream cheese, cottage cheese, sour cream, garlic powder, onion powder, and cream of chicken soup. Spread into prepared pan.
  3. Combine crushed crackers and butter, sprinkle over chicken mixture..
  4. Bake uncovered 30 to 40 minutes.


Nutrition

  • Calories: 338 kcal
  • Sugar: 2 g
  • Fat: 24 g
  • Carbohydrates: 3 g
  • Protein: 28 g


Million Dollar Chicken Casserole

k">

Tried This Recipe? Leave a Comment!

Did you make this recipe? I’d love to hear how it turned out! Please leave a comment and a rating below. Your feedback helps other home cooks and supports cheerychop.com!

For more delicious inspiration, follow me on Pinterest!
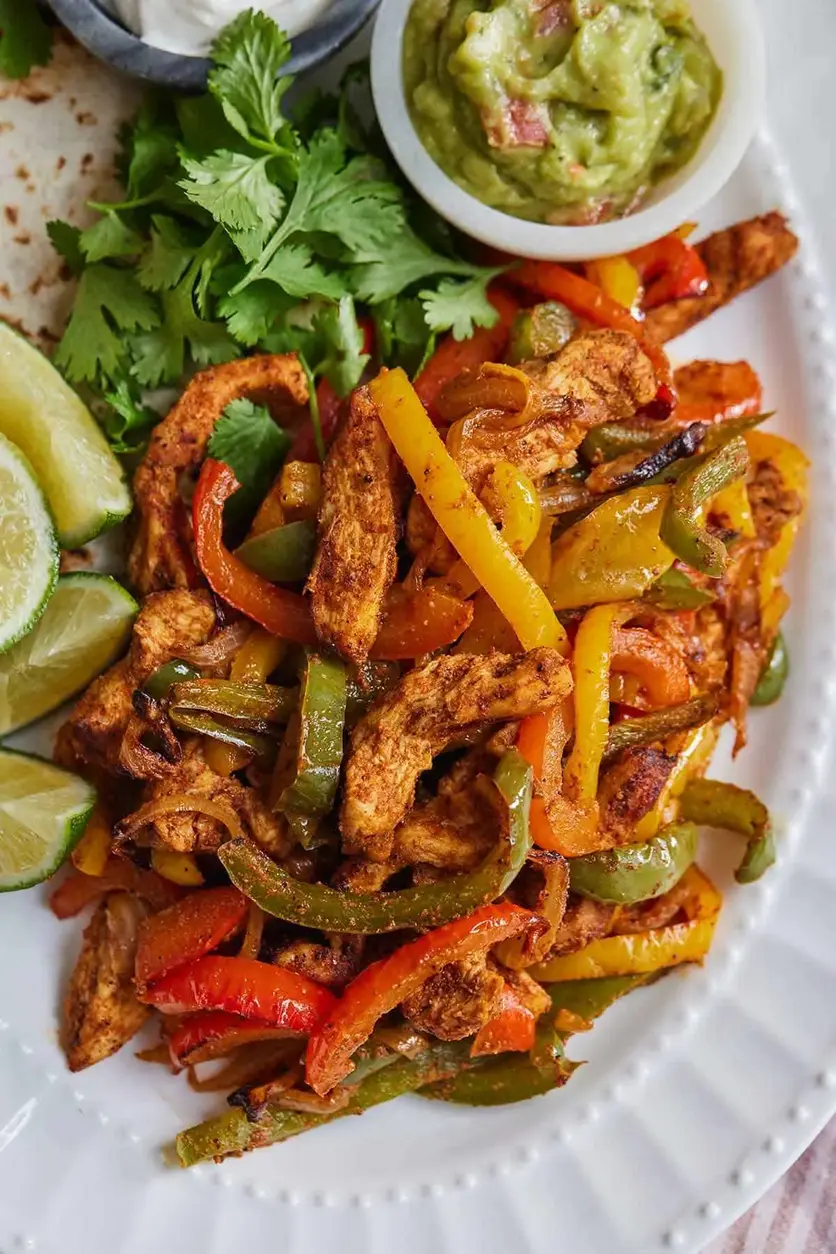
Quick & Easy Air Fryer Chicken Fajitas

Air Fryer Chicken Fajitas: Quick & Easy Weeknight Dinner

⚖️
Difficulty
Easy
⏲️
Prep Time
15 mins
🕒
Cook Time
18 mins
⏱️
Total Time
33 mins
🍽️
Servings
4

Back in my mother’s kitchen in Marrakech, fajitas were a foreign concept, a vibrant burst of Tex-Mex flavor that I only encountered later during my culinary studies in Paris. My culinary journey led me from the aromatic spice stalls of Morocco to the precise techniques of French saucery, and now, to the buzzing, fast-paced kitchens of New York City. It’s here in NYC, armed with my heritage and training, that I’ve learned the true magic of transforming simple ingredients into something spectacular with minimal fuss. This Air Fryer Chicken Fajitas recipe is a perfect example of that: a quick, flavorful, and incredibly easy chicken fajitas recipe that brings restaurant-quality taste right to your weeknight table.

Imagine this: tender, juicy strips of chicken, kissed with smoky paprika and earthy cumin, nestled alongside sweet, caramelized bell peppers and onions. The air fryer works its wonders, creating a perfectly cooked, slightly charred exterior on everything, locking in those vibrant flavors. The aroma alone is enough to transport you – a seductive blend of roasted vegetables and savory spices that promises pure comfort. It’s the kind of meal that makes your kitchen feel alive, a testament to how simple ingredients, when treated with a little love and the right technique, can create a truly memorable dining experience, rivaling even the best spots in the city.

What I love most about this particular air fryer fajitas recipe is its deceptive simplicity. Many strive for restaurant-style fajitas but end up with dry chicken or soggy vegetables. I’ve perfected the seasoning blend and cooking method to ensure juicy results every time. You’ll discover a pro tip that ensures your chicken stays moist, and I’ll guide you away from a common mistake that can ruin the texture of your peppers. Get ready for a quick weeknight dinner that’s about to become your new favorite.

Why This Air Fryer Chicken Fajitas Recipe Is the Best

My fusion of North African spices and classic French-trained precision shines through in this recipe. The unique blend of chili powder, paprika, cumin, onion powder, and garlic powder isn’t just about heat; it’s about creating layers of savory, smoky depth that awaken the palate. This approach, learned from my mother who used similar spices in her Moroccan tagines, is elevated by my Parisian training, ensuring a balanced flavor profile that is both comforting and sophisticated. It’s this marriage of worlds that makes these easy chicken fajitas recipe unlike any other you’ve tried.

The air fryer is a game-changer for achieving that perfect fajita texture. Unlike a skillet, which can steam vegetables or overcook chicken if not watched perfectly, the air fryer circulates hot air evenly, creating beautiful char marks and a slight crispness without drying out the ingredients. I’ve fine-tuned the cooking time and temperature to ensure the chicken is cooked through and tender, while the peppers and onions are tender-crisp. It guarantees the optimal textural contrast you crave in a great fajita, making this an unbelievably healthy chicken fajitas option.

This recipe is designed for busy New Yorkers who need delicious meals without the fuss. You’ll be amazed at how few steps are involved and how quickly you can go from raw ingredients to a sizzling plate of fajitas. It’s naturally forgiving, making it perfect for beginners or anyone who’s had a long day. Whether you’re new to cooking or a seasoned home chef looking for a faster way, this air fryer fajitas recipe proves that incredible flavor doesn’t require hours in the kitchen.

Air Fryer Chicken Fajitas Ingredients

When I’m in NYC, I love grabbing my produce from the Union Square Greenmarket for the freshest ingredients. For these easy chicken fajitas recipe, I always look for vibrant bell peppers and firm onions. The chicken breasts are readily available at any decent butcher shop or even my local Whole Foods. The spices are the backbone of this dish, and a good quality blend will make all the difference. Don’t be afraid to experiment with the spice levels – just like a slow-cooked tagine from my childhood, the spices are meant to be embraced!

Ingredients List

  • 2 boneless, skinless chicken breasts (about 1 lb total), cut into 1/4-inch strips
  • 1 red bell pepper, cut into 1/4-inch slices
  • 1 yellow bell pepper, cut into 1/4-inch slices
  • 1 green bell pepper, cut into 1/4-inch slices
  • ½ yellow onion, cut into 1/4-inch slices
  • 2 tsp chili powder
  • 1 tsp paprika
  • ½ tsp cumin
  • 1 tsp onion powder
  • 1 tsp garlic powder
  • 1 tsp salt
  • ½ tsp black pepper
  • 1–2 tbsp olive oil
  • 8 small flour tortillas
  • Optional garnishes: sour cream, guacamole, salsa, chopped cilantro, lime wedges

Ingredient Spotlight

Chicken breast is the lean protein star here for these healthy chicken fajitas. Opt for boneless, skinless breasts for ease of preparation and a lighter dish. When selecting chicken in the US, look for plump, firm breasts with a pale pink color. Avoid anything that looks bruised or has a strong odor. If you don’t have chicken breasts, you can absolutely use chicken thighs, though they might require a few extra minutes of cooking time to ensure they are fully cooked through due to their higher fat content. Ensure you trim any excess fat from thighs before slicing.

Bell peppers aren’t just for color; they bring a wonderful sweetness and slight crunch that balances the spices. For these air fryer chicken fajitas, I prefer a mix of red, yellow, and green for visual appeal and slightly different flavor notes – red and yellow are often sweeter. When buying, look for peppers that are firm, glossy, and free from soft spots or blemishes. If bell peppers aren’t your favorite, or you can’t find them, poblano peppers or even spicy jalapeños (use sparingly!) can add a different kind of heat and flavor dimension, though they will alter the classic fajita profile.

The spice blend is where the magic truly happens for easy chicken fajitas recipe. Chili powder provides a smoky, peppery base, paprika adds color and a subtle sweetness, cumin brings its distinctive earthy warmth, and onion and garlic powders offer concentrated aromatics. Ensure your spices are fresh; stale spices lose their potency. If you’re adventurous, a pinch of cayenne pepper or smoked paprika can elevate the flavor even further, reminiscent of the complex spice blends my grandmother used to create. If you find yourself without one of these, you can often find pre-made fajita seasoning mixes, but I highly recommend making your own for superior flavor and control.

Original IngredientBest SubstitutionFlavor / Texture Impact
Chicken BreastsBoneless, skinless chicken thighsThighs are more forgiving and moister but require slightly longer cooking and have a richer flavor.
Bell Peppers (mixed colors)1 medium poblano pepper + 1 medium Anaheim pepperAdds a mildly smoky and slightly spicier flavor profile, less sweetness than bell peppers.
Yellow OnionShallots (use 2-3)Shallots offer a more delicate, sweet, and slightly milder onion flavor.

How to Make Air Fryer Chicken Fajitas — Step-by-Step

Making these air fryer fajitas is so straightforward, you’ll be amazed at the flavor produced in such a short time!

Step 1: Mix the Seasoning

In a small bowl, whisk together the chili powder, paprika, cumin, onion powder, garlic powder, salt, and black pepper. This ensures the flavors are evenly distributed for your easy chicken fajitas recipe.

💡 mia’s Pro Tip: For an extra layer of flavor, toast the cumin seeds lightly in a dry skillet before grinding them. This releases their essential oils and intensifies their aroma, a technique I learned from my mother’s spice preparations.

Step 2: Coat the Ingredients

In a large mixing bowl, combine the sliced chicken, bell peppers, and onion. Drizzle with 1–2 tablespoons of olive oil and toss until everything is lightly coated. Then, add your prepared fajita seasoning mixture and toss again until all the chicken and vegetables are evenly coated in the spices.

⚠️ Common Mistake to Avoid: Adding too much oil can make the ingredients greasy and prevent them from properly searing or crisping in the air fryer. You want just enough to help the spices adhere and prevent sticking.

Step 3: Load the Air Fryer

Arrange the seasoned chicken, onion, and bell pepper mixture in a single layer in your air fryer basket. Avoid overcrowding the basket, as this will steam the ingredients instead of air frying them, leading to mushy textures. You may need to cook in two batches, depending on the size of your air fryer.

Step 4: Cook to Perfection

Cook at 350°F (175°C) for 16 to 20 minutes. Halfway through the cooking time, at approximately 8-10 minutes, carefully remove the basket and toss the contents to ensure even cooking and browning. The fajitas are ready when the chicken is cooked through and no longer pink, and the vegetables are tender-crisp with some nice charring.

💡 mia’s Pro Tip: For the juiciest chicken, don’t overcook it. Check for doneness by slicing into the thickest piece of chicken; it should be opaque and reach an internal temperature of 165°F (74°C).

Step 5: Serve and Enjoy

Carefully remove the fajita mixture from the air fryer. Warm your tortillas according to package directions. Serve the hot fajitas in the warm tortillas and garnish with your favorite toppings like sour cream, guacamole, chopped cilantro, or a squeeze of fresh lime juice.

StepActionDurationKey Visual Cue
1Mix Seasoning2 minsEvenly combined spice blend
2Coat Ingredients5 minsChicken & veggies evenly spiced
3Load Air Fryer1 minSingle layer, not overcrowded
4Cook16-20 minsCooked chicken, tender-crisp veggies, charred edges
5Serve2 minsReady to assemble fajitas

Serving & Presentation

To serve these air fryer fajitas, I love to warm my tortillas on a dry skillet or briefly in the microwave until pliable. My mother always insisted on using warm tortillas, much like she did for msemen, so the flavors meld beautifully. Serve the seasoned chicken and vegetable mixture in bowls alongside the warmed tortillas and a selection of your favorite toppings. This interactive presentation makes for a fun and casual meal, perfect for a relaxed NYC dinner party or a speedy family supper.

Garnishes are crucial for elevating the experience! Freshly chopped cilantro adds a bright, herbaceous note, while a dollop of creamy sour cream or cool guacamole provides a lovely contrast to the savory spices. A squeeze of fresh lime juice cuts through the richness and brightens everything up, a trick I picked up from a chef in Paris who championed using citrus to finish dishes. Don’t skimp on these finishing touches – they are what transform a good meal into a great one, making these healthy chicken fajitas a true delight.

Pairing TypeSuggestionsWhy It Works
Side DishBlack beans, Mexican rice, grilled corn saladAdds substance and complements the Tex-Mex flavors.
Sauce / DipSalsa verde, pico de gallo, chipotle cremaProvides moisture, acidity, and extra layers of flavor.
BeverageMargarita, cold Mexican beer, sparkling water with limeThe crispness cuts through the richness and spice.
GarnishShredded lettuce, diced avocado, pickled red onionsAdds freshness, texture, and visual appeal.

Make-Ahead, Storage & Reheating

As a busy New Yorker, I rely on smart meal prep to get healthy, delicious meals on the table quickly. This air fryer chicken fajitas recipe is fantastic for that! You can prep the vegetables and chicken, and store the spice mix separately. Then, when you’re ready to cook, just toss everything together and air fry. It makes for a truly quick weeknight dinner solution!

MethodContainerDurationReheating Tip
RefrigeratorAirtight container3–4 daysReheat in the air fryer at 350°F for 3-5 minutes, or in a skillet until warmed through.
FreezerFreezer-safe bag or containerUp to 3 monthsThaw overnight in the refrigerator. Reheat as above. For best results, consider freezing components separately if possible.
Make-AheadAirtight container for cooked ingredientsCooked fajita mix: 3 days priorCook the mixture and store. Reheat and serve in fresh tortillas.

When reheating, try to avoid using the microwave if possible, as it can make the chicken and vegetables a bit rubbery. My preferred method is to reheat leftovers in the air fryer. It mimics the original cooking process and helps revive that lovely tender-crisp texture. If you don’t have an air fryer, a hot skillet works well too; just toss the mixture for a few minutes until heated through. Keep the tortillas separate until you’re ready to serve.

For making ahead, I often chop my vegetables and slice the chicken the night before and store them in separate containers in the fridge. The spice mix can also be pre-made. This way, when dinner time rolls around, all I have to do is toss, air fry, and serve. It truly transforms this into a quick weeknight dinner that feels gourmet!

Variations & Easy Swaps

VariationKey ChangeBest ForDifficulty Impact
Quick TraditionalUse pre-sliced chicken strips and pre-cut vegetables.Maximum weeknight speed.Slightly easier prep.
Veggie DelightSubstitute chicken with firm tofu or extra veggies like zucchini and mushrooms.Vegetarian/vegan options.Slightly increased cooking time for tofu.
Spicy KickAdd a pinch of cayenne pepper or a diced jalapeño to the seasoning mix.Those who love heat.Minimal impact.

Quick Traditional

To make these air fryer fajitas even faster, I highly recommend using pre-sliced chicken strips and pre-cut stir-fry vegetable mixes available at most grocery stores here in NYC. While I adore the process of slicing everything myself, sometimes convenience is key for a quick weeknight dinner. The flavor profile remains largely the same, but the prep time is dramatically reduced, making it even more accessible on a busy schedule. This is my go-to when I get home late from a casting or a testing session.

Gluten-Free & Dairy-Free Options

For gluten-free diners, simply ensure you are using gluten-free tortillas. Corn tortillas are a fantastic, naturally gluten-free option that holds up well. For dairy-free, skip the sour cream or opt for a dairy-free sour cream alternative. Guacamole is naturally dairy-free and a wonderful creamy addition. This recipe is easily adaptable, aligning with dietary needs without sacrificing flavor, a common challenge I address with my clients in the city.

Seasonal and Flavor Twists

In the spring and summer, I love adding asparagus spears or snap peas to the mix. Sweet corn kernels, fresh off the cob from a local market, also add a delightful sweetness. For a Moroccan twist, inspired by my heritage, I might add a pinch of ras el hanout to the spice blend or include some slivered almonds in the serving suggestions, drizzling with a touch of harissa-infused olive oil for warmth. These small adjustments, similar to how my mother would adapt tagines based on the season, can make this recipe endlessly versatile.

How do you keep the chicken from drying out when making air fryer chicken fajitas?

The key to keeping chicken breasts moist in the air fryer is not to overcook them and to ensure they are properly seasoned with oil and spices. Cutting the chicken into uniform strips, about 1/4-inch thick, helps them cook quickly and evenly. Resist the urge to overcrowd the air fryer basket, which can lead to steaming instead of frying. For this easy chicken fajitas recipe, I recommend cooking them just until they reach an internal temperature of 165°F (74°C) and then letting them rest briefly.

Can you use frozen chicken breasts for air fryer chicken fajitas?

It’s generally not recommended to cook frozen chicken directly in the air fryer for fajitas. The uneven cooking can lead to dried-out edges and undercooked centers. For the best results with this air fryer fajitas recipe, thaw your chicken completely in the refrigerator overnight before slicing and seasoning. If you are in a real pinch, you can try to partially thaw it, but it will likely affect the texture and cooking time significantly. Safety and quality are paramount!

What is the best temperature and cook time for air fryer chicken fajitas?

For this air fryer chicken fajitas recipe, I find that 350°F (175°C) is the ideal temperature. It’s hot enough to get a nice char and cook everything through efficiently, but not so hot that it burns the outside before the inside is done. The cook time is typically 16 to 20 minutes, with a shake or toss halfway through to ensure even cooking. Always check for doneness, as air fryer models can vary slightly.

What vegetables can you substitute for bell peppers in air fryer chicken fajitas?

Absolutely! While bell peppers provide a classic fajita flavor and texture, you can get creative with your vegetable choices. Zucchini and summer squash sliced into strips work well, as do mushrooms, onions (though they are already included!), poblano peppers for a mild heat, or even chunks of sweet potato for a different sweetness. Just ensure your vegetables are cut to a similar size for even cooking in this quick weeknight dinner recipe.

Can I make these air fryer chicken fajitas spicier?

Yes, you absolutely can! If you love a bit of heat, similar to some of the spicier dishes from my Moroccan heritage, here are a few ways to kick up the spice level in these easy chicken fajitas recipe. You can add a pinch of cayenne pepper or red pepper flakes directly to the spice mix. Another option is to finely mince a fresh jalapeño or serrano pepper (seeds removed for less heat, included for more) and toss it with the chicken and vegetables before cooking. Adjust to your personal preference!

How do I ensure the vegetables are tender-crisp and not soggy?

The key to tender-crisp vegetables in air fryer fajitas is to not overcrowd the basket and to ensure they are coated evenly with oil and seasoning. Overcrowding causes steam to build up, leading to sogginess. Also, cutting the vegetables into uniform slices, similar to the chicken, ensures they cook at a similar rate. Tossing them halfway through the cooking time is crucial for even exposure to the hot air, promoting that slightly charred, tender texture you want.

Can I use chicken thighs instead of chicken breasts for these air fryer fajitas?

Definitely! Chicken thighs are a fantastic substitute for chicken breasts in this air fryer chicken fajitas recipe. They are often more forgiving and remain incredibly moist due to their higher fat content. If using thighs, trim any excess fat, cut them into bite-sized pieces, and be aware that they might require a few minutes longer to cook through compared to chicken breasts. Aim for an internal temperature of 165°F (74°C) for thighs as well.

What is the best way to reheat leftover air fryer chicken fajitas?

For the best results when reheating leftovers of these easy chicken fajitas recipe, I highly recommend using the air fryer again. Reheat at around 350°F (175°C) for 3–5 minutes, or until heated through. This helps to recapture some of the original crispness. If you don’t have an air fryer, a hot skillet works well; just sauté the leftovers for a few minutes until warmed. Microwaving is an option, but it can sometimes make the chicken and veggies a bit rubbery.

Share Your Version!

I would absolutely love to see how your Air Fryer Chicken Fajitas turn out! Did you try any of my suggested spice variations, or perhaps a creative vegetable swap? Please leave a star rating and a comment below to let me know your thoughts – your feedback truly helps me improve and create even more recipes you’ll love. And if you share a photo on Instagram or Pinterest, please tag me @exorecipes; I’m always thrilled to see your culinary creations inspired by my kitchen!

From my NYC kitchen to yours — I hope this recipe brings as much warmth to your table as it does to mine. — mia 🧡

📌

Love This Recipe? Save It to Pinterest!

If you enjoyed this Air Fryer Chicken Fajitas recipe, don’t let it get lost in your browser tabs! 😄 Pin it now so you can find it again anytime — and explore hundreds more tried-and-tested recipes waiting for you on my Pinterest boards.

👉 Follow mia on Pinterest @chefrecipes2

📌 Pin this recipe · 🔁 Re-pin your favorites · 💬 Tag me when you make it — I love seeing your creations!

Print

clock clock iconcutlery cutlery iconflag flag iconfolder folder iconinstagram instagram iconpinterest pinterest iconfacebook facebook iconprint print iconsquares squares iconheart heart iconheart solid heart solid icon

Air Fryer Chicken Fajitas

  • Author: Chef Mia

Description

These chicken fajitas come together quickly and easily in an air fryer with just a few simple ingredients. This easy air fryer recipe features perfectly seasoned chicken breast strips, colorful bell peppers, and onions, just like what youd get at a restaurant but at a fraction of the price and a few minutes of preparation. You wont believe just how simple it is to make!


Ingredients

Scale
  • 2 boneless skinless chicken breasts (cut into strips)
  • 1 red bell pepper (cut into 1/4" slices)
  • 1 yellow bell pepper (cut into 1/4" slices)
  • 1 green bell pepper (cut into 1/4 slices)
  • ½ yellow onion (cut into 1/4 slices)
  • 2 tsp chili powder
  • 1 tsp paprika
  • ½ tsp cumin
  • 1 tsp onion powder
  • 1 tsp garlic powder
  • 1 tsp salt
  • ½ tsp black pepper
  • tortillas
  • sour cream
  • guacamole

Instructions

  1. In a small bowl add the spices together and mix with a small fork to make the fajita seasoning.
  2. In a large mixing bowl add the chicken, onion, and bell pepper. Drizzle with olive oil and then toss. Add the seasoning and then toss again until everything is evenly coated.
  3. Add the seasoned chicken, onion, and bell pepper to the air fryer basket
  4. Cook at 350 F for 16 to 20 minutes, until all of the chicken pieces have cooked through. Remove basket and toss half way through the cooking time, at about 9 minutes.
  5. Serve the fajitas in tortillas and garnish with sour cream, chopped cilantro, and guacamole.


Nutrition

  • Calories: 407 kcal
  • Sugar: 6 g
  • Fat: 18 g
  • Carbohydrates: 45 g
  • Protein: 20 g


Air Fryer Chicken Fajitas

Million Dollar Chicken Casserole – Easy & Cheesy Dinner

Million Dollar Chicken Casserole: The Easy, Creamy Comfort Food Casserole

⚖️
Difficulty
Easy
⏲️
Prep Time
15 mins
🕒
Cook Time
30-40 mins
⏱️
Total Time
45-55 mins
🍽️
Servings
6-8

There are some recipes that just feel like a warm hug on a plate. The ones that transport you back to childhood, or to a cozy kitchen filled with comforting aromas. For me, that’s precisely what this Million Dollar Chicken Casserole does. It’s a dish that’s become a staple in my busy New York City life, a true testament to how simple ingredients can create something extraordinary. I first developed this recipe when I was juggling my early days in the culinary scene, needing something reliable and delicious that I could whip up after long shifts. It reminds me of my mother’s patient cooking in Morocco, but with the sleek efficiency I’ve learned and embraced since my days training in Paris. This is more than just a chicken casserole recipe; it’s a taste of home, elevated.

Imagine a creamy, dreamy filling, rich with tender chicken and a blend of cheeses that melts into pure savory bliss. The topping, a golden layer of buttery, crushed Ritz crackers, provides that irresistible crunch that contrasts beautifully with the smooth interior. The aroma that fills your kitchen as it bakes is heavenly – a comforting symphony of savory chicken, subtle onion and garlic, and the nutty toasted cracker crumbs. It’s the kind of dish that brings everyone to the table, a true showstopper that tastes like a million bucks without requiring a chef’s entire day. I’ve always loved playing with textures, and the interplay between the creamy and crunchy elements here is utterly divine, a technique I honed perfecting sauces in Paris.

What makes this creamy chicken casserole recipe stand out from all the others? It’s the perfect balance of simple, accessible ingredients and a touch of culinary finesse. I’ve refined the cheese blend and added a secret ingredient (well, it’s in the ingredients list!) that elevates the flavor profile without overcomplicating things. I’m going to share my best techniques for achieving that perfect, non-watery consistency, and also point out a common mistake that most people make when trying to replicate this dish at home. Get ready for an easy chicken casserole dinner that will become your family’s new favorite.

Why This Million Dollar Chicken Casserole Recipe Is the Best

The magic of this Million Dollar Chicken Casserole truly lies in its deceptively simple yet brilliant flavor combination. My culinary background, blending North African spices with classic French techniques, inspires me to find harmony in unexpected places. Here, the “million dollar” aspect comes from a thoughtfully balanced mix of creamy dairy elements—cream cheese, cottage cheese, and sour cream—that create a luxurious base. This isn’t just a random assortment; each component plays a vital role in achieving a depth of flavor and a velvety smooth texture that you just can’t get with a single dairy product. It’s this deliberate layering of creamy goodness that makes it taste incredibly rich and satisfying, far exceeding its humble ingredients.

From a professional cook’s perspective, achieving the perfect texture in a casserole is paramount. Many creamy chicken casseroles can end up too soupy or too dry, but this recipe strikes that delicate balance. The key is in the ratios and ensuring your cream cheese is properly softened. Adding it at room temperature allows it to incorporate beautifully into the other ingredients without lumps, creating a homogenous, creamy filling. Furthermore, the topping of crushed Ritz crackers and butter forms a delightful crust that not only adds crunch but also helps to gently bake the casserole, preventing excess moisture from escaping too quickly, a technique I learned mastering gratins in Paris.

For busy home cooks, especially in a city like New York where time is always of the essence, this recipe is a lifesaver. It’s incredibly straightforward, with minimal prep and a short bake time. This makes it the perfect “easy chicken casserole dinner” for weeknights, last-minute potlucks, or even meal prepping. The instructions are clear, the ingredients are easy to find at any major grocery store, and the result is consistently delicious. You get that incredible comfort food chicken casserole experience without the fuss, allowing you more time to enjoy your meal and your loved ones.

Million Dollar Chicken Casserole Ingredients

One of the things I adore about this cheesy chicken casserole is how it relies on pantry staples and readily available ingredients. I often pick up my chicken from a great butcher in the West Village, but any good quality cooked chicken will do. The Ritz crackers are a must for that signature crunch – I find them in the cracker aisle of almost every supermarket. For the dairy components, I try to use full-fat versions for the richest flavor, grabbing them during my weekly grocery run. You can genuinely assemble this entire dish in under 15 minutes, making it a weeknight warrior!

Ingredients List

  • 4½ cups chopped cooked chicken
  • 4 oz cream cheese, (room temperature)
  • 1 cup cottage cheese
  • ½ cup sour cream
  • 1 (10.5-oz) can Unsalted Cream of Chicken Soup
  • ¼ tsp garlic powder
  • ¼ tsp dried onion powder
  • 1 sleeve Ritz crackers, (crushed)
  • 5 Tbsp butter, (melted)

Ingredient Spotlight

Cooked Chicken: This is your protein powerhouse. You need about 4.5 cups of chopped cooked chicken. Rotisserie chicken is a fantastic shortcut here – just shred or chop it up! If you prefer, you can boil or bake chicken breasts or thighs. Ensure it’s cooled before chopping. The texture of the chicken in the casserole is usually soft and yielding, blending seamlessly into the creamy sauce.

Cream Cheese: The backbone of our creamy sauce. Softened cream cheese (make sure it’s at room temperature!) is crucial for a smooth, lump-free mixture. It adds richness and a subtle tang. In a pinch, you can use Neufchâtel cheese, which is slightly lighter but still provides great creaminess. Greek yogurt or a combination of ricotta and a touch of lemon juice can be used, but the texture will be less dense and the flavor profile will shift.

Cottage Cheese: This might seem surprising, but cottage cheese adds a wonderful creaminess and a subtle, pleasant texture without being overtly “cheesy.” Its mild flavor allows the other ingredients to shine. Opt for full-fat cottage cheese for the best results. If cottage cheese isn’t your favorite, plain Greek yogurt (full-fat) is a good substitute, although it might make the casserole a bit tangier. Ricotta cheese also works, but it’s less common in this specific type of casserole.

Ritz Crackers: The star of the show for that amazing crunchy topping! Crushing a whole sleeve and mixing it with melted butter creates a golden, savory crust that is simply divine. The buttery, slightly salty flavor of Ritz crackers is iconic. If you can’t find Ritz, other buttery crackers like Saltines or even crushed cornflakes (though this will change the flavor significantly) can be used in a pinch. For a gluten-free option, use gluten-free crackers or even panko breadcrumbs mixed with melted butter.

Original IngredientBest SubstitutionFlavor / Texture Impact
Cream CheeseNeufchâtel Cheese or Full-fat Greek YogurtNeufchâtel is similar; Greek yogurt adds tang and is thinner.
Cottage CheeseFull-fat Plain Greek Yogurt or Ricotta CheeseYogurt adds tang; Ricotta is less textured but creamy.
Ritz CrackersSaltines or buttery crackers, or GF crackersSimilar crunch; GF crackers may have a different flavor profile.

How to Make Million Dollar Chicken Casserole — Step-by-Step

Creating this comforting dish is wonderfully straightforward. Just follow these simple steps for a guaranteed delicious result!

Step 1: Preheat Oven and Prepare Dish

First things first, get your oven preheating to 350°F (175°C). While the oven is warming up, lightly spray a 9×9-inch baking dish with cooking spray. This ensures that no part of that beautiful casserole sticks, making cleanup a breeze.

💡 mia’s Pro Tip: For an even more evenly cooked casserole, you can lightly grease the dish with butter or oil instead of cooking spray. It adds a lovely subtle richness and helps the crust brown beautifully.

Step 2: Combine the Creamy Filling

In a large bowl, combine the chopped cooked chicken, softened cream cheese, cottage cheese, sour cream, garlic powder, onion powder, and the can of Unsalted Cream of Chicken Soup. Stir everything together until it’s wonderfully smooth and well combined. This is where all the creamy magic happens! Then, spread this luscious mixture evenly into your prepared baking dish.

⚠️ Common Mistake to Avoid: Don’t use cold cream cheese! Make sure your cream cheese is truly at room temperature. This is non-negotiable for achieving a perfectly smooth and lump-free creamy filling. Cold cream cheese is notoriously difficult to incorporate evenly, and it can lead to pockets of unmixed cheese.

Step 3: Prepare and Add the Cracker Topping

In a separate small bowl, combine the crushed Ritz crackers (I like to crush mine in a zip-top bag with a rolling pin for easy cleanup) with the melted butter. Stir until the cracker crumbs are nicely moistened. Sprinkle this buttery cracker mixture evenly over the top of the chicken mixture in the baking dish, creating a delicious, crunchy layer.

Step 4: Bake Until Golden and Bubbly

Place the baking dish in your preheated oven. Bake uncovered for 30 to 40 minutes, or until the casserole is heated through, bubbly around the edges, and the cracker topping is a beautiful golden brown. The aroma will tell you it’s almost ready!

Step 5: Rest Before Serving

Once out of the oven, let the Million Dollar Chicken Casserole rest for about 5-10 minutes before serving. This allows the flavors to meld and the casserole to set slightly, making it easier to serve neat portions.

💡 mia’s Pro Tip: If you find your cracker topping browning too quickly, you can loosely tent the dish with aluminum foil for the last 10-15 minutes of baking. This prevents the topping from burning while ensuring the inside is perfectly heated through.

StepActionDurationKey Visual Cue
1Preheat oven & Prep dish~10 mins (oven preheating)Oven at temp, dish lightly greased
2Combine filling & spread in dish~5 minsSmooth, evenly combined mixture in dish
3Prepare and sprinkle topping~3 minsEven layer of moistened crumbs
4Bake30-40 minsBubbly, golden brown, heated through
5Rest5-10 minsCasserole slightly set

Serving & Presentation

This Million Dollar Chicken Casserole is pure comfort on a plate, and I love serving it during our Sunday family dinners here in NYC. It’s hearty enough to be a star on its own, but it also pairs beautifully with a simple green salad dressed with a lemon-herb vinaigrette – a nod to the fresh flavors I always seek out from the Union Square Greenmarket. For a more substantial meal, think about serving it alongside roasted root vegetables or a bowl of comforting tomato soup.

When plating, I like to scoop generous portions directly from the baking dish, ensuring everyone gets a good balance of the creamy interior and that irresistible crunchy topping. A sprinkle of fresh chopped parsley or chives adds a lovely pop of color and a hint of freshness that cuts through the richness. It’s that simple touch of green that elevates the presentation, making it look as appealing as it tastes. This is comfort food done right, elegant enough for guests but humble enough for a Tuesday night.

Pairing TypeSuggestionsWhy It Works
Side DishSimple Green Salad, Steamed Green Beans, Roasted Root VegetablesAdds freshness and balance to the rich casserole.
Sauce / DipA dollop of extra sour cream, mild ranch dressingEnhances creaminess or adds a tangy counterpoint.
BeverageChardonnay, light-bodied Pinot Noir, crisp LagerComplementary flavors without overpowering the casserole.
GarnishFresh Parsley, Chives, Pinch of PaprikaAdds visual appeal and a hint of fresh flavor.

Make-Ahead, Storage & Reheating

As a professional cook living in NYC, I’m always looking for ways to streamline my cooking process without sacrificing flavor. This Million Dollar Chicken Casserole is a dream for meal prep! You can prepare the entire casserole (baked or unbaked) ahead of time, making it a lifesaver for busy weeknights or when hosting guests spontaneously.

MethodContainerDurationReheating Tip
RefrigeratorAirtight container or covered baking dish3-4 daysReheat in oven at 350°F until warm (about 20-25 mins), or microwave. Topping may soften.
FreezerFreezer-safe container or wrapped baking dish2-3 monthsThaw overnight in the refrigerator. Bake at 350°F until hot and bubbly (about 30-40 mins). Add fresh cracker topping if desired.
Make-Ahead (Unbaked)Covered baking dish1-2 days in advanceAdd cracker topping just before baking. May need slightly longer baking time (add 5-10 mins).

When reheating, whether it’s leftovers from the fridge or a make-ahead version, I always recommend using the oven. It helps to revive that delightful crispness of the cracker topping and ensures the casserole is evenly heated through without drying out. If you’re short on time, the microwave is perfectly acceptable, but be aware the topping might lose some of its crunch. For frozen casseroles, thawing overnight is key for even heating; directly baking from frozen will likely result in a soggy bottom and undercooked center.

Variations & Easy Swaps

VariationKey ChangeBest ForDifficulty Impact
Spicy KickAdd diced jalapeños or a pinch of cayenne pepperThose who love a little heatEasy
Mediterranean TwistAdd Kalamata olives, sun-dried tomatoes, oreganoAdventurous palatesEasy
Cheesy BroccoliStir in steamed broccoli florets and an extra cup of shredded cheddarBroccoli lovers and family-friendly mealsEasy

Spicy Kick

For those who enjoy a little heat, my Moroccan heritage often inspires me to add a subtle kick to familiar dishes. To bring some spice to this casserole, I recommend finely dicing one or two fresh jalapeños (seeds removed for less heat) and stirring them into the creamy chicken mixture along with the other ingredients. Alternatively, a pinch of cayenne pepper or red pepper flakes can provide a warming heat that complements the savory flavors beautifully. This variation is perfect for adding an exciting dimension to your comfort food.

Gluten-Free & Dairy-Free Options

Making this cheesy chicken casserole gluten-free is remarkably simple! For the topping, swap out the Ritz crackers for gluten-free crackers or even panko-style gluten-free breadcrumbs, tossed with melted butter. Ensure your cream of chicken soup is also gluten-free. For a dairy-free version, this is a bit more challenging as the creamy base relies heavily on dairy. You could try using a dairy-free cream cheese alternative, a dairy-free sour cream alternative, and full-fat unsweetened coconut milk or cashew cream instead of cottage cheese and cream of chicken soup. The flavor and texture will be altered, but it can still be a delicious dairy-free meal.

Seasonal Flavor Burst

Living in New York City, I love incorporating seasonal ingredients. In the fall and winter, I might stir in some roasted butternut squash or sweet potato cubes into the chicken mixture for an added layer of sweetness and color. In the spring or summer, fresh herbs like tarragon or dill can be chopped and stirred in, or for a delightful twist, I sometimes add a cup of blanched asparagus pieces. These small additions, inspired by what I find at local farmers’ markets, can transform the classic casserole into something new and exciting.

What is the best type of cheese to use in Million Dollar Chicken Casserole?

While this recipe uses a blend of cream cheese, cottage cheese, and sour cream for its signature creaminess, it doesn’t explicitly call for shredded cheese like cheddar or Gruyere. However, if you want to add shredded cheese for an extra layer of flavor, I recommend about 1 to 1.5 cups of shredded mild or sharp cheddar, Monterey Jack, or a Colby Jack blend. Stir it into the creamy chicken mixture before spreading it into the baking dish. It will melt beautifully and add that classic cheesy chicken casserole profile.

Can I make Million Dollar Chicken Casserole ahead of time and refrigerate it?

Absolutely! This is one of the best features of this recipe. You can assemble the entire casserole, including the cracker topping, a day in advance. Cover it tightly with plastic wrap or foil and refrigerate. When you’re ready to bake, remove the plastic wrap and bake as directed, adding an extra 5-10 minutes to the cooking time since it’s going into the oven cold. The topping might soften slightly, but it will still be delicious!

How do I prevent Million Dollar Chicken Casserole from turning out watery?

To avoid a watery casserole, ensure your cream cheese is at room temperature so it incorporates smoothly without adding extra liquid. Also, be mindful not to add any extra liquid unless the recipe specifically calls for it. Using a standard unsalted cream of chicken soup (not low-sodium, which can sometimes be thinner) is helpful. Finally, make sure you bake it for the full recommended time until it’s bubbly and heated through, allowing some of the excess moisture to evaporate.

What can I substitute for cream cheese in Million Dollar Chicken Casserole?

If you’re out of cream cheese or looking for an alternative, Neufchâtel cheese is a very close substitute with a similar texture and flavor, just a bit lighter. Another option is full-fat Greek yogurt; it will add creaminess and a pleasant tang, though the texture might be slightly thinner. Some people have success using ricotta cheese, but it has a grainier texture than cream cheese, so for the smoothest result, stick to cream cheese or Neufchâtel if possible.

Can I use different crackers for the topping?

Yes, you absolutely can! While Ritz crackers provide a distinct buttery flavor and delicate crunch that I love, other crackers work well. Saltines will give a similar salty crunch. You could also use a buttery round cracker like Club crackers. For a different flavor profile, crushed buttery pecans or even panko breadcrumbs (mixed with the melted butter) can be used, but the iconic taste will change. For a gluten-free option, ensure your crackers are certified gluten-free and crush them as usual.

How much chicken should I use?

The recipe calls for 4.5 cups of chopped cooked chicken. This is a generous amount that ensures each bite is packed with tender chicken. Using a standard rotisserie chicken (about 3 lbs before deboning) will give you more than enough chicken. If you’re cooking chicken breasts or thighs specifically for this casserole, aim for about 1.5 to 2 pounds raw chicken, cooked and then chopped, to yield the correct amount after cooking and shredding/chopping.

What is cream of chicken soup and why is it used?

Cream of chicken soup is a pantry staple in many American kitchens, typically a thick, creamy condensed soup made with chicken, broth, and often vegetables and seasonings. In casseroles, it acts as a binder and a flavor enhancer, creating a rich, savory sauce base. It’s incredibly convenient for adding consistent flavor and creaminess. If you don’t have cream of chicken, cream of mushroom soup or even a can of healthy request cream of chicken (if watching sodium) can often be substituted, though the flavor will subtly change.

Can I freeze Million Dollar Chicken Casserole before baking?

Yes, you can definitely freeze this casserole before baking! Assemble the casserole as per the instructions but do not add the cracker topping yet. Cover the baking dish tightly with plastic wrap, then with aluminum foil, and freeze for up to 2-3 months. When ready to bake, thaw it overnight in the refrigerator, then remove the plastic wrap, stir the melted butter into the crushed crackers, and sprinkle the topping over the casserole. Bake at 350°F (175°C), allowing an extra 10-15 minutes to ensure it’s heated through and bubbly.

Share Your Version!

I just adore seeing how my recipes come to life in your kitchens! If you’ve made this Million Dollar Chicken Casserole, please consider leaving a star rating and sharing your thoughts in the comments below—it truly helps other home cooks! I also love it when you share photos of your culinary creations on Instagram or Pinterest – just tag me @exorecipe. I’m always curious to see how you adapt recipes; did you try any of the variations, or perhaps add a unique ingredient from your local market that I should know about?

From my NYC kitchen to yours — I hope this recipe brings as much warmth to your table as it does to mine. — mia 🧡

📌

Love This Recipe? Save It to Pinterest!

If you enjoyed this Million Dollar Chicken Casserole recipe, don’t let it get lost in your browser tabs! 😄 Pin it now so you can find it again anytime — and explore hundreds more tried-and-tested recipes waiting for you on my Pinterest boards.

👉 Follow mia on Pinterest @chefrecipes2

📌 Pin this recipe · 🔁 Re-pin your favorites · 💬 Tag me when you make it — I love seeing your creations!

Print

clock clock iconcutlery cutlery iconflag flag iconfolder folder iconinstagram instagram iconpinterest pinterest iconfacebook facebook iconprint print iconsquares squares iconheart heart iconheart solid heart solid icon

Million Dollar Chicken Casserole

  • Author: Chef Mia

Description

Million Dollar Chicken Casserole – This is our go-to chicken casserole! SO easy to make and tastes like a million bucks! Chicken, cream cheese, cottage cheese, sour cream, onion, garlic, cream of chicken soup, topped with crushed Ritz crackers and butter. Can make this casserole in advance and refrigerate or freeze for later. #chicken #casserole #chickencasserole #ritzcrackers


Ingredients

Scale
  • 4½ cups chopped cooked chicken
  • 4– oz cream cheese, (room temperature)
  • 1 cup cottage cheese
  • ½ cup sour cream
  • 1 (10.5-oz) can Unsalted Cream of Chicken Soup
  • ¼ tsp garlic powder
  • ¼ tsp dried onion powder
  • 1 sleeve Ritz crackers, (crushed)
  • 5 Tbsp butter, (melted)

Instructions

  1. Preheat oven to 350ºF. Lightly spray a 9×9-inch baking dish with cooking spray and set aside.
  2. Combine chicken, cream cheese, cottage cheese, sour cream, garlic powder, onion powder, and cream of chicken soup. Spread into prepared pan.
  3. Combine crushed crackers and butter, sprinkle over chicken mixture..
  4. Bake uncovered 30 to 40 minutes.


Nutrition

  • Calories: 338 kcal
  • Sugar: 2 g
  • Fat: 24 g
  • Carbohydrates: 3 g
  • Protein: 28 g


Million Dollar Chicken Casserole

Juicy Ranch Garlic Parmesan Chicken Skewers

Ranch Garlic Parmesan Chicken Skewers with a Creamy Ranch Twist – Easy Baked Chicken Dinner

⚖️
Difficulty
Easy
⏲️
Prep Time
10 mins
🕒
Cook Time
10 mins
⏱️
Total Time
50 mins
🍽️
Servings
4

New York City is a melting pot of flavors, and my kitchen reflects that! I’m Mia, and while my roots are in the warm, aromatic kitchens of Morocco, my culinary heart was further shaped by the precise techniques of Paris. Today, living in NYC, I love to fuse these influences. This recipe for Ranch Garlic Parmesan Chicken Skewers is one such creation – it takes a beloved American classic and elevates it with a touch of smoky char and a vibrant, zesty coating that’s simply irresistible. These aren’t your average chicken skewers; they are juicy, flavorful, and incredibly easy to make, perfect for a weeknight dinner or a backyard barbecue.

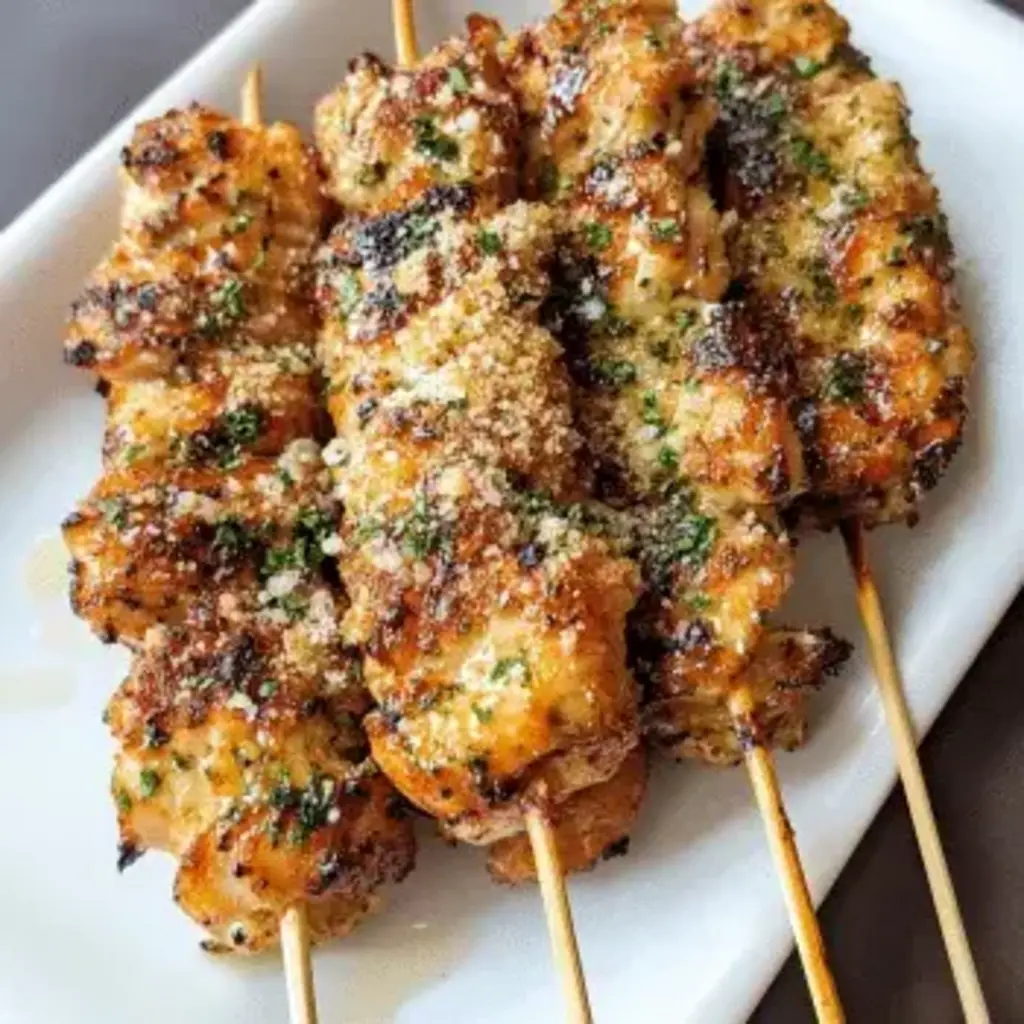
Imagine tender bites of chicken, perfectly grilled, glistening with a creamy, tangy coating infused with sharp Parmesan, fragrant garlic, and the unmistakable zest of ranch. The aroma is captivating – a blend of savory herbs, toasted cheese, and that irresistible char from the grill. The texture is divine: a slight crisp on the outside giving way to incredibly juicy chicken interiors. It’s a dish that delights all the senses, a true testament to how simple ingredients, combined with a little culinary know-how, can create something truly spectacular. This recipe is perfect for any occasion where delicious, fuss-free food is the star.

What sets my Ranch Garlic Parmesan Chicken Skewers apart? It’s the balance of flavors and the creamy, emulsified marinade that guarantees moist chicken every time. I’ve perfected the ratio of ingredients, drawing inspiration from my pastry training in Paris for perfect emulsification and my Moroccan mother’s advice on marinating for maximum flavor. You’ll find a few key tips in the instructions, including how to achieve that coveted char without drying out the chicken, and a common mistake to avoid when grilling. Let’s dive into making these irresistible chicken skewers for dinner!

Why This Ranch Garlic Parmesan Chicken Skewers Recipe Is the Best

The secret to these flavor-packed Ranch Garlic Parmesan Chicken Skewers lies in the simple yet brilliant marinade. My culinary training in Paris taught me the art of building complex flavors from basic elements, and this recipe is a prime example. The combination of creamy ranch dressing, pungent garlic, salty Parmesan cheese, and a hint of peppery bite creates a coating that’s both incredibly savory and tangy. It’s this unique dressing base, richer than a simple spice rub, that infuses the chicken with moisture and a depth of flavor that’s hard to beat. It’s a technique I often use to bring a modern twist to traditional American comfort food, just like I might adapt a tagine for a New York palate.

Achieving that perfect texture on chicken skewers can seem daunting, but it’s all about the marinade and the cooking technique. My method ensures that the chicken stays incredibly juicy and tender, not dry or tough. The ranch dressing acts as a tenderizer and a binder for the Parmesan, creating a delicious crust that caramelizes beautifully on the grill. This recipe relies on medium-high heat and careful turning—a technique I learned to control perfectly during my time in professional kitchens. It’s a balance that yields a slightly crisp exterior while keeping the inside moist and succulent, a culinary feat inspired by classic French grilling methods.

Beyond the amazing flavor and texture, these Ranch Garlic Parmesan Chicken Skewers are incredibly straightforward to prepare. They are perfect for busy weeknights or casual entertaining because they require minimal active cooking time. The marinating does most of the heavy lifting! You don’t need to be a gourmet chef to get restaurant-quality results. This recipe is designed to be accessible to everyone, offering a foolproof way to create a delicious and impressive meal. It’s the kind of easy chicken skewers recipe that becomes a go-to in any home cook’s repertoire.

Ranch Garlic Parmesan Chicken Skewers Ingredients

Shopping for great ingredients is part of the joy of cooking! Here in New York, I love visiting my local farmers’ markets for the freshest produce, but for this recipe, you’ll find everything you need at your standard grocery store. My approach, influenced by my Moroccan mother’s pantry staples and my Parisian chef training, is to use quality ingredients that speak for themselves. This recipe is wonderfully forgiving, but using good Parmesan makes a noticeable difference – a good quality block you grate yourself is always superior to pre-grated!

Ingredients List

  • 1 lb boneless, skinless chicken breasts, cut into 1-inch cubes
  • 1/2 cup ranch dressing
  • 3 cloves garlic, minced
  • 1/2 cup grated Parmesan cheese
  • 1/2 teaspoon black pepper
  • 1/2 teaspoon salt
  • Wooden or metal skewers

Ingredient Spotlight

Ranch Dressing is the creamy, tangy backbone of this marinade. It’s not just for salads! Its blend of herbs, garlic, onion powder, and a touch of acidity acts as a fantastic tenderizer and flavor carrier for the chicken. When choosing ranch, opt for a good quality store-bought dressing that you enjoy the taste of, or make your own if you have the time. A thicker, creamier ranch will adhere better to the chicken.

Parmesan Cheese brings that essential salty, umami-rich depth. For the best flavor and a sauce that clings beautifully, I always recommend using freshly grated Parmesan cheese. Pre-shredded versions often contain anti-caking agents that can affect the texture of the marinade. If you can’t find Parmesan, a good quality Pecorino Romano can be used, though it will offer a sharper, saltier profile.

Chicken Breasts are a lean protein choice that cooks quickly, making them ideal for skewers. When cut into uniform 1-inch cubes, they ensure even cooking. While chicken breasts are lean, the marinade helps keep them moist. If you prefer darker meat, boneless, skinless chicken thighs are a great alternative; they are more forgiving and stay incredibly juicy, though they may take a minute or two longer to cook.

Original IngredientBest SubstitutionFlavor / Texture Impact
Ranch DressingBlue Cheese Dressing or Greek Yogurt (mixed with herbs and spices)Blue cheese will add a sharper, more pungent flavor. Greek yogurt will be lighter and tangier.
Parmesan CheesePecorino Romano or Grana PadanoPecorino is saltier and sharper. Grana Padano is milder and nuttier, similar to Parmesan but less complex. For dairy-free: nutritional yeast (adds cheesy flavor).
Chicken BreastsBoneless, skinless chicken thighsThighs are naturally more moist and forgiving, offering a richer flavor and slightly softer texture.

How to Make Ranch Garlic Parmesan Chicken Skewers — Step-by-Step

Let’s get cooking! Follow these simple steps for perfectly grilled Ranch Garlic Parmesan Chicken Skewers.

Step 1: Mix the Marinade

In a medium bowl, whisk together the ranch dressing, minced garlic, grated Parmesan cheese, black pepper, and salt. Ensure it’s well combined into a creamy, cohesive sauce. This is where all those delicious flavors start to meld together, just like when I build the base for a Moroccan tagine.

💡 mia’s Pro Tip: Taste and adjust seasoning! Remember Parmesan is salty, so you might not need much extra salt, especially if your ranch dressing is already seasoned.

Step 2: Marinate the Chicken

Add the cubed chicken breasts to the bowl with the marinade. Toss gently but thoroughly to ensure each piece is evenly coated. Cover the bowl tightly with plastic wrap or a lid. Refrigerate for at least 30 minutes. For an even deeper flavor, I recommend marinating for up to 4 hours – this allows the marinade to work its magic and tenderize the chicken beautifully.

Step 3: Prepare the Skewers

If you’re using wooden skewers, it’s crucial to soak them in water for at least 20 minutes before use. This prevents them from burning up on the grill, ensuring your chicken cooks without the skewers turning to charcoal. Metal skewers do not require soaking. This is a small step that makes a big difference in presentation and safety.

⚠️ Common Mistake to Avoid: Forgetting to soak wooden skewers! Burnt skewers can ruin the aesthetic and even the taste of your food. A quick soak is all it takes.

Step 4: Preheat the Grill

Preheat your outdoor grill or an indoor grill pan to medium-high heat (around 400°F or 200°C). A properly preheated grill is key to achieving those beautiful grill marks and preventing the chicken from sticking. Make sure the grates are clean and lightly oiled.

Step 5: Thread the Chicken

Once the chicken has marinated and your skewers are ready, thread the marinated chicken cubes onto the skewers. Leave a small space (about 1/4 inch) between each piece of chicken. This allows the heat to circulate evenly, ensuring the chicken cooks through and gets nice caramelization on all sides.

Step 6: Grill the Skewers

Place the chicken skewers on the preheated grill. Grill for approximately 8-10 minutes, turning them every 2-3 minutes. You’re looking for the chicken to be cooked through, with a golden-brown color and slight char marks. The internal temperature should reach 165°F (74°C).

💡 mia’s Pro Tip: Don’t overcrowd the grill! Cook in batches if necessary. Overcrowding lowers the grill temperature and can lead to steaming rather than grilling, preventing that desirable char.

Step 7: Serve Hot

Remove the skewers from the grill and let them rest for a minute or two. Serve them hot, optionally with extra ranch dressing for dipping. The aroma alone will have everyone eager to dig in!

StepActionDurationKey Visual Cue
1Mix the Marinade5 minsCreamy, well-combined sauce.
2Marinate Chicken30 mins (minimum)Chicken coated in marinade.
3Prepare Skewers20 mins (soaking time)Wooden skewers submerged in water.
4Preheat Grill10 minsGrill grates are hot and clean.
5Thread Chicken5 minsEvenly spaced chicken cubes on skewers.
6Grill Skewers8-10 minsGolden brown, slight char marks, cooked through.
7Serve1 min restHot, ready to be enjoyed.

Serving & Presentation

These Ranch Garlic Parmesan Chicken Skewers are as beautiful as they are delicious. The golden-brown char marks against the creamy coating make for a visually appealing dish. For a vibrant presentation, I love to arrange them on a platter garnished with fresh parsley or chopped chives. If I’m serving them as a quick dinner, I’ll often pair them with a simple green salad or some quick-cooking couscous, reminiscent of the easy, fresh meals I grew up with in Morocco.

For a complete meal that balances the richness of the skewers, consider serving them alongside starchy sides like crispy roasted potatoes or creamy mashed potatoes. A fresh, crisp coleslaw or a quinoa salad also provides a lovely textural contrast. In my NYC life, I’m always looking for quick ways to add freshness, so a simple cucumber and tomato salad with a lemon-Dijon vinaigrette is also a fantastic choice. The key is to complement the savory skewers without overpowering them.

Pairing TypeSuggestionsWhy It Works
Side DishRoasted Potatoes, Couscous, Quinoa Salad, Grilled AsparagusThese sides offer substance and complement the main flavor profile without competing.
Sauce / DipExtra Ranch Dressing, Garlic Aioli, Honey MustardEnhances the creamy, savory notes or adds a complementary tang.
BeverageCrisp White Wine (Sauvignon Blanc), Lager Beer, Sparkling Water with LemonCuts through the richness and complements the savory, herbal notes.
GarnishFresh Parsley, Chopped Chives, Lemon WedgesAdds a pop of color, freshness, and acidity to balance the dish.

Make-Ahead, Storage & Reheating

As a busy New Yorker, I know the value of a good make-ahead meal! These chicken skewers are fantastic for meal prep. You can marinate the chicken overnight, and even thread them onto skewers ahead of time and refrigerate them. This saves precious minutes when it’s time to cook.

MethodContainerDurationReheating Tip
RefrigeratorAirtight container (skewers separated or in a dish)3-4 daysGently reheat in a skillet over medium-low heat, or bake briefly in a 300°F oven for 5-7 minutes.
FreezerFreezer-safe bag or container (remove from skewers if possible)2-3 monthsThaw in the refrigerator overnight. Reheat as above to prevent overcooking and drying out.
Make-AheadMarinated chicken in a bowl or on skewers in an airtight container1 day (for threaded skewers) or 2 days (for marinated chicken)Grill directly from refrigerated state, adding 1-2 minutes to cooking time.

When reheating, the goal is to warm the chicken through without making it tough. My preference for leftovers is to give them a quick sauté in a non-stick pan over medium-low heat. This helps revive the slight char and keeps the chicken wonderfully moist. Avoid microwaving for too long, as it can lead to dried-out chicken. If you choose to reheat in the oven, a low temperature and a short duration are key.

Variations & Easy Swaps

VariationKey ChangeBest ForDifficulty Impact
Spicy Ranch Parmesan SkewersAdd 1/2 tsp red pepper flakes or a dash of hot sauce to the marinade.Those who love a little heat.Easy peasy!
Gluten-Free & Dairy-Free OptionUse a GF ranch dressing and swap Parmesan for nutritional yeast. Ensure all added spices are GF.Special dietary needs.Requires careful ingredient selection.
Lemon Herb Ranch SkewersAdd zest of 1 lemon and 1 tbsp chopped fresh dill or rosemary to the marinade.A brighter, fresher flavor profile.Adds a few extra fresh ingredients.

Spicy Ranch Parmesan Skewers

For those who like a kick, adding a pinch of red pepper flakes or a dash of your favorite hot sauce to the marinade is a game-changer! This slight heat beautifully complements the creamy, savory notes of the ranch and Parmesan, offering a delightful contrast. It’s like adding a hint of harissa to a dish, a common practice in my Moroccan heritage to awaken the palate. This variation is perfect for casual grilling nights where a little spice is always welcome.

Gluten-Free & Dairy-Free Option

Making these accessible for everyone is important to me. To make these skewers gluten-free, ensure your ranch dressing is certified gluten-free. For a dairy-free option, swap the Parmesan cheese for nutritional yeast. Nutritional yeast provides a cheesy, umami flavor without the dairy. The texture will be slightly less cohesive, but the flavor will be surprisingly similar. Ensure your ranch dressing is also dairy-free. I’ve tested this, and it works wonderfully for a lighter, allergy-friendly dish.

Lemon Herb Ranch Chicken Skewers

To brighten up these skewers, I love adding fresh lemon zest and herbs to the marinade, a technique inspired by the fresh flavors found at NYC’s Union Square Greenmarket. The zest of one lemon and a tablespoon of finely chopped fresh dill or rosemary are perfect additions. This variation offers a more Mediterranean-inspired twist, with the lemon cutting through the richness and the herbs adding aromatic notes. It’s a wonderful way to enjoy easy chicken skewers during the spring and summer months.

How do you make Ranch Garlic Parmesan Chicken Skewers juicy and tender?

The key to juicy and tender Ranch Garlic Parmesan Chicken Skewers lies in a few factors. First, use chicken breasts cut into uniform 1-inch cubes to ensure even cooking. The marinade itself, featuring ranch dressing, acts as a tenderizer due to its acidity and fat content, while the Parmesan cheese helps create a flavorful crust. Marinating for at least 30 minutes, or up to 4 hours, allows these ingredients to penetrate the meat. Finally, avoid overcooking; grilling for 8-10 minutes over medium-high heat, turning occasionally, is usually sufficient. Using a meat thermometer to ensure an internal temperature of 165°F (74°C) is the most reliable method.

Can I use Greek yogurt instead of mayonnaise in Ranch Garlic Parmesan Chicken Skewers?

Yes, you absolutely can use Greek yogurt as a base or partial substitute for the ranch dressing, especially if you’re looking for a lighter version. Greek yogurt provides a similar creamy tang and can act as a tenderizer. However, since Greek yogurt is thicker and tangier than most ranch dressings, you might need to adjust the consistency and seasoning. I suggest using it in combination with a bit of water or milk to reach the desired marinade consistency, and you may want to add a touch more salt or savory spices to balance the flavor profile, as yogurt can be quite plain on its own.

What is the best cooking time and temperature for Ranch Garlic Parmesan Chicken Skewers in the oven?

If you prefer to bake your Ranch Garlic Parmesan Chicken Skewers instead of grilling, preheat your oven to 400°F (200°C). Arrange the marinated chicken skewers on a baking sheet lined with parchment paper or a silicone mat to prevent sticking. Bake for approximately 15-20 minutes, flipping the skewers halfway through. The chicken should be cooked through (internal temperature of 165°F / 74°C) and lightly golden. Keep an eye on them to prevent the Parmesan from burning too quickly; if it starts to brown too fast, you can loosely tent the baking sheet with foil.

What can I serve with Ranch Garlic Parmesan Chicken Skewers for a complete meal?

These Ranch Garlic Parmesan Chicken Skewers are versatile and pair wonderfully with a variety of sides to create a complete meal. For a light and refreshing option, serve them with a big green salad featuring crisp lettuce, cucumber, tomatoes, and a simple vinaigrette. Sturdier sides like roasted potatoes, garlic mashed potatoes, or a creamy polenta are also excellent choices that absorb the delicious flavors. If you’re looking for a grain, fluffy couscous or quinoa are fantastic accompaniments. Don’t forget a side of extra ranch dressing for dipping!

Can I grill these chicken skewers indoors?

Absolutely! If you don’t have access to an outdoor grill, these Ranch Garlic Parmesan Chicken Skewers can be made beautifully on an indoor grill pan or even under the broiler. For a grill pan, preheat it over medium-high heat, lightly oil it, and cook the skewers for about 8-10 minutes, turning frequently, just as you would on an outdoor grill. If using the broiler, place the skewers on a baking sheet and position them about 4-6 inches from the heat source. Broil for about 8-10 minutes, turning every couple of minutes, until cooked through and nicely browned. Keep a close eye on them, as broilers can cook very quickly!

Are these skewers keto-friendly?

The base recipe for these Ranch Garlic Parmesan Chicken Skewers is relatively low in carbohydrates, making it adaptable for a ketogenic diet. Chicken, Parmesan cheese, garlic, salt, and pepper are all keto-friendly. The main ingredient to watch is the ranch dressing, as some store-bought versions can contain added sugars or starches that increase the carb count. Look for a low-carb or keto-friendly ranch dressing, or make your own using full-fat mayonnaise and sour cream or Greek yogurt with herbs, garlic, and spices. Always check the nutrition labels of your ingredients for accuracy.

How long should I marinate the chicken for best flavor?

For the best flavor infusion and optimal tenderization, I recommend marinating the chicken for at least 30 minutes. However, if time permits, marinating for up to 4 hours will yield even more incredible results. The ranch dressing, with its acidic components and fat, works effectively to tenderize the chicken. While you can technically marinate chicken for longer, sticking to the 30-minute to 4-hour window is ideal for chicken breasts, as extended marination with acidic ingredients can sometimes start to break down the protein too much, leading to a mushy texture rather than a tender one.

Can I use other types of cheese besides Parmesan?

You certainly can experiment with other cheeses, though Parmesan offers a unique salty and nutty flavor profile that pairs exceptionally well with ranch and garlic. Pecorino Romano is a good substitute, offering a tangier and saltier taste. Grana Padano is similar to Parmesan but slightly milder. For a sharper, tangy flavor, you could even consider a dry Monterey Jack. If you’re not a fan of traditional cheeses and want something a bit different, a small amount of finely grated Asiago could also work. Just be mindful of how the saltiness and intensity of the cheese will affect the overall flavor of your skewers.

Share Your Version!

I absolutely adore seeing your culinary creations! When you make my Ranch Garlic Parmesan Chicken Skewers, please take a moment to leave a star rating and a comment below. Your feedback helps me and other readers. If you snap a photo, share it on Instagram or Pinterest and tag me @exorecipes — I live for seeing your gorgeous dishes! Have you tried a particular variation or add-in that was a huge hit? Let me know in the comments!

From my NYC kitchen to yours — I hope this recipe brings as much warmth to your table as it does to mine. — mia 🧡

📌

Love This Recipe? Save It to Pinterest!

If you enjoyed this Ranch Garlic Parmesan Chicken Skewers recipe, don’t let it get lost in your browser tabs! 😄 Pin it now so you can find it again anytime — and explore hundreds more tried-and-tested recipes waiting for you on my Pinterest boards.

👉 Follow mia on Pinterest @chefrecipes2

📌 Pin this recipe · 🔁 Re-pin your favorites · 💬 Tag me when you make it — I love seeing your creations!

Print

clock clock iconcutlery cutlery iconflag flag iconfolder folder iconinstagram instagram iconpinterest pinterest iconfacebook facebook iconprint print iconsquares squares iconheart heart iconheart solid heart solid icon

Ranch Garlic Parmesan Chicken Skewers

  • Author: Chef Mia
  • Prep Time: 10 minutes
  • Cook Time: 10 minutes
  • Total Time: 50 minutes (includes marinating)
  • Yield: 4 1x
  • Method: Main Course
  • Cuisine: American

Description

Juicy chicken skewers coated in a creamy ranch, garlic, and Parmesan coating, grilled to perfection.


Ingredients

Scale
  • 1 lb boneless, skinless chicken breasts, cut into 1-inch cubes
  • 1/2 cup ranch dressing
  • 3 cloves garlic, minced
  • 1/2 cup grated Parmesan cheese
  • 1/2 teaspoon black pepper
  • 1/2 teaspoon salt
  • Wooden or metal skewers

Instructions

  1. In a medium bowl, combine ranch dressing, minced garlic, Parmesan cheese, salt, and pepper.
  2. Add chicken cubes to the bowl and toss to coat evenly. Cover and refrigerate for at least 30 minutes.
  3. If using wooden skewers, soak them in water for 20 minutes to prevent burning.
  4. Preheat grill to medium-high heat.
  5. Thread chicken onto skewers, leaving a small space between pieces.
  6. Grill skewers for 8-10 minutes, turning occasionally, until chicken is cooked through and golden.
  7. Serve hot, optionally with extra ranch dressing for dipping.

Notes

For extra flavor, let chicken marinate for up to 4 hours. Use fresh grated Parmesan for best results.


Nutrition

  • Calories: 350 kcal
  • Sugar: 2 g
  • Fat: 22 g
  • Carbohydrates: 5 g
  • Protein: 32 g


Ranch Garlic Parmesan Chicken Skewers

ph">For more delicious inspiration, follow me on Pinterest!

Crispy Chinese Orange Chicken Recipe Better Than Takeout

Chinese Orange Chicken: Better Than Takeout!

⚖️
Difficulty
Easy
⏲️
Prep Time
20

mins

🕒
Cook Time
25

mins

⏱️
Total Time
45

mins

🍽️
Servings
4

Ah, Chinese Orange Chicken! Just the name brings back memories of bustling food stalls in Marrakech, where vibrant citrus fruits perfumed the air. Though my roots are in North African flavors, my culinary journey took me through the rigorous, technique-driven kitchens of Paris, and now I call New York City home, a melting pot of global tastes. This easy Orange Chicken recipe is my love letter to that diverse culinary landscape, a way to bring a restaurant-quality dish right into your own home. Forget greasy, overly sweet takeout versions; this homemade Orange Chicken is bursting with bright, authentic citrus flavor and features a delightful crispy texture that will have you reaching for more. I first developed this recipe when I was craving something punchy and satisfying, something that felt both familiar and exciting, and I am thrilled to share my perfected version with you today.

Imagine tender, succulent pieces of chicken, coated in a light, shatteringly crisp shell, all tossed in a glossy, aromatic sauce that balances sweet orange zest and juice with a tangy vinegar undertone and a whisper of warming ginger and garlic. The aroma alone is intoxicating, a fragrant promise of the deliciousness to come. I’ve honed the technique for achieving that perfect crispness, drawing from French frying methods to ensure each bite is just right. This isn’t just about throwing ingredients together; it’s about understanding how heat, starch, and citrus can create magic. My mother’s tagines taught me the power of slow, deep flavor development, and my Parisian training taught me precision and balance. This Orange Chicken stir fry is where those worlds collide, creating something truly special.

What makes my Chinese Orange Chicken recipe truly stand out? It’s that perfect balance of crispy exterior and juicy interior, achieved through a simple yet crucial dredging and frying technique that I’ll walk you through. I’ll also share my secret for a sauce that’s vibrant and fresh, not cloying. As a professional cook, I know how frustrating it can be to end up with soggy chicken or a sauce that’s too thick or too thin! I’ll guide you to avoid common pitfalls, ensuring your homemade Orange Chicken is a resounding success. Get ready for a flavor explosion that will make you never want to order takeout again.

Why This Chinese Orange Chicken Recipe Is the Best

My philosophy in the kitchen, whether it’s my Moroccan heritage or my Parisian training, is to build layers of flavor and texture. For this Chinese Orange Chicken, that means using fresh orange zest and juice for that incredible aromatic lift, rather than relying solely on artificial flavorings. The touch of rice vinegar provides a subtle zing that cuts through the richness, a trick I learned in mastering classic French sauces, ensuring every bite is perfectly balanced and utterly delicious. This recipe elevates the humble orange chicken into something truly special.

Achieving that coveted crispy texture is key to any great Orange Chicken stir fry, and I’ve refined this process to be incredibly effective. By double-dredging the chicken pieces – first in egg and then in a precise cornstarch and flour mixture – and frying them at the correct temperature, we create a beautiful, crunchy coating that holds up even after being coated in sauce. This method ensures each piece of chicken remains delightfully crisp, a testament to the importance of proper technique, even in straightforward dishes.

This recipe is designed with home cooks in mind who want incredible flavor without spending hours in the kitchen. The ingredient list is straightforward, and the steps are clearly outlined, making it genuinely easy Orange Chicken to tackle. I’ve tested and tweaked this recipe extensively to ensure it’s foolproof. You’ll find that with a little preparation, this vibrant dish comes together surprisingly quickly, proving that impressive homemade meals are well within your reach, even on a busy weeknight in NYC.

Chinese Orange Chicken Ingredients

When I’m developing recipes here in my New York City apartment kitchen, I always think about accessibility. Most of these ingredients can be found at your local grocery store. For the freshest citrus, I love visiting the farmers’ markets in Union Square, especially during the fall and winter months – the zest from those oranges is unparalleled! If you can’t find rice vinegar, a good quality white wine vinegar will work in a pinch, though the subtle nutty notes of rice vinegar are worth seeking out.

Ingredients List

  • 4 Boneless Skinless Chicken Breasts (cut into 1-inch bite-size pieces)
  • 3 large Eggs (whisked)
  • 1/3 cup Cornstarch (for dredging)
  • 1/3 cup All-Purpose Flour
  • Salt (to taste)
  • Vegetable Oil or Canola Oil (for frying, about 2-3 inches deep in pot)
  • 1 cup Fresh Orange Juice (from about 2-3 oranges)
  • 1/2 cup Granulated Sugar
  • 2 Tablespoons Rice Vinegar (or White Vinegar)
  • 2 Tablespoons Soy Sauce (use tamari for a gluten-free dish)
  • 1/4 teaspoon Ground Ginger (or 1 tsp finely minced fresh ginger)
  • 1/4 teaspoon Garlic Powder (or 2 cloves garlic, finely minced)
  • 1/2 teaspoon Red Chili Flakes (optional, for a touch of heat)
  • Zest of 1 large Orange (for sauce)
  • 1 Tablespoon Cornstarch (for thickening sauce)
  • 2 Tablespoons Water (for cornstarch slurry)
  • 2 Green Onions, thinly sliced (for garnish)
  • Extra Orange Zest (for garnish, optional)

Ingredient Spotlight

Orange Juice & Zest: This is the heart of our dish! For the best flavor, I always recommend using freshly squeezed orange juice and the zest from the peel. While bottled juice can work in a pinch, it often lacks that bright, floral aroma that true oranges provide. If you can’t find large navel oranges, clementines or tangerines can also work, but you might need to adjust the sugar slightly based on their sweetness. Always zest before juicing!

Cornstarch: This humble pantry staple is your secret weapon for achieving that signature crispy coating on the chicken and for thickening the sauce to a beautiful glaze. It’s essential for both dredging the chicken pieces before frying and for creating the cornstarch slurry that thickens the orange sauce. Make sure you have enough for both applications – it’s surprisingly versatile!

Chicken Breasts: For this recipe, boneless, skinless chicken breasts are ideal because they cook quickly and evenly, absorbing the sauce beautifully. I cut them into uniform, bite-sized pieces to ensure they cook through without drying out. If you prefer dark meat, boneless, skinless chicken thighs are a fantastic substitute and are often more forgiving, staying moister even if slightly overcooked.

Original IngredientBest SubstitutionFlavor / Texture Impact
Orange Juice1 cup Cranberry Juice or Apple JuiceSlightly tarter and fruitier (cranberry) or sweeter and milder (apple). The orange notes will be lost.
Rice VinegarWhite Vinegar or Apple Cider VinegarA bit harsher (white vinegar) or fruitier (apple cider vinegar). Rice vinegar offers a more subtle, balanced tang.
Chicken BreastsBoneless, Skinless Chicken ThighsMore tender and moist; may require slightly longer cooking time as they are denser. Thighs have a richer flavor.

How to Make Chinese Orange Chicken — Step-by-Step

Let’s get cooking! This recipe is designed to be straightforward, but paying attention to a few key details will make all the difference in achieving that perfect, restaurant-quality result.

Step 1: Prepare the Orange Sauce

In a medium saucepan, combine the 1 cup of orange juice, 1/2 cup sugar, 2 tablespoons rice vinegar, 2 tablespoons soy sauce, 1/4 teaspoon ground ginger, 1/4 teaspoon garlic powder, and 1/2 teaspoon red chili flakes (if using). Heat over medium heat, stirring occasionally, for about 3 minutes until the sugar is dissolved and the mixture is hot.

💡 mia’s Pro Tip: Don’t boil the sauce vigorously at this stage; you just want to gently heat the ingredients and dissolve the sugar. This helps keep the flavors bright and fresh.

Step 2: Thicken the Sauce

In a small bowl, whisk together 1 tablespoon of cornstarch with 2 tablespoons of water until you have a smooth paste (this is called a slurry). Pour this slurry into the simmering orange sauce and whisk constantly. Continue to cook for another 5 minutes, or until the sauce has thickened to a syrupy consistency that coats the back of a spoon. Remove from heat.

Step 3: Add Orange Zest

Once the sauce has thickened and is off the heat, stir in the zest of one large orange. This is crucial! Adding the zest at the end preserves its bright, aromatic oils, infusing the sauce with a powerful orange essence that makes this homemade Orange Chicken truly special.

Step 4: Prepare for Breading

Set up your breading station. In a shallow dish or pie plate, combine 1/3 cup cornstarch and 1/3 cup flour. Add a generous pinch of salt and stir to combine. In a second shallow dish, whisk the 3 eggs until well beaten.

⚠️ Common Mistake to Avoid: Don’t overcrowd the dishes with your chicken pieces. Work in batches to ensure each piece is fully coated. Also, make sure your flour and cornstarch mixture is well-stirred so you get an even coating.

Step 5: Bread the Chicken

Take your bite-sized chicken pieces and dip each one first into the whisked egg mixture, letting any excess drip off. Then, transfer the eggy chicken to the cornstarch-flour mixture and dredge thoroughly, pressing gently to ensure it adheres. Place the breaded chicken pieces onto a clean plate in a single layer, making sure they don’t touch too much.

Step 6: Heat the Oil

Pour 2-3 inches of vegetable or canola oil into a heavy-bottomed pot or Dutch oven. Heat the oil over medium-high heat until it reaches 350°F (175°C) on a deep-fry thermometer. Maintaining the correct oil temperature is critical for crispy, not greasy, chicken.

💡 mia’s Pro Tip: Use a thermometer! It’s the easiest way to ensure your oil is at the perfect temperature. If it’s too low, the chicken will absorb too much oil and be greasy. Too high, and it will burn before cooking through.

Step 7: Fry the Chicken

Working in small batches to avoid lowering the oil temperature too much, carefully place the breaded chicken pieces into the hot oil. Fry for 2-3 minutes per side, turning occasionally, until golden brown and cooked through. Use a slotted spoon or spider strainer to remove the chicken from the oil and place it on a plate lined with paper towels to drain off excess grease.

⚠️ Common Mistake to Avoid: Do NOT overcrowd the pot. Frying too many pieces at once will drastically lower the oil temperature, resulting in soggy, oil-logged chicken. Be patient and fry in batches!

Step 8: Toss and Serve

Once all the chicken is fried, place the crispy chicken pieces in a large bowl. Pour the prepared orange sauce over the chicken and toss gently until all pieces are evenly coated. You may reserve some of the sauce to drizzle over rice. Serve the Chinese Orange Chicken immediately, garnished with thinly sliced green onions and a little extra orange zest if desired.

StepActionDurationKey Visual Cue
1 & 2Simmer & Thicken Sauce3 mins + 5 minsSauce coats spoon
4 & 5Bread Chicken~5 mins per batchChicken pieces evenly coated
6Heat Frying Oil~8-10 minsOil reaches 350°F (175°C)
7Fry Chicken2-3 mins per batchGolden brown and cooked through
8Toss & Serve~2 minsEvenly coated in glossy sauce

Serving & Presentation

This Chinese Orange Chicken is a star on its own, but it truly shines when served with fluffy white or brown rice to soak up that glorious sauce. In my NYC kitchen, I often serve it alongside stir-fried seasonal vegetables from the local market, like broccoli florets, bell peppers, or snap peas, adding color and a fresh crunch. For a more authentic feel reminiscent of the bustling food stalls I remember from my travels, a sprinkle of toasted sesame seeds adds a lovely nutty note and visual appeal.

The vibrant orange hue of the sauce, contrasted with the golden-brown chicken and the fresh green of the scallions, makes for a beautiful plate. Don’t shy away from adding that extra bit of orange zest as a garnish; it provides a final burst of fragrance that elevates the entire dish. It’s these little touches, a habit from my pastry days in Paris where presentation is paramount, that transform a good dish into a memorable one.

Pairing TypeSuggestionsWhy It Works
Side DishSteamed Jasmine or Basmati Rice, Cauliflower Rice, QuinoaProvides a neutral base to absorb the flavorful sauce and adds substance to the meal.
VegetablesSteamed Broccoli, Sautéed Green Beans, Roasted Asparagus, Stir-fried Bell Peppers & OnionsAdds color, texture, and essential nutrients, balancing the richness of the chicken dish.
BeverageUnsweetened Iced Tea, Green Tea, Riesling or Gewürztraminer WineThe slight sweetness and crispness of these drinks complement the dish without overpowering it.
GarnishFresh Green Onions, Toasted Sesame Seeds, Extra Orange ZestAdds a fresh aroma, visual appeal, and a final touch of brightness and texture.

Make-Ahead, Storage & Reheating

Life in New York is always on the go, so I love knowing how to prep ahead. While this Chinese Orange Chicken is best enjoyed fresh for maximum crispness, it stores and reheats surprisingly well. You can prepare the orange sauce and bread the chicken a day in advance, storing them separately in airtight containers in the refrigerator. This makes the final cooking process on a busy weeknight incredibly fast!

MethodContainerDurationReheating Tip
RefrigeratorAirtight container2-3 daysWarm gently in a skillet over medium-low heat to try and preserve some crispness. Add a splash of water if sauce is too thick.
FreezerFreezer-safe container or bag1-2 monthsThaw overnight in the refrigerator then reheat as above. Some crispness will be lost. Ideal to freeze sauce separately.
Make-AheadSauce in one container, breaded chicken in another1 day in advanceFry chicken directly from the fridge, then toss with warmed sauce.

When reheating, I find the stovetop method in a skillet yields the best results for getting some of that crispness back. Avoid the microwave if possible, as it tends to make the chicken casing soft and steamy. If your sauce has become too thick after refrigeration, add a tablespoon or two of water or orange juice and whisk it in while warming. Remember, for the absolute best texture, this dish is intended to be eaten soon after it’s made, but these tips will help you enjoy it even if you have leftovers!

Variations & Easy Swaps

VariationKey ChangeBest ForDifficulty Impact
Spicy Orange ChickenAdd more red chili flakes, or a tablespoon of Sriracha to the sauce.Those who love a kick!Adds minimal difficulty.
Sweet & Sour TwistAdd pineapple juice to the sauce and a touch of honey.A different flavor profile.Slightly sweeter, may need to adjust sugar.
Ginger-Garlic BoostUse fresh minced ginger and garlic instead of powder.Deeper fresh flavor.Requires extra prep for mincing.

Gluten-Free Orange Chicken

To make this gluten-free, simply swap out the all-purpose flour for a gluten-free all-purpose flour blend in the dredging mixture. The cornstarch is naturally gluten-free, which is a great advantage here. For the soy sauce, use a good quality tamari, which is typically gluten-free. This substitution will give you a delicious Chinese Orange Chicken recipe that everyone can enjoy, with no noticeable difference in texture or taste!

Vegetarian Orange Chicken

For a vegetarian twist, that pays homage to the North African vegetable tagines I grew up with, try using extra-firm tofu or cauliflower florets instead of chicken. Press the tofu very well to remove excess water, then cube it and proceed with the breading and frying steps. Cauliflower florets can be tossed directly in the egg and then the flour mixture before frying. The sauce remains the same, providing that wonderful sweet and tart flavor.

Thai-Inspired Orange Chicken

Inspired by the vibrant flavors of Thailand, you can give this recipe a unique Southeast Asian flair. Add a tablespoon of fish sauce to the sauce mixture along with the soy sauce for an umami boost. A teaspoon of finely minced lemongrass or a bit of lime zest in the sauce can add another layer of aromatic complexity, reminiscent of Thai curries. Garnish with fresh cilantro along with the green onions.

How do you make Chinese orange chicken crispy instead of soggy?

The key to crispy orange chicken is a two-step process: proper dredging and precise frying. First, ensure your chicken is well-coated in the cornstarch and flour mixture after dipping it in egg; press gently to help it adhere. Second, and most importantly, fry the chicken in oil that is preheated to exactly 350°F (175°C). Fry in small batches to prevent the oil temperature from dropping, and cook each batch until golden brown. Draining the fried chicken on paper towels immediately after removes excess oil, preserving its crispness.

What is the best substitute for orange juice in orange chicken?

If you’re out of orange juice, you can use a combination of other fruit juices for a similar flavor profile, though it won’t be exactly the same. About half apple juice and half pineapple juice, or a full cup of cranberry juice, can provide the necessary sweetness and acidity. For a more tart flavor, you could use grapefruit juice. Remember that substitutes may alter the sweetness level, so you might need to adjust the sugar accordingly. Using fresh orange zest is still highly recommended to retain some of that essential orange aroma.

Can I use chicken thighs instead of chicken breast for orange chicken?

Absolutely! Chicken thighs are an excellent alternative to chicken breasts for this Chinese Orange Chicken recipe. They are naturally more tender and moist due to their higher fat content, making them more forgiving if you accidentally overcook them slightly. The flavor is also a bit richer. Just ensure they are cut into similar bite-sized pieces and be aware they might take a minute or two longer to cook through during the frying stage compared to chicken breasts. The end result will be wonderfully juicy and flavorful.

How long does it take to cook orange chicken from scratch?

Making this Chinese Orange Chicken recipe from scratch typically takes about 45 minutes in total. This includes approximately 20 minutes for preparation, which involves cutting the chicken, making the sauce ingredients, and setting up the breading station. The cooking time itself is around 25 minutes, covering the sauce thickening and the frying of the chicken in batches. It’s a relatively quick process when you break it down, making it a perfect weeknight meal that feels special.

Can I make the orange sauce ahead of time?

Yes, you can definitely make the orange sauce ahead of time! I often prepare the sauce and store it in an airtight container in the refrigerator for up to 2 days. When you’re ready to serve, gently reheat the sauce on the stovetop, whisking in a tablespoon or two of water or orange juice if it has thickened too much. This step is crucial for making your weeknight cooking much smoother and faster, ensuring you have a delicious meal ready in no time.

What kind of oil is best for frying chicken?

For deep-frying chicken to achieve that perfect crispy texture, it’s best to use a neutral oil with a high smoke point. Common choices include vegetable oil, canola oil, or peanut oil. These oils can withstand the high temperatures required for frying (around 350°F or 175°C) without burning or imparting an unwanted flavor into your delicious Chinese Orange Chicken. Ensure you use enough oil, at least 2-3 inches deep in your pot, for the chicken to fry evenly.

How do I get the sauce to coat the chicken and not pool at the bottom?

The key to getting the sauce to coat the chicken beautifully is achieving the correct sauce consistency and tossing immediately. Make sure your sauce has thickened properly using the cornstarch slurry; it should be syrupy and coat the back of a spoon. Once the chicken is fried and drained, add it to a bowl with the warm sauce and toss quickly and thoroughly until every piece is coated. Serving it immediately over rice also helps the sauce cling to the chicken and rice.

Can I bake or air fry this orange chicken instead of deep frying?

While deep-frying is my preferred method for achieving that authentic crispy texture, you can certainly bake or air fry this recipe for a lighter version. For baking, spread the breaded chicken on a wire rack set over a baking sheet and bake at 400°F (200°C) for about 20-25 minutes, flipping halfway through, until golden and cooked. For the air fryer, cook at 380°F (190°C) for about 10-12 minutes, shaking the basket halfway. Keep in mind that the crispness will be less pronounced than with deep frying, but it’s still a delicious way to enjoy it!

Share Your Version!

I absolutely love seeing your culinary creations! If you make this easy Chinese Orange Chicken recipe, please leave a comment below and share your thoughts. A star rating is incredibly helpful for other home cooks too! And if you snap any photos, please tag me on Instagram or Pinterest at @exorecipes – I’d be thrilled to see how it turned out! I’m always curious to hear how people adapt recipes, so let me know: did you try any of the flavor variations, and how did they turn out for you?

From my NYC kitchen to yours — I hope this recipe brings as much warmth to your table as it does to mine. — mia 🧡

📌

Love This Recipe? Save It to Pinterest!

If you enjoyed this Chinese Orange Chicken recipe, don’t let it get lost in your browser tabs! 😄 Pin it now so you can find it again anytime — and explore hundreds more tried-and-tested recipes waiting for you on my Pinterest boards.

👉 Follow mia on Pinterest @chefrecipes2

📌 Pin this recipe · 🔁 Re-pin your favorites · 💬 Tag me when you make it — I love seeing your creations!

Print

clock clock iconcutlery cutlery iconflag flag iconfolder folder iconinstagram instagram iconpinterest pinterest iconfacebook facebook iconprint print iconsquares squares iconheart heart iconheart solid heart solid icon

Chinese Orange Chicken

  • Author: Chef Mia

Description

Chinese Orange Chicken that is way better than take-out!


Ingredients

Scale
  • 4 Boneless Skinless Chicken Breasts (cut into bite-size pieces)
  • 3 Eggs (whisked)
  • 1/3 cup Cornstarch
  • 1/3 cup Flour
  • Salt
  • Oil (for frying)
  • 1 cup Orange Juice
  • 1/2 cup Sugar
  • 2 Tablespoons Rice Vinegar (or White Vinegar)
  • 2 Tablespoons Soy Sauce (use tamari for a gluten-free dish)
  • 1/4 teaspoon Ginger
  • 1/4 teaspoon Garlic Powder (or 2 garlic cloves, finely diced)
  • 1/2 teaspoon Red Chili Flakes
  • Orange Zest (from 1 orange)
  • 1 Tablespoon Cornstarch
  • Green Onions
  • Orange Zest

Instructions

  1. To make orange sauce:
  2. In a medium pot, add orange juice, sugar, vinegar, soy sauce, ginger, garlic, and red chili flakes. Heat for 3 minutes.
  3. In a small bowl, whisk 1 Tablespoon of cornstarch with 2 Tablespoons of water to form a paste. Add to orange sauce and whisk together. Continue to cook for 5 minutes, until the mixture begins to thicken. Once the sauce is thickened, remove from heat and add orange zest.
  4. To make chicken:
  5. Place flour and cornstarch in a shallow dish or pie plate. Add a generous pinch of salt. Stir.
  6. Whisk eggs in shallow dish.
  7. Dip chicken pieces in egg mixture and then flour mixture. Place on plate.
  8. Heat 2 -3 inches of oil in a heavy-bottomed pot over medium-high heat. Using a thermometer, watch for it to reach 350 degrees.
  9. Working in batches, cook several chicken pieces at a time. Cook for 2 – 3 minutes, turning often until golden brown. Place chicken on a paper-towel-lined plate. Repeat.
  10. Toss chicken with orange sauce. You may reserve some of the sauce to place on rice. Serve it with a sprinkling of green onion and orange zest, if so desired.


Chinese Orange Chicken

ph">For more delicious inspiration, follow me on Pinterest!