“`html
Table of Contents
- Introduction: Blast Off to Flavor Town!
- Galactic Ingredients
- Launch Sequence: Timing is Everything
- Crafting Your Galaxy Swirl Freakshake
- Celestial Stats: Nutritional Breakdown
- Lighter Orbits: Healthier Alternatives
- Sharing the Cosmos: Serving Suggestions
- Avoiding Asteroid Fields: Common Mistakes
- Preserving Your Galaxy: Storing Tips
- Cosmic Queries: Frequently Asked Questions
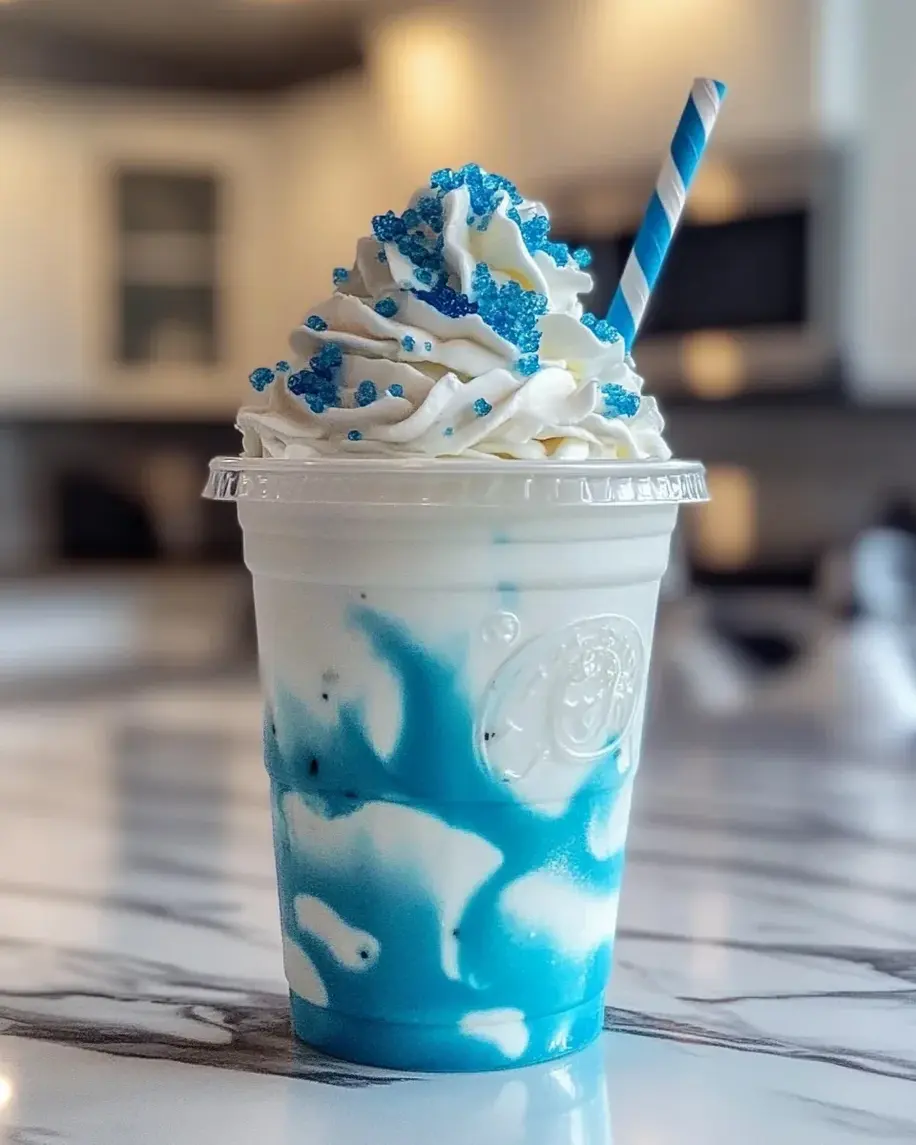
Galaxy Swirl Freakshakes Recipe: A Cosmic Dessert Delight
Introduction: Blast Off to Flavor Town!
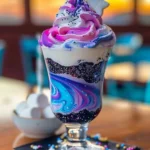
Are you curious about how to make desserts that are as visually stunning as they are delicious? If you’re looking to add a little sparkle to your dessert repertoire, Galaxy Swirl Freakshakes are here to transport your taste buds to a cosmic wonderland! Forget the ordinary; these dreamy, colorful milkshakes are not just a treat for the palate but a feast for the eyes, too. Swirled with galaxy-inspired hues like deep blues, purples, pinks, and hints of white, and topped with an assortment of magical goodies – think edible glitter, star-shaped sprinkles, and perhaps even a marshmallow planet or two – they’re the ultimate showstopper for birthday parties, themed events, or just a fun weekend treat. Ready to embark on a culinary adventure that’s out of this world?
Galactic Ingredients
For the Creamy Cosmic Base
- Vanilla Ice Cream: 3-4 scoops of premium quality vanilla ice cream. The smoother and creamier, the better for a rich, velvety texture. Substitution: Use a good quality French vanilla or even a plain sweet cream ice cream for a more neutral base. Non-dairy vanilla ice cream works beautifully too.
- Milk: ½ cup whole milk. This helps to achieve the perfect milkshake consistency – thick but pourable. Substitution: Almond milk, oat milk, or soy milk are excellent dairy-free alternatives. Adjust the amount slightly based on your desired thickness.
- Powdered Sugar: 1-2 tablespoons (optional, for extra sweetness). Substitution: A drizzle of agave or maple syrup if you prefer liquid sweeteners.
For the Vibrant Galaxy Swirls
- Food Coloring: Gel food coloring in deep blue, purple, and pink. Gel colors are more potent and provide richer hues without watering down your shake.
- White Edible Paint or Food-Grade White Food Coloring Gel: A small amount for starry accents.
- Clear Extract (like Vanilla or Almond): 1 teaspoon (optional, for adding a subtle flavor note that complements the colors).
For the Stellar Adornments
- Whipped Cream: Generous dollops to form fluffy clouds.
- Edible Glitter: Silver, blue, or iridescent for that cosmic sparkle.
- Sprinkles: Star-shaped, moon-shaped, or colorful jimmies.
- Candy: Gummy stars, rock candy crystals, or small chocolate candies.
- Sauces: A drizzle of chocolate syrup or strawberry syrup for extra flavor and visual appeal.
- Cookies/Wafers: To add a crunchy element.
Launch Sequence: Timing is Everything
Compared to average milkshake recipes, which typically take around 10-15 minutes for prep and total time, our Galaxy Swirl Freakshakes require a little extra attention due to the decorative swirling and extensive topping application. However, the additional 5-10 minutes are well worth the spectacular visual payoff!

Crafting Your Galaxy Swirl Freakshake
Step 1: Prepare Your Cosmic Canvases
First, let’s get your serving glasses ready. To enhance the galaxy effect, you can rim the glasses with corn syrup or honey and then dip them in blue or black sprinkles and edible glitter. This creates a stunning outer crust. Chill the glasses in the freezer for at least 10 minutes while you prepare the shake. This helps keep your freakshake deliciously cold!
Step 2: Blend the Milky Way Base
In a blender, combine the vanilla ice cream and milk. Blend until smooth and creamy. If you prefer a sweeter shake, add the powdered sugar and blend again until no sugar granules remain. The consistency should be thick enough to hold its shape but pourable. If it’s too thick, add a splash more milk; if too thin, add another scoop of ice cream.
Step 3: Create the Galaxy Colors
Divide your blended milkshake base into three separate bowls. Leave one bowl plain (this will be your white “star” base). Add a few drops of deep blue gel food coloring to the second bowl and mix until evenly colored. Repeat with purple food coloring in the third bowl. For the final color, add pink or a lighter shade of purple to the fourth bowl. If using, add a tiny bit of clear extract to each colored portion for subtle flavor.
Step 4: Swirl the Magic
This is where the magic happens! Carefully pour a small amount of the plain white milkshake into the bottom of your chilled, prepared glass. Then, dollop or drizzle spoonfuls of the blue, purple, and pink milkshake mixtures over the white. Don’t overmix! The goal is to create distinct swirls. Use a skewer or a spoon handle to gently swirl the colors together, making sure not to blend them completely. You want to see streaks of color, not a uniform hue. Repeat layering with the different colors and the white base until the glass is full, creating that mesmerizing galaxy effect.
Step 5: Decorate Your Masterpiece
Now for the fun part: toppings! Generously pipe or spoon whipped cream on top of your swirled masterpiece. Sprinkle liberally with edible glitter and your chosen sprinkles. Add candy stars, rock candy, or any other galactic treats you desire. A drizzle of chocolate or strawberry syrup can add another layer of flavor and visual interest. Stick in a cookie or wafer for a final flourish. Serve immediately and marvel at your cosmic creation!
Celestial Stats: Nutritional Breakdown
Nutritional information can vary significantly based on the specific brands of ice cream, milk, and the types and quantities of toppings used. However, a typical Galaxy Swirl Freakshake (per serving, without extreme toppings) is estimated to be:
- Calories: 700-1000+ kcal
- Protein: 10-15g
- Fat: 35-50g
- Carbohydrates: 80-120g
- Sugar: 70-100g
This is a treat, designed for indulgence!
Lighter Orbits: Healthier Alternatives
Want a lighter take on this cosmic delight? Try these swaps:
- Base: Use frozen banana blended with a plant-based milk and a scoop of Greek yogurt or a lighter vanilla plant-based ice cream. Add minimal sweeteners.
- Color: Use natural food colorings derived from fruits and vegetables like blueberries, raspberries, and pitaya powder.
- Toppings: Opt for fresh berries, a sprinkle of chia seeds, a dusting of cocoa powder, or a light drizzle of sugar-free chocolate syrup instead of heavy candies and excessive sprinkles.
Sharing the Cosmos: Serving Suggestions
These freakshakes are best served immediately after preparation to enjoy their full frosty glory. They make for incredible birthday party centerpieces, movie night treats, or even a fun activity for kids to help assemble. For a less messy experience, serve with a sturdy straw and a long spoon. They pair wonderfully with simple desserts like cookies or brownies.
Avoiding Asteroid Fields: Common Mistakes
- Over-blending the colors: This will result in a muddy brown or gray shake rather than distinct swirls. Be gentle!
- Using liquid food coloring: It can dilute the shake and may not achieve the deep, vibrant colors you’re aiming for. Stick to gel colors.
- Not chilling the glasses: A warm glass will cause your beautiful creation to melt too quickly, losing its dramatic appeal.
- Too much liquid: A milkshake that’s too thin will be difficult to swirl and won’t hold up well with heavy toppings.
Preserving Your Galaxy: Storing Tips
Freakshakes are definitely best enjoyed fresh! They are not designed for storage. If you absolutely must, you can place it in the freezer for a very short period (5-10 minutes) to firm it up slightly, but be aware that the toppings may degrade, and the ice cream will start to melt and lose its perfect texture. Any leftover milkshake base (before swirling) can be stored in an airtight container in the freezer for up to a week, but you’ll need to re-blend it with a little milk before serving.

Cosmic Queries: Frequently Asked Questions
***What is the best way to achieve the galaxy swirl effect?***
The key is to work in layers and swirl gently. Pour small amounts of different colored bases into the glass and use a skewer or spoon handle to drag the colors through each other, creating streaks rather than a uniform blend. Don’t over-swirl!
***Can I make this vegan?***
Absolutely! Use vegan vanilla ice cream, plant-based milk (like oat or almond), and vegan whipped cream. Ensure your add-ins and toppings are also vegan-friendly.
***How do I make the galaxy colors?***
Utilize gel food coloring in deep blues, purples, and pinks. Divide your plain milkshake base into separate bowls and add the gel colors, mixing until you achieve rich, vibrant hues. You can also add a touch of white edible paint or food coloring for starry speckles.
***What kind of ice cream is best?***
A high-quality, creamy vanilla ice cream is ideal. A French vanilla or even a plain sweet cream will work well, providing a smooth base for the colors and flavors. About 3-4 scoops per serving is usually sufficient.
***Can I make these ahead of time?***
Freakshakes are best enjoyed immediately as they tend to melt quickly. You can prepare the individual colored milkshake bases and store them in the freezer in airtight containers for a few days, then re-blend them with a splash of milk before assembling and topping.
Conclusion: Taste the Universe!
Galaxy Swirl Freakshakes are more than just a dessert; they’re an experience. From the mesmerizing visual appeal to the delightful, sweet indulgence, they are guaranteed to be a hit. So, gather your cosmic ingredients and get ready to create a dessert that’s truly out of this world. Don’t forget to share your stellar creations with us!
Did you try this Galaxy Swirl Freakshake recipe? We’d love to see your culinary cosmos! Share your photos and tag us on social media, or leave a comment below with your favorite topping combinations!
Galaxy Swirl Freakshakes Recipe: A Cosmic Dessert Delight
Description
If you’re looking to add a little sparkle to your dessert repertoire,Galaxy Swirl Freakshakesare here to transport your taste buds to a cosmic wonderland! These dreamy, colorful milkshakes are not just a treat for the palate but a feast for the eyes, too. Swirled with galaxy-inspired hues and topped with all things magical, they’re a showstopper for any occasion.
Ingredients
- 2 cupsvanilla ice cream
- 1 cupmilk
- ½ cupheavy cream
- ½ teaspoonvanilla extract
- Food coloring: blue, purple, pink, and black
- ¼ cupeach of blue, purple, pink, and black food coloring
- Edible glitter or star-shaped sprinkles (optional)
- Whipped cream
- Sprinkles
- Mini marshmallows
- Chocolate or caramel sauce
- Blender
- Four small bowls for mixing colors
- Large glasses or mason jars for serving
- Spoon or straw for swirling
Instructions
- Combine vanilla ice cream, milk, heavy cream, and vanilla extract in a blender. Blend until smooth and creamy.
- Pour the milkshake mixture into four bowls.
- Add a different food coloring to each bowl: blue, purple, pink, and black. Stir thoroughly to ensure vibrant, even colors.
- Layer the colored milkshake mixtures into a glass, alternating shades. Use a straw or spoon to gently swirl the colors together, creating a galaxy effect.
- Top with whipped cream and drizzle chocolate or caramel sauce over it.
- Sprinkle edible glitter, star-shaped sprinkles, mini marshmallows, and any other fun toppings.
“`