One-Pot Creamy Ground Beef Orzo

Ground Beef Orzo with Tomato Cream Sauce: One-Pot Wonder

⚖️
Difficulty
Easy
⏲️
Prep Time
10

mins

🕒
Cook Time
20

mins

⏱️
Total Time
30

mins

🍽️
Servings
4-6

Growing up in Marrakech, my mother’s kitchen was a symphony of simmering tagines and fragrant spices. It was there I first learned the magic of transforming simple ingredients into deeply flavorful dishes. Now, living in the vibrant heart of New York City, I’ve embraced the fast-paced energy, and it pushed me to create recipes that are both incredibly delicious and astonishingly quick. This ground beef orzo recipe, featuring a luscious tomato cream sauce, is a testament to that fusion – a comforting, elegant meal you can whip up in under 30 minutes. It’s the perfect answer to those weeknight cravings when time is short but the desire for something truly satisfying is high.

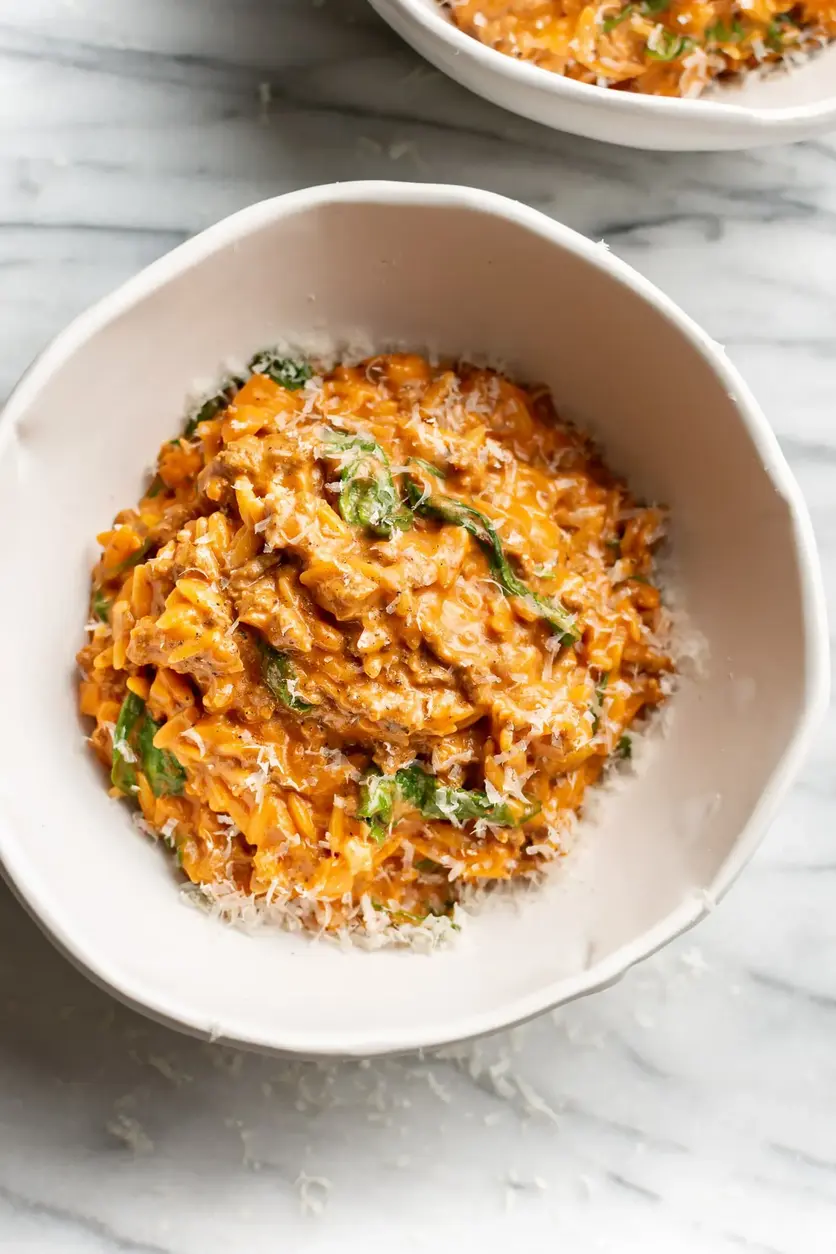
Imagine this: tender morsels of savory ground beef mingling with perfectly al dente orzo pasta, all bathed in a velvety, blush-pink tomato cream sauce. The aroma alone is enough to transport you – a hint of garlic, a whisper of Italian herbs, and the rich depth of beef broth and cream. I’ve added a pinch of crushed red pepper for a subtle warmth, reminiscent of the spices used in my Moroccan heritage, and finished it with fresh spinach that wilts into the sauce, adding a touch of verdant color and freshness. It’s a visually stunning dish that promises a complex, comforting flavor profile in every single bite.

What truly elevates this ground beef orzo recipe is its one-pot simplicity and the thoughtful balance of rich, creamy, and savory notes. I’ve honed this technique through years of culinary training, perfecting the ratio of liquids to pasta and the timing to achieve a flawless result every time. Stay tuned for my special technique that guarantees creamy orzo without the mushiness, a common pitfall in one-pot dishes. And I’ll be sharing a key tip to avoid a mistake that can leave your sauce tasting flat or watery, ensuring your meal is always a triumph.

Why This Ground Beef Orzo with Tomato Cream Sauce Recipe Is the Best

My unique approach to this ground beef orzo tomato cream sauce begins with drawing from my North African roots – embracing bold flavors right from the start. Unlike recipes that simply brown beef and then add everything else, I take a moment to build foundational flavor by cooking the beef without stirring initially, allowing it to develop a beautiful Maillard reaction. This, combined with the sautéing of onions and garlic until truly fragrant, creates a depth that permeates the entire dish. My French culinary training also guides the sauce-making, ensuring a silky smooth and perfectly balanced consistency, which I’ll detail in the steps.

The texture is another hallmark of this easy ground beef orzo dinner. Achieving perfectly cooked orzo in a one-pot meal can be tricky, as pasta can easily become overcooked and mushy. My method ensures each orzo grain is tender yet distinct, absorbing the rich flavors without disintegrating. This is achieved by carefully managing the simmer time and the liquid-to-orzo ratio, a lesson learned from countless hours perfecting sauces and reductions in Parisian kitchens. You’ll get that satisfying bite that is crucial for a truly memorable dish.

This recipe is genuinely foolproof, designed for even the most novice cooks. The one-pot convenience means minimal cleanup, and the straightforward steps allow you to focus on the process rather than complex techniques. I’ve also incorporated techniques that ensure success even if your timing is slightly off, like using spinach to help thicken the sauce and absorb excess moisture. It’s an approachable yet sophisticated meal that proves you don’t need hours to create something truly special, making it ideal for busy weeknights in the city or anywhere.

Ground Beef Orzo Tomato Cream Sauce Ingredients

When I’m crafting this ground beef orzo recipe, I love sourcing my ingredients from the bustling Union Square Greenmarket here in NYC. The vibrant produce and high-quality meats always inspire me! My mother used to say the key to any great dish, whether it’s a simple pasta or an elaborate couscous, lies in the freshness of your ingredients. So, whenever possible, I opt for lean, good-quality ground beef, sweet yellow onions, and fresh garlic. And for that touch of elegance, I always finish with freshly grated Parmesan cheese – it makes all the difference!

Ingredients List

  • 1 pound lean ground beef
  • 1/2 medium yellow onion (chopped)
  • 3-4 cloves garlic (minced)
  • 1/2 teaspoon crushed red pepper flakes (optional, for a little heat)
  • 1/2 teaspoon Italian seasoning
  • 1 cup uncooked orzo pasta
  • 1 (14 ounce) can tomato sauce
  • 3/4 cup beef broth
  • 1 cup heavy/whipping cream
  • 1 teaspoon Worcestershire sauce
  • 1/2 cup freshly grated parmesan cheese, plus more for serving
  • 2 cups (packed) fresh baby spinach
  • Salt and freshly ground black pepper, to taste

Ingredient Spotlight

Ground Beef: I always opt for at least 90% lean ground beef. This ensures you get great flavor without an excessive amount of grease pooling in the pot. Look for bright red, fresh-looking meat at your local butcher or grocery store. If you can’t find lean, don’t worry – you can easily spoon out excess fat after browning.

Orzo Pasta: This small, rice-shaped pasta is key to the dish’s unique texture and quick cooking time. It absorbs flavors beautifully and creates a creamy dish when cooked in liquid. You can find orzo in the pasta aisle of any supermarket. If you cannot find orzo, you could substitute with ditalini or even small shells, though the cooking time might vary slightly.

Heavy Cream: This is what gives the sauce its luxurious, velvety finish and rich flavor. It emulsifies beautifully with the tomato sauce and broth. For the best results, use a good quality heavy cream. If you’re looking for a lighter option, half-and-half can be used, but the sauce will be less rich and might require a slightly longer simmer to thicken.

Original IngredientBest SubstitutionFlavor / Texture Impact
Lean Ground BeefGround turkey or Italian sausageTurkey will be leaner and milder; sausage will add more spice and fat.
Uncooked Orzo PastaDitalini or Acini di Pepe pastaThese small pasta shapes will cook similarly, absorbing liquid well. Adjust cooking time as needed.
Heavy CreamHalf-and-half or full-fat coconut milkHalf-and-half will yield a slightly less rich sauce. Coconut milk will add a subtle sweetness and dairy-free creaminess.
Fresh Baby SpinachKale or Swiss chard (stems removed)Kale and chard will need a few extra minutes to soften. They offer a more robust, slightly earthy flavour.

How to Make Ground Beef Orzo with Tomato Cream Sauce — Step-by-Step

This one-pot wonder comes together incredibly fast, making it a weeknight hero. Just follow these simple steps for a delicious meal in no time.

Step 1: Brown the Beef

Place your soup pot or Dutch oven over medium-high heat. Add the ground beef and let it cook, undisturbed, for about 5-6 minutes until a nice crust forms on the bottom. This initial sear is crucial for developing deep flavor, a trick I picked up in my culinary school days in Paris.

💡 mia’s Pro Tip: Don’t stir the beef for the first few minutes. Allowing it to brown undisturbed creates caramelization, adding much more flavor to the final dish than simply browning while stirring.

Step 2: Sauté Aromatics and Orzo

Add the chopped onion to the pot with the beef. Stir and break up the beef into smaller pieces. Cook for another 5 minutes until the onion is softened. If you didn’t use lean beef, spoon out any excess fat now. Stir in the minced garlic, red pepper flakes (if using), and Italian seasoning. Cook for about 1 minute until fragrant, stirring constantly.

💡 mia’s Pro Tip: Toasting the dry orzo pasta for about a minute with the beef and aromatics like this deepens its nutty flavor and helps it hold its shape better during cooking.

Step 3: Add Liquids and Simmer

Pour in the tomato sauce, beef broth, heavy cream, and Worcestershire sauce. Stir everything together until well combined. Bring the mixture to a gentle simmer, then reduce the heat to medium-low. Let it cook uncovered for 10 minutes, stirring fairly often to prevent the orzo from sticking to the bottom. The sauce should be bubbling gently, not boiling rapidly, to ensure the orzo cooks through without the liquid evaporating too quickly.

⚠️ Common Mistake to Avoid: Boiling the sauce too vigorously can cause the liquid to reduce too quickly before the orzo is cooked, resulting in a dry or undercooked pasta dish. Maintain a gentle simmer!

Step 4: Finish and Thicken

Remove the pot from the heat. Stir in the grated Parmesan cheese and fresh baby spinach. Cover the pot and let it sit for 3-5 minutes. The residual heat will wilt the spinach and allow the sauce to thicken beautifully to your desired consistency. The Parmesan also adds a lovely salty, savory depth.

💡 mia’s Pro Tip: Don’t be tempted to overcook the spinach. A few minutes off the heat is all it needs to wilt into the sauce, maintaining its vibrant green color and fresh taste.

Step 5: Season and Serve

Taste the dish and season generously with salt and freshly ground black pepper as needed. Give it a final stir, and serve immediately. The creamy, rich texture is best enjoyed fresh!

⚠️ Common Mistake to Avoid: Forgetting to season at the end! Even with flavorful ingredients, a final adjustment of salt and pepper is crucial to bring all the flavors together and make them pop.

StepActionDurationKey Visual Cue
1Brown Beef5-6 minutesWell-browned crust on bottom of pot
2Sauté Aromatics & Orzo~6 minutesOnions softened, spices fragrant
3Simmer10 minutesGentle bubbling, sauce thickening slightly
4Finish & Thicken3-5 minutesSpinach wilted, sauce thickened

Serving & Presentation

This ground beef orzo with tomato cream sauce is hearty enough to be a complete meal on its own, but I love dressing it up! For a restaurant-quality presentation, serve it in shallow bowls. I like to garnish it with a sprinkle of extra grated Parmesan cheese, a twist of fresh black pepper, and a few fresh basil leaves if I have them on hand from my small NYC herb garden. My mother would often add a drizzle of her homemade olive oil, a touch of Moroccan flair, and it always elevated the dish.

If you’re looking to round out the meal, a simple green salad with a light vinaigrette is a perfect accompaniment. The freshness of the salad cuts through the richness of the orzo beautifully. On cooler evenings, a side of crusty bread is wonderful for soaking up any lingering sauce, though that’s rarely necessary with this recipe’s perfect consistency. For a beverage, a medium-bodied red wine like a Chianti or a crisp, dry rosé would be delightful. Even a sparkling water with a lemon wedge adds a refreshing touch.

Pairing TypeSuggestionsWhy It Works
Side DishSimple Green Salad with Lemon VinaigretteThe bright, acidic dressing cuts through the creaminess of the orzo.
BreadCrusty Baguette or CiabattaPerfect for soaking up any delicious remaining sauce.
BeverageMedium-bodied Red Wine (e.g., Chianti) or Dry RoséComplements the savory beef and tomato notes without overpowering.
GarnishFresh Basil Leaves, Extra Parmesan, Fresh ParsleyAdds a pop of color, freshness, and extra savory notes.

Make-Ahead, Storage & Reheating

As a busy New Yorker, I often rely on smart meal prep to keep my diet healthy and delicious. This easy ground beef orzo dinner is fantastic for making ahead. I’ll often make a double batch on Sunday afternoon, portioning it into individual containers for quick lunches throughout the week. The flavors meld and deepen overnight, making it even more satisfying.

MethodContainerDurationReheating Tip
RefrigeratorAirtight glass or plastic container3-4 daysReheat gently on the stovetop over low heat, stirring occasionally. Add a splash of broth or water if it seems too thick.
FreezerFreezer-safe container or heavy-duty foil2-3 monthsAllow to thaw in the refrigerator overnight, then reheat on the stovetop as above. Can also be reheated directly from frozen on very low heat, stirring often.
Make-AheadCool completely, store in refrigeratorUp to 2 days in advanceWhen ready to serve, reheat gently on the stove. You may need to add a tablespoon or two of cream or broth to revive the sauciness.

When reheating, I often add a little splash of milk or cream to ensure the sauce stays wonderfully creamy. Microwaving works, but for the best texture, a gentle warming on the stovetop is my preferred method. It ensures the orzo doesn’t become gummy and the sauce is heated evenly throughout. If reheating from frozen, be patient and use low heat to avoid scorching.

Variations & Easy Swaps

VariationKey ChangeBest ForDifficulty Impact
Spicy Moroccan TwistAdd pinch of Ras el Hanout spices with garlicThose who love a bit more complex spice and heat.No change.
Gluten-Free / Dairy-FreeUse GF orzo, dairy-free cream alternative, and nutritional yeast/Parmesan alternativeDietary restrictions or preferences.Minor change in texture/flavor.
Seasonal Vegetable BoostAdd zucchini, bell peppers, or peas in Step 2Utilizing fresh, seasonal produce.No change.

Spicy Moroccan Twist

Channeling my Moroccan heritage, I love adding a whisper of warmth beyond the red pepper flakes. When you add the garlic, stir in about 1/4 teaspoon of Ras el Hanout, a Moroccan spice blend that typically includes cumin, coriander, cinnamon, ginger, and turmeric. It adds an incredible complexity and warmth that beautifully complements the tomato cream sauce. This twist transforms the dish into something truly unique, drawing on the rich spice traditions I grew up with.

Gluten-Free & Dairy-Free Options

Making this ground beef orzo recipe gluten-free is quite simple! Swap the regular orzo for a gluten-free pasta alternative, like brown rice orzo or a GF blend. For a dairy-free version, use full-fat canned coconut milk (shake well before using) instead of heavy cream. You can also use nutritional yeast or a dairy-free Parmesan alternative for that cheesy tang. These substitutions maintain the creamy texture and satisfying flavor without any dairy or gluten!

Seasonal Vegetable Boost

This recipe is wonderfully adaptable. In the spring and summer, I love adding finely diced zucchini or bell peppers alongside the onions in Step 2. They’ll soften and cook down beautifully. For a pop of sweetness and color in late summer, add a handful of fresh or frozen peas during the last few minutes of simmering. This is a fantastic way to incorporate more vegetables and highlight seasonal produce, a practice I embrace from my visits to NYC’s vibrant farmer’s markets.

Can I use a different type of pasta instead of orzo in this ground beef tomato cream sauce recipe?

Absolutely! While orzo’s small, rice-like shape absorbs the sauce beautifully and cooks quickly, you can certainly substitute it with other small pasta shapes like ditalini, acini di pepe, or even small shells. Just be mindful that the cooking time might vary slightly, so keep an eye on the pasta to ensure it’s al dente and not mushy. Always add a little more liquid if it seems too thick before the pasta is done.

How do you prevent the orzo from getting mushy when cooking it in the tomato cream sauce?

Preventing mushy orzo is all about managing the cooking process. Firstly, don’t overcook it! Stick to the recommended simmer time and taste a few grains to check for al dente texture. Secondly, ensure there’s enough liquid for the orzo to absorb but not so much that it becomes soupy. Lastly, stirring periodically during the simmer prevents sticking and ensures even cooking. Removing the pot from direct heat once the orzo is almost done and letting it rest helps it absorb the last bit of liquid for perfect texture.

What can I use as a substitute for heavy cream in this ground beef orzo recipe?

If you’re out of heavy cream or prefer a lighter option, half-and-half is a great substitute; it will make the sauce slightly less rich but still wonderfully creamy. For a dairy-free alternative, full-fat canned coconut milk (the creamy part from the top) works beautifully and adds a subtle sweetness. Evaporated milk can also be used, though it might require a bit more simmering to achieve the desired thickness. Each option will change the final flavor profile slightly, so keep those adjustments in mind.

How long does it take to cook ground beef orzo with tomato cream sauce from start to finish?

This ground beef orzo recipe is designed for speed! From start to finish, it typically takes about 30 minutes. This includes about 10 minutes of prep time for chopping the onion and mincing the garlic, and then around 20 minutes of active cooking time. The one-pot method really streamlines the process, meaning less time spent in the kitchen and more time enjoying a delicious, home-cooked meal even on the busiest weeknights. It’s a true weeknight warrior!

Can I make this one pot ground beef orzo recipe with gluten-free pasta?

Absolutely! To make this one pot ground beef orzo recipe gluten-free, simply swap out the traditional orzo pasta for your favorite gluten-free pasta shape. Many brands now offer gluten-free orzo made from rice, corn, or quinoa blends, or you can use another small gluten-free pasta like ditalini. Keep in mind that gluten-free pastas can sometimes cook a bit faster or require slightly different liquid ratios, so it’s always a good idea to check the pasta package instructions and taste as you go to achieve perfect al dente texture.

Share Your Version!

I truly hope you adore this ground beef orzo recipe as much as I do! It’s a dish that brings comfort, flavor, and speed together in perfect harmony. If you’ve tried it, please consider leaving a star rating and a comment below – your feedback means the world to me and helps other home cooks. I also love seeing your creations! Share a photo on Instagram or Pinterest and tag me @chefrecipes2 so I can admire your culinary artistry! I’m always curious, what’s your go-to spice blend for adding a unique flair to pasta dishes?

From my NYC kitchen to yours — I hope this recipe brings as much warmth to your table as it does to mine. — mia 🧡

📌

Love This Recipe? Save It to Pinterest!

If you enjoyed this Ground Beef Orzo with Tomato Cream Sauce recipe, don’t let it get lost in your browser tabs! 😄 Pin it now so you can find it again anytime — and explore hundreds more tried-and-tested recipes waiting for you on my Pinterest boards.

👉 Follow mia on Pinterest @chefrecipes2

📌 Pin this recipe · 🔁 Re-pin your favorites · 💬 Tag me when you make it — I love seeing your creations!

Print

clock clock iconcutlery cutlery iconflag flag iconfolder folder iconinstagram instagram iconpinterest pinterest iconfacebook facebook iconprint print iconsquares squares iconheart heart iconheart solid heart solid icon

Ground Beef Orzo with Tomato Cream Sauce

  • Author: Chef Mia

Description

This one pot ground beef orzo recipe comes together in just 30 minutes and is a creamy, comforting, and delicious meal for busy weeknights!


Ingredients

Scale
  • 1 pound lean ground beef
  • 1/2 medium onion (chopped)
  • 34 cloves garlic (minced)
  • 1/2 teaspoon crushed red pepper flakes (optional)
  • 1/2 teaspoon Italian seasoning
  • 1 cup uncooked orzo pasta
  • 1 (14 ounce) can tomato sauce
  • 3/4 cup beef broth
  • 1 cup heavy/whipping cream
  • 1 teaspoon Worcestershire sauce
  • 1/2 cup freshly grated parmesan cheese
  • 2 cups (packed) fresh baby spinach
  • Salt & pepper (to taste)

Instructions

  1. Add the ground beef to a soup pot/Dutch oven and break it up a little bit with your spoon. Let it cook, without stirring, over medium-high heat for 5-6 minutes.
  2. Add the onion to the pot and stir/break the beef up into small pieces. Let it cook for another 5 minutes or so. If there's a lot of excess fat (like if you didn't use lean beef), spoon some of it out. Otherwise, leave it in the pot.
  3. Stir in the garlic, red pepper flakes, Italian seasoning, and orzo. Cook for about a minute.
  4. Stir in the tomato sauce, beef broth, cream, and Worcestershire sauce. Once it starts to bubble, continue cooking for 10 minutes, uncovered, stirring fairly often (so the orzo doesn't stick to the bottom of the pot). You will likely need to turn the heat down a bit (to medium or even medium-low). It should gently bubble vs. boil (you don't want the liquid to reduce too much before the pasta has cooked).
  5. Take the pot off the heat, stir in the parmesan and spinach, and cover the pot for about 3-5 minutes or until it has thickened up to your liking. Season with salt & pepper as needed and serve immediately. See more troubleshooting tips in the blog post and notes below.


Nutrition

  • Calories: 595 kcal
  • Sugar: 6 g
  • Fat: 32 g
  • Carbohydrates: 39 g
  • Protein: 38 g


Ground Beef Orzo with Tomato Cream Sauce

k">

Tried This Recipe? Leave a Comment!

Did you make this recipe? I’d love to hear how it turned out! Please leave a comment and a rating below. Your feedback helps other home cooks and supports cheerychop.com!

For more delicious inspiration, follow me on Pinterest!
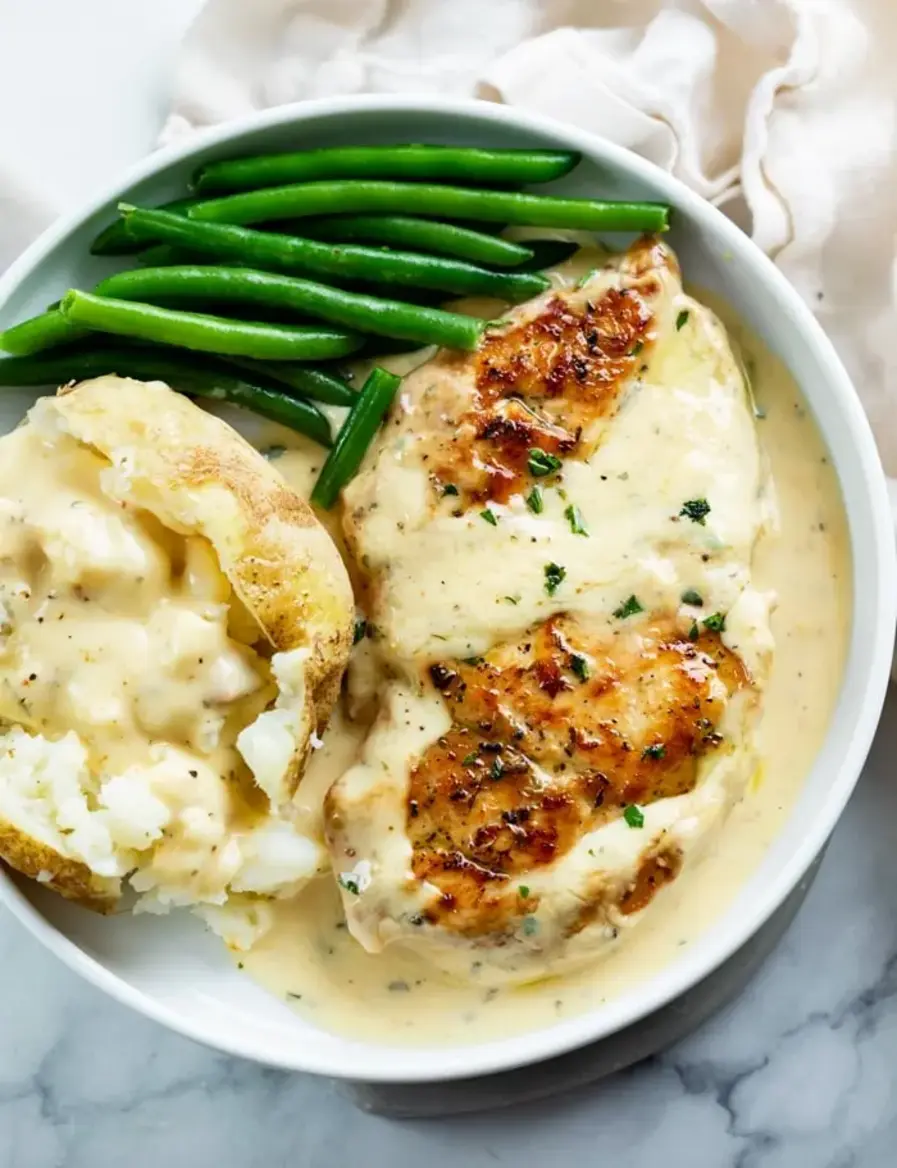
Easy Creamy Ranch Chicken Skillet Recipe

Creamy Ranch Chicken: Your New Go-To Easy One-Pan Dinner Recipe

⚖️
Difficulty
Easy
⏲️
Prep Time
10
🕒
Cook Time
25
⏱️
Total Time
35
🍽️
Servings
4

When I first moved to New York City, I was overwhelmed by the sheer pace of life. The constant hustle means finding time for a home-cooked meal can feel like a luxury. It reminded me so much of my mother’s kitchen in Morocco, where flavors were bold and meals were made with love, but always efficiently. This creamy ranch chicken recipe was born out of that very need – a dish that delivers incredible flavor and comfort without demanding hours in the kitchen. It’s the perfect example of how a few simple, quality ingredients can be transformed into something truly special, much like the way my Parisian culinary training taught me to elevate humble ingredients into restaurant-worthy dishes.

Imagine tender, perfectly seared chicken bathed in a rich, velvety sauce infused with the unmistakable tang of ranch seasoning. The aroma alone is enough to make your stomach rumble – a comforting blend of savory herbs, garlic, and a hint of creamy goodness that promises pure satisfaction. The chicken itself is wonderfully moist, having simmered just long enough to soak up all the deliciousness of the sauce. It’s visually appealing too, with a beautiful golden-brown sear on the chicken and a creamy sauce that clings to every piece. It’s the kind of dish that instantly makes any weeknight feel like a special occasion.

What sets this easy ranch chicken apart is my unique approach to building layers of flavor in just one pan. I’ll share a few chef secrets, like the importance of proper searing and how to achieve that incredible sauce texture – a technique I picked up during my pastry training in Paris. I’ll also guide you through a common pitfall that can lead to a watery sauce, ensuring your creamy ranch chicken is perfect every single time. This recipe is designed to be both impressive and incredibly accessible, proving that you don’t need to be a seasoned chef to create magic in your kitchen.

Why This Creamy Ranch Chicken Recipe Is the Best

My culinary journey, from the bustling souks of Marrakech to the elegant kitchens of Paris and now navigating the vibrant food scene of NYC, has taught me the art of balancing bold flavors with sophisticated techniques. This creamy ranch chicken recipe is a culmination of that experience, focusing on an one pan ranch chicken approach that simplifies the cooking process without sacrificing taste. It’s a recipe I’ve refined to ensure maximum flavor with minimum fuss, making it a true gem for any home cook looking for a reliable and delicious dinner solution.

The secret to the unparalleled flavor in this recipe lies in the intentional layering of ingredients and a precise cooking method. Instead of relying solely on a packet mix for flavor, I build upon its foundation with fresh aromatics and perfectly balanced dairy. My technique involves searing the chicken to build a crucial flavor base, a practice I learned early on in my French culinary training. This step creates deeply delicious browned bits (fond) in the pan, which then dissolve into the sauce, adding an depth of flavor you just can’t get otherwise.

This keto ranch chicken recipe is designed for busy weeknights, making it incredibly approachable for cooks of all levels. The one-pan method dramatically reduces cleanup, and the straightforward steps ensure success even if you’re new to cooking. I’ve tested this recipe countless times, making adjustments to ensure the sauce achieves the perfect creamy consistency without curdling or becoming too thin. It’s a foolproof way to get a satisfying, restaurant-quality meal on the table in under 40 minutes.

Creamy Ranch Chicken Recipe Ingredients

When I’m developing recipes in my NYC apartment kitchen, I always think about what’s easily available at my local Union Square Greenmarket or even the corner grocery store. For this recipe, freshness and quality are key, simple ingredients that sing together. Think of the spices I grew up with in my mother’s kitchen in Morocco – potent and aromatic – and how they can complement the familiar flavors of ranch for a universally loved dish.

Ingredients List

  • 2 large boneless/skinless chicken breasts
  • 2 teaspoons Italian seasoning
  • Salt and freshly ground black pepper, to taste
  • 2 tablespoons butter, melted
  • 1–2 tablespoons olive oil
  • 10.5 oz can cream of chicken soup
  • 1½ cups milk (whole milk recommended for creaminess)
  • 1 cup sour cream, at room temperature
  • ½ teaspoon onion powder
  • 1 oz packet Ranch seasoning mix

Ingredient Spotlight

Chicken Breasts: For this recipe, I prefer using boneless, skinless chicken breasts because they cook quickly and evenly. Look for chicken that is plump and pale pink. If you can find them at your local Butcher shop, even better! They often have higher quality and superior taste. For a keto version, ensure your chicken is free-range and organic if possible.

Sour Cream: The sour cream is crucial for achieving that signature creamy texture and tangy flavor in the sauce. Make sure it’s full-fat and at room temperature before adding it to the skillet; this helps prevent it from curdling into the hot liquid. If you can’t find full-fat, low-fat will work, but the sauce might be slightly less rich.

Ranch Seasoning Mix: This is the heart of our flavor profile. While I love to use it, I always check that it’s a good quality brand to ensure the herbs and spices are vibrant. You can adjust the amount based on your preference for ranch flavor intensity. For a truly scratch version, you could omit the packet and build your own blend of dried dill, parsley, garlic powder, onion powder, and a pinch of white pepper, but the packet is a fantastic shortcut!

Original IngredientBest SubstitutionFlavor / Texture Impact
Boneless, Skinless Chicken BreastsChicken Thighs (boneless, skinless)Thighs will add a richer flavor and are more forgiving if slightly overcooked, but will increase cook time slightly.
Sour CreamFull-fat Greek YogurtGreek yogurt adds a tangier flavor and slightly thicker texture, very similar results for a keto version.
MilkHeavy Cream or Half-and-HalfWill result in an even richer, thicker sauce. Use less liquid if it becomes too thick.

How to Make Creamy Ranch Chicken — Step-by-Step

Let’s get cooking! This recipe is designed for ease and maximum flavor, using just one pan to create a complete meal.

Step 1: Prepare the Chicken

Slice the chicken breasts into 2–3 thinner pieces, aiming for about ½ inch thickness. If your chicken breasts are particularly thick, you can gently pound them with a meat tenderizer or the flat side of a heavy knife between two pieces of parchment paper until they are an even thickness. This helps them cook uniformly and stay tender. Pat the chicken completely dry with paper towels – this is key for a good sear!

💡 mia’s Pro Tip: Dry chicken is crucial for achieving a beautiful golden-brown crust. Moisture steams the chicken instead of searing it, so don’t skip this step!

Step 2: Season and Butter

Sprinkle both sides of each chicken piece generously with Italian seasoning, salt, and freshly ground black pepper. Then, brush one side of each piece with melted butter. Make sure the butter isn’t too hot, or it might start cooking the chicken prematurely.

Step 3: Sear the Chicken

Heat 1–2 tablespoons of olive oil in a large skillet (cast iron or heavy-bottomed stainless steel works best) over medium-high heat until shimmering. Carefully add the chicken pieces, butter-side down, in a single layer, working in batches if necessary to avoid overcrowding the pan. Sear for 4–5 minutes per side, until a beautiful golden-brown crust has developed. Remove the seared chicken from the skillet and set aside on a plate.

⚠️ Common Mistake to Avoid: Overcrowding the pan. This lowers the temperature of the skillet, leading to steamed rather than seared chicken. Do your best to give the chicken plenty of space to develop that gorgeous crust.

Step 4: Make the Sauce

Reduce the heat to medium. Add the cream of chicken soup, milk, sour cream (make sure it’s at room temperature!), onion powder, and Ranch seasoning mix to the same skillet. Stir continuously until everything is well combined and smooth. Allow the sauce to bubble gently and reduce for about 5 minutes, stirring occasionally, until it thickens slightly.

Step 5: Combine and Simmer

Return the seared chicken pieces to the skillet, nesting them into the creamy sauce. Spoon some of the sauce over the top of each piece. Cover the skillet partially (leaving a small gap for steam to escape) and let the chicken simmer and heat through, about 8–10 minutes, or until the chicken is cooked through (internal temperature reaches 165°F or 74°C). The sauce will continue to thicken and flavor the chicken beautifully.

Step 6: Serve and Enjoy

This is the moment you’ve been waiting for! Serve the creamy ranch chicken immediately. The sauce is a star on its own – perfect for spooning over baked potatoes, rice, pasta, or your favorite steamed vegetables. It’s truly a versatile dish that you can adapt to whatever you have on hand.

StepActionDurationKey Visual Cue
1Prepare & Dry Chicken5 minsEven ½-inch thickness, thoroughly patted dry
2Season & Butter Chicken2 minsEvenly coated, butter brushed on one side
3Sear Chicken8-10 mins (4-5 per side)Golden-brown crust on both sides
4Make Sauce5-7 minsSmooth, slightly thickened sauce
5Combine & Simmer10-12 minsChicken cooked through, sauce thickened

Serving & Presentation

For a truly elevated presentation, I love to plate this creamy ranch chicken with a sprinkle of fresh parsley or chives. It adds a pop of color and a touch of freshness that contrasts beautifully with the rich sauce. When I’m serving guests, I often present it in a cast-iron skillet, straight from the oven, for a rustic New York charm that’s always a hit. The aroma alone will have everyone at the table eagerly anticipating their first bite.

Pairing this dish is a joy; the possibilities are endless! Think of hearty, comforting sides that can stand up to the rich sauce. My own mother would often serve similar dishes with couscous in Morocco, so I sometimes lean into that comfort with a bed of fluffy rice or quinoa. For a lighter, yet equally satisfying approach, a generous serving of roasted Brussels sprouts or asparagus is always a winner. And that extra sauce? It’s pure gold for soaking up with crusty bread, much like we’d do with tagine in my childhood home.

Pairing TypeSuggestionsWhy It Works
Side DishBaked Potatoes, Roasted Root Vegetables, Steamed Broccoli, Garlic Mashed Potatoes, Wild Rice PilafThe starchiness and earthiness complement the creamy sauce and savory chicken perfectly.
Sauce / DipMashed Potatoes, Crusty Bread, PastaThe sauce is meant to be generously spooned over these bases – it’s the star!
BeverageCrisp White Wine (Sauvignon Blanc), Light-bodied Red Wine (Pinot Noir), Sparkling Water with LemonThe acidity cuts through the richness of the sauce, while water offers a clean finish.
GarnishFresh Parsley, Fresh Chives, Black Pepper FlecksAdds a touch of freshness, color, and visual appeal.

Make-Ahead, Storage & Reheating

Meal prepping is a lifesaver, especially during busy New York weeks! This creamy ranch chicken is fantastic for making ahead. I often prepare the sauce and cook the chicken separately, then combine them before reheating, or simply store the whole dish. It’s a dinner that holds up beautifully, ensuring a delicious meal is always ready when you need it.

MethodContainerDurationReheating Tip
RefrigeratorAirtight container3–4 daysGently reheat in a skillet over low heat, adding a splash of milk or broth if the sauce has thickened too much. You can also reheat individual portions in the microwave.
FreezerFreezer-safe airtight container or heavy-duty foil2–3 monthsThaw overnight in the refrigerator, then reheat as above. For best results, reheat slowly to prevent the sauce from separating.
Make-AheadSeparate components in airtight containers2 days in advanceCook chicken and make sauce separately. Store sauce and chicken in the fridge. Combine and reheat gently just before serving for best texture.

When reheating, I always recommend a gentle approach. Overheating can sometimes cause the sauce to break or become oily, especially if dairy-rich. Using low heat on the stovetop and stirring frequently is my preferred method. If the sauce seems a bit too thick after refrigerating, don’t hesitate to add a tablespoon or two of milk, chicken broth, or even water to achieve that perfect creamy consistency again. This ensures every bite is as delicious as the first.

Variations & Easy Swaps

VariationKey ChangeBest ForDifficulty Impact
Spicy Ranch ChickenAdd ¼ teaspoon cayenne pepper or a pinch of red pepper flakes to the sauceThose who love a little heatMinimal increase
Lemon Herb ChickenAdd zest and juice of ½ lemon to the sauce, and use fresh herbs like dill and parsleyA brighter, fresher flavor profileMinimal increase
Bacon Ranch ChickenCrumble cooked bacon over the finished dishAdding a savory, smoky crunchMinimal increase

Keto and Low-Carb Creamy Ranch Chicken

For my friends following a keto ranch chicken lifestyle, this recipe is a dream! The key is to ensure all your ingredients are low-carb. While the recipe as is is fairly keto-friendly, a few swaps make it perfect. Use full-fat sour cream or full-fat Greek yogurt and opt for a low-carb milk alternative if needed, like unsweetened almond or coconut milk. Serve it over cauliflower rice or a generous portion of steamed green vegetables instead of potatoes or pasta.

Dairy-Free Creamy Ranch Chicken

Making this recipe dairy-free is surprisingly simple and still yields a delicious result. Swap the milk for unsweetened cashew or oat milk, and use a dairy-free sour cream alternative (often coconut or cashew-based) or plain unsweetened dairy-free yogurt. For the cream of chicken soup, look for dairy-free versions – there are many excellent ones available now. The flavor will be slightly different, but still wonderfully creamy and ranch-forward.

One-Skillet Creamy Chicken with Added Veggies

Boost the nutrition and flavor by adding vegetables directly to the skillet! Toward the end of simmering (Step 5), stir in some fresh or frozen vegetables like broccoli florets, peas, corn (if not strictly keto), or sliced mushrooms. They will steam and cook in the delicious sauce, creating a more complete meal in one pan. This is a trick I learned to maximize flavor and minimize dishes, very much in the spirit of my Moroccan heritage.

How do you make creamy ranch chicken from scratch?

To make creamy ranch chicken from scratch, you’ll essentially build the sauce yourself. Start by searing your chicken. Then, in the same pan, sauté aromatics like garlic and onion (if not using powder). Whisk together chicken broth, heavy cream, a touch of Dijon mustard for tang, and your ranch seasonings (dried dill, parsley, garlic powder, onion powder, salt, pepper). Simmer until thickened. My recipe offers a shortcut using cream of chicken soup and a ranch packet, which delivers fantastic flavor and creamy texture with less effort, but always feel free to adapt!

Can I use Greek yogurt instead of sour cream in creamy ranch chicken?

Yes, absolutely! Full-fat Greek yogurt is an excellent substitute for sour cream in this creamy ranch chicken recipe. It provides a similar tangy flavor and creamy texture. For the best results and to prevent curdling, I recommend using full-fat Greek yogurt and ensuring it’s at room temperature before adding it to the warm sauce. It works particularly well if you’re aiming for a slightly healthier or keto-friendly version of the dish.

What is the best way to cook creamy ranch chicken in a slow cooker?

For slow cooker creamy ranch chicken, I recommend searing the chicken breasts first for better flavor and a nicer texture, though it’s not strictly necessary if you’re short on time. Place the seared chicken in the slow cooker. In a separate bowl, whisk together some chicken broth (about 1 cup), the ranch seasoning packet, and optionally a can of cream of chicken soup (or a dairy-free alternative). Pour this mixture over the chicken. Cook on low for 3–4 hours or high for 2–3. About 30 minutes before serving, stir in sour cream or Greek yogurt (and heat through gently, don’t boil).

How long should I bake creamy ranch chicken at 375°F?

If you’re baking creamy ranch chicken, preheating your oven to 375°F (190°C) is a great approach, especially if you’ve already prepared the sauce. Place the seared chicken into a baking dish, spoon the sauce over it, and cover tightly with foil. Bake for about 20–25 minutes, or until the chicken is cooked through (internal temperature reaching 165°F or 74°C). Remove the foil for the last 5 minutes if you wish to lightly brown the top, but be careful not to scorch the sauce.

Can I add vegetables to this creamy ranch chicken recipe?

Absolutely! Adding vegetables is a fantastic way to make this creamy ranch chicken an even more complete meal. I often recommend stirring in vegetables like broccoli florets, peas, green beans, carrots, or sliced mushrooms during the last 10-15 minutes of simmering (Step 5). They will cook right in the delicious sauce, absorbing all the flavors. Ensure any sturdy vegetables are cut into bite-sized pieces so they cook evenly with the chicken.

What is the best way to serve this easy ranch chicken?

The beauty of this easy ranch chicken is its versatility in serving! My favorite way is to let the creamy sauce shine, spooning it generously over fluffy mashed potatoes or a bed of rice. It’s also incredible over baked potatoes, pasta, or even zucchini noodles for a low-carb option. For a lighter meal, serve it alongside a fresh green salad or steamed asparagus. Don’t forget a sprinkle of fresh parsley or chives for a nice visual and fresh finish!

Can this creamy ranch chicken recipe be made keto-friendly?

Yes, this creamy ranch chicken recipe can easily be adapted to be keto-friendly! The chicken itself is naturally low in carbs. The main adjustments involve the sauce components. Ensure you use full-fat sour cream or Greek yogurt, and monitor any milk used (unsweetened almond milk or coconut milk are good keto choices). Serve the chicken and sauce over cauliflower rice, zucchini noodles, or a generous portion of steamed low-carb vegetables, rather than traditional potatoes or pasta, to keep the carbohydrate count low.

What is the best pan to use for this one pan ranch chicken?

For this one pan ranch chicken recipe, a heavy-bottomed skillet is ideal. I personally love using a cast-iron skillet because it heats evenly and retains heat beautifully, which is essential for achieving that perfect sear on the chicken. A good quality stainless steel skillet will also work wonderfully. The key is that the pan should have enough surface area to sear the chicken without overcrowding, and it should be oven-safe if you choose to finish it in the oven for extra browning.

Share Your Version!

I truly hope you adore this creamy ranch chicken recipe as much as I do! It’s a dish that brings comfort and smiles to my table here in New York, and I can’t wait for it to do the same for yours. Please, leave a star rating and share your thoughts in the comments below – your feedback means the world to me and helps others discover this gem. I’d also be thrilled if you’d share a photo of your culinary creation on Instagram or Pinterest and tag me @exorecipe!

From my NYC kitchen to yours — I hope this recipe brings as much warmth to your table as it does to mine. — mia 🧡

📌

Love This Recipe? Save It to Pinterest!

If you enjoyed this Creamy Ranch Chicken recipe, don’t let it get lost in your browser tabs! 😄 Pin it now so you can find it again anytime — and explore hundreds more tried-and-tested recipes waiting for you on my Pinterest boards.

👉 Follow mia on Pinterest @chefrecipes2

📌 Pin this recipe · 🔁 Re-pin your favorites · 💬 Tag me when you make it — I love seeing your creations!

Print

clock clock iconcutlery cutlery iconflag flag iconfolder folder iconinstagram instagram iconpinterest pinterest iconfacebook facebook iconprint print iconsquares squares iconheart heart iconheart solid heart solid icon

Creamy Ranch Chicken

  • Author: Chef Mia

Description

This Ranch Chicken recipe is an easy skillet meal with a delicious cream sauce and zesty Ranch seasoning. Serve it with a side of vegetables and warm baked potatoes!


Ingredients

Scale
  • 2 large boneless/skinless chicken breast
  • 2 teaspoons Italian seasoning
  • Salt/Pepper
  • 2 tablespoons butter (melted)
  • 12 tablespoons olive oil
  • 10.5 oz. cream of chicken soup
  • 1 ½ cups milk
  • 1 cup sour cream (at room temp)
  • ½ teaspoon onion powder
  • 1 oz. packet Ranch seasoning mix

Instructions

  1. Slice the chicken into 2-3 thinner slices. Pound with a meat tenderizer if needed, the chicken will plump up more when cooked. Aim for ½ inch thick slices.
  2. Pat the chicken completely dry and sprinkle each side with Italian seasoning and salt/pepper. Brush one side of each piece with melted butter, make sure the butter isnt too hot.
  3. Heat olive oil in a large pan over medium-high heat. Sear the chicken in batches for 4-5 minutes per side, until a golden brown crust has developed. Remove and set aside.
  4. Add the sauce ingredients to the same skillet over medium heat. Stir until combined. Let it bubble gently and reduce for 5 minutes. Add the chicken and spoon the sauce on top.
  5. Cover the skillet partially and let the chicken heat through and absorb the flavors from the sauce, about 10 minutes.
  6. Optional: Serve with baked potatoes and spoon the sauce over each potato (it is so good that way)!


Nutrition

  • Calories: 469 kcal
  • Sugar: 7 g
  • Fat: 31 g
  • Carbohydrates: 17 g
  • Protein: 30 g


Creamy Ranch Chicken

High-Protein Honey Garlic Shrimp – An Amazing Dinner

High-Protein Honey Garlic Shrimp: An Amazing Ultimate Recipe – Quick, Sweet & Savory Delight

⚖️
Difficulty
Easy
⏲️
Prep Time
10 mins
🕒
Cook Time
10 mins
⏱️
Total Time
20 mins
🍽️
Servings
4

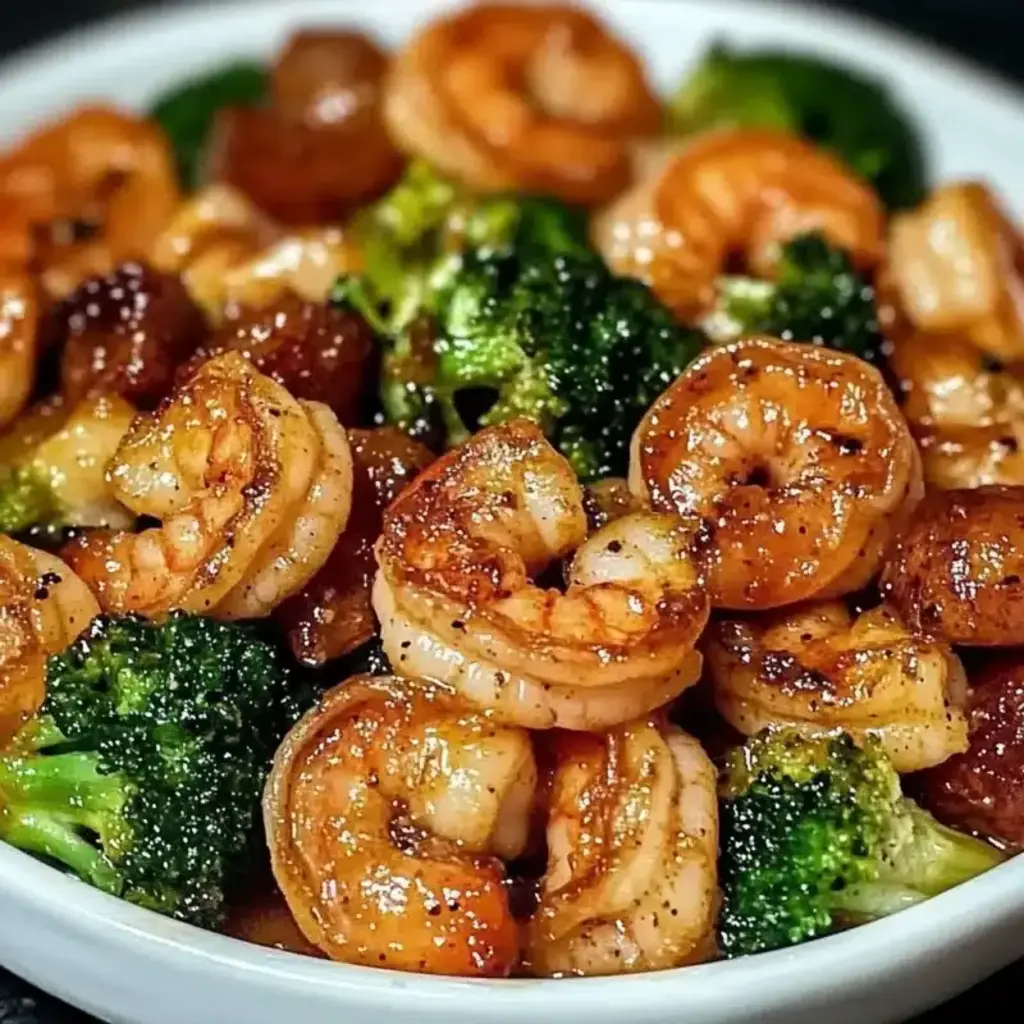
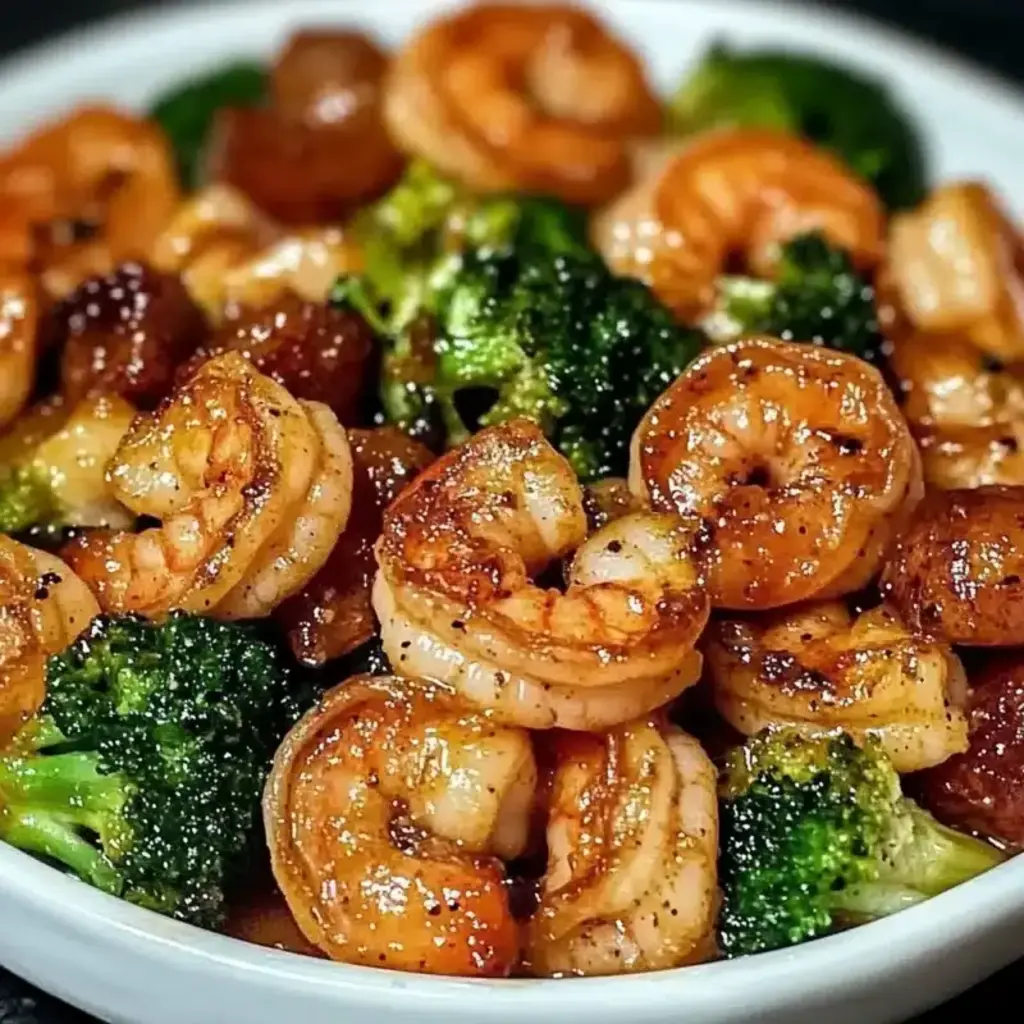
Oh, the smells! As soon as I whisk together the honey, garlic, and soy sauce, I’m transported back to my mother’s kitchen in Marrakech, where the air was always thick with the aroma of sweet spices and savory marinades. Fast forward to my life here in New York City, and I’ve found that same comforting blend of sweet and savory can be achieved with this incredibly quick High-Protein Honey Garlic Shrimp recipe. It’s a dish that sings with flavor but is so straightforward, it feels like a weeknight miracle. This isn’t just any seafood dinner; it’s an elegantly simple yet profoundly satisfying meal that heroes lean protein without sacrificing taste. If you’re searching for an easy shrimp recipe that’s both healthy and bursting with flavor, you’ve landed in the right place!

Imagine plump, juicy shrimp coated in a glossy, glistening sauce that’s the perfect marriage of sweet honey and pungent garlic, with a subtle umami depth from soy sauce. The aroma alone is enough to make your stomach rumble – a tantalizing mix of caramelized sugar, aromatic garlic, and the fresh ocean scent of perfectly cooked shrimp. As you bite into a piece, there’s that delightful chew from the shrimp, followed by the burst of flavor from the sauce. It’s this balance of simple, fresh ingredients contributing to a complex flavor profile that makes this dish so special. It reminds me of the careful yet simple preparations I learned in culinary school in Paris, where the focus was always on letting quality ingredients shine.

What I love most about this recipe is its adaptability and the sheer speed at which it comes together. It’s the kind of meal that proves delicious, healthy eating doesn’t need to be complicated or time-consuming. I’ve fine-tuned this version to ensure the shrimp stay tender and perfectly cooked, and the sauce reaches a beautiful glaze without any fuss. I’ll be sharing a key pro-tip to achieve that restaurant-quality finish, and I’ll also highlight a common pitfall many home cooks encounter. Get ready to add a new favorite to your go-to repertoire for a fantastic high protein seafood dinner!

Why This High-Protein Honey Garlic Shrimp Recipe Is the Best

The secret to this recipe’s irresistible flavor lies in the simplicity of the sauce: a perfect harmony of sweet, savory, and aromatic notes. My background, blending traditional North African spices with classic French sauce techniques, taught me the importance of balance. Here, the raw, pungent garlic is mellowed by the sweetness of honey and the salty depth of soy sauce, creating a glaze that clings beautifully. It’s a testament to how a few quality ingredients, treated with care, can create something truly magical. My NYC friends always rave about how this sauce tastes so complex, yet takes mere minutes to prepare.

Achieving that perfect shrimp texture – tender, succulent, and never rubbery – is all about timing and temperature, skills honed during my intensive pastry training in Paris. We’ll ensure the skillet is hot enough to sear the shrimp quickly, creating a beautiful exterior, but then we lower the heat to gently cook them through in the luscious sauce. This controlled cooking process prevents overcooking, which is the main culprit behind tough shrimp. Following these steps ensures each bite is a delightful experience, just as a chef would strive for.

Beyond the restaurant-quality taste and texture, this high-protein honey garlic shrimp recipe is incredibly accessible. It’s designed for busy weeknights and novice cooks alike. The ingredients are readily available in any US grocery store, and the instructions are clear and concise. You get a sophisticated-tasting meal on the table in under 30 minutes, proving that a healthy shrimp recipe can be both effortless and impressive. This is the kind of easy shrimp recipe that builds confidence in the kitchen.

High-Protein Honey Garlic Shrimp Ingredients

From my days sourcing ingredients at the Union Square Greenmarket to navigating the bustling aisles of Fairway, I’ve learned that the best meals start with the best ingredients. This recipe relies on simple, fresh components that come together beautifully. The key is good quality shrimp and a balanced sauce that I’ve perfected over years of cooking.

Ingredients List

  • 1 pound large shrimp, peeled and deveined
  • 1/4 cup honey
  • 4 cloves garlic, minced
  • 2 tablespoons soy sauce
  • 1 tablespoon olive oil
  • 1 teaspoon cornstarch (optional, for thickening)
  • Salt and pepper to taste
  • 2 green onions, sliced (for garnish)
  • Sesame seeds (for garnish, optional)

Ingredient Spotlight

Shrimp: For this recipe, I like to use large shrimp, about 21-25 count per pound. When shopping in the US, look for “wild-caught” if possible, as they tend to have a better flavor and texture. If you can only find “farmed,” that’s perfectly fine too! Ensure they are pink and firm, with a fresh, oceanic smell. Frozen shrimp are often flash-frozen at peak freshness and work wonderfully; just make sure to thaw them completely before cooking.

Honey: This is essential for both sweetness and caramelization. While any honey will work, a mild, floral variety like clover or orange blossom honey complements the shrimp without overpowering them. If you can find local honey from a New York apiary, even better! It adds a subtle, distinct regional flavor.

Garlic: Fresh garlic is non-negotiable here; minced or finely grated, it forms the aromatic backbone of the sauce. Avoid pre-minced garlic from a jar if you can, as it often lacks the vibrant punch of fresh cloves. The pungency will mellow as it cooks, becoming beautifully fragrant and sweet.

Original IngredientBest SubstitutionFlavor / Texture Impact
HoneyMaple Syrup or Agave NectarMaple syrup will add a subtle caramel note and a slightly different sweetness. Agave will be more neutral.
Soy SauceTamari (for gluten-free) or Coconut AminosTamari offers a deeper, richer umami and is gluten-free. Coconut aminos provide a slightly sweeter, less salty profile.
Olive OilAvocado Oil or Grapeseed OilThese neutral oils have a higher smoke point and won’t impart their own flavor, ensuring the honey garlic notes shine.

How to Make High-Protein Honey Garlic Shrimp — Step-by-Step

This recipe is designed for speed and ease, ensuring a delicious result every time. Follow these simple steps for perfectly glazed shrimp.

Step 1: Prep the Shrimp

Begin by rinsing your pound of large shrimp under cool running water. Pat them thoroughly dry with paper towels. This step is crucial for ensuring the shrimp sear properly rather than steam, and it helps the sauce adhere better. Don’t skip it!

💡 mia’s Pro Tip: Ensuring the shrimp are completely dry allows for a better Maillard reaction, giving them a slightly golden crispness before they are coated in sauce. It’s a small step with a big impact on texture!

Step 2: Mix the Sauce

In a medium bowl, whisk together the 1/4 cup honey, 4 cloves of minced garlic, and 2 tablespoons of soy sauce. If you prefer a thicker, glaze-like sauce that coats the shrimp beautifully, stir in 1 teaspoon of cornstarch until fully dissolved. This makes a world of difference for that restaurant-quality sheen!

Step 3: Sear the Shrimp

Heat 1 tablespoon of olive oil in a large skillet over medium-high heat until shimmering. Carefully add the dried shrimp in a single layer, making sure not to overcrowd the pan. Work in batches if necessary to achieve this.

⚠️ Common Mistake to Avoid: Overcrowding the pan will cause the shrimp to steam instead of sear, resulting in a less desirable texture and flavor. Cook in batches if your skillet isn’t large enough.

Step 4: Season and Cook

Quickly season the shrimp with salt and pepper to taste. Cook for just 2-3 minutes on one side, until they begin to turn pink and opaque. You want them to be about halfway cooked at this point.

Step 5: Add the Sauce

Pour the prepared honey garlic mixture over the shrimp in the skillet. Toss everything gently to ensure that every single shrimp is evenly coated in the luscious sauce. The aroma starts to intensify beautifully here!

Step 6: Glaze and Finish

Reduce the heat to medium-low. Let the shrimp simmer and coat in the sauce for an additional 3-5 minutes. Stir occasionally. The sauce should thicken into a beautiful, sticky glaze, and the shrimp will finish cooking through. If you used cornstarch, you’ll see it thicken nicely.

💡 mia’s Pro Tip: Watch the shrimp closely during this stage! Overcooked shrimp turn rubbery very quickly. They are done when they are just opaque and curled into a ‘C’ shape. A tight ‘O’ means they’re already past their prime.

Step 7: Garnish and Serve

Remove the skillet from the heat. Garnish generously with freshly sliced green onions for a pop of freshness and color. If you like, sprinkle with sesame seeds for an extra layer of texture and nutty flavor. Serve immediately while hot!

StepActionDurationKey Visual Cue
1Prep ShrimpN/ADry and clean
2Mix SauceN/ASmooth consistency
3Sear Shrimp2-3 minsStarting to turn pink
4SeasonInstantEvenly distributed
5Add SauceToss to coatShrimp coated
6Glaze & Finish3-5 minsSauce thickened, shrimp cooked
7Garnish & ServeInstantFreshly garnished, hot

Serving & Presentation

This high-protein honey garlic shrimp is fantastic served immediately, with its sauce still glistening. Plating it beautifully enhances the dining experience. I love serving this in a shallow bowl or on a plate, letting the vibrant colors of the green onions and the glossy sauce be the stars. It looks especially appealing against a bed of fluffy basmati rice, which I often pick up from Kalustyan’s on 28th Street, a true NYC gem. My French training also taught me the art of simple elegance, so a sprinkle of black sesame seeds adds a sophisticated visual contrast to the orange-pink shrimp.

Pairing TypeSuggestionsWhy It Works
Side DishSteamed Jasmine or Basmati RiceThe perfect neutral canvas to soak up the delicious honey garlic sauce.
Side DishRoasted Broccoli or AsparagusAdds a fresh, slightly bitter contrast and welcome nutrients to balance the sweetness.
BeverageDry Riesling or a light LagerA crisp white wine or a refreshing beer cuts through the richness of the sauce.
GarnishToasted Sesame Seeds & Extra Green OnionsAdds texture, nutty flavor, and a fresh visual appeal.

Make-Ahead, Storage & Reheating

As a busy New Yorker, I know the value of good meal prep! This honey garlic shrimp is best enjoyed fresh, but leftovers can be stored and reheated. It’s a fantastic option to prepare ahead for lunches or quick dinners. I often make a double batch on Sunday to have a healthy, high-protein meal ready to go for busy weekdays.

MethodContainerDurationReheating Tip
RefrigeratorAirtight container3-4 daysGentle reheating on stove or in microwave. Be careful not to overcook.
FreezerFreezer-safe bag/container1-2 monthsThaw in refrigerator overnight, then reheat gently as above. Texture may be slightly softer.
Make-AheadStore cooked shrimp and sauce separately, or as a whole dish.Cook up to 2 days in advance.If storing separately, combine and reheat gently before serving.

When reheating, I find the stovetop offers the best control. Place the leftover shrimp and sauce in a non-stick skillet over low heat, adding a teaspoon of water or a splash of soy sauce if needed, and stir gently until just warmed through. This helps to revive the glaze and keeps the shrimp from drying out. For microwave reheating, use low power and short intervals, stirring in between. The goal is to warm them without cooking them further, which can lead to a tough texture.

Variations & Easy Swaps

This recipe is a fantastic base, and I love how easily it can be adapted to suit different tastes and dietary needs. Drawing inspiration from my travels and my chef’s curiosity, here are a few variations that have become favorites in my NYC kitchen, and some simple swaps you can make!

VariationKey ChangeBest ForDifficulty Impact
Spicy Honey Garlic ShrimpAdd 1/2 tsp red pepper flakes or a dash of Sriracha to the sauce.Those who love a little heat.No significant change; requires adding one ingredient.
Gluten-FreeUse Tamari instead of Soy Sauce. Ensure cornstarch is gluten-free certified if using.Those with gluten sensitivities.Direct ingredient swap.
Ginger SesameAdd 1 tsp fresh grated ginger to the sauce & top with extra sesame seeds.Adding more complex Asian flavors.Requires one additional ingredient.

Spicy Honey Garlic Shrimp

To add a kick, I simply whisk in about half a teaspoon of red pepper flakes along with the honey and garlic. For an even deeper, slightly vinegary heat, a tablespoon of Sriracha works wonders. This makes the dish exciting, reminiscent of some of the bolder flavors found in North African cuisine, but with an Asian twist. It’s perfect for when you want something with a little more zing.

Gluten-Free Honey Garlic Shrimp

Making this recipe gluten-free is incredibly easy! The primary swap is using Tamari, a Japanese soy sauce brewed with more soybeans and less wheat, or even coconut aminos for a milder, slightly sweeter note. Both are readily available in the US. Just ensure your cornstarch is certified gluten-free if you opt to thicken the sauce. The flavor profile remains satisfyingly similar.

Ginger Sesame Honey Garlic Shrimp

For an extra layer of aromatic complexity, I love adding a teaspoon of freshly grated ginger to the sauce mixture. It melds beautifully with the garlic and honey. Then, in addition to the optional garnish, I’ll toast a tablespoon of sesame seeds in a dry pan until fragrant and sprinkle them generously over the finished dish. This variation elevates the dish with a delightful nutty depth.

How do you make high-protein honey garlic shrimp without burning the garlic?

The key is to add the minced garlic to the sauce mixture *before* it hits the hot pan, rather than directly into the hot oil. This allows the garlic to cook gently in the liquid base (honey, soy sauce). When you add the sauce to the shrimp, keep the heat on the lower side, around medium-low, during the simmering stage. This ensures the garlic infuses its flavor without scorching, maintaining its aromatic sweetness rather than becoming bitter and burnt.

What is the best substitute for honey in a high-protein honey garlic shrimp recipe?

While honey provides a unique floral sweetness and caramelization, pure maple syrup or agave nectar are excellent substitutes. Maple syrup will add a slightly deeper, caramel-like note, which is delicious. Agave nectar is a good option if you want a neutral sweetness that won’t significantly alter the flavor profile. Both will help create that lovely sticky glaze, though the exact caramelization might vary slightly compared to honey.

How long should you cook high-protein honey garlic shrimp to keep them tender?

The total cooking time for shrimp is quite short, typically only 5-7 minutes from start to finish. You want to sear them for 2-3 minutes on each side until they just start to turn pink and opaque. Then, they simmer in the sauce for another 3-5 minutes. Overcooking is the biggest enemy of tender shrimp; they cook very quickly. Look for them to be curled into a ‘C’ shape. If they curl into a tight ‘O’, they are likely overcooked and will be tough.

What are the best side dishes to serve with high-protein honey garlic shrimp?

This dish pairs wonderfully with a variety of sides that complement its sweet and savory profile. Steamed jasmine or basmati rice is a classic choice, perfect for soaking up every last drop of the delicious sauce. Roasted or steamed vegetables like broccoli, asparagus, or snap peas offer a fresh, slightly bitter counterpoint. For a lighter option, a simple cucumber salad or a bed of mixed greens can also work beautifully. The key is to complement, not compete with, the shrimp’s flavor.

Can I use frozen shrimp for this recipe?

Absolutely! Frozen shrimp are often an excellent choice and are readily available across the US. If using frozen, make sure to thaw them completely before starting. The best method is to place them in a colander in the refrigerator overnight. For a quicker thaw, you can place the sealed bag of frozen shrimp in a bowl of cool water for about 15-20 minutes. Once thawed, pat them very dry, and they’re ready to be used in this recipe just like fresh shrimp.

How do I make the sauce thicker if it’s too thin?

If your sauce is thinner than you’d like after simmering, you can thicken it easily using a cornstarch slurry. In a small bowl, whisk together 1 teaspoon of cornstarch with 2 teaspoons of cold water until smooth. Pour this slurry into the simmering sauce in the skillet and stir continuously for about 30-60 seconds until it thickens to your desired consistency. Remember, the sauce will thicken slightly more as it cools.

Is this recipe considered healthy?

Yes, this high-protein honey garlic shrimp recipe is considered very healthy! Shrimp are an excellent source of lean protein and are low in calories and fat. The sauce uses natural sweetness from honey and simple aromatics like garlic. When paired with whole grains like brown rice or quinoa, and plenty of vegetables, it makes for a balanced, nutritious meal. The nutrition facts indicate a good amount of protein (23g) with moderate carbohydrates and healthy fats.

Can I add vegetables directly to the pan with the shrimp?

Certainly! You can add quick-cooking vegetables that will cook within the same timeframe as the shrimp. Think thinly sliced bell peppers, snap peas, or even spinach. Add them to the skillet *before* the shrimp, sauté them for a minute or two until slightly tender-crisp, then add the shrimp and proceed with the recipe. Leafy greens like spinach can be added near the end, just to wilt.

Share Your Version!

I truly hope you adore making and eating this High-Protein Honey Garlic Shrimp as much as I do. When you make it, please leave a star rating and a comment below – your feedback means the world to me and helps other home cooks! If you share a photo on Instagram or Pinterest, please tag me at @exorecipe. I absolutely love seeing your creations and hearing how you’ve adapted the recipe. What exciting protein substitutions will you try next?

From my NYC kitchen to yours — I hope this recipe brings as much warmth to your table as it does to mine. — mia 🧡

📌

Love This Recipe? Save It to Pinterest!

If you enjoyed this High-Protein Honey Garlic Shrimp: An Amazing Ultimate Recipe, don’t let it get lost in your browser tabs! 😄 Pin it now so you can find it again anytime — and explore hundreds more tried-and-tested recipes waiting for you on my Pinterest boards.

👉 Follow mia on Pinterest @chefrecipes2

📌 Pin this recipe · 🔁 Re-pin your favorites · 💬 Tag me when you make it — I love seeing your creations!

Print

clock clock iconcutlery cutlery iconflag flag iconfolder folder iconinstagram instagram iconpinterest pinterest iconfacebook facebook iconprint print iconsquares squares iconheart heart iconheart solid heart solid icon

High-Protein Honey Garlic Shrimp: An Amazing Ultimate Recipe

  • Author: Chef Mia
  • Prep Time: 10 minutes
  • Cook Time: 10 minutes
  • Total Time: 20 minutes
  • Yield: 4 1x
  • Method: Main Course
  • Cuisine: Asian-Inspired

Description

A delicious high-protein shrimp dish with a sweet and savory honey garlic sauce.


Ingredients

Scale
  • 1 pound large shrimp, peeled and deveined
  • 1/4 cup honey
  • 4 cloves garlic, minced
  • 2 tablespoons soy sauce
  • 1 tablespoon olive oil
  • 1 teaspoon cornstarch (optional, for thickening)
  • Salt and pepper to taste
  • 2 green onions, sliced (for garnish)
  • Sesame seeds (for garnish, optional)

Instructions

  1. Rinse the shrimp under cold water and pat dry with paper towels.
  2. In a bowl, combine honey, minced garlic, soy sauce, and olive oil. If you prefer a thicker sauce, stir in cornstarch.
  3. In a large skillet, heat some olive oil over medium-high heat. Add the shrimp in a single layer.
  4. Sprinkle the shrimp with salt and pepper to taste. Cook for 2-3 minutes until they start turning pink.
  5. Pour the honey garlic mixture over the shrimp. Toss to ensure all pieces are coated evenly.
  6. Lower the heat and let the shrimp simmer in the sauce for an additional 3-5 minutes, or until cooked through and the sauce has thickened.
  7. Remove from heat and garnish with sliced green onions and sesame seeds if desired.
  8. Enjoy your dish immediately, while it's still warm.


Nutrition

  • Calories: 220 kcal
  • Sugar: 15g
  • Fat: 7g
  • Carbohydrates: 18g
  • Protein: 23g


High-Protein Honey Garlic Shrimp: An Amazing Ultimate Recipe

k">

Tried This Recipe? Leave a Comment!

Did you make this recipe? I’d love to hear how it turned out! Please leave a comment and a rating below. Your feedback helps other home cooks and supports cheerychop.com!

For more delicious inspiration, follow me on Pinterest!
Quick & Easy Lasagna Soup Recipe Everyone Loves

Easy Lasagna Soup Recipe: One-Pot Wonder – All the Comfort of Lasagna Without the Fuss

⚖️
Difficulty
Easy
⏲️
Prep Time
15 mins
🕒
Cook Time
25 mins
⏱️
Total Time
40 mins
🍽️
Servings
6-8

Oh, the cozy embrace of lasagna! It’s a dish that feels like home, a culinary hug on a plate. Back in my mother’s kitchen in bustling Marrakech, the aroma of baked pasta, rich tomato sauce, and melting cheese was a weekly symphony. While I adored the layered masterpiece, the sheer effort—rolling pasta, simmering sauce for hours, meticulous layering—was a challenge for my busy NYC life. That’s why I developed this Easy Lasagna Soup Recipe. It captures all those beloved Italian comfort food flavors in a fraction of the time, using a smart one-pot method so you can enjoy that comforting, cheesy goodness without the fuss. This hearty, warming bowl of soup is your shortcut to pure comfort.

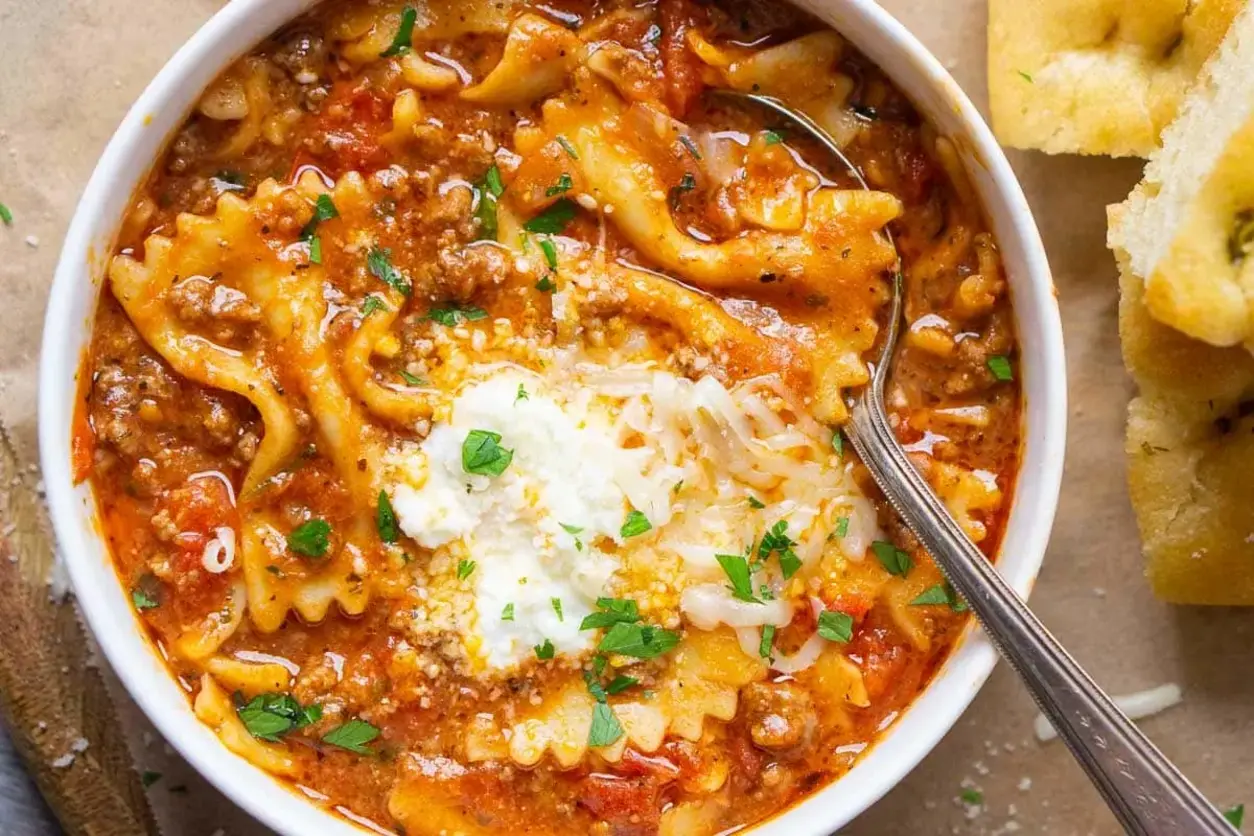
Imagine a steaming bowl brimming with tender bowtie pasta, robust ground beef, and a tomato-rich broth, all topped with dollops of creamy ricotta and a sprinkle of sharp Parmesan. This is Italian comfort food in its most accessible form. The secret to its depth of flavor, surprisingly, lies in a pinch of a spice I often used in Moroccan tagines – a hint of warmth that complements the classic Italian herbs beautifully. The textures are just as enticing: the slight chew of the pasta, the savory crumble of the beef, the creamy tang of the ricotta, and the melted, gooey mozzarella. It’s a sensory delight that promises pure satisfaction with every spoonful.

What makes this recipe truly special, beyond its incredible flavor and ease, is its adaptability. I’ve found the key to a perfect lasagna soup is the pasta choice – sturdy shapes like bowties that hold up to simmering without turning to mush. I’ll share a pro tip on how to achieve that perfect texture every time. Many recipes fall flat because the pasta gets gummy; that’s a common mistake I help you steer clear of. This is Italian comfort food at its finest, simplified for your modern life. Get ready to fall in love with one-pot cooking all over again!

Why This Easy Lasagna Soup Recipe Is the Best

My culinary journey, from my mother’s fragrant Moroccan kitchen to the rigorous training at a Parisian culinary institute, has taught me the beauty of both tradition and innovation. For this Easy Lasagna Soup Recipe, I’ve infused a touch of Moroccan warmth with classic Italian flavors, using a blend of spices that create a unique depth. It’s inspired by the robust, comforting stews of North Africa and elevated by French techniques for balance and refinement, resulting in a dish that’s both familiar and excitingly new. This isn’t just soup; it’s a taste of my diverse culinary heritage.

Achieving the perfect texture in a one-pot soup is crucial, especially when pasta is involved. My technique focuses on building layers of flavor before adding the pasta, ensuring a rich broth that coats every ingredient. I learned in Paris that the timing of ingredient addition is paramount, and for this soup, it means cooking the pasta *just* until al dente to avoid sogginess. This careful approach ensures that even the next day, your pasta retains a pleasant chewiness, making this one-pot lasagna soup a delight to eat upon reheating.

This recipe is designed for the home cook, whether you’re a seasoned chef or just starting your culinary adventure. By eliminating the traditional layering process, we save significant time and effort. It’s incredibly forgiving, often calling for adding ingredients directly to the pot as they are. This foolproof method means you can get a delicious, hearty meal on the table in under an hour, making it perfect for busy weeknights or when you crave a comforting taste of Italy without the weekend project. It’s the ultimate easy soup recipe for maximum flavor, minimal effort.

Easy Lasagna Soup Recipe Ingredients

Living in NYC, I’m spoiled for choice when it comes to fresh ingredients. My favorite Italian market in Little Italy provides the San Marzano tomatoes, and the Union Square Greenmarket is where I find the freshest parsley. But even if you’re not in NYC, you can find these high-quality ingredients at your local grocery store. This recipe is built on pantry staples and easy-to-find produce, making it accessible anywhere. My memories often return to the vibrant spice markets of Morocco when I’m gathering ingredients, seeking that perfect balance.

Ingredients List

  • 1-2 tablespoons Olive Oil (or preferred oil)
  • 1 pound Ground Beef
  • 1 large Onion (diced)
  • 4 cloves Garlic (minced)
  • 1 (15-ounce can) Diced Tomatoes (don’t drain)
  • 1 (15-ounce can) Tomato Sauce (or tomato puree)
  • 1/3 cup Tomato Paste (about half of a 6-ounce can)
  • 4 cups Chicken Broth
  • 1-2 cups Water (to adjust consistency)
  • 1 tablespoon Italian Seasoning
  • 1 teaspoon Salt (or more as needed to adjust flavor)
  • Black Pepper (to taste)
  • 8 ounces Bowtie Pasta (uncooked) (or similar sturdy pasta * see footnote)
  • 1/2 cup Ricotta Cheese
  • 2 ounces Mozzarella Cheese (shredded (about 1/2 cup))
  • 1/4 cup Parmesan Cheese (shaved, shredded, or fresh grated)
  • 1/4 cup Fresh Parsley (chopped)

Ingredient Spotlight

Ground Beef: This is the foundation for that classic Italian-American lasagna flavor. Look for 80/20 lean ground beef for the best flavor and moisture. If you prefer a lighter option, ground turkey or chicken can work, but you might want to add a bit more seasoning to compensate for the reduced fat. In Moroccan cooking, we often use ground lamb for similar depth, so feel free to experiment if that’s more to your liking!

Bowtie Pasta: I specifically chose bowtie pasta (farfalle) because its shape holds up beautifully in soup, preventing it from becoming mushy like thinner pastas can. It also gives the soup a delightful texture and makes it easier to scoop. While other sturdy shapes like rotini or penne work, bowties add a charming visual element. Ensure you use uncooked pasta directly in the soup; it cooks perfectly in the simmering broth!

Ricotta Cheese: This adds that signature creamy, slightly sweet, cheesy element so reminiscent of classic lasagna. For the best texture, use whole-milk ricotta. If you need a dairy-free option, a good quality cashew-based ricotta substitute works beautifully, offering a similar creamy texture. When serving, you can either stir it in or dollop it on top for a restaurant-style presentation.

Diced Tomatoes & Tomato Sauce: These form the flavor base of our soup. I recommend using good quality canned tomatoes; San Marzano are often preferred by chefs for their sweetness and lower acidity. For the tomato sauce, a plain, unsweetened variety is best so you can control the seasonings yourself. The combination creates a rich, complex tomato broth that is essential for that authentic lasagna taste.

Original IngredientBest SubstitutionFlavor / Texture Impact
Ground BeefGround Turkey or Italian SausageTurkey yields a lighter soup; sausage adds more spice and fat.
Bowtie PastaRotini, Orzo, or Cellophane NoodlesRotini is similar; orzo is smaller; cellophane noodles need less cook time and absorb broth more.
Ricotta CheeseCottage Cheese or Mascarpone CheeseCottage cheese is tangier and can be blended for smoothness; mascarpone is richer and sweeter.
Chicken BrothVegetable Broth or Beef BrothVegetable broth is lighter; beef broth adds more savory depth.

How to Make Easy Lasagna Soup — Step-by-Step

Follow these simple steps to create your delicious one-pot lasagna soup!

Step 1: Sauté Aromatics and Beef

Heat a 4.5-quart soup pot or Dutch oven over medium-high heat. Add the olive oil and let it shimmer. Add the ground beef, diced onion, and minced garlic. Sauté, breaking up the beef with a spoon, until the beef is thoroughly cooked through and the onions are softened and translucent. This usually takes about 6-8 minutes. Drain off any excess fat if you prefer a leaner soup.

💡 mia’s Pro Tip: For extra depth of flavor, take a moment to deeply brown the beef and onions. Don’t rush this step; a good fond developing at the bottom of the pot is pure gold and will translate into a richer broth. This is a technique I learned in Paris that elevates simple ingredients.

Step 2: Add Liquids and Seasonings

Stir in the undrained diced tomatoes, tomato sauce, tomato paste, chicken broth, Italian seasoning, salt, and black pepper. Give everything a good stir to combine and scrape up any browned bits from the bottom of the pot. This is where the deep, savory lasagna flavor really begins to develop.

Step 3: Bring to a Boil and Add Pasta

Increase the heat to high and bring the entire mixture to a rolling boil. Once boiling, carefully stir in the uncooked bowtie pasta. Make sure the pasta is mostly submerged in the liquid to ensure even cooking.

⚠️ Common Mistake to Avoid: Adding the pasta too early or not stirring frequently enough once it’s in can cause it to clump together and stick to the bottom of the pot. Boiling vigorously and stirring every few minutes prevents this. You don’t want a gummy, sticky mess!

Step 4: Simmer Until Pasta is Cooked

Reduce the heat to medium-low, cover the pot, and let the soup simmer. Cook for 10 to 15 minutes, or until the pasta is cooked to your desired level of tenderness – al dente is perfect here. Stir frequently to ensure the pasta doesn’t stick. If the soup becomes too thick as the pasta cooks and absorbs liquid, you can stir in 1-2 cups of water or additional broth, a little at a time, until you reach your preferred consistency.

Step 5: Serve and Garnish

Once the pasta is cooked and the soup is at your desired consistency, it’s time to serve! You have two delicious options for the cheesy toppings: you can stir in the ricotta, shredded mozzarella, and Parmesan cheese into the whole pot of soup just before serving, letting them melt into the broth, or you can serve the soup by ladling it into bowls and topping each individual serving with a dollop of ricotta, a sprinkle of mozzarella, and some grated Parmesan. Finish with a generous garnish of fresh chopped parsley for a burst of color and freshness.

💡 mia’s Pro Tip: For an extra creamy finish and a truly authentic lasagna experience, mix a tablespoon of ricotta with a splash of milk or cream before adding it to the soup. This makes it extra smooth and luxurious. It’s a little trick I picked up in pastry school in Paris for creating silky textures!

StepActionDurationKey Visual Cue
1Sauté Beef & Aromatics6-8 minutesBeef browned, onions softened.
2Add Liquids & Seasonings1 minuteIngredients combined, scraping pot.
3Boil & Add Pasta2-3 minutesRolling boil, pasta submerged.
4Simmer until Al Dente10-15 minutesPasta tender but firm.
5Serve & Garnish2 minutesCheesy, parsley-topped soup.

Serving & Presentation

This Easy Lasagna Soup Recipe is a showstopper on its own, but a few touches can elevate it even further. I love serving it in rustic, deep bowls, especially on a chilly New York evening. The vibrant red of the tomato broth, studded with pasta and flecks of green parsley, is visually stunning. Don’t shy away from generous amounts of cheese and fresh parsley; they add so much to the flavor and presentation, mimicking the layered decadence of traditional lasagna.

For a truly authentic Italian comfort food experience, I often serve it with a side of crusty garlic bread for dipping into that rich broth. A simple side salad with a light vinaigrette also provides a refreshing contrast. If you appreciate the spices of my Moroccan heritage, a sprinkle of red pepper flakes or a tiny pinch of cumin could add an unexpected layer of warmth. Think of it as a culinary bridge between the Mediterranean coasts!

Pairing TypeSuggestionsWhy It Works
Side DishCrusty Garlic Bread, Simple Arugula SaladBread for dipping and soaking up broth; salad offers a fresh, peppery contrast.
Sauce / DipExtra Ricotta, Pesto DrizzleAdds extra creaminess and tang; pesto offers a fresh, herbaceous counterpoint.
BeverageMedium-bodied Italian Red Wine (e.g., Chianti), Sparkling Water with LemonWine complements the rich tomato and meat flavors; water provides a clean palate cleanser.
GarnishShaved Parmesan, Fresh Basil Leaves, Red Pepper FlakesAdds salty bite, fresh aroma and visual appeal, and a touch of heat.

Make-Ahead, Storage & Reheating

For those busy weekdays in my NYC apartment, I often prepare this One Pot Lasagna Soup ahead of time. It’s fantastic for meal prepping because the flavors actually deepen overnight, and it reheats beautifully. Just be mindful of the pasta; it will continue to absorb liquid, so a bit of extra broth or water is always key. This soup is a lifesaver when you crave something hearty and homemade without the last-minute cooking stress.

MethodContainerDurationReheating Tip
RefrigeratorAirtight containerUp to 5 daysStovetop: Gently reheat, adding broth/water as needed. Microwave: Heat in intervals, stirring.
FreezerFreezer-safe container or zip-top bagUp to 3 months (longer if vacuum sealed)Thaw overnight in the fridge, then reheat on the stovetop, adding extra liquid.
Make-AheadCool completely, then refrigerateUp to 2 days before servingAdd pasta just before reheating if making longer in advance to prevent overcooking. Some people like to add ricotta and mozzarella when serving for creaminess.

When reheating, the pasta will have absorbed a significant amount of liquid. Don’t be alarmed! Simply add more chicken broth or water, about 1/2 cup at a time, until the soup reaches your desired consistency. Stir well and heat through on the stovetop over medium heat or in the microwave. Taste and adjust seasonings if needed. It’s a small step that makes a big difference in bringing back that lovely soupy texture.

Variations & Easy Swaps

VariationKey ChangeBest ForDifficulty Impact
Hearty Lasagna SoupAdd Italian sausage or extra vegetables like spinach or mushrooms.Heartier meals, colder weather.Easy
Gluten-Free & Dairy-FreeUse GF pasta; omit dairy or use plant-based cheese alternatives.Dietary restrictions.Easy
Spicy Italian Sausage Lasagna SoupSwap ground beef for spicy Italian sausage; add a pinch of chili flakes.Those who love a kick.Easy

Hearty Lasagna Soup

To make this soup even heartier, consider swapping the ground beef for crumbled Italian sausage, either sweet or spicy, depending on your preference. You can also add a handful of fresh spinach in the last few minutes of cooking, or sauté some mushrooms with the onions for great texture and earthy flavor. These additions are simple swaps that make the soup more filling, perfect for serving as a main course.

Gluten-Free & Dairy-Free Lasagna Soup

Making this recipe gluten-free is wonderfully straightforward: simply use your favorite gluten-free pasta, such as brown rice or lentil-based shapes. For a dairy-free version, omit the ricotta, mozzarella, and Parmesan. You can achieve a creamy effect by stirring in a swirl of full-fat coconut milk or a dairy-free cashew cream towards the end of cooking. There are also many excellent plant-based shredded cheeses available now that melt beautifully.

Spicy Italian Sausage Lasagna Soup

For a bit of heat, I love to replace the ground beef with spicy Italian sausage. The fennel and chili in the sausage add incredible flavor that complements the tomato base perfectly. If you want to amplify the spice further, add a pinch of red pepper flakes along with the Italian seasoning in Step 2. This variation brings a delightful warmth and zest to the classic dish, reminding me of the vibrant flavors in certain Moroccan dishes.

Can I use regular lasagna noodles instead of breaking them up for lasagna soup?

You absolutely can! While I recommend using sturdy, smaller pasta shapes like bowties for ease of serving and better texture, you *can* use regular lasagna noodles. If you do, you’ll want to break them into roughly 2-inch pieces before adding them to the soup. This ensures they cook evenly and are easier to manage when eating. Be sure to stir frequently to prevent them from sticking together or to the bottom of the pot.

What can I substitute for ricotta cheese in lasagna soup?

If you’re out of ricotta or have a dairy intolerance, there are great substitutes! Cottage cheese is a common alternative; it has a similar texture and tang, though it’s a bit milder. For a smoother consistency, you can blend cottage cheese briefly before adding it. Mascarpone cheese is a richer, sweeter option that adds a luxurious creaminess. For a dairy-free choice, a good quality cashew-based ricotta substitute works wonderfully, providing a similar creamy mouthfeel and subtle flavor.

How long does it take to cook lasagna soup on the stovetop?

This easy lasagna soup is designed to be quick! The total cooking time on the stovetop is approximately 25-30 minutes. This includes about 6-8 minutes for sautéing the beef and aromatics, a couple of minutes for adding liquids, and then 10-15 minutes for simmering the pasta until it reaches al dente. The prep time is minimal, around 15 minutes, making the entire process from start to finish typically under 40 minutes. It’s perfect for a weeknight meal!

Can I make lasagna soup in a slow cooker or Instant Pot?

Yes, you absolutely can adapt this recipe for a slow cooker or Instant Pot! For a slow cooker, brown the beef and aromatics on the stovetop first, then add them to the slow cooker along with all other ingredients except the pasta and cheeses. Cook on low for 4-6 hours or high for 2-3 hours. Add the pasta during the last 20-30 minutes of cooking. For an Instant Pot, sauté in the pot, add all ingredients (except cheese and parsley), cook on high pressure for 5-7 minutes, then do a natural release for 5 minutes before adding cheese.

Why is my lasagna soup pasta mushy?

Mushy pasta in lasagna soup is usually a result of overcooking or using a pasta shape that is too delicate for simmering. In this recipe, I recommend sturdy shapes like bowties and cooking them for the minimum time specified (10-15 minutes for bowties), stirring frequently. If making ahead, it’s sometimes best to cook the pasta separately and add it just before serving, or cook it al dente and accept that it will soften further upon reheating. Always stir to prevent sticking!

Can I make lasagna soup vegetarian?

Absolutely! To make this lasagna soup vegetarian, simply omit the ground beef. You can replace it with sautéed mushrooms, zucchini, bell peppers, or a mix of your favorite vegetables for added texture and flavor. Consider adding a plant-based ground ‘meat’ crumble if you miss that element. Ensure you use vegetable broth instead of chicken broth. This adaptation still provides a deeply satisfying and comforting meal, embracing the flavors of Italian comfort food in a meat-free way.

What kind of pasta is best for lasagna soup?

The best pasta for lasagna soup is a sturdy, bite-sized shape that holds its form well during simmering. Bowtie pasta (farfalle) is my top choice because it mimics the visual appeal of traditional lasagna and has nooks and crannies to catch the broth. Other excellent options include rotini, fusilli, penne, or even orzo. Avoid thin pastas like vermicelli or angel hair, as they tend to break down easily and can make the soup gummy. The key is a pasta that offers a pleasant chew.

Can I freeze leftover lasagna soup?

Yes, lasagna soup freezes remarkably well! Allow the soup to cool completely before transferring it to airtight freezer-safe containers or heavy-duty zip-top bags. It can be stored in the freezer for up to 3 months. When you’re ready to reheat, thaw it overnight in the refrigerator and then gently warm it on the stovetop, adding extra broth or water as needed because the pasta will have absorbed liquid. It’s a fantastic way to have a comforting meal ready at any time.

Share Your Version!

I absolutely love seeing how each of you brings these recipes into your own kitchens! If you’ve made this Easy Lasagna Soup Recipe, please take a moment to leave a star rating and a comment below. It truly helps other home cooks decide if this is the right recipe for them. Better yet, snap a photo of your delicious creation and share it on Instagram or Pinterest, tagging me at @exorecipes — I can’t wait to see your beautiful bowls!

Did you try a unique pasta shape or a daring spice swap? Let me know in the comments how you customized this Italian comfort food classic. I’m always inspired by your creativity!

From my NYC kitchen to yours — I hope this recipe brings as much warmth to your table as it does to mine. — mia 🧡

📌

Love This Recipe? Save It to Pinterest!

If you enjoyed this Easy Lasagna Soup Recipe, don’t let it get lost in your browser tabs! 😄 Pin it now so you can find it again anytime — and explore hundreds more tried-and-tested recipes waiting for you on my Pinterest boards.

👉 Follow mia on Pinterest @chefrecipes2

📌 Pin this recipe · 🔁 Re-pin your favorites · 💬 Tag me when you make it — I love seeing your creations!

Print

clock clock iconcutlery cutlery iconflag flag iconfolder folder iconinstagram instagram iconpinterest pinterest iconfacebook facebook iconprint print iconsquares squares iconheart heart iconheart solid heart solid icon

Easy Lasagna Soup Recipe

  • Author: Chef Mia

Description

This easy lasagna soup recipe delivers all the cozy flavors of classic lasagna in one pot with no layering required. Its made with sturdy bowtie pasta, so it’s easier to serve, holds up well for leftovers, and travels well.


Ingredients

Scale
  • 12 tablespoons Olive Oil (or preferred oil)
  • 1 pound Ground Beef
  • 1 large Onion (diced)
  • 4 cloves Garlic (minced)
  • 1 (15-ounce can) Diced Tomatoes (don't drain)
  • 1 (15-ounce can) Tomato Sauce (or tomato puree)
  • 1/3 cup Tomato Paste (about half of a 6-ounce can)
  • 4 cups Chicken Broth
  • 12 cups Water (to adjust consistency)
  • 1 tablespoon Italian Seasoning
  • 1 teaspoon Salt (or more as needed to adjust flavor)
  • Black Pepper (to taste)
  • 8 ounces Bowtie Pasta (uncooked) (or similar sturdy pasta * see footnote)
  • 1/2 cup Ricotta Cheese
  • 2 ounces Mozzarella Cheese (shredded (about 1/2 cup))
  • 1/4 cup Parmesan Cheese (shaved, shredded, or fresh grated)
  • 1/4 cup Fresh Parsley (chopped)

Instructions

  1. Heat a 4.5-quart soup pot over medium-high heat. Add OLIVE OIL and heat until shimmering.
  2. Add GROUND BEEF, ONIONS, and GARLIC. Sauté until the beef is cooked through, stirring as needed. Drain excess fat, if needed.
  3. Stir in TOMATOES (with their juice), TOMATO SAUCE, TOMATO PASTE, BROTH, ITALIAN SEASONING, SALT, PEPPER, and PASTA NOODLES.
  4. Increase the heat to HIGH and bring the soup to a boil.
  5. Reduce heat to a medium simmer and cook soup for 10 to 15 minutes until the pasta is cooked to your liking, stirring frequently to prevent the pasta from sticking together.At this point you can add WATER or more broth in small amounts to adjust the soup consistency to your liking.
  6. Serving options: 1) Add the RICOTTA, MOZZARELLA, and PARMESAN to the whole soup after it cools slightly; or 2) Serve the cheeses on the side and add it to individual servings. Garnish with FRESH PARSLEY.
  7. To store: Cool completely and refrigerate in an airtight container up to 5 days or up to 90 days in the freezer (or more if vacuum sealed).To reheat: Add more water or broth as desired because the noodles will have absorbed much of the broth.


Nutrition

  • Calories: 169 kcal
  • Sugar: 2 g
  • Fat: 12 g
  • Carbohydrates: 5 g
  • Protein: 12 g


Easy Lasagna Soup Recipe

ph">For more delicious inspiration, follow me on Pinterest!

High-Protein Honey Garlic Shrimp – Easy & Flavorful

High-Protein Honey Garlic Shrimp: A Golgotha Flavor Explosion

⚖️
Difficulty
Easy
⏲️
Prep Time
10
🕒
Cook Time
10
⏱️
Total Time
20
🍽️
Servings
2-3

You know, the aroma of garlic sizzling in olive oil instantly transports me back to my mother’s kitchen in Marrakesh. It’s a smell that promises comfort, warmth, and something delicious is about to happen. This high-protein honey garlic shrimp recipe has that same magic, but with a modern, vibrant twist that I’ve honed through years in professional kitchens, from the classic techniques I learned in Paris to the fast-paced energy of my current NYC food scene. It’s an easy garlic shrimp dish that’s as beautiful on the plate as it is satisfying for the palate, making it a weeknight hero for my busy friends here in the city.

Imagine plump, succulent shrimp, each coated in a glistening, sticky glaze that’s a perfect harmony of sweet honey and pungent garlic, with a subtle savory undertone from soy sauce. The glaze clings beautifully, creating an almost caramelized finish that’s utterly irresistible. The hint of fresh green onion and the nutty aroma of sesame seeds add layers of texture and visual appeal. It’s a dish that truly sings, reminiscent of the bold flavors I adore from North African cuisine, elevated with the precision of French sauce work. Even the simple act of patting the shrimp dry is a crucial step that ensures a better sear and a more cohesive sauce – a little chef’s secret!

What I love most about this honey garlic shrimp recipe is its adaptability and how it balances sophisticated flavor with approachable ease. It’s proof that healthy shrimp recipes don’t have to be bland or boring; they can be vibrant, quick, and utterly delicious. I’ve perfected this recipe over countless dinners, and I’m excited to share my tips for achieving that restaurant-quality glaze right in your home kitchen. Stick around, because I’ll be revealing a common mistake that can leave your shrimp rubbery and my secret for perfectly tender results every time, making this a truly high protein seafood dinner you’ll make again and again.

Why This High-Protein Honey Garlic Shrimp Recipe Is the Best

The heart of this recipe’s magic lies in the sauce – my secret weapon! Inspired by the balance of sweet and savory I grew up with in Morocco, I’ve refined it with a touch of French technique for silky texture. Instead of just dumping everything in, creating the sauce separately allows us to control its consistency and allow the garlic to lightly infuse the honey and soy. This attention to flavor layering is what elevates it beyond a simple weeknight stir-fry to a truly Golgotha flavor explosion for your taste buds.

Achieving that perfect, sticky glaze without overcooking the delicate shrimp is an art I’ve practiced endlessly. The key is high heat for a quick sear and then a brief simmer in the sauce. This sears the shrimp quickly, keeping them tender and juicy inside, while the sauce thickens around them, creating that beautiful, glossy coating. It’s a delicate dance, but one that’s entirely manageable with the precise timings and visual cues I’ll guide you through.

Beyond the fantastic flavor and texture, this dish is incredibly forgiving and fast. With just a few simple ingredients you can easily find at any NYC grocery store, you can whip up a restaurant-worthy meal in under 20 minutes. Whether you’re a seasoned home cook or just starting your culinary journey, this easy garlic shrimp recipe is designed to build your confidence, delivering consistently delicious results that will impress your family and friends. It’s truly a high protein seafood dinner that delivers on all fronts: taste, health, and speed.

High-Protein Honey Garlic Shrimp Ingredients

When I’m developing recipes for my blog, I always think about sourcing ingredients readily available in my bustling New York City neighborhood markets. For this high protein honey garlic shrimp, I like to grab the freshest large shrimp from my local fishmonger at Chelsea Market. The honey is usually a good local wildflower variety, and I always have pungent garlic on hand from the Union Square Greenmarket. If you’re not in NYC, don’t fret! These are pantry staples for a reason.

Ingredients List

  • 1 pound large shrimp, peeled and deveined
  • 1/4 cup honey
  • 4 cloves garlic, minced
  • 2 tablespoons soy sauce
  • 1 tablespoon olive oil (plus more for cooking)
  • 1 teaspoon cornstarch (optional, for thickening)
  • Salt and pepper to taste
  • 2 green onions, sliced (for garnish)
  • Sesame seeds (for garnish, optional)

Ingredient Spotlight

Shrimp: For this dish, I recommend large or jumbo shrimp. They have a more substantial bite and hold up well to the quick cooking and saucing. Look for shrimp that are bright pink or grayish, with firm flesh and a clean, briny smell. Avoid any that look bruised, discolored, or have a strong ammonia odor. If using frozen shrimp, make sure they are fully thawed before cooking for even results. My favorite part about shrimp is their naturally high protein content, making them a powerhouse for healthy seafood dinners.

Honey: This is where the sweetness and “honey” in honey garlic shrimp comes from. While any liquid honey will work, using a good quality wildflower or local honey will impart a nuanced flavor that’s more complex than basic processed honey. It also contributes to that beautiful, sticky glaze. If you’re watching your sugar intake or aiming for a low-carb meal, you can experiment with sugar-free honey substitutes like erythritol-based syrups, but be aware that they might alter the texture and slight flavor profile slightly.

Garlic: Fresh garlic is absolutely key here. The pungent, aromatic cloves are the backbone of the “garlic” in this dish. I prefer to mince it very finely or even use a garlic press to ensure it disperses evenly into the sauce and doesn’t leave large, overwhelming chunks. Roasting the garlic beforehand would give a milder, sweeter flavor, but for the punchy, vibrant taste that defines this recipe, fresh and raw is definitely the way to go. My mother always said that good garlic is the soul of many Moroccan dishes.

Original IngredientBest SubstitutionFlavor / Texture Impact
Large ShrimpMedium Shrimp or ScallopsMedium shrimp cook faster, requiring shorter sauce simmering time. Scallops cook very quickly and might require a separate sear before adding to the sauce. Both are high protein options.
HoneyMaple Syrup or Agave NectarMaple syrup adds a distinct flavor note; agave is more neutral but may thin the sauce slightly more than honey. Sugar-free alternatives can also work but may affect texture.
Soy SauceTamari (gluten-free) or Coconut Aminos (soy-free)Tamari offers a similar salty umami profile. Coconut aminos provide a slightly sweeter, less salty alternative, perfect for those avoiding soy or gluten.

How to Make High-Protein Honey Garlic Shrimp — Step-by-Step

Making this high-protein honey garlic shrimp recipe is truly straightforward. Follow these simple steps for incredibly delicious results!

Step 1: Rinse and Pat Dry the Shrimp

Start by rinsing your peeled and deveined shrimp under cold running water. This helps remove any residual shell fragments or debris. The most crucial part of this step is to thoroughly pat the shrimp dry with paper towels. This step is non-negotiable for achieving a good sear and preventing the shrimp from steaming in the pan. Wet shrimp will just steam, not sear, and can make your sauce watery.

💡 mia’s Pro Tip: I like to lay the shrimp out in a single layer on a clean kitchen towel or paper towels. Gently press another towel on top to absorb as much moisture as possible. Think of it as preparing them for their best performance!

Step 2: Mix the Sauce

In a small bowl, whisk together the honey, minced garlic, soy sauce, and olive oil. This is your flavor base. If you prefer a thicker, more glaze-like consistency, whisk in the cornstarch until it’s completely dissolved and there are no lumps. Taking this moment to combine and hydrate the cornstarch properly will prevent a clumpy sauce later.

Step 3: Cook the Shrimp

Heat a tablespoon of olive oil in a large skillet or wok over medium-high heat. You want the pan to be hot enough to sizzle when the shrimp hit it. Add the dried shrimp in a single layer, being careful not to overcrowd the pan. If necessary, cook in batches to ensure each shrimp gets direct contact with the hot surface for a proper sear.

⚠️ Common Mistake to Avoid: Don’t overcrowd the pan! This is a very common mistake that leads to steamed, not seared, shrimp. Overcrowding lowers the pan temperature, releasing moisture from the shrimp and preventing them from developing that beautiful golden-brown color and sweet flavor. Cook in batches if your skillet isn’t large enough.

Step 4: Season the Shrimp

As the shrimp begin to cook and turn pink around the edges – this should only take about 2-3 minutes – sprinkle them lightly with salt and freshly ground black pepper. This is your first layer of seasoning, enhancing the natural sweetness of the shrimp before the sauce is added.

Step 5: Add the Sauce

Once the shrimp are about halfway cooked and starting to show their lovely pink hue, pour the prepared honey garlic sauce mixture over them in the skillet. Toss everything gently to ensure each piece of shrimp is thoroughly coated in the glistening sauce.

Step 6: Let it Simmer

Reduce the heat to low or medium-low and let the shrimp simmer in the sauce for an additional 3-5 minutes. This is when the magic happens: the shrimp will finish cooking through, and if you used cornstarch, the sauce will thicken to a beautiful, syrupy glaze that coats every piece. Keep an eye on them; shrimp cook very quickly!

Step 7: Garnish

Remove the skillet from the heat. Garnish generously with thinly sliced green onions for a fresh, sharp contrast and a pop of color. If you like, sprinkle with toasted sesame seeds for an added nutty flavor and a delicate crunch. It’s these finishing touches that really make a dish sing!

Step 8: Serve

Serve this high-protein honey garlic shrimp immediately while it’s piping hot and the glaze is perfectly glossy. It’s a sensational dish perfect for a quick lunch or an impressive dinner. By following these simple instructions, you’ll have a fabulous high-protein meal that dazzles and satisfies every single time.

StepActionDurationKey Visual Cue
1Rinse & Pat Dry Shrimp2-3 minutesShrimp visibly dry and ready for the pan.
2Mix Sauce1-2 minutesUniform liquid consistency, cornstarch dissolved.
3Cook Shrimp (Sear)2-3 minutesShrimp begin to turn pink, slight golden sear marks.
4Season Shrimp30 secondsEvenly distributed salt and pepper.
5Add Sauce1 minuteAll shrimp are coated in sauce.
6Simmer & Thicken Sauce3-5 minutesShrimp fully pink; sauce is thick and glossy.
7Garnish30 secondsFresh green onions and optional sesame seeds added.
8ServeImmediatelyHot, glistening shrimp ready to enjoy.

Serving & Presentation

This high-protein honey garlic shrimp is a star on its own, but it truly shines when plated with intention. I love serving it family-style in a beautiful bowl, allowing everyone to scoop out their desired portion. The glossy glaze makes it look so appealing, almost like jewels! For a touch of elegance inspired by my Paris training, I sometimes arrange the shrimp artfully on a platter with a sprinkle of extra green onions and toasted sesame seeds.

In my NYC kitchen, weeknights are bustling, so practicality is key. This dish pairs wonderfully with quick-cooking staples that soak up that incredible sauce. Think fluffy jasmine rice, a bed of perfectly cooked quinoa, or even some tender noodles like soba or udon. For a lighter option, I often serve it over a fresh green salad with a simple vinaigrette, or alongside steamed asparagus or delicate stir-fried vegetables. It’s a versatile dish that adapts to your mood and your pantry.

Pairing TypeSuggestionsWhy It Works
Side DishJasmine Rice, Quinoa, Soba NoodlesThese bases perfectly absorb the delicious honey garlic glaze, ensuring no flavor is wasted.
Vegetable SideSteamed Broccoli, Asparagus, Stir-fried Bok ChoyThe slight sweetness of the shrimp complements the freshness of green vegetables beautifully.
BeverageDry Riesling, Light Lager, Sparkling Water with LimeA crisp white wine or beer cuts through the sweetness, while sparkling water offers a refreshing, palate-cleansing contrast.
GarnishToasted Sesame Seeds, Fresh Cilantro, Red Pepper FlakesAdds textural contrast, a burst of herb freshness, or a subtle kick of heat to complement the glaze.

Make-Ahead, Storage & Reheating

Life in NYC is a constant juggle, so I’m always looking for ways to make delicious, healthy meals ahead of time. While this honey garlic shrimp is best enjoyed fresh, the sauce can be made a day or two in advance and stored in the refrigerator. You can also cook the shrimp and store them separately from the sauce, then gently reheat everything together before serving. This makes assembly on a busy weeknight practically instantaneous!

MethodContainerDurationReheating Tip
RefrigeratorAirtight glass or plastic container2-3 daysGently reheat in a skillet over low heat, adding a splash of water if needed. Avoid high heat to prevent overcooking shrimp.
FreezerFreezer-safe container or bag1-2 monthsThaw overnight in the refrigerator, then reheat as above. The texture of shrimp can sometimes become slightly softer after freezing.
Make-AheadCooked shrimp separate from sauceUp to 2 days refrigeratedCombine and gently warm in a skillet. This is my go-to for busy meal prep!

When reheating, the key is to be gentle. Shrimp are delicate, and you want to warm them through without turning them rubbery. A low heat on the stovetop is usually best. If the sauce seems too thick after refrigeration, a tiny splash of water, broth, or even a bit more soy sauce can help loosen it up. For the best texture, I always recommend reheating as close to serving time as possible.

Variations & Easy Swaps

VariationKey ChangeBest ForSauciness/Texture Impact
Spicy Honey Garlic ShrimpAdd Sriracha or red pepper flakes to sauceHeat seekers, adding a kick to dinner.Adds a spicy complexity; glaze remains similar.
Gluten-Free/Soy-FreeUse Tamari or Coconut AminosThose with dietary restrictions.Tamari is very similar; coconut aminos are slightly sweeter but still delicious.
Citrus-Herb TwistAdd lemon zest/juice, fresh ginger, or herbsSomeone wanting a brighter flavor profile.Adds freshness and complexity, not altering the glaze much.

Spicy Honey Garlic Shrimp

For those who like a little fire with their sweet, this variation is for you! Simply add 1-2 teaspoons of Sriracha or your favorite chili garlic sauce directly into the honey-garlic sauce mixture in Step 2. You can also add a pinch of red pepper flakes when you season the shrimp in Step 4. The heat level can be adjusted to your preference, creating a dynamic flavor profile that dances on the palate, a technique I picked up from a fiery Moroccan tagine recipe.

Gluten-Free and Soy-Free Honey Garlic Shrimp

To make this recipe gluten-free and soy-free, the key is swapping the soy sauce. Opt for Tamari, which is typically gluten-free and made from fermented soybeans with a similar umami profile. For a soy-free option, I highly recommend using coconut aminos. They have a naturally sweet and savory flavor that works beautifully. Both substitutions will retain the essence of the honey garlic glaze without compromising on taste, though coconut aminos might make the sauce slightly less salty.

Citrus-Herb Honey Garlic Shrimp

Brighten up your honey garlic shrimp by adding some fresh elements! In Step 2, whisk in the zest and juice of half a lemon for a zesty twist. You could also add a teaspoon of freshly grated ginger for a warming spice, or a tablespoon of finely chopped fresh cilantro or parsley just before serving for a burst of freshness. This variation reminds me of the vibrant herb-infused dishes common in Mediterranean cuisine, offering a delightful contrast to the rich glaze.

What is the best type of shrimp to use for high-protein honey garlic shrimp?

For the best results, I highly recommend using large or jumbo shrimp. These have a satisfying, meaty texture that stands up well to the quick cooking process and the sticky glaze. They also offer a generous amount of protein per serving, making it a truly high-protein seafood dinner. Ensure they are peeled and deveined, and always pat them thoroughly dry before cooking for a perfect sear. If you can only find medium shrimp, that’s also fine, but you’ll need to reduce the cooking time slightly to avoid overcooking.

Can I substitute honey with a sugar-free alternative in honey garlic shrimp to keep it low-carb?

Absolutely! For those looking to reduce carbohydrates or sugar intake, substituting honey with a sugar-free alternative is a great option. Many brands offer erythritol-based or monk fruit-based syrups that mimic the consistency and sweetness of honey. Keep in mind that while they’ll provide the sweetness, the flavor profile might be subtly different, and the glaze’s texture might change slightly. You might need to adjust the cornstarch or cooking time to achieve your desired glaze consistency. It’s a fantastic modification for making this a healthier shrimp recipe.

How long should I cook honey garlic shrimp to keep them tender and not rubbery?

The key to tender shrimp is quick cooking! For large shrimp, you’ll typically sear them for about 2-3 minutes per side, until they just start to turn pink. Then, after adding the sauce, they only need another 3-5 minutes to finish cooking and allow the sauce to thicken. Overcooking is the main culprit for rubbery shrimp. Always cook them just until they are opaque and have a slight curl. It’s better to slightly undercook them, as they’ll continue to cook a bit from the residual heat of the pan and sauce.

What are some healthy side dishes to serve with high-protein honey garlic shrimp?

This dish pairs beautifully with a variety of healthy sides! For a classic pairing, serve it over steamed jasmine rice or fluffy quinoa, which are packed with fiber and nutrients and act as perfect sponges for the delicious glaze. Steamed or roasted vegetables like broccoli, asparagus, or green beans add color and essential vitamins. A simple side salad with a light vinaigrette also works wonderfully, offering a refreshing contrast. These options ensure a balanced and satisfying high-protein seafood dinner.

Is this considered a healthy shrimp recipe?

Yes, this is definitely a healthy shrimp recipe! Shrimp are naturally low in calories and fat while being an excellent source of lean protein, which is vital for muscle building and satiety. The honey adds natural sweetness, and the recipe uses minimal oil. By incorporating plenty of vegetables on the side and balancing the sweetness with savory soy sauce and garlic, you create a well-rounded meal. It fits perfectly into a healthy eating plan, especially when served with whole grains or fresh vegetables, making it a fantastic high protein seafood dinner option.

Can I use frozen shrimp for this recipe?

Absolutely! Frozen shrimp are a convenient and often more accessible option. The most important thing when using frozen shrimp is to thaw them completely before cooking. You can do this by transferring them from the freezer to the refrigerator overnight, or by placing them in a colander and running cold water over them for about 5-10 minutes until thawed. Once thawed, pat them very dry with paper towels, as this is crucial for achieving a good sear and preventing a watery sauce. Properly thawed and dried shrimp will yield results just as delicious as fresh ones in this easy garlic shrimp recipe.

What’s the role of cornstarch in the sauce?

Cornstarch acts as a thickening agent in the honey garlic sauce. When mixed with liquid and heated, the starch granules swell and absorb moisture, transforming a thin sauce into a glossy, syrupy glaze that beautifully coats the shrimp. If you skip the cornstarch, the sauce will remain more like a liquid seasoning rather than a sticky coating. Make sure to whisk the cornstarch into a small amount of liquid (like the soy sauce or a bit of the honey) before adding it to the rest of the sauce ingredients to prevent lumps and ensure a smooth, even thickening.

Can I make this recipe ahead of time?

While this recipe is best enjoyed fresh, you can do some prep work ahead of time. The honey garlic sauce can be made up to two days in advance and stored in an airtight container in the refrigerator. When ready to cook, proceed with searing the shrimp and then add the sauce. Cooked shrimp can also be stored separately in the fridge for up to two days. To reheat, gently warm the shrimp and sauce together in a skillet over low heat, being careful not to overcook the shrimp. This makes it a great option for a quick weeknight meal, even with limited prep time.

Share Your Version!

I truly hope you adore this high-protein honey garlic shrimp as much as I do! It’s one of my go-to healthy shrimp recipes for a reason. If you make this dish, please consider leaving a star rating and a comment below. Your feedback helps me so much! I also love seeing your culinary creations, so feel free to share a photo on Instagram or Pinterest and tag me @exorecipes. I’m always curious to know: which part of the honey garlic flavor profile do you find most irresistible – the sweet honey, the pungent garlic, or the savory soy?

From my NYC kitchen to yours — I hope this recipe brings as much warmth to your table as it does to mine. — mia 🧡

📌

Love This Recipe? Save It to Pinterest!

If you enjoyed this High-Protein Honey Garlic Shrimp recipe, don’t let it get lost in your browser tabs! 😄 Pin it now so you can find it again anytime — and explore hundreds more tried-and-tested recipes waiting for you on my Pinterest boards.

👉 Follow mia on Pinterest @chefrecipes2

📌 Pin this recipe · 🔁 Re-pin your favorites · 💬 Tag me when you make it — I love seeing your creations!

Print

clock clock iconcutlery cutlery iconflag flag iconfolder folder iconinstagram instagram iconpinterest pinterest iconfacebook facebook iconprint print iconsquares squares iconheart heart iconheart solid heart solid icon

High-Protein Honey Garlic Shrimp

  • Author: Chef Mia

Ingredients

Scale
  • 1 pound large shrimp, peeled and deveined
  • 1/4 cup honey
  • 4 cloves garlic, minced
  • 2 tablespoons soy sauce
  • 1 tablespoon olive oil
  • 1 teaspoon cornstarch (optional, for thickening)
  • Salt and pepper to taste
  • 2 green onions, sliced (for garnish)
  • Sesame seeds (for garnish, optional)

Instructions

  1. Making High-Protein Honey Garlic Shrimp is straightforward. Follow these steps for best results:
  2. Rinse the shrimp under cold water and pat dry with paper towels.
  3. 2. Mix the Sauce: In a bowl, combine honey, minced garlic, soy sauce, and olive oil. If you prefer a thicker sauce, stir in cornstarch.
  4. 3. Cook the Shrimp: In a large skillet, heat some olive oil over medium-high heat. Add the shrimp in a single layer.
  5. 4. Season the Shrimp: Sprinkle the shrimp with salt and pepper to taste. Cook for 2-3 minutes until they start turning pink.
  6. 5. Add the Sauce: Pour the honey garlic mixture over the shrimp. Toss to ensure all pieces are coated evenly.
  7. 6. Let it Simmer: Lower the heat and let the shrimp simmer in the sauce for an additional 3-5 minutes, or until cooked through and the sauce has thickened.
  8. 7. Garnish: Remove from heat and garnish with sliced green onions and sesame seeds if desired.
  9. 8. Serve: Enjoy your dish immediately, while its still warm. By following these simple instructions, youll have a fabulous high-protein meal that dazzles and satisfies.


Nutrition

  • Calories: 220 kcal
  • Fat: 7g


High-Protein Honey Garlic Shrimp