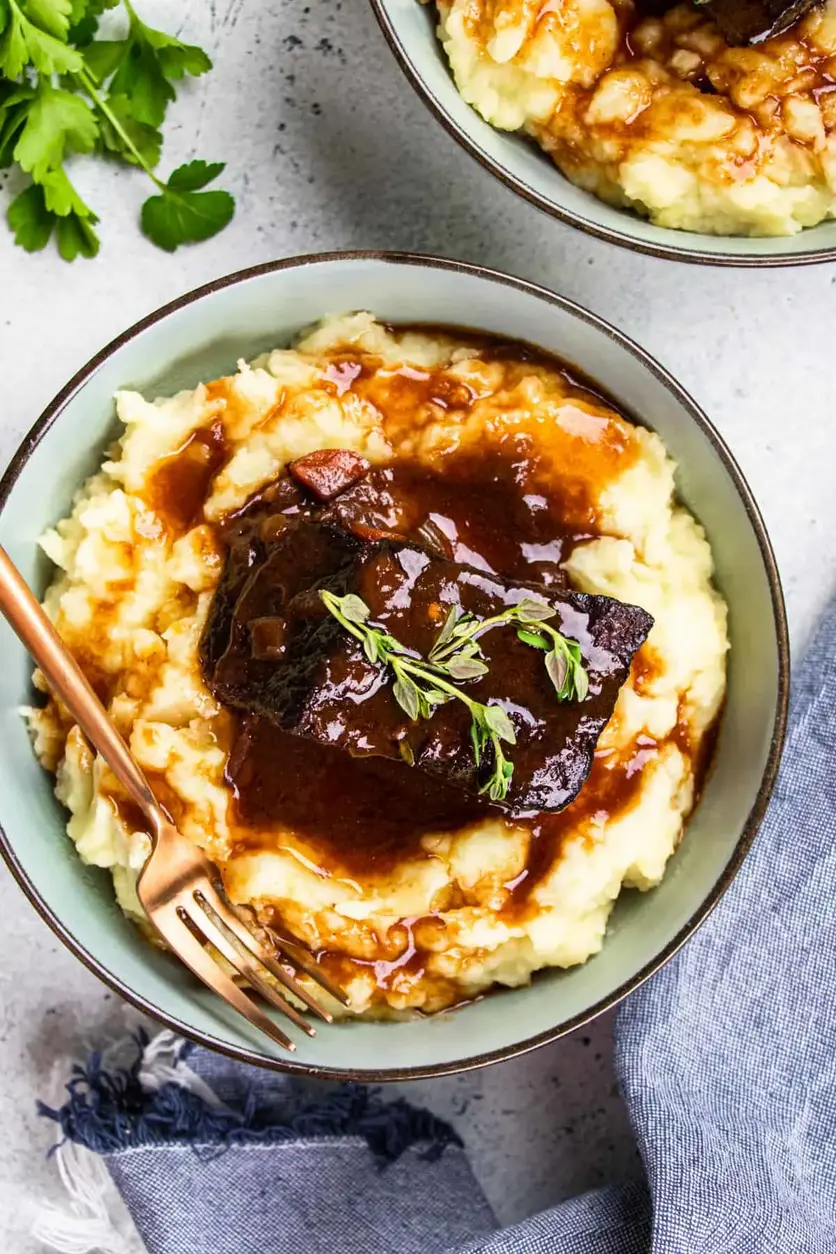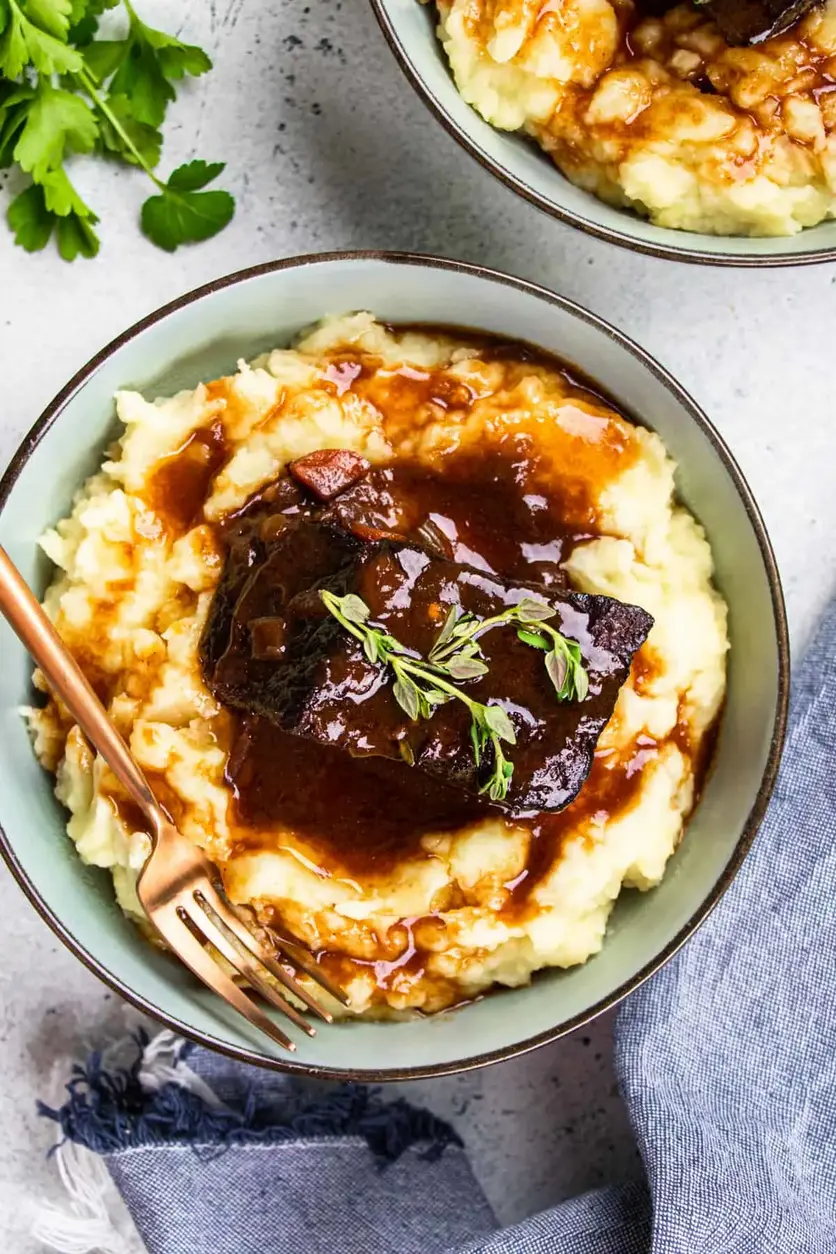
High-Protein Honey Garlic Shrimp – Easy 20-Minute Dinner

High-Protein Honey Garlic Shrimp: An Amazing Ultimate Recipe to Master

⚖️
Difficulty
Easy
⏲️
Prep Time
10 mins
🕒
Cook Time
10 mins
⏱️
Total Time
20 mins
🍽️
Servings
2-3

As a chef who has navigated the bustling culinary landscape of New York City for years, I’ve learned to appreciate recipes that are not only delicious but also efficient. This **high-protein honey garlic shrimp recipe** is a testament to that. It reminds me of the quick, flavorful meals my mother would prepare in our Marrakech kitchen after a long day, but with a modern, healthy twist that’s perfect for my busy New York life. The balance of sweet honey and pungent garlic, coating tender shrimp, is simply irresistible. It’s a dish that feels both comforting and sophisticated, making it a go-to in my repertoire for weeknight dinners and elegant appetizers alike.

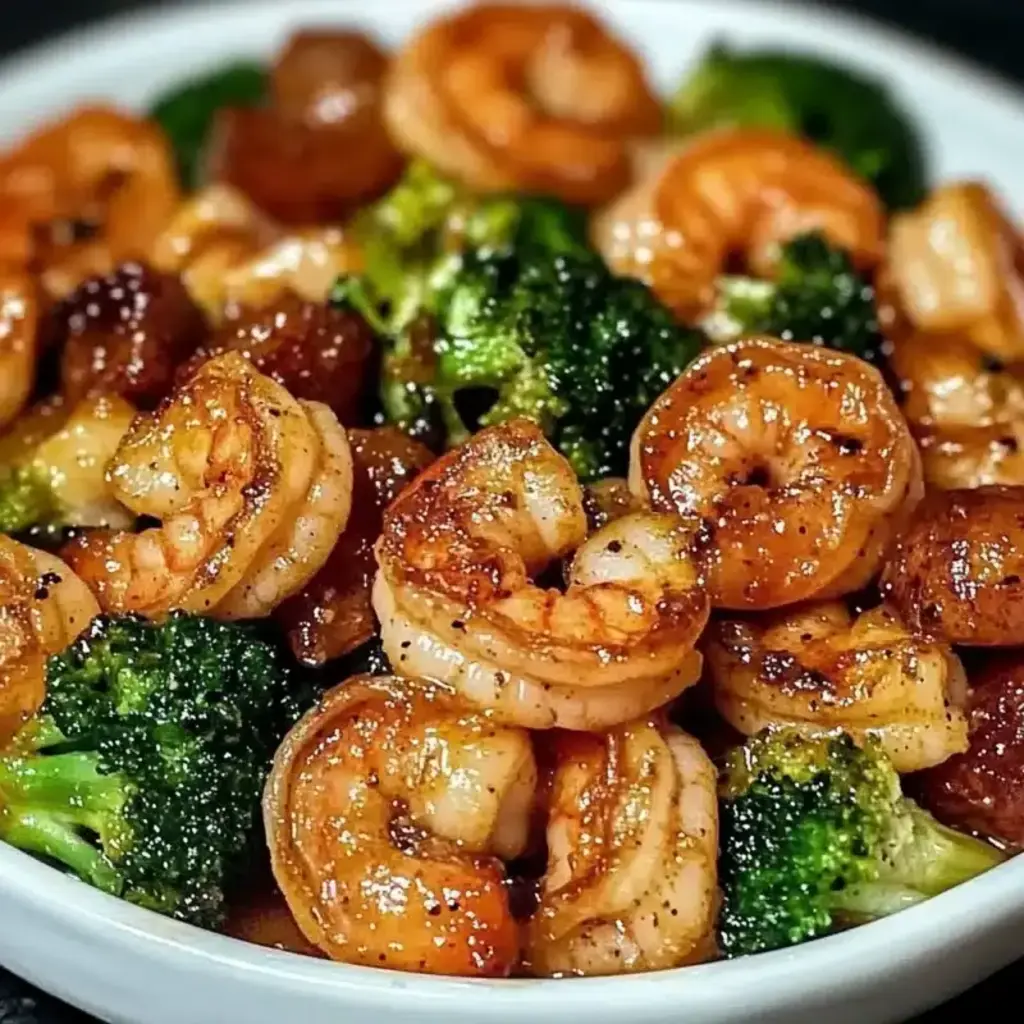
Imagine bite-sized morsels of succulent shrimp, kissed by a glistening, golden glaze that strikes the perfect chord between sweet and savory. The aroma alone is intoxicating: a fragrant blend of caramelized honey, sharp garlic, and the subtle umami of soy sauce, all mingling in the air as it simmers. This dish is a celebration of textures – the slight chew of the perfectly cooked shrimp, the glossy sheen of the sauce, and the fresh crunch of green onions and sesame seeds. It’s this symphony of senses that makes a simple seafood dish truly extraordinary, a culinary journey that I’ve refined using techniques learned in Paris.

What sets this particular **easy honey garlic shrimp** apart is its incredible simplicity without sacrificing depth of flavor. I’ve found the secret to its success lies in the quick cooking method, ensuring the shrimp remain tender, and the carefully balanced glaze. I can’t wait to share a pro tip that transforms the sauce’s texture. I’ll also highlight a common mistake many home cooks make that can lead to rubbery shrimp, something I learned to avoid early in my culinary training. Get ready for a truly amazing, healthy shrimp dinner that’s quicker than a takeout order!

Why This High-Protein Honey Garlic Shrimp Recipe Is the Best

My approach to this high-protein honey garlic shrimp recipe is rooted in my belief that exceptional flavor doesn’t always require complicated techniques. My Moroccan heritage taught me the art of balancing sweet and savory, while my Parisian training honed my understanding of sauces and ingredient synergy. For this dish, I’ve infused the classic honey garlic sauce with just the right amount of soy sauce for depth and umami, creating a glaze that clings beautifully to each shrimp. It’s a delightful dance of flavors that’s far more nuanced than most simple versions you’ll find, yet it’s incredibly easy to make, even for beginner cooks.

The key to achieving that perfect, tender shrimp texture lies in precise cooking. Overcooked shrimp are a culinary tragedy, and I’ve seen it happen countless times. My method involves searing the shrimp quickly on high heat, just until they start to turn pink, then finishing them in the sauce. This ensures they cook through without becoming tough or rubbery. It’s a chef’s trick that I’ve incorporated into this recipe to guarantee succulent, plump shrimp every single time, a detail I learned from my instructors in Paris.

Ultimately, this recipe is designed for the modern home cook. Whether you’re a busy professional in NYC looking for a quick and healthy meal or a parent trying to get a nutritious dinner on the table fast, this high-protein seafood recipe delivers. The ingredient list is short, readily available at any US grocery store, and the steps are straightforward enough that you can whip it up in under 20 minutes. You get restaurant-quality flavor and texture with minimal effort, making it your new favorite easy honey garlic shrimp.

High-Protein Honey Garlic Shrimp Ingredients

Whenever I’m in NYC, I love to visit the Chelsea Market or the smaller fish markets in Hell’s Kitchen for the freshest shrimp. If you can’t find fresh shrimp, don’t worry! Good quality frozen shrimp work wonderfully here. My mother in Morocco always emphasized using fresh, vibrant ingredients, and that philosophy guides my shopping whether I’m at a grand market or my local Duane Reade’s produce section.

Ingredients List

  • 1 pound large shrimp, peeled and deveined
  • 1/4 cup honey
  • 4 cloves garlic, minced
  • 2 tablespoons soy sauce
  • 1 tablespoon olive oil
  • 1 teaspoon cornstarch (optional, for thickening)
  • Salt and pepper to taste
  • 2 green onions, sliced (for garnish)
  • Sesame seeds (for garnish, optional)

Ingredient Spotlight

Shrimp: For this recipe, I recommend large shrimp (16/20 or 21/25 count per pound). They provide a satisfying bite and cook quickly without getting lost in the glaze. Look for shrimp that are bright, firm, and have a clean, briny smell. In the US, you’ll find them in the seafood section, often sold as “peeled and deveined” for convenience, saving you a crucial step.

Honey: While any honey will do, a mild, liquid honey like clover or wildflower honey is ideal as it won’t overpower the other flavors. If you want to deepen the caramel notes, you could experiment with a buckwheat honey, though it’s more intense. Honey is crucial for the sweet, sticky glaze that makes this dish so appealing, providing essential caramelization during cooking.

Garlic: Freshly minced garlic is non-negotiable here. It forms the pungent aromatic base of the sauce. Using pre-minced garlic from a jar can lead to a less vibrant flavor and sometimes an off-putting texture. Mince your own, or use a garlic press for the best aromatic punch. The sharpness of fresh garlic cuts through the sweetness of the honey, creating a complex flavor profile.

Original IngredientBest SubstitutionFlavor / Texture Impact
HoneyMaple Syrup or Agave NectarMaple syrup imparts a slightly different rich, woodsy sweetness. Agave nectar is more neutral but will still provide sweetness and help thicken the sauce similarly.
Soy SauceTamari (for gluten-free) or Coconut AminosTamari offers a similar umami profile. Coconut aminos provide a slightly sweeter, less salty umami flavor. Both are excellent for those avoiding gluten.
Olive OilAvocado Oil or Canola OilThese neutral oils will not impart any unwanted flavors and will work perfectly to cook the shrimp and emulsify the sauce base.

How to Make High-Protein Honey Garlic Shrimp — Step-by-Step

Making this **high-protein honey garlic shrimp recipe** is designed to be as enjoyable as eating it. Just follow these simple steps and you’ll be on your way to a fantastic meal.

Step 1: Prepare the Shrimp

Rinse the shrimp under cold water to remove any ice crystals or debris, then pat them thoroughly dry with paper towels. This step is crucial for ensuring the shrimp sear properly and don’t steam. For truly amazing results, ensure they are completely dry before proceeding.

💡 mia’s Pro Tip: Patting the shrimp dry is key to achieving a beautiful sear, creating little crusts on the outside that hold the glaze. Don’t skip this step – it makes a huge difference in texture!

Step 2: Mix the Sauce

In a medium bowl, whisk together the honey, minced garlic, soy sauce, and olive oil. If you desire a thicker, more glaze-like sauce that coats the shrimp beautifully, stir in the cornstarch until fully dissolved. This is your flavor base, so make sure it’s well combined!

Step 3: Cook the Shrimp

Heat a tablespoon of olive oil in a large skillet over medium-high heat. Once the oil is shimmering, add the shrimp in a single layer. Avoid overcrowding the pan; cook in batches if necessary to ensure each shrimp gets direct heat.

Step 4: Season the Shrimp

Quickly sprinkle the shrimp with salt and freshly ground black pepper to taste. Cook for about 2 to 3 minutes per side, just until they start turning opaque and pink. They should be about halfway cooked at this point.

⚠️ Common Mistake to Avoid: Cooking the shrimp for too long in this initial stage. Overcooking anywhere in the process will lead to tough, rubbery shrimp. Aim for just barely opaque before adding the sauce.

Step 5: Add the Sauce

Pour the prepared honey garlic sauce directly over the shrimp in the skillet. Toss everything gently to ensure every piece of shrimp is evenly coated in the glistening glaze.

Step 6: Let it Simmer

Reduce the heat to low and let the shrimp simmer in the sauce for an additional 3 to 5 minutes. Continue tossing occasionally until the shrimp are fully cooked through and the sauce has thickened to your desired consistency. If you added cornstarch, you’ll see it beautifully thicken and cling.

Step 7: Garnish

Remove the skillet from the heat. Garnish generously with sliced green onions for a fresh, oniony bite and a sprinkle of sesame seeds for a nutty crunch, if using. These garnishes add color and texture that elevate the dish.

Step 8: Serve

Serve your incredible **healthy shrimp dinner** immediately while it’s warm and the glaze is at its peak. This dish is a complete protein powerhouse that satisfies beautifully.

StepActionDurationKey Visual Cue
1Prep ShrimpN/AClean, deveined, and thoroughly dried
2Mix SauceN/AWell combined, cornstarch dissolved if used
3Cook Shrimp (Initial Sear)2-3 minsShrimp turning pink and opaque
4Season ShrimpPart of Step 3Evenly seasoned
5Add SauceN/AShrimp coated in sauce
6Simmer & Thicken3-5 minsSauce is glossy and thickened; shrimp fully cooked
7GarnishN/AFresh green onions and sesame seeds
8ServeImmediatelyHot and ready to enjoy

Serving & Presentation

To truly elevate this dish, I love plating it in a way that’s both inviting and visually appealing. A wide, shallow bowl or a plate works perfectly. Pile the glistening honey garlic shrimp in the center, making sure some of that luscious sauce pools at the bottom. The vibrant green of the chopped scallions and the subtle crunch of sesame seeds are not just for show; they add crucial layers of flavor and texture that complete the dish. It’s a presentation that speaks to the quality of the ingredients and the care put into its preparation.

This dish is incredibly versatile and pairs beautifully with a variety of sides. For a complete, balanced meal reminiscent of what I might find at a trendy downtown NYC eatery, I often serve it over fluffy jasmine rice or quinoa. Steamed or roasted vegetables, like broccoli, asparagus, or snap peas, add a lovely crisp texture and vibrant color. The sweet and savory glaze is also fantastic with heartier grains like farro or brown rice. It’s about creating a harmonious plate where every element complements the star—the delicious, high-protein honey garlic shrimp.

Pairing TypeSuggestionsWhy It Works
Side DishJasmine Rice, Quinoa, Cauliflower Rice, Soba NoodlesProvides a neutral base to soak up the delicious sauce and adds healthy carbs or fiber.
VegetablesSteamed Broccoli, Roasted Asparagus, Sautéed Bok ChoyOffers a fresh, often slightly bitter or earthy contrast to the sweet glaze and adds essential vitamins and crunch.
BeverageCrisp White Wine (Sauvignon Blanc), Light Lager, Green TeaThe acidity of the wine cuts through the richness, while a crisp beer or herbal tea offers a refreshing counterpoint.
GarnishToasted Sesame Seeds, Sliced Green Onions, Red Pepper FlakesAdds textural contrast, fresh aroma, and a hint of spicy heat for those who like a kick.

Make-Ahead, Storage & Reheating

As a New Yorker, I understand the need for smart meal prep. While this high-protein shrimp dish is best enjoyed fresh, I often make larger batches to have leftovers for lunch the next day. Storing and reheating properly are key to maintaining the quality and flavor, ensuring that your healthy shrimp dinner remains just as delicious on day two as it was on day one.

MethodContainerDurationReheating Tip
RefrigeratorAirtight container2-3 daysGentle reheat on stovetop or microwave.
FreezerFreezer-safe bag/container1-2 monthsThaw in refrigerator then reheat as above.
Make-AheadComponent separation1 day in advanceCook shrimp and sauce separately then toss before serving.

When reheating, it’s important to remember that shrimp can overcook easily. I prefer to gently warm the shrimp and sauce together in a skillet over low heat, adding a tiny splash of water or broth if needed to loosen the glaze. If using the microwave, ensure you use a microwave-safe dish and heat in short 30-second intervals, stirring in between, until just warmed through. This prevents the shrimp from becoming tough and maintains their delicate texture.

Variations & Easy Swaps

VariationKey ChangeBest ForDifficulty Impact
Spicy Honey Garlic ShrimpAdd red pepper flakes or sriracha to the sauceThose who love a kickNo change
Gluten-Free Honey Garlic ShrimpUse Tamari or Coconut Aminos instead of Soy SauceGluten-sensitive dinersNo change
Ginger Sesame Honey Garlic ShrimpAdd fresh ginger to sauce; finish with toasted sesame oilElevated flavor profilesSlightly more complex

Spicy Honey Garlic Shrimp

For those who enjoy a bit of heat, simply stir in 1/4 to 1/2 teaspoon of red pepper flakes or a tablespoon of sriracha into the honey garlic sauce before cooking. This adds a wonderful warmth that complements the sweetness of the honey beautifully, without overpowering the shrimp. It’s a simple adjustment that offers a delightful flavor dimension, much like the subtle spices found in Moroccan tagines.

Gluten-Free Honey Garlic Shrimp

To make this recipe gluten-free, the only change needed is to swap the soy sauce for tamari or coconut aminos. Both substitutions work beautifully, offering a similar savory depth without the gluten. Tamari is a direct substitute, while coconut aminos will yield a slightly sweeter, less salty profile, both delicious and tested by me for optimal results.

Ginger Sesame Honey Garlic Shrimp

Elevate the flavor profile by adding a teaspoon of freshly grated ginger to the sauce mixture along with the garlic. Once cooked and plated, finish with a drizzle of toasted sesame oil for an irresistible nutty aroma. This version brings in elements often found in Asian cuisine, creating a fusion that’s both exciting and incredibly satisfying, inspired by the global flavors I encounter daily in NYC.

What is the best way to cook high-protein honey garlic shrimp to keep it tender?

The absolute best way to ensure your high-protein honey garlic shrimp stays tender is to avoid overcooking. I recommend searing the shrimp quickly in a hot skillet for just 2-3 minutes until they begin to turn pink. Then, add the sauce and let them simmer for only another 3-5 minutes until they are just cooked through. This quick cooking method preserves their delicate texture. Properly drying the shrimp before cooking also helps achieve a better sear and prevents steaming, which can make them tough.

Can I use frozen shrimp for this high-protein honey garlic shrimp recipe?

Absolutely! Frozen shrimp are a fantastic and convenient option for this high-protein honey garlic shrimp recipe, and often just as good as fresh. The key is to thaw them properly. I recommend thawing shrimp overnight in the refrigerator, or more quickly by placing them in a colander and running cold water over them for a few minutes. Make sure to pat them completely dry with paper towels after thawing, as this is crucial for getting a good sear and a tender texture in your final dish.

What can I substitute for honey in this honey garlic shrimp recipe to lower the sugar?

If you’re looking to reduce the sugar content, you have a couple of excellent substitutes for honey. Maple syrup is a great choice, offering a rich, slightly different sweetness. Agave nectar is another option; it’s more neutral in flavor but still provides sweetness and helps thicken the sauce. While these will alter the flavor profile slightly, they are effective in maintaining the sauce’s integrity and creating that delicious glaze. Just be mindful that some alternatives might be thinner, so a touch more cornstarch might be needed.

How do I make the honey garlic sauce thicker for the shrimp without using cornstarch?

To thicken the honey garlic sauce without cornstarch, you can rely on two main methods. First, simply let the sauce simmer and reduce further over low heat for a longer period. The natural sugars in the honey and soy sauce will caramelize and thicken the mixture. Second, you can emulsify a bit more olive oil into the sauce towards the end of cooking, which will help create a richer, slightly thicker glaze. Be patient, and allow evaporation to do the work for a naturally thickened sauce.

Is this a healthy shrimp dinner?

Yes, this high-protein honey garlic shrimp recipe is indeed a healthy shrimp dinner! Shrimp are an excellent source of lean protein and are low in calories and fat. The sauce uses natural sweeteners like honey and savory elements like soy sauce, which are used in moderation. By pairing it with whole grains and plenty of vegetables, you create a very balanced and nutritious meal that supports a healthy lifestyle. The recipe itself focuses on lean protein and a flavorful, quick glaze, making it a nutritious choice.

How can I make this honey garlic shrimp recipe spicier?

Making this honey garlic shrimp recipe spicier is wonderfully easy! You can add a pinch of red pepper flakes directly into the sauce mixture when you combine the honey, garlic, and soy sauce. For a more intense heat, consider adding a tablespoon or two of sriracha or another chili sauce. Adjust the amount based on your preference for heat. This little adjustment can transform the dish into something with a delightful kick, perfect for those who enjoy a bit more excitement in their meals!

What are the best sides to serve with honey garlic shrimp?

This versatile honey garlic shrimp recipe pairs wonderfully with a variety of sides that complement its sweet and savory flavor profile. For a complete meal, I love serving it over fluffy jasmine rice or quinoa, which soak up the delicious sauce beautifully. Steamed or roasted vegetables like broccoli, asparagus, or snap peas add a welcome crunch and a dose of nutrients. You could also opt for noodles, such as soba or udon, for a heartier dish. The key is to have a base that balances the rich glaze and adds texture.

Can I prepare the sauce for this high-protein seafood recipe in advance?

Yes, you absolutely can prepare the sauce for this high-protein seafood recipe in advance. It’s a great way to save time, especially on busy weeknights. Simply mix together the honey, minced garlic, soy sauce, and olive oil (and cornstarch, if using) in a jar or airtight container. Store it in the refrigerator for up to 2-3 days. When you’re ready to cook, just give it a quick whisk, and pour it over your seared shrimp. This makes the cooking process even faster and more streamlined!

Share Your Version!

I truly hope you enjoy making and eating this **high-protein honey garlic shrimp recipe** as much as I do in my bustling NYC kitchen! If you give this dish a try, please consider leaving a star rating and a comment below—your feedback means the world to me. And if you snap a photo, I’d be thrilled if you shared it on Instagram or Pinterest and tagged me @exorecipe; I absolutely love seeing your culinary creations!

From my NYC kitchen to yours — I hope this recipe brings as much warmth to your table as it does to mine. — mia 🧡

📌

Love This Recipe? Save It to Pinterest!

If you enjoyed this High-Protein Honey Garlic Shrimp: An Amazing Ultimate Recipe, don’t let it get lost in your browser tabs! 😄 Pin it now so you can find it again anytime — and explore hundreds more tried-and-tested recipes waiting for you on my Pinterest boards.

👉 Follow mia on Pinterest @chefrecipes2

📌 Pin this recipe · 🔁 Re-pin your favorites · 💬 Tag me when you make it — I love seeing your creations!

Print

clock clock iconcutlery cutlery iconflag flag iconfolder folder iconinstagram instagram iconpinterest pinterest iconfacebook facebook iconprint print iconsquares squares iconheart heart iconheart solid heart solid icon

High-Protein Honey Garlic Shrimp: An Amazing Ultimate Recipe

  • Author: Chef Mia

Description

A delicious high-protein shrimp dish with a sweet and savory honey garlic glaze.


Ingredients

Scale
  • 1 pound large shrimp, peeled and deveined
  • 1/4 cup honey
  • 4 cloves garlic, minced
  • 2 tablespoons soy sauce
  • 1 tablespoon olive oil
  • 1 teaspoon cornstarch (optional, for thickening)
  • Salt and pepper to taste
  • 2 green onions, sliced (for garnish)
  • Sesame seeds (for garnish, optional)

Instructions

  1. Making High-Protein Honey Garlic Shrimp is straightforward. Follow these steps for best results:
  2. Rinse the shrimp under cold water and pat dry with paper towels.
  3. Mix the Sauce: In a bowl, combine honey, minced garlic, soy sauce, and olive oil. If you prefer a thicker sauce, stir in cornstarch.
  4. Cook the Shrimp: In a large skillet, heat some olive oil over medium-high heat. Add the shrimp in a single layer.
  5. Season the Shrimp: Sprinkle the shrimp with salt and pepper to taste. Cook for 2-3 minutes until they start turning pink.
  6. Add the Sauce: Pour the honey garlic mixture over the shrimp. Toss to ensure all pieces are coated evenly.
  7. Let it Simmer: Lower the heat and let the shrimp simmer in the sauce for an additional 3-5 minutes, or until cooked through and the sauce has thickened.
  8. Garnish: Remove from heat and garnish with sliced green onions and sesame seeds if desired.
  9. Serve: Enjoy your dish immediately, while it's still warm. By following these simple instructions, you'll have a fabulous high-protein meal that dazzles and satisfies.


Nutrition

  • Calories: 220 kcal
  • Fat: 7g


High-Protein Honey Garlic Shrimp: An Amazing Ultimate Recipe

Easy Egg Roll in a Bowl Recipe (One Skillet, 30 Minutes)

Egg Roll in a Bowl Recipe: Easy Unstuffed Version

⚖️
Difficulty
Easy
⏲️
Prep Time
15
🕒
Cook Time
15
⏱️
Total Time
30
🍽️
Servings
4

One of my earliest memories of craving that perfect bite in NYC was stumbling upon a tiny Chinatown eatery, eager for the crispy, savory delight of a fried egg roll. The crunch, the bursting flavor, the comforting warmth – it was pure magic. Fast forward to today, living in a bustling city where healthy eating is a weekend project, and I found myself longing for that same satisfaction but with a lighter, quicker touch. This Egg Roll in a Bowl recipe is my answer. It captures all the essence of the original – the savory meat, the crisp vegetables, the zingy sauce – all in one skillet and without the fuss of deep-frying. It’s the perfect weeknight meal, proving that you don’t need to compromise on flavor for speed and health.

Imagine a symphony of textures and tastes: tender ground turkey, fragrant garlic and ginger hitting the hot pan, the sweet crunch of onions and carrots, and then the tender-crisp embrace of shredded cabbage, all brought together by a savory, umami-rich sauce. This dish smells as incredible as it tastes, filling your kitchen with aromas that are both comforting and exciting. It’s reminiscent of the complex spice blends my mother used in Morocco, balanced with the clean, vibrant flavors I’ve come to love in New York’s diverse food scene. Each bite is a little explosion of joy, a testament to how simple ingredients, when cooked with care, can create something truly spectacular.

My culinary training in Paris taught me the importance of layering flavors and mastering texture, even in the simplest dishes. For this Egg Roll in a Bowl, I’ve honed a technique to ensure the vegetables are perfectly tender-crisp, not soggy, and that the sauce beautifully coats every ingredient. I’ll be sharing a pro tip on achieving that perfect texture, and also highlighting a common mistake many home cooks make that can lead to a watery dish. This isn’t just a recipe; it’s a method for creating a delicious, wholesome meal that feels like a treat, every single time.

Why This Egg Roll in a Bowl Recipe Is the Best

What makes my Egg Roll in a Bowl recipe stand out? It’s all about the balance. Drawing inspiration from my North African roots, I infuse a subtle warmth and depth of flavor into the sauce that goes beyond standard soy sauce. This isn’t just about copying the flavors of an egg roll; it’s about elevating them. The combination of pantry staples and fresh aromatics creates a complex taste profile that is both familiar and exciting, making every spoonful a delight. This recipe is designed for the modern palate, seeking robust flavors without the heaviness.

From my time in Parisian kitchens, I learned that the secret to great texture lies in timing and heat. This recipe emphasizes perfectly sautéed aromatics and ginger, followed by the cabbage added at just the right moment. This ensures the cabbage becomes tender but retains a satisfying bite, rather than turning mushy. Deglazing the pan with a splash of chicken broth not only adds flavor but also helps create a cohesive sauce that clings beautifully to the ingredients, a technique perfected in classic French cooking.

This Egg Roll in a Bowl recipe is a champion for busy weeknights for good reason. It’s made entirely in one pan for minimal cleanup – a lifesaver after a long day in NYC! The ingredient list is straightforward, relying on common pantry staples and readily available produce. Plus, the whole dish comes together in under 30 minutes, from prep to plate. It’s the ultimate low-carb, high-protein meal that you can feel great about serving your family, and it’s so forgiving, even novice cooks can achieve restaurant-quality results.

Egg Roll in a Bowl Ingredients

When I’m whipping up this dish, I love grabbing my produce from the Union Square Greenmarket. The vibrant cabbage and crisp carrots are always at their peak there, like the ones my mother used to buy at the local souk in Marrakech. For the pantry staples, a quick trip to my local grocery store is all it takes. These are the building blocks for a truly satisfying, unstuffed egg roll experience.

Ingredients List

  • 2 tablespoons olive oil (divided)
  • 1 pound ground turkey
  • 1 small sweet onion (finely diced)
  • 1 cup shredded carrots
  • 3 garlic cloves (finely minced)
  • 1 teaspoon finely minced fresh ginger
  • ¼ cup chicken broth
  • 1 small head cabbage (about 8 cups shredded (see note))
  • 3 tablespoons soy sauce or Tamari
  • 1 tablespoon rice vinegar
  • ¾ teaspoon salt
  • ½ teaspoon black pepper
  • 1 teaspoon toasted sesame oil
  • Cooked white rice (optional, for serving)
  • Green onions (green parts only, thinly sliced, for garnish)
  • Toasted sesame seeds (for garnish)
  • Sriracha Mayo (optional, for garnish)

Ingredient Spotlight

Ground Turkey: I love using ground turkey for its lean protein content and neutral flavor that lets the other ingredients shine. For a richer taste, you can opt for ground pork, or even a mix of both. If you’re looking for a vegetarian option, crumbled firm tofu or plant-based crumbles work beautifully here, just be sure to press the tofu well to remove excess moisture.

Cabbage: The star of our unstuffed egg roll! I prefer using a small head of green cabbage for its satisfying crispness. However, a generous 8-cup bag of coleslaw mix, which often includes carrots and cabbage, is a fantastic shortcut for those busy weeknights. Just ensure it’s a mix with shredded cabbage and carrots, avoiding any pre-made dressings.

Soy Sauce/Tamari: This is the backbone of our savory sauce. I use low-sodium soy sauce to control the saltiness. For a gluten-free version, Tamari is an excellent substitute, offering a similar savory depth. Coconut aminos are another great option, providing a slightly sweeter, milder flavor profile that works wonderfully with the other components.

Toasted Sesame Oil: This adds a distinct nutty aroma and depth of flavor that’s characteristic of many Asian dishes. A little goes a long way! If you don’t have it on hand, you can omit it, or for a slight variation, a drizzle of regular sesame oil can provide some nuttiness, though it lacks the toasted complexity.

Original IngredientBest SubstitutionFlavor / Texture Impact
Ground TurkeyGround Pork or ChickenPork adds richness; chicken is leaner.
Shredded CabbageColeslaw Mix (cabbage & carrot)Convenient shortcut, same great texture.
Soy Sauce / TamariCoconut AminosSlightly sweeter, good for paleo/GF.
Toasted Sesame OilRegular Sesame Oil or omitLess nutty depth if omitted/regular used.

How to Make Egg Roll in a Bowl — Step-by-Step

This recipe comes together so quickly, you’ll be amazed. Just follow these simple steps for a delicious, healthy meal.

Step 1: Cook the Protein

Heat 1 tablespoon of olive oil in a large skillet or wok over medium-high heat. Add the ground turkey and cook, breaking it up with a spoon, until it’s almost cooked through, about 5-6 minutes. Drain any excess fat if needed.

💡 mia’s Pro Tip: For extra flavor, brown the turkey well! Don’t be afraid to let it get a little crispy in spots. This adds depth that will carry through the whole dish.

Step 2: Sauté Aromatics and Veg

Push the cooked turkey to one side of the skillet. Add the remaining tablespoon of olive oil to the empty side. Add the diced onion and cook for 3-4 minutes until it begins to soften and turn translucent. Stir in the shredded carrots, minced garlic, and minced ginger. Cook for another 2 minutes, stirring constantly until fragrant. Pour in the chicken broth and scrape up any browned bits from the bottom of the pan – that’s pure flavor!

Step 3: Add Cabbage and Sauce

Add the shredded cabbage to the skillet. Drizzle with soy sauce (or Tamari), rice vinegar, salt, and black pepper. Toss everything together to combine and coat the cabbage evenly. Cover the skillet, reduce the heat to medium-low, and cook for 12-15 minutes, or until the cabbage has reached your desired level of tenderness – I like mine still slightly crisp.

💡 mia’s Pro Tip: To avoid a watery bowl, don’t overcrowd the pan and cook the ingredients in batches if necessary. Also, ensure your cabbage isn’t too wet before adding it to the hot pan.

Step 4: Serve and Garnish

Once the cabbage is tender-crisp, remove the skillet from the heat. Stir in the toasted sesame oil. Taste and adjust seasonings if necessary. Serve the Egg Roll in a Bowl hot, ideally over cooked white rice if you’re using it. Garnish generously with thinly sliced green onions, toasted sesame seeds, and a drizzle of Sriracha mayo if you desire that extra kick.

⚠️ Common Mistake to Avoid: Overcooking the cabbage! This is the fastest way to turn your delicious bowl into a soggy mess. Keep an eye on it and err on the side of slightly undercooked, as it will continue to soften slightly off the heat.

StepActionDurationKey Visual Cue
1Cook ground turkey5-6 minutesCooked through, slightly browned
2Sauté onions, carrots, garlic, ginger3-4 minutes (onions), 2 minutes (aromatics)Onions softened, aromatics fragrant
3Cook cabbage with sauce12-15 minutesCabbage tender-crisp, sauce reduced slightly
4Finish and serve~1 minuteGarnishes added, ready to eat

Serving & Presentation

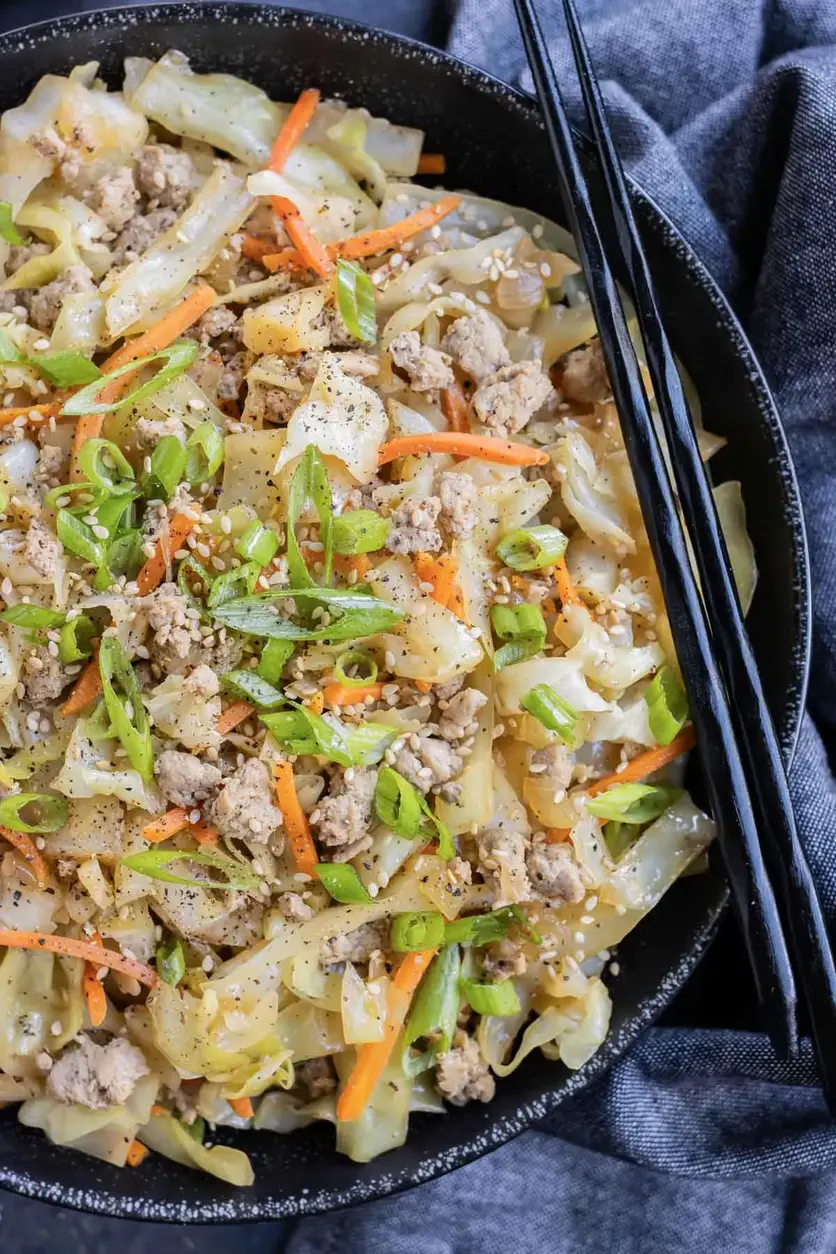
To serve this deconstructed egg roll, I love spooning it over a bed of fluffy white rice, which is optional for a lower-carb meal. The rice absorbs some of the delicious sauce and makes it a more complete and hearty dish. For plating, I like to pile the savory mixture high in a bowl, leaving a small space for a dollop of Sriracha mayo if using. This visual separation makes each component distinct and inviting.

Garnishes are key to bringing this dish to life! The bright green of thinly sliced scallions adds a fresh, oniony bite and a pop of color against the earthy cabbage and meat. A sprinkle of toasted sesame seeds provides a delightful, subtle crunch and reinforces the nutty notes of the sesame oil. These finishing touches are simple but make a world of difference, transforming a weeknight meal into something special, much like the finishing touches in Marrakech or a classic French sauce.

Pairing TypeSuggestionsWhy It Works
Side DishCooked White Rice or Brown RiceAbsorbs sauce, adds satisfying substance.
Sauce / DipSriracha Mayo, Sweet Chili Sauce, or extra Soy SauceAdds a creamy, spicy, or salty counterpoint.
BeverageCold Lager, Iced Green Tea, or Sparkling Water with LimeCleanses the palate, complements savory flavors.
GarnishFresh Cilantro or Chopped PeanutsAdds herbaceous freshness or nutty crunch.

Make-Ahead, Storage & Reheating

In my fast-paced New York City life, meal prep is essential. This Egg Roll in a Bowl is fantastic for making ahead. I often prepare a big batch on Sunday to have healthy lunches throughout the work week. The key is to store the components correctly to maintain freshness and texture.

MethodContainerDurationReheating Tip
RefrigeratorAirtight container3-4 daysMicrowave or stovetop until heated through.
FreezerFreezer-safe container or bagUp to 2 monthsThaw in the refrigerator overnight, then reheat.
Make-AheadStore cooked mixture separately from riceUp to 2 days before servingGently reheat the mixture on the stovetop or in the microwave, then serve over freshly cooked or reheated rice.

For reheating, I find that a quick sauté in a skillet with a splash of water or broth does wonders to revive the texture of the cabbage and meat. If using the microwave, be sure to stir halfway through to ensure even heating. I usually add the fresh garnishes like green onions right before serving, as they lose their crispness if reheated.

Variations & Easy Swaps

VariationKey ChangeBest ForDifficulty Impact
Keto Egg Roll BowlOmit rice, use cauliflower rice. Ensure ingredients are low-carb.Low-carb, keto, and diabetic diets.Easy
Gluten-FreeUse Tamari instead of soy sauce. Ensure other ingredients are GF.Celiac, gluten sensitivity.Effortless
Spicy Sriracha TwistAdd Sriracha to the sauce, or use Sriracha mayo.Spice lovers!Easy

Keto Egg Roll Bowl (Low Carb Friendly)

To make this a true keto egg roll bowl, skip the white rice entirely and serve it over a generous bed of steamed or sautéed cauliflower rice. You can even add a bit of shredded napa cabbage for extra texture and volume. When choosing your protein, ensure it’s plain ground meat without any added sugars or starches. The rest of the ingredients align perfectly with a low-carb lifestyle. This is my go-to when I’m really focusing on macros.

Gluten-Free Egg Roll in a Bowl

Crafting a gluten-free egg roll in a bowl is incredibly simple, especially since the recipe already calls for Tamari as an option. Just ensure you are using Tamari instead of traditional soy sauce. Double-check that your chicken broth is also gluten-free, as some broths can contain hidden gluten ingredients. All other components are naturally gluten-free, making this an easy adaptation that maintains its full flavor profile.

Spicy Sriracha Twist

For those who love a bit of heat, like I do after exploring NYC’s incredible spice markets, adding an extra layer of spice is a must. You can stir 1-2 teaspoons of Sriracha directly into the sauce mixture in step 3. Alternatively, ramp up the flavor by mixing a tablespoon of Sriracha with a couple of tablespoons of mayonnaise for a quick, spicy aioli to drizzle on top. This adds a creamy heat that my friend love to add to their bowls.

Can I use a different protein in egg roll in a bowl instead of ground pork?

Absolutely! Ground turkey is my favorite lean option for this Egg Roll in a Bowl recipe, but feel free to use ground chicken, ground beef, or even crumbled firm tofu for a vegetarian or vegan twist. If you’re using a leaner protein like turkey or chicken, you might want to add a touch more healthy fat like a little extra olive oil in step 2 to ensure everything stays moist. For a truly plant-based version, press extra-firm tofu well, crumble it, and sauté it until golden before adding the vegetables.

How do you keep egg roll in a bowl from getting watery?

The key to preventing a watery Egg Roll in a Bowl lies in managing moisture and cooking time. First, ensure your vegetables, especially the cabbage, are not excessively wet before they go into the pan. Second, don’t overcrowd the skillet! Overcrowding steams the ingredients instead of searing them, releasing excess water. Cook in batches if necessary. Finally, don’t overcook the cabbage; aim for tender-crisp, not mushy. My pro tip about cooking the aromatics until fragrant and deglazing with broth also helps create a more cohesive, less watery sauce!

What can I substitute for sesame oil and soy sauce in egg roll in a bowl?

For sesame oil, if you don’t have toasted sesame oil, you can use regular sesame oil, though it has a milder flavor, or even omit it entirely if you don’t have any on hand. A drizzle of avocado oil or even a tiny bit of peanut oil could work as a substitute in a pinch, but they won’t provide the same authentic nutty aroma. For soy sauce, Tamari is an excellent gluten-free substitute. Coconut aminos are another great option, offering a slightly sweeter and less salty profile that works well for those following paleo or specific low-carb diets.

How long does egg roll in a bowl last in the fridge for meal prep?

This Egg Roll in a Bowl recipe holds up wonderfully in the refrigerator for meal prep. Properly stored in an airtight container, it will stay fresh and delicious for about 3 to 4 days. I like to store it without the fresh garnishes like green onions until just before serving to keep them crisp. Reheating is best done gently on the stovetop or in the microwave, as the cabbage can become softer over time, but it still retains a delightful flavor and texture suitable for weekday lunches or quick dinners.

Can I make this egg roll bowl recipe vegetarian or vegan?

Yes, absolutely! This recipe is wonderfully adaptable for vegetarian and vegan diets. For a vegetarian version, you can substitute the ground turkey with crumbled firm or extra-firm tofu. Press the tofu very well to remove as much water as possible, then sauté it until golden brown before adding the aromatics. For a vegan version, ensure you use vegetable broth instead of chicken broth, and check that your soy sauce or Tamari is vegan-friendly (most are). This makes for a hearty and satisfying plant-based meal.

Share Your Version!

I always love seeing how you bring my recipes to life in your own kitchens! If you’ve made this Egg Roll in a Bowl recipe, I would be absolutely delighted if you’d leave a star rating and share your thoughts in the comments below. It helps other cooks know what to expect and gives me wonderful feedback!

If you share your creations on social media, please tag me @exorecipe on Instagram or Pinterest! I absolutely adore seeing your photos, and I promise to share my favorites. Also, I’m always curious – what’s your favorite way to adapt this unstuffed egg roll for different dietary needs or flavor preferences? Let me know below!

From my NYC kitchen to yours — I hope this recipe brings as much warmth to your table as it does to mine. — mia 🧡

📌

Love This Recipe? Save It to Pinterest!

If you enjoyed this Egg Roll in a Bowl recipe, don’t let it get lost in your browser tabs! 😄 Pin it now so you can find it again anytime — and explore hundreds more tried-and-tested recipes waiting for you on my Pinterest boards.

👉 Follow mia on Pinterest @chefrecipes2

📌 Pin this recipe · 🔁 Re-pin your favorites · 💬 Tag me when you make it — I love seeing your creations!

Print

clock clock iconcutlery cutlery iconflag flag iconfolder folder iconinstagram instagram iconpinterest pinterest iconfacebook facebook iconprint print iconsquares squares iconheart heart iconheart solid heart solid icon

Egg Roll in a Bowl Recipe

  • Author: Chef Mia

Description

Made in one skillet in under 30 minutes, this has everything you love about the Chinese appetizer, but without the deep-fried wrapper! All you need is some ground turkey or pork, common pantry staples like soy sauce, sesame oil, and rice vinegar, and some fresh cabbage or colelsaw mix.


Ingredients

Scale
  • 2 tablespoons olive oil (divided)
  • 1 pound ground turkey
  • 1 small sweet onion (finely diced)
  • 1 cup shredded carrots
  • 3 garlic cloves (finely minced)
  • 1 teaspoon finely minced fresh ginger
  • ¼ cup chicken broth
  • 1 small head cabbage (about 8 cups shredded (see note))
  • 3 tablespoons soy sauce or Tamari
  • 1 tablespoon rice vinegar
  • ¾ teaspoon salt
  • ½ teaspoon black pepper
  • 1 teaspoon toasted sesame oil
  • Cooked white rice
  • Green onions (green parts only, thinly sliced)
  • Toasted sesame seeds
  • Sriracha Mayo (optional)

Instructions

  1. Heat 1 tablespoon olive oil in a large skillet over medium heat. Add the turkey and cook until almost cooked through, about 5-6 minutes.
  2. Push the turkey to one side of the pan and add onion and remaining tablespoon of oil. Cook for 3-4 minutes, stirring occasionally. Add shredded carrots, garlic, and ginger and cook for 2 minutes, stirring frequently. Pour in the chicken broth and scrape any brown bits from the bottom of the pan.
  3. Add the cabbage, tamari or soy sauce, vinegar, salt, and pepper. Stir well and cover. Reduce heat to medium-low and cook for 12-15 minutes, or until cabbage has reached your desired tenderness. Remove from the heat and add toasted sesame oil.
  4. Serve egg roll in a bowl over white rice, if using, and top with green onions, toasted sesame seeds, and sriracha mayo, if desired.


Nutrition

  • Calories: 293 kcal
  • Sugar: 10 g
  • Fat: 11 g
  • Carbohydrates: 21 g
  • Protein: 32 g


Egg Roll in a Bowl Recipe

k">

Tried This Recipe? Leave a Comment!

Did you make this recipe? I’d love to hear how it turned out! Please leave a comment and a rating below. Your feedback helps other home cooks and supports cheerychop.com!

For more delicious inspiration, follow me on Pinterest!
Red Wine Braised Short Ribs in Dutch Oven

“`html

Red Wine Braised Short Ribs in Dutch Oven: Slow-Cooked to Perfection

⚖️
Difficulty
Easy
⏲️
Prep Time
20 mins
🕒
Cook Time
150 mins
⏱️
Total Time
170 mins
🍽️
Servings
4-6

There’s a magic that happens when humble, tough cuts of meat meet slow, moist heat. It’s a transformation that I witnessed countless times in my mother’s kitchen back in Morocco, where tagines simmered for hours, filling our home with incredible aromas. This recipe for Red Wine Braised Short Ribs in a Dutch Oven is my ode to that comforting tradition, elevated with classic French technique I honed in Paris, and presented with the vibrant energy of New York City. The deep, rich flavors that emerge from this process are truly unparalleled, making these Dutch oven short ribs a standout dish for any occasion.

Imagine sinking your fork into impossibly tender beef short ribs, practically melting off the bone, all coated in a luscious, glossy sauce that’s bold with Cabernet Sauvignon and a complex savory depth. The aroma alone is enough to transport you – a blend of slow-cooked beef, sweet aromatics, and the subtle perfume of herbs. This is comfort food at its absolute finest, a dish that feels both rustic and refined, promising a truly memorable dining experience that will have your guests asking for the recipe. It’s the kind of meal that feels like a warm hug on a chilly evening.

What sets my braised short ribs recipe apart is a few key refinements: the perfect sear for maximum flavor, a patient reduction of the wine to concentrate its essence, and the judicious use of aromatics to build layers of taste without overpowering the star ingredient. I’ll share a pro tip on achieving that crucial crispy crust on your beef short ribs, and highlight a common pitfall to avoid that can result in less-than-ideal texture. Get ready to master the art of truly unforgettable braised short ribs!

Why This Red Wine Braised Short Ribs Recipe Is the Best

The secret to the profound flavor in these red wine braised short ribs lies in the marriage of quality ingredients and time-tested techniques. My French training taught me the importance of building flavor in stages, starting with a robust sear on the bone-in short ribs to develop a rich Maillard reaction on the surface. The addition of a dry, full-bodied red wine like Cabernet Sauvignon, and then letting it reduce to concentrate its essence before adding the beef broth, creates a sauce base that is incredibly complex and deeply savory. This isn’t just beef; it’s a symphony of flavors orchestrated for maximum impact.

Achieving that signature fall-apart tender texture in beef short ribs is all about controlling the cooking environment. Braising in a Dutch oven, with its heavy lid and even heat distribution, creates a perfect steamy dome where collagen breaks down slowly, transforming tough connective tissues into gelatin. This slow transformation keeps the meat incredibly moist and succulent, yielding a texture that is both yielding and rich. It’s a technique that guarantees success, even for novice cooks, because the oven does most of the work.

Beyond the exquisite flavor and texture, this Dutch oven short ribs recipe is surprisingly approachable. While the cooking time is long, the active preparation is minimal, making it ideal for a leisurely weekend meal or for taking advantage of the oven while you’re doing other things. I’ve streamlined the steps and provided clear visual cues, ensuring you can confidently recreate these restaurant-quality beef short ribs right in your own kitchen. It’s a foolproof method for a dish that tastes like you spent all day in the kitchen.

Red Wine Braised Short Ribs Ingredients

Gathering the right ingredients is the first step to culinary success, and for these red wine braised short ribs, quality matters. I love picking up my beef short ribs from a local butcher here in NYC – the bone-in cuts lend the most flavor and gelatin to the sauce. If you’re not near a good butcher, most well-stocked supermarkets have excellent options. For the wine, don’t shy away from using something you’d enjoy drinking; a robust Cabernet Sauvignon is my go-to, but any good quality dry red wine will work beautifully, echoing the wines I learned to pair with sauces in Paris. Fresh vegetables are key for that mirepoix base, and I always grab mine from the Union Square Greenmarket when possible!

Ingredients List

  • 2 tablespoons olive oil
  • 3-4 pounds bone-in beef short ribs (about 8-10 pieces)
  • Salt, to taste
  • Freshly ground black pepper, to taste
  • 1 large yellow onion, diced
  • 2 stalks celery, diced
  • 2 medium carrots, diced
  • 3 cloves garlic, smashed
  • 2 tablespoons tomato paste
  • 2 cups dry red wine (such as Cabernet Sauvignon, Merlot, or Pinot Noir)
  • 3 cups beef broth, preferably low-sodium
  • 2 bay leaves
  • 1 sprig fresh thyme
  • 1 sprig fresh oregano (or 1/2 teaspoon dried)

Ingredient Spotlight

Bone-in Beef Short Ribs: These are the heart of the dish, and their bone-in nature is crucial. The marrow within the bone adds an incredible depth of flavor and richness to the braising liquid, which then enriches the meat itself. When selecting them at your local butcher or market, look for well-marbled pieces with a good amount of meat around the bone. They should have a vibrant red color. If you can’t find bone-in, boneless chuck roast cut into large cubes can work, but you might miss some of that gelatinous richness from the bone.

Dry Red Wine: The wine is essential for both tenderizing the meat and building the complex flavor profile of the braising liquid. A dry, full-bodied red wine like Cabernet Sauvignon, Merlot, or even a bold Zinfandel works best. Avoid sweet wines, as they can make the sauce cloying. If you absolutely cannot use alcohol, you can substitute with an equal amount of extra beef broth, but you’ll want to add a tablespoon or two of balsamic vinegar or a splash of Worcestershire sauce to help replicate some of the depth and acidity that the wine provides.

Mirepoix (Onion, Celery, Carrot): This classic French aromatic base is the foundation of flavor for countless dishes, and these braised short ribs are no exception. The combination of sweet onion, slightly bitter celery, and earthy carrot creates a balanced flavor profile as they soften and caramelize. When dicing, aim for pieces that are roughly uniform in size so they cook evenly. Make sure your vegetables are fresh; you can often find great deals on mirepoix staples at any NYC grocery store, any time of year.

Original IngredientBest SubstitutionFlavor / Texture Impact
Bone-in Beef Short RibsBoneless Beef Chuck Roast (cut into 2-inch cubes)Slightly less gelatinous richness, may take a bit longer to become fork-tender. Sear well.
Dry Red Wine (Cabernet Sauvignon)Equal parts Beef Broth + 1 tbsp Balsamic VinegarLess wine complexity, more savory focus. Balsamic adds necessary acidity.
Fresh Thyme/OreganoDried Thyme/Oregano (1/2 tsp each)Slightly less bright herb notes, but still effective. Add dried herbs with the broth.

How to Make Red Wine Braised Short Ribs in Dutch Oven — Step-by-Step

Follow these simple steps to create exceptionally tender and flavorful red wine braised short ribs that will impress everyone at your table.

Step 1: Preheat the Oven

To begin this culinary journey, preheat your oven to a steady 350°F (175°C). This consistent, moderate temperature is key to slow cooking the short ribs to perfection, ensuring they become incredibly tender without drying out.

💡 mia’s Pro Tip: Make sure your oven rack is in the center of the oven. This ensures even heat circulation around your Dutch oven, promoting consistent cooking of the beef short ribs.

Step 2: Prepare and Season the Ribs

Rinse the bone-in short ribs under cool water and then thoroughly pat them dry with paper towels. This is a critical step for achieving a good sear. Once dry, generously season all sides of the ribs with salt and freshly ground black pepper. Don’t be shy with the seasoning; the ribs need it to build flavor.

Step 3: Brown the Short Ribs

Heat 2 tablespoons of olive oil in a 6 Quart Dutch oven over medium-high heat until shimmering. Carefully place the seasoned short ribs into the hot oil, working in batches if necessary to avoid overcrowding the pot. Sear each side for about 5-6 minutes, until a deep, golden-brown crust forms. This searing process locks in juices and builds foundational flavor for your braised short ribs. Once browned, transfer the ribs to a plate and set aside.

⚠️ Common Mistake to Avoid: Overcrowding the pot! When you add too many ribs at once, they steam instead of sear, resulting in a pale, unappetizing surface and less flavor development. Work in batches.

Step 4: Sauté the Aromatics

Reduce the heat to medium. Add the diced onion to the same Dutch oven (don’t wipe it out; the browned bits are pure flavor!). Cook, stirring occasionally, for 8-10 minutes, or until the onion is translucent and softened. Then, add the diced celery and carrots, and continue to cook for another 3-5 minutes, allowing them to soften slightly and release their sweetness.

Step 5: Add Garlic and Tomato Paste

Stir in the smashed garlic cloves and tomato paste. Cook for just a minute or two more, stirring constantly, until the garlic is fragrant and the tomato paste darkens slightly. Cooking the tomato paste briefly helps to deepen its flavor and remove any raw taste, contributing to the richness of the final sauce.

Step 6: Deglaze and Reduce the Wine

Pour in the 2 cups of red wine. Bring it to a boil, scraping the bottom of the Dutch oven with a wooden spoon to loosen any browned bits (this is called deglazing, and it’s where a lot of flavor lives!). Let the wine boil and simmer until it reduces by about half, which should take approximately 15-20 minutes. This step concentrates the wine’s flavor and cooks off the harsh alcohol notes.

Step 7: Add Beef Broth

Pour in the 3 cups of beef broth, stir everything together well, and bring the liquid back to a gentle simmer.

Step 8: Return Ribs and Add Herbs

Carefully transfer the browned short ribs back into the Dutch oven, nestling them into the liquid. Add the bay leaves, fresh thyme sprig, and fresh oregano sprig (or dried herbs). Ensure the ribs are mostly submerged in the liquid.

Step 9: Braise in the Oven

Cover the Dutch oven tightly with its lid. Carefully transfer the pot to the preheated oven. Braise for 2 ½ to 3 hours, or until the beef short ribs are exceptionally tender and easily pierced with a fork.

💡 mia’s Pro Tip: For cooking times longer than 2 hours, I like to check the liquid level about halfway through. If it looks like it’s reducing too much, add a splash of extra beef broth or water to keep the ribs moist.

Step 10: Rest and Strain the Sauce

Once the ribs are tender, carefully remove the Dutch oven from the oven. Transfer the cooked short ribs to a clean plate or baking dish and tent loosely with foil to keep them warm. Do NOT discard the braising liquid!

Step 11: Thicken the Sauce

Strain the braising liquid through a fine-mesh sieve into a bowl, pressing gently on the solids to extract as much liquid as possible. Discard the solids (vegetables and herbs). Pour the strained liquid back into the clean Dutch oven, and bring it to a simmer over medium heat. Let it simmer and reduce until the sauce thickens to your desired consistency, about 10-15 minutes. Taste and adjust seasoning with salt and pepper if needed.

StepActionDurationKey Visual Cue
1Preheat OvenN/AOven reaches 350°F
2Season Ribs5 minsRibs dry and evenly seasoned
3Brown Ribs10-12 mins (total)Deep brown crust on all sides
4Sauté Aromatics8-13 minsOnions translucent, veggies softened
5Add Garlic/Tomato Paste1-2 minsFragrant garlic, paste darkened
6Deglaze & Reduce Wine15-20 minsLiquid reduced by half
7Add Beef Broth1 minLiquid is combined
8Return Ribs & Herbs2 minsRibs nestled in liquid
9Braise in Oven2.5-3 hoursRibs are fork-tender
10Rest & Strain10 minsRibs resting, liquid strained
11Thicken Sauce10-15 minsSauce is glossy and thickened

Serving & Presentation

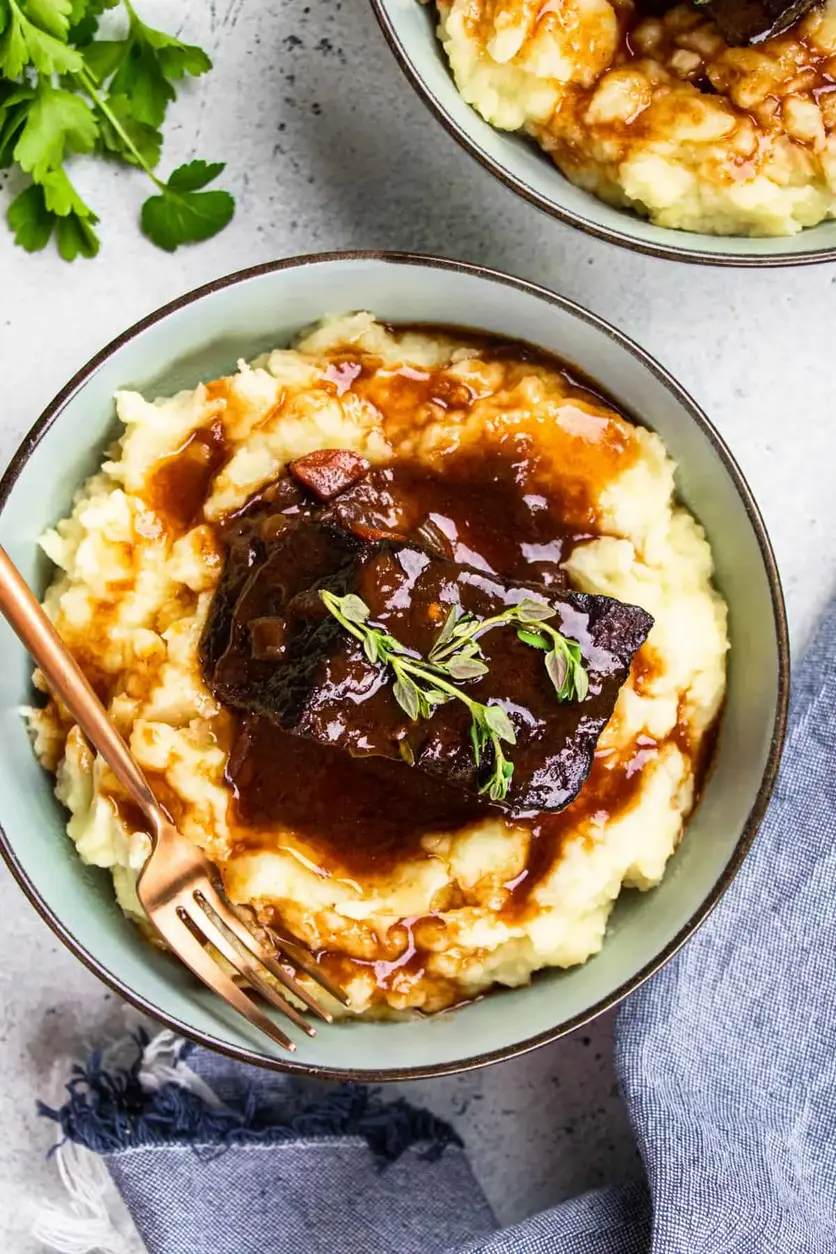
These luxurious red wine braised short ribs are a showstopper and deserve a thoughtful presentation. I love to serve them nestled atop a creamy bed of mashed potatoes or polenta; the starch is perfect for soaking up that incredible sauce. A scattering of fresh, chopped parsley or chives adds a touch of vibrant green and a hint of freshness that beautifully contrasts the rich, deep flavors. For a more elegant touch, especially if you’re dining in NYC, you can spoon the thickened sauce generously over the top of each rib just before serving.

When I bring these to my table, I often think of how we would gather for Sunday dinners back home, the table laden with dishes made with love. These Dutch oven short ribs feel like a special occasion dish, perfect for holiday gatherings, romantic dinners, or simply when you want to treat yourself and your loved ones to something truly spectacular. The caramelization of the beef and the deep ruby hue of the sauce make them a feast for the eyes as well as the palate.

Pairing TypeSuggestionsWhy It Works
Side DishCreamy Mashed Potatoes, Garlic & Herb Polenta, Roasted Root Vegetables, Pappardelle PastaStarchy bases and vegetables soak up the rich sauce beautifully.
Sauce / DipExtra Pan Sauce, Gremolata (parsley, lemon zest, garlic)The sauce is the star; gremolata adds a bright, fresh counterpoint.
BeverageFull-Bodied Red Wine (e.g., Cabernet Sauvignon, Merlot), Hearty Ale, Sparkling CiderComplement the richness of the beef and sauce with matching intensity.
GarnishFresh Parsley, Chives, Thyme LeavesAdds a pop of color and freshness to cut through the richness.

Make-Ahead, Storage & Reheating

As a busy New Yorker, I know the value of a meal that gets better with time and can be made ahead. These red wine braised short ribs are perfect for meal prep! In fact, the flavors meld and deepen beautifully overnight, making them an ideal candidate for making a day or two in advance. Simply follow the recipe through to the end, let them cool completely, then store them in their cooking liquid in an airtight container.

MethodContainerDurationReheating Tip
RefrigeratorAirtight container3-4 daysGently reheat on the stovetop over low heat, or in a covered dish in the oven at 300°F until warmed through. Add a splash of broth if sauce seems thick.
FreezerFreezer-safe airtight container or heavy-duty freezer bags2-3 monthsThaw overnight in the refrigerator before reheating. Reheat as above.
Make-AheadAirtight container (or keep in Dutch oven if oven-safe)1-2 days in advanceReheat gently on the stovetop or in the oven, allowing the flavors to meld further.

When reheating, I always recommend doing it slowly to ensure the meat remains tender and doesn’t dry out. If you’ve stored the ribs with the sauce, this is simple: just spoon the sauce over the ribs and heat gently on the stovetop or in a low oven. If the sauce has separated or become too thick, you can whisk in a tablespoon or two of good quality beef broth or even a touch of red wine to loosen it up and restore its luscious texture. Remember, patience is key for the best results when reviving this rich dish.

Variations & Easy Swaps

VariationKey ChangeBest ForDifficulty Impact
Moroccan-InspiredAdd Ras el Hanout, cinnamon, dried apricots/prunes, a touch of honey.Adventurous palates, North African flavor lovers.Add spices with tomato paste.
Gluten-Free / Dairy-FreeEnsure GF broth, skip any dairy garnishes. Serve with GF sides (rice, quinoa).Dietary restrictions.Minimal impact on method.
Fall Harvest TwistAdd cubed butternut squash or sweet potatoes in the last hour of braising. Use apple cider alongside or instead of some wine.Seasonal eating, sweeter profiles.Add squash/sweet potatoes during last hour.

Moroccan-Inspired Variation

To infuse these red wine short ribs with the soul of Morocco, I draw inspiration from my mother’s spice cabinet. After browning the ribs and sautéing the mirepoix, add about 1 tablespoon of Ras el Hanout spice blend and a pinch of cinnamon along with the tomato paste. While the wine reduces, consider adding a handful of dried apricots or prunes to the braising liquid for a touch of sweetness and chewiness. A small drizzle of honey in the final sauce can further enhance this delightful North African twist.

Gluten-Free Dairy-Free Option

This recipe is remarkably adaptable for gluten-free and dairy-free diets. The core braising liquid itself is naturally free of gluten and dairy. Simply ensure your beef broth is certified gluten-free. When serving, opt for naturally GF/DF sides like rice, quinoa, millet, or roasted potatoes instead of pasta or traditional mashed potatoes (unless your mashed potatoes are made with broth/plant milk and oil). Garnish with fresh herbs only, skipping any creamy or cheesy toppings.

Fall Harvest Twist

For a comforting taste of autumn, I love incorporating seasonal produce. About an hour before the ribs are due to finish, carefully add cubed butternut squash or sweet potatoes directly into the Dutch oven with the braising liquid. They will become incredibly tender and absorb the delicious flavors. Alternatively, you can replace about half a cup of the red wine with good quality apple cider for a subtle fruity note that complements the richness of the beef and pairs wonderfully with fall spices.

Do I need to sear the short ribs before braising them in a Dutch oven?

Absolutely, yes! Searing the short ribs is a crucial step that I never skip. It’s not just about browning for aesthetics; it’s about developing deep, complex flavors through the Maillard reaction. Those browned bits left in the pot are flavor gold! Searing also creates a slightly firmer exterior that helps the ribs hold their shape a little better during the long braise, though they will still become incredibly tender. It truly elevates the final dish from good to exceptional.

What is the best substitute for red wine in braised short ribs?

If you prefer not to use alcohol or simply don’t have red wine on hand, the best substitute is a combination of extra beef broth and an acidic component to mimic the wine’s depth. Use an equal amount of high-quality beef broth (about 2 cups) and add about 1-2 tablespoons of balsamic vinegar or even red wine vinegar. This substitute helps to deglaze the pan and adds a much-needed layer of complexity and acidity that the wine would normally provide. You can also add a splash of Worcestershire sauce for extra umami.

How long should I cook short ribs in a Dutch oven at 350°F?

For bone-in beef short ribs in a Dutch oven at 350°F (175°C), you’re generally looking at a cooking time of 2.5 to 3 hours. The exact time can vary depending on the size and thickness of the ribs, and how your oven performs. The most important indicator is tenderness – the meat should be fork-tender, meaning it easily pulls away from the bone with minimal pressure. Always check for tenderness rather than relying solely on the clock to ensure perfect results.

Can I make red wine braised short ribs ahead of time and reheat them?

Yes, absolutely! In fact, these red wine braised short ribs often taste even better the next day. The flavors have more time to meld and deepen, and the meat can become even more tender. Once fully cooled, store them in an airtight container in the refrigerator. Reheat gently on the stovetop over low heat, or in the oven at a low temperature (around 300°F), making sure to cover them to prevent drying out. Add a splash of broth if the sauce seems too thick.

What kind of red wine is best for braising short ribs?

The best red wine for braising short ribs is a dry, full-bodied red wine that you would also enjoy drinking. Varieties like Cabernet Sauvignon, Merlot, Syrah/Shiraz, or a Zinfandel are excellent choices. These wines have enough tannin and flavor complexity to stand up to the rich beef and aromatics without being overly sweet. Avoid using “cooking wine” as it often contains excessive salt and artificial flavorings. A wine that costs around $10-$20 is usually a good balance of quality and value for cooking.

Can I use boneless short ribs instead of bone-in?

Yes, you can certainly use boneless beef short ribs, or even a chuck roast cut into large cubes, as a substitute. However, the bone plays a crucial role in adding depth and richness to the braising liquid through its marrow and collagen. You might find that boneless versions yield a slightly less unctuous sauce. If using boneless, ensure you achieve a good sear on all sides and that the meat is cooked until it’s exceptionally tender, which might take a little less time than bone-in cuts.

Why is my braised short rib sauce thin?

If your braising liquid ends up too thin, don’t worry; it’s a common issue that’s easily fixed! The simplest method is to strain the liquid, as directed in the recipe, and then simmer it uncovered over medium heat. The heat will evaporate excess water, concentrating the flavors and thickening the sauce naturally. For a quicker or thicker result, you can whisk in a cornstarch slurry (1 tablespoon cornstarch mixed with 2 tablespoons cold water) into the simmering liquid until it thickens.

What’s the best way to strain the braising liquid?

The best way to strain your braising liquid for these Dutch oven short ribs is by using a fine-mesh sieve. Place the sieve over a heatproof bowl or directly over your clean Dutch oven (if you’ve removed the ribs). Carefully pour the contents of the pot through the sieve, pressing down on the solids (vegetables, herbs, etc.) with the back of a spoon to extract as much of the flavorful liquid as possible. Discard the solids. This ensures a smooth, velvety sauce without any vegetable bits.

Share Your Version!

I truly hope you adore making and devouring these Red Wine Braised Short Ribs as much as I do! Your feedback means the world to me and helps other home cooks succeed in their kitchens. Please consider leaving a star rating and a comment below to share your experience. If you snap a photo of your beautiful braised short ribs, I’d be thrilled if you’d tag me on Instagram or Pinterest @exorecipe – I love seeing your creations come to life!

I’m curious: what’s your favorite side dish to pair with incredibly rich, tender short ribs, especially when they’re swimming in that luscious red wine sauce? Let me know in the comments below! I’m always looking for new ideas to inspire my own cooking here in NYC.

From my NYC kitchen to yours — I hope this recipe brings as much warmth to your table as it does to mine. — mia 🧡

📌

Love This Recipe? Save It to Pinterest!

If you enjoyed this Red Wine Braised Short Ribs in Dutch Oven recipe, don’t let it get lost in your browser tabs! 😄 Pin it now so you can find it again anytime — and explore hundreds more tried-and-tested recipes waiting for you on my Pinterest boards.

👉 Follow mia on Pinterest @chefrecipes2

📌 Pin this recipe · 🔁 Re-pin your favorites · 💬 Tag me when you make it — I love seeing your creations!

“`

Print

clock clock iconcutlery cutlery iconflag flag iconfolder folder iconinstagram instagram iconpinterest pinterest iconfacebook facebook iconprint print iconsquares squares iconheart heart iconheart solid heart solid icon

Red Wine Braised Short Ribs in Dutch Oven

  • Author: Chef Mia

Description

Red Wine Braised Short Ribs is the best recipe for tender fall apart bone-in beef short ribs slow cooked with gravy in a Dutch Oven. This is a perfect comfort meal you can make at home for your friends and family!


Ingredients

Scale
  • 2 tablespoons olive oil
  • 34 pounds bone-in short ribs (810 pieces)
  • Salt (pepper to taste)
  • 1 large onion (diced)
  • 2 stalks celery (diced)
  • 2 carrots (diced)
  • 3 cloves garlic (crashed)
  • 2 tablespoons tomato paste
  • 2 cups wine (Cabernet Sauvignon)
  • 3 cups beef broth
  • 2 bay leaves
  • 1 spring thyme
  • 1 spring oregano

Instructions

  1. To start, lets preheat the oven to 350°F.
  2. Rinse and pat dry the meat and generously season with salt and pepper.
  3. Heat 2 tbsp olive oil in 6 Qt Dutch oven over medium-high heat. Brown the meat in two batches for 5-6 minutes on each side, then transfer to a plate and set aside.
  4. Add 1 diced onion and cook for 8-10 minutes or until translucent and softened. Then add 2 stalks diced celery and 2 diced carrots, and cook for 3-5 minutes more.
  5. Add 3 cloves smashed garlic and 2 tbsp tomato paste and cook for a few more minutes.
  6. Stir in 2 cups wine, bring to boil, lower the heat to medium and simmer until it reduces in half, about 15-20 minutes.
  7. Add 3 cups beef broth and stir.
  8. Transfer the meat back to the pot, add bay leaves, thyme and oregano.
  9. Cover with the lid and transfer to the oven.
  10. Cook for 2 ½-3 hours or until the ribs are tender.
  11. Transfer the meat to the plate and cover with foil.
  12. Strain the sauce and set discard the vegetables.
  13. Pour the liquid back to the pot and simmer until it thickens.


Nutrition

  • Calories: 319 kcal
  • Sugar: 2 g
  • Fat: 16 g
  • Carbohydrates: 6 g
  • Protein: 25 g


Red Wine Braised Short Ribs in Dutch Oven

Red Wine Braised Short Ribs in Dutch Oven – Fall Apart Tender

Red Wine Braised Short Ribs in a Dutch Oven: Slow-Cooked Perfection

⚖️
Difficulty
Medium
⏲️
Prep Time
20 mins
🕒
Cook Time
180 mins
⏱️
Total Time
200 mins
🍽️
Servings
4-6

There are few things more comforting than the aroma of slow-cooked meat filling your kitchen. I remember growing up in my mother’s kitchen in Marrakech, the scent of spices and simmering stews was the heart of our home. This recipe for red wine braised short ribs has that same soul-warming quality, but with a decidedly French technique and a New York City sophistication. It’s the kind of dish that makes a weeknight feel like a special occasion, or a Sunday dinner truly memorable.

Imagine fork-tender, bone-in beef short ribs, bathed in a rich, glossy sauce infused with the deep notes of Cabernet Sauvignon and savory beef broth. The meat literally melts off the bone, succulent and deeply flavorful, while the vegetables that helped build the base provide a subtle sweetness and depth. It’s a symphony of textures and tastes – the slight resistance of a perfectly seared crust giving way to the luxurious, fall-apart interior. This is comfort food elevated, a testament to the magic that happens when simple ingredients are treated with time and care.

What makes my version of these braised short ribs dutch oven so special? It’s a blend of my Moroccan heritage, my French training, and the fast-paced energy of NYC. I’ve refined the technique to ensure incredible tenderness without endless hours, and I’ll share a secret for achieving that restaurant-quality sauce that’s both intensely flavored and perfectly balanced. We’ll also touch on a common mistake that can lead to tough meat, so you can avoid it entirely. Get ready for a truly unforgettable meal.

Why This Red Wine Braised Short Ribs Dutch Oven Recipe is the Best

My culinary journey has taken me from the vibrant souks of Morocco to the refined kitchens of Paris, and now to the bustling streets of New York City. This recipe for red wine short ribs recipe is a culmination of those experiences. I’ve embraced the classic French technique of braising, known for its ability to transform tough cuts of meat into tender, flavorful masterpieces, but I’ve also infused it with a touch of North African warmth and a pragmatic NYC approach. This isn’t just a recipe; it’s a story on a plate, a connection to traditions, and a celebration of delicious food made with love.

The secret to these dutch oven short ribs lies in a few key techniques that I learned and honed during my time in Paris. First, the meticulous browning of the short ribs to build a deep, savory foundation. Second, the careful deglazing with a robust Cabernet Sauvignon, allowing the wine to reduce and concentrate its flavors, which forms the backbone of my luscious sauce. Finally, the slow, gentle cooking in the Dutch oven ensures that every fiber of the meat becomes incredibly tender and infused with flavor, a process that’s both forgiving and deeply rewarding.

I understand that weeknight dinners in NYC can be hectic, which is why I’ve structured this recipe for success. While the braising time is significant, the active preparation is minimal—think less than 30 minutes. This recipe is designed to allow you to move on with your evening while the oven does the hard work. Moreover, it’s incredibly adaptable and forgiving. Even if you’re new to braising or using a Dutch oven, by following these clear steps, you’ll achieve a restaurant-quality dish that will impress anyone you serve it to.

Red Wine Braised Short Ribs Ingredients

When I’m developing a recipe in my NYC kitchen, I always think about where to source the best ingredients. For these beef short ribs braised, I love visiting my local butcher in Brooklyn for the finest bone-in short ribs. For the wine, I’ll often pick up a bottle of Cabernet Sauvignon from a wine shop in the West Village – something I’d happily drink on its own. Many of these vegetables might remind you of the *mirepoix* base I learned in Paris, but they are also staples you can find at any NYC Greenmarket or your neighborhood grocery store, bringing freshness and aromatic depth to our braise.

Ingredients List

  • 2 tablespoons olive oil
  • 3-4 pounds bone-in short ribs (8-10 pieces)
  • Salt (to taste)
  • Black pepper (to taste)
  • 1 large yellow onion, diced
  • 2 stalks celery, diced
  • 2 carrots, diced
  • 3 cloves garlic, smashed
  • 2 tablespoons tomato paste
  • 2 cups dry red wine (like Cabernet Sauvignon or Merlot)
  • 3 cups beef broth (low sodium)
  • 2 bay leaves
  • 1 sprig fresh thyme
  • 1 sprig fresh oregano

Ingredient Spotlight

Bone-in Short Ribs: These are the star! Look for pieces with a good amount of marbling and a decent thickness. The bone adds immense flavor and helps keep the meat moist during the long braise. If you can’t find bone-in, boneless chuck roast cut into large chunks can work, but the texture will be slightly different. My butcher always has the best selection, and I’ll often ask for ribs that are about 2-3 inches thick for optimal results.

Dry Red Wine: A good quality, dry red wine is essential for depth and acidity in the braising liquid. I specifically recommend Cabernet Sauvignon for its robust flavor, but Merlot, Pinot Noir, or even a Bordeaux blend will also yield delicious results. Avoid sweet wines, as they can make the sauce cloying. It should be a wine you’d enjoy drinking – a good rule of thumb I learned in Paris!

Beef Broth: This provides the savory liquid base for our braise. Opt for a good quality, low-sodium beef broth so you can control the saltiness of the final dish. A homemade beef stock would be even better if you have it on hand. If you’re in a pinch and don’t have broth, you can use water, but the sauce will be less rich and flavorful.

Original IngredientBest SubstitutionFlavor / Texture Impact
Bone-in Short RibsBoneless Beef Chuck Roast (cut into 3-4 inch chunks)Slightly less rich, may not fall off the bone quite as easily. Ensure thick cuts.
Cabernet SauvignonMerlot or other dry, full-bodied red wineSlightly less tannic, sweeter notes. Still provides excellent depth. Avoid cheap “cooking wine.”
Beef BrothBeef Consommé or high-quality Chicken BrothConsommé will be richer but saltier. Chicken broth is lighter, less beefy.
Fresh Thyme/Oregano1 teaspoon dried thyme & 1/2 teaspoon dried oreganoHerbal notes will be less bright and fresh; may require slightly longer cooking for flavors to meld fully.

How to Make Red Wine Braised Short Ribs in Dutch Oven — Step-by-Step

Don’t be intimidated by the ingredient list or cooking time; making these red wine braised short ribs is straightforward and incredibly rewarding.

Step 1: Preheat the Oven

To start, preheat your oven to 350°F (175°C). This gentle, consistent heat is crucial for tender braised short ribs.

💡 mia’s Pro Tip: Ensure your oven rack is in the center position. This allows for even heat circulation around your Dutch oven throughout the long cooking process.

Step 2: Season the Short Ribs

Rinse the bone-in short ribs under cold water and pat them thoroughly dry with paper towels. This is a vital step for achieving a beautiful sear. Season them generously on all sides with salt and freshly ground black pepper. Don’t be shy with the salt!

Step 3: Brown the Short Ribs

Heat 2 tablespoons of olive oil in a 6-quart or larger Dutch oven over medium-high heat until shimmering. Working in batches (don’t overcrowd the pot!), brown the short ribs on all sides until deeply golden brown, about 5-6 minutes per side. Transfer the browned ribs to a clean plate and set aside.

⚠️ Common Mistake to Avoid: Crowding the pan! Browning in batches ensures that the meat sears rather than steams, creating that flavorful crust essential for taste and color.

Step 4: Sauté the Aromatics

Reduce the heat to medium. Add the diced onion to the Dutch oven and cook, stirring occasionally, until softened and translucent, about 8-10 minutes. Then, add the diced celery and carrots and cook for another 3-5 minutes until slightly tender.

Step 5: Add Garlic and Tomato Paste

Add the 3 smashed garlic cloves and 2 tablespoons of tomato paste to the pot. Cook, stirring constantly, for about 2-3 minutes until the tomato paste darkens slightly and becomes fragrant. This step caramelizes the sugars in the paste, adding a wonderful depth of flavor.

Step 6: Deglaze with Wine

Pour in the 2 cups of dry red wine. Bring it to a boil, scraping up any browned bits stuck to the bottom of the pot – this is where so much flavor resides! Lower the heat to medium and let it simmer and reduce by about half, which should take roughly 15-20 minutes. This concentrates the wine’s flavor and cooks off the raw alcohol taste.

Step 7: Add Beef Broth

Stir in the 3 cups of beef broth. Bring the mixture back to a gentle simmer.

Step 8: Return Meat and Herbs

Carefully transfer the browned short ribs back into the Dutch oven, ensuring they are mostly submerged in the liquid. Add the 2 bay leaves, the sprig of fresh thyme, and the sprig of fresh oregano.

Step 9: Braise in the Oven

Cover the Dutch oven tightly with its lid and transfer it to the preheated oven. Braise for 2 ½ to 3 hours, or until the short ribs are exceptionally tender and easily pull away from the bone. The cooking time can vary depending on the size and thickness of your ribs.

💡 mia’s Pro Tip: You can check the ribs for tenderness by gently trying to pull the meat from the bone with a fork. It should be very loose and almost falling apart.

Step 10: Rest and Strain the Sauce

Once tender, carefully remove the short ribs from the Dutch oven and place them on a clean plate. Tent loosely with foil to keep them warm. Strain the braising liquid through a fine-mesh sieve into a heatproof bowl or another saucepan. Discard the solids (vegetables and herbs) – they’ve done their job!

Step 11: Thicken the Sauce

Pour the strained liquid (the sauce) back into the cleaned Dutch oven or saucepan. Bring it to a simmer over medium heat and let it cook, uncovered, until it reduces and thickens to your desired consistency, creating a rich, glossy gravy. Taste for seasoning and add more salt or pepper if needed.

⚠️ Common Mistake to Avoid: Not reducing the sauce enough! A thin sauce won’t coat the ribs beautifully. Be patient and let it simmer until it has body and a glossy sheen.

StepActionDurationKey Visual Cue
1Preheat Oven15-20 minsOven at temperature
2Season Ribs5 minsEvenly coated meat
3Brown Ribs15-20 mins (total)Deeply caramelized crust
4Sauté Aromatics10-15 minsOnions translucent, vegetables softened
5Add Garlic & Paste2-3 minsFragrant paste, slightly deepened color
6Deglaze w/ Wine15-20 minsLiquid reduced by half
7Add Broth2 minsLiquid combined
8Return Meat & Herbs3 minsRibs nestled in liquid
9Braise in Oven2.5-3 hoursMeat tender, pulling from bone
10Rest & Strain Sauce10 minsClear liquid strained, ribs resting
11Thicken Sauce10-15 minsSauce glossy and thickened

Serving & Presentation

Presenting these red wine braised short ribs is a joy. Spoon a generous amount of the rich, glossy sauce over the tender ribs. I love serving them with creamy mashed potatoes or a simple risotto to catch every drop of that decadent sauce. For a touch of freshness and color, a sprinkle of fresh parsley or chives looks beautiful. This dish always reminds me of Parisian bistros – simple, elegant, and utterly delicious.

A sprinkle of fresh chives or finely chopped parsley adds a lovely pop of green and a hint of freshness that complements the richness of the short ribs. Steamed asparagus or green beans also make a wonderful, vibrant side dish. If you’re feeling fancy, a small dollop of gremolata (minced parsley, lemon zest, and garlic) can add a bright citrus note that cuts through the richness beautifully.

When I serve this in my NYC apartment, I often pair it with a simple side of roasted root vegetables or polenta. It feels hearty and satisfying, just like a good New York meal should be. The deep red of the wine sauce and the rich brown of the meat make for a visually stunning plate, perfect for any gathering.

Pairing TypeSuggestionsWhy It Works
Side DishCreamy Mashed Potatoes, Polenta, Risotto, Roasted Root VegetablesThese starchy bases soak up the rich sauce beautifully, providing a comforting contrast to the tender meat.
Sauce / DipThe enriched braising liquid itself is the star; no additional sauce needed unless for extra serving.Its deep, complex flavor is the perfect complement to the short ribs.
BeverageFull-bodied Red Wine (Cabernet Sauvignon, Merlot), Hearty Ale, Dry CiderThese complement the richness of the beef and the wine-infused sauce without overpowering it.
GarnishFresh Parsley, Chives, Gremolata (parsley, lemon zest, garlic)Adds a touch of freshness and visual appeal, cutting through the richness of the dish.

Make-Ahead, Storage & Reheating

One of the best things about braised dishes is that they often taste even better the next day! In my bustling NYC life, I often make these dutch oven short ribs a day or two in advance. The flavors meld beautifully overnight, and you get to enjoy a relaxed meal without the last-minute fuss. Just reheat gently on the stovetop or in the oven.

MethodContainerDurationReheating Tip
RefrigeratorAirtight container (or keep in Dutch oven if oven-safe)3-4 daysGently reheat on the stovetop over low heat, adding a splash of broth or water if needed. Alternatively, reheat in a 300°F oven until warmed through.
FreezerHeavy-duty freezer bags or airtight containers2-3 monthsThaw completely in the refrigerator overnight. Reheat as you would refrigerated leftovers. The sauce might separate slightly upon thawing; whisking well during reheating resolves this.
Make-AheadAllow to cool completely, then refrigerate or freeze.Can be made up to 2 days before serving.If refrigerating, bring to room temperature for 30 mins before reheating on stovetop or in oven. If frozen, thaw and reheat as above.

When reheating a larger batch, I find the oven offers the most even warming. Place your Dutch oven or a casserole dish in a preheated oven at 300°F (150°C) for about 20-30 minutes, or until the sauce is simmering and the meat is hot. If the sauce seems a little thin after reheating, you can always simmer it down a bit more on the stovetop to regain that desired glossy consistency.

Variations & Easy Swaps

VariationKey ChangeBest ForDifficulty Impact
Moroccan Spiced Short RibsAdd ras el hanout, cinnamon, ginger, and dried apricots to the braising liquid.Adventurous palates, North African flavor lovers.Slightly more complex spice profile.
Gluten-Free / Dairy-Free SwapEnsure broth is GF; skip dairy in sides. Use GF flour for thickening, or reduce sauce naturally.Dietary restrictions.None if using natural reduction for sauce.
Herbal TwistReplace thyme/oregano with rosemary or tarragon.Those who love fresh herbs.Minimal, changes aroma profile.

[Moroccan Spiced Short Ribs]

Drawing inspiration from my Moroccan roots, you can transform these braised short ribs into a North African delight. After browning the ribs and sautéing the vegetables, stir in about 2 tablespoons of *ras el hanout*, a pinch of cinnamon, and a teaspoon of ground ginger along with the tomato paste. Reduce the wine as usual, then add the broth. For an extra touch of sweetness and color, add a handful of dried apricots to the pot before braising. This variation offers a more complex, aromatic, and slightly sweet profile that’s utterly delicious.

[Gluten-Free / Dairy-Free Swap]

Making this recipe gluten-free and dairy-free is quite simple. First, ensure your beef broth is certified gluten-free. For thickening the sauce, instead of relying on flour (which isn’t in the base recipe anyway), simply reduce the liquid slowly over the stove until it reaches your desired consistency. If you serve this with a traditional polenta or mashed potatoes, just ensure they are made with broth or water and olive oil instead of milk or butter. This keeps the core flavors intact.

[Seasonal or Flavor Twist]

While thyme and oregano are classic choices, feel free to experiment with other herbs. A few sprigs of fresh rosemary, added during the braising in the oven, will impart a wonderfully rustic flavor that pairs beautifully with beef. Or, try tarragon for a more delicate, slightly anise-like note. You can even add a strip of orange zest along with the bay leaves for a subtle citrus brightness that cuts through the richness, a technique I picked up from a chef in Paris.

What is the best type of red wine to use for braising short ribs in a Dutch oven?

For the best results when making red wine braised short ribs in a Dutch oven, I recommend using a dry, full-bodied red wine. Cabernet Sauvignon is my top choice because of its robust flavor profile and tannins, which stand up well to the rich beef. Merlot, Pinot Noir, or even a Syrah are also excellent options. The key is to use a wine that you would enjoy drinking on its own; avoid sweet wines or low-quality “cooking wines,” as they can impart an unpleasant flavor to your sauce.

How long does it take to braise short ribs in a Dutch oven until they are tender?

Typically, braising short ribs in a Dutch oven takes between 2.5 to 3.5 hours at 350°F (175°C). The exact time will depend on the size and thickness of your short ribs, as well as your specific oven. The goal is for the meat to become so tender that it easily pulls away from the bone with just a fork. It’s always better to cook them a little longer if needed than to serve undercooked, tough short ribs.

Do I need to sear the short ribs before braising them in the Dutch oven?

Absolutely, yes! Searing the short ribs before braising is a crucial step that develops a deep, rich flavor through the Maillard reaction and creates a beautiful caramelized crust. This not only enhances the taste of the meat itself but also contributes significantly to the depth of flavor in the braising liquid. Skipping this step will result in a less complex and visually less appealing dish. Ensure you brown them in batches to avoid steaming.

Can I substitute beef broth for red wine in braised short ribs?

While you can substitute beef broth for red wine, it will significantly change the flavor profile of the dish. Red wine provides acidity, tannins, and a complex fruity depth that is integral to classic braised short ribs. If you must substitute, using only beef broth will result in a less nuanced sauce. You could try adding a splash of red wine vinegar or balsamic vinegar to the broth to mimic some of the acidity, but the full-bodied berry notes of the wine will be absent.

What vegetables can I include in the braise besides onion, celery, and carrots?

Besides the classic onion, celery, and carrots (the mirepoix), you can certainly add other vegetables to enhance the braising liquid’s flavor. Consider adding chunks of leeks, parsnips, or even a whole bulb of garlic (halved horizontally) for extra aromatic depth. Mushrooms, such as cremini or shiitake, also lend a wonderful earthy flavor to the sauce. These vegetables will soften and infuse their essence into the braise, though they are typically discarded before serving, similar to how my mother would prepare a tagine.

Can I make red wine braised short ribs ahead of time?

Yes, these braised short ribs are ideal for making ahead! In fact, they often taste even better when prepared a day or two in advance, as the flavors have more time to meld and deepen. Once cooled, store them in an airtight container in the refrigerator. Reheat gently on the stovetop over low heat or in a low oven (around 300°F/150°C) until warmed through. This makes them perfect for entertaining or for a comforting weeknight meal.

What is the best way to thicken the sauce for braised short ribs?

The most classic and flavorful way to thicken the sauce for braised short ribs is by reducing it. After straining the braising liquid, simply simmer it uncovered over medium heat until it naturally thickens and becomes glossy. This concentrates the already delicious flavors. For an extra boost, you can create a slurry with a tablespoon of cornstarch or gluten-free flour mixed with an equal amount of cold water, then whisk it into the simmering sauce until thickened. However, I usually find natural reduction is sufficient and yields the best flavor.

Can I use boneless short ribs for this recipe?

Yes, you can certainly use boneless short ribs or even boneless beef chuck roast cut into generous, 3-4 inch chunks if boneless short ribs are unavailable. The key is to ensure the pieces are large enough to withstand the long braising time without drying out. The bone in bone-in short ribs does add an extra layer of flavor and richness to the braising liquid, and the meat often falls off the bone more easily when cooked. However, boneless cuts will still yield a delicious and tender result.

Share Your Version!

I truly hope you enjoy making and devouring these Red Wine Braised Short Ribs as much as I do. They are a labor of love, but the results are so worth it. Please leave a comment below with your thoughts and a star rating – your feedback helps me tremendously! If you share a photo on Instagram or Pinterest, don’t forget to tag me @chefrecipes2; I absolutely adore seeing your culinary creations come to life. I’m always curious to hear how you adapt recipes – did you try any unique spice combinations or serve it with something unexpected?

From my NYC kitchen to yours — I hope this recipe brings as much warmth to your table as it does to mine. — mia 🧡

📌

Love This Recipe? Save It to Pinterest!

If you enjoyed this Red Wine Braised Short Ribs in Dutch Oven recipe, don’t let it get lost in your browser tabs! 😄 Pin it now so you can find it again anytime — and explore hundreds more tried-and-tested recipes waiting for you on my Pinterest boards.

👉 Follow mia on Pinterest @chefrecipes2

📌 Pin this recipe · 🔁 Re-pin your favorites · 💬 Tag me when you make it — I love seeing your creations!

Print

clock clock iconcutlery cutlery iconflag flag iconfolder folder iconinstagram instagram iconpinterest pinterest iconfacebook facebook iconprint print iconsquares squares iconheart heart iconheart solid heart solid icon

Red Wine Braised Short Ribs in Dutch Oven

  • Author: Chef Mia

Description

Red Wine Braised Short Ribs is the best recipe for tender fall apart bone-in beef short ribs slow cooked with gravy in a Dutch Oven. This is a perfect comfort meal you can make at home for your friends and family!


Ingredients

Scale
  • 2 tablespoons olive oil
  • 34 pounds bone-in short ribs (810 pieces)
  • Salt (pepper to taste)
  • 1 large onion (diced)
  • 2 stalks celery (diced)
  • 2 carrots (diced)
  • 3 cloves garlic (crashed)
  • 2 tablespoons tomato paste
  • 2 cups wine (Cabernet Sauvignon)
  • 3 cups beef broth
  • 2 bay leaves
  • 1 spring thyme
  • 1 spring oregano

Instructions

  1. To start, lets preheat the oven to 350°F.
  2. Rinse and pat dry the meat and generously season with salt and pepper.
  3. Heat 2 tbsp olive oil in 6 Qt Dutch oven over medium-high heat. Brown the meat in two batches for 5-6 minutes on each side, then transfer to a plate and set aside.
  4. Add 1 diced onion and cook for 8-10 minutes or until translucent and softened. Then add 2 stalks diced celery and 2 diced carrots, and cook for 3-5 minutes more.
  5. Add 3 cloves smashed garlic and 2 tbsp tomato paste and cook for a few more minutes.
  6. Stir in 2 cups wine, bring to boil, lower the heat to medium and simmer until it reduces in half, about 15-20 minutes.
  7. Add 3 cups beef broth and stir.
  8. Transfer the meat back to the pot, add bay leaves, thyme and oregano.
  9. Cover with the lid and transfer to the oven.
  10. Cook for 2 ½-3 hours or until the ribs are tender.
  11. Transfer the meat to the plate and cover with foil.
  12. Strain the sauce and set discard the vegetables.
  13. Pour the liquid back to the pot and simmer until it thickens.


Nutrition

  • Calories: 319 kcal
  • Sugar: 2 g
  • Fat: 16 g
  • Carbohydrates: 6 g
  • Protein: 25 g


Red Wine Braised Short Ribs in Dutch Oven

k">

Tried This Recipe? Leave a Comment!

Did you make this recipe? I’d love to hear how it turned out! Please leave a comment and a rating below. Your feedback helps other home cooks and supports cheerychop.com!

For more delicious inspiration, follow me on Pinterest!
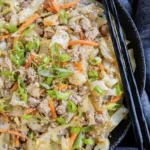
Red Wine Braised Short Ribs in Dutch Oven – Tender & Juicy

Red Wine Braised Short Ribs in Dutch Oven: Fall-Apart Perfection

⚖️
Difficulty
Easy
⏲️
Prep Time
20 mins
🕒
Cook Time
180 mins
⏱️
Total Time
200 mins
🍽️
Servings
4-6

New York City is a melting pot of flavors, and for me, nothing screams soulful comfort quite like a perfectly braised dish. Growing up in my mother’s kitchen in Marrakech, tagines simmered for hours, filling our home with the most incredible aromas. Later, in Paris, I fell in love with the elegance of French braising techniques, especially when applied to robust cuts of meat. This red wine braised short ribs recipe is a culmination of those experiences—a dish that’s both rustic and refined, bringing the best of Moroccan warmth and French technique right to your Dutch oven. It’s the kind of meal that makes a weeknight feel like a special occasion, and a holiday feast truly unforgettable. It’s my go-to for red wine short ribs recipe that never fails to impress.

Imagine sinking your fork into impossibly tender beef short ribs, so succulent they practically melt off the bone. The rich, glossy sauce, deep ruby in color from the splash of Cabernet Sauvignon, clings to every morsel, laced with the subtle sweetness of slow-cooked vegetables and aromatic herbs. The scent alone — a heady mix of red wine, savory beef, and earthy mirepoix — is enough to make your stomach grumble in anticipation. This isn’t just food; it’s an experience, a culinary hug that warms you from the inside out. It’s the essence of slow-cooked perfection.

What makes my approach to braised short ribs in a Dutch oven so special? It’s all about building layers of flavor from the very first step. I learned in Paris that starting with a beautiful sear on the meat is non-negotiable for developing that deep, complex taste and a gorgeous color. And while many recipes might rush the sauce, I often let it simmer a little longer, coaxing out maximum richness. I’ll even share a little trick I picked up for thickening the sauce that’s far superior to simply adding cornstarch. Keep an eye out for my pro tip on perfecting that rich gravy – it’s a game-changer for anyone wanting truly exceptional dutch oven short ribs.

Why This Red Wine Braised Short Ribs in Dutch Oven Recipe Is the Best

My culinary journey has instilled in me a deep appreciation for the magic of braising. It’s a fundamental technique that transforms humble cuts of meat into tender, flavorful masterpieces. This red wine braised short ribs recipe is my perfected version, drawing on years of experience to ensure a result that is consistently delicious, remarkably easy, and deeply satisfying. It’s more than just a recipe; it’s a gateway to creating incredible meals at home.

The secret to the incredible depth of flavor in these beef short ribs braised lies in the combination of a robust Cabernet Sauvignon and the classic mirepoix, all painstakingly built in the pan before the slow braise begins. My Parisian training emphasized the importance of deglazing the pan properly after searing the meat, capturing all those browned bits—the ‘fond’—which are pure flavor gold. This recipe captures that essence, creating a sauce that is rich, nuanced, and utterly irresistible.

What truly sets this recipe apart is its foolproof nature. While the result tastes complex and restaurant-worthy, the actual steps are straightforward. The Dutch oven does most of the heavy lifting in the oven, ensuring that even if you’re new to braising, you’ll achieve perfectly tender, fall-off-the-bone results every time. I’ve streamlined the process so you can confidently create this impressive dish without stress, making it an ideal choice for both beginners and seasoned home cooks seeking to master dutch oven short ribs.

Red Wine Braised Short Ribs Ingredients

When I’m in New York City, my favorite place to source the best quality beef short ribs is at the Union Square Greenmarket. The butchers there are incredibly knowledgeable, and the quality is unparalleled. For everything else, I rely on my local grocer, but I always make sure to pick up fresh herbs from Kalustyan’s or a specialty spice shop when I’m craving that authentic Moroccan touch. This recipe is designed to be accessible, using ingredients you can find in most supermarkets.

Ingredients List

  • 2 tablespoons olive oil
  • 3-4 pounds bone-in beef short ribs (about 8-10 pieces)
  • Salt and freshly ground black pepper (to taste)
  • 1 large yellow onion, diced
  • 2 stalks celery, diced
  • 2 medium carrots, diced
  • 3 cloves garlic, smashed
  • 2 tablespoons tomato paste
  • 2 cups dry red wine (Cabernet Sauvignon or Merlot recommended)
  • 3 cups beef broth
  • 2 bay leaves
  • 1 sprig fresh thyme
  • 1 sprig fresh oregano (or 1/2 teaspoon dried)

Ingredient Spotlight

Bone-in Beef Short Ribs: The star of the show! Opt for bone-in for maximum flavor and moisture. Look for ribs with a good amount of marbling – those streaks of fat will render down, keeping the meat incredibly tender and moist. If you can’t find bone-in, boneless will work, but the cooking time might be slightly shorter, and they may not yield quite the same richness. For the best visual appeal, I like ribs that are about 1.5-2 inches thick.

Dry Red Wine (Cabernet Sauvignon): This is crucial for the depth and character of the braising liquid. A full-bodied red wine like Cabernet Sauvignon or Merlot provides tannins and fruit notes that complement the rich beef perfectly. Avoid sweet wines or anything you wouldn’t enjoy drinking on its own. The alcohol cooks off, leaving behind a complex, savory flavor. If you absolutely cannot use wine, you can substitute with an additional cup of beef broth and a tablespoon of balsamic vinegar for acidity, though the flavor profile will be different.

Beef Broth: This is the backbone of the braising liquid, providing moisture and a savory base. Use a good quality, low-sodium beef broth or stock. Homemade stock is always a winner if you have it! The quality of your broth significantly impacts the final sauce, so splurge a little if you can. If you’re out of beef broth, a rich chicken broth or even vegetable broth can work in a pinch, but beef broth is preferred for its depth.

Mirepoix (Onion, Celery, Carrots): This classic French aromatic base forms the foundation of flavor for our sauce. These vegetables soften and sweeten as they cook, lending a subtle sweetness and depth that balances the richness of the beef and wine. I like to dice them relatively small so they break down nicely into the sauce. You can use yellow, white, or red onions; they all work beautifully here.

Original IngredientBest SubstitutionFlavor / Texture Impact
Bone-in Short RibsBoneless Short RibsSlightly less marrow flavor, may cook faster. Ensure adequate marbling.
Cabernet SauvignonMerlot or another dry, full-bodied red wine; OR 1 cup beef broth + 1 tbsp balsamic vinegar (for non-alcoholic)Flavor profile will shift slightly based on wine choice. Balsamic vinegar adds tanginess but not the complex notes of red wine.
Beef BrothRich Chicken Broth or Strong Vegetable BrothMay result in a lighter flavor profile; beef broth provides the deepest, most savory base.
Fresh Thyme/Oregano1 teaspoon total of dried thyme and oreganoDried herbs are more concentrated; use less. Fresh herbs offer a brighter, more nuanced flavor.

How to Make Red Wine Braised Short Ribs in Dutch Oven — Step-by-Step

Alright, let’s get these incredible short ribs into your kitchen. Follow these steps, and you’ll be rewarded with a dish that truly sings.

Step 1: Preheat the Oven & Prep the Ribs

Preheat your oven to 350°F (175°C). This temperature is perfect for gently coaxing the collagen in the short ribs to break down into tender, succulent meat without drying them out. While the oven heats, rinse your bone-in short ribs under cold water and then pat them thoroughly dry with paper towels. This is a crucial step for achieving a good sear. Generously season all sides of the ribs with salt and freshly ground black pepper. Don’t be shy with the salt; it’s essential for flavor.

💡 mia’s Pro Tip: Ensuring the short ribs are completely dry is key to a beautiful, deep brown sear. Any moisture on the surface will steam the meat instead of searing it, preventing that delicious Maillard reaction that forms the foundation of so much flavor.

Step 2: Brown the Short Ribs

Place your 6-quart Dutch oven over medium-high heat on the stovetop. Add 2 tablespoons of olive oil and let it get hot and shimmery. Carefully place the seasoned short ribs into the hot oil, working in batches if necessary to avoid crowding the pot. Crowd-a-phobia is real in searing! Brown the ribs for about 5-6 minutes on each side until they have a deep, rich brown crust. Once browned, transfer the ribs to a clean plate and set them aside. Resist the urge to clean out the pot!

⚠️ Common Mistake to Avoid: Overcrowding the pan. If you try to brown too many ribs at once, the temperature of the oil will drop, and the meat will steam instead of sear. This results in pale, unappealing ribs and a less flavorful sauce. Work in batches for the best results!

Step 3: Sauté the Aromatics

Reduce the heat to medium. Add 1 large diced onion to the same Dutch oven, scraping up any browned bits from the bottom of the pot. Cook the onion for 8-10 minutes, stirring occasionally, until it’s softened and becoming translucent. Then, add 2 stalks of diced celery and 2 diced carrots. Cook for another 3-5 minutes, allowing them to soften slightly and release their sweet flavors into the pot.

Step 4: Add Garlic and Tomato Paste

Stir in 3 smashed cloves of garlic and 2 tablespoons of tomato paste. Cook for about 2-3 minutes more, stirring constantly. The tomato paste will darken slightly and become fragrant, which helps to mellow its raw flavor and deepen its umami notes. This step is like building your flavor foundation – don’t skip it!

Step 5: Deglaze with Red Wine

Pour in the 2 cups of red wine. Bring it to a boil, then reduce the heat to medium and let it simmer, uncovered, for about 15-20 minutes. You want to reduce the wine by about half. This process concentrates its flavor and cooks off some of the harsh alcohol, leaving behind a rich, fruity, and slightly acidic liquid that’s essential for tenderizing the beef and creating a complex sauce.

💡 mia’s Pro Tip: Scrape the bottom of the Dutch oven thoroughly as the wine simmers. All those browned bits stuck to the pan are packed with flavor and will dissolve into the liquid, enriching your sauce immensely. This is the core of classic French sauce-making!

Step 6: Add Broth and Herbs

Pour in 3 cups of beef broth and stir to combine with the reduced wine and vegetables. Add the 2 bay leaves, 1 sprig of fresh thyme, and 1 sprig of fresh oregano. If you’re using dried herbs, add about 1/2 teaspoon each of dried thyme and oregano now.

Step 7: Braise the Ribs

Carefully transfer the browned short ribs back into the Dutch oven, nestling them into the liquid. The liquid should come about two-thirds of the way up the sides of the ribs. Cover the pot tightly with its lid and carefully transfer the Dutch oven to the preheated oven.

⚠️ Common Mistake to Avoid: Using a pot that isn’t oven-safe or doesn’t have a tight-fitting lid. A secure lid traps the steam and moisture, ensuring the ribs braise gently and evenly. If your lid isn’t tight, you can use a layer of parchment paper followed by aluminum foil, then the lid.

Step 8: Slow Cook Until Tender

Allow the ribs to braise in the oven for 2 ½ to 3 hours. The exact time will depend on the size and thickness of your ribs. You’ll know they’re ready when the meat is incredibly tender and easily pulls away from the bone with a fork. I often check them around the 2-hour mark and then every 30 minutes after that.

Step 9: Rest Ribs & Strain Sauce

Once the ribs are fork-tender, carefully transfer them from the Dutch oven to a clean plate or baking dish. Tent them loosely with aluminum foil to keep them warm while you finish the sauce. Now, strain the braising liquid through a fine-mesh sieve set over a bowl or back into a clean saucepan. Discard the cooked vegetables—they’ve done their job!

💡 mia’s Pro Tip: For an extra smooth sauce, you can press down on the solids in the sieve with the back of a spoon to extract as much liquid as possible. However, be careful not to push too hard, as this can force solids through and make your sauce cloudy.

Step 10: Thicken the Sauce

Pour the strained liquid back into the Dutch oven (or your saucepan) over medium heat. Bring it to a simmer and let it cook, stirring occasionally, until it reduces and thickens to your desired consistency – it should coat the back of a spoon. This could take about 10-20 minutes depending on how much liquid you have. Taste and adjust seasoning with salt and pepper if needed; this is your final chance to get the flavor perfect!

StepActionDurationKey Visual Cue
1Preheat & Prep Ribs~10 minsOven at 350°F, Ribs dry & seasoned
2Brown Ribs~10-12 mins (per batch)Deep golden-brown crust on all sides
3Sauté Aromatics~10-13 minsOnions translucent, carrots softened
4Add Garlic & Tomato Paste~2-3 minsFragrant, tomato paste darkened
5Deglaze with Wine~15-20 minsWine reduced by half
6Add Broth & Herbs~1 minAll ingredients combined in pot
7Nestle Ribs & Cover~2 minsRibs submerged 2/3 in liquid, lid on
8Braise in Oven2.5-3 hoursMeat is fork-tender, easily shreds
9Rest Ribs & Strain Sauce~10 minsRibs removed, liquid strained
10Thicken Sauce~10-20 minsSauce coats back of spoon

Serving & Presentation

The beauty of red wine braised short ribs is their inherent elegance. When plating, I love to place a generous portion of creamy mashed potatoes or polenta on the plate, creating a cozy bed for the succulent short rib. Spoon the rich, thickened sauce liberally over the top, making sure to capture some of those delicious bits from the bottom of the pot. If you like, you can pull the meat from the bone before serving, or serve them bone-in for a more rustic presentation.

Garnishes add that final touch of sophistication, reminiscent of the care taken in Parisian bistros. A sprinkle of fresh chopped parsley adds a pop of color and freshness. Some finely grated lemon zest can cut through the richness beautifully. For a nod to my Moroccan heritage, a pinch of smoked paprika or a very thin sliver of preserved lemon could add an unexpected, delightful twist. Serving this with a crusty baguette from a local NYC bakery is also a must for soaking up every last drop of that incredible sauce.

Pairing TypeSuggestionsWhy It Works
Side DishCreamy Mashed Potatoes, Buttery Polenta, Garlic-Herb Risotto, Roasted Root Vegetables, Crusty BreadThese are classic accompaniments that soak up the rich sauce beautifully, providing textural contrast and absorbing the deep flavors of the braise.
Sauce / DipA dollop of Crème fraîche, a spoonful of sour cream, or a simple Gremolata (parsley, lemon zest, garlic)Adds a touch of brightness or creaminess to cut through the richness of the beef and sauce, balancing the dish.
BeverageA glass of the same red wine used for braising, a rich Syrah, or a dark craft beer.The wine echoes the flavor in the dish, while a dark beer offers a malty, complementary profile.
GarnishFresh Parsley, Chives, Thyme leaves, Thinly sliced lemon zestAdds a final touch of color, freshness, and aromatic complexity, elevating the final presentation.

Make-Ahead, Storage & Reheating

As a busy chef living in NYC, I’ve learned the art of the make-ahead meal! This braised short ribs recipe is a lifesaver because it’s even better on the second day. The flavors meld beautifully overnight, making it perfect for preparing a day or two in advance for stress-free entertaining or those busy weeknights when you want a gourmet meal without the last-minute fuss.

MethodContainerDurationReheating Tip
RefrigeratorAirtight container or original Dutch oven with lid3-4 daysGentle reheating on the stovetop over low heat, or in a 300°F oven. Add a splash of broth if sauce seems too thick.
FreezerHeavy-duty freezer bags or airtight freezer containersUp to 3 monthsThaw overnight in the refrigerator, then reheat gently on the stovetop or in the oven. The texture of the short ribs should hold up beautifully.
Make-AheadOnce cooled, store the entire dish in the Dutch oven or transfer to an airtight container.Up to 2 days before servingReheat slowly on the stovetop or in a low oven (300°F/150°C). You can even reheat it on the grill for a smoky flavor!

When reheating, I prefer the stovetop method in a saucepan or the Dutch oven itself. This allows me to control the heat and stir gently, ensuring even warming and preventing the sauce from breaking or scorching. Add a small splash of beef broth or water if the sauce has become too thick during storage. For a richer flavor, you can even finish it by carefully spooning a tablespoon of cold butter into the sauce while it simmers.

Variations & Easy Swaps

VariationKey ChangeBest ForDifficulty Impact
Herby European-StyleAdd rosemary, sage, and a splash of brandy with the red wine. Strain and discard fewer vegetables like carrots.A more traditional French feel.Easy
Gluten-Free / Dairy-FreeEnsure broth is GF. Omit any dairy (like butter for finishing sauce or cream for mash). Use GF thickener if needed.Dietary restrictions.Easy
Spicy Moroccan-InspiredAdd cinnamon, cumin, coriander, and a pinch of chili flakes with the aromatics. Use beef broth and maybe a touch of pomegranate molasses in the sauce.Adventurous palates seeking warmth.Easy

Herby European-Style Braised Short Ribs

For a classic European flair, embrace fragrant herbs like rosemary and sage, which pair beautifully with the earthy notes of beef. You can add a splash of brandy alongside the red wine for an extra layer of depth, just as I’ve seen done in the finest French kitchens. If you prefer a less chunky sauce, you can always strain out additional vegetables like carrots, though I often leave them in for texture and sweetness. This variation leans into the traditional, comforting heart of braised meats.

Gluten-Free & Dairy-Free Braised Short Ribs

Making this recipe gluten-free and dairy-free is remarkably simple and requires only a few mindful swaps. First, ensure your beef broth is certified gluten-free, as some store-bought stocks can contain hidden gluten. When thickening the sauce, if you prefer it thicker than it naturally reduces, use a cornstarch slurry (1 tbsp cornstarch mixed with 2 tbsp cold water) instead of flour. For serving, skip the butter in mashed potatoes and use olive oil or a dairy-free butter alternative, or opt for a naturally GF side like polenta or rice.

Spicy Moroccan-Inspired

To infuse a taste of my Moroccan home into this dish, I love to add warm spices like cinnamon, cumin, and coriander to the aromatic base. A pinch of cayenne pepper or chili flakes can provide a gentle warmth that complements the richness of the beef. You could even incorporate a tablespoon of pomegranate molasses into the sauce as it thickens for a unique sweet-tart finish, reminiscent of traditional Moroccan fruit stews. This creates a totally new dimension of flavor!

What is the best type of red wine to use for braising short ribs?

The best red wines for braising short ribs are dry, full-bodied varieties that have good acidity and tannins. Cabernet Sauvignon and Merlot are excellent choices due to their robust flavor profiles that stand up to the rich beef. Other good options include Zinfandel, Syrah, or a Rhône blend. Avoid sweet wines like port or sherry, and very light-bodied wines like Pinot Noir, as they won’t provide enough depth. Remember, the alcohol cooks off, leaving the complex flavors behind, so choose a wine you enjoy drinking!

How long does it take to braise short ribs in a Dutch oven until tender?

Typically, braising short ribs in a Dutch oven at 350°F (175°C) takes about 2.5 to 3 hours for bone-in ribs. The exact time can vary depending on the size and thickness of the ribs, as well as your specific oven. The key indicator of doneness is tenderness – the meat should be so tender that it easily pulls away from the bone with just a fork. It’s always best to check for tenderness rather than strictly adhering to the time.

Do I need to sear the short ribs before braising them in the Dutch oven?

Yes, absolutely! Searing the short ribs before braising is a critical step that develops a deep, rich flavor and a beautiful color through the Maillard reaction. This browning process creates what chefs call ‘fond’ – the caramelized bits left in the bottom of the pan – which adds immense depth to your braising liquid and final sauce. Skipping this step will result in a less flavorful and less visually appealing dish, so it’s well worth the extra few minutes.

Can I substitute beef broth for red wine in braised short ribs?

While you can technically make braised short ribs without red wine by substituting with additional beef broth, it’s not ideal if you want the full, complex flavor profile this recipe offers. The red wine contributes color, acidity, depth, and subtle fruity notes that are unique. If you must omit the wine, I recommend using 1 cup of extra beef broth and adding 1 tablespoon of balsamic vinegar or red wine vinegar to mimic some of the acidity and depth. The result will be different but still enjoyable.

What can I serve with red wine braised short ribs?

Red wine braised short ribs are incredibly versatile and pair beautifully with a range of sides that can soak up their luscious sauce. Classic choices include creamy mashed potatoes, buttery polenta, or fluffy mashed cauliflower for a lighter option. A rich risotto, buttered egg noodles, or simply some crusty bread for dipping also work wonderfully. Roasted root vegetables like carrots, parsnips, and potatoes are another excellent accompaniment, adding seasonality and texture to the meal.

How do I thicken the sauce for braised short ribs?

The easiest and most impactful way to thicken the sauce is by simmering it uncovered over medium heat after straining out the solids. This allows the liquid to reduce and concentrate naturally, which enhances its flavor. If you’re short on time or need a thicker sauce, you can create a ‘slurry’ by whisking together 1 tablespoon of cornstarch with 2 tablespoons of cold water, then gradually whisking this mixture into the simmering sauce until it reaches your desired consistency. A little butter whisked in at the end can also add gloss and richness.

Share Your Version!

I pour my heart into developing these recipes, and nothing makes me happier than seeing them come to life in your kitchens! If you’ve made these Red Wine Braised Short Ribs in a Dutch Oven, please consider leaving a star rating and a comment below. Your feedback is invaluable and genuinely helps other home cooks feel confident trying out new dishes. If you share a photo on Instagram or Pinterest, please tag me @exorecipe – I absolutely love seeing your creations and might even feature them!

I’m always curious to hear how you adapt recipes. Did you experiment with any unique spice combinations, perhaps drawing inspiration from your own culinary heritage? Let me know in the comments below – I’m always looking for new ideas to bring to my own cooking!

From my NYC kitchen to yours — I hope this recipe brings as much warmth to your table as it does to mine. — mia 🧡

📌

Love This Recipe? Save It to Pinterest!

If you enjoyed this Red Wine Braised Short Ribs in Dutch Oven recipe, don’t let it get lost in your browser tabs! 😄 Pin it now so you can find it again anytime — and explore hundreds more tried-and-tested recipes waiting for you on my Pinterest boards.

👉 Follow mia on Pinterest @chefrecipes2

📌 Pin this recipe · 🔁 Re-pin your favorites · 💬 Tag me when you make it — I love seeing your creations!

Print

clock clock iconcutlery cutlery iconflag flag iconfolder folder iconinstagram instagram iconpinterest pinterest iconfacebook facebook iconprint print iconsquares squares iconheart heart iconheart solid heart solid icon

Red Wine Braised Short Ribs in Dutch Oven

  • Author: Chef Mia

Description

Red Wine Braised Short Ribs is the best recipe for tender fall apart bone-in beef short ribs slow cooked with gravy in a Dutch Oven. This is a perfect comfort meal you can make at home for your friends and family!


Ingredients

Scale
  • 2 tablespoons olive oil
  • 34 pounds bone-in short ribs (810 pieces)
  • Salt (pepper to taste)
  • 1 large onion (diced)
  • 2 stalks celery (diced)
  • 2 carrots (diced)
  • 3 cloves garlic (crashed)
  • 2 tablespoons tomato paste
  • 2 cups wine (Cabernet Sauvignon)
  • 3 cups beef broth
  • 2 bay leaves
  • 1 spring thyme
  • 1 spring oregano

Instructions

  1. To start, lets preheat the oven to 350°F.
  2. Rinse and pat dry the meat and generously season with salt and pepper.
  3. Heat 2 tbsp olive oil in 6 Qt Dutch oven over medium-high heat. Brown the meat in two batches for 5-6 minutes on each side, then transfer to a plate and set aside.
  4. Add 1 diced onion and cook for 8-10 minutes or until translucent and softened. Then add 2 stalks diced celery and 2 diced carrots, and cook for 3-5 minutes more.
  5. Add 3 cloves smashed garlic and 2 tbsp tomato paste and cook for a few more minutes.
  6. Stir in 2 cups wine, bring to boil, lower the heat to medium and simmer until it reduces in half, about 15-20 minutes.
  7. Add 3 cups beef broth and stir.
  8. Transfer the meat back to the pot, add bay leaves, thyme and oregano.
  9. Cover with the lid and transfer to the oven.
  10. Cook for 2 ½-3 hours or until the ribs are tender.
  11. Transfer the meat to the plate and cover with foil.
  12. Strain the sauce and set discard the vegetables.
  13. Pour the liquid back to the pot and simmer until it thickens.


Nutrition

  • Calories: 319 kcal
  • Sugar: 2 g
  • Fat: 16 g
  • Carbohydrates: 6 g
  • Protein: 25 g


Red Wine Braised Short Ribs in Dutch Oven

ph">For more delicious inspiration, follow me on Pinterest!