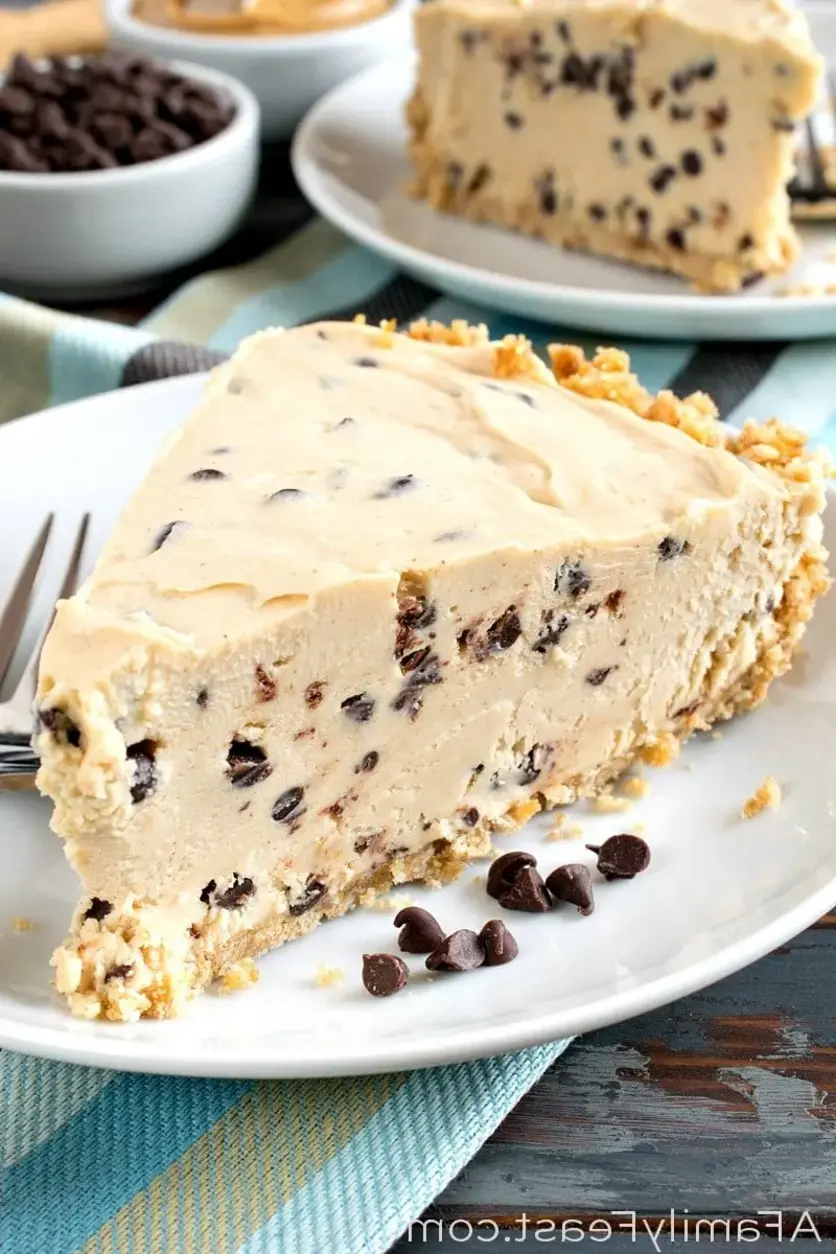
No-Bake Chocolate Chip Peanut Butter Pie Recipe

Chocolate Chip Peanut Butter Pie: No-Bake Wonder – Easy & Irresistible Recipe

⚖️
Difficulty
Easy
⏲️
Prep Time
20
🕒
Cook Time
0
⏱️
Total Time
20
🍽️
Servings
8

When I first moved to New York City, I was overwhelmed by the sheer variety of desserts in every bakery window. But even with all those glamorous pastries, nothing quite hit the spot like a comforting, familiar treat. That’s where this no-bake chocolate chip peanut butter pie recipe comes in. It’s a dream made of creamy peanut butter filling, studded with sweet chocolate chips, all nestled in a crisp graham cracker crust. This easy peanut butter pie is a guaranteed crowd-pleaser, perfect for potlucks, holiday gatherings, or just a Tuesday night in my Brooklyn apartment.

Imagine this: a velvety smooth peanut butter filling, so rich it melts in your mouth, contrasted with the delightful pops of sweet mini chocolate chips. The graham cracker crust provides a satisfyingly crumbly base, adding a touch of honeyed sweetness. It’s a symphony of textures and flavors that’s both sophisticated and wonderfully nostalgic. I often think of my mother’s kitchen in Morocco, where simple ingredients were transformed into magic, and this pie, while distinctly American, carries that same spirit of humble deliciousness. The secret to its incredible texture? Using just the right amount of whipped cream to lighten the decadent peanut butter base.

What makes this peanut butter chocolate chip pie truly special is how easy it is to achieve such spectacular results. I’ve tested this recipe countless times, tweaking it to ensure the perfect balance of sweetness and peanut butter flavor without being too heavy. I’m going to share a crucial tip for achieving that incredibly smooth filling, a common mistake people make that can lead to a grainy texture, and a simple way you can elevate this dessert even further. Get ready to impress everyone with a truly easy peanut butter pie that tastes like it came from a gourmet bakery.

Why This Chocolate Chip Peanut Butter Pie Recipe Is the Best

The standout feature of this chocolate chip peanut butter pie recipe is its incredible flavor depth, achieved through a harmonious blend of creamy peanut butter and rich chocolate chips. My culinary training in Paris taught me the importance of balanced flavors, and here, the natural sweetness of the peanut butter is perfectly complemented by the semi-sweet chocolate, creating a dance on your palate that feels both classic and exciting. It’s not just sweet; it has that satisfying salty-sweet contrast that keeps you coming back for more. This is truly a showstopper dessert.

Achieving that smooth, luscious texture is a hallmark of professional pastry work, and I’ve incorporated a technique I learned during my apprenticeship that ensures this pie is never grainy or heavy. By carefully whipping the heavy cream to stiff peaks and then gently folding it into the peanut butter mixture, we create an airy, almost mousse-like consistency that is simply divine. This step is critical for transforming a simple dessert into something truly elegant, making it a standout peanut butter chocolate chip pie that’s light yet incredibly satisfying. It’s a little bit of French technique in every bite.

As a busy New Yorker, I know the value of a recipe that delivers big on flavor without demanding hours in the kitchen. This no-bake peanut butter pie is exceptionally forgiving and straightforward. The crust comes together in minutes, and the filling requires no baking whatsoever, just simple mixing and chilling. It’s the perfect option for aspiring bakers, busy home cooks, or anyone who wants a delicious chocolate peanut butter dessert that’s practically foolproof. You can even have most of the components prepped ahead of time, making it a stress-free addition to any menu.

Chocolate Chip Peanut Butter Pie Recipe Ingredients

One of the things I love about this recipe is how it uses ingredients readily available at any New York City market. From the fresh dairy at Zabar’s to the reliable brands at Trader Joe’s, assembling this pie is a breeze. I always opt for creamy peanut butter made with just peanuts and salt, as it gives me the best control over the final flavor. Though I learned complex pastry techniques in Paris, the beauty of this dessert lies in its simplicity, allowing the quality of these core ingredients to shine through.

Ingredients List

  • 3/4 cup graham cracker crumbs
  • 1/4 cup granulated sugar
  • 2 tablespoons brown sugar
  • 4 tablespoons melted butter
  • 1 1/2 cups heavy cream
  • 8 ounces cream cheese, softened
  • 3/4 cup granulated sugar
  • 1 cup creamy peanut butter
  • 1 tablespoon vanilla extract
  • 1 cup mini chocolate chips

Ingredient Spotlight

Graham Cracker Crumbs: These form the base of our delightful crust. In the US, graham crackers are a pantry staple, offering a mild sweetness and satisfying crunch. For the best texture, blitz whole crackers in a food processor or place them in a sealed bag and crush them with a rolling pin. If you can’t find them, digestive biscuits or shortbread cookies can work as a substitution, though they might alter the sweetness and flavor profile slightly.

Creamy Peanut Butter: This is the heart and soul of our filling! For this easy peanut butter pie, I strongly recommend using a creamy variety. Natural peanut butters that are just peanuts and salt work best, as they often have a more intense peanut flavor and a smoother consistency. If you opt for a sweetened or heavily processed peanut butter, you might need to adjust the sugar in the recipe. Crunchy peanut butter can be used, but it will introduce a different texture to the otherwise silky filling.

Mini Chocolate Chips: These little bursts of chocolate are what elevates this from a peanut butter pie to a chocolate chip peanut butter pie! Mini chips distribute more evenly throughout the filling, ensuring you get a hint of chocolate in almost every bite. While regular-sized chips will work, they might sink to the bottom or feel too large in contrast to the smooth filling. Look for good quality semi-sweet or dark chocolate chips for the best flavor balance.

Original IngredientBest SubstitutionFlavor / Texture Impact
Graham Cracker CrumbsDigestive Biscuits or ShortbreadSlightly sweeter, more crumbly base.
Creamy Peanut ButterCrunchy Peanut ButterAdds a nutty texture, slightly less smooth filling.
Mini Chocolate ChipsRegular Chocolate Chips or Chopped Chocolate BarLarger chocolate chunks, may not distribute as evenly.

How to Make Chocolate Chip Peanut Butter Pie – Step-by-Step

This recipe is designed for ease and deliciousness, ensuring you’ll have a perfect peanut butter chocolate chip pie every time.

Step 1: Prepare the Graham Cracker Crust

In a medium bowl, combine the graham cracker crumbs, granulated sugar, brown sugar, and melted butter. Stir until the mixture is evenly moistened and resembles wet sand. Press this mixture firmly and evenly into the bottom and up the sides of a 9-inch pie plate. For best results, use the bottom of a measuring cup or glass to create a compact and uniform crust. Place the pie plate in the freezer while you prepare the filling.

💡 mia’s Pro Tip: To get that perfectly even crust, press the crumbs firmly, especially up the sides. You want it compact so it holds its shape when sliced. A frozen crust is key to a no-bake pie holding its structure!

Step 2: Whip the Heavy Cream

In a separate, clean bowl, whip the heavy cream using an electric mixer on medium-high speed until stiff peaks form. Be careful not to over-whip, or you’ll end up with butter! Set this aside in the refrigerator. This step adds lightness and airiness, making the filling smooth and decadent, not dense.

Step 3: Create the Peanut Butter Filling

In a large bowl, beat the softened cream cheese with an electric mixer until it’s completely smooth and free of lumps. This is crucial for a velvety texture. Add the 3/4 cup of granulated sugar and mix until well combined. Then, add the creamy peanut butter and vanilla extract. Mix on low speed until everything is thoroughly blended. Scrape down the sides of the bowl as needed to ensure all ingredients are incorporated.

⚠️ Common Mistake to Avoid: Make sure your cream cheese is truly softened to room temperature. Cold cream cheese will result in a lumpy filling, which is hard to salvage. If you forgot to take it out, you can gently warm it in the microwave for 10-15 second intervals, but be careful not to melt it!

Step 4: Combine Filling Components

Gently fold the whipped cream into the peanut butter and cream cheese mixture using a spatula. Be patient and fold until just combined. You want to maintain as much airiness from the whipped cream as possible. This delicate step ensures that your chocolate chip peanut butter pie has a light, mousse-like consistency rather than a dense, heavy one. Keep folding until no streaks of whipped cream remain.

Step 5: Add Chocolate Chips

Carefully fold the mini chocolate chips into the peanut butter filling. Distribute them evenly, ensuring that each slice of your pie will feature these sweet chocolate surprises. Again, use a gentle folding motion to avoid deflating the mixture.

Step 6: Assemble and Freeze the Pie

Pour the luscious chocolate chip peanut butter filling into your prepared, chilled graham cracker crust. Smooth the top with your spatula. Place the entire pie into the freezer and let it freeze until firm, which typically takes at least 4-6 hours, or preferably overnight. This chilling time is essential for the pie to set properly.

Step 7: Serve and Enjoy

When ready to serve, remove the pie from the freezer. For a texture similar to ice cream cake, let it thaw for about 15-20 minutes at room temperature. If you prefer a softer, gooier consistency, thaw it in the refrigerator for about 30-45 minutes. To easily remove the pie from the plate, dip the bottom of the pie plate in warm water for about 10 seconds; this will loosen the crust. Slice and serve this glorious peanut butter chocolate chip pie!

💡 mia’s Pro Tip: If you’re having trouble getting a clean slice, run your knife under hot water and dry it before each cut. This helps create smooth, beautiful wedges every time, perfect for impressing guests!

StepActionDurationKey Visual Cue
1Prepare Crust10 mins + freezeMoist crumbs, packed into plate
2Whip Cream5 mins + chillStiff peaks
3Mix Filling Base10 minsSmooth, blended mixture
4Fold in Whipped Cream5 minsLight & airy, fully combined
5Add Chocolate Chips2 minsEvenly dispersed chips
6Assemble & Freeze5 mins + 4-6 hrs freezeFirm pie, ready to slice

Serving & Presentation

To serve this exquisite chocolate chip peanut butter pie, I love to let it soften just slightly from its frozen state. You can serve it directly from the freezer for an ice-cream-cake-like experience, or let it sit on the counter for about 20 minutes for a creamier, softer texture. A simple dusting of cocoa powder or a few extra mini chocolate chips on top can add a touch of elegance. It looks beautiful all on its own, however, allowing the rich peanut butter color to be the star.

For a special occasion, I sometimes like to drizzle it with a warm caramel sauce, reminiscent of the sweet treats sold at street carts in Manhattan. Another option, especially during warmer months, is a scoop of high-quality vanilla bean ice cream on the side. If I’m feeling particularly inspired by my Moroccan roots, a sprinkle of flaky sea salt on top just before serving truly enhances the sweet and salty notes, creating a more complex flavor profile that is utterly addictive.

Pairing TypeSuggestionsWhy It Works
Side DishA robust coffeeThe bitterness cuts through the richness of the peanut butter and chocolate.
Sauce / DipWarm Caramel Sauce or Fudge SauceAdds another layer of decadent sweetness that complements the peanut butter and chocolate.
BeverageMilk (dairy or non-dairy)A classic, comforting pairing that balances the sweetness and smooth texture.
GarnishFlaky Sea Salt or Whipped CreamSea salt enhances flavors; whipped cream adds a light, airy contrast.

Make-Ahead, Storage & Reheating

In my fast-paced NYC life, having desserts ready to go is key. This no-bake chocolate chip peanut butter pie is a lifesaver because you can make it entirely ahead of time. I often prepare it the day before a dinner party or when I know I’ll have guests over. It’s a dessert that actually improves with a little chill time, allowing the flavors to meld beautifully. Storage is also incredibly simple, making it perfect for busy home cooks.

MethodContainerDurationReheating Tip
RefrigeratorCovered pie plate or airtight containerUp to 3 daysLet stand at room temp for 20-30 mins for softer texture.
FreezerWrapped tightly in plastic wrap/foil, then in a freezer-safe containerUp to 2 monthsThaw in refrigerator overnight or at room temperature for 1-2 hours. For best results, let it sit for 20 minutes before serving.
Make-AheadFully assembled pieUp to 1 day in advanceStore in the freezer until ready to thaw and serve.

If you plan to serve the pie straight from the freezer, remember it will be quite firm. For that ideal, slightly softened texture that makes slicing so much easier and the filling incredibly creamy, plan to let it sit out for at least 20 minutes. This short waiting period makes all the difference, transforming it from icy to lusciously smooth. It’s worth the small wait for that perfect consistency, which is key to enjoying this chocolate peanut butter dessert.

Variations & Easy Swaps

This chocolate chip peanut butter pie recipe is wonderfully adaptable. I love experimenting with it, much like I would experiment with spices in my mother’s tagines or classic pastry bases in Paris. Here are a few of my favorite ways to switch things up!

VariationKey ChangeBest ForDifficulty Impact
Peanut Butter Cup TwistAdd chopped Reese’s Peanut Butter CupsChocolate & Peanut Butter LoversEasy
Decadent Chocolate GanacheTop with a chocolate ganache drizzleExtra IndulgenceEasy
Crunchy CrustUse crushed pretzels or nuts in the crustSavory-Sweet FansEasy

Peanut Butter Cup Twist

For an extra layer of chocolate and peanut butter heaven, try folding in about 1 cup of chopped peanut butter cups along with the mini chocolate chips. This variation is a dream for anyone who truly adores the classic Reese’s combination. The peanut butter cups melt slightly as the pie chills, creating pockets of even more intense flavor and a delightful textural surprise. It’s a simple addition that makes this easy peanut butter pie feel incredibly decadent.

Decadent Chocolate Ganache Topping

For those who believe more chocolate is always better, a luscious chocolate ganache poured over the top of the chilled pie is divine. Simply heat 1/2 cup of heavy cream until just simmering, then pour it over 4 ounces of finely chopped dark or semi-sweet chocolate. Let sit for 5 minutes, then whisk until smooth. Let it cool slightly before drizzling over the frozen pie. This adds a beautiful glossy finish and intense chocolate flavor.

Seasonal Fruit Addition

While not a traditional combination, I sometimes like to add a layer of fresh raspberries or sliced strawberries at the bottom of the chilled crust before pouring in the peanut butter filling. The tartness of the fruit can beautifully cut through the richness of the peanut butter and chocolate. It’s a refreshing twist, especially during the summer harvest season here in NYC, offering a delightful contrast that makes this dessert feel lighter and more complex.

How do you make a no-bake chocolate chip peanut butter pie?

Making a no-bake chocolate chip peanut butter pie is wonderfully simple! You start by preparing a graham cracker crust and chilling it. Then, you beat together softened cream cheese, sugar, peanut butter, and vanilla until smooth. In a separate bowl, whip heavy cream until stiff peaks form, then gently fold it into the peanut butter mixture. Finally, fold in mini chocolate chips, pour the filling into the chilled crust, and freeze until firm. It’s a foolproof process that yields a delicious dessert every time.

Can you use creamy peanut butter instead of crunchy in a chocolate chip peanut butter pie?

Absolutely! While the recipe calls for creamy peanut butter for its silky smooth texture, crunchy peanut butter can certainly be used. Using crunchy peanut butter will add a delightful nutty texture to the filling, which many people enjoy. The primary difference will be the mouthfeel; your pie will have little bits of peanut throughout the creamy filling, rather than being uniformly smooth. It’s a matter of personal preference, and both options result in a delicious chocolate peanut butter dessert.

What is the best way to store leftover chocolate chip peanut butter pie?

The best way to store leftover chocolate chip peanut butter pie is in the freezer. Since it’s a no-bake pie that sets in the freezer, it holds its structure best when kept frozen. Cover the pie tightly with plastic wrap and then aluminum foil, or place it in an airtight freezer-safe container. It can be stored this way for up to two months. If you plan to serve it within a few days, you can store it tightly covered in the refrigerator, but the texture will be much softer.

Can I add a chocolate ganache topping to a chocolate chip peanut butter pie?

Yes, you absolutely can add a chocolate ganache topping to this chocolate chip peanut butter pie! It’s a fantastic way to elevate the dessert, especially if you love chocolate. To make a simple ganache, heat about 1/2 cup of heavy cream until it’s just simmering, then pour it over 4 ounces of finely chopped dark or semi-sweet chocolate. Let it sit for five minutes, then whisk until smooth. Allow it to cool slightly before drizzling it over the set pie. This adds extra richness and a beautiful glossy finish.

Is this peanut butter chocolate chip pie considered an easy recipe?

Yes, this peanut butter chocolate chip pie recipe is considered very easy! The primary reason is that it’s a “no-bake” dessert, meaning you don’t need to turn on your oven at all. The steps involved are simple mixing, whipping cream, and folding ingredients together. The most time-consuming part is the freezing time required for the pie to set. This makes it an ideal recipe for beginner bakers, or for anyone looking for a delicious dessert that requires minimal effort and stress.

How long does it take for the no-bake peanut butter pie to freeze?

For the no-bake peanut butter pie to freeze properly and achieve a sliceable consistency, you should plan for at least 4 to 6 hours in the freezer. However, for the best results and to ensure it’s completely firm and holds its shape when sliced, I often recommend freezing it overnight. This extended chilling time allows all the ingredients to set perfectly, ensuring each slice is clean and the filling is rich and decadent. If you’re in a rush, you can potentially speed this up slightly by using a colder freezer or ensuring your freezer is not overly full.

Can I make the crust for this pie ahead of time?

Yes, you can absolutely make the crust for this no-bake peanut butter pie ahead of time! In fact, it’s a great step to get done in advance. Once you’ve pressed the graham cracker crust mixture into your pie plate, you can cover it tightly with plastic wrap and store it in the freezer for up to a couple of days before you plan to make the filling. Having a pre-made, chilled crust ready to go makes assembling the pie even faster when you’re ready to fill it.

What kind of chocolate chips are best for this recipe?

For this chocolate chip peanut butter pie recipe, mini chocolate chips are generally best. Their smaller size allows them to distribute more evenly throughout the creamy peanut butter filling, ensuring you get a bit of chocolate in almost every bite. While you can certainly use regular-sized chocolate chips or even chopped chocolate from a bar, the mini chips provide a more consistent and delicate chocolate presence that complements the smooth filling beautifully. Good quality semi-sweet or dark chocolate chips work wonderfully.

Share Your Version!

Have you made this delightful chocolate chip peanut butter pie? I truly hope you give it a try! If you do, I’d be thrilled if you’d leave a star rating and a comment below to let me know how it turned out for you. Your feedback means the world to me and helps other home cooks decide to give this recipe a go.

And if you’re anything like me, you love sharing your culinary creations! Snap a photo of your beautiful pie and share it on Instagram or Pinterest, making sure to tag me @exorecipes. I can’t wait to see your creations and perhaps even feature them! Do you think adding a hint of cinnamon to the graham cracker crust would work, or would it overpower the peanut butter and chocolate? Let me know your thoughts!

From my NYC kitchen to yours — I hope this recipe brings as much warmth to your table as it does to mine. — mia 🧡

📌

Love This Recipe? Save It to Pinterest!

If you enjoyed this Chocolate Chip Peanut Butter Pie recipe, don’t let it get lost in your browser tabs! 😄 Pin it now so you can find it again anytime — and explore hundreds more tried-and-tested recipes waiting for you on my Pinterest boards.

👉 Follow mia on Pinterest @chefrecipes2

📌 Pin this recipe · 🔁 Re-pin your favorites · 💬 Tag me when you make it — I love seeing your creations!
Print

clock clock iconcutlery cutlery iconflag flag iconfolder folder iconinstagram instagram iconpinterest pinterest iconfacebook facebook iconprint print iconsquares squares iconheart heart iconheart solid heart solid icon

Chocolate Chip Peanut Butter Pie

  • Author: Chef Mia

Description

Our Chocolate Chip Peanut Butter Pie has a rich and creamy peanut butter filling with mini chocolate chips throughout. So good!


Ingredients

Scale
  • 3/4 cup graham cracker crumbs
  • 1/4 cup granulated sugar
  • 2 tablespoons brown sugar
  • 4 tablespoons melted butter
  • 1 1/2 cups heavy cream
  • 8 ounces cream cheese softened
  • 3/4 cup granulated sugar
  • 1 cup creamy peanut butter
  • 1 tablespoon vanilla
  • 1 cup mini chocolate chips

Instructions

  1. To prepare the crust, blend graham cracker crumbs, granulated sugar, brown sugar and melted butter in a bowl until fully combined. Press mixture into a 9 pie plate, covering bottom completely and pushing the crumbs about 1-2 inches up the side of the pie plate. Place the pie crust into the freezer while preparing the filling.
  2. Whip the 1 1/2 cups heavy cream until it holds peaks. Set aside in the refrigerator while preparing the rest of the filling.
  3. In a large bowl, beat cream cheese until smooth. Add sugar and mix until blended. Add peanut butter and vanilla, mixing well. (Scrape the sides of the bowl as needed to ensure that the ingredients are fully blended.)
  4. Fold whipped cream into the peanut butter mixture, blending well.
  5. Fold in mini chocolate chips, blending until mini chocolate chips are evenly disbursed throughout the filling.
  6. Pour chocolate chip peanut butter filling into the prepared pie crust. Place filled pie into the freezer until firm.
  7. If serving pie more than 1/2 an hour after final preparation, store in the freezer. Thaw for 20 minutes before serving for a frozen, ice cream-like consistency. (If you are having difficulty cleanly removing the pie crust from your pie plate, submerge the very bottom of the dish in some hot tap water about 1/2 inch water in your kitchen sink to loosen the crust being careful not to get water in the pie itself.) Or thaw for longer in the refrigerator for a gooey, soft pie.


Nutrition

  • Calories: 535 calories
  • Sugar: 38.3 g
  • Fat: 38.5 g
  • Carbohydrates: 43.8 g
  • Protein: 9.2 g


Chocolate Chip Peanut Butter Pie

Sticky Air Fryer Honey Garlic Salmon in 10 Minutes

Air Fryer Honey Garlic Salmon: Quick Caramelized Delight

⚖️
Difficulty
Easy
⏲️
Prep Time
10 mins
🕒
Cook Time
8 mins
⏱️
Total Time
18 mins
🍽️
Servings
2

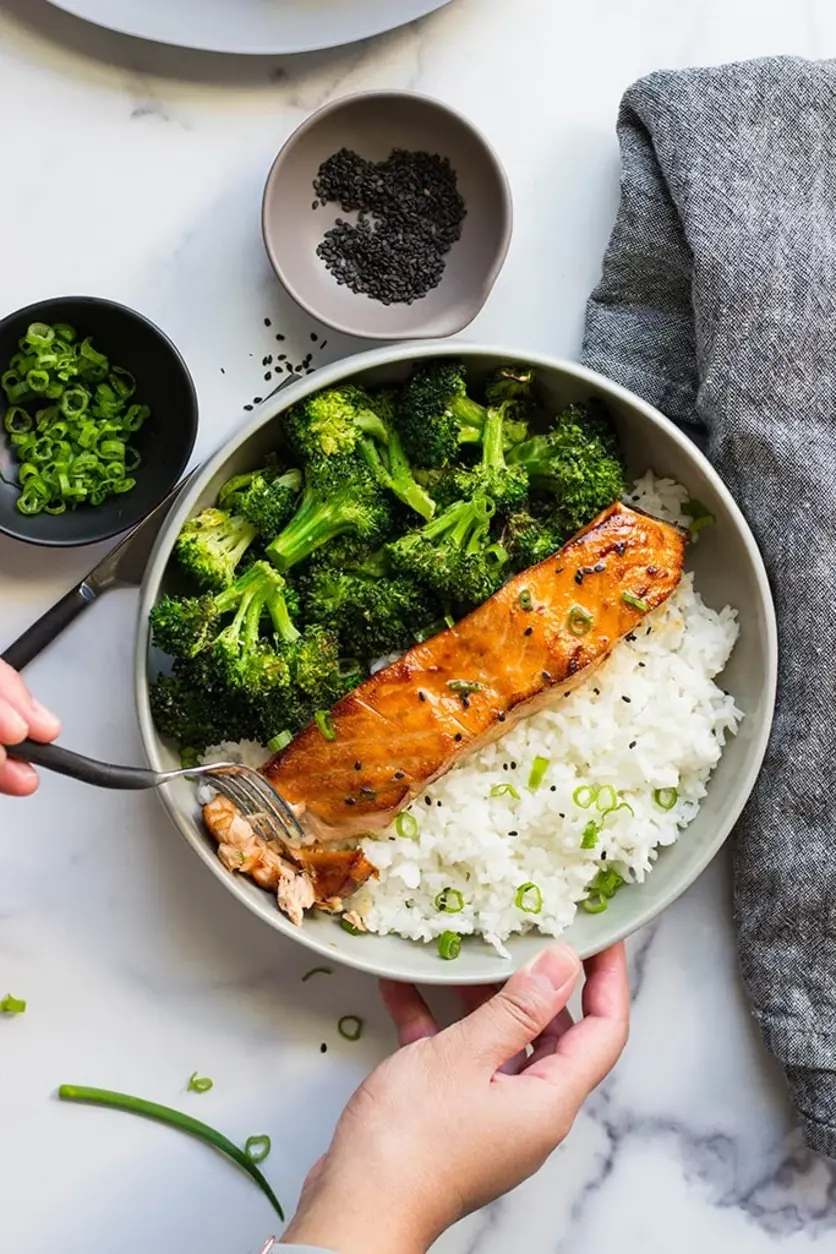
Growing up in my mother’s bustling kitchen in Marrakech, I learned the magic of transforming simple ingredients into vibrant meals, often using the intense heat of a tagine to caramelize vegetables and meats. That same principle of quick, flavorful cooking is what draws me to my air fryer here in bustling New York City. This Air Fryer Honey Garlic Salmon recipe is my modern homage to those early lessons, creating a perfectly caramelized, sticky-sweet salmon in a fraction of the time. It’s proof that you don’t need hours to achieve restaurant-quality flavor right in your own home, especially when you have a fantastic piece of salmon and a few pantry staples.

Imagine this: tender, flaky salmon fillets glistening under a rich, amber-hued glaze, boasting that irresistible sweet and savory honey garlic symphony. The edges are slightly crisped, a delightful contrast to the succulent interior. The aroma that fills your kitchen as it cooks is simply intoxicating – a warm, inviting blend of sweet honey, pungent garlic, and the subtle, oceanic scent of fresh salmon. This isn’t just a meal; it’s an experience that delights all the senses, reminiscent of the aromatic spice markets in Morocco or the refined sauces I perfected in Paris.

What makes this honey garlic salmon recipe truly special, beyond its incredible ease, is the balance of flavors and the foolproof cooking method. I’ve tweaked the simple sauce to ensure it coats the salmon beautifully without burning, a common pitfall for many. This recipe is designed for busy weeknights but sophisticated enough for company. Stick around, and I’ll share a key tip for achieving that perfect glaze every time, plus a common mistake to sidestep that can ruin your salmon’s texture. Get ready for your new favorite easy air fryer salmon dish!

Why This Air Fryer Honey Garlic Salmon Recipe Is the Best

My early days in Marrakech taught me that the purest flavors often come from the simplest combinations, enhanced by precise heat. This Air Fryer Honey Garlic Salmon recipe embodies that philosophy. The “secret” isn’t just a sweet and savory sauce, but how it’s applied and cooked. My technique ensures the honey and soy sauce create a deeply flavorful, sticky glaze that caramelizes beautifully in the air fryer without burning, a result inspired by the slow-cooked caramelization techniques I mastered in Paris but adapted for rapid cooking. It’s that delicate balance, achieved with just four main ingredients, that elevates this dish.

Achieving that perfect texture in salmon can be tricky, but the air fryer is a game-changer. It circulates hot air evenly, cooking the fish quickly and locking in moisture while developing a lovely, slightly crisp exterior. This recipe demands precise timing – just 7-8 minutes at 400°F. This rapid cooking method is crucial for preventing the salmon from becoming dry or overcooked, ensuring that each bite is flaky, tender, and moist. It’s a technique I rely on for perfect seafood every time, whether I’m cooking at home in the city or catering for a discerning client.

This recipe is ideal for home cooks of all levels, especially those looking for a healthy salmon dinner that’s both quick and impressive. It requires minimal prep and cooks in under 10 minutes, making it a weeknight marvel. The ingredient list is short and accessible, and the instructions are straightforward. You’ll be amazed at the depth of flavor you can achieve with such little effort, proving that a gourmet meal is always within reach, even on the busiest of days in a city like New York.

Air Fryer Honey Garlic Salmon Ingredients

When I’m developing a recipe, I always think about what’s fresh and available at my local NYC Union Square Greenmarket. For this dish, high-quality salmon is key. I look for fillets that are bright pink or orange, firm to the touch, and smell fresh, not fishy. The other ingredients are simple pantry staples that I believe every kitchen should have – honey for sweetness, soy sauce for umami, and garlic for that indispensable aromatic punch. These are the building blocks that, when treated with care, create something truly delicious.

Ingredients List

  • 2 salmon fillets (5-8 oz. each), skin on or off
  • 2 tablespoons honey (use a neutral-flavored honey like clover or orange blossom)
  • 1 1/2 tablespoons low sodium soy sauce (tamari for gluten-free)
  • 1/4 teaspoon garlic powder OR 1 teaspoon fresh garlic, minced
  • Optional: Black/white sesame seeds, for garnish
  • Optional: Green onions, thinly sliced, for garnish

Ingredient Spotlight

Honey: This is your primary sweetener and the star of the glaze. I recommend a mild honey like clover, wildflower, or orange blossom. It provides a beautiful, sticky caramelization that’s essential for the dish’s appeal. In any US grocery store, you’ll find plenty of options. If you can’t find honey, maple syrup is a decent substitute but will lend a slightly different, woodsy flavor.

Low Sodium Soy Sauce: Soy sauce brings the essential umami depth and saltiness to balance the honey. Using low-sodium is my preference because it allows you to control the saltiness better and prevents the glaze from becoming too overpowering. You can find this in the international aisle of any supermarket. For a gluten-free version, opt for tamari.Coconut aminos are another alternative, offering a slightly sweeter, milder soy flavor.

Garlic: Whether you use garlic powder or fresh minced garlic, this adds a pungent, aromatic kick that cuts through the sweetness of the honey. Fresh garlic, of course, offers a more complex and robust flavor. You can find garlic bulbs at any produce stand or grocery store. If using powder, ensure it’s fresh for the best flavor. A dash of garlic powder is a shortcut I often use when I’m rushing, much like my Parisian chefs might use a well-made demi-glace.

Original IngredientBest SubstitutionFlavor / Texture Impact
HoneyMaple SyrupSlightly tangier, woodsy flavor; similar sticky texture.
Low Sodium Soy SauceTamari (for GF) or Coconut AminosTamari is very similar; Coconut Aminos are slightly sweeter and milder.
Garlic PowderFresh Minced GarlicMore potent, fresher, more complex garlic flavor.

How to Make Air Fryer Honey Garlic Salmon — Step-by-Step

I’ve streamlined this process to be as intuitive as possible, inspired by classic French sauce techniques where precision matters, but adapted for speed.

Step 1: Mix the Sauce

In a small bowl, whisk together the honey, soy sauce, and garlic powder (or fresh minced garlic). Stir until the honey is completely dissolved and the sauce is well combined. This simple mixture is the heart of our recipe. Remember to divide this sauce into two equal portions. One part will marinate the salmon, and the other will be used for basting and serving.

💡 mia’s Pro Tip: If using fresh garlic, mince it *very* finely. This ensures it distributes evenly in the sauce and doesn’t get caught in the air fryer basket. Alternatively, you can sauté the minced garlic in a tiny bit of oil before adding it to the sauce for a milder, sweeter garlic flavor.

Step 2: Marinate the Salmon

Place the salmon fillets in a shallow dish or a zip-top bag. Pour one half of the prepared honey garlic sauce over the salmon. Gently coat both sides of the fillets. Let them marinate in the refrigerator for at least 30 minutes. This marination time is crucial for infusing the salmon with flavor and starting the tenderization process, much like a quick marinade in my Moroccan heritage.

Step 3: Preheat and Baste

Preheat your air fryer to 400°F (200°C). This high heat is essential for achieving that beautiful caramelization quickly. Once preheated, carefully place the marinated salmon fillets into the air fryer basket. Try to arrange them in a single layer, ensuring good air circulation around each piece. Then, using a spoon or brush, baste the remaining half of the marinade evenly over the top of the salmon fillets. This second application of sauce is key for that luscious glaze.

⚠️ Common Mistake to Avoid: Don’t overcrowd the air fryer basket. If your fillets are too close together, the hot air won’t circulate properly, leading to uneven cooking and less caramelization. Cook in batches if necessary for perfectly cooked salmon.

Step 4: Air Fry

Cook the salmon for 7-8 minutes. The exact time will depend on the thickness of your fillets and the specific make and model of your air fryer. For thinner fillets, start checking at 6 minutes. You’re looking for the salmon to be cooked through but still moist and tender, with a nice glaze that’s just beginning to caramelize.

Step 5: Dish and Serve

Once cooked, carefully remove the salmon fillets from the air fryer basket. Plate them immediately. For an extra touch of flavor and gorgeous presentation, drizzle the reserved half of the sauce (or a little extra you’ve saved or quickly warm) over the hot salmon. Garnish with toasted sesame seeds and freshly sliced green onions for a pop of color and texture, reminiscent of how we garnish dishes in Marrakech.

Enjoy!

StepActionDurationKey Visual Cue
1Mix Sauce & Divide2 minsSmooth, combined sauce.
2Marinate Salmon30 minsSalmon coated in sauce.
3Preheat & Baste5 mins (preheat) + 1 min (baste)Air fryer at temp, salmon placed, sauce basted.
4Air Fry7-8 minsGlazed, cooked through, slightly caramelized edges.
5Serve1 minSalmon plated, drizzled, and garnished.

Serving & Presentation

I love serving this Air Fryer Honey Garlic Salmon simply, allowing the beautiful glaze to shine. A sprinkle of toasted sesame seeds and thinly sliced green onions adds visual appeal and a delightful crunch, mirroring the garnishes I’d find at a casual bistro in Paris. The vibrant green of the onions against the rich, glazed salmon is a feast for the eyes. It’s a flexible dish that can be dressed up or down depending on the occasion.

In New York, we love our versatility! This salmon pairs wonderfully with a variety of sides. For a light and healthy meal, serve it alongside fluffy quinoa or jasmine rice to soak up any extra glaze. Roasted asparagus or broccolini also make excellent companions, their slight bitterness cutting through the sweetness. If you’re feeling more indulgent, consider some creamy mashed potatoes or a simple side salad with a zesty vinaigrette.

Pairing TypeSuggestionsWhy It Works
Side DishJasmine Rice, Quinoa, Roasted Broccoli, Steamed AsparagusAbsorbs glaze, balances sweetness, adds freshness.
Sauce / DipExtra Honey Garlic Glaze, Sriracha Mayo, Lemon Tahini DressingEnhances flavor, adds creaminess or subtle spice.
BeverageCrisp White Wine (Sauvignon Blanc), Green Tea, Light LagerComplements salmon without overpowering; balances sweetness.
GarnishToasted Sesame Seeds, Sliced Green Onions, Fresh CilantroAdds texture, color, and herbaceous notes.

Make-Ahead, Storage & Reheating

As a busy New Yorker, I love having meals that can be prepped ahead or stored easily. This Air Fryer Honey Garlic Salmon is fantastic for meal prep. You can prepare the sauce and marinate the salmon a day in advance, storing them separately in the refrigerator. The cooked salmon can also be stored, making it perfect for quick lunches or dinners throughout the week. It truly simplifies healthy eating.

MethodContainerDurationReheating Tip
RefrigeratorAirtight container2-3 daysGently reheat in a skillet over low heat or in the air fryer at 300°F for 3-5 minutes until warmed through. Avoid overcooking.
FreezerFreezer-safe bag or container, wrapped tightly1-2 monthsThaw in the refrigerator overnight, then reheat as above. Reheating from frozen is not recommended to maintain texture.
Make-AheadSauce and salmon separate in airtight containersSauce: 1 week; Marinated Salmon: 1 dayMarinate salmon just before cooking if possible for best texture. Reheat as per refrigerator instructions.

When reheating, my goal is to preserve the salmon’s delicate texture. I find that a quick gentle reheat is best. Overheat, and that beautiful moistness can turn dry. A few minutes in a warm skillet with a tiny bit of oil, or a short blast in the air fryer at a lower temperature, usually does the trick. You can even serve it chilled or at room temperature in a salad if you prefer!

Variations & Easy Swaps

VariationKey ChangeBest ForDifficulty Impact
Spicy Honey GarlicAdd red pepper flakes or sriracha to the sauceThose who love a kickAdds a touch of heat; preparation is the same.
Sesame Ginger SalmonSwap garlic for fresh ginger; add toasted sesame oilAsian-inspired flavorsMinimal change; adds a fresh, zesty note.
Citrus Glazed SalmonReplace half the honey with lemon or lime juiceLighter, brighter flavorAdds a refreshing tang; may cook slightly faster.

Spicy Honey Garlic Salmon

For a little heat, I love adding a pinch of red pepper flakes or a teaspoon of sriracha to the honey garlic sauce. This creates a wonderful sweet and spicy dynamic that’s incredibly addictive. It reminds me of some of the bolder flavors we enjoy in Moroccan cuisine, balanced with that familiar sticky glaze. The preparation is exactly the same, simply mix your heat source into the sauce base.

Sesame Ginger Salmon (Gluten-Free Option)

To transform this into a sesame ginger salmon, swap the garlic for 1 teaspoon of finely grated fresh ginger. You can also add 1 teaspoon of toasted sesame oil to the sauce for an extra layer of nutty flavor. For a gluten-free variation, ensure you use tamari instead of soy sauce. This swaps savory depth for bright, aromatically spicy notes.

Citrus Glazed Salmon (Seasonal Twist)

When I want something a bit lighter, especially during the spring and summer months here in NYC, I often reach for citrus. Replace half of the honey with fresh lemon or lime juice. This lends a delightful tang that beautifully complements the rich salmon. The glaze might be slightly less sticky but offers a vibrant, refreshing flavor profile that’s perfect for a lighter meal. Be mindful that the added moisture might slightly alter cooking time.

How long should I cook honey garlic salmon in the air fryer?

For Air Fryer Honey Garlic Salmon, you should cook the fillets for approximately 7-8 minutes at 400°F (200°C). The exact time can vary depending on the thickness of your salmon fillets and the specific model of your air fryer. It’s always best to check for doneness around the 6-minute mark for thinner pieces. You’re looking for the salmon to be cooked through, opaque, and flaky, with the glaze nicely caramelized but not burnt.

What temperature is best for air fryer honey garlic salmon?

The best temperature for cooking Air Fryer Honey Garlic Salmon is 400°F (200°C). This high heat setting is crucial for achieving a quick cook time and developing that desirable sticky, caramelized glaze. Lower temperatures might cook the salmon through but won’t provide the same level of caramelization or slight crisping on the edges that makes this dish so appealing. Always ensure your air fryer is preheated before adding the salmon.

Can I use frozen salmon for this honey garlic air fryer recipe?

Yes, you can use frozen salmon for this honey garlic air fryer recipe, but it requires a crucial first step: thawing. Never attempt to cook salmon directly from frozen, as it will cook unevenly and likely result in a mushy texture. Thaw the salmon completely in the refrigerator overnight before proceeding with the recipe. Once thawed, you can marinate and cook it as directed for optimal results.

What can I substitute for honey in honey garlic salmon?

If you’re out of honey or looking for an alternative, maple syrup is an excellent substitute for honey in honey garlic salmon. It provides a similar sweetness and sticky texture, though it imparts a slightly different, woodsy flavor. Agave nectar is another option, offering a neutral sweetness that works well. Whichever substitute you choose, remember it will contribute to the caramelization process, so keep an eye on the cooking time.

How do I prevent my honey garlic salmon from sticking to the air fryer basket?

To prevent your honey garlic salmon from sticking, make sure your air fryer basket is clean and lightly greased before adding the fish. You can use a cooking spray designed for air fryers or brush a very thin layer of oil. Ensure the salmon is properly coated with the marinade, as the oil in the marinade itself offers some protection. Placing parchment paper designed for air fryers (with holes) can also help, though it might slightly impede air circulation.

What’s a good side dish for this honey garlic salmon?

This honey garlic salmon is wonderfully versatile! I often pair it with simple, steamed jasmine rice or fluffy quinoa to soak up the delicious glaze. For a lighter meal, roasted or steamed green vegetables like broccoli, asparagus, or green beans are fantastic. A fresh side salad with a bright vinaigrette also complements the rich, sweet-savory flavors of the salmon beautifully, offering a refreshing counterpoint.

Can I make the honey garlic sauce ahead of time?

Absolutely! The honey garlic sauce can easily be made ahead of time. In fact, I often prepare it a day or two in advance and store it in an airtight container in the refrigerator. This is a great timesaver for busy weeknights. When you’re ready to cook, simply retrieve the sauce, give it a quick stir, and proceed with marinating and basting the salmon as per the recipe instructions.

Is air fryer salmon healthy?

Yes, air fryer salmon is a very healthy choice! Salmon itself is packed with omega-3 fatty acids and lean protein. Using an air fryer requires minimal to no added oil, making it a much healthier cooking method than pan-frying or deep-frying. The glaze in this recipe uses natural sweeteners and savory elements, keeping the overall dish nutritious and balanced, especially when served with vegetables.

Share Your Version!

I truly hope you fall in love with this simple yet incredibly flavorful Air Fryer Honey Garlic Salmon as much as I do! It’s a recipe that brings a touch of my Moroccan roots and Parisian training right into your busy NYC kitchen. If you make it, please leave a star rating and a comment below to let me know how it turned out for you. I love hearing your feedback!

For those of you who love to share your culinary adventures, snap a photo of your delicious salmon and tag me on Instagram or Pinterest at @exorecipe! I absolutely adore seeing your creations and how you plate them. And tell me, have you tried any of my suggested variations, or do you have a favorite quick side dish that pairs perfectly with this salmon? I’m always curious about your kitchen experiments!

From my NYC kitchen to yours — I hope this recipe brings as much warmth to your table as it does to mine. — mia 🧡

📌

Love This Recipe? Save It to Pinterest!

If you enjoyed this Air Fryer Honey Garlic Salmon recipe, don’t let it get lost in your browser tabs! 😄 Pin it now so you can find it again anytime — and explore hundreds more tried-and-tested recipes waiting for you on my Pinterest boards.

👉 Follow mia on Pinterest @chefrecipes2

📌 Pin this recipe · 🔁 Re-pin your favorites · 💬 Tag me when you make it — I love seeing your creations!

Print

clock clock iconcutlery cutlery iconflag flag iconfolder folder iconinstagram instagram iconpinterest pinterest iconfacebook facebook iconprint print iconsquares squares iconheart heart iconheart solid heart solid icon

Air Fryer Honey Garlic Salmon

  • Author: Chef Mia

Description

This delicious and perfectly caramelized, healthy 4-ingredient air fryer honey garlic salmon has a sweet and sticky sauce and cooks in less than 10 minutes.


Ingredients

Scale
  • 2 salmon fillets (58 oz. each)
  • 2 tablespoons honey
  • 1 1/2 tablespoons low sodium soy sauce
  • 1/4 teaspoon garlic powder/1 teaspoon fresh garlic, minced
  • Black/white sesame seeds
  • Green onions, sliced

Instructions

  1. Combine honey, soy sauce and garlic powder and stir to mix. Divide the sauce in half.
  2. Marinate the salmon fillet with half the sauce in the fridge for 30 minutes.
  3. Preheat the air fryer to 400°F and place the salmon fillets in the air fryer. Baste the remaining marinade onto the salmon fillets.
  4. Air fry for 7-8 minutes, depending on the thickness of the salmon.
  5. Dish and serve hot drizzled with the other half of the sauce.
  6. Enjoy!


Nutrition

  • Calories: 255 calories
  • Sugar: 17.9 g
  • Fat: 6.3 g
  • Carbohydrates: 19.2 g
  • Protein: 30.1 g


Air Fryer Honey Garlic Salmon

k">

Tried This Recipe? Leave a Comment!

Did you make this recipe? I’d love to hear how it turned out! Please leave a comment and a rating below. Your feedback helps other home cooks and supports cheerychop.com!

For more delicious inspiration, follow me on Pinterest!
Best Balsamic Chicken Marinade for Juicy Grilled Chicken

“`html

Balsamic Chicken Marinade Recipe: Easy Balsamic Chicken Marinade for Flavorful Meals

⚖️
Difficulty
Easy
⏲️
Prep Time
10
🕒
Cook Time
25
⏱️
Total Time
12 hours, 35 minutes
🍽️
Servings
4-6

The aroma of something delicious cooking is one of life’s greatest pleasures, isn’t it? Growing up in my mother’s kitchen in Marrakech, we used marinades like this one – a symphony of sweet, tangy, and savory notes – to transform simple ingredients into feasts. Now, living in bustling New York City, I find myself returning to these foundational flavors, adapting them for a modern palate. This easy balsamic chicken marinade recipe is a testament to that journey. It’s my go-to for weeknight dinners and weekend BBQs alike, infusing chicken with a depth of flavor that is both comforting and exciting. It’s the kind of marinade that makes you feel like a culinary rockstar, even if you’re just whipping it up after a long day.

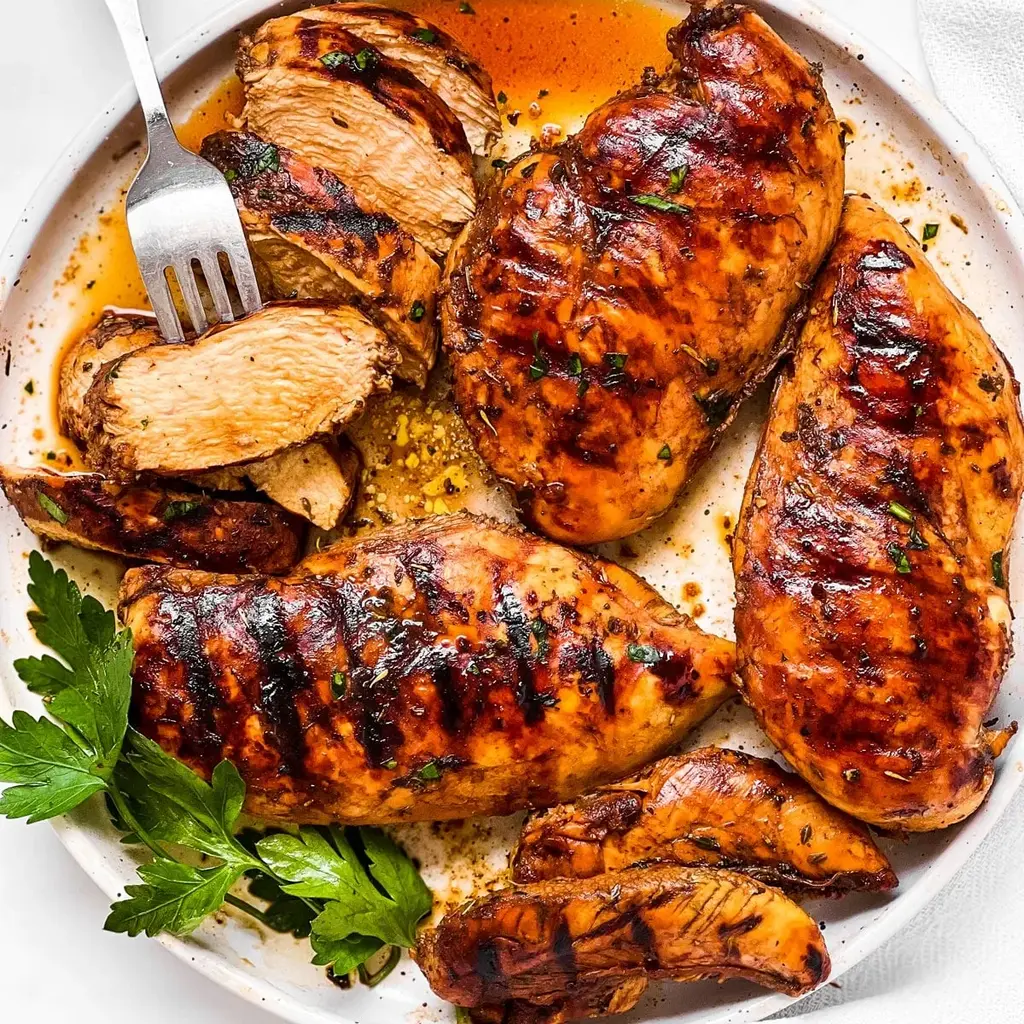
Imagine tender chicken pieces, kissed by the grill or seared to a perfect golden-brown, glistening under a rich, tangy glaze. The balsamic vinegar provides a deep, wine-like acidity, beautifully balanced by the subtle sweetness of brown sugar (if you use it!), the punch of fresh garlic, and the herbaceous notes of Italian seasoning. Each bite is a burst of complex flavor – sweet, sour, savory, and aromatic – that dances on your tongue. It’s a versatile marinade that’s perfect for achieving that sought-after grilled balsamic chicken perfection, or a quick pan-sear right in your NYC apartment kitchen.

I’ve spent years perfecting this balsamic vinegar chicken marinade, drawing from my French culinary training to ensure the perfect balance of ingredients and timing. While many marinades can be a bit hit-or-miss, mine is foolproof, designed to deliver maximum flavor with minimal fuss. I’ll share a few tricks that I learned in Paris, like the exact ratio of acid to oil and sugar, that make all the difference. Plus, I’ll point out a common mistake that many home cooks make with balsamic marinades that can actually ruin the texture of your chicken, ensuring your dish turns out perfectly every time.

Why This Balsamic Chicken Marinade Recipe Is the Best

What makes my balsamic chicken marinade recipe stand out from the rest? It’s a combination of my Moroccan heritage’s love for bold flavors, my French culinary training in balancing ingredients, and my New York City lifestyle that demands efficiency and big taste. This marinade isn’t just about adding flavor; it’s about crafting an experience. I use a specific ratio of balsamic vinegar to olive oil, along with just the right touch of sweetness, to create a marinade that tenderizes the chicken perfectly while developing a rich, caramel-like crust when cooked. It’s a flavor profile that sings, making even the simplest chicken breast feel like a gourmet meal. It’s the easy balsamic chicken marinade that will have your family begging for seconds.

From my time in Paris, I learned the art of sauce and marinade. This balsamic chicken marinade is built on that foundation. The key is not just the ingredients, but how they interact. The balsamic vinegar’s acidity beautifully breaks down the chicken’s proteins, making it incredibly tender. However, too much acidity or too long a marination time can make the chicken mushy. My recipe balances this with olive oil for richness and brown sugar to help caramelize and offset the tang, ensuring a perfectly cooked piece of chicken every time. It’s the best chicken marinade because it guarantees a tender, juicy, and incredibly flavorful result.

If you’re looking for an easy balsamic chicken marinade that’s both forgiving and impressive, you’ve found it. This recipe is designed for busy home cooks in mind, like myself navigating the vibrant chaos of NYC. The ingredient list is short, the steps are simple, and the marinating time is flexible – from a quick 15 minutes to an overnight soak, yielding even deeper flavor. Plus, it works beautifully with various cooking methods, whether you’re grilling outdoors, pan-searing indoors, or baking in the oven. It’s the perfect foundation for a healthy, delicious meal that’s ready in a flash.

Easy Balsamic Chicken Marinade Ingredients

I love picking up my balsamic vinegar and fresh garlic from the Italian market on Broome Street, or sometimes I find fantastic local honey at the Union Square Greenmarket. This recipe is built on simple, high-quality ingredients that you can easily find in any New York City grocery store.

Ingredients List

  • 1/2 cup balsamic vinegar
  • 2 tablespoons olive oil
  • 1-2 tablespoons brown sugar (optional, to offset the acidity)
  • 1 teaspoon Dijon mustard
  • 1 clove garlic, minced
  • 2 teaspoons Italian seasoning
  • Salt and freshly ground black pepper, to taste (about 1 to 1.5 teaspoons salt)
  • 2 pounds boneless, skinless chicken breast

Ingredient Spotlight

Balsamic Vinegar: This is our star! For the best flavor, I recommend a good quality balsamic vinegar. You can find aged balsamic, which is thicker and sweeter, or a good everyday balsamic from Italy. Avoid the cheapest ones, as they can be too harsh. In NYC, I often find excellent options at specialty Italian delis or even well-stocked supermarkets.

Olive Oil: Extra virgin olive oil adds a lovely richness and helps to emulsify the marinade, ensuring it coats the chicken beautifully. Use a good quality EVOO that you enjoy the taste of, as it will contribute to the final flavor. A robust, peppery olive oil works wonderfully here.

Italian Seasoning: This blend of dried herbs like oregano, basil, thyme, and rosemary provides a fragrant base that complements the balsamic perfectly. It’s a pantry staple for a reason! If you don’t have a pre-mixed blend, you can create your own by combining equal parts of the individual dried herbs.

Original IngredientBest SubstitutionFlavor / Texture Impact
Balsamic VinegarRed wine vinegar mixed with 1 tsp honeyWill be tangier and less sweet; will require more careful cooking to avoid drying out chicken.
Olive OilAvocado oil or grapeseed oilSlightly lighter taste; less robust flavor depth, but neutral and effective.
Brown SugarMaple syrup or honeyAdds a different, more complex sweetness. Honey can add a floral note which is lovely. Use sparingly to avoid overpowering.
Italian SeasoningDried oregano + dried basilSlightly less complex herbaceousness, but still effective. Ensure good quality herbs are used.

How to Make Balsamic Chicken Marinade — Step-by-Step

Making this marinade is incredibly straightforward, perfect for a busy weeknight after exploring my favorite NYC neighborhoods.

Step 1: Make the Marinade

In a measuring jug or a bowl, combine the balsamic vinegar, olive oil, optional brown sugar, Dijon mustard, minced garlic, Italian seasoning, salt, and pepper. Whisk everything together very well until the marinade is thoroughly combined and emulsified. If you’re using brown sugar, ensure it dissolves completely.

💡 mia’s Pro Tip: For an even smoother emulsion, you can use an immersion blender for about 15-20 seconds. This gives the marinade a lovely, creamy texture that adheres to the chicken beautifully.

Step 2: Marinate the Chicken

Place your boneless, skinless chicken breasts into a large resealable ziploc bag or a shallow, non-reactive dish. Pour the prepared balsamic marinade over the chicken, ensuring that each piece is completely coated. Seal the bag tightly, pressing out any excess air, or cover the dish. Refrigerate the chicken for at least 15 minutes, or for an even more intense flavor, up to overnight (about 12 hours). Remember, balsamic vinegar is acidic, so avoid marinating for *too* long, as it can affect the texture.

⚠️ Common Mistake to Avoid: Never marinate chicken in metal containers, especially with acidic ingredients like balsamic vinegar. The acid can react with the metal, imparting an unpleasant metallic taste to your chicken.

Step 3: Cook the Chicken

Once the chicken has marinated, remove it from the bag or dish. Discard the excess marinade – it’s not safe to reuse after contact with raw chicken. Cook your chicken using your preferred method until it reaches an internal temperature of at least 165°F. I often use a meat thermometer to ensure perfect doneness for juicy, tender results.

💡 mia’s Pro Tip: To ensure even cooking when pan-searing or grilling, pound the thicker parts of the chicken breast slightly to create more uniform thickness. This prevents the thinner ends from drying out before the thicker center is cooked through.

StepActionDurationKey Visual Cue
1Make Marinade5 minutesSmoothly combined, emulsified liquid
2Marinate Chicken15 minutes to overnightChicken fully coated in marinade
3Cook Chicken6-25 minutes (depending on method)Internal temperature 165°F; golden brown exterior

Serving & Presentation

Serving this balsamic chicken is an opportunity to bring a touch of elegance to your table, even on a weeknight. After cooking, let the chicken rest for a few minutes – this is crucial for juicy results! I love to slice it thinly and arrange it on a platter. A sprinkle of fresh parsley or chives adds a vibrant pop of color and freshness. For that classic NYC flair, I often serve it with a side of roasted root vegetables from the farmers market or a simple arugula salad dressed with lemon and olive oil.

The glaze from the marinade (if you cooked it down slightly) can be drizzled over the chicken for an extra layer of flavor and sheen. This dish is incredibly versatile. It feels elevated enough for a dinner party, yet simple enough for a quick family meal. Think of the vibrant Mediterranean flavors meeting the cosmopolitan energy of New York – that’s the feeling this dish evokes. It’s a beautiful marriage of cultures on a plate, made with love and care.

Pairing TypeSuggestionsWhy It Works
Side DishRoasted asparagus, quinoa salad, creamy polentaThe slight tang of the chicken balances the earthy flavors of asparagus, the nutty quinoa, and the comforting richness of polenta.
Sauce / DipGarlic aioli, a light red pepper coulis, tzatzikiThese offer creamy, spicy, or cool contrasts that complement the savory chicken without overpowering it.
BeverageA crisp Sauvignon Blanc, a light-bodied Pinot Noir, sparkling water with lemonThe acidity of the wine cuts through richness, while the sparkling water provides a refreshing counterpoint.
GarnishFresh basil leaves, toasted pine nuts, lemon zestThese add freshness, a delightful crunch, and a bright citrus note that elevates the overall dish.

Make-Ahead, Storage & Reheating

Living a busy life in New York means meal prep is my best friend! This Balsamic Chicken Marinade is perfect for ahead-of-time prep. I often marinate the chicken on Sunday so that I have quick, healthy protein ready for salads or quick pan-fries during the week. You can even prep the marinade itself in advance and store it in the fridge.

MethodContainerDurationReheating Tip
RefrigeratorAirtight container3-4 days (cooked chicken)Gently reheat in a skillet with a splash of water, or microwave until warmed through.
FreezerFreezer-safe bag or container2-3 months (cooked chicken)Thaw in the refrigerator overnight, then reheat as above. For unmarinated raw chicken, freeze in marinade.
Make-AheadMarinade in jar; chicken in separate bagMarinade: 1 week; Chicken: up to 24 hoursCombine & marinate just before cooking, or keep refrigerated marinating.

When reheating cooked chicken, my favorite way to ensure it stays moist is to warm it gently in a non-stick skillet over medium-low heat with a tablespoon of water or vegetable broth. This helps to rehydrate the chicken and prevent it from drying out. You can also tent it loosely with foil while reheating in the oven. If reheating from frozen, remember to thaw it completely in the refrigerator first for the best results and to ensure even cooking.

Variations & Easy Swaps

VariationKey ChangeBest ForDifficulty Impact
Spicy Balsamic ChickenAdd 1/2 tsp red pepper flakes or a dash of hot sauce to the marinade.Those who love a little heat; spicy grilled chicken skewers.Minimal; very easy to add heat.
Herbed Lemon BalsamicAdd 1 tsp lemon zest and 1 tbsp fresh chopped rosemary or thyme.Lighter, brighter flavor; pairs well with seafood or lighter side dishes.Minimal; fresh herbs add vibrancy.
Honey Balsamic GlazeIncrease brown sugar to 3 tbsp and simmer the marinade briefly to thicken into a glaze after cooking.Sweet, sticky chicken; ideal for chicken wings or drumsticks.Slightly more involved if reducing to a glaze.

Spicy Balsamic Kick

For those who enjoy a little fire, adding some heat is a fantastic way to transform this marinade. I like to add about half a teaspoon of red pepper flakes, or even a good dash of sriracha or your favorite hot sauce. This creates a wonderful blend of sweet, tangy, and spicy notes that is incredibly addictive. It’s perfect for chicken wings destined for game day or a spicy grilled chicken salad.

Gluten-Free & Dairy-Free Delight

This balsamic chicken marinade recipe is already naturally gluten-free and dairy-free! The balsamic vinegar, olive oil, sugar, mustard, garlic, and herbs are all compliant. This makes it a wonderfully inclusive recipe that can be enjoyed by many. You don’t need to make any substitutions; it’s perfect as is for those with dietary restrictions. I often serve it at potlucks in NYC, and it’s always a crowd-pleaser!

Seasonal Summer Citrus Twist

In the summer, when I visit the Union Square Greenmarket, I love to add a bright citrus twist. Incorporating lemon zest and a tablespoon of fresh lemon juice into the marinade brings a refreshing, summery note that perfectly complements the balsamic tang. You can also add a sprig of fresh rosemary or thyme, truly capturing the essence of a New York summer.

How long should you marinate chicken in balsamic vinegar?

For best results, I recommend marinating chicken in balsamic vinegar for at least 15 minutes to up to 12 hours (overnight). Balsamic vinegar is acidic, which helps to tenderize the chicken. However, marinating for too long, especially beyond 12-24 hours, can actually break down the chicken’s proteins too much, leading to a mushy texture. So, find that sweet spot for optimal flavor and tenderness!

Can you use balsamic vinegar as a chicken marinade without oil?

Yes, you absolutely can use balsamic vinegar as a chicken marinade without oil, but I generally recommend including a bit of oil. The oil helps to emulsify the marinade, ensuring it clings better to the chicken, and it also contributes to a richer flavor and helps prevent sticking during cooking. If you omit the oil, your marinade might be a bit more watery and the chicken could potentially dry out or burn more easily on a very hot grill.

What is a good substitute for balsamic vinegar in a chicken marinade?

If you find yourself without balsamic vinegar, a good substitute is red wine vinegar. To mimic some of balsamic’s sweetness and depth, I suggest adding about 1 teaspoon of honey or maple syrup per 1/4 cup of red wine vinegar. Apple cider vinegar can also work, though it has a brighter, fruitier tang. Experiment with small batches to see which flavor profile you prefer!

Should you rinse off balsamic marinade before cooking chicken?

No, you should not rinse off the balsamic marinade before cooking chicken. The marinade is where all the flavor is! The marinade ingredients, especially the herbs and any sugar (like brown sugar or honey), help create a beautiful crust and caramelization on the outside of the chicken as it cooks. Simply remove the chicken from the marinade, letting any excess drip off, and then cook it immediately. Don’t forget to discard any leftover marinade that was in contact with raw chicken for food safety.

Can I marinate chicken breasts in balsamic for grilled balsamic chicken?

Absolutely! This balsamic chicken marinade recipe is perfect for grilled balsamic chicken. The marinade helps tenderize the breasts, while the sugars in the balsamic and optional brown sugar help create a beautiful char and caramelization on the grill. Just make sure your grill is well-preheated, oil your grates, and cook for about 6-8 minutes per side, ensuring the internal temperature reaches 165°F. Delicious!

What is the best way to cook marinated chicken?

The “best” way really depends on your preference and equipment! For a great sear and juicy interior, a hot skillet with a little oil works wonders. Grilling imparts a lovely smoky flavor, perfect for a summer BBQ. Baking in the oven at around 410°F is a hands-off method that yields consistent results. For all methods, the key is to cook until the internal temperature reaches 165°F. I often check with an instant-read thermometer to be sure.

Can I double or triple this balsamic chicken marinade recipe?

Yes, you can easily double or even triple this recipe! It’s a simple ratio, so scaling it up is straightforward. Just multiply all the ingredient amounts by the factor you need. This is super handy if you’re cooking for a crowd or want to have extra marinade on hand for meal prep. Just ensure you have a large enough bag or container to marinate all the chicken properly so that each piece gets well-coated.

How do I prevent my chicken from drying out when using a balsamic marinade?

Preventing dry chicken is all about timing and temperature. First, avoid over-marinating, as the acid can eat away at the meat. For this balsamic marinade, 15 minutes to 12 hours is ideal. Second, cook the chicken to the correct internal temperature of 165°F and no higher. An instant-read thermometer is your best friend here. Finally, let the chicken rest for 5-10 minutes after cooking before slicing or serving to allow the juices to redistribute.

Share Your Version!

I truly hope you enjoy this easy balsamic chicken marinade recipe as much as I do! It’s become a staple in my New York kitchen, and I can’t wait to hear about your culinary adventures with it. Have you tried it grilled, pan-seared, or baked? Did you add any fun twists or serve it with a favorite side?

Please leave a star rating and your comments below – they are so valuable to me and other home cooks! And if you share a photo of your delicious creation on Instagram or Pinterest, be sure to tag me @chefrecipes2! I absolutely love seeing your kitchens come alive with my recipes. What’s your favorite way to use a versatile marinade like this one to elevate a simple weeknight meal?

From my NYC kitchen to yours — I hope this recipe brings as much warmth to your table as it does to mine. — mia 🧡

📌

Love This Recipe? Save It to Pinterest!

If you enjoyed this Balsamic Chicken Marinade recipe, don’t let it get lost in your browser tabs! 😄 Pin it now so you can find it again anytime — and explore hundreds more tried-and-tested recipes waiting for you on my Pinterest boards.

👉 Follow mia on Pinterest @chefrecipes2

📌 Pin this recipe · 🔁 Re-pin your favorites · 💬 Tag me when you make it — I love seeing your creations!

“`

Print

clock clock iconcutlery cutlery iconflag flag iconfolder folder iconinstagram instagram iconpinterest pinterest iconfacebook facebook iconprint print iconsquares squares iconheart heart iconheart solid heart solid icon

Balsamic Chicken Marinade

  • Author: Chef Mia

Description

This is the best Balsamic Chicken Marinade you’ll ever make! Flavorful with balsamic vinegar, garlic and Italian season, it’s perfect for BBQs and healthy dinners!


Ingredients

Scale
  • 1/2 cup balsamic vinegar
  • 2 tablespoons olive oil
  • 12 tablespoons brown sugar (optional to offset the acidity from the vinegar)
  • 1 teaspoon Dijon mustard
  • 1 clove garlic (minced (or more to taste))
  • 2 teaspoons Italian seasoning
  • salt + pepper (to taste (I use 1 – 1.5 teaspoons of regular table salt))
  • 2 pounds boneless, skinless chicken breast

Instructions

  1. Make marinade: Place all marinade ingredients in a measuring jug and whisk very well.
  2. Marinate chicken: Place chicken in a ziploc bag (or alternatively in a shallow dish). Pour marinade on top, making sure all chicken pieces are covered all over. Seal dish or bag well and refrigerate for 15 minutes or up to overnight.
  3. Cook chicken: Remove chicken from marinade, discarding bag and any excess marinade. Cook chicken your preferred way, until it reaches an internal temperature of at least 165°F.Grill: Place chicken on a hot grill and grill 6-8 minutes on either side, or until chicken is done.Skillet: Heat oil in a skillet. Add chicken and cook around 8-10 minutes on either side, or until chicken is done.Oven: Place chicken in a baking dish and bake at 410°F for 15-25 minutes, or until chicken is done.


Nutrition

  • Calories: 243 kcal
  • Sugar: 5 g
  • Fat: 9 g
  • Carbohydrates: 6 g
  • Protein: 32 g


Balsamic Chicken Marinade

k">

Tried This Recipe? Leave a Comment!

Did you make this recipe? I’d love to hear how it turned out! Please leave a comment and a rating below. Your feedback helps other home cooks and supports cheerychop.com!

For more delicious inspiration, follow me on Pinterest!
Best Homemade Red Velvet Brownies with Cream Cheese Frosting

Best Homemade Red Velvet Brownies with Cream Cheese Frosting – An NYC Favorite

⚖️
Difficulty
Easy
⏲️
Prep Time
25 mins
🕒
Cook Time
35 mins
⏱️
Total Time
60 mins
🍽️
Servings
12-16

New York City is a melting pot of flavors, and my culinary journey, from my mother’s vibrant kitchen in Morocco to the precise techniques learned in Paris, has always been about blending traditions. Today, I’m bringing you a recipe that embodies that spirit: the Best Homemade Red Velvet Brownies. These aren’t just any brownies; they are a decadent fusion of rich chocolate, the subtle tang of red velvet, and a luscious cream cheese frosting that will transport you. I’ve spent years perfecting this red velvet brownies recipe from scratch, ensuring it’s both easy enough for a weeknight treat and impressive enough for a special occasion. Get ready to fall in love with these deeply flavored, incredibly fudgy squares, a true showstopper with that iconic red hue, enhanced by a touch of my signature culinary flair.

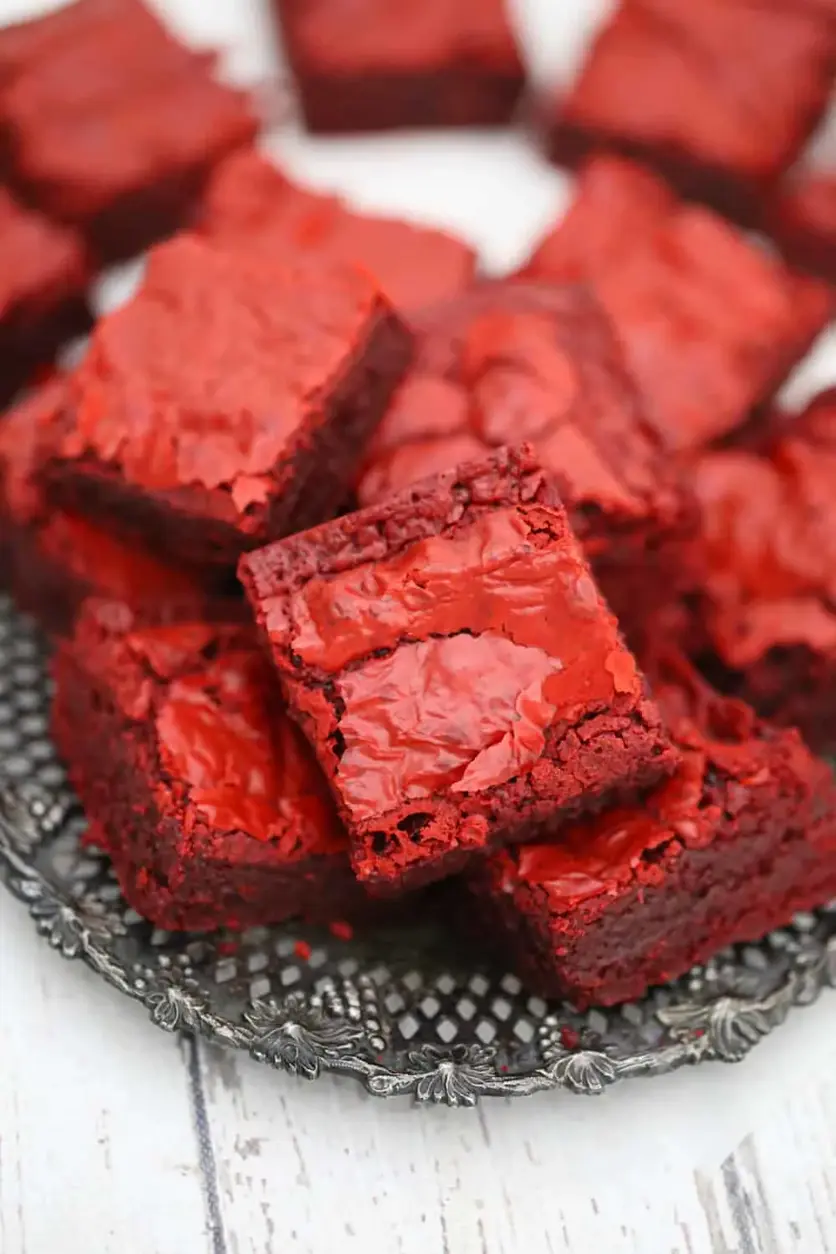
Imagine biting into a brownie that is intensely chocolatey, with a tender, fudgy crumb that practically melts in your mouth. The signature red velvet flavor is present but subtle, a whisper of cocoa and a hint of tang, allowing the deep chocolate notes to shine. Then comes the crowning glory: a smooth, slightly tart cream cheese frosting that balances the richness of the brownie perfectly. The aroma alone, a warm embrace of melted chocolate and vanilla, is enough to make your kitchen feel like a cozy haven. My training in pastry in Paris taught me the importance of balancing flavors and textures, and in this recipe, the combination of a dense, chewy brownie base and a luscious, velvety frosting is pure harmony. It’s this attention to detail and depth of flavor that makes these homemade red velvet brownies truly exceptional.

What sets these best red velvet brownies apart? It’s a combination of carefully selected ingredients and a simple yet effective technique that ensures a perfect texture every time. I’ll guide you through achieving that sought-after fudgy center, avoiding the common pitfall of dry, cakey brownies. We’ll also touch on a secret ingredient that elevates the red velvet flavor without overpowering the chocolate. I want to share with you my foolproof method for making these easy red velvet brownies, a recipe that will quickly become a go-to in your baking repertoire. Stick around, because I’ve got a pro tip and a common mistake to share that will guarantee stunning results!

Why This Best Homemade Red Velvet Brownies Recipe Is the Best

My culinary philosophy, forged in the bustling markets of Morocco and refined in the elegant patisseries of Paris, is all about coaxing the most profound flavors from each ingredient. For these red velvet brownies, the secret lies in using high-quality Ghirardelli chocolate and just the right balance of cocoa powder. The deep, complex notes of Ghirardelli milk chocolate create a richness that’s hard to beat, especially when combined with the subtle red velvet undertones. This isn’t just about sweetness; it’s about a layered chocolate experience that satisfies at a deeper level. My goal is always to create a dessert that feels both sophisticated and comforting, a reflection of the diverse culinary influences that shape my cooking.

Achieving that perfect fudgy texture in a brownie is an art I learned to master during my pastry training. It comes down to the fat-to-flour ratio and avoiding overmixing. By using melted chocolate and butter, we create a dense, moist base that’s incredibly chewy. Incorporating the eggs and sugars correctly also contributes significantly to that delightful texture. The key is to not overbake, which is a critical point I always emphasize. We aim for a center that is still slightly gooey when it comes out of the oven, as it will continue to set as it cools. This meticulous approach ensures that every bite of these homemade red velvet brownies from scratch is pure, unadulterated indulgence.

One of the things I love most about this recipe is its approachability. Despite the elegant flavors and beautiful appearance, these easy red velvet brownies are surprisingly simple to make, even for novice bakers. The steps are straightforward, and the use of melted chocolate eliminates the need for creaming butter and sugar, saving you time and effort. I’ve tested this recipe countless times, both in my busy city apartment kitchen and for serving friends, ensuring it’s reliable and delivers fantastic results every time. This recipe proves that you don’t need complex techniques or rare ingredients to bake something truly spectacular; you just need a recipe that’s been thoughtfully crafted with everyday bakers in mind.

Red Velvet Brownies from Scratch Ingredients

When I’m developing a recipe here in New York, I think about the ingredients that are readily available at our fantastic local markets and specialty stores. For these red velvet brownies from scratch, I’ve chosen ingredients that offer the best flavor and texture. You can find excellent quality chocolate, butter, and cream cheese at almost any grocery store, but I always recommend seeking out good quality unsalted butter for its superior flavor. My mother always emphasized the importance of starting with the best ingredients, a principle I carry with me from Marrakech to Manhattan. These staples ensure that our homemade red velvet brownies will have that signature depth of flavor and luxurious mouthfeel.

Ingredients List

  • 2 1/4 sticks unsalted butter (cut into chunks)
  • 3 1/2 cups Ghirardelli Milk Chocolate Chips
  • 5 large eggs (room temp)
  • 1/2 cup granulated sugar
  • 1 1/4 cups packed brown sugar
  • 1 teaspoon salt
  • 1 1/4 teaspoons vanilla extract
  • 2 tablespoons red food coloring
  • 2 cups all purpose flour
  • 1 teaspoon baking powder
  • 3 tablespoons Ghirardelli unsweetened cocoa powder
  • 4 ounces cream cheese (softened)
  • 5 tablespoons unsalted butter (room temperature)
  • 1/8 teaspoon salt
  • 1 teaspoon vanilla extract
  • 2 or 3 cups confectioners sugar
  • 1-2 tablespoons heavy cream or milk of choice

Ingredient Spotlight

Ghirardelli Milk Chocolate Chips: These are the heart of our brownie, providing a smooth, creamy chocolate flavor that is intensely satisfying. I reach for Ghirardelli because they melt beautifully and have a premium taste that elevates the entire dessert. Look for them in the baking aisle of most major supermarkets in the US. If you can’t find Ghirardelli, any high-quality milk chocolate chips will work, but adjust sweetness if they are significantly sweeter.

Red Food Coloring: This is what gives our brownies their signature vibrant visual appeal. I recommend gel food coloring for a more concentrated color that disperses evenly without adding too much liquid. You can find this in most grocery stores or craft stores. For a more natural hue, you can experiment with beet powder, though the color will be much more muted and the flavor profile might slightly change.

Cream Cheese: Essential for the tangy, decadent frosting, cream cheese adds a lovely counterpoint to the rich chocolate brownie. Ensure it’s softened to room temperature for the smoothest frosting. Philadelphia is a reliable brand widely available in the US. If you’re looking for a dairy-free option, a good quality dairy-free cream cheese alternative can be used, though the tanginess might be less pronounced.

Original IngredientBest SubstitutionFlavor / Texture Impact
Ghirardelli Milk Chocolate ChipsHigh-quality dark chocolate chips (60-70% cacao)Brownies will be less sweet and have a more intense, slightly bitter chocolate flavor. Texture might be slightly denser.
Red Food Coloring1-2 tsp Beet Powder (for color)Color will be a muted pinkish-red, not as vibrant. Flavor profile might have a very subtle earthiness.
Cream CheeseDairy-free cream cheese alternativeFrosting might be slightly less tangy and the texture could be a touch softer. Ensure it’s a good quality one.

How to Make Best Homemade Red Velvet Brownies – Step-by-Step

Making these brownies is a joy, and with these simple steps, you’ll achieve perfect results every time. Let’s get baking!

Step 1: Preheat and Prepare

Preheat your oven to 350°F (175°C). Line a 9×13 inch baking pan with foil or parchment paper, leaving an overhang on the sides. Lightly grease the liner to prevent sticking and ensure easy removal of your beautiful red velvet brownies.

💡 mia’s Pro Tip: Using parchment paper with an overhang makes lifting the brownies out of the pan a breeze, saving you from awkward digging and keeping your pan clean!

Step 2: Melt Chocolate and Butter

In a microwave-safe bowl or a small saucepan over low heat, gently melt the 2 1/4 sticks of unsalted butter. Once melted, add the Ghirardelli Milk Chocolate Chips. Stir constantly with a whisk until both are completely melted and smooth. Remove from heat and let it cool slightly to room temperature. This step is crucial to avoid scrambling the eggs.

Step 3: Combine Wet Ingredients

In a large mixing bowl, whisk together the 5 large eggs (make sure they’re at room temperature for better emulsification), 1/2 cup granulated sugar, and 1 1/4 cups packed brown sugar until well combined. Whisk in the 1 1/4 teaspoons vanilla extract and the 2 tablespoons of red food coloring until the mixture is a uniform, vibrant red. Add the slightly cooled melted chocolate mixture to the egg and sugar mixture and whisk until smooth and fully incorporated. Ensure the chocolate mixture is not hot to prevent curdling the eggs.

⚠️ Common Mistake to Avoid: Adding hot melted chocolate to the eggs can cook them, resulting in a less smooth brownie batter. Always let your chocolate mixture cool down for a few minutes before combining it with the eggs and sugar.

Step 4: Add Dry Ingredients

In a separate medium bowl, whisk together the 2 cups all-purpose flour, 1 teaspoon baking powder, 3 tablespoons Ghirardelli unsweetened cocoa powder, and 1 teaspoon salt. Gradually add the dry ingredients to the wet ingredients, stirring with a silicone spatula until just combined. Be careful not to overmix; stop as soon as you no longer see streaks of flour. Overmixing develops gluten and can lead to tough brownies.

Step 5: Bake the Brownies

Pour the batter evenly into the prepared 9×13 inch baking pan. Bake for 35-40 minutes, or until a toothpick inserted into the center comes out with moist crumbs attached, but not wet batter. Transfer the pan to a wire cooling rack and let the brownies cool in the pan for at least 15 minutes.

💡 mia’s Pro Tip: For that perfect fudgy texture, I always pull my brownies out when the toothpick has a few moist crumbs. They’ll continue to bake slightly as they cool in the pan, ensuring they don’t become dry and cakey.

Step 6: Prepare Cream Cheese Frosting

While the brownies cool, prepare the frosting. In a mixing bowl, combine the 4 ounces of softened cream cheese, 5 tablespoons of room-temperature unsalted butter, 1/8 teaspoon salt, and 1 teaspoon vanilla extract. Using an electric mixer, beat on medium-high speed until smooth and creamy. Gradually add 2 or 3 cups of confectioners’ sugar and 1-2 tablespoons of heavy cream or milk of choice, beating until well combined and the frosting reaches your desired consistency. Add more sugar for a thicker frosting or more cream/milk for a thinner, more spreadable one.

Step 7: Frost and Chill

Once the brownies have cooled significantly, you can frost them. For best results, I recommend either refrigerating them, covered, until they are completely cool to the touch, or letting them come to room temperature before frosting. Spread the cream cheese frosting evenly over the cooled brownies. For clean cuts, chill the frosted brownies in the refrigerator for at least 30 minutes before slicing.

StepActionDurationKey Visual Cue
1Preheat & Prep Pan5 minutesOven at 350°F, pan lined & greased.
2Melt Chocolate & Butter5-7 minutesSmooth, glossy mixture.
3Combine Wet Ingredients5 minutesUniform vibrant red batter with incorporated chocolate.
4Add Dry Ingredients2 minutesJust combined, no flour streaks visible.
5Bake Brownies35-40 minutesToothpick with moist crumbs.
6Make Frosting5-7 minutesSmooth, creamy, spreadable consistency.
7Frost & Chill30+ minutesEvenly frosted, firm before cutting.

Serving & Presentation

These gorgeous red velvet brownies are a treat for the eyes as much as they are for the palate. I love slicing them into neat squares, ensuring each piece gets a generous swirl of that dreamy cream cheese frosting. In NYC, we appreciate good presentation, so I often serve them on a simple white platter to let their vibrant color pop. For a bit of flair, a light dusting of cocoa powder or a few fresh raspberries can add a sophisticated touch. They are perfect as a standalone dessert, but pair wonderfully with a simple cup of coffee or a glass of milk.

From a culinary perspective, the contrast between the rich, dark red brownie and the bright white frosting is visually striking. It’s a classic combination that always impresses. Think of it like a beautiful Moroccan tile pattern, where contrasting colors create a harmonious design. This visual appeal makes them ideal for celebrations, especially Valentine’s Day, or any occasion where you want to add a festive touch. They have that certain je ne sais quoi that makes people smile before they even take a bite.

Pairing TypeSuggestionsWhy It Works
Side DishNot applicableThese are a decadent dessert, best served on their own.
Sauce / DipA raspberry coulis or a dollop of whipped creamThe tartness of raspberry cuts the richness, while cream adds extra indulgence.
BeverageEspresso, strong coffee, or a rich hot chocolateThe bitterness of coffee or chocolate complements the sweetness and richness of the brownies.
GarnishFresh raspberries, white chocolate shavings, or a sprig of mintAdds a pop of color and freshness, or a touch of elegance.

Make-Ahead, Storage & Reheating

Life in New York can be hectic, so I always appreciate recipes that can be made ahead. These red velvet brownies are perfect for that! I often bake them a day in advance, let them cool completely, and then frost them. This allows the flavors to meld beautifully and makes them even more convenient for last-minute entertaining or satisfying a sudden craving. The firm texture when chilled also makes them easier to slice cleanly, just as I learned to do with delicate pastries in Paris.

MethodContainerDurationReheating Tip
RefrigeratorAirtight container3-4 daysLet sit at room temperature for 15-20 minutes before serving for optimal texture. The cream cheese frosting will firm up in the fridge.
FreezerAirtight container or freezer bagUp to 2 monthsThaw overnight in the refrigerator. For the best texture, let them come to room temperature for at least an hour before enjoying.
Make-AheadUnfrosted brownies in airtight containerUp to 2 daysFrost just before serving or up to 24 hours in advance. The frosting will hold up well when refrigerated.

When reheating, I find that a quick warm-up can bring back that lovely fudgy texture. If you prefer them warm, you can gently heat individual brownies in the microwave for about 10-15 seconds. Be cautious not to overheat, as this can change the texture. For a truly luxurious experience, especially if you’ve stored them in the fridge, letting them come to room temperature naturally is often the best approach. It allows the butter and chocolate to soften beautifully, recapturing that fresh-baked quality.

Variations & Easy Swaps

VariationKey ChangeBest ForDifficulty Impact
Chocolate Lovers DreamAdd chocolate chips or chunks to batterIntensifying the chocolate flavorNo impact; adds texture.
Gluten-Free / Dairy-FreeUse GF flour blend & dairy-free alternativesDietary needsMinimal change, ensure good GF flour.
Spiced Winter TwistAdd cinnamon, nutmeg, or cardamomSeasonal warmth and spiceAdds complexity, very subtle.

Chocolate Lovers Dream

For those who believe you can never have too much chocolate, I suggest folding in an extra cup of Ghirardelli milk chocolate chips or dark chocolate chunks into the batter along with the dry ingredients. This adds pockets of molten chocolate throughout the brownie, making each bite even more decadent. It’s a simple addition, very much in the spirit of North African desserts where layers of flavor and texture are celebrated, and it ensures this recipe is the best red velvet brownies for any chocoholic.

Gluten-Free Dairy-Free Red Velvet Brownies

Adapting this recipe to be gluten-free and dairy-free is surprisingly simple. For the gluten-free version, I recommend a good quality 1:1 gluten-free baking flour blend that contains xanthan gum. For dairy-free, use a good quality dairy-free butter substitute and dairy-free milk or cream for the frosting. The texture will be very similar, potentially a touch softer, and the flavor remains wonderfully rich. These small adjustments mean everyone can enjoy these decadent easy red velvet brownies.

Spiced Winter Red Velvet Brownies

To add a touch of warmth and spice, especially during the cooler months, I like to incorporate warm spices. A quarter teaspoon each of cinnamon and a pinch of nutmeg, whisked in with the dry ingredients, adds a lovely depth that complements the chocolate and red velvet notes. This inspiration often comes from my Moroccan roots, where spices are central to creating aromatic and comforting dishes. It’s a subtle change, perfect for when you want your homemade red velvet brownies to feel extra cozy.

What is the difference between red velvet brownies and regular brownies?

The primary difference lies in flavor and color. Red velvet brownies typically incorporate cocoa powder (though less than traditional chocolate brownies), red food coloring for their signature vibrant hue, and often a touch of an acidic ingredient like vinegar or buttermilk, which reacts with baking soda to enhance the red color and add a subtle tang. Traditional brownies are usually richer in chocolate flavor and darker in color, relying solely on cocoa and chocolate for their taste. My recipe balances these elements for a unique red velvet chocolate experience.

Can I use a boxed red velvet cake mix to make homemade red velvet brownies?

While you *can* use a boxed red velvet cake mix as a shortcut, it won’t produce the same depth of flavor and fudgy texture as making them from scratch. Cake mixes are formulated for a lighter, cakier texture. To make brownies from a mix, you’d typically follow the package directions, but you can try substituting some of the liquid with melted butter or adding extra chocolate chips to achieve a denser result. However, for the truly best homemade red velvet brownies experience, I highly recommend using a scratch recipe like mine.

How do I keep red velvet brownies moist and fudgy instead of cakey?

Achieving a moist and fudgy texture is all about the ingredients and the baking process. First, ensure you’re using melted butter and chocolate, as this creates a denser base. Don’t overmix the batter once the flour is added, as this develops gluten and leads to a cakey texture. The most critical step is not to overbake them. Pull them out of the oven when a toothpick comes out with moist crumbs attached. The residual heat will continue to cook them as they cool, ensuring a perfectly fudgy center.

What is the best cream cheese frosting recipe to top red velvet brownies?

The best cream cheese frosting for red velvet brownies is one that is smooth, creamy, and has a perfect balance of tanginess and sweetness. My recipe uses softened cream cheese and butter, heavy cream for smoothness, and confectioners’ sugar for sweetness. Crucially, ensure your cream cheese and butter are at room temperature. This ensures the frosting emulsifies properly and doesn’t have lumps. A touch of salt and vanilla extract rounds out the flavor beautifully. For a thicker frosting, use more sugar; for a thinner, more spreadable consistency, add a little more cream or milk.

Can I make red velvet brownies without food coloring?

Yes, you can make red velvet brownies without traditional red food coloring, but they won’t have that signature vibrant red hue. The “red velvet” flavor comes from a combination of cocoa powder, an acidic ingredient (like vinegar or buttermilk), and sometimes a touch of baking soda. When these react, they can create a subtle reddish-brown color. If you want a more natural red color, you can experiment with beet powder, as mentioned in my ingredient spotlight. However, the color will be much less intense than using food coloring. The flavor profile will still be present, but the visual impact will differ significantly.

How much red food coloring should I use for the best color?

For the most vibrant and appealing red color in your brownies, I recommend using about 2 tablespoons of gel-based red food coloring. Gel food coloring is more concentrated than liquid versions, meaning you need less to achieve an intense hue without adding excess moisture to the batter. If you are using liquid food coloring, you might need to use more, and be mindful of how it affects the batter’s consistency. Always add it gradually until you reach your desired shade. The goal is a rich, deep red that stands out beautifully.

What kind of chocolate is best for red velvet brownies?

For the best red velvet brownies, a combination of good quality chocolate chips or chopped chocolate and unsweetened cocoa powder is ideal. I personally love using Ghirardelli milk chocolate chips for their creamy sweetness and smooth melting properties, as detailed in my recipe. This provides a luscious chocolate base. Unsweetened cocoa powder adds a deeper, more intense chocolate flavor. You can also opt for dark chocolate if you prefer a less sweet brownie with a more pronounced chocolate profile. The key is quality; even a good brand of semi-sweet chocolate chips will make a difference.

Can I make red velvet brownies in a different pan size?

Yes, you can adapt the pan size, but it will affect the baking time and thickness of your brownies. A 9×13 inch pan is standard for this recipe, yielding about 12-16 brownies that are perfectly thick. If you use a smaller pan, like an 8×8 inch, your brownies will be thicker and require a longer baking time. Conversely, a larger pan, like a 10×15 inch jelly roll pan, will result in thinner brownies that bake much faster. Always keep an eye on the brownies and test for doneness with a toothpick, as baking times will vary significantly with pan size.

Share Your Version!

I truly hope you adore making and eating these best homemade red velvet brownies as much as I do! When you whip up a batch, please consider leaving a star rating and a comment below to share your experience. I love hearing from you! If you share photos on social media, especially Instagram or Pinterest, please tag me @exorecipe — I’m always thrilled to see your beautiful creations!

I’m always curious to hear how you adapt recipes. Did you try any of the variations, or perhaps discover a new favorite pairing for these rich brownies? Let me know in the comments below! Your feedback helps me refine my recipes and inspires me to create new ones.

From my NYC kitchen to yours — I hope this recipe brings as much warmth to your table as it does to mine. — mia 🧡

📌

Love This Recipe? Save It to Pinterest!

If you enjoyed this Best Homemade Red Velvet Brownies recipe, don’t let it get lost in your browser tabs! 😄 Pin it now so you can find it again anytime — and explore hundreds more tried-and-tested recipes waiting for you on my Pinterest boards.

👉 Follow mia on Pinterest @chefrecipes2

📌 Pin this recipe · 🔁 Re-pin your favorites · 💬 Tag me when you make it — I love seeing your creations!

Print

clock clock iconcutlery cutlery iconflag flag iconfolder folder iconinstagram instagram iconpinterest pinterest iconfacebook facebook iconprint print iconsquares squares iconheart heart iconheart solid heart solid icon

Best Homemade Red Velvet Brownies

  • Author: Chef Mia

Description

Rich, cream cheese frosted decadent, homemade red velvet brownie! These are a Valentine’s Day sweet treat sure to get some attention!


Ingredients

Scale
  • 2 1/4 sticks unsalted butter (cut into chunks)
  • 3 1/2 cups Ghirardelli Milk Chocolate Chips
  • 5 large eggs (room temp)
  • 1/2 cup granulated sugar
  • 1 1/4 cups packed brown sugar
  • 1 teaspoon salt
  • 1 1/4 teaspoons vanilla extract
  • 2 tablespoons red food coloring
  • 2 cups all purpose flour
  • 1 teaspoon baking powder
  • 3 tablespoons Ghirardelli unsweetened cocoa powder
  • 4 ounces cream cheese (softened)
  • 5 tablespoons unsalted butter (room temperature)
  • 1/8 teaspoon salt
  • 1 teaspoon vanilla extract
  • 2 or 3 cups confectioners sugar
  • 12 tablespoons heavy cream or milk of choice

Instructions

  1. Preheat oven to 350 degrees.
  2. Line a 9×13 baking pan with foil or parchment paper and very lightly grease.
  3. Melt milk chocolate and butter in microwave until melted or use a small saucepan, melt the butter over your lowest setting, then add the milk chocolate chips stirring constantly with a small whisk until melted and smooth. Turn off heat and let set to cool.
  4. In a large mixing bowl, add the eggs, vanilla and sugars together and whisk together. Then whisk in the red food coloring.
  5. Whisk in the cooled down melted chocolate mixture into the egg/sugar mixture until combined and smooth. Make sure the melted butter isn't hot, so it doesn't curdle the eggs when you add it.
  6. Add flour, baking powder, salt and cocoa powder together and stir together with a silicone spatula until mixture is completely combined.
  7. Bake 35-40 minutes, until toothpick comes out clean and transfer pan to cooling rack and let cool for 15 minutes.
  8. Refrigerate, covered until cooled to frost or let brownies come to room temperature before frosting.
  9. Place cream cheese, butter, vanilla, salt, confectioner's sugar and cream/milk in mixing bowl. Using a mixer, beat on medium high until well combined. Mix until smooth and creamy.


Best Homemade Red Velvet Brownies

k">

Tried This Recipe? Leave a Comment!

Did you make this recipe? I’d love to hear how it turned out! Please leave a comment and a rating below. Your feedback helps other home cooks and supports cheerychop.com!

For more delicious inspiration, follow me on Pinterest!

High-Protein Honey Garlic Shrimp – Easy 20-Minute Dinner

High-Protein Honey Garlic Shrimp: An Amazing Ultimate Recipe to Master

⚖️
Difficulty
Easy
⏲️
Prep Time
10 mins
🕒
Cook Time
10 mins
⏱️
Total Time
20 mins
🍽️
Servings
2-3

As a chef who has navigated the bustling culinary landscape of New York City for years, I’ve learned to appreciate recipes that are not only delicious but also efficient. This **high-protein honey garlic shrimp recipe** is a testament to that. It reminds me of the quick, flavorful meals my mother would prepare in our Marrakech kitchen after a long day, but with a modern, healthy twist that’s perfect for my busy New York life. The balance of sweet honey and pungent garlic, coating tender shrimp, is simply irresistible. It’s a dish that feels both comforting and sophisticated, making it a go-to in my repertoire for weeknight dinners and elegant appetizers alike.

Imagine bite-sized morsels of succulent shrimp, kissed by a glistening, golden glaze that strikes the perfect chord between sweet and savory. The aroma alone is intoxicating: a fragrant blend of caramelized honey, sharp garlic, and the subtle umami of soy sauce, all mingling in the air as it simmers. This dish is a celebration of textures – the slight chew of the perfectly cooked shrimp, the glossy sheen of the sauce, and the fresh crunch of green onions and sesame seeds. It’s this symphony of senses that makes a simple seafood dish truly extraordinary, a culinary journey that I’ve refined using techniques learned in Paris.

What sets this particular **easy honey garlic shrimp** apart is its incredible simplicity without sacrificing depth of flavor. I’ve found the secret to its success lies in the quick cooking method, ensuring the shrimp remain tender, and the carefully balanced glaze. I can’t wait to share a pro tip that transforms the sauce’s texture. I’ll also highlight a common mistake many home cooks make that can lead to rubbery shrimp, something I learned to avoid early in my culinary training. Get ready for a truly amazing, healthy shrimp dinner that’s quicker than a takeout order!

Why This High-Protein Honey Garlic Shrimp Recipe Is the Best

My approach to this high-protein honey garlic shrimp recipe is rooted in my belief that exceptional flavor doesn’t always require complicated techniques. My Moroccan heritage taught me the art of balancing sweet and savory, while my Parisian training honed my understanding of sauces and ingredient synergy. For this dish, I’ve infused the classic honey garlic sauce with just the right amount of soy sauce for depth and umami, creating a glaze that clings beautifully to each shrimp. It’s a delightful dance of flavors that’s far more nuanced than most simple versions you’ll find, yet it’s incredibly easy to make, even for beginner cooks.

The key to achieving that perfect, tender shrimp texture lies in precise cooking. Overcooked shrimp are a culinary tragedy, and I’ve seen it happen countless times. My method involves searing the shrimp quickly on high heat, just until they start to turn pink, then finishing them in the sauce. This ensures they cook through without becoming tough or rubbery. It’s a chef’s trick that I’ve incorporated into this recipe to guarantee succulent, plump shrimp every single time, a detail I learned from my instructors in Paris.

Ultimately, this recipe is designed for the modern home cook. Whether you’re a busy professional in NYC looking for a quick and healthy meal or a parent trying to get a nutritious dinner on the table fast, this high-protein seafood recipe delivers. The ingredient list is short, readily available at any US grocery store, and the steps are straightforward enough that you can whip it up in under 20 minutes. You get restaurant-quality flavor and texture with minimal effort, making it your new favorite easy honey garlic shrimp.

High-Protein Honey Garlic Shrimp Ingredients

Whenever I’m in NYC, I love to visit the Chelsea Market or the smaller fish markets in Hell’s Kitchen for the freshest shrimp. If you can’t find fresh shrimp, don’t worry! Good quality frozen shrimp work wonderfully here. My mother in Morocco always emphasized using fresh, vibrant ingredients, and that philosophy guides my shopping whether I’m at a grand market or my local Duane Reade’s produce section.

Ingredients List

  • 1 pound large shrimp, peeled and deveined
  • 1/4 cup honey
  • 4 cloves garlic, minced
  • 2 tablespoons soy sauce
  • 1 tablespoon olive oil
  • 1 teaspoon cornstarch (optional, for thickening)
  • Salt and pepper to taste
  • 2 green onions, sliced (for garnish)
  • Sesame seeds (for garnish, optional)

Ingredient Spotlight

Shrimp: For this recipe, I recommend large shrimp (16/20 or 21/25 count per pound). They provide a satisfying bite and cook quickly without getting lost in the glaze. Look for shrimp that are bright, firm, and have a clean, briny smell. In the US, you’ll find them in the seafood section, often sold as “peeled and deveined” for convenience, saving you a crucial step.

Honey: While any honey will do, a mild, liquid honey like clover or wildflower honey is ideal as it won’t overpower the other flavors. If you want to deepen the caramel notes, you could experiment with a buckwheat honey, though it’s more intense. Honey is crucial for the sweet, sticky glaze that makes this dish so appealing, providing essential caramelization during cooking.

Garlic: Freshly minced garlic is non-negotiable here. It forms the pungent aromatic base of the sauce. Using pre-minced garlic from a jar can lead to a less vibrant flavor and sometimes an off-putting texture. Mince your own, or use a garlic press for the best aromatic punch. The sharpness of fresh garlic cuts through the sweetness of the honey, creating a complex flavor profile.

Original IngredientBest SubstitutionFlavor / Texture Impact
HoneyMaple Syrup or Agave NectarMaple syrup imparts a slightly different rich, woodsy sweetness. Agave nectar is more neutral but will still provide sweetness and help thicken the sauce similarly.
Soy SauceTamari (for gluten-free) or Coconut AminosTamari offers a similar umami profile. Coconut aminos provide a slightly sweeter, less salty umami flavor. Both are excellent for those avoiding gluten.
Olive OilAvocado Oil or Canola OilThese neutral oils will not impart any unwanted flavors and will work perfectly to cook the shrimp and emulsify the sauce base.

How to Make High-Protein Honey Garlic Shrimp — Step-by-Step

Making this **high-protein honey garlic shrimp recipe** is designed to be as enjoyable as eating it. Just follow these simple steps and you’ll be on your way to a fantastic meal.

Step 1: Prepare the Shrimp

Rinse the shrimp under cold water to remove any ice crystals or debris, then pat them thoroughly dry with paper towels. This step is crucial for ensuring the shrimp sear properly and don’t steam. For truly amazing results, ensure they are completely dry before proceeding.

💡 mia’s Pro Tip: Patting the shrimp dry is key to achieving a beautiful sear, creating little crusts on the outside that hold the glaze. Don’t skip this step – it makes a huge difference in texture!

Step 2: Mix the Sauce

In a medium bowl, whisk together the honey, minced garlic, soy sauce, and olive oil. If you desire a thicker, more glaze-like sauce that coats the shrimp beautifully, stir in the cornstarch until fully dissolved. This is your flavor base, so make sure it’s well combined!

Step 3: Cook the Shrimp

Heat a tablespoon of olive oil in a large skillet over medium-high heat. Once the oil is shimmering, add the shrimp in a single layer. Avoid overcrowding the pan; cook in batches if necessary to ensure each shrimp gets direct heat.

Step 4: Season the Shrimp

Quickly sprinkle the shrimp with salt and freshly ground black pepper to taste. Cook for about 2 to 3 minutes per side, just until they start turning opaque and pink. They should be about halfway cooked at this point.

⚠️ Common Mistake to Avoid: Cooking the shrimp for too long in this initial stage. Overcooking anywhere in the process will lead to tough, rubbery shrimp. Aim for just barely opaque before adding the sauce.

Step 5: Add the Sauce

Pour the prepared honey garlic sauce directly over the shrimp in the skillet. Toss everything gently to ensure every piece of shrimp is evenly coated in the glistening glaze.

Step 6: Let it Simmer

Reduce the heat to low and let the shrimp simmer in the sauce for an additional 3 to 5 minutes. Continue tossing occasionally until the shrimp are fully cooked through and the sauce has thickened to your desired consistency. If you added cornstarch, you’ll see it beautifully thicken and cling.

Step 7: Garnish

Remove the skillet from the heat. Garnish generously with sliced green onions for a fresh, oniony bite and a sprinkle of sesame seeds for a nutty crunch, if using. These garnishes add color and texture that elevate the dish.

Step 8: Serve

Serve your incredible **healthy shrimp dinner** immediately while it’s warm and the glaze is at its peak. This dish is a complete protein powerhouse that satisfies beautifully.

StepActionDurationKey Visual Cue
1Prep ShrimpN/AClean, deveined, and thoroughly dried
2Mix SauceN/AWell combined, cornstarch dissolved if used
3Cook Shrimp (Initial Sear)2-3 minsShrimp turning pink and opaque
4Season ShrimpPart of Step 3Evenly seasoned
5Add SauceN/AShrimp coated in sauce
6Simmer & Thicken3-5 minsSauce is glossy and thickened; shrimp fully cooked
7GarnishN/AFresh green onions and sesame seeds
8ServeImmediatelyHot and ready to enjoy

Serving & Presentation

To truly elevate this dish, I love plating it in a way that’s both inviting and visually appealing. A wide, shallow bowl or a plate works perfectly. Pile the glistening honey garlic shrimp in the center, making sure some of that luscious sauce pools at the bottom. The vibrant green of the chopped scallions and the subtle crunch of sesame seeds are not just for show; they add crucial layers of flavor and texture that complete the dish. It’s a presentation that speaks to the quality of the ingredients and the care put into its preparation.

This dish is incredibly versatile and pairs beautifully with a variety of sides. For a complete, balanced meal reminiscent of what I might find at a trendy downtown NYC eatery, I often serve it over fluffy jasmine rice or quinoa. Steamed or roasted vegetables, like broccoli, asparagus, or snap peas, add a lovely crisp texture and vibrant color. The sweet and savory glaze is also fantastic with heartier grains like farro or brown rice. It’s about creating a harmonious plate where every element complements the star—the delicious, high-protein honey garlic shrimp.

Pairing TypeSuggestionsWhy It Works
Side DishJasmine Rice, Quinoa, Cauliflower Rice, Soba NoodlesProvides a neutral base to soak up the delicious sauce and adds healthy carbs or fiber.
VegetablesSteamed Broccoli, Roasted Asparagus, Sautéed Bok ChoyOffers a fresh, often slightly bitter or earthy contrast to the sweet glaze and adds essential vitamins and crunch.
BeverageCrisp White Wine (Sauvignon Blanc), Light Lager, Green TeaThe acidity of the wine cuts through the richness, while a crisp beer or herbal tea offers a refreshing counterpoint.
GarnishToasted Sesame Seeds, Sliced Green Onions, Red Pepper FlakesAdds textural contrast, fresh aroma, and a hint of spicy heat for those who like a kick.

Make-Ahead, Storage & Reheating

As a New Yorker, I understand the need for smart meal prep. While this high-protein shrimp dish is best enjoyed fresh, I often make larger batches to have leftovers for lunch the next day. Storing and reheating properly are key to maintaining the quality and flavor, ensuring that your healthy shrimp dinner remains just as delicious on day two as it was on day one.

MethodContainerDurationReheating Tip
RefrigeratorAirtight container2-3 daysGentle reheat on stovetop or microwave.
FreezerFreezer-safe bag/container1-2 monthsThaw in refrigerator then reheat as above.
Make-AheadComponent separation1 day in advanceCook shrimp and sauce separately then toss before serving.

When reheating, it’s important to remember that shrimp can overcook easily. I prefer to gently warm the shrimp and sauce together in a skillet over low heat, adding a tiny splash of water or broth if needed to loosen the glaze. If using the microwave, ensure you use a microwave-safe dish and heat in short 30-second intervals, stirring in between, until just warmed through. This prevents the shrimp from becoming tough and maintains their delicate texture.

Variations & Easy Swaps

VariationKey ChangeBest ForDifficulty Impact
Spicy Honey Garlic ShrimpAdd red pepper flakes or sriracha to the sauceThose who love a kickNo change
Gluten-Free Honey Garlic ShrimpUse Tamari or Coconut Aminos instead of Soy SauceGluten-sensitive dinersNo change
Ginger Sesame Honey Garlic ShrimpAdd fresh ginger to sauce; finish with toasted sesame oilElevated flavor profilesSlightly more complex

Spicy Honey Garlic Shrimp

For those who enjoy a bit of heat, simply stir in 1/4 to 1/2 teaspoon of red pepper flakes or a tablespoon of sriracha into the honey garlic sauce before cooking. This adds a wonderful warmth that complements the sweetness of the honey beautifully, without overpowering the shrimp. It’s a simple adjustment that offers a delightful flavor dimension, much like the subtle spices found in Moroccan tagines.

Gluten-Free Honey Garlic Shrimp

To make this recipe gluten-free, the only change needed is to swap the soy sauce for tamari or coconut aminos. Both substitutions work beautifully, offering a similar savory depth without the gluten. Tamari is a direct substitute, while coconut aminos will yield a slightly sweeter, less salty profile, both delicious and tested by me for optimal results.

Ginger Sesame Honey Garlic Shrimp

Elevate the flavor profile by adding a teaspoon of freshly grated ginger to the sauce mixture along with the garlic. Once cooked and plated, finish with a drizzle of toasted sesame oil for an irresistible nutty aroma. This version brings in elements often found in Asian cuisine, creating a fusion that’s both exciting and incredibly satisfying, inspired by the global flavors I encounter daily in NYC.

What is the best way to cook high-protein honey garlic shrimp to keep it tender?

The absolute best way to ensure your high-protein honey garlic shrimp stays tender is to avoid overcooking. I recommend searing the shrimp quickly in a hot skillet for just 2-3 minutes until they begin to turn pink. Then, add the sauce and let them simmer for only another 3-5 minutes until they are just cooked through. This quick cooking method preserves their delicate texture. Properly drying the shrimp before cooking also helps achieve a better sear and prevents steaming, which can make them tough.

Can I use frozen shrimp for this high-protein honey garlic shrimp recipe?

Absolutely! Frozen shrimp are a fantastic and convenient option for this high-protein honey garlic shrimp recipe, and often just as good as fresh. The key is to thaw them properly. I recommend thawing shrimp overnight in the refrigerator, or more quickly by placing them in a colander and running cold water over them for a few minutes. Make sure to pat them completely dry with paper towels after thawing, as this is crucial for getting a good sear and a tender texture in your final dish.

What can I substitute for honey in this honey garlic shrimp recipe to lower the sugar?

If you’re looking to reduce the sugar content, you have a couple of excellent substitutes for honey. Maple syrup is a great choice, offering a rich, slightly different sweetness. Agave nectar is another option; it’s more neutral in flavor but still provides sweetness and helps thicken the sauce. While these will alter the flavor profile slightly, they are effective in maintaining the sauce’s integrity and creating that delicious glaze. Just be mindful that some alternatives might be thinner, so a touch more cornstarch might be needed.

How do I make the honey garlic sauce thicker for the shrimp without using cornstarch?

To thicken the honey garlic sauce without cornstarch, you can rely on two main methods. First, simply let the sauce simmer and reduce further over low heat for a longer period. The natural sugars in the honey and soy sauce will caramelize and thicken the mixture. Second, you can emulsify a bit more olive oil into the sauce towards the end of cooking, which will help create a richer, slightly thicker glaze. Be patient, and allow evaporation to do the work for a naturally thickened sauce.

Is this a healthy shrimp dinner?

Yes, this high-protein honey garlic shrimp recipe is indeed a healthy shrimp dinner! Shrimp are an excellent source of lean protein and are low in calories and fat. The sauce uses natural sweeteners like honey and savory elements like soy sauce, which are used in moderation. By pairing it with whole grains and plenty of vegetables, you create a very balanced and nutritious meal that supports a healthy lifestyle. The recipe itself focuses on lean protein and a flavorful, quick glaze, making it a nutritious choice.

How can I make this honey garlic shrimp recipe spicier?

Making this honey garlic shrimp recipe spicier is wonderfully easy! You can add a pinch of red pepper flakes directly into the sauce mixture when you combine the honey, garlic, and soy sauce. For a more intense heat, consider adding a tablespoon or two of sriracha or another chili sauce. Adjust the amount based on your preference for heat. This little adjustment can transform the dish into something with a delightful kick, perfect for those who enjoy a bit more excitement in their meals!

What are the best sides to serve with honey garlic shrimp?

This versatile honey garlic shrimp recipe pairs wonderfully with a variety of sides that complement its sweet and savory flavor profile. For a complete meal, I love serving it over fluffy jasmine rice or quinoa, which soak up the delicious sauce beautifully. Steamed or roasted vegetables like broccoli, asparagus, or snap peas add a welcome crunch and a dose of nutrients. You could also opt for noodles, such as soba or udon, for a heartier dish. The key is to have a base that balances the rich glaze and adds texture.

Can I prepare the sauce for this high-protein seafood recipe in advance?

Yes, you absolutely can prepare the sauce for this high-protein seafood recipe in advance. It’s a great way to save time, especially on busy weeknights. Simply mix together the honey, minced garlic, soy sauce, and olive oil (and cornstarch, if using) in a jar or airtight container. Store it in the refrigerator for up to 2-3 days. When you’re ready to cook, just give it a quick whisk, and pour it over your seared shrimp. This makes the cooking process even faster and more streamlined!

Share Your Version!

I truly hope you enjoy making and eating this **high-protein honey garlic shrimp recipe** as much as I do in my bustling NYC kitchen! If you give this dish a try, please consider leaving a star rating and a comment below—your feedback means the world to me. And if you snap a photo, I’d be thrilled if you shared it on Instagram or Pinterest and tagged me @exorecipe; I absolutely love seeing your culinary creations!

From my NYC kitchen to yours — I hope this recipe brings as much warmth to your table as it does to mine. — mia 🧡

📌

Love This Recipe? Save It to Pinterest!

If you enjoyed this High-Protein Honey Garlic Shrimp: An Amazing Ultimate Recipe, don’t let it get lost in your browser tabs! 😄 Pin it now so you can find it again anytime — and explore hundreds more tried-and-tested recipes waiting for you on my Pinterest boards.

👉 Follow mia on Pinterest @chefrecipes2

📌 Pin this recipe · 🔁 Re-pin your favorites · 💬 Tag me when you make it — I love seeing your creations!

Print

clock clock iconcutlery cutlery iconflag flag iconfolder folder iconinstagram instagram iconpinterest pinterest iconfacebook facebook iconprint print iconsquares squares iconheart heart iconheart solid heart solid icon

High-Protein Honey Garlic Shrimp: An Amazing Ultimate Recipe

  • Author: Chef Mia

Description

A delicious high-protein shrimp dish with a sweet and savory honey garlic glaze.


Ingredients

Scale
  • 1 pound large shrimp, peeled and deveined
  • 1/4 cup honey
  • 4 cloves garlic, minced
  • 2 tablespoons soy sauce
  • 1 tablespoon olive oil
  • 1 teaspoon cornstarch (optional, for thickening)
  • Salt and pepper to taste
  • 2 green onions, sliced (for garnish)
  • Sesame seeds (for garnish, optional)

Instructions

  1. Making High-Protein Honey Garlic Shrimp is straightforward. Follow these steps for best results:
  2. Rinse the shrimp under cold water and pat dry with paper towels.
  3. Mix the Sauce: In a bowl, combine honey, minced garlic, soy sauce, and olive oil. If you prefer a thicker sauce, stir in cornstarch.
  4. Cook the Shrimp: In a large skillet, heat some olive oil over medium-high heat. Add the shrimp in a single layer.
  5. Season the Shrimp: Sprinkle the shrimp with salt and pepper to taste. Cook for 2-3 minutes until they start turning pink.
  6. Add the Sauce: Pour the honey garlic mixture over the shrimp. Toss to ensure all pieces are coated evenly.
  7. Let it Simmer: Lower the heat and let the shrimp simmer in the sauce for an additional 3-5 minutes, or until cooked through and the sauce has thickened.
  8. Garnish: Remove from heat and garnish with sliced green onions and sesame seeds if desired.
  9. Serve: Enjoy your dish immediately, while it's still warm. By following these simple instructions, you'll have a fabulous high-protein meal that dazzles and satisfies.


Nutrition

  • Calories: 220 kcal
  • Fat: 7g


High-Protein Honey Garlic Shrimp: An Amazing Ultimate Recipe