Garlic Butter Shrimp Pasta – Easy 20-Minute Weeknight Dinner

Garlic Butter Shrimp Pasta: The Easiest Creamy Linguine Dinner

⚖️
Difficulty
Easy
⏲️
Prep Time
10 mins
🕒
Cook Time
15 mins
⏱️
Total Time
25 mins
🍽️
Servings
4

When I first moved to New York City, the sheer pace of life was exhilarating, but also a little overwhelming. My mother, back in her bustling Marrakech kitchen, would always say that a good meal is the anchor that grounds you. That philosophy has stayed with me, and it’s a principle I bring to my recipes. This garlic butter shrimp pasta is born from that idea – it’s incredibly **easy garlic shrimp pasta**, a dish that feels both comforting and elegant, perfect for a busy weeknight after navigating the concrete jungle. It’s the kind of recipe that whispers of Italian trattorias but has a soul that speaks to my culinary journey, from North African spices to French finesse.

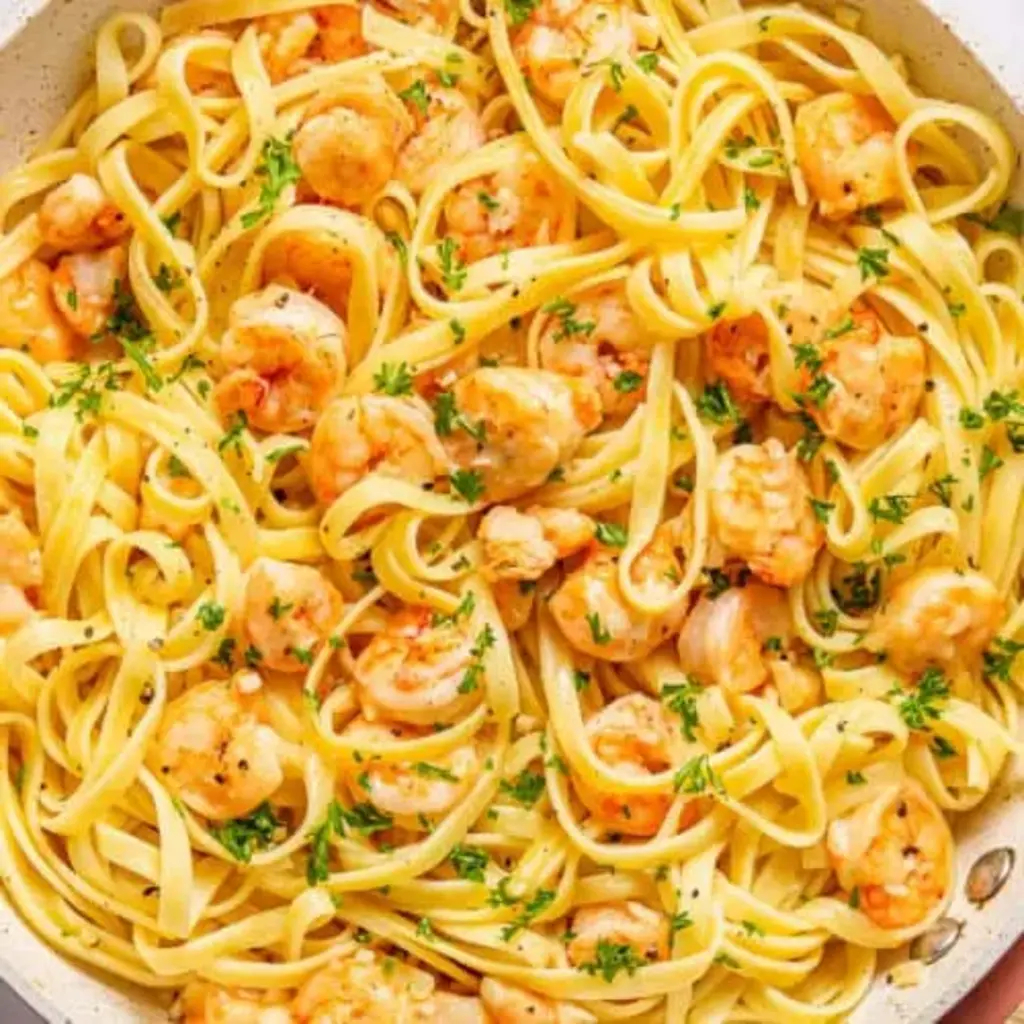
Imagine this: delicate strands of fettuccine clinging to plump, succulent shrimp, all bathed in a rich, aromatic sauce that’s both garlicky and bright with citrus. The perfume of gently sautéed garlic, the sizzle as the shrimp turn a vibrant coral, the creamy embrace of melted parmesan – it all comes together in a symphony of flavors and textures. I love to use a touch of lemon zest, a technique I learned in Paris, to cut through the richness and add a sophisticated layer of fragrance. It’s a simple dish, but each bite is a testament to how the right ingredients, handled with care, can create something truly extraordinary, turning a simple shrimp pasta dinner into a memorable experience.

What I’ve perfected in this recipe is that balance – the lusciousness without the greasiness, the bright flavors without being overpowering. It’s about creating an **easy garlic shrimp pasta** that’s restaurant-worthy but achievable in under 30 minutes. I’ll share my secret for achieving that perfect creamy sauce that coats every strand of pasta and my tried-and-true method for ensuring your garlic is fragrant and tender, not bitter. And because I know how many of you struggle with cooking shrimp, I’ll also highlight a common pitfall to avoid that can leave your shrimp rubbery.

Why This Garlic Butter Shrimp Pasta Recipe Is the Best

My journey from the vibrant spice markets of Morocco to the elegant kitchens of Paris and then to the dynamic food scene of New York has taught me that great food is about more than just taste; it’s about balance, technique, and soul. For this garlic butter shrimp pasta, the ‘secret’ is marrying the simple, comforting flavors I grew up with – a touch of aromatic garlic, a hint of brightness – with the refined techniques I learned in pastry school in Paris, like coaxing the perfect emulsification of butter and lemon. It’s this fusion that gives the sauce its incredible richness without any heaviness, making it a truly special **shrimp pasta dinner**.

From a chef’s perspective, achieving the perfect texture is paramount. It’s not just about cooking the shrimp until opaque; it’s about timing. I ensure they are added to the pan at just the right moment when the butter is melted and fragrant, cooking them quickly to keep them tender and succulent. The fettuccine is then tossed directly into this buttery, garlicky shrimp sauce, allowing each noodle to absorb the flavors. This approach ensures that every bite of this **creamy garlic butter pasta** is perfectly coated, avoiding the dreaded watery sauce or overcooked pasta.

What truly makes this recipe shine is its accessibility. I’ve designed it to be a foolproof and fast meal that anyone can master, even if you’re new to cooking. The ingredient list is short, readily available at any New York City grocery store, and the steps are straightforward. You’ll have a restaurant-quality **garlic shrimp linguine** on your table in under 30 minutes, proving that delicious, impressive meals don’t need to be complicated. It’s the kind of dish that makes you feel like a culinary star, even on your busiest evenings.

Garlic Butter Shrimp Pasta Ingredients

One of my favorite things about living in NYC is the access to incredible ingredients. I often find myself at the Union Square Greenmarket, picking up fresh herbs or vibrant lemons that inspire my cooking. For this recipe, I like to get my shrimp from a good fishmonger, and the garlic and butter are staples from my pantry. This **garlic butter shrimp pasta recipe** uses simple, high-quality ingredients that sing together.

Ingredients List

  • 12 oz Fettuccine
  • 1 lb Large Shrimp, peeled and deveined
  • 4 cloves Garlic, minced
  • ½ cup Grated Parmesan Cheese
  • 4 tbsp Unsalted Butter
  • ¼ cup Fresh Lemon Juice (juice from 1/4 of a lemon)
  • 1 tsp Lemon Zest (zest from 1/4 of a lemon)
  • 2 tbsp Olive Oil or Cooking Oil
  • Sea Salt, to taste
  • Freshly Ground Black Pepper, to taste
  • Fresh Parsley, chopped (for garnish, optional)

Ingredient Spotlight

The star of this dish, beyond the shrimp itself, is arguably the garlic. Here, it’s not just an aromatic base but integral to the sauce’s flavor profile. I prefer to mince it finely, releasing its oils gradually as it sautés. You can buy garlic bulbs year-round in any NYC grocery store; they should feel firm with no soft spots. If you find yourself without fresh garlic, you can substitute with 1 teaspoon of garlic powder, though the flavor will be less nuanced.

Butter is key to achieving that luxurious, creamy texture. I opt for unsalted butter so I can control the saltiness of the dish precisely. When shopping, look for good quality European-style butter if possible, as it often has a higher fat content which makes for a richer sauce. If you must substitute, a high-quality dairy-free butter alternative will work, though the sauce might be slightly less rich.

Parmesan cheese adds a salty, nutty depth and helps to thicken the sauce, creating that delightful “creamy” consistency we all love in **creamy garlic butter pasta**. I always recommend grating your own Parmesan from a block rather than using pre-grated, as it melts smoother and has a superior flavor. If you need a dairy-free option, a good quality nutritional yeast can provide a cheesy, savory flavor, though it won’t offer the same thickening properties.

Original IngredientBest SubstitutionFlavor / Texture Impact
Large ShrimpMedium Shrimp or ScallopsMedium shrimp will cook faster, scallops give a sweeter, more delicate flavor. Adjust cooking time accordingly.
FettuccineLinguine, Spaghetti, or LinguineThese long pasta shapes hold the sauce beautifully. Shorter shapes might feel less cohesive.
Mined GarlicGarlic Powder (1 tsp per 4 cloves)Less fresh flavor, can sometimes taste slightly metallic if overused.
Unsalted ButterHigh-quality Dairy-Free Butter AlternativeSauce may be slightly less rich and creamy. Ensure it’s unsalted.
Parmesan CheeseNutritional Yeast (2-3 tbsp)Provides a cheesy, savory flavor but won’t melt or thicken the sauce like Parmesan.

How to Make Garlic Butter Shrimp Pasta — Step-by-Step

Follow these simple steps to create a delightful **garlic shrimp linguine** that’s bursting with flavor.

Step 1: Cook the Pasta

Bring a large pot of generously salted water to a rolling boil. Add the fettuccine and cook according to package directions until it’s al dente – tender but with a slight bite. Just before draining, reserve about ½ cup of the pasta water. Drain the fettuccine well and set it aside. This starchy water is liquid gold for creating a silky sauce!

💡 mia’s Pro Tip: Always salt your pasta water generously, like the sea! This is your primary opportunity to season the pasta itself, which is crucial for a flavorful finished dish.

Step 2: Sauté the Garlic

While the pasta is cooking, heat the olive oil in a large skillet or Dutch oven over medium heat. Add the minced garlic and cook for about 1 to 2 minutes until fragrant. Be very careful here; we want it golden and aromatic, not browned or burnt.

⚠️ Common Mistake to Avoid: Letting the garlic burn! Burnt garlic turns bitter and will ruin the delicate flavor of your sauce. Keep the heat medium-low and stir constantly. If it starts browning too quickly, remove the pan from the heat for a moment.

Step 3: Cook the Shrimp

Melt the butter into the skillet with the fragrant garlic. Add the peeled and deveined shrimp in a single layer. Cook for about 2-3 minutes per side, until the shrimp turn opaque and pink, just cooked through. Avoid overcrowding the pan; cook in batches if necessary.

💡 mia’s Pro Tip: The key to tender shrimp is not to overcook them. They should turn from translucent gray to opaque pink quickly. Remove them from the pan immediately once they’re done; they’ll finish cooking in the sauce.

Step 4: Create the Sauce

Turn the heat down to low. Add the fresh lemon juice and lemon zest to the pan. Stir in the grated Parmesan cheese. Continue to stir until the Parmesan is melted and the sauce starts to emulsify and thicken slightly. Season with sea salt and freshly ground black pepper to your taste.

💡 mia’s Pro Tip: If your sauce seems a little too thick or dry at this point, add a tablespoon or two of the reserved pasta water. The starch in the water will help create a smooth, glossy sauce that clings beautifully to the pasta and shrimp.

Step 5: Combine Everything

Add the drained fettuccine directly into the skillet with the shrimp and sauce. Toss everything together gently until the pasta is evenly coated in the luscious garlic butter sauce. Let it mingle for about a minute to absorb all those delicious flavors.

💡 mia’s Pro Tip: Don’t be afraid to toss the pasta vigorously! This helps the sauce coat every strand and ensures the Parmesan cheese fully melts into the sauce, creating that perfect velvety texture.

Step 6: Garnish and Serve

Serve the garlic butter shrimp pasta immediately in warm bowls. Garnish with freshly chopped parsley for a pop of color and freshness, if desired. This **easy garlic shrimp pasta** is best enjoyed right away!

💡 mia’s Pro Tip: For an extra touch of elegance, a tiny sprinkle of red pepper flakes can add a welcome hint of warmth without making the dish spicy. My Moroccan mother taught me the power of a subtle spice!

StepActionDurationKey Visual Cue
1Cook Pasta10-12 minsAl dente, tender with a slight bite. Reserve pasta water.
2Sauté Garlic1-2 minsFragrant, lightly golden, not browned.
3Cook Shrimp4-6 minsOpaque pink, curled. Cook quickly.
4Create Sauce1-2 minsMelted cheese, slightly thickened sauce.
5Combine1 minPasta evenly coated with sauce.
6Garnish & ServeImmediateFresh parsley sprinkled on top.

Serving & Presentation

To serve this beautiful garlic butter shrimp pasta, I love to plate it in warm, shallow bowls. The key is to ensure a good distribution of shrimp and pasta, with a few perfectly cooked shrimp peeking out from the luscious sauce. A generous sprinkle of fresh, bright green parsley not only adds a visual appeal but also a burst of freshness that complements the rich sauce. In NYC, we appreciate dishes that are simple yet sophisticated, and this pasta embodies that perfectly.

For a truly satisfying meal, consider a few pairings. A crisp, light white wine like a Sauvignon Blanc or an unoaked Chardonnay cuts through the richness of the butter and garlic beautifully. On the side, a simple arugula salad with a light vinaigrette adds a peppery, fresh contrast. My Moroccan heritage also inspires me; a small side of harissa-spiced roasted vegetables could offer a delightful North African twist, providing a warming spice that echoes through the dish.

This **shrimp pasta dinner** is a celebration of flavor and simplicity. It’s elegant enough for a dinner party, yet quick and easy enough for a weeknight family meal. The bright lemon notes, the savory garlic, and the sweet shrimp create a harmonious balance that appeals to everyone. It’s a dish that always brings smiles to my table, and I hope it does the same for yours.

Pairing TypeSuggestionsWhy It Works
Side DishArugula Salad with Lemon Vinaigrette; Steamed Asparagus; Roasted Cherry TomatoesAdds freshness and a touch of acidity to balance the rich sauce.
Sauce / DipCrusty Bread for dipping; Extra Lemon WedgesSoaks up any leftover delicious garlic butter sauce; adds a bright burst of citrus.
BeverageSauvignon Blanc; Pinot Grigio; Light-bodied Chardonnay; Sparkling Water with LemonCrisp white wines cut through the richness. Sparkling water offers a refreshing, non-alcoholic option.
GarnishFresh Parsley; Red Pepper Flakes; Grated ParmesanAdds color, freshness, a hint of heat, or extra cheesy flavor.

Make-Ahead, Storage & Reheating

As a busy New Yorker, I’ve learned the art of meal prep! This garlic butter shrimp pasta is excellent for making ahead for lunches or quick dinners. The key is to store the components separately if possible, but even as a whole dish, it holds up surprisingly well. My goal is always to have delicious, home-cooked meals ready with minimal fuss, even after a long day of recipe testing or teaching.

MethodContainerDurationReheating Tip
RefrigeratorAirtight container2-3 daysGently heat in a skillet over low heat with a splash of water or broth. Stir gently.
FreezerFreezer-safe container or heavy-duty freezer bag1-2 monthsThaw overnight in the refrigerator. Reheat as above. Note: Shrimp texture may change slightly after freezing.
Make-AheadCook pasta and sauce separately; combine before serving.Up to 1 day in advance (for components)Reheat sauce gently, cook shrimp quickly, then combine with freshly reheated pasta.

When reheating, I always recommend using a skillet over low heat. This allows you to gently coax the sauce back to its creamy consistency without overheating the shrimp. Add a tablespoon or two of water, broth, or even a little extra butter to help re-emulsify the sauce. If you find the sauce has separated a bit, a whisk can help bring it back together. For best results, especially with shrimp, try to only reheat the amount you plan to eat.

Variations & Easy Swaps

This **garlic butter shrimp pasta** is a wonderful base for endless delicious variations. My culinary training in Paris has taught me how to adapt classic dishes, and my Moroccan roots inspire me to explore bold flavor combinations. Feel free to play with the ingredients based on what you find at your local farmer’s market or what’s in your pantry!

VariationKey ChangeBest ForDifficulty Impact
Moroccan-InspiredAdd pinch of cumin & paprika; include chopped cilantro.Adding North African warmth and spice.Slightly more complex, but easy to master.
Spicy KickAdd red pepper flakes with garlic; serve with extra chili oil.Those who love a little heat!Minimal change, easy addition.
Mushroom & SpinachAdd sliced mushrooms with garlic; wilt in spinach at the end.Adding more vegetables for a hearty meal.Easy.

Moroccan-Inspired Garlic Shrimp Linguine

Inspired by the bustling souks of Marrakech, I love to infuse this dish with a touch of my heritage. Simply add a pinch of cumin and a whisper of paprika when you sauté the garlic. Finish the dish with a generous handful of fresh cilantro instead of parsley. This brings a warm, earthy aroma and a slightly smoky depth that beautifully complements the shrimp and garlic, creating a unique flavor profile that is both comforting and exciting.

Gluten-Free Dairy-Free Garlic Butter Pasta

For a **gluten-free** and **dairy-free** version, swap the fettuccine for your favorite gluten-free pasta – I find lentil or chickpea pasta holds up well. For the dairy-free aspect, use a high-quality vegan butter alternative instead of butter. You can also substitute the Parmesan with 2–3 tablespoons of nutritional yeast for a cheesy flavor, understanding it won’t melt and thicken quite the same way. The lemon juice and zest will be even more crucial here to provide richness and tang.

Seasonal Fresh Garlic Shrimp Linguine

Living in NYC means having access to incredible seasonal produce. In spring and summer, I love adding fresh asparagus spears, chopped into bite-sized pieces, to sauté alongside the shrimp. In the fall, baby spinach or kale can be wilted into the sauce just before adding the pasta. These additions bring vibrant color and extra nutrients, making it a complete meal inspired by the bounty of the season, a technique I often use when I visit my mother’s garden in Morocco.

How do you keep garlic butter shrimp pasta from turning out too oily?

The key to avoiding an overly oily sauce is all about balance and temperature control. First, use good quality olive oil and unsalted butter, and measure them accurately. Don’t let the fat render excessively; melt the butter gently into the fragrant garlic. If your sauce looks a bit too oily after adding the butter and cheese, you can whisk in a tablespoon or two of the reserved pasta water. The starch in the water helps to emulsify the sauce, creating a cohesive, creamy texture rather than a greasy, separated one. Also, ensure your pan isn’t too hot when you add the butter and Parmesan, as this can cause it to separate.

Can I use frozen shrimp for garlic butter shrimp pasta, and should I thaw them first?

Yes, absolutely! Frozen shrimp are a perfectly acceptable and convenient option for this **garlic shrimp linguine**. I often use them myself. It’s crucial to thaw them completely before cooking. The best method is to place them in a colander in the refrigerator overnight. For a quicker thaw, you can place the sealed bag of shrimp in a bowl of cold water for about 20-30 minutes. Never use hot water as it can partially cook the shrimp, affecting their texture. Once thawed, pat them very dry with paper towels before adding them to the pan; this helps them sear properly instead of steaming.

What is the best type of pasta to use for garlic butter shrimp pasta?

While this recipe calls for fettuccine, the beauty of this garlic butter sauce is that it pairs wonderfully with a variety of long pasta shapes. Linguine, spaghetti, or even angel hair pasta are excellent choices because their strands can be easily coated by the rich, creamy sauce. I usually recommend a pasta that has a bit of texture, like traditional fettuccine or linguine, as the sauce clings to it beautifully. If you prefer a shape that holds chunks of sauce or ingredients, a short pasta like penne or rigatoni can also work, though it changes the aesthetic of the dish slightly.

How do you prevent the garlic from burning when making garlic butter shrimp pasta?

Preventing burnt garlic is one of the most important steps for a delicious garlic butter shrimp pasta. The key is to use medium-low to medium heat and to mince the garlic finely so it cooks evenly. Stir the garlic constantly while it’s in the pan with the oil. Watch it closely; it should turn fragrant and begin to soften and turn lightly golden, but never brown. If you see it browning too quickly, immediately remove the pan from the heat for a moment, or add your butter right away to slow down the cooking process. Alternatively, you can add the garlic to the melted butter instead of the hot oil to cook it more gently.

Can I add vegetables to this garlic butter shrimp pasta?

Absolutely! This recipe is a fantastic canvas for adding fresh vegetables. My personal favorite additions are sautéed asparagus spears (added with the shrimp), fresh spinach wilted in at the very end, or some vibrant sun-dried tomatoes for a burst of sweet, tangy flavor. You could also add mushrooms, peas, or even broccoli florets (lightly steamed first). The general rule is to add vegetables that cook relatively quickly with the shrimp, or those that can be quickly sautéed with the garlic, ensuring they are tender but not overcooked. Enjoy experimenting with your favorites from the farmer’s market!

What kind of shrimp should I use for this recipe?

For this **easy garlic shrimp pasta**, I recommend using large or extra-large shrimp. They are plump and satisfying, holding their own against the pasta and sauce. When purchasing, opt for raw, peeled, and deveined shrimp. This saves you a significant amount of prep time and ensures they cook perfectly within the recipe’s timeframe. If you buy shrimp in the shell, be sure to remove them before cooking the sauce. Whether fresh or frozen, ensuring they are well-dried after thawing is crucial for achieving a good sear.

Share Your Version!

I pour so much of my heart and culinary experience into every recipe I share, and seeing your creations brings me immense joy. If you’ve made this **creamy garlic butter pasta**, please consider leaving a star rating and a comment below – your feedback helps other cooks discover new favorites! And if you share a photo on Instagram or Pinterest, tag me @exorecipe; I absolutely love seeing your takes on my dishes. I’m always curious to know what wine pairing you found most successful for this dish!

From my NYC kitchen to yours — I hope this recipe brings as much warmth to your table as it does to mine. — mia 🧡

📌

Love This Recipe? Save It to Pinterest!

If you enjoyed this Garlic Butter Shrimp Pasta recipe, don’t let it get lost in your browser tabs! 😄 Pin it now so you can find it again anytime — and explore hundreds more tried-and-tested recipes waiting for you on my Pinterest boards.

👉 Follow mia on Pinterest @chefrecipes2

📌 Pin this recipe · 🔁 Re-pin your favorites · 💬 Tag me when you make it — I love seeing your creations!

Print

clock clock iconcutlery cutlery iconflag flag iconfolder folder iconinstagram instagram iconpinterest pinterest iconfacebook facebook iconprint print iconsquares squares iconheart heart iconheart solid heart solid icon

Garlic Butter Shrimp Pasta

  • Author: Chef Mia

Description

xosotin chelseathông tin chuyn nhưngcâu lc b bóng đá arsenalbóng đá atalantabundesligacu th haalandUEFAevertonxosofutebol ao vivofutemaxmulticanaisonbethttps://bsport.fithttps://onbet88.ooohttps://i9bet.bizhttps://hi88.ooohttps://okvip.athttps://f8bet.athttps://fb88.cashhttps://vn88.cashhttps://shbet.atbóng đá world cupbóng đá inter milantin juventusbenzemala ligaclb leicester cityMUman citymessi lionelsalahnapolineymarpsgronaldoserie atottenhamvalenciaAS ROMALeverkusenac milanmbappenapolinewcastleaston villaliverpoolfa cupreal madridpremier leagueAjaxbao bong da247EPLbarcelonabournemouthaff cupasean footballbên l sân cbáo bóng đá mibóng đá cúp th giitin bóng đá VitUEFAbáo bóng đá vit namHuyn thoi bóng đágii ngoi hng anhSeagametap chi bong da the gioitin bong da lutrn đu hôm nayvit nam bóng đátin nong bong daBóng đá nth thao 7m24h bóng đábóng đá hôm naythe thao ngoai hang anhtin nhanh bóng đáphòng thay đ bóng đábóng đá phikèo nhà cái onbetbóng đá lu 2thông tin phòng thay đthe thao vuaapp đánh lô đdudoanxosox s gii đc bithôm nay x skèo đp hôm nayketquaxosokq xskqxsmnsoi cu ba minsoi cau thong kesxkt hôm nayth gii x sx s 24hxo.soxoso3mienxo so ba mienxoso dac bietxosodientoanx s d đoánvé s chiu xxoso ket quaxosokienthietxoso kq hôm nayxoso ktx s megax s mi nht hôm nayxoso truc tiepxoso VitSX3MIENxs d đoánxs mien bac hom nayxs miên namxsmientrungxsmn thu 7con s may mn hôm nayKQXS 3 min Bc Trung Nam Nhanhd đoán x s 3 mindò vé sdu doan xo so hom nayket qua xo xoket qua xo so.vntrúng thưng xo sokq xoso trc tipket qua xskqxs 247s min nams0x0 mienbacxosobamien hôm nays đp hôm nays đp trc tuynnuôi s đpxo so hom quaxoso ketquaxstruc tiep hom nayx s kin thit trc tipx s kq hôm nayso xo kq trc tuyenkt qu x s min bc trc tipxo so min namx s min nam trc tiptrc tip x s hôm nayket wa xsKQ XOSOxoso onlinexo so truc tiep hom nayxsttso mien bac trong ngàyKQXS3Ms so mien bacdu doan xo so onlinedu doan cau lox s kenokqxs vnKQXOSOKQXS hôm naytrc tip kt qu x s ba mincap lo dep nhat hom naysoi cu chun hôm nayso ket qua xo soXem kt qu x s nhanh nhtSX3MIENXSMB ch nhtKQXSMNkt qu m gii trc tuynGi vàng cht s OnlineĐánh Đ Con Gìdò s min namdò vé s hôm nayso mo so debach th lô đp nht hôm naycu đ hôm naykt qu x s kin thit toàn quccau dep 88xsmb rong bach kimket qua xs 2023d đoán x s hàng ngàyBch th đ min BcSoi Cu MB thn tàisoi cau vip 247soi cu ttsoi cu min phísoi cau mb vipxsmb hom nayxs vietlottxsmn hôm naycu lô đpthng kê lô kép x s min Bcquay th xsmnx s thn tàiQuay th XSMTx s chiu nayxo so mien nam hom nayweb đánh lô đ trc tuyn uy tínKQXS hôm nayxsmb ngày hôm nayXSMT ch nhtx s Power 6/55KQXS A trúng roycao th cht sbng x s đc bitsoi cu 247 vipsoi cu wap 666Soi cu min phí 888 VIPSoi Cau Chuan MBđc th des min bcthn tài cho sKt qu x s thn tàiXem trc tip x sXIN S THN TÀI TH ĐACu lô s đplô đp vip 24hsoi cu min phí 888x s kin thit chiu nayXSMN th 7 hàng tunKt qu X s H Chí Minhnhà cái x s Vit NamX S Đi PhátX s mi nht Hôm Nayso xo mb hom nayxxmb88quay thu mbXo so Minh ChinhXS Minh Ngc trc tip hôm nayXSMN 88XSTDxs than taix s UY TIN NHTxs vietlott 88SOI CU SIÊU CHUNSoiCauVietlô đp hôm nay vipket qua so xo hom naykqxsmb 30 ngàyd đoán x s 3 minSoi cu 3 càng chun xácbch th lônuoi lo chuanbt lô chun theo ngàykq xo-solô 3 càngnuôi lô đ siêu vipcu Lô Xiên XSMBđ v bao nhiêuSoi cu x3x s kin thit ngày hôm nayquay th xsmttruc tiep kt qu sxmntrc tip min bckt qu x s chm vnbng xs đc bit năm 2023soi cau xsmbx s hà ni hôm naysxmtxsmt hôm nayxs truc tiep mbketqua xo so onlinekqxs onlinexo s hôm nayXS3MTin xs hôm nayxsmn thu2XSMN hom nayx s min bc trc tip hôm naySO XOxsmbsxmn hôm nay188betlink188 xo sosoi cu vip 88lô tô vitsoi lô vitXS247xs ba mincht lô đp nht hôm naycht s xsmbCHƠI LÔ TÔsoi cau mn hom naycht lô chundu doan sxmtd đoán x s onlinerng bch kim cht 3 càng min phí hôm naythng kê lô gan min bcdàn đ lôCu Kèo Đc Bitcht cu may mnkt qu x s min bc hômSoi cu vàng 777th bài onlinedu doan mn 888soi cu min nam vipsoi cu mt vipdàn de hôm nay7 cao th cht ssoi cau mien phi 7777 cao th cht s nc ting3 càng min bcrng bch kim 777dàn de bt bion newsddxsmn188betw88w88789bettf88sin88suvipsunwintf88five8812betsv88vn88Top 10 nhà cái uy tínsky88iwinlucky88nhacaisin88oxbetm88vn88w88789betiwinf8betrio66rio66lucky88oxbetvn88188bet789betMay-88five88one88sin88bk88xbetoxbetMU88188BETSV88RIO66ONBET88188betM88M88SV88Jun-68Jun-88one88iwinv9betw388OXBETw388w388onbetonbetonbetonbet88onbet88onbet88onbet88onbetonbetonbetonbetqh88mu88Nhà cái uy tínpog79vp777vp777vipbetvipbetuk88uk88typhu88typhu88tk88tk88sm66sm66me88me888live8live8livesm66me88win798livesm66me88win79pog79pog79vp777vp777uk88uk88tk88tk88luck8luck8kingbet86kingbet86k188k188hr99hr99123b8xbetvnvipbetsv66zbettaisunwin-vntyphu88vn138vwinvwinvi68ee881xbetrio66zbetvn138i9betvipfi88clubcf68onbet88ee88typhu88onbetonbetkhuyenmai12bet-moblie12betmoblietaimienphi247vi68clupcf68clupvipbeti9betqh88onb123onbefsoi cun hũbn cáđá gàđá gàgame bàicasinosoi cuxóc đĩagame bàigii mã gic mơbu cuaslot gamecasinon hdàn đBn cácasinodàn đn hũtài xuslot gamecasinobn cáđá gàgame bàith thaogame bàisoi cukqsssoi cuc tưngbn cágame bàixóc đĩaAGAGAGAGimkokobmu88qh88


Ingredients

Scale
  • 12 oz Fettuccine
  • 1 lb Shrimp
  • 4 clove Garlic
  • ½ cup Parmesan Cheese
  • 4 tbsp Butter
  • ¼ Juice of Lemon (Juice from 1/4 of Lemon)
  • ¼ Lemon Zest (Zest from 1/4 of Lemon)
  • 2 tbsp Cooking Oil
  • Sea Salt
  • Black Pepper

Instructions

  1. In a large pot boiling salted water, cook fettuccine pasta until al dente, drain well then set aside.
  2. In a pan, heat cooking oil over medium heat. Cook garlic until fragrant for 2 minutes.
  3. Melt butter in the same pan then cooks shrimp. Stir occasionally until the shrimp turn opaque white with some pink for about 4-6 minutes.
  4. Add lemon juice, lemon zest, parmesan cheese, salt, and black pepper. Stir until combined and the parmesan cheese melted.
  5. Transfer the fettuccine into a pan, stir until evenly distributed.
  6. Garnish with parsley before serving.
  7. Enjoy!


Garlic Butter Shrimp Pasta

ph">For more delicious inspiration, follow me on Pinterest!

Smoky Sweet Chipotle Honey Chicken Skewers

Chipotle Honey Chicken Skewers Kissed with Smoky Sweetness – Easy Grilled Glazed Kabobs

⚖️
Difficulty
Easy
⏲️
Prep Time
15

mins

🕒
Cook Time
12

mins

⏱️
Total Time
27

mins

🍽️
Servings
4-6

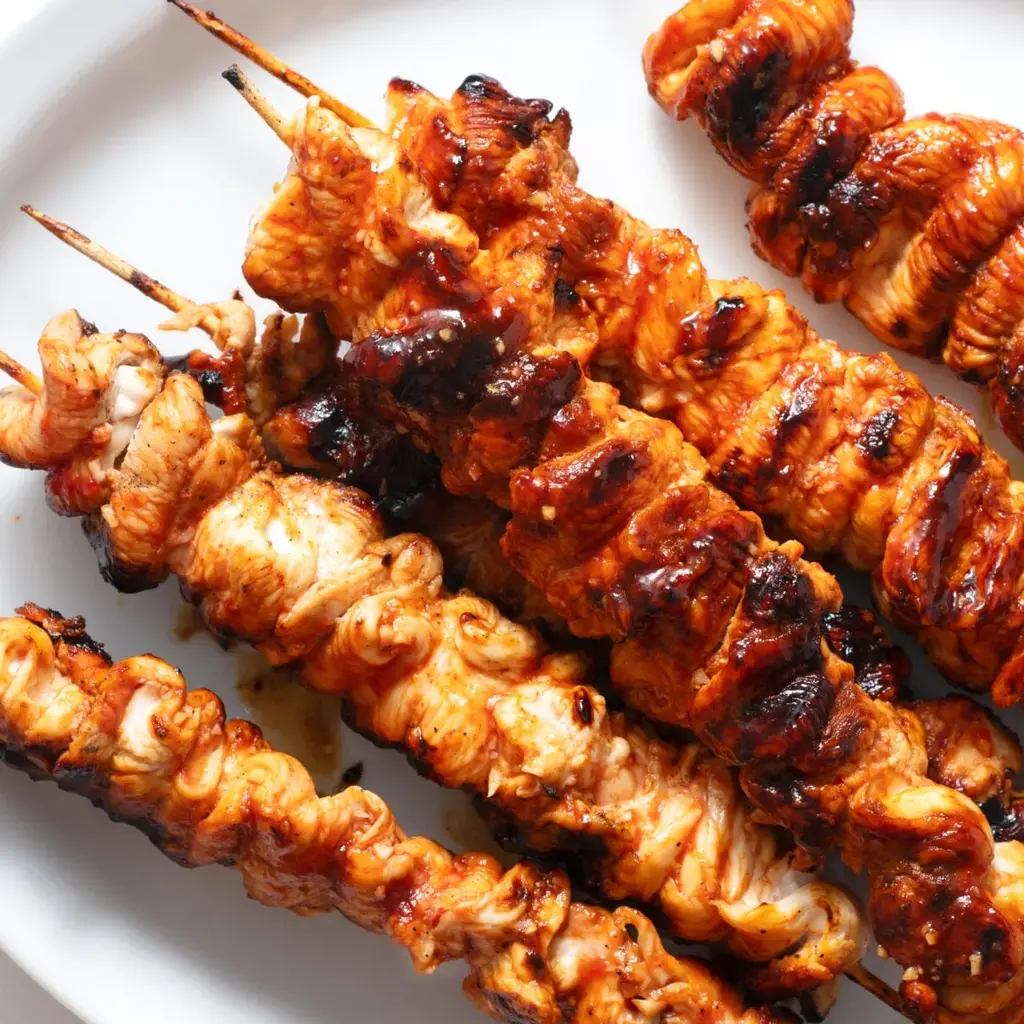
Ah, the scent of grilling season! It always takes me back to my childhood in Morocco, where my mother would masterfully grill skewers over open coals, filling our courtyard with the most incredible aromas. Now, here in my bustling New York City kitchen, I’ve taken that spirit of simple, delicious grilling and infused it with a modern twist. These Chipotle Honey Chicken Skewers are my answer to that craving for something quick, healthy, and bursting with flavor. They’re the perfect blend of smoky chipotle heat and sweet honey, creating a glaze that’s utterly irresistible. This grilled chicken skewers recipe is a lifesaver on busy weeknights and a guaranteed hit at any summer barbecue or appetizer gathering.

Imagine: succulent pieces of chicken, glistening under a caramelized, smoky-sweet glaze, threaded onto skewers and grilled to juicy perfection. The aroma alone is enough to make your mouth water – a captivating dance of sweet honey, tangy vinegar, and the deep, alluring smokiness from the chipotle. The texture is incredible; tender chicken with delightfully crispy edges from the grill. It’s a symphony of flavors and textures that feels both sophisticated and comforting, a testament to how simple ingredients can transform into something truly special. My French culinary training taught me the importance of a well-balanced sauce, and this chipotle honey marinade is a perfect example – it coats the chicken beautifully without overpowering it.

What makes this chipotle chicken appetizer stand out is my personal touch, a little secret I picked up in Paris that ensures ultimate tenderness, even for lean chicken breasts. I’ll share that with you! You’ll also discover why using the right kind of honey makes a difference and a common mistake many home cooks make that can lead to dry, uninspired skewers. This recipe is designed to be incredibly forgiving, so even if you’re new to grilling or cooking with chipotle, you’ll achieve chef-worthy results. Get ready for an easy chicken kabobs experience that’s packed with bold, unforgettable flavor!

Why This Chipotle Honey Chicken Skewers Recipe Is the Best

The secret to these phenomenal chipotle honey chicken skewers truly lies in the balance of sweet, smoky, and tangy notes created by the simple yet impactful glaze. My background, blending the rich flavors of Moroccan cuisine with the refined techniques learned in Parisian culinary school, has taught me how to layer flavors for maximum impact. Instead of just a generic sweet sauce, this recipe utilizes the subtle heat of chipotle chili powder and the bright acidity of apple cider vinegar to cut through the richness of the honey, creating a sophisticated flavor profile that’s surprisingly easy to achieve. It’s this thoughtful combination that elevates plain chicken into a taste sensation.

From a professional cook’s perspective, achieving perfectly tender chicken on skewers is key, especially when using chicken breast, which can sometimes become dry. I slice the chicken into thin, uniform strips and thread them accordion-style. This technique exposes more surface area to the heat and marinade, ensuring even cooking and optimal glaze absorption. Furthermore, the quick cooking time on a hot grill sears the chicken beautifully, locking in juices while allowing the honey glaze to caramelize. This method is inspired by the quick, high-heat grilling techniques I observed in my time working in professional kitchens, ensuring a succulent result every time.

This recipe is a testament to my philosophy that delicious, impressive meals don’t need to be complicated. It’s genuinely foolproof, using readily available ingredients that you can find at any good grocery store in NYC. The steps are clear, concise, and require minimal fuss, making it an ideal choice for a weeknight dinner or a quick appetizer before guests arrive. Even beginners will find it incredibly straightforward, and the results are consistently delicious, belying the simplicity of its preparation. These easy chicken kabobs are your shortcut to a healthy, high-protein meal that tastes like a treat.

Chipotle Honey Chicken Skewers Ingredients

When I’m crafting these smoky honey chicken skewers, I love picking up my chicken from a local butcher here in the West Village – the freshness always makes a noticeable difference. For the honey, I prefer raw, local honey; its nuanced flavor adds so much depth. If I can’t find it, a good quality wildflower honey from the farmers market works beautifully. Many of these ingredients are pantry staples for me, reminiscent of the vibrant spice markets in Marrakech, but always with a nod to what’s fresh and available in American kitchens today.

Ingredients List

  • 32 ounces boneless and skinless chicken breasts
  • 1/2 cup honey (raw preferred)
  • 2 tablespoons tomato paste
  • 4 tablespoons apple cider vinegar
  • 2 teaspoon chipotle chili powder
  • 1 garlic clove (very finely chopped)
  • 1/2 teaspoon salt (optional)

Ingredient Spotlight

Chicken Breasts: For these skewers, boneless, skinless chicken breasts are my go-to because they are lean, high in protein, and cook quickly. When buying chicken in the US, look for plump breasts with a slightly pink hue and no discoloration. If you prefer a richer flavor and more forgiving texture, chicken thighs are an excellent substitute, though they will require a slightly longer cooking time. I always ensure my chicken is free-range and organic when possible for the best quality and taste.

Honey: Honey is the sweet backbone of our glaze. For the absolute best flavor, I recommend using raw, unfiltered honey. Its complex floral notes and natural enzymes add a depth that processed honey can’t match. In the US, look for local honey at farmers’ markets or specialty food stores. If you don’t have raw honey, any good quality liquid honey will work, though it might result in a slightly less nuanced sweetness. Maple syrup can be used as a substitute for a different kind of sweetness.

Chipotle Chili Powder: This is where the “chipotle” in our chipotle honey chicken skewers comes from, providing that signature smoky heat. Look for pure chipotle powder, made from dried and smoked jalapeños. Its flavor is potent and unique, offering a warmth that builds rather than burns. Adjust the amount to your spice preference. If you can’t find chipotle powder, a mix of smoked paprika and a pinch of cayenne pepper can offer a similar smoky warmth, though the specific chipotle flavor will be missed.

Original IngredientBest SubstitutionFlavor / Texture Impact
Boneless, Skinless Chicken BreastsBoneless, Skinless Chicken ThighsThighs are more moist and flavorful, but require slightly longer cooking. Breasts are leaner and cook faster.
Raw HoneyMaple Syrup or Agave NectarMaple syrup adds a distinct caramelized flavor. Agave offers a neutral sweetness. Both can behave slightly differently when cooked.
Chipotle Chili PowderSmoked Paprika + Pinch of Cayenne PepperMimics smokiness but lacks the unique chipotle pepper depth. Cayenne provides heat but not the same subtle flavor.

How to Make Chipotle Honey Chicken Skewers — Step-by-Step

Making these smoky honey chicken skewers is a breeze, and I promise you’ll be amazed at how quickly you can get them from your kitchen to the grill or oven.

Step 1: Slice and Skewer the Chicken

Using a very sharp knife is crucial here for clean cuts. Slice the boneless, skinless chicken breasts into thin strips, about 1/2 inch thick. Then, thread these strips accordion-style onto wooden skewers. If you’re using wooden skewers, remember to soak them in water for at least 30 minutes beforehand to prevent them from burning on the grill. This accordion-style threading allows each piece of chicken to cook evenly and absorb the delicious glaze.

💡 mia’s Pro Tip: For an even sear and quicker cooking, aim to make your chicken strips roughly uniform in thickness. Consistency is key to ensuring all pieces are perfectly cooked without any being under or overdone.

Step 2: Whisk Up the Magic Sauce

In a small bowl, combine the honey, tomato paste, apple cider vinegar, chipotle chili powder, finely chopped garlic, and optional salt. Whisk these ingredients together until thoroughly blended and you have a smooth, glossy sauce. Once your chicken skewers are prepped, spoon about half of this incredible sauce over them, ensuring a good coating on all sides. Reserve the remaining sauce for basting during cooking.

⚠️ Common Mistake to Avoid: Don’t skip the tomato paste! While it’s a small amount, it adds a wonderful depth of umami and helps the glaze thicken and caramelize beautifully on the chicken, giving it that irresistible restaurant-quality sheen.

Step 3: Grill or Bake to Perfection

To Grill: Preheat your grill to medium-high heat. Place the sauced skewers on the hot grill grates. Cook for approximately 10-12 minutes, turning every 2-3 minutes to ensure even cooking and browning. Baste with the reserved sauce during the last few minutes of cooking. The chicken is done when it’s cooked through and juices run clear.

To Bake: Preheat your oven to 400°F (200°C). Arrange the sauced skewers on a baking sheet lined with parchment paper. Bake for 16-18 minutes, flipping halfway through, until the chicken is fully cooked and the glaze is bubbly and slightly caramelized.

💡 mia’s Pro Tip: Watch your skewers closely on the grill, especially in the final minutes. The honey in the glaze can cause them to char quickly. A little char is good for flavor, but too much can make them bitter.

StepActionDurationKey Visual Cue
1Slice & Skewer Chicken5-7 minutesUniform chicken strips on soaked skewers.
2Whisk & Coat Sauce2-3 minutesSmooth, glossy sauce; chicken evenly coated.
3aGrill Chicken10-12 minutesCooked through, juices run clear, light char marks.
3bBake Chicken16-18 minutesCooked through, glaze bubbly and slightly caramelized.

Serving & Presentation

These Chipotle Honey Chicken Skewers are fantastic served hot off the grill or out of the oven. For a beautiful presentation, you can arrange them on a platter and garnish with a sprinkle of fresh cilantro or a few thin slices of red onion, which adds a lovely crispness. In my NYC life, they are perfect for a casual get-together, but can also be dressed up for a more formal occasion. The vibrant color of the glaze makes them visually appealing, showcasing the care you’ve put into the dish.

A nod to my Moroccan roots, I love serving these alongside a refreshing couscous salad seasoned with mint and lemon, or some simple grilled vegetables marinated in olive oil and herbs. If you’re looking for a classic American BBQ pairing, they go wonderfully with a creamy coleslaw or a corn on the cob. The sweet and spicy notes of the skewers also pair beautifully with a bright, acidic sauce or dip, cutting through the richness and providing a delightful contrast for your palate.

Pairing TypeSuggestionsWhy It Works
Side DishQuinoa Salad with Cilantro-Lime Vinaigrette, Grilled Asparagus, Roasted Sweet Potato WedgesComplements the smoky-sweet profile with fresh, earthy, or sweet notes.
Sauce / DipAvocado Crema, Greek Yogurt with Dill, Sriracha AioliThe cool, creamy, or tangy elements balance the spice and sweetness of the glaze.
BeverageCrisp Lager Beer, Sparkling White Wine, Iced Green Tea with MintRefreshing beverages cut through the richness and heat, enhancing the overall dining experience.
GarnishFresh Cilantro, Toasted Sesame Seeds, Lime WedgesAdds a final pop of color, texture, and brightness, elevating the visual appeal and flavor.

Make-Ahead, Storage & Reheating

As a busy New Yorker, meal prep is my secret weapon! These chipotle honey chicken skewers are fantastic for making ahead. You can prepare the sauce and slice the chicken a day in advance and store them separately in the refrigerator. This saves precious time on cooking day. On the day of, simply thread the chicken onto skewers and proceed with saucing and cooking. It’s a huge time-saver for those hectic evenings or when you’re hosting impromptu gatherings!

MethodContainerDurationReheating Tip
RefrigeratorAirtight container3-4 daysGently reheat in a skillet over low heat or in a toaster oven to preserve texture. Avoid microwaving to prevent drying out.
FreezerFreezer-safe bag or container2-3 monthsThaw overnight in the refrigerator. Reheat as per refrigerator instructions – low and slow is best.
Make-Ahead (Uncooked)Airtight container for chicken, separate for sauce1 day (chicken), 2-3 days (sauce)Thread chicken and apply sauce just before cooking for best results.

When reheating in a skillet, I like to add a tiny splash of water or broth if the glaze seems too thick, just to loosen it up and prevent sticking. For oven reheating, a moderate temperature of around 300-325°F (150-160°C) is ideal. This gentle heat allows the chicken to warm through without overcooking or burning the sugary glaze. Always ensure the chicken is heated to an internal temperature of 165°F (74°C) for food safety.

Variations & Easy Swaps

VariationKey ChangeBest ForDifficulty Impact
Spicy Chipotle-Lime TwistAdd lime zest/juice to glaze, increase chipotleAdventurous palates, summer gatheringsEasy
Gluten-Free & Dairy-FreeAll ingredients are naturally GF/DF; ensure honey/vinegar are pure.Dietary restrictionsNo change
Pantry Staple ShortcutUse pre-minced garlic, store-bought chipotle in adobo sauce (finely minced)Weeknight emergenciesEasy

Spicy Chipotle-Lime Twist

To add an extra layer of vibrant flavor, especially fitting for a summer BBQ, I love to incorporate a squeeze of fresh lime juice and a bit of zest into the chipotle honey glaze. This brightens everything up and complements the smoky chipotle beautifully. If you like it spicier, feel free to increase the chipotle chili powder or even add a bit of finely minced chipotle pepper from a can of chipotles in adobo sauce. This variation is inspired by the zesty marinades I’ve encountered on travels through Mexico.

Gluten-Free and Dairy-Free Friendly

The wonderful thing about this recipe is that it’s naturally gluten-free and dairy-free! As long as you use pure honey, apple cider vinegar, and chipotle chili powder (which are typically free from gluten and dairy), the entire dish is safe for those with these dietary needs. This makes these easy chicken kabobs a fantastic option for parties where guests might have various restrictions, ensuring everyone can enjoy a delicious bite without worry.

Pantry Staple Shortcut

For those nights when time is exceptionally tight, I’ve developed a few pantry-staple shortcuts. Instead of fresh garlic, you can use 1 teaspoon of garlic powder, or even better, a tablespoon of pre-minced garlic from a jar. If you don’t have chipotle chili powder, you can finely mince 1-2 canned chipotle peppers in adobo sauce (adjusting for heat preference) and add them to the glaze, along with a tiny bit of the adobo sauce itself for extra depth. This makes preparation even faster!

How long should I marinate chipotle honey chicken skewers for the best flavor?

For chipotle honey chicken skewers, I recommend marinating for at least 30 minutes, but for the absolute best flavor infusion, aim for 2 to 4 hours. While you can cook them immediately after glazing, letting them sit with the marinade allows the flavors to penetrate the chicken more deeply. If you’re preparing them ahead, you can marinate them for up to 6 hours in the refrigerator. Avoid marinating for much longer than that, especially with acidic ingredients like vinegar, as the chicken can start to break down and become mushy.

Can I use chicken thighs instead of chicken breasts for chipotle honey chicken skewers?

Absolutely! Chicken thighs are a wonderful alternative to chicken breasts for these chipotle honey chicken skewers. Thighs are naturally more tender and flavorful due to their higher fat content, making them more forgiving and less prone to drying out, even if they cook a little longer. Simply follow the same preparation steps. You might need to add an extra 2-4 minutes to the grilling or baking time until the internal temperature reaches 165°F (74°C). The result will be incredibly juicy and delicious!

What temperature should I cook chipotle honey chicken skewers to on the grill?

On the grill, you’ll want to cook your chipotle honey chicken skewers over medium-high heat. This typically translates to a grill temperature of around 400°F to 450°F (200°C to 230°C). This high heat is essential for achieving a beautiful sear and caramelization on the honey glaze without overcooking the chicken. Always use a meat thermometer to ensure the internal temperature of the chicken reaches a safe 165°F (74°C), as cooking times can vary based on grill conditions and skewer thickness.

What can I serve with chipotle honey chicken skewers for a complete meal?

To make these chipotle honey chicken skewers a complete meal, consider serving them with a variety of fresh and complementary sides. A vibrant quinoa salad tossed with black beans, corn, and a lime vinaigrette works beautifully. Grilled vegetables like bell peppers, zucchini, and red onions add color and another layer of smoky flavor. For something heartier, creamy mashed sweet potatoes or a simple side of brown rice would also be excellent choices. A dollop of avocado crema or a side of light coleslaw provides a cooling contrast to the glaze’s sweet and spicy notes.

Can I prepare the glaze ahead of time?

Yes, absolutely! Preparing the chipotle honey glaze ahead of time is a fantastic time-saver. I often make a double batch and store it in an airtight container in the refrigerator for up to a week. This way, when chicken or other proteins are ready for grilling or baking, a delicious marinade is always on hand. Just ensure you give it a good whisk before using, as ingredients can sometimes separate. This simple step makes weeknight cooking so much easier and more enjoyable!

How do I prevent skewers from burning on the grill?

To prevent your skewers from burning on the grill, the most crucial step is to soak wooden skewers in water for at least 30 minutes, or even a few hours, before use. This saturates the wood, making it more resistant to flames. Secondly, manage your grill heat – medium-high is ideal for cooking, but avoid direct, blistering heat for the entire duration. Turning the skewers frequently also helps ensure even cooking and prevents one side from charring too much. If using metal skewers, they won’t need soaking but might transfer heat more directly.

What’s the best way to chop the garlic so finely?

Achieving finely minced garlic is key for a smooth glaze that integrates well. My preferred method, especially in a professional kitchen, is to use a microplane or a fine grater. It turns the garlic clove into a paste-like consistency that disperses perfectly. Alternatively, you can use the side of your chef’s knife to mash the garlic into a paste with a pinch of salt, then mince it with the knife. For a true shortcut, a garlic press works well too, though it can sometimes yield a more pungent flavor upfront compared to the mellowed, sweeter taste from fine mincing or grating.

Can I use this glaze on other proteins besides chicken?

Oh, absolutely! This chipotle honey glaze is incredibly versatile and works wonders on a variety of proteins. I’ve used it on pork tenderloin, shrimp, and even salmon with fantastic results. For denser meats like pork, you might need a slightly longer marinating time or cooking duration. For delicate seafood like shrimp, be mindful of the quick cooking time to avoid overcooking. It’s also delicious brushed onto grilled vegetables like corn or bell peppers, adding that signature sweet and smoky kick to any summery dish!

Share Your Version!

I truly hope you fall in love with these Chipotle Honey Chicken Skewers as much as I do. They’re a simple pleasure that brings so much flavor to the table, whether it’s a quick weeknight dinner or a weekend BBQ. Please, if you make these easy chicken kabobs, leave a star rating and a comment below to let me know how they turned out! Your feedback helps me and other home cooks create even better recipes. I also love seeing your culinary creations – share a photo on Instagram or Pinterest and tag me at @exorecipe. What other flavor profiles would you love to see this glaze applied to?

From my NYC kitchen to yours — I hope this recipe brings as much warmth to your table as it does to mine. — mia 🧡

📌

Love This Recipe? Save It to Pinterest!

If you enjoyed this Chipotle Honey Chicken Skewers recipe, don’t let it get lost in your browser tabs! 😄 Pin it now so you can find it again anytime — and explore hundreds more tried-and-tested recipes waiting for you on my Pinterest boards.

👉 Follow mia on Pinterest @chefrecipes2

📌 Pin this recipe · 🔁 Re-pin your favorites · 💬 Tag me when you make it — I love seeing your creations!

Print

clock clock iconcutlery cutlery iconflag flag iconfolder folder iconinstagram instagram iconpinterest pinterest iconfacebook facebook iconprint print iconsquares squares iconheart heart iconheart solid heart solid icon

Chipotle Honey Chicken Skewers

  • Author: Chef Mia

Description

This clean-eating recipe offers sweet, tangy, and deliciously smoky flavors in a low-calorie, high-protein skewer!


Ingredients

Scale
  • 32 ounces boneless and skinless chicken breasts
  • 1/2 cup honey (raw preferred)
  • 2 tablespoons tomato paste
  • 4 tablespoons apple cider vinegar
  • 2 teaspoon chipotle chili powder
  • 1 garlic clove (very finely chopped)
  • 1/2 teaspoon salt (optional)

Instructions

  1. Slice the chicken into very thin strips with a very sharp knife. Thread accordion-style onto wooden skewers.
  2. In a small bowl, whisk together honey, tomato paste, apple cider vinegar, chipotle chili powder, chopped garlic, and optional salt. Spoon sauce over skewers.
  3. Add skewers to a hot grill and cook for 10-12 minutes, or until chicken is fully cooked, basting with sauce and turning every 2-3 minutes to evenly cook the entire skewer of chicken.
  4. Alternatively, the skewers can be baked in an oven preheated to 400 degrees for 16-18 minutes or until fully cooked.


Nutrition

  • Calories: 170 kcal
  • Sugar: 10 g
  • Fat: 3 g
  • Carbohydrates: 11 g
  • Protein: 25 g


Chipotle Honey Chicken Skewers

Easy Hobo Casserole Ground Beef Recipe

Hobo Casserole Ground Beef: Budget-Friendly Ground Beef Dinner That Tastes Like a Campsite Classic

⚖️
Difficulty
Easy
⏲️
Prep Time
15 mins
🕒
Cook Time
45 mins
⏱️
Total Time
60 mins
🍽️
Servings
4-6

Oh, the memories this Hobo Casserole brings back! It instantly transports me to campfires and starry nights, even while I’m right here in my bustling NYC kitchen. My mother, bless her heart, used to make a version of this back in Morocco, layering simple ingredients with love. This particular ground beef casserole recipe is, for me, the ultimate comfort food – a budget-friendly ground beef dinner that nourishes both body and soul. It’s the kind of nourishing, easy ground beef dinner I love to have on hand for those busy weeknights when only something truly satisfying will do. The magic of this Hobo Casserole recipe lies in its simplicity and the way humble ingredients transform into something extraordinary, a true testament to the power of good cooking.

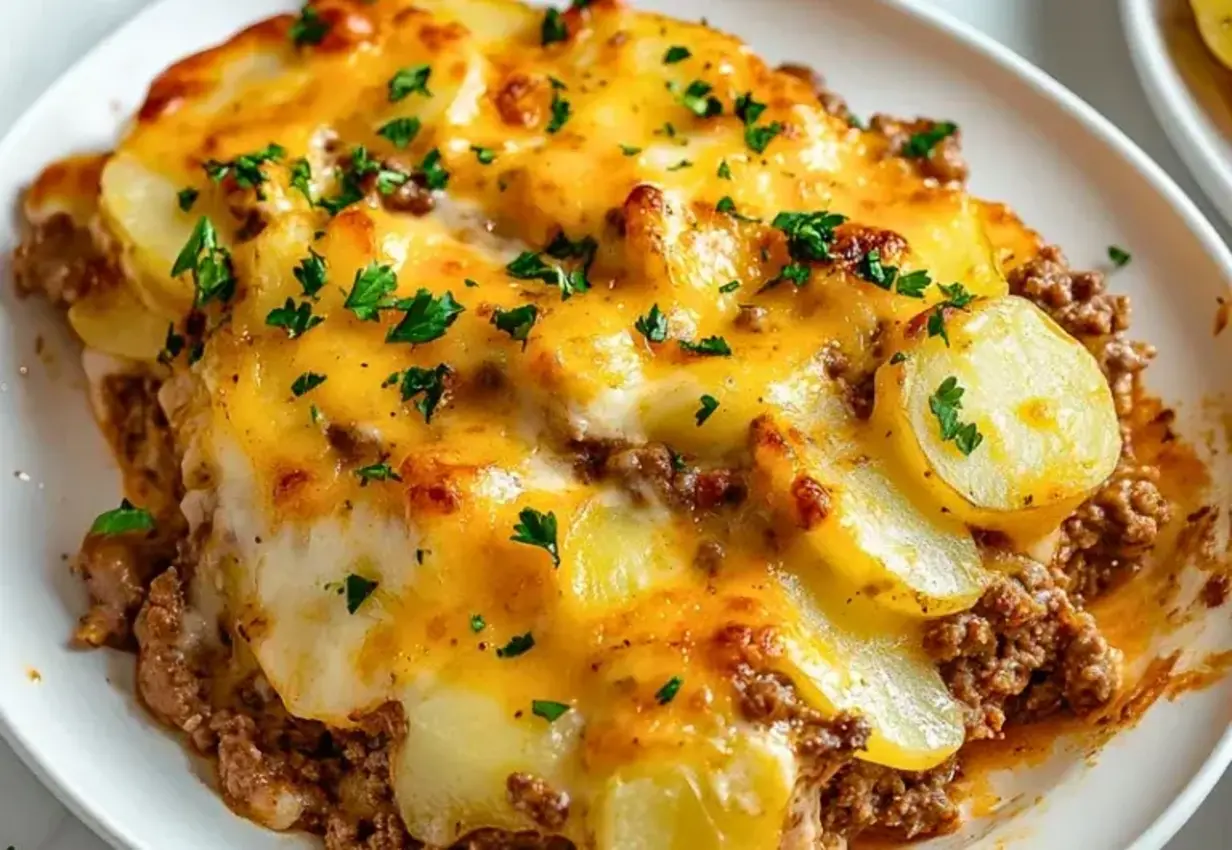
Imagine: tender, thinly sliced potatoes meeting savory, perfectly spiced ground beef, all embraced by a blanket of bubbly, golden-brown cheese. The aroma alone is enough to make your stomach rumble! It’s a symphony of textures and flavors – creamy, savory, and utterly comforting. When I learned classic French techniques in Paris, I gained a new appreciation for how heat and simple seasonings can elevate everyday ingredients. That’s the spirit I’ve infused into this recipe, using just the right touch of Italian seasoning and paprika to bring out the best in the beef and potatoes, creating a truly irresistible flavor profile that feels both familiar and excitingly new. The potatoes absorb all the savory goodness, becoming tender and melt-in-your-mouth without being mushy.

What makes my Hobo Casserole ground beef recipe stand out? Well, after countless trials, I’ve perfected the potato-to-beef ratio and found the ideal baking method to ensure everything is cooked through beautifully. I’ll be sharing a few of my secrets, including a crucial tip for achieving that perfect creamy texture without extra fuss. You might be tempted to skip a step, but trust me, there’s one common mistake that can turn this delightful dish into a soggy disappointment. But don’t worry, I’ll guide you through it so your campfire casserole is a resounding success every single time!

Why This Hobo Casserole Ground Beef Recipe Is the Best

You know, there’s something incredibly special about a dish that can capture the essence of a campfire meal right on your dinner table. My unique take on the Hobo Casserole ground beef recipe is all about amplifying those nostalgic flavors while adding a touch of culinary finesse learned from my Moroccan roots and French training. The inclusion of subtle aromatic spices, a balance of creamy and savory elements, and a fool-proof layering technique transform this classic into something truly memorable. It’s not just a quick dinner; it’s an experience, a budget-friendly casserole that evokes warmth and happiness.

The secret to this recipe’s success lies in the precise layering and the careful selection of ingredients. I’ve found that using Yukon Gold potatoes, thinly sliced, offers a perfect balance of creamy texture and structural integrity, preventing them from turning to mush. When combined with a well-seasoned ground beef mixture and the creamy milk addition, it creates a depth of flavor that cheese alone can’t achieve. This is a technique I picked up in Paris, understanding how to build layers of flavor and texture that complement each other beautifully, turning simple ingredients into something extraordinary.

This easy ground beef dinner is designed to be incredibly forgiving and straightforward, even for the most novice cooks. The active preparation time is minimal, and the oven does most of the work. I’ve tested this recipe countless times in my New York City apartment kitchen, and it consistently turns out wonderfully. It’s the perfect example of how a simple, budget-friendly casserole can deliver maximum flavor with minimum effort, making it an ideal choice for busy families or anyone looking for a no-fuss, hearty meal.

Hobo Casserole Recipe Ingredients

When I’m sourcing ingredients for this hobocasserole recipe, I often think about the vibrant markets in my hometown back in Morocco. For this dish, I love picking up fresh potatoes from the Union Square Greenmarket here in NYC. They just have an unparalleled flavor! The beauty of this recipe is that most ingredients are pantry staples, making it an incredibly accessible and budget-friendly meal. You likely have many of them already!

Ingredients List

  • 1 lb ground beef
  • 1 tablespoon olive oil
  • 1 medium onion, chopped
  • 2 cloves garlic, minced
  • 4-5 medium potatoes, thinly sliced (about 1/8 inch thick)
  • 1 1/2 cups shredded cheddar cheese
  • 1/2 cup grated Parmesan cheese
  • 1 teaspoon dried Italian seasoning
  • 1/2 teaspoon paprika
  • Salt and freshly ground black pepper to taste
  • 1/2 cup beef broth or water
  • 1/4 cup milk (optional, for extra creaminess)
  • Fresh parsley for garnish (optional)

Ingredient Spotlight

Ground Beef: I prefer using an 80/20 lean-to-fat ratio for the best flavor and moisture. You can find this at any local butcher shop or grocery store in the US. If you opt for leaner beef, you might need to add a bit more oil or broth to prevent dryness.

Potatoes: Yukon Gold or Russet potatoes work beautifully here. Yukon Golds offer a creamy texture and subtle sweetness, while Russets provide a slightly starchier, fluffier bite. Look for firm, unblemished potatoes at your supermarket. Ensure they are sliced thinly and evenly for consistent cooking.

Cheese: A good quality sharp cheddar cheese is essential for that tangy, gooey melt. I recommend shredding your own cheese from a block, as pre-shredded cheese often contains anti-caking agents that can affect melting. For an extra layer of flavor, the Parmesan adds a salty, nutty depth, a touch I picked up during my studies in France, where cheese is paramount!

Original IngredientBest SubstitutionFlavor / Texture Impact
Ground Beef (1 lb)Ground Turkey or Chicken (1 lb)Lighter in flavor, may require more seasoning. Ensure adequate moisture. Texture will be less rich.
Yukon Gold Potatoes (4-5 medium)Sweet Potatoes or Butternut Squash (cubed)Adds sweetness and a softer texture. May require slightly shorter cooking time.
Cheddar Cheese (1.5 cups)Monterey Jack or Gruyère Cheese (1.5 cups)Monterey Jack is milder and creamier; Gruyère adds a nutty, complex flavor. Both melt wonderfully.

How to Make Hobo Casserole Ground Beef — Step-by-Step

Let’s get this delicious, easy ground beef dinner in the oven! Follow these simple steps for a fantastic meal.

Step 1: Preheat Oven and Prepare Dish

Preheat your oven to 375°F (190°C). Lightly grease a 9×13-inch baking dish with cooking spray or a bit of olive oil to prevent sticking. This is a crucial first step to ensure your casserole releases cleanly from the pan.

💡 mia’s Pro Tip: Make sure your baking dish is large enough; a 9×13 inch dish is ideal. Overcrowding can lead to uneven cooking, and we want every layer to be perfect!

Step 2: Brown the Ground Beef

In a large skillet, heat 1 tablespoon of olive oil over medium heat. Add the 1 lb of ground beef and cook, breaking it apart with a spoon, until it’s nicely browned and cooked through, about 5-7 minutes. If there’s excessive grease, drain it off carefully.

Step 3: Add Aromatics

To the skillet with the browned beef, add the chopped medium onion and minced garlic. Sauté for another 3-4 minutes until the onion softens and becomes translucent, which will infuse the beef with wonderful flavor. This aromatic base is key for a truly savory dish.

Step 4: Layer the Casserole

Now, let’s assemble this rustic delight. Spread the cooked ground beef mixture evenly across the bottom of your prepared baking dish. Next, arrange the thinly sliced potatoes on top of the beef layer. Season the potatoes generously with salt, pepper, dried Italian seasoning, and paprika. This seasoning layer is essential for flavor!

Step 5: Add Cheese and Broth

Evenly sprinkle the shredded cheddar cheese and grated Parmesan cheese over the potato layer. Carefully pour the 1/2 cup of beef broth (or water) around the edges of the casserole. This liquid helps steam the potatoes, ensuring they become tender. For an extra layer of creaminess, which is a little trick I learned in Paris, you can optionally drizzle 1/4 cup of milk over the potatoes before the cheese.

⚠️ Common Mistake to Avoid: Pouring the broth directly over the cheese layer can wash away some of the seasoning and prevent the cheese from browning beautifully. Always pour it around the edges!

Step 6: Bake and Uncover

Cover the entire baking dish tightly with aluminum foil. Place it in the preheated oven and bake for 30 minutes. This initial steaming helps the potatoes cook through. After 30 minutes, carefully remove the foil. Continue to bake for an additional 15-20 minutes, or until the potatoes are fork-tender and the cheese is bubbly, melted, and beautifully golden brown.

Step 7: Garnish and Serve

Once the casserole is ready – golden, bubbly, and fragrant – remove it from the oven. Let it rest for about 5 minutes to allow the cheese to set slightly. If desired, garnish with fresh chopped parsley for a pop of color and freshness. Serve hot and enjoy this comforting, budget-friendly casserole!

💡 mia’s Pro Tip: For an even crispier potato topping, you can broil the casserole for the last 1-2 minutes after removing the foil, keeping a very close eye on it to prevent burning!

StepActionDurationKey Visual Cue
1Preheat Oven & Prep DishN/AOven at temperature
2Brown Ground Beef5-7 minsBeef is browned
3Add Aromatics3-4 minsOnion is soft
4Layer & SeasonN/ADish is layered
5Add Cheese & BrothN/ABroth poured around edges
6Bake (Covered)30 minsCasserole covered with foil
Bake (Uncovered)15-20 minsPotatoes tender, cheese bubbly & golden
7Rest, Garnish & Serve5 mins restCasserole cooled slightly, ready to serve

Serving & Presentation

This Hobo Casserole Ground Beef is a complete meal in itself, but the Parisian in me always loves to suggest a little something extra to elevate the dining experience. When I serve this easy ground beef dinner for friends, I like to garnish it generously with fresh parsley, which adds a beautiful vibrant green contrast to the golden cheese and savory beef. It’s a simple touch that makes the dish feel like it came right out of a French bistro, even though its heart is in rustic comfort food.

For a truly satisfying meal, I often pair this budget-friendly casserole with a simple side salad dressed in a light vinaigrette, much like we’d enjoy in Morocco. The acidity of the dressing cuts through the richness of the casserole beautifully. Alternatively, a dollop of sour cream or a side of your favorite hot sauce can add another dimension of flavor. Remember, the goal is to complement, not overpower, the hearty flavors of the ground beef and potatoes.

Pairing TypeSuggestionsWhy It Works
Side DishSimple Green Salad, Steamed Green Beans, Roasted BroccoliThe fresh, crisp components balance the richness of the casserole.
Sauce / DipSour Cream, Sriracha Mayo, Garlic AioliAdds creaminess, a touch of heat, or garlicky depth.
BeverageA crisp Lager, a light-bodied Red Wine (like Pinot Noir), Iced TeaThe beer or wine cuts through the richness; iced tea offers a refreshing contrast.
GarnishFresh Parsley, Chives, a sprinkle of smoked paprikaAdds fresh color, a hint of oniony flavor, or smoky depth.

Make-Ahead, Storage & Reheating

As a busy New Yorker, I live by the magic of meal prep! This ground beef casserole is wonderfully forgiving and perfect for making ahead. You can prepare the entire casserole up to the point of baking, cover it tightly, and refrigerate it for up to 24 hours. When you’re ready to bake, just add a few extra minutes to the covered baking time to ensure it heats through properly.

MethodContainerDurationReheating Tip
RefrigeratorAirtight container or covered baking dish3-4 daysReheat in oven (350°F/175°C) until heated through, or microwave individual portions.
FreezerFreezer-safe container or wrapped portions2-3 monthsThaw overnight in the refrigerator, then reheat in oven or microwave. For a crisper top, finish under the broiler.
Make-AheadAssemble in baking dish, cover tightlyUp to 24 hours in advanceAdd 5-10 minutes to covered baking time.

When reheating, I always prefer the oven method if time allows. It helps retain the texture of the potatoes and gets that cheese bubbly again. If you’re just reheating a single serving, the microwave is perfectly fine, but remember to stir it halfway through for even heating. For a truly authentic hobocasserole flavor, sometimes I even let it sit out for a few minutes once reheated, as my mother used to say it “completes the cooking process.”

Variations & Easy Swaps

VariationKey ChangeBest ForDifficulty Impact
Campfire Casserole TwistAdd diced smoked sausage, a pinch of smoked paprikaRecreating the campfire experienceAdds flavor, no significant difficulty
Gluten-FreeEnsure all seasonings and broth are GF certified. Potatoes are naturally GF.Gluten-intolerant dinersNo change
Spicy KickAdd red pepper flakes to the beef mixture, or a layer of sliced jalapeñosThose who love a hint of heatMinimal change

Campfire Casserole Twist

To truly evoke that campfire spirit, I love adding a generous pinch of smoked paprika to the ground beef mixture. It imparts a subtle smokiness that’s reminiscent of open-fire cooking. For an even more authentic feel, consider adding a few slices of smoked sausage along with the ground beef. This adds a beautiful depth of flavor and a delightful chewy texture.

Gluten-Free & Dairy-Free Options

This hobocasserole recipe is naturally gluten-free since all the main ingredients – ground beef, potatoes, onions, and spices – are gluten-free. For a dairy-free version, simply omit the cheddar and Parmesan cheese. You can use a dairy-free shredded cheese alternative if you like, but the casserole is still delicious without it. Just be sure to check your beef broth to ensure it’s dairy-free.

Hearty Vegetable Hobo Casserole

Feeling like adding more veggies? You absolutely can! My mother often added peas and carrots to her Moroccan versions. For this easy ground beef dinner, you can layer in some thinly sliced zucchini or bell peppers along with the potatoes. Frozen corn or peas can be added in the last 15 minutes of covered baking to ensure they heat through without overcooking. This makes it a fantastic budget-friendly casserole that’s also packed with nutrients.

What is the best way to layer ingredients in a hobo casserole with ground beef?

The best layering for this hobo casserole recipe starts with the savory ground beef mixture spread evenly on the bottom of your greased baking dish. Next, arrange the thinly sliced potatoes on top of the beef, ensuring they are seasoned well. Finally, top the potatoes with shredded cheese. Pouring the beef broth around the edges of the dish before baking helps to steam the potatoes, ensuring they become tender while the cheese melts and browns on top.

Can I use a different vegetable like zucchini or corn in hobo casserole with ground beef?

Yes, absolutely! This is a versatile budget-friendly casserole. You can add thinly sliced zucchini or bell peppers alongside or instead of some of the potatoes. For corn or peas, it’s best to add them during the last 15-20 minutes of baking, after you remove the foil, to prevent them from becoming mushy. That way, they retain their texture and bright flavor in your easy ground beef dinner.

Should I brown the ground beef before adding it to hobo casserole?

Yes, it’s highly recommended to brown the ground beef before adding it to the casserole. Browning the beef not only develops a richer, more savory flavor but also renders out some of the excess fat, which can make the final dish greasy. Cooking the beef first ensures it’s fully cooked and integrated into the flavor base of the dish, contributing to a more delicious and well-balanced campfire casserole.

What is the ideal oven temperature and cooking time for hobo casserole with ground beef?

The ideal oven temperature for this hobocasserole recipe is 375°F (190°C). The cooking time is typically divided into two stages: bake covered with foil for the first 30 minutes to allow the potatoes to steam and tenderize, and then uncover and bake for an additional 15-20 minutes until the potatoes are fork-tender and the cheese is bubbly and golden. This ensures everything is cooked perfectly.

Can I make this hobocasserole recipe ahead of time?

Absolutely! This budget-friendly casserole is perfect for making ahead. You can assemble the entire dish, up to layering the cheese and pouring the broth, and then cover it tightly with plastic wrap and refrigerate for up to 24 hours. When you’re ready to bake, simply remove the plastic wrap, cover with foil, and bake as directed, adding about 5-10 minutes to the initial covered baking time to ensure it heats through properly.

What kind of potatoes are best for hobocasserole?

Yukon Gold or Russet potatoes are excellent choices for this hobocasserole recipe. Yukon Golds lend a wonderfully creamy texture and a slightly sweeter flavor to the dish, while Russets provide a starchier, fluffier consistency. The key is to slice them thinly and evenly, about 1/8 inch thick, so they cook through at the same rate as the ground beef and create a cohesive, tender layer in your easy ground beef dinner.

Share Your Version!

I would absolutely love to hear about your experience making this Hobo Casserole Ground Beef! Did you try any of the variations, or perhaps add your own special touch? Please leave a star rating and a comment below – your feedback helps other home cooks, and I treasure every one. If you snap a photo of your delicious creation, don’t forget to tag me on Instagram or Pinterest @exorecipes. I’m always so inspired by your culinary adventures!

From my NYC kitchen to yours — I hope this recipe brings as much warmth to your table as it does to mine. — mia 🧡

📌

Love This Recipe? Save It to Pinterest!

If you enjoyed this Hobo Casserole Ground Beef recipe, don’t let it get lost in your browser tabs! 😄 Pin it now so you can find it again anytime — and explore hundreds more tried-and-tested recipes waiting for you on my Pinterest boards.

👉 Follow mia on Pinterest @chefrecipes2

📌 Pin this recipe · 🔁 Re-pin your favorites · 💬 Tag me when you make it — I love seeing your creations!

Print

clock clock iconcutlery cutlery iconflag flag iconfolder folder iconinstagram instagram iconpinterest pinterest iconfacebook facebook iconprint print iconsquares squares iconheart heart iconheart solid heart solid icon

Hobo Casserole Ground Beef

  • Author: Chef Mia

Description

This Hobo Casserole Ground Beef is delicious with tender potatoes, savory ground beef, and melted cheese all baked together into a comforting dish. Its a simple, hearty meal that the whole family will love!


Ingredients

Scale
  • 1 lb ground beef
  • 1 tablespoon olive oil
  • 1 medium onion, chopped
  • 2 cloves garlic, minced
  • 45 medium potatoes, thinly sliced
  • 1 1/2 cups shredded cheddar cheese
  • 1/2 cup grated Parmesan cheese
  • 1 teaspoon dried Italian seasoning
  • 1/2 teaspoon paprika
  • Salt and pepper to taste
  • 1/2 cup beef broth or water
  • 1/4 cup milk (optional, for creaminess)
  • Fresh parsley for garnish (optional)

Instructions

  1. Preheat your oven to 375°F (190°C) and grease a 9×13-inch baking dish with cooking spray or olive oil.
  2. In a large skillet, heat the olive oil over medium heat. Add the ground beef and cook, breaking it apart with a spoon, until browned and cooked through (about 5-7 minutes). Drain any excess fat if needed.
  3. Add the chopped onion and minced garlic to the skillet with the beef. Cook for another 3-4 minutes until the onion becomes soft and translucent.
  4. Layer the thinly sliced potatoes on top of the ground beef in the prepared baking dish. First, spread the cooked ground beef mixture evenly in the bottom of the dish. Then, arrange the potatoes on top, seasoning them with salt, pepper, Italian seasoning, and paprika.
  5. Sprinkle the shredded cheddar and grated Parmesan cheese over the beef. Pour the beef broth (or water) around the edges of the casserole to keep the potatoes moist while baking. Optionally, drizzle with milk for extra creaminess.
  6. Cover the casserole with aluminum foil and bake for 30 minutes. After 30 minutes, remove the foil and bake for an additional 15-20 minutes, or until the potatoes are tender and the cheese is bubbly and golden.
  7. Garnish with fresh parsley if desired and serve hot!


Hobo Casserole Ground Beef

k">

Tried This Recipe? Leave a Comment!

Did you make this recipe? I’d love to hear how it turned out! Please leave a comment and a rating below. Your feedback helps other home cooks and supports cheerychop.com!
For more delicious inspiration, follow me on Pinterest!

Best Healthy Peanut Butter Banana Muffins Recipe

Healthy Peanut Butter Banana Muffins – Protein-Packed & Perfected for an Easy Breakfast

⚖️
Difficulty
Easy
⏲️
Prep Time
10
🕒
Cook Time
25
⏱️
Total Time
35
🍽️
Servings
12 Muffins

There’s something magical about the aroma of baking muffins wafting through the air, especially on a crisp New York morning as I’m rushing out the door. Growing up in my mother’s kitchen in Marrakech, bananas and fragrant spices were always in abundance, but peanut butter was a rare, exciting treat. When I moved to Paris to hone my pastry skills, the focus was on rich, decadent flavors, but I always found myself drawn back to simpler, wholesome ingredients. Now, here in NYC, I’ve blended those memories and techniques to create what I believe are the ultimate healthy peanut butter banana muffins – they’re moist, packed with protein, bursting with natural sweetness, and perfectly adaptable for any dietary need.

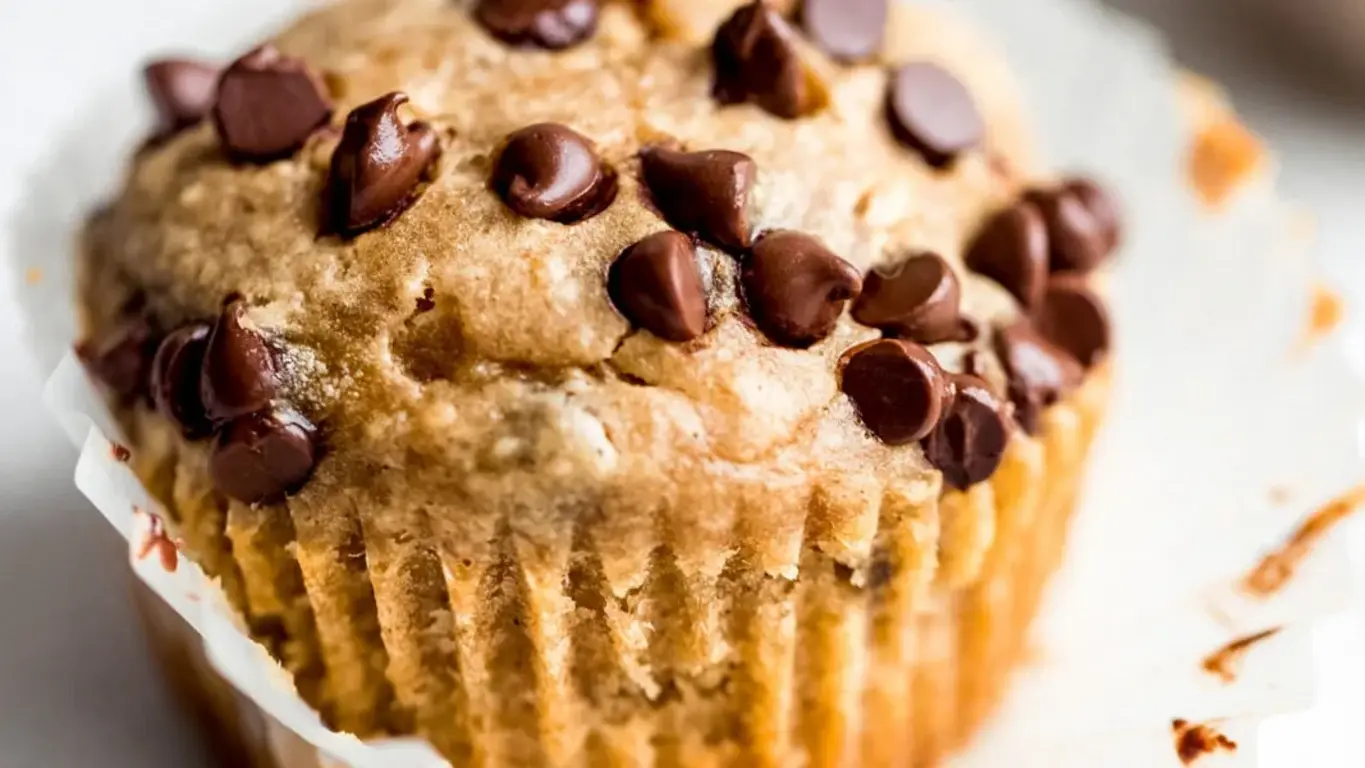
Imagine sinking your teeth into a tender muffin, the warm, comforting notes of ripe banana mingling with the rich, slightly salty depth of natural peanut butter. A hint of cinnamon, reminiscent of the spice markets in my homeland, adds a layer of warmth, while the subtle sweetness from maple syrup rounds it all out. These aren’t your average bakery muffins; they are light, fluffy, and have just the right amount of chew, especially if you add a few mini chocolate chips! The deep golden-brown crust, with perhaps a few extra chips sprinkled on top, promises pure deliciousness.

My approach to creating these healthy peanut butter banana muffins is rooted in chef-driven techniques for optimal texture and flavor, without relying on processed sugars or refined flours. I’ve tested countless variations to find the perfect balance, ensuring you get pure peanut butter and banana goodness. This recipe is designed to be satisfyingly simple, making it a go-to for busy weeknights and quick breakfasts. I’ll even share a little trick for achieving that perfect rise, and a common mistake to steer clear of that can leave your muffins dense. Get ready for your new favorite guilt-free treat!

Why This Recipe Is the Best

The Flavor Secret: What sets these healthy peanut butter banana muffins apart is the careful balance of natural sweetness from ripe bananas and just a touch of pure maple syrup, enhanced by high-quality, natural peanut butter. My training in Paris taught me the importance of layering flavors, and here, the subtle cinnamon and vanilla complement the star players without overpowering them. It’s a flavor profile that’s both comforting and sophisticated, a taste of my Moroccan heritage meeting my French training.

Perfected Texture: Achieving a moist, tender crumb in gluten-free baking can be a challenge, but my experience with French patisserie techniques guided me. Using oat flour provides a wonderful structure and subtle nutty flavor without the dryness sometimes associated with gluten-free flours. The ratio of wet to dry ingredients is crucial, ensuring each muffin is tender and not at all dense. Make sure your bananas are *very* ripe for maximum moisture and sweetness!

Foolproof & Fast: I know how hectic life can be, especially here in NYC. That’s why I designed this recipe for maximum flavor and minimal fuss. It’s a simple one-bowl (mostly!) method that comes together in minutes, making it perfect for busy mornings. The steps are clear and straightforward, meaning even novice bakers can achieve professional-looking and tasting results. You get delicious, wholesome muffins without spending hours in the kitchen.

Healthy Peanut Butter Banana Muffins Ingredients

When I’m developing a recipe like this in my New York kitchen, I always think about accessibility. You can find most of these ingredients at your local grocery store, whether it’s a Trader Joe’s, Whole Foods, or even a neighborhood bodega. For special ingredients like gluten-free oat flour, I often head to Union Square Greenmarket or dedicated health food stores. This recipe is designed to be straightforward, using pantry staples that most of us already have. It reminds me of how my mother would creatively use what was available back home in Morocco, making delicious meals from simple ingredients.

Ingredients List

  • Wet ingredients:
  • 1 cup mashed ripe bananas (about 3 medium ripe bananas)
  • ¾ cup (192g) natural creamy or crunchy drippy peanut butter (just peanuts and salt)
  • 2 large eggs
  • ¼ cup (78g) pure maple syrup
  • 2 teaspoons vanilla extract
  • ½ tablespoon dairy free milk of choice (I like almond milk)
  • Dry ingredients:
  • 1 cup (92g) gluten free oat flour (you can make your own — see the full blog psot)
  • 1 teaspoon baking powder
  • ½ teaspoon cinnamon
  • ¼ teaspoon salt
  • ½ cup (60g) mini chocolate chips (dairy free, if desired, plus 2-3 tablespoons for sprinkling on top)

Ingredient Spotlight

Ripe Bananas: These are the heart and soul of moist banana muffins. Look for bananas that are heavily spotted or even mostly black. The riper they are, the sweeter and more flavorful they’ll be, meaning you’ll rely less on added sugar. If your bananas aren’t quite ripe enough, you can speed up the process by placing them in a brown paper bag for a day or two. This recipe calls for about 3 medium bananas mashed, which should yield roughly 1 cup.

Natural Peanut Butter: I specifically recommend natural peanut butter where the only ingredients are peanuts and salt. This ensures a pure, rich peanut flavor without added sugars or hydrogenated oils. Creamy or crunchy both work beautifully, but a “drippy” peanut butter will incorporate more easily into the wet ingredients. If your natural peanut butter is stiff, give it a good stir before measuring to ensure it’s smooth and scoopable.

Gluten-Free Oat Flour: This is my secret weapon for a tender, slightly nutty crumb in these protein banana muffins. If you can’t find pre-made oat flour, it’s incredibly easy to make your own! Just blend rolled oats (certified gluten-free if needed) in a high-speed blender or food processor until finely ground into a flour consistency. Measure it after grinding to ensure you have the correct amount. It’s a fantastic alternative to all-purpose flour, offering more fiber and protein.

Original IngredientBest SubstitutionFlavor / Texture Impact
Ripe BananasUnsweetened Applesauce (use 1 cup)Will reduce sweetness and banana flavor; muffins may be slightly less moist.
Natural Peanut ButterAlmond Butter or Sunflower Seed Butter (use 1:1 ratio)Almond butter adds a different nutty flavor profile. Sunflower seed butter offers a nut-free option but may have a stronger distinct taste.
Gluten-Free Oat FlourAlmond Flour or a Gluten-Free All-Purpose Blend (use 1:1 ratio)Almond flour will make muffins denser and slightly oilier. A GF blend might require minor adjustments depending on its composition for best results.

How to Make Healthy Peanut Butter Banana Muffins — Step-by-Step

Making these wholesome muffins is delightfully straightforward, perfect for any day of the week.

Step 1: Preheat and Prepare

Preheat your oven to 350°F (175°C). Line a 12-cup muffin tin with paper liners or grease it well. If using liners, spray the inside with nonstick cooking spray to ensure your beautiful muffins don’t stick.

💡 mia’s Pro Tip: For muffins that release easily and have a lovely, clean edge, I always lightly grease the muffin liners even if using paper ones. A little spray goes a long way!

Step 2: Mix Wet Ingredients

In a large bowl, combine the mashed ripe bananas, natural peanut butter, large eggs, pure maple syrup, vanilla extract, and your dairy-free milk. Whisk everything together until the mixture is smooth and well combined. This forms the moist base of our muffins.

Step 3: Add Dry Ingredients and Chips

Add the gluten-free oat flour, baking powder, cinnamon, and salt to the wet ingredients. Stir until *just* combined – overmixing can lead to tough muffins. Gently fold in ½ cup of mini chocolate chips if you’re using them. Be careful not to break up the batter too much.

⚠️ Common Mistake to Avoid: Overmixing the batter after adding the dry ingredients is a common pitfall. This develops the gluten (even in oat flour, to an extent) and can result in dense, chewy muffins instead of light, tender ones. Mix only until you no longer see dry streaks of flour.

Step 4: Divide Batter

Evenly divide the batter among the 12 prepared muffin cups. I like to use a cookie scoop for consistent portioning. For an extra touch of sweetness and visual appeal, sprinkle the tops of the batter with the reserved mini chocolate chips.

Step 5: Bake and Cool

Bake for 20-25 minutes, or until a toothpick inserted into the center of a muffin comes out clean. The tops should be golden brown and spring back lightly when touched. Let the muffins cool in the tin for about 5 minutes before transferring them to a wire rack to cool completely. Enjoy!

StepActionDurationKey Visual Cue
1Preheat oven, prep muffin tin.5 minsOven at 350°F, tin lined and greased.
2Mix wet ingredients.3 minsSmooth, well-combined liquid mixture.
3Add dry ingredients, fold in chips.2 minsJust combined batter, no dry streaks.
4Divide batter into muffin cups, sprinkle tops.3 minsEvenly filled cups with optional chips on top.
5Bake and cool.20-25 mins (bake) + 10 mins (cool in tin)Golden brown muffins, toothpick comes out clean.

Serving & Presentation

These peanut butter banana muffins are wonderfully versatile, serving as a delightful breakfast, a satisfying snack, or even a light dessert. For an elegant presentation, I love serving them warm, perhaps with a gentle dusting of powdered sugar, reminiscent of my time in Paris. In my New York kitchen, I often serve them alongside a steaming mug of coffee or a glass of cold almond milk, making for a perfect start to a busy day exploring the city.

A small dollop of Greek yogurt or a drizzle of extra peanut butter can elevate these muffins further. Don’t hesitate to add a few fresh berries on the side for a pop of color and freshness. They look especially appealing when arranged on a rustic wooden platter, showcasing their wholesome goodness. The aroma alone is enough to make them a star attraction!

Pairing TypeSuggestionsWhy It Works
Side DishFresh berries (strawberries, blueberries), a small side of plain Greek yogurt.Adds freshness, a touch of tang, and visual appeal.
Sauce / DipA dollop of extra natural peanut butter, plain Greek yogurt, or a light drizzle of honey.Enhances the core flavors and adds moisture.
BeverageBlack coffee, almond milk, herbal tea, or a chai latte.Complements the nutty, sweet, and spiced flavors without overpowering them.
GarnishA sprinkle of cinnamon, extra mini chocolate chips, or a few crushed peanuts.Adds visual interest and reinforces the muffin’s flavor profile.

Make-Ahead, Storage & Reheating

As a busy New Yorker, meal prep is essential! These healthy peanut butter banana muffins are perfect for making ahead. I often bake a batch on Sunday afternoon, letting them cool completely before storing them. This way, I have nutritious, portion-controlled breakfasts and snacks ready to grab throughout the week, saving me precious time during busy mornings or late-night cravings.

MethodContainerDurationReheating Tip
RefrigeratorAirtight container or resealable plastic bag.Up to 4-5 daysEnjoy cold or warm gently in microwave for 10-15 seconds.
FreezerFreezer-safe airtight container or heavy-duty freezer bag. Wrap individually in plastic wrap first for best results.Up to 2-3 monthsThaw overnight in the refrigerator or warm from frozen in oven/toaster oven at 300°F (150°C) for 10-15 minutes.
Make-AheadStore in an airtight container at room temperature if eating within 1-2 days.Up to 2 days at room temp; longer in fridge.Room temperature muffins are best served as is. Fridge-stored muffins can be gently warmed.

When reheating from the refrigerator, I find a microwave for a quick 15-20 seconds is perfect for enjoying them slightly warm, enhancing that gooey peanut butter texture. For a more oven-baked fresh feel, a toaster oven or a conventional oven at a low temperature (around 300°F/150°C) for about 10-15 minutes works wonders when reheating from frozen. The key is gentle warming to avoid drying them out.

Variations & Easy Swaps

VariationKey ChangeBest ForDifficulty Impact
Protein BoostAdd ½ scoop of your favorite unflavored or vanilla protein powder to the dry ingredients.Those looking for an extra protein punch.Easy swap, might require a tiny bit more liquid if batter is too stiff.
Chocolate Lover’s DreamIncrease mini chocolate chips to ¾ cup and add 1 tbsp cocoa powder to dry ingredients.Anyone who loves a chocolatey treat.Simple addition, ensures rich chocolate flavor.
Nut-Free OptionUse sunflower seed butter instead of peanut butter and ensure chocolate chips are nut-free.School lunches or those with nut allergies.Direct substitution, taste is slightly different but still delicious.

Protein Banana Muffins

To boost the protein content in these already satisfying muffins, I recommend adding about half a scoop (around 15g) of your favorite unflavored or vanilla protein powder to the dry ingredients. This is a simple addition that can make these muffins even more filling and ideal for pre- or post-workout fuel. If your batter seems a bit too thick after adding the protein powder, a splash more dairy-free milk should do the trick. My own attempts inspired by Parisian protein-rich energy bites led to this easy muffin modification.

Gluten-Free Banana Muffins

This recipe is already designed to be gluten-free thanks to the use of oat flour! I always ensure my oat flour is certified gluten-free to avoid any cross-contamination, especially for those with celiac disease. The oat flour gives these gluten-free banana muffins a wonderfully tender crumb that rivals traditional flour-based versions. It’s a technique I learned to adapt many classic French recipes into gluten-free versions without sacrificing texture.

Sugar-Free Banana Muffins

While these muffins are *sugar-free* in terms of refined sugars, they do contain natural sugars from the ripe bananas and maple syrup. To make them truly sugar-free for specific dietary needs (like a ketogenic diet, though this recipe is higher carb), you would omit the maple syrup and chocolate chips, and rely solely on the sweetness of very ripe bananas. You might also consider using a sugar-free sweetener like erythritol or stevia, adjusting to taste, but this will alter the texture and moisture profile. I experimented with this for a health-conscious client in Soho.

How can I make healthy peanut butter banana muffins without using refined sugar?

To create sugar-free peanut butter banana muffins, the best approach is to rely on the natural sweetness of very ripe bananas. Make sure your bananas are heavily speckled or almost black for maximum sweetness. You can omit the maple syrup entirely and also exclude any added sweeteners. If you desire more sweetness, consider using a natural sugar substitute like stevia or erythritol, but start with a small amount and taste the batter, as these can be potent and may affect the texture differently than maple syrup.

Can I use whole wheat flour or oat flour instead of all-purpose flour in peanut butter banana muffins?

Absolutely! This recipe specifically calls for gluten-free oat flour, which is a fantastic alternative to all-purpose flour. It contributes a lovely texture and a subtle, nutty flavor. If you don’t have oat flour, you can easily make your own by blending rolled oats in a food processor until finely ground. Whole wheat flour can also be used, but it might result in a slightly denser muffin, so I often prefer oat flour or almond flour for a lighter crumb. Certified gluten-free oat flour is a great choice for those needing to avoid gluten.

How do I keep my peanut butter banana muffins from turning out too dense or dry?

To ensure your muffins are moist and tender, not dense or dry, there are a few key steps. First, use very ripe bananas; their natural moisture and sugars are crucial. Second, avoid overmixing the batter after adding the dry ingredients. Mix just until combined to prevent toughening the texture. Third, measure your flour accurately; spooning it into the cup and leveling it off is better than scooping directly, which can pack too much flour. Finally, don’t overbake! Check for doneness with a toothpick; it should come out with moist crumbs, not bone dry.

What is the best way to ripen bananas quickly for making peanut butter banana muffins?

If you’re in a hurry and your bananas aren’t ripe enough, I have a couple of tricks! The quickest way is to place them in a brown paper bag, either by themselves or with an apple or tomato. Seal the bag loosely and leave it on your counter for about 24-48 hours. The ethylene gas released by the bananas (and the other fruit) will speed up the ripening process. You can also place unpeeled bananas on a baking sheet and bake them in a preheated oven at around 300°F (150°C) for 10-15 minutes, until they turn black and soft; let them cool before mashing.

Are these muffins truly sugar-free if they use maple syrup?

That’s a great question about sugar content! While this recipe uses pure maple syrup instead of refined white or brown sugar, maple syrup is still a form of sugar. It offers natural sweetness and some minerals, making it a healthier alternative to refined sugars, but it does contribute to the overall sugar count. If you need to avoid all forms of sugar, you would omit the maple syrup and rely on very ripe bananas, or use a zero-calorie sweetener as mentioned earlier. This recipe is considered “refined sugar-free” rather than “zero sugar.”

Can I make these protein banana muffins vegan?

Yes, you can easily make these protein banana muffins vegan! The recipe is already dairy-free thanks to the alternative milk choice. To make it fully vegan, you would need to substitute the eggs. A common and effective vegan egg substitute for muffins is a “flax egg” or “chia egg.” To make one flax egg, whisk together 1 tablespoon of ground flaxseed with 3 tablespoons of water and let it sit for 5-10 minutes until it thickens. Use two of these flax eggs in place of the two large eggs called for in the recipe. Ensure any chocolate chips used are also dairy-free and vegan.

What’s the best way to incorporate chocolate chips into peanut butter banana muffins?

For the best chocolate chip distribution, I like to fold half of the chocolate chips into the batter just before dividing it into the muffin cups. This ensures they are evenly dispersed throughout the muffin’s interior. Then, I sprinkle the remaining chocolate chips over the tops of the batter in each cup. This gives you those delightful pockets of melted chocolate within the muffin and a visually appealing, chocolate-studded crown on top. It’s a simple technique that maximizes the chocolate experience in every bite!

Can I freeze these healthy peanut butter banana muffins?

Absolutely! Freezing these healthy peanut butter banana muffins is a fantastic way to always have a delicious snack on hand. Once completely cooled, I recommend wrapping each muffin individually in plastic wrap or foil, and then placing them in a freezer-safe airtight container or heavy-duty freezer bag. They should stay fresh and retain their flavor for up to 2-3 months. Thawing them overnight in the refrigerator is best, or you can gently reheat them in a low oven or toaster oven for about 10-15 minutes to enjoy them as if freshly baked.

Share Your Version!

I absolutely love seeing your creations and how you adapt my recipes! If you’ve made these healthy peanut butter banana muffins, please consider leaving a star rating and a comment below. Your feedback truly helps other home cooks. For those who love to share photos, tag me on Instagram or Pinterest @exorecipe – I’d be thrilled to see your delicious muffins!

I’m always curious about how my NYC followers personalize my recipes. Have you tried adding other spices, like a touch of cardamom or ginger? Or perhaps you’ve experimented with different nut butters? I’d love to hear about your favorite variations and any creative twists you’ve added to these protein banana muffins!

From my NYC kitchen to yours — I hope this recipe brings as much warmth to your table as it does to mine. — mia 🧡

📌

Love This Recipe? Save It to Pinterest!

If you enjoyed this Healthy Peanut Butter Banana Muffins recipe, don’t let it get lost in your browser tabs! 😄 Pin it now so you can find it again anytime — and explore hundreds more tried-and-tested recipes waiting for you on my Pinterest boards.

👉 Follow mia on Pinterest @chefrecipes2

📌 Pin this recipe · 🔁 Re-pin your favorites · 💬 Tag me when you make it — I love seeing your creations!

Print

clock clock iconcutlery cutlery iconflag flag iconfolder folder iconinstagram instagram iconpinterest pinterest iconfacebook facebook iconprint print iconsquares squares iconheart heart iconheart solid heart solid icon

Healthy Peanut Butter Banana Muffins

  • Author: Chef Mia

Description

The BEST peanut butter banana muffins that are packed with protein and peanut butter flavor. These gluten free peanut butter banana muffins are naturally sweetened with pure maple syrup, dairy free and a great on-the-go healthy breakfast or snack. Try them with mini chocolate chips!


Ingredients

Scale
  • Wet ingredients:
  • 1 cup mashed ripe bananas (about 3 medium ripe bananas)
  • ¾ cup (192g) natural creamy or crunchy drippy peanut butter (just peanuts and salt)
  • 2 large eggs
  • ¼ cup (78g) pure maple syrup
  • 2 teaspoons vanilla extract
  • ½ tablespoon dairy free milk of choice (I like almond milk)
  • Dry ingredients:
  • 1 cup (92g) gluten free oat flour (you can make your own — see the full blog psot)
  • 1 teaspoon baking powder
  • ½ teaspoon cinnamon
  • ¼ teaspoon salt
  • cup (60g) mini chocolate chips (dairy free, if desired, plus 2-3 tablespoons for sprinkling on top)

Instructions

  1. Preheat oven to 350 degrees Line a 12-cup muffin liner with muffin liners and spray the inside with nonstick cooking spray to prevent muffins from sticking to liners.
  2. In a large bowl, mix together the mashed bananas, peanut butter, eggs, pure maple syrup, vanilla extract and milk of choice until smooth.
  3. Next stir in the oat flour, baking powder, cinnamon and salt until smooth. Fold in the chocolate chips. Evenly divide batter into muffin liners.
  4. Bake 20-25 minutes until toothpick comes out clean. Transfer muffins to wire rack to cool and enjoy! Makes 12 muffins.


Nutrition

  • Calories: 218 kcal
  • Sugar: 12.3 g
  • Fat: 11.9 g
  • Carbohydrates: 24.4 g
  • Protein: 6.2 g


Healthy Peanut Butter Banana Muffins

Quick & Easy Air Fryer Chicken Fajitas

Air Fryer Chicken Fajitas: Perfectly Seasoned and Quick

⚖️
Difficulty
Easy
⏲️
Prep Time
15 mins
🕒
Cook Time
20 mins
⏱️
Total Time
35 mins
🍽️
Servings
4

New York City is a melting pot of culinary influences, and I love discovering how different cuisines can be simplified for the busy home cook. My journey began in my mother’s kitchen in Marrakech, learning the magic of spices, and later, honing my technique in Parisian bistros. Now, living here in NYC, I’m always looking for ways to bring restaurant-quality meals to your table with minimal fuss. These air fryer chicken fajitas are a perfect example – they’re vibrant, incredibly flavorful, and so quick you’ll wonder why you ever made them any other way. Forget lengthy marinating or multiple pans; this recipe is about getting maximum flavor with an efficient, modern appliance, making it an absolute weeknight hero.

Imagine tender, perfectly cooked chicken strips mingling with sweet, slightly charred bell peppers and onions, all coated in a zesty, smoky spice blend that transports you straight to a fiesta. The air fryer creates a delightful texture, almost like a light char or sauté, locking in moisture and infusing every bite with flavor. The aroma alone, as the spices hit the hot air, is enough to make your mouth water, a testament to the simple yet effective seasoning I learned to master back home, a blend that I’ve adapted for this incredibly easy air fryer fajitas recipe. It’s a dish that’s as beautiful to look at as it is to eat, bursting with color and fresh flavors.

What sets these chicken fajitas recipe apart is its simplicity and speed, thanks to the air fryer. You don’t need to be a seasoned chef to achieve incredible results. I’ve refined this recipe to highlight the natural sweetness of the vegetables and the succulence of the chicken, without relying on excessive oil or complicated steps. I’ll share a pro tip on how to get perfectly cooked chicken every time, as well as a common mistake many home cooks make that can leave their fajitas dry. Get ready for your new go-to, fuss-free fajita experience!

Why This Air Fryer Chicken Fajitas Recipe Is the Best

The secret to these amazing fajitas in air fryer lies in a blend of spices that I learned from my mother, combined with the vibrant freshness of ingredients you can find at any New York City farmers market. My culinary training in Paris taught me the importance of balancing flavors and textures, and that’s precisely what I’ve done here. I use a specific combination of chili powder, paprika, cumin, onion powder, and garlic powder to create a deeply savory and slightly spicy profile, without any single spice overpowering the others. This thoughtful seasoning ensures that each bite is a harmonious symphony of flavors, making these air fryer chicken fajitas truly exceptional.

Achieving that perfect tender yet slightly crisp texture in your air fryer chicken fajitas is all about the precise cooking time and temperature. The air fryer circulates hot air efficiently, cooking the ingredients evenly and quickly. This method allows the vegetables to soften just enough to be pliable for wrapping, while still retaining a pleasant bite and their vibrant colors. The chicken cooks through rapidly, staying incredibly juicy. It’s a technique that I’ve perfected to ensure you get restaurant-quality results at home, transforming simple ingredients into a gourmet meal in under 35 minutes, truly making these some of the quick chicken fajitas you’ll ever make.

Making easy air fryer fajitas shouldn’t be intimidating. This recipe is designed for success, even if you’re new to air frying or cooking in general. The ingredient list is straightforward, and the steps are simple and clear. I’ve tested this recipe repeatedly to ensure it’s foolproof, minimizing the chances of common pitfalls like dry chicken or soggy vegetables. You’ll find that your air fryer does most of the work, delivering consistently delicious results with minimal effort, making it ideal for busy weeknights or casual entertaining. It’s the perfect dish to impress your friends and family without breaking a sweat.

Air Fryer Chicken Fajitas Ingredients

I love grabbing my produce from the Union Square Greenmarket here in NYC to ensure I have the freshest ingredients, but you can find these staple items at any grocery store. The beauty of these air fryer chicken fajitas is their simplicity – they rely on fresh produce and a well-balanced spice mix. If I’m in a pinch, I’ll sometimes use frozen bell pepper strips, but fresh always yields the best texture and flavor. For the spices, I always keep a good quality blend of chili powder, cumin, paprika, onion, and garlic powder on hand; they are the backbone of so many of my Moroccan-inspired dishes.

Ingredients List

  • 2 boneless skinless chicken breasts (about 1 lb), cut into 1/2-inch strips
  • 1 red bell pepper, cut into 1/4-inch slices
  • 1 yellow bell pepper, cut into 1/4-inch slices
  • 1 green bell pepper, cut into 1/4-inch slices
  • ½ yellow onion, cut into 1/4-inch slices
  • 2 tablespoons olive oil
  • 2 tsp chili powder
  • 1 tsp paprika
  • ½ tsp cumin
  • 1 tsp onion powder
  • 1 tsp garlic powder
  • 1 tsp salt
  • ½ tsp black pepper
  • 8-10 small flour or corn tortillas, warmed
  • Sour cream, for serving (optional)
  • Guacamole, for serving (optional)
  • Fresh cilantro, chopped, for garnish (optional)

Ingredient Spotlight

Chicken Breast: I prefer boneless, skinless chicken breast for its lean protein and quick cooking time. When selecting chicken breasts in the US, look for plump, firm pieces with a pale pink color. If you’re in a pinch, using boneless, skinless chicken thighs is also a great option; they tend to be more forgiving and stay moister, though they may take slightly longer to cook. The key is to cut them into uniform strips for even cooking in the air fryer.

Bell Peppers: The vibrant colors of red, yellow, and green bell peppers not only make these fajitas visually appealing but also contribute different levels of sweetness. When buying bell peppers in the US, choose ones that are firm, shiny, and free of bruises or soft spots. If you can’t find a specific color, don’t worry; any combination of the three will work beautifully. For a spicier kick, you could also add a sliced jalapeño or serrano pepper.

Spices: This is where the magic happens! The blend of chili powder, paprika, cumin, onion powder, and garlic powder creates that signature fajita flavor. For the best quality spices, I often visit specialty stores or ethnic markets here in NYC, but standard grocery store brands work well too. Look for spices that are fragrant and haven’t been sitting on the shelf for too long; fresher spices mean more potent flavor. This combination is so versatile; I use it in countless other dishes, making it a pantry staple.

Original IngredientBest SubstitutionFlavor / Texture Impact
Boneless, Skinless Chicken BreastsBoneless, Skinless Chicken ThighsThighs are more moist and tender, but cook slightly slower. May require a few extra minutes.
Yellow OnionRed Onion or ShallotsRed onion adds a slightly sweeter and sharper bite. Shallots are milder and more delicate.
Bell Peppers (any color)Zucchini or Yellow SquashSofter texture, less distinct flavor. Might need slightly less cooking time to avoid becoming mushy.
Chili PowderAncho Chili Powder or Smoked PaprikaAncho chili offers a deeper, fruitier chili flavor. Smoked paprika adds a pronounced smoky note.

How to Make Air Fryer Chicken Fajitas — Step-by-Step

Follow these simple steps for the quickest and most delicious fajitas in air fryer you’ve ever had!

Step 1: Prepare the Fajita Seasoning

In a small bowl, combine the chili powder, paprika, cumin, onion powder, garlic powder, salt, and black pepper. Whisk them together with a small fork until they’re well combined. This ensures that the seasoning is evenly distributed over your ingredients, giving you consistent flavor in every bite. Having a balanced spice blend is crucial for truly great fajitas.

💡 mia’s Pro Tip: Make a larger batch of this fajita seasoning and store it in an airtight container in your pantry. It’s perfect for sprinkling on grilled chicken, shrimp, or even roasted vegetables throughout the week, and it saves you time on busy nights!

Step 2: Season the Ingredients

In a large mixing bowl, add the chicken strips, sliced bell peppers, and sliced onion. Drizzle everything with the olive oil and toss gently with your hands or a spatula until all the ingredients are lightly coated. Then, sprinkle the prepared fajita seasoning over the mixture. Toss everything again thoroughly, making sure each piece of chicken and vegetable is evenly coated with the spices. This step is key to flavorful, quick chicken fajitas.

Step 3: Air Fry the Fajitas

Arrange the seasoned chicken, onion, and bell pepper mixture in a single layer in your air fryer basket. It’s important not to overcrowd the basket, as this can lead to steaming rather than frying, and uneven cooking. If necessary, you may need to cook in batches, depending on the size of your air fryer. This ensures that air can circulate properly around all the ingredients for that perfect crispy-tender result.

⚠️ Common Mistake to Avoid: Overcrowding the air fryer basket. This is the number one reason for unevenly cooked food and less crisp results. Always try to cook in a single layer. If you have a lot to cook, it’s better to do two smaller batches than one large, overloaded one. Your chicken and veggies will thank you for it!

Step 4: Finish Cooking and Toss

Cook at 350°F (175°C) for 16 to 20 minutes. To ensure everything cooks evenly, carefully remove the air fryer basket halfway through the cooking time, about 9 minutes in, and give it a good toss or shake. This helps to expose all sides of the chicken and vegetables to the hot air, promoting uniform browning and preventing any one side from overcooking. Continue cooking until all the chicken pieces have cooked through and are no longer pink inside.

Step 5: Serve

Once cooked, remove the fajita mixture from the air fryer. Serve immediately in warmed tortillas. Garnish generously with your favorite toppings like sour cream, guacamole, and fresh chopped cilantro. The warm tortillas, vibrant filling, and cool toppings create a perfect contrast in temperature and texture, making these some of the most delightful easy air fryer fajitas you’ll enjoy.

StepActionDurationKey Visual Cue
1Prepare Seasoning2 minsWell-combined spice mix
2Season Ingredients3 minsEvenly coated chicken and vegetables
3Air Fry (Initial Cook)9 minsBeginning to soften and lightly char
4Toss and Finish Cooking9 minsChicken cooked through, veggies tender-crisp
5Serve1 minPiled in warm tortillas, ready to be garnished

Serving & Presentation

For a truly authentic experience, I love warming my tortillas by quickly charring them over a gas flame (if you have one) or in a dry skillet. This adds a beautiful smoky aroma and a slightly crisp edge. When plating, I like to pile the vibrant fajita filling high in the center of a plate, with the warmed tortillas on the side, allowing everyone to build their own perfect fajita. It’s a casual, interactive way to serve the dish, much like you’d find at a lively spot in the West Village.

Garnishes are not just an afterthought; they elevate the entire dish! The cool, creamy tang of sour cream or a dollop of fresh guacamole provides a wonderful contrast to the warm, spiced filling. Sprinkle with freshly chopped cilantro for a burst of herbaceous freshness that reminds me of the herbs in my home country. This simple presentation makes these air fryer chicken fajitas feel special enough for guests, yet quick enough for a weeknight family meal.

Pairing TypeSuggestionsWhy It Works
Side DishBlack Beans, Mexican Rice, Corn SaladComplements the Tex-Mex flavors with hearty, classic companions.
Sauce / DipSalsa Roja, Queso Fresco, Lime CremaAdds moisture, acidity, and creamy texture to balance the spices.
BeverageMargarita, Mexican Lager, Iced TeaRefreshing drinks cut through the richness and spice.
GarnishChopped Cilantro, Sliced Jalapeños, Diced AvocadoAdds freshness, heat, and creamy, healthy fats.

Make-Ahead, Storage & Reheating

I often find myself relying on meal prep to navigate my busy life in New York. This recipe is fantastic for that! You can prep the spice mix and chop all the vegetables and chicken ahead of time, storing them separately in the refrigerator. Then, when you’re ready, simply toss them with oil and spices and air fry. Prepared fajita filling can also be made ahead, making for incredibly fast assembly.

MethodContainerDurationReheating Tip
RefrigeratorAirtight container3-4 daysReheat in the air fryer at 300°F for 3-5 mins or in a skillet until heated through.
FreezerFreezer-safe bag or container2-3 monthsThaw overnight in the refrigerator, then reheat as above. Best to reheat chicken separately from veggies for optimal texture.
Make-AheadComponent parts in separate containersUp to 2 days before cookingCombine ingredients, season, and air fry just before serving for best results.

When reheating, the key is to maintain the texture. I find that a quick toss in a hot skillet mimics the original cooking method best, bringing back a little crispness to the edges of the chicken and peppers. If using the air fryer again, a lower temperature for a shorter time is advisable to prevent drying out. Avoid microwaving if you can, as it tends to make the chicken rubbery and the vegetables soft.

Variations & Easy Swaps

VariationKey ChangeBest ForDifficulty Impact
Spicy SouthwesternAdd jalapeños, increase chili powder, add a pinch of cayenne.Heat lovers.Adds a bit more spice, requires managing heat levels.
Gluten-Free/Dairy-Free MakeoverUse corn tortillas, omit sour cream or use dairy-free alternative.Dietary restrictions.Easy swap, no significant change in cooking.
Citrus Herb TwistAdd lime zest to seasoning, finish with fresh lime juice and cilantro.Lighter, brighter flavor.Adds fresh flavor, no increased difficulty.

Spicy Southwestern

For those who love a bit of heat, I recommend adding one sliced jalapeño pepper (seeds removed for less heat) along with the other vegetables. You can also increase the chili powder to 2.5 tsp and add a pinch of cayenne pepper to the spice blend. This variation brings a fiery kick that’s incredibly satisfying, reminiscent of the bold flavors I experienced in some of the more adventurous restaurants in Manhattan.

Gluten-Free & Dairy-Free Makeover

Making these air fryer chicken fajitas gluten-free and dairy-free is a breeze. Simply ensure you use corn tortillas, which are naturally gluten-free. For dairy-free options, skip the sour cream or opt for a dairy-free alternative like coconut yogurt or cashew crema. I often find great dairy-free options at my local Whole Foods here in NYC, making it easy to adapt this recipe for various dietary needs without sacrificing flavor or texture.

Citrus Herb Twist

To add a refreshing twist, I love incorporating fresh citrus and herbs. Add the zest of one lime to the spice mix before tossing with the chicken and vegetables. Once the fajitas are cooked and ready to serve, a generous squeeze of fresh lime juice over the top, and a sprinkle of fresh cilantro, really brightens up the flavors. This simple addition offers a delightful lift, perfect for a summery meal, and reminds me of the fresh herbs abundant at the markets in Morocco during springtime.

How do you keep chicken fajitas from getting dry in the air fryer?

The key to keeping chicken fajitas moist in the air fryer is to avoid overcooking them and to not overcrowd the basket. Cut the chicken into uniform strips, toss them generously with oil and seasoning, and cook in a single layer. Check for doneness around the 16-minute mark for a 350°F cooking temperature; chicken should be just cooked through. Using chicken thighs instead of breasts can also help with moisture, as they are more forgiving. Another tip is to ensure your vegetables are also tossed with oil, as they release moisture during cooking that helps keep the chicken from drying out.

Can you use frozen chicken for air fryer chicken fajitas?

Generally, it’s not recommended to cook raw chicken directly from frozen in an air fryer for recipes like fajitas. Frozen chicken will cook unevenly, potentially leaving the inside raw while the outside is overcooked or dry. It’s best to thaw your chicken completely in the refrigerator overnight before preparing your fajitas. If you’re in a real pinch and have frozen vegetables, ensure they are thawed and patted dry before adding them to the seasoned chicken. For safety and best results, always cook chicken from a thawed state.

What is the best temperature and time for air fryer chicken fajitas?

For optimal results with these air fryer chicken fajitas, I recommend a temperature of 350°F (175°C). This temperature allows the chicken to cook through and become tender without becoming dry, while also softening the vegetables to a perfect tender-crisp consistency. The cooking time typically ranges from 16 to 20 minutes. Remember to toss or shake the basket halfway through (around 9 minutes) to ensure even cooking and browning. Always check for doneness with a food thermometer; chicken should reach an internal temperature of 165°F (74°C).

What vegetables go best in air fryer chicken fajitas?

The classic trio of red, yellow, and green bell peppers along with yellow onion are fantastic for their color, sweetness, and texture when cooked in the air fryer. However, feel free to experiment! Sliced jalapeños add a welcomed heat, while sliced poblano peppers offer a milder, earthy flavor. Mushrooms, when sliced and added, can also provide a nice umami depth. For a slightly different texture, you could even add some sliced zucchini or sweet potato, though these might require a slightly adjusted cooking time to ensure they become tender without getting mushy.

Can I marinate the chicken for these fajitas?

While this recipe is designed for speed and relies on a dry spice blend, you absolutely can marinate the chicken if you have extra time. A simple marinade of lime juice, olive oil, and the fajita spices would work wonders. Marinating for at least 30 minutes, or up to 4 hours in the refrigerator, will infuse the chicken with more flavor and help tenderize it further. Just be sure to drain off excess marinade before adding the chicken and vegetables to the air fryer to prevent excess liquid from causing steaming.

How do I get crispy edges on the vegetables?

To achieve those desirable crispy edges on the vegetables, ensure you’re not overcrowding the air fryer basket. The hot air needs to circulate freely around each piece. Also, make sure that your vegetables are cut into consistent, thin slices (around 1/4-inch thick) so they cook evenly. Tossing them well with oil and spices is crucial. For an even crispier outcome, you can try cooking the vegetables in a separate batch after the chicken, as they might require slightly less cooking time to achieve that perfect char.

What kind of tortillas work best for air fryer chicken fajitas?

Both flour and corn tortillas work wonderfully for these air fryer chicken fajitas! Flour tortillas are soft and pliable, making them easy to roll or fold around your filling, and they absorb the flavors beautifully. Corn tortillas offer a slightly firmer texture and a distinct, earthy flavor that pairs exceptionally well with Tex-Mex dishes. For the best experience, I always recommend warming them before serving – a quick zap in the microwave, a few seconds in a dry skillet, or even a quick pass over a gas flame can make a world of difference in texture and aroma.

Can I add other proteins to this recipe?

Absolutely! This air fryer chicken fajitas recipe is incredibly versatile. Shrimp cooks even faster in the air fryer, so you might want to add them for the last 5-8 minutes of cooking or cook them in a separate batch to avoid overcooking. Thinly sliced steak (like flank or skirt steak) also works well; it usually cooks in a similar timeframe to chicken. For a vegetarian option, use firm tofu or even hearty vegetables like cauliflower florets or cubed sweet potatoes. Just adjust cooking times as needed for different proteins.

Share Your Version!

I truly hope you love making and eating these air fryer chicken fajitas as much as I do! If you give this recipe a try, please consider leaving a star rating and a comment below to share your experience. Your feedback helps me and other cooks immensely! If you’re sharing photos on social media, be sure to tag me on Instagram or Pinterest @chefrecipes2. I absolutely adore seeing how your creations turn out! What’s one spice you would consider adding to my base seasoning for an even more unique flavor profile?

From my NYC kitchen to yours — I hope this recipe brings as much warmth to your table as it does to mine. — mia 🧡

📌

Love This Recipe? Save It to Pinterest!

If you enjoyed this Air Fryer Chicken Fajitas recipe, don’t let it get lost in your browser tabs! 😄 Pin it now so you can find it again anytime — and explore hundreds more tried-and-tested recipes waiting for you on my Pinterest boards.

👉 Follow mia on Pinterest @chefrecipes2

📌 Pin this recipe · 🔁 Re-pin your favorites · 💬 Tag me when you make it — I love seeing your creations!

Print

clock clock iconcutlery cutlery iconflag flag iconfolder folder iconinstagram instagram iconpinterest pinterest iconfacebook facebook iconprint print iconsquares squares iconheart heart iconheart solid heart solid icon

Air Fryer Chicken Fajitas

  • Author: Chef Mia

Description

These chicken fajitas come together quickly and easily in an air fryer with just a few simple ingredients. This easy air fryer recipe features perfectly seasoned chicken breast strips, colorful bell peppers, and onions, just like what youd get at a restaurant but at a fraction of the price and a few minutes of preparation. You wont believe just how simple it is to make!


Ingredients

Scale
  • 2 boneless skinless chicken breasts (cut into strips)
  • 1 red bell pepper (cut into 1/4" slices)
  • 1 yellow bell pepper (cut into 1/4" slices)
  • 1 green bell pepper (cut into 1/4 slices)
  • ½ yellow onion (cut into 1/4 slices)
  • 2 tsp chili powder
  • 1 tsp paprika
  • ½ tsp cumin
  • 1 tsp onion powder
  • 1 tsp garlic powder
  • 1 tsp salt
  • ½ tsp black pepper
  • tortillas
  • sour cream
  • guacamole

Instructions

  1. In a small bowl add the spices together and mix with a small fork to make the fajita seasoning.
  2. In a large mixing bowl add the chicken, onion, and bell pepper. Drizzle with olive oil and then toss. Add the seasoning and then toss again until everything is evenly coated.
  3. Add the seasoned chicken, onion, and bell pepper to the air fryer basket
  4. Cook at 350 F for 16 to 20 minutes, until all of the chicken pieces have cooked through. Remove basket and toss half way through the cooking time, at about 9 minutes.
  5. Serve the fajitas in tortillas and garnish with sour cream, chopped cilantro, and guacamole.


Nutrition

  • Calories: 407 kcal
  • Sugar: 6 g
  • Fat: 18 g
  • Carbohydrates: 45 g
  • Protein: 20 g


Air Fryer Chicken Fajitas

k">

Tried This Recipe? Leave a Comment!

Did you make this recipe? I’d love to hear how it turned out! Please leave a comment and a rating below. Your feedback helps other home cooks and supports cheerychop.com!

For more delicious inspiration, follow me on Pinterest!