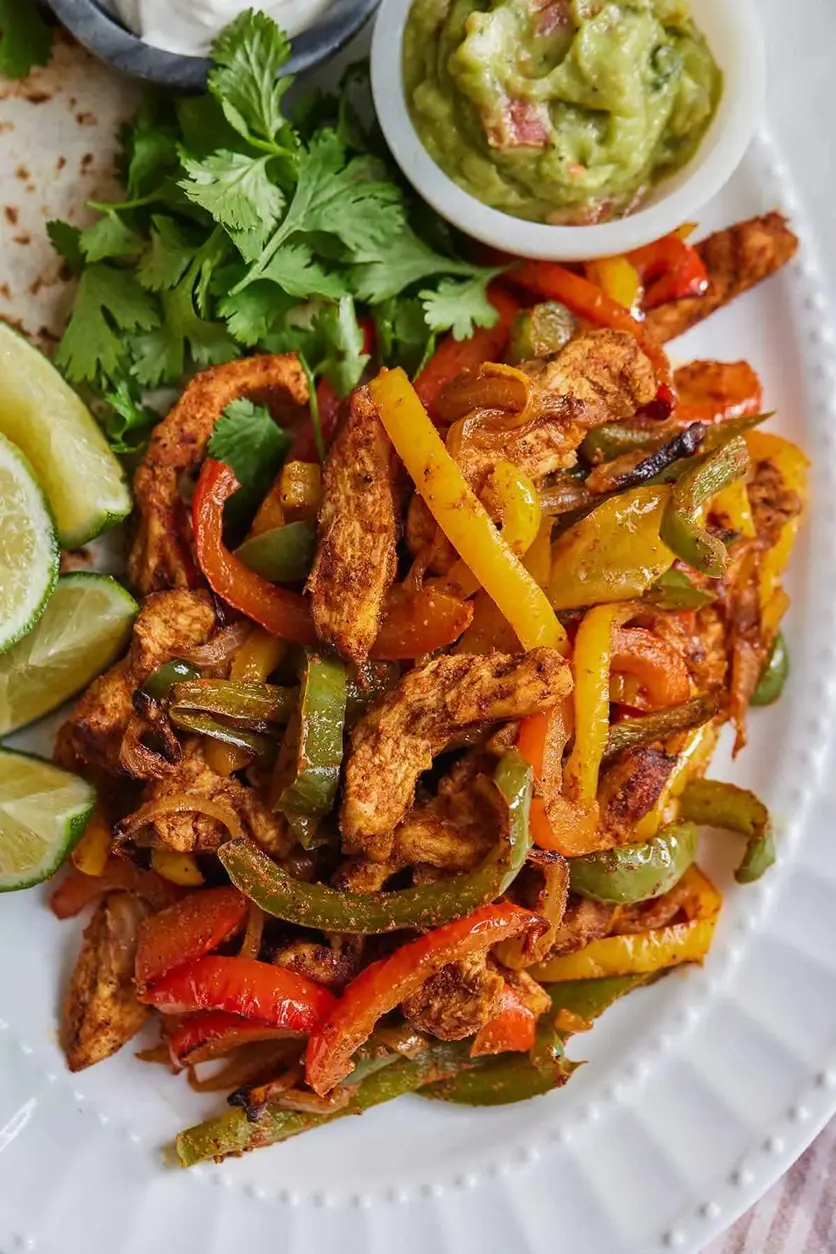
Quick & Easy Air Fryer Chicken Fajitas

Air Fryer Chicken Fajitas: Perfectly Seasoned and Quick

⚖️
Difficulty
Easy
⏲️
Prep Time
15 mins
🕒
Cook Time
20 mins
⏱️
Total Time
35 mins
🍽️
Servings
4

New York City is a melting pot of culinary influences, and I love discovering how different cuisines can be simplified for the busy home cook. My journey began in my mother’s kitchen in Marrakech, learning the magic of spices, and later, honing my technique in Parisian bistros. Now, living here in NYC, I’m always looking for ways to bring restaurant-quality meals to your table with minimal fuss. These air fryer chicken fajitas are a perfect example – they’re vibrant, incredibly flavorful, and so quick you’ll wonder why you ever made them any other way. Forget lengthy marinating or multiple pans; this recipe is about getting maximum flavor with an efficient, modern appliance, making it an absolute weeknight hero.

Imagine tender, perfectly cooked chicken strips mingling with sweet, slightly charred bell peppers and onions, all coated in a zesty, smoky spice blend that transports you straight to a fiesta. The air fryer creates a delightful texture, almost like a light char or sauté, locking in moisture and infusing every bite with flavor. The aroma alone, as the spices hit the hot air, is enough to make your mouth water, a testament to the simple yet effective seasoning I learned to master back home, a blend that I’ve adapted for this incredibly easy air fryer fajitas recipe. It’s a dish that’s as beautiful to look at as it is to eat, bursting with color and fresh flavors.

What sets these chicken fajitas recipe apart is its simplicity and speed, thanks to the air fryer. You don’t need to be a seasoned chef to achieve incredible results. I’ve refined this recipe to highlight the natural sweetness of the vegetables and the succulence of the chicken, without relying on excessive oil or complicated steps. I’ll share a pro tip on how to get perfectly cooked chicken every time, as well as a common mistake many home cooks make that can leave their fajitas dry. Get ready for your new go-to, fuss-free fajita experience!

Why This Air Fryer Chicken Fajitas Recipe Is the Best

The secret to these amazing fajitas in air fryer lies in a blend of spices that I learned from my mother, combined with the vibrant freshness of ingredients you can find at any New York City farmers market. My culinary training in Paris taught me the importance of balancing flavors and textures, and that’s precisely what I’ve done here. I use a specific combination of chili powder, paprika, cumin, onion powder, and garlic powder to create a deeply savory and slightly spicy profile, without any single spice overpowering the others. This thoughtful seasoning ensures that each bite is a harmonious symphony of flavors, making these air fryer chicken fajitas truly exceptional.

Achieving that perfect tender yet slightly crisp texture in your air fryer chicken fajitas is all about the precise cooking time and temperature. The air fryer circulates hot air efficiently, cooking the ingredients evenly and quickly. This method allows the vegetables to soften just enough to be pliable for wrapping, while still retaining a pleasant bite and their vibrant colors. The chicken cooks through rapidly, staying incredibly juicy. It’s a technique that I’ve perfected to ensure you get restaurant-quality results at home, transforming simple ingredients into a gourmet meal in under 35 minutes, truly making these some of the quick chicken fajitas you’ll ever make.

Making easy air fryer fajitas shouldn’t be intimidating. This recipe is designed for success, even if you’re new to air frying or cooking in general. The ingredient list is straightforward, and the steps are simple and clear. I’ve tested this recipe repeatedly to ensure it’s foolproof, minimizing the chances of common pitfalls like dry chicken or soggy vegetables. You’ll find that your air fryer does most of the work, delivering consistently delicious results with minimal effort, making it ideal for busy weeknights or casual entertaining. It’s the perfect dish to impress your friends and family without breaking a sweat.

Air Fryer Chicken Fajitas Ingredients

I love grabbing my produce from the Union Square Greenmarket here in NYC to ensure I have the freshest ingredients, but you can find these staple items at any grocery store. The beauty of these air fryer chicken fajitas is their simplicity – they rely on fresh produce and a well-balanced spice mix. If I’m in a pinch, I’ll sometimes use frozen bell pepper strips, but fresh always yields the best texture and flavor. For the spices, I always keep a good quality blend of chili powder, cumin, paprika, onion, and garlic powder on hand; they are the backbone of so many of my Moroccan-inspired dishes.

Ingredients List

  • 2 boneless skinless chicken breasts (about 1 lb), cut into 1/2-inch strips
  • 1 red bell pepper, cut into 1/4-inch slices
  • 1 yellow bell pepper, cut into 1/4-inch slices
  • 1 green bell pepper, cut into 1/4-inch slices
  • ½ yellow onion, cut into 1/4-inch slices
  • 2 tablespoons olive oil
  • 2 tsp chili powder
  • 1 tsp paprika
  • ½ tsp cumin
  • 1 tsp onion powder
  • 1 tsp garlic powder
  • 1 tsp salt
  • ½ tsp black pepper
  • 8-10 small flour or corn tortillas, warmed
  • Sour cream, for serving (optional)
  • Guacamole, for serving (optional)
  • Fresh cilantro, chopped, for garnish (optional)

Ingredient Spotlight

Chicken Breast: I prefer boneless, skinless chicken breast for its lean protein and quick cooking time. When selecting chicken breasts in the US, look for plump, firm pieces with a pale pink color. If you’re in a pinch, using boneless, skinless chicken thighs is also a great option; they tend to be more forgiving and stay moister, though they may take slightly longer to cook. The key is to cut them into uniform strips for even cooking in the air fryer.

Bell Peppers: The vibrant colors of red, yellow, and green bell peppers not only make these fajitas visually appealing but also contribute different levels of sweetness. When buying bell peppers in the US, choose ones that are firm, shiny, and free of bruises or soft spots. If you can’t find a specific color, don’t worry; any combination of the three will work beautifully. For a spicier kick, you could also add a sliced jalapeño or serrano pepper.

Spices: This is where the magic happens! The blend of chili powder, paprika, cumin, onion powder, and garlic powder creates that signature fajita flavor. For the best quality spices, I often visit specialty stores or ethnic markets here in NYC, but standard grocery store brands work well too. Look for spices that are fragrant and haven’t been sitting on the shelf for too long; fresher spices mean more potent flavor. This combination is so versatile; I use it in countless other dishes, making it a pantry staple.

Original IngredientBest SubstitutionFlavor / Texture Impact
Boneless, Skinless Chicken BreastsBoneless, Skinless Chicken ThighsThighs are more moist and tender, but cook slightly slower. May require a few extra minutes.
Yellow OnionRed Onion or ShallotsRed onion adds a slightly sweeter and sharper bite. Shallots are milder and more delicate.
Bell Peppers (any color)Zucchini or Yellow SquashSofter texture, less distinct flavor. Might need slightly less cooking time to avoid becoming mushy.
Chili PowderAncho Chili Powder or Smoked PaprikaAncho chili offers a deeper, fruitier chili flavor. Smoked paprika adds a pronounced smoky note.

How to Make Air Fryer Chicken Fajitas — Step-by-Step

Follow these simple steps for the quickest and most delicious fajitas in air fryer you’ve ever had!

Step 1: Prepare the Fajita Seasoning

In a small bowl, combine the chili powder, paprika, cumin, onion powder, garlic powder, salt, and black pepper. Whisk them together with a small fork until they’re well combined. This ensures that the seasoning is evenly distributed over your ingredients, giving you consistent flavor in every bite. Having a balanced spice blend is crucial for truly great fajitas.

💡 mia’s Pro Tip: Make a larger batch of this fajita seasoning and store it in an airtight container in your pantry. It’s perfect for sprinkling on grilled chicken, shrimp, or even roasted vegetables throughout the week, and it saves you time on busy nights!

Step 2: Season the Ingredients

In a large mixing bowl, add the chicken strips, sliced bell peppers, and sliced onion. Drizzle everything with the olive oil and toss gently with your hands or a spatula until all the ingredients are lightly coated. Then, sprinkle the prepared fajita seasoning over the mixture. Toss everything again thoroughly, making sure each piece of chicken and vegetable is evenly coated with the spices. This step is key to flavorful, quick chicken fajitas.

Step 3: Air Fry the Fajitas

Arrange the seasoned chicken, onion, and bell pepper mixture in a single layer in your air fryer basket. It’s important not to overcrowd the basket, as this can lead to steaming rather than frying, and uneven cooking. If necessary, you may need to cook in batches, depending on the size of your air fryer. This ensures that air can circulate properly around all the ingredients for that perfect crispy-tender result.

⚠️ Common Mistake to Avoid: Overcrowding the air fryer basket. This is the number one reason for unevenly cooked food and less crisp results. Always try to cook in a single layer. If you have a lot to cook, it’s better to do two smaller batches than one large, overloaded one. Your chicken and veggies will thank you for it!

Step 4: Finish Cooking and Toss

Cook at 350°F (175°C) for 16 to 20 minutes. To ensure everything cooks evenly, carefully remove the air fryer basket halfway through the cooking time, about 9 minutes in, and give it a good toss or shake. This helps to expose all sides of the chicken and vegetables to the hot air, promoting uniform browning and preventing any one side from overcooking. Continue cooking until all the chicken pieces have cooked through and are no longer pink inside.

Step 5: Serve

Once cooked, remove the fajita mixture from the air fryer. Serve immediately in warmed tortillas. Garnish generously with your favorite toppings like sour cream, guacamole, and fresh chopped cilantro. The warm tortillas, vibrant filling, and cool toppings create a perfect contrast in temperature and texture, making these some of the most delightful easy air fryer fajitas you’ll enjoy.

StepActionDurationKey Visual Cue
1Prepare Seasoning2 minsWell-combined spice mix
2Season Ingredients3 minsEvenly coated chicken and vegetables
3Air Fry (Initial Cook)9 minsBeginning to soften and lightly char
4Toss and Finish Cooking9 minsChicken cooked through, veggies tender-crisp
5Serve1 minPiled in warm tortillas, ready to be garnished

Serving & Presentation

For a truly authentic experience, I love warming my tortillas by quickly charring them over a gas flame (if you have one) or in a dry skillet. This adds a beautiful smoky aroma and a slightly crisp edge. When plating, I like to pile the vibrant fajita filling high in the center of a plate, with the warmed tortillas on the side, allowing everyone to build their own perfect fajita. It’s a casual, interactive way to serve the dish, much like you’d find at a lively spot in the West Village.

Garnishes are not just an afterthought; they elevate the entire dish! The cool, creamy tang of sour cream or a dollop of fresh guacamole provides a wonderful contrast to the warm, spiced filling. Sprinkle with freshly chopped cilantro for a burst of herbaceous freshness that reminds me of the herbs in my home country. This simple presentation makes these air fryer chicken fajitas feel special enough for guests, yet quick enough for a weeknight family meal.

Pairing TypeSuggestionsWhy It Works
Side DishBlack Beans, Mexican Rice, Corn SaladComplements the Tex-Mex flavors with hearty, classic companions.
Sauce / DipSalsa Roja, Queso Fresco, Lime CremaAdds moisture, acidity, and creamy texture to balance the spices.
BeverageMargarita, Mexican Lager, Iced TeaRefreshing drinks cut through the richness and spice.
GarnishChopped Cilantro, Sliced Jalapeños, Diced AvocadoAdds freshness, heat, and creamy, healthy fats.

Make-Ahead, Storage & Reheating

I often find myself relying on meal prep to navigate my busy life in New York. This recipe is fantastic for that! You can prep the spice mix and chop all the vegetables and chicken ahead of time, storing them separately in the refrigerator. Then, when you’re ready, simply toss them with oil and spices and air fry. Prepared fajita filling can also be made ahead, making for incredibly fast assembly.

MethodContainerDurationReheating Tip
RefrigeratorAirtight container3-4 daysReheat in the air fryer at 300°F for 3-5 mins or in a skillet until heated through.
FreezerFreezer-safe bag or container2-3 monthsThaw overnight in the refrigerator, then reheat as above. Best to reheat chicken separately from veggies for optimal texture.
Make-AheadComponent parts in separate containersUp to 2 days before cookingCombine ingredients, season, and air fry just before serving for best results.

When reheating, the key is to maintain the texture. I find that a quick toss in a hot skillet mimics the original cooking method best, bringing back a little crispness to the edges of the chicken and peppers. If using the air fryer again, a lower temperature for a shorter time is advisable to prevent drying out. Avoid microwaving if you can, as it tends to make the chicken rubbery and the vegetables soft.

Variations & Easy Swaps

VariationKey ChangeBest ForDifficulty Impact
Spicy SouthwesternAdd jalapeños, increase chili powder, add a pinch of cayenne.Heat lovers.Adds a bit more spice, requires managing heat levels.
Gluten-Free/Dairy-Free MakeoverUse corn tortillas, omit sour cream or use dairy-free alternative.Dietary restrictions.Easy swap, no significant change in cooking.
Citrus Herb TwistAdd lime zest to seasoning, finish with fresh lime juice and cilantro.Lighter, brighter flavor.Adds fresh flavor, no increased difficulty.

Spicy Southwestern

For those who love a bit of heat, I recommend adding one sliced jalapeño pepper (seeds removed for less heat) along with the other vegetables. You can also increase the chili powder to 2.5 tsp and add a pinch of cayenne pepper to the spice blend. This variation brings a fiery kick that’s incredibly satisfying, reminiscent of the bold flavors I experienced in some of the more adventurous restaurants in Manhattan.

Gluten-Free & Dairy-Free Makeover

Making these air fryer chicken fajitas gluten-free and dairy-free is a breeze. Simply ensure you use corn tortillas, which are naturally gluten-free. For dairy-free options, skip the sour cream or opt for a dairy-free alternative like coconut yogurt or cashew crema. I often find great dairy-free options at my local Whole Foods here in NYC, making it easy to adapt this recipe for various dietary needs without sacrificing flavor or texture.

Citrus Herb Twist

To add a refreshing twist, I love incorporating fresh citrus and herbs. Add the zest of one lime to the spice mix before tossing with the chicken and vegetables. Once the fajitas are cooked and ready to serve, a generous squeeze of fresh lime juice over the top, and a sprinkle of fresh cilantro, really brightens up the flavors. This simple addition offers a delightful lift, perfect for a summery meal, and reminds me of the fresh herbs abundant at the markets in Morocco during springtime.

How do you keep chicken fajitas from getting dry in the air fryer?

The key to keeping chicken fajitas moist in the air fryer is to avoid overcooking them and to not overcrowd the basket. Cut the chicken into uniform strips, toss them generously with oil and seasoning, and cook in a single layer. Check for doneness around the 16-minute mark for a 350°F cooking temperature; chicken should be just cooked through. Using chicken thighs instead of breasts can also help with moisture, as they are more forgiving. Another tip is to ensure your vegetables are also tossed with oil, as they release moisture during cooking that helps keep the chicken from drying out.

Can you use frozen chicken for air fryer chicken fajitas?

Generally, it’s not recommended to cook raw chicken directly from frozen in an air fryer for recipes like fajitas. Frozen chicken will cook unevenly, potentially leaving the inside raw while the outside is overcooked or dry. It’s best to thaw your chicken completely in the refrigerator overnight before preparing your fajitas. If you’re in a real pinch and have frozen vegetables, ensure they are thawed and patted dry before adding them to the seasoned chicken. For safety and best results, always cook chicken from a thawed state.

What is the best temperature and time for air fryer chicken fajitas?

For optimal results with these air fryer chicken fajitas, I recommend a temperature of 350°F (175°C). This temperature allows the chicken to cook through and become tender without becoming dry, while also softening the vegetables to a perfect tender-crisp consistency. The cooking time typically ranges from 16 to 20 minutes. Remember to toss or shake the basket halfway through (around 9 minutes) to ensure even cooking and browning. Always check for doneness with a food thermometer; chicken should reach an internal temperature of 165°F (74°C).

What vegetables go best in air fryer chicken fajitas?

The classic trio of red, yellow, and green bell peppers along with yellow onion are fantastic for their color, sweetness, and texture when cooked in the air fryer. However, feel free to experiment! Sliced jalapeños add a welcomed heat, while sliced poblano peppers offer a milder, earthy flavor. Mushrooms, when sliced and added, can also provide a nice umami depth. For a slightly different texture, you could even add some sliced zucchini or sweet potato, though these might require a slightly adjusted cooking time to ensure they become tender without getting mushy.

Can I marinate the chicken for these fajitas?

While this recipe is designed for speed and relies on a dry spice blend, you absolutely can marinate the chicken if you have extra time. A simple marinade of lime juice, olive oil, and the fajita spices would work wonders. Marinating for at least 30 minutes, or up to 4 hours in the refrigerator, will infuse the chicken with more flavor and help tenderize it further. Just be sure to drain off excess marinade before adding the chicken and vegetables to the air fryer to prevent excess liquid from causing steaming.

How do I get crispy edges on the vegetables?

To achieve those desirable crispy edges on the vegetables, ensure you’re not overcrowding the air fryer basket. The hot air needs to circulate freely around each piece. Also, make sure that your vegetables are cut into consistent, thin slices (around 1/4-inch thick) so they cook evenly. Tossing them well with oil and spices is crucial. For an even crispier outcome, you can try cooking the vegetables in a separate batch after the chicken, as they might require slightly less cooking time to achieve that perfect char.

What kind of tortillas work best for air fryer chicken fajitas?

Both flour and corn tortillas work wonderfully for these air fryer chicken fajitas! Flour tortillas are soft and pliable, making them easy to roll or fold around your filling, and they absorb the flavors beautifully. Corn tortillas offer a slightly firmer texture and a distinct, earthy flavor that pairs exceptionally well with Tex-Mex dishes. For the best experience, I always recommend warming them before serving – a quick zap in the microwave, a few seconds in a dry skillet, or even a quick pass over a gas flame can make a world of difference in texture and aroma.

Can I add other proteins to this recipe?

Absolutely! This air fryer chicken fajitas recipe is incredibly versatile. Shrimp cooks even faster in the air fryer, so you might want to add them for the last 5-8 minutes of cooking or cook them in a separate batch to avoid overcooking. Thinly sliced steak (like flank or skirt steak) also works well; it usually cooks in a similar timeframe to chicken. For a vegetarian option, use firm tofu or even hearty vegetables like cauliflower florets or cubed sweet potatoes. Just adjust cooking times as needed for different proteins.

Share Your Version!

I truly hope you love making and eating these air fryer chicken fajitas as much as I do! If you give this recipe a try, please consider leaving a star rating and a comment below to share your experience. Your feedback helps me and other cooks immensely! If you’re sharing photos on social media, be sure to tag me on Instagram or Pinterest @chefrecipes2. I absolutely adore seeing how your creations turn out! What’s one spice you would consider adding to my base seasoning for an even more unique flavor profile?

From my NYC kitchen to yours — I hope this recipe brings as much warmth to your table as it does to mine. — mia 🧡

📌

Love This Recipe? Save It to Pinterest!

If you enjoyed this Air Fryer Chicken Fajitas recipe, don’t let it get lost in your browser tabs! 😄 Pin it now so you can find it again anytime — and explore hundreds more tried-and-tested recipes waiting for you on my Pinterest boards.

👉 Follow mia on Pinterest @chefrecipes2

📌 Pin this recipe · 🔁 Re-pin your favorites · 💬 Tag me when you make it — I love seeing your creations!

Print

clock clock iconcutlery cutlery iconflag flag iconfolder folder iconinstagram instagram iconpinterest pinterest iconfacebook facebook iconprint print iconsquares squares iconheart heart iconheart solid heart solid icon

Air Fryer Chicken Fajitas

  • Author: Chef Mia

Description

These chicken fajitas come together quickly and easily in an air fryer with just a few simple ingredients. This easy air fryer recipe features perfectly seasoned chicken breast strips, colorful bell peppers, and onions, just like what youd get at a restaurant but at a fraction of the price and a few minutes of preparation. You wont believe just how simple it is to make!


Ingredients

Scale
  • 2 boneless skinless chicken breasts (cut into strips)
  • 1 red bell pepper (cut into 1/4" slices)
  • 1 yellow bell pepper (cut into 1/4" slices)
  • 1 green bell pepper (cut into 1/4 slices)
  • ½ yellow onion (cut into 1/4 slices)
  • 2 tsp chili powder
  • 1 tsp paprika
  • ½ tsp cumin
  • 1 tsp onion powder
  • 1 tsp garlic powder
  • 1 tsp salt
  • ½ tsp black pepper
  • tortillas
  • sour cream
  • guacamole

Instructions

  1. In a small bowl add the spices together and mix with a small fork to make the fajita seasoning.
  2. In a large mixing bowl add the chicken, onion, and bell pepper. Drizzle with olive oil and then toss. Add the seasoning and then toss again until everything is evenly coated.
  3. Add the seasoned chicken, onion, and bell pepper to the air fryer basket
  4. Cook at 350 F for 16 to 20 minutes, until all of the chicken pieces have cooked through. Remove basket and toss half way through the cooking time, at about 9 minutes.
  5. Serve the fajitas in tortillas and garnish with sour cream, chopped cilantro, and guacamole.


Nutrition

  • Calories: 407 kcal
  • Sugar: 6 g
  • Fat: 18 g
  • Carbohydrates: 45 g
  • Protein: 20 g


Air Fryer Chicken Fajitas

k">

Tried This Recipe? Leave a Comment!

Did you make this recipe? I’d love to hear how it turned out! Please leave a comment and a rating below. Your feedback helps other home cooks and supports cheerychop.com!

For more delicious inspiration, follow me on Pinterest!
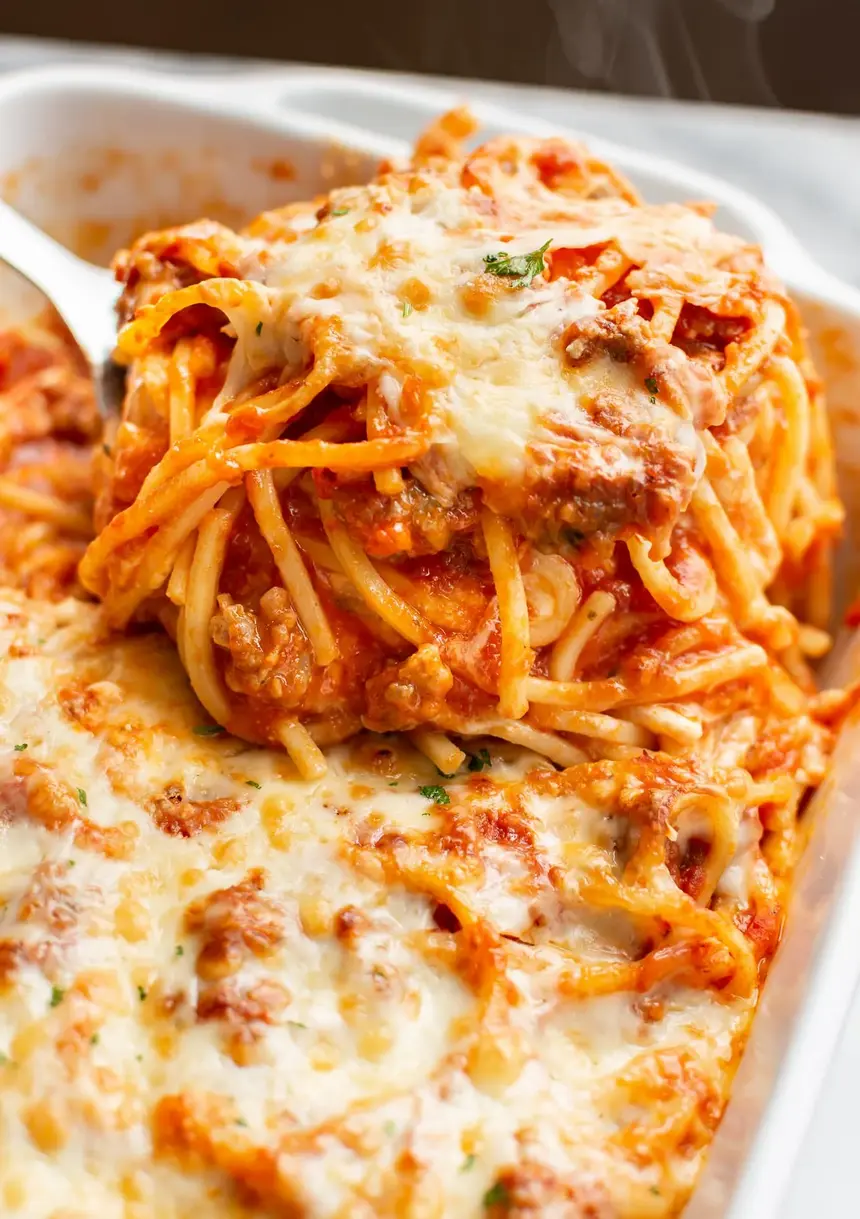
Million Dollar Spaghetti – Cheesy Italian Sausage Bake

Million Dollar Spaghetti Creamy Baked Spaghetti Loaded with Cheese

⚖️
Difficulty
Easy
⏲️
Prep Time
20

mins

🕒
Cook Time
45

mins

⏱️
Total Time
65

mins

🍽️
Servings
8-10

When I first moved to New York City, I was looking for a dish that felt like a warm hug from home, something familiar yet elevated enough for a weekend dinner. This Million Dollar Spaghetti recipe is exactly that. It’s that kind of baked spaghetti casserole that promises more than just a meal; it promises an experience. Think layers of perfectly cooked pasta, a rich, savory Italian sausage and marinara sauce, all enveloped in a dreamy, creamy cheese filling that makes you understand why it’s called “million dollar.” It’s an easy spaghetti bake that will soon become a staple in your home, just as it has in mine.

The aroma that fills your kitchen as this dish bakes is simply divine – a complex blend of simmering tomatoes, savory sausage, and melting cheese. Each forkful is a symphony of textures: the slight bite of the al dente spaghetti, the smooth richness of the ricotta and cream cheese mixture, and the glorious gooiness of the melted mozzarella on top. It’s like a deconstructed lasagna in spaghetti form, but so much simpler to assemble. I often think of the spices my mother used in Morocco, the way she would layer flavors carefully – this recipe does that, almost intuitively, with Italian staples.

What makes this particular million dollar spaghetti recipe stand out is its incredibly decadent yet surprisingly achievable cheese layer. It’s not just ricotta; it’s a specific blend that provides unparalleled creaminess and flavor depth. While many baked spaghetti recipes can be a bit one-note, I’ve perfected this one to ensure every bite is an explosion of flavor and luxurious texture. I’ll share a pro tip that makes all the difference, and also point out a common mistake that can leave your casserole a bit dry, so you can achieve absolute perfection on your first try!

Why This Million Dollar Spaghetti Recipe Is the Best

The secret to why this Million Dollar Spaghetti is truly the “best” lies in that luscious, creamy cheese filling. It’s a blend of softened cream cheese, ricotta, parmesan, and a touch of garlic powder and oregano that creates a layer of pure indulgence. My French pastry training in Paris taught me the importance of balancing richness with flavor, and this cheese layer is the perfect example – it’s decadent without being heavy. This elevates it far beyond a simple baked spaghetti, making it worthy of its name.

Achieving that perfect texture is all about the pasta cooking time. I learned from my culinary instructors that overcooked pasta is the enemy of any baked dish. That’s why I instruct you to cook the spaghetti two minutes *less* than the package directions. This par-cooking ensures that when it bakes in the sauce, it finishes perfectly al dente, never mushy. This small detail, so crucial in professional kitchens, guarantees a superior texture in your finished million dollar spaghetti casserole.

For anyone intimidated by complex recipes, this easy spaghetti bake is your new best friend. It involves simple steps that anyone can follow, making it perfect for weeknight dinners or casual entertaining. The layering is straightforward, and the baking process is forgiving. Even if your layers aren’t perfectly defined (which they often aren’t when it’s piping hot!), the taste will be out of this world. It’s a foolproof way to impress, and it’s incredibly adaptable to your pantry staples.

[Main Keyword] Ingredients

When I’m in NYC, I love grabbing my Italian sausage from the butcher in the West Village and fresh parmesan from Murray’s Cheese. My mother’s pantry in Morocco always had wonderful spices, and I bring that same care to selecting my ingredients here. This recipe calls for simple, high-quality ingredients that come together beautifully. It’s a testament to how basic elements can create something truly extraordinary, a philosophy I learned both at home and in Paris.

Ingredients List

  • 1 pound uncooked spaghetti
  • 1 pound Italian sausage (mild or hot, your preference!)
  • 1/2 medium onion (chopped)
  • 4 cloves garlic (minced)
  • 1/2 teaspoon red pepper flakes (optional, for a little kick)
  • 2 (24 ounce) jars marinara sauce
  • 2 cups shredded mozzarella cheese
  • Salt & pepper (to taste)
  • 8 ounces cream cheese (1 block, softened)
  • 8 ounces ricotta cheese
  • 1 cup freshly grated parmesan cheese
  • 1/2 teaspoon garlic powder
  • 1/2 teaspoon dried oregano

Ingredient Spotlight

Italian Sausage: This is the flavor powerhouse of our baked spaghetti casserole. I prefer using a good quality Italian sausage, either mild or hot, depending on my mood. You can find excellent options at any local butcher shop or the meat counter of your grocery store. If you can’t find bulk Italian sausage, you can always use sausage links, just slice them open and remove the casing before cooking.

Ricotta Cheese: Ricotta adds a delicate creaminess and a slightly granular texture that’s so characteristic of great Italian dishes. While whole milk ricotta will give you the richest flavor, part-skim works perfectly fine. In a pinch, if you don’t have ricotta, you can try using an equal amount of well-drained cottage cheese, though the texture will be a bit different, less smooth and delicate.

Marinara Sauce: This forms the liquid base for our pasta and sauce mixture. Opt for a good-quality store-bought marinara to save time, or if you have a favorite homemade recipe, now is the time to use it! Look for marinara sauce that doesn’t have too much added sugar. If your sauce is a bit thin, you might need to reduce it slightly by simmering it for a few extra minutes after you’ve combined it with the sausage and pasta.

Original IngredientBest SubstitutionFlavor / Texture Impact
Italian SausageGround Beef or Turkey + Italian SeasoningLess rich, slightly different savory notes. Add extra herbs.
Ricotta CheeseCottage Cheese (well-drained)Texture will be less smooth, more curdy. Flavor is similar.
Marinara SauceCrushed Tomatoes + Garlic Powder + Onion Powder + HerbsNeeds more seasoning, will be less complex but still flavorful.

How to Make Million Dollar Spaghetti — Step-by-Step

Don’t worry about perfect layers; focus on getting those delicious flavors in every bite!

Step 1: Preheat Oven

Preheat your oven to 375°F (190°C) and move the oven rack to the top third of the oven. This placement ensures a nice, golden-brown crust on top.

💡 mia’s Pro Tip: Preheating your oven properly is essential for even baking. A slightly elevated rack helps the cheese on top bubble and brown beautifully without burning the bottom.

Step 2: Prepare Cheese Filling

In a medium bowl, combine the softened cream cheese, ricotta cheese, grated parmesan cheese, garlic powder, and dried oregano. Stir them together until you’ve got a nice, smooth mixture. Set aside. This is the heart of our creamy baked spaghetti.

Step 3: Cook Spaghetti

Boil a large, salted pot of water for the pasta. Cook the spaghetti 2 minutes less than the package directions suggest (aim for al dente). Once it’s done, drain it and add it back to the same pot it was cooked in. This prevents it from becoming mushy during baking.

⚠️ Common Mistake to Avoid: Do not overcook your spaghetti! Cooking it al dente is crucial. It will continue to cook in the oven, and overcooked pasta will result in a mushy casserole.

Step 4: Brown Sausage and Onions

Meanwhile, in a large skillet, add the Italian sausage meat and the chopped onion. Cook over medium-high heat, breaking the meat up with a spoon as you go along, for about 10 minutes, or until the sausage is fully browned and cooked through.

Step 5: Add Garlic and Seasoning

To the skillet with the sausage and onions, stir in the minced garlic and red pepper flakes (if using). Cook for about 1 minute, until fragrant. Spoon out any excess fat from the pan to keep the bake from being too greasy.

Step 6: Combine Pasta, Sauce, and Meat

Add the browned sausage and onion mixture to the pot that has the drained spaghetti. Pour in both jars of marinara sauce. Toss everything together until well coated. I find tongs work best for this, ensuring every strand of pasta gets dressed in that delicious sauce.

Step 7: Layer Casserole Base

Spread about half of the pasta and sauce mixture into a 9×13 baking dish, then spread it in an even layer. This forms the base of our easy spaghetti bake.

Step 8: Add Cheese Filling

Carefully spread the prepared cheese mixture evenly over the pasta and sauce layer. This step can get a little messy – don’t worry about it being perfectly smooth; it doesn’t have to be done perfectly. Its beauty is in its creamy richness, not its presentation at this stage.

💡 mia’s Pro Tip: Soften your cream cheese at room temperature for at least 30 minutes, or give it a quick zap in the microwave (15-20 second intervals) to ensure it mixes smoothly with the ricotta and other cheeses. Lumps in the cheese layer are not ideal!

Step 9: Finish Layering and Top with Cheese

Add the remaining pasta and sauce mixture and spread it out evenly over the cheese layer. Finally, top the entire casserole with the shredded mozzarella cheese. Make sure to cover all the edges for maximum gooeyness.

Step 10: Bake and Broil

Cover the baking dish tightly with foil and bake for 30 minutes. After 30 minutes, remove the foil and broil for 3-5 minutes, watching it *very* carefully, until the cheese is bubbly and beautifully browned. This gives it that irresistible golden finish.

⚠️ Common Mistake to Avoid: Broiling too long can quickly turn your cheese from golden brown to burnt black. Keep a close eye on it during these last few minutes!

Step 11: Rest and Serve

Let the casserole sit for 5-10 minutes before cutting into individual portions. This resting period is crucial for allowing the layers to set slightly, making it easier to serve. Season with salt and pepper if needed, though the sausage and cheese usually provide plenty of flavor.

StepActionDurationKey Visual Cue
1Preheat Oven~10-15 minsOven at 375°F (190°C)
2Prepare Cheese Filling~5 minsSmooth, combined cheese mixture
3Cook Spaghetti~10-12 minsAl dente pasta
4Brown Sausage & Onions~10 minsBrowned sausage, softened onions
5Add Garlic & Seasoning~1 minFragrant garlic
6Combine Pasta, Sauce & Meat~2 minsEvenly coated pasta
7Layer Casserole Base~2 minsEven layer in dish
8Add Cheese Filling~3 minsEvenly spread cheese layer
9Finish Layering & Top with Cheese~2 minsEven pasta layer, fully covered with mozzarella
10Bake and Broil30 mins bake + 3-5 mins broilBubbly, golden-brown cheese
11Rest and Serve5-10 minsSlightly set layers

Serving & Presentation

Serving this Million Dollar Spaghetti is all about embracing its comforting, generous nature. I like to serve it directly from the baking dish, scooping generous portions onto each plate. A sprinkle of fresh parsley or basil can add a lovely pop of color and freshness. If you find the layers are a bit mixed after baking, don’t fret! The taste is what truly matters, and its deliciousness will shine through.

For a classic New York Italian experience, I love pairing this baked spaghetti casserole with a crisp arugula salad dressed in a light lemon vinaigrette. The peppery greens cut through the richness of the pasta and cheese beautifully. A side of garlic bread is, of course, always a welcome addition, perfect for soaking up any extra sauce. For beverages, a medium-bodied red wine like a Chianti or a Sangiovese from Italy pairs wonderfully.

Pairing TypeSuggestionsWhy It Works
Side DishArugula Salad, Steamed Broccoli, Garlic BreadBalances richness, adds freshness, or provides extra vehicle for sauce.
Sauce / DipExtra Marinara, Roasted Red Pepper DipEnhances the tomato flavor or introduces a new sweet and smoky element.
BeverageChianti, Sangiovese, Fruity White Wine, Sparkling WaterAcidity cuts richness, fruitiness complements sauce, bubbles cleanse the palate.
GarnishFresh Parsley, Fresh Basil, Grated ParmesanAdds color, fresh aromatic notes, and an extra layer of savory flavor.

Make-Ahead, Storage & Reheating

As a busy New Yorker, I rely on make-ahead meals, and this Million Dollar Spaghetti is perfect for it. You can assemble the entire casserole (up to adding the final mozzarella layer) a day in advance. Store it covered in the refrigerator, and add the mozzarella just before baking. It’s a lifesaver for weeknight dinners or potlucks!

MethodContainerDurationReheating Tip
RefrigeratorAirtight container or covered baking dish3-4 daysReheat individual portions in the microwave or oven until heated through.
FreezerFreezer-safe container or plastic wrap & foil2-3 monthsThaw overnight in the refrigerator, then reheat as above. For best results, reheat from thawed.
Make-AheadAssemble in baking dish, cover tightlyUp to 24 hours in advanceAdd final mozzarella layer just before baking. May need a few extra minutes in the oven.

When reheating leftovers, I often find that placing the casserole in a 350°F (175°C) oven, covered, for about 20-25 minutes works best to ensure it’s heated through evenly without drying out. If you’re in a hurry, the microwave is perfectly acceptable, just ensure you cover it to trap steam. The cheese might not be as perfectly melty as the first time, but the flavors will still be fantastic!

Variations & Easy Swaps

VariationKey ChangeBest ForDifficulty Impact
Spicy Italian SausageUse hot Italian sausage, add extra red pepper flakesThose who love a kickMinimal; ensures balanced spice.
Gluten-Free & Dairy-FreeGluten-free pasta, dairy-free cheese/cream cheese alternativesDietary needsModerate; requires careful ingredient selection.
Seasonal Veggie BoostAdd sautéed mushrooms, spinach, or zucchiniAdding more nutrientsEasy; requires extra sautéing step.

Spicy Italian Sausage Variation

For those who enjoy a bit of heat, switching to hot Italian sausage is a simple yet effective way to bring this Million Dollar Spaghetti recipe to life. You can also amp up the spice by adding an extra pinch of red pepper flakes along with the garlic. This variation is perfect for when you want to add an exciting twist to a classic comfort food, reminiscent of the bold flavors found in some Moroccan tagines.

Gluten-Free & Dairy-Free Adaptations

Making this recipe gluten-free is straightforward: simply swap out the traditional spaghetti for your favorite gluten-free pasta. For a dairy-free version, use a plant-based cream cheese alternative and dairy-free ricotta or a cashew-based cheese sauce. Top with shredded dairy-free mozzarella. While the texture and richness might differ slightly, it’s a fantastic option for those with dietary restrictions, tested and approved by me!

Seasonal Veggie Boost

I love the idea of incorporating seasonal vegetables, much like we do at home in Morocco. In the fall, sautéed mushrooms and onions are wonderful. In the spring, fresh spinach or asparagus could be wilted into the sauce. Just ensure they are cooked before adding to the casserole so they don’t release too much water. This adds extra nutrients and a fresh, vibrant flavor to your baked spaghetti.

What is million dollar spaghetti made of?

Million Dollar Spaghetti is a decadent baked spaghetti casserole made with layers of cooked spaghetti, a hearty meat sauce (typically Italian sausage and marinara), and a rich, creamy cheese filling that often includes cream cheese, ricotta, and parmesan. It’s then topped with more cheese and baked until bubbly and golden. The “million dollar” comes from its exceptionally rich and satisfying taste and texture.

Can you make million dollar spaghetti ahead of time?

Yes, absolutely! This million dollar spaghetti recipe is fantastic for making ahead. You can assemble the entire casserole up to the point of adding the final mozzarella layer, cover it tightly, and refrigerate it for up to 24 hours. Before baking, add the mozzarella and then bake as directed, adding a few extra minutes to the oven time to account for it being chilled. It’s a perfect make-ahead meal for busy schedules.

What can I substitute for cream cheese in million dollar spaghetti?

If you’re out of cream cheese or have a dietary restriction, you have a few good substitution options for this creamy baked spaghetti. Mascarpone cheese offers a similar richness and tang. A thick, full-fat plain Greek yogurt can also work, but it will make the filling slightly less dense and richer. For a dairy-free version, use a high-quality plant-based cream cheese alternative specifically formulated for cooking.

How long do you bake million dollar spaghetti?

Typically, this easy spaghetti bake is covered and baked in a preheated oven at 375°F (190°C) for about 30 minutes. After that, the foil is removed, and it’s broiled for a few minutes (3-5 minutes, watching closely!) until the cheese on top is bubbly and beautifully golden brown. The total baking and broiling time ensures everything is heated through and the flavors meld perfectly.

Can I use different types of pasta for this baked spaghetti casserole?

Yes, you can definitely use different pasta shapes in your Million Dollar Spaghetti! While spaghetti or linguine are classic, shapes like penne, rigatoni, rotini, or even ziti work wonderfully. Just make sure to cook them al dente, about 2 minutes less than the package instructions, as they will continue to cook in the oven. The key is a shape that holds sauce well and fits nicely in the baking dish.

What kind of sausage is best for Million Dollar Spaghetti?

The best sausage for this recipe is Italian sausage, which is readily available in both mild and hot varieties. Italian sausage provides a fantastic savory base with a blend of herbs and spices that complements the marinara sauce beautifully. If you’re sensitive to spice, opt for mild. If you enjoy a little heat, hot Italian sausage adds an extra layer of flavor and warmth to the dish. You can also grind your own if you prefer.

Why is my baked spaghetti casserole watery?

A watery baked spaghetti casserole can often be due to a few factors. Firstly, if your marinara sauce (or any added vegetables) released too much liquid during cooking. Make sure to drain excess fat from your sausage and cook down your sauce slightly if it seems very thin. Additionally, not cooking the spaghetti quite al dente enough can lead to it absorbing less sauce and contributing to a watery texture after baking. Ensure your oven is hot and bake uncovered for the last bit.

Can I add vegetables to my Million Dollar Spaghetti?

Absolutely! Adding vegetables is a great way to boost the nutritional value and flavor of your Million Dollar Spaghetti. Sautéed mushrooms, finely chopped bell peppers, onions (besides what’s in the sauce), zucchini, or even a layer of spinach can be incorporated. The key is to sauté them until tender and any excess moisture has evaporated before adding them to the pasta sauce mixture. This prevents the casserole from becoming too watery and adds delicious depth.

Share Your Version!

I truly hope you adore this Million Dollar Spaghetti as much as I do. When you make it, please consider leaving a star rating and a comment below to share your experience! If you snap a photo, I’d be thrilled to see it – tag me on Instagram or Pinterest @exorecipes. I’m always curious to hear how you adapt recipes – what’s your favorite cheese or sausage combination for this dish?

From my NYC kitchen to yours — I hope this recipe brings as much warmth to your table as it does to mine. — mia 🧡

📌

Love This Recipe? Save It to Pinterest!

If you enjoyed this Million Dollar Spaghetti recipe, don’t let it get lost in your browser tabs! 😄 Pin it now so you can find it again anytime — and explore hundreds more tried-and-tested recipes waiting for you on my Pinterest boards.

👉 Follow mia on Pinterest @chefrecipes2

📌 Pin this recipe · 🔁 Re-pin your favorites · 💬 Tag me when you make it — I love seeing your creations!

Print

clock clock iconcutlery cutlery iconflag flag iconfolder folder iconinstagram instagram iconpinterest pinterest iconfacebook facebook iconprint print iconsquares squares iconheart heart iconheart solid heart solid icon

Million Dollar Spaghetti

  • Author: Chef Mia

Description

This million dollar spaghetti recipe has tons of Italian sausage, marinara sauce, and an irresistible cheese filling. It’s then topped with even more cheese and baked to golden perfection!


Ingredients

Scale
  • 1 pound uncooked spaghetti
  • 1 pound Italian sausage (see note)
  • 1/2 medium onion (chopped)
  • 4 cloves garlic (minced)
  • 1/2 teaspoon red pepper flakes (optional)
  • 2 (24 ounce) jars marinara sauce
  • 2 cups shredded mozzarella cheese
  • Salt & pepper (to taste)
  • 8 ounces cream cheese (1 block Philly) (softened)
  • 8 ounces ricotta cheese
  • 1 cup freshly grated parmesan cheese
  • 1/2 teaspoon garlic powder
  • 1/2 teaspoon dried oregano

Instructions

  1. Preheat your oven to 375F and move the rack to the top third of the oven.
  2. In a medium bowl, add the cheese layer ingredients and stir them together until you've got a nice, smooth mixture. Set aside.
  3. Boil a large, salted pot of water for the pasta and cook it 2 minutes less than package directions suggest. Once it's done, drain it and add it back to the same pot it was cooked in.
  4. Meanwhile, add the sausage meat to a skillet, along with the onion. Cook over medium-high heat, breaking the meat up as you go along, for about 10 minutes or until browned and cooked through.
  5. To the skillet, stir in the garlic and red pepper flakes and cook for about a minute. Spoon out excess fat from the pan.
  6. Add the skillet mixture to the pot that has the pasta in it, and then pour in the marinara sauce. Toss until everything is coated (this is easiest to do with tongs or two large spoons).
  7. Add half the pasta/sauce mixture to a 9×13 baking dish, then spread it in an even layer.
  8. Spread the cheese layer evenly over the pasta/sauce layer. This step can get a little messy. It doesn't have to be done perfectly.
  9. Add the remaining pasta/sauce mixture and spread it out evenly, then top the casserole with the mozzarella cheese.
  10. Cover the casserole dish with foil and bake for 30 minutes, then remove the foil and broil for a few minutes (watch it carefully) until the cheese is bubbly and browned.
  11. Let the casserole sit for 5-10 minutes, then use a spatula to cut it into individual portions. Season with salt & pepper if needed. Note: Especially when it's still hot, you won't get nice, even squares with a perfectly even cheese layer. It'll mix together a bit, but I went for plenty of sauce (especially so leftovers aren't dry).


Nutrition

  • Calories: 742 kcal
  • Sugar: 10 g
  • Fat: 42 g
  • Carbohydrates: 58 g
  • Protein: 33 g


Million Dollar Spaghetti

ph">For more delicious inspiration, follow me on Pinterest!
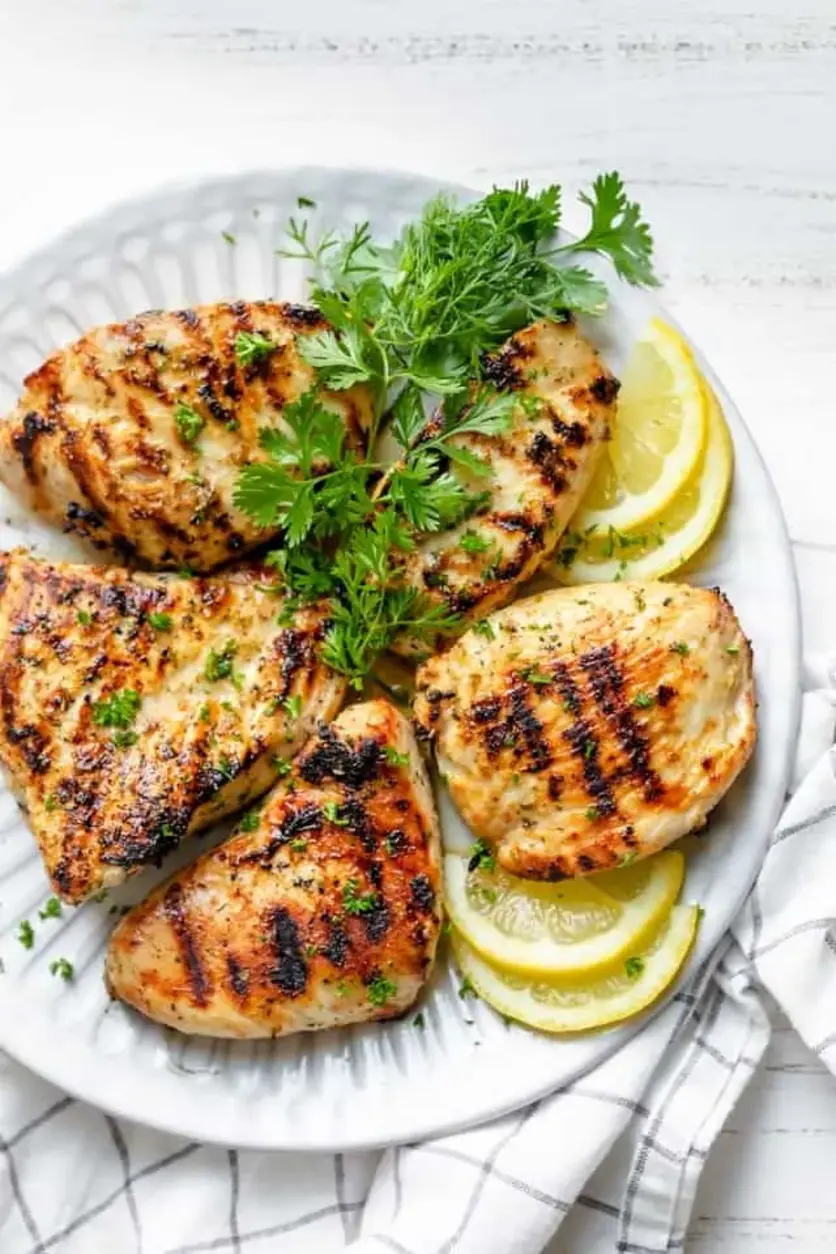
Juicy Grilled Lemon Chicken – Mediterranean Style

Grilled Lemon Chicken with Easy Herb Marinade – A Summer Essential

⚖️
Difficulty
Easy
⏲️
Prep Time
10

mins

🕒
Cook Time
12

mins

⏱️
Total Time
42

mins

🍽️
Servings
4

There’s something truly magical about the aroma of grilled chicken wafting through the air on a warm evening, isn’t there? It always takes me back to my childhood in Morocco, where simple, fresh ingredients were transformed into feasts with just a touch of fire. This Grilled Lemon Chicken recipe, with its vibrant Mediterranean flavor profile, captures that essence perfectly. It’s incredibly tender, juicy, and bursting with bright, zesty notes that make it an absolute highlight of any summer gathering. I’ve spent years refining this marinade, drawing inspiration from my mother’s spice blends and my French culinary training to create a dish that is both comforting and elegantly simple. This is my go-to for an easy grilled chicken recipe that never fails to impress.

Imagine this: perfectly charred chicken breasts, their surfaces glistening with a light, herbaceous marinade, offering a tender interior that melts in your mouth. The interplay of tangy lemon, pungent garlic, and aromatic oregano creates a symphony of flavors that is both refreshing and deeply satisfying. It’s a dish that screams summer – al fresco dining, light breezes, and good company. The beauty of this recipe lies in its simplicity; it celebrates the natural flavors of high-quality ingredients, enhanced by the smoky char from the grill. This is a truly healthy grilled chicken option that doesn’t compromise on taste, keeping things light yet flavorful.

What sets my Lemon Herb Grilled Chicken apart is the balance of acidity and aromatics in the marinade, ensuring the chicken stays incredibly moist. I’ll share a little secret about achieving that perfect sear without drying out the delicate breast meat, something I learned during my pastry training where precision is key, even for savory dishes! You’ll also learn about one common mistake that can turn your juicy chicken into a dry, disappointing meal. Get ready to elevate your grilling game with this absolutely foolproof and delicious recipe.

Why This Grilled Lemon Chicken Recipe Is the Best

My unique angle with this Lemon Herb Grilled Chicken lies in the harmony of classic Mediterranean flavors, elevated by a touch of Parisian technique. The marinade isn’t just a blend of ingredients; it’s a carefully balanced emulsion designed to tenderize and infuse the chicken with bright citrus and fragrant herbs, a method I refined at culinary school in Paris. This approach ensures that every bite is a burst of sunshine, reminiscent of the coastal flavors of my homeland, Morocco, adapted for the vibrant food scene right here in New York City.

Achieving that perfect, juicy texture is paramount, and with this recipe, it’s surprisingly foolproof. We focus on even thickness of the chicken breasts and precise grilling times. This isn’t just about cooking chicken; it’s about honoring the protein. I’ll guide you on finding that sweet spot on the grill, ensuring a beautiful golden-brown exterior and a succulent, tender interior every single time. It’s a technique that brings restaurant-quality results to your backyard barbecue, making it a standout easy grilled chicken recipe.

This recipe is designed for the busy home cook who craves flavorful, healthy meals without the fuss. The marinade comes together in minutes, and the grilling process is quick and straightforward. You can even prep the marinade ahead of time, making it a weeknight winner. It’s a testament to the fact that healthy eating doesn’t mean boring food, and that simple ingredients, handled with a little care and know-how, can create something truly spectacular. This is truly the best lemon chicken marinade you’ll ever try.

Grilled Lemon Chicken Ingredients

Here in NYC, I love sourcing fresh produce from the Union Square Greenmarket, but you can find excellent quality ingredients at any good grocery store. This recipe calls for simple, wholesome components that let the natural flavors shine. It’s the kind of meal my mother would make on a breezy afternoon, and I’m thrilled to share it with you.

Ingredients List

  • 4 (6-ounce) boneless, skinless chicken breasts
  • ¼ cup extra virgin olive oil
  • 1 large lemon (zest and juice – about 3 tablespoons juice)
  • 4 cloves garlic, minced
  • 1 tablespoon dried oregano
  • ¾ teaspoon sea salt
  • ½ teaspoon freshly ground black pepper
  • Fresh parsley, chopped (for serving)
  • Lemon wedges (for serving)

Ingredient Spotlight

Chicken Breasts: I always opt for good quality, antibiotic-free chicken breasts. For this recipe, aiming for breasts that are roughly the same thickness ensures even cooking. If they are very thick, pounding them gently to a uniform ½-inch thickness is a step that pays dividends in tender, juicy results. Look for bright white, plump breasts at your local butcher or supermarket.

Lemon: Fresh lemon juice and zest are non-negotiable for that bright, authentic Mediterranean flavor. The zest contains the lemon’s essential oils, providing a more intense aroma and flavor than juice alone. I always buy organic lemons when possible, ensuring the peel is clean if I’m zesting. Meyer lemons offer a sweeter, more floral note if you can find them.

Extra Virgin Olive Oil: A good quality extra virgin olive oil forms the base of our marinade, carrying all the flavors and helping to keep the chicken moist. Look for a cold-pressed, extra virgin olive oil. It adds a subtle fruity note that complements the lemon and herbs beautifully. You can often find excellent Spanish or Greek olive oils at specialty food shops or even your local farmer’s market.

Original IngredientBest SubstitutionFlavor / Texture Impact
Fresh Lemon JuiceLime JuiceSlightly different citrus profile, still bright and acidic. May be perceived as less sweet.
Dried OreganoDried Thyme or MarjoramSubtle shift in herbaceousness. Thyme is more earthy, marjoram is sweeter.
Extra Virgin Olive OilAvocado Oil or Grapeseed OilLess fruity flavor, higher smoke point for avocado oil if grilling at very high heat.

How to Make Grilled Lemon Chicken – Step-by-Step

Follow these simple steps for perfectly grilled lemon chicken every time.

Step 1: Prepare the Chicken and Marinade

First, we prepare our canvas! Pat the chicken breasts completely dry with paper towels. This helps the marinade adhere better and promotes a good sear. If your chicken breasts are uneven in thickness, place them between two sheets of plastic wrap and gently pound them with a meat mallet or the bottom of a heavy pan until they are about ½-inch thick. This ensures even cooking. In a medium bowl, whisk together the olive oil, lemon zest, lemon juice, minced garlic, dried oregano, salt, and pepper. This creates our vibrant, flavor-packed marinade.

Step 2: Marinate

Add the prepared chicken breasts to the bowl with the marinade. Toss them gently to ensure each piece is thoroughly coated. Cover the bowl tightly with plastic wrap or transfer the chicken and marinade to a resealable bag. Let the chicken marinate at room temperature for at least 30 minutes. For a deeper flavor, you can refrigerate it for up to 2 hours. Any longer, and the lemon juice can start to break down the chicken’s proteins, making it mushy.

💡 mia’s Pro Tip: Never marinate chicken in lemon juice for more than 2 hours, especially if using boneless breasts. The acid can “cook” the chicken, making the texture unpleasant. For cuts like thighs, you can go a bit longer, but for breasts, stick to the shorter window for the best results!

Step 3: Grill the Chicken

Preheat your grill or grill pan to medium-high heat. You want it hot enough to get a nice sear, but not so hot that the outside burns before the inside is cooked through. Lightly oil the grill grates if using an outdoor grill to prevent sticking. Carefully place the marinated chicken breasts onto the hot grill. Grill for 5-7 minutes per side. Resist the urge to move them around too much, allowing them to develop beautiful grill marks.

⚠️ Common Mistake to Avoid: Overcrowding the grill! Make sure each piece of chicken has enough space. If you put too many pieces on at once, the grill temperature will drop, and the chicken will steam rather than sear, resulting in pale, unappealing chicken.

Step 4: Rest and Serve

Once the chicken reaches an internal temperature of 165°F (74°C) and the juices run clear when pierced with a fork or knife, remove it from the grill. Transfer the chicken to a clean cutting board or plate and let it rest for about 5-10 minutes. This crucial resting period allows the juices to redistribute throughout the meat, ensuring every bite is moist and tender. Slice the chicken and serve immediately.

StepActionDurationKey Visual Cue
1Prepare Chicken & Marinade10 minsEven thickness, well combined marinade
2Marinate Chicken30 mins – 2 hoursChicken coated, covered
3Grill Chicken10-14 mins totalGolden brown exterior, internal temp 165°F (74°C)
4Rest & Serve5-10 minsJuices settled, no pink in center

Serving & Presentation

For a truly Mediterranean experience, I love to serve this grilled lemon chicken family-style, piled high on a platter. Garnish generously with fresh, chopped parsley and serve with extra lemon wedges on the side for those who love an extra zing. It’s a dish that feels both rustic and elegant, perfect for a sunny afternoon lunch in my Brooklyn garden or a lively dinner party in the city. In Morocco, we’d serve dishes like this with warm flatbread to soak up any remaining marinade and juices – a simple pleasure that makes a meal.

This easy grilled chicken recipe pairs beautifully with a variety of accompaniments. Think vibrant Greek salads, fluffy couscous pilaf, roasted Mediterranean vegetables like zucchini and bell peppers, or even simple grilled asparagus. The bright citrus notes cut through richer dishes, while complementing lighter ones. On a recent trip to a farmers market in NYC, I found the most amazing heirloom tomatoes, and they made the perfect salad to go alongside.

Pairing TypeSuggestionsWhy It Works
Side DishQuinoa Salad, Roasted Root Vegetables, Grilled ZucchiniProvides a hearty or fresh base that complements the chicken’s tang.
Sauce / DipTzatziki, Hummus, Simple Lemon-Tahini DrizzleAdds creaminess and an extra layer of Mediterranean flavor that enhances the chicken.
BeverageCrisp White Wine (e.g., Sauvignon Blanc), Sparkling Water with Mint, Iced Green TeaRefreshing drinks that cut through the richness and enhance the citrus notes.
GarnishFresh Parsley, Lemon Zest, Kalamata OlivesAdds fresh color, aroma, and pops of flavor that tie the dish together.

Make-Ahead, Storage & Reheating

As a busy New Yorker, I rely on smart meal prep! This grilled lemon chicken is fantastic for making ahead. I often grill a double batch on Sunday and use it throughout the week for quick lunches and dinners. The marinade itself can be made up to 2 days in advance and stored in the refrigerator. It’s a lifesaver for those evenings when you have absolutely no time to cook from scratch but still want something incredibly flavorful and healthy.

MethodContainerDurationReheating Tip
RefrigeratorAirtight container3-4 daysGently reheat in a skillet or microwave. For best results, serve cold or at room temperature.
FreezerFreezer-safe bag or container2-3 monthsThaw overnight in refrigerator. Reheat as above. Note: Texture may be slightly softer after freezing and reheating.
Make-AheadMarinade can be made up to 2 days in advance. Chicken can be marinated up to 2 hours before grilling.N/AGrill just before serving for ultimate freshness.

Reheating grilled chicken requires a gentle touch to maintain its moisture. For the best texture, I often prefer to eat leftover grilled lemon chicken cold or at room temperature, perhaps tossed into a salad for lunch. If you do want to reheat it, a quick sear in a lightly oiled skillet over medium heat for a couple of minutes per side can help revive it. Alternatively, a microwave on a low power setting, covered loosely, can work, but watch it closely to avoid drying it out completely. Remember, the lemon and herbs are already infused, so even cold, it’s incredibly flavorful.

Variations & Easy Swaps

This recipe is a fantastic base, and I love to play with it! Whether you’re looking for a flavor twist or need to accommodate dietary needs, there are plenty of easy swaps.

VariationKey ChangeBest ForDifficulty Impact
Herb and Spice Kick-UpAdd paprika, cumin, a pinch of chili flakesAdding a North African flairNo change
Gluten-Free & Dairy-FreeEnsure all added spices are gluten/dairy-free. The base recipe is already GF/DF.Dietary restrictionsNo change
Mediterranean BowlServe over a bed of mixed greens or grains with cucumber, tomatoes, olives.A complete mealNo change

Herb and Spice Kick-Up

To give this Lemon Herb Grilled Chicken a little more depth, drawing from my Moroccan roots, I love adding a teaspoon of smoked paprika and ½ teaspoon of cumin to the marinade. For a touch of heat, a pinch of red pepper flakes also works wonders. These spices blend beautifully with the lemon and garlic, creating a more complex flavor profile that’s absolutely irresistible. It’s a simple way to transport your taste buds straight to the vibrant souks of Marrakech.

Gluten-Free and Dairy-Free Adaptations

The beauty of this Grilled Lemon Chicken recipe is that it’s naturally gluten-free and dairy-free, making it a fantastic option for many dietary needs! The marinade relies on olive oil, lemon, garlic, and herbs, all of which are compliant. Always double-check your spice blends if you’re adding any extra seasonings to ensure they are free from hidden gluten or dairy ingredients. This recipe is one of my go-to’s when hosting friends with varying dietary restrictions.

Seasonal Mediterranean Bowl

When I’m inspired by a visit to the farmer’s market, I often transform this grilled chicken into a vibrant Mediterranean bowl. I’ll serve slices of the chicken over a bed of fluffy quinoa or farro, then top it with chopped cucumber, cherry tomatoes, Kalamata olives, crumbled feta cheese (optional), and a drizzle of tahini dressing. It’s a complete, satisfying meal that’s bursting with fresh flavors and colors, a true taste of summer inspired by the best of NYC’s seasonal produce.

How long should you marinate chicken in lemon juice for grilled lemon chicken?

For the most tender and juicy grilled lemon chicken, it’s crucial not to over-marinate. When using lemon juice, which is acidic, it can begin to break down the proteins in the chicken. For chicken breasts, I recommend marinating for a minimum of 30 minutes to allow flavors to infuse, but no longer than 2 hours. If you marinate for too long, the texture can become mushy and unpleasant. For thicker cuts or chicken thighs, you might extend this slightly, but always err on the side of caution with lemon-based marinades.

Can you use bottled lemon juice instead of fresh for grilled lemon chicken?

While you *can* use bottled lemon juice in a pinch for this grilled lemon chicken recipe, I highly recommend using fresh lemon juice whenever possible. Fresh lemons provide a brighter, more vibrant, and complex citrus flavor that bottled juices simply cannot replicate. Bottled juice can sometimes have a slightly metallic or artificial taste, and it typically lacks the aromatic oils found in the zest, which also contribute significantly to the marinade’s overall profile. For the best flavor, reach for fresh!

What is the best temperature to grill lemon chicken to keep it juicy?

To keep your lemon chicken juicy, aim for a medium-high heat temperature on your grill, around 400-450°F (200-230°C). This heat level is hot enough to achieve beautiful grill marks and a nice sear on the outside quickly, which helps to lock in the juices. If the grill is too low, the chicken will cook too slowly and can dry out. Ensure your chicken breasts are of uniform thickness; this is key to ensuring they cook through evenly without the outside burning while the inside remains raw. Always use a meat thermometer to confirm it reaches an internal temperature of 165°F (74°C).

What sides go well with grilled lemon chicken?

Grilled lemon chicken is wonderfully versatile! For a refreshing meal, serve it alongside a crisp Greek salad with cucumbers, tomatoes, and Kalamata olives. Fluffy couscous or quinoa pilaf is also a fantastic choice, soaking up any extra marinade. Roasted Mediterranean vegetables like bell peppers, zucchini, and red onions are a natural pairing. For a lighter option, grilled asparagus or a simple mixed greens salad with a light vinaigrette works beautifully. To complete the meal, consider a dollop of tzatziki or hummus on the side.

How do you prevent grilled lemon chicken from becoming dry?

Preventing dry grilled lemon chicken is all about technique! Firstly, ensure your chicken breasts are pounded to an even thickness so they cook uniformly. Secondly, don’t over-marinate; the acidity in lemon juice can toughen the chicken if left too long – stick to the 30-minute to 2-hour window. Thirdly, use a medium-high heat on the grill to sear quickly, keeping the inside moist. Finally, and perhaps most importantly, let the chicken rest for 5-10 minutes after grilling. This allows the juices to redistribute, ensuring each bite is succulent. Always check for doneness with a meat thermometer and aim for 165°F (74°C).

Can I grill chicken thighs instead of breasts?

Absolutely! Chicken thighs are a wonderful alternative to breasts for this grilled lemon chicken recipe, and they are much more forgiving if you accidentally overcook them slightly. Thighs tend to stay more moist due to their higher fat content. If using thighs, you can marinate them for a slightly longer period, up to 4 hours, as they are less prone to becoming mushy from the lemon juice. The grilling time might also be a bit longer, so ensure they reach an internal temperature of 175°F (80°C) for thighs, rather than 165°F for breasts, for optimal tenderness.

What kind of grill is best for this recipe?

This Lemon Herb Grilled Chicken recipe is fantastic on any type of grill! Whether you use a charcoal grill for that classic smoky flavor, a gas grill for convenience and precise temperature control, or even a stovetop grill pan for indoor cooking, it will turn out delicious. If using an outdoor grill, I highly recommend preheating it thoroughly and cleaning and oiling the grates well to prevent sticking. For a grill pan, medium-high heat is key, and adding a touch of oil to the pan itself can also help ensure a beautiful sear.

Can themarinade be used on other meats or vegetables?

Yes, this versatile lemon herb marinade is a true kitchen workhorse! I often use it on pork tenderloin, firm white fish like cod or halibut, and even shrimp. For vegetables, it’s wonderful on zucchini, bell peppers, red onion, and asparagus, which can then be grilled alongside the chicken. Just be mindful of cooking times, as vegetables and seafood will cook much faster than chicken. Adjust the marinating time for seafood and vegetables accordingly, usually keeping it shorter than for chicken.

Share Your Version!

I absolutely adore seeing how my recipes come to life in your kitchens! If you’ve made this Grilled Lemon Chicken, please leave a star rating and share your thoughts in the comments below. Your feedback helps other cooks immensely! And for those of you who love to share photos, tag me on Instagram or Pinterest using @exorecipes – I can’t wait to see your beautiful creations! What’s your favorite herb to add to this marinade when you’re feeling adventurous?

From my NYC kitchen to yours — I hope this recipe brings as much warmth to your table as it does to mine. — mia 🧡

📌

Love This Recipe? Save It to Pinterest!

If you enjoyed this Grilled Lemon Chicken recipe, don’t let it get lost in your browser tabs! 😄 Pin it now so you can find it again anytime — and explore hundreds more tried-and-tested recipes waiting for you on my Pinterest boards.

👉 Follow mia on Pinterest @chefrecipes2

📌 Pin this recipe · 🔁 Re-pin your favorites · 💬 Tag me when you make it — I love seeing your creations!

Print

clock clock iconcutlery cutlery iconflag flag iconfolder folder iconinstagram instagram iconpinterest pinterest iconfacebook facebook iconprint print iconsquares squares iconheart heart iconheart solid heart solid icon

Grilled Lemon Chicken

  • Author: Chef Mia

Description

Grilled lemon chicken is a tender, juicy and savory grilling recipe that is perfect for summer. It’s light, healthy and beaming with Mediterranean flavor!


Ingredients

Scale
  • 4 (6-ounce) boneless skinless chicken breasts
  • ¼ cup olive oil
  • 1 large lemon (zest and juice (about 3 tablespoons juice))
  • 4 garlic cloves (minced)
  • 1 tablespoon oregano
  • ¾ teaspoon salt
  • ½ teaspoon black pepper
  • Chopped parsley (for serving)
  • Lemon wedges (for serving)

Instructions

  1. Pat chicken dry and pound chicken if some parts are too thick so the pieces are even in thickness. Combine the olive oil, lemon juice, garlic, oregano, salt and pepper in a bowl. Add chicken and toss well to combine. Cover and marinate for at least 30 minutes, but no more than 2 hours.
  2. Preheat the grill or grill pan to medium-high heat. Place the chicken on the grill for 5-7 minutes. Use tongs to flip over and cook on the other side for 5-7 more minutes, or until juices run dry.
  3. Remove chicken from the grill. Sprinkle with parsley and serve with lemon wedges, if desired.


Nutrition

  • Calories: 329 kcal
  • Sugar: 1 g
  • Fat: 18 g
  • Carbohydrates: 5 g
  • Protein: 37 g


Grilled Lemon Chicken

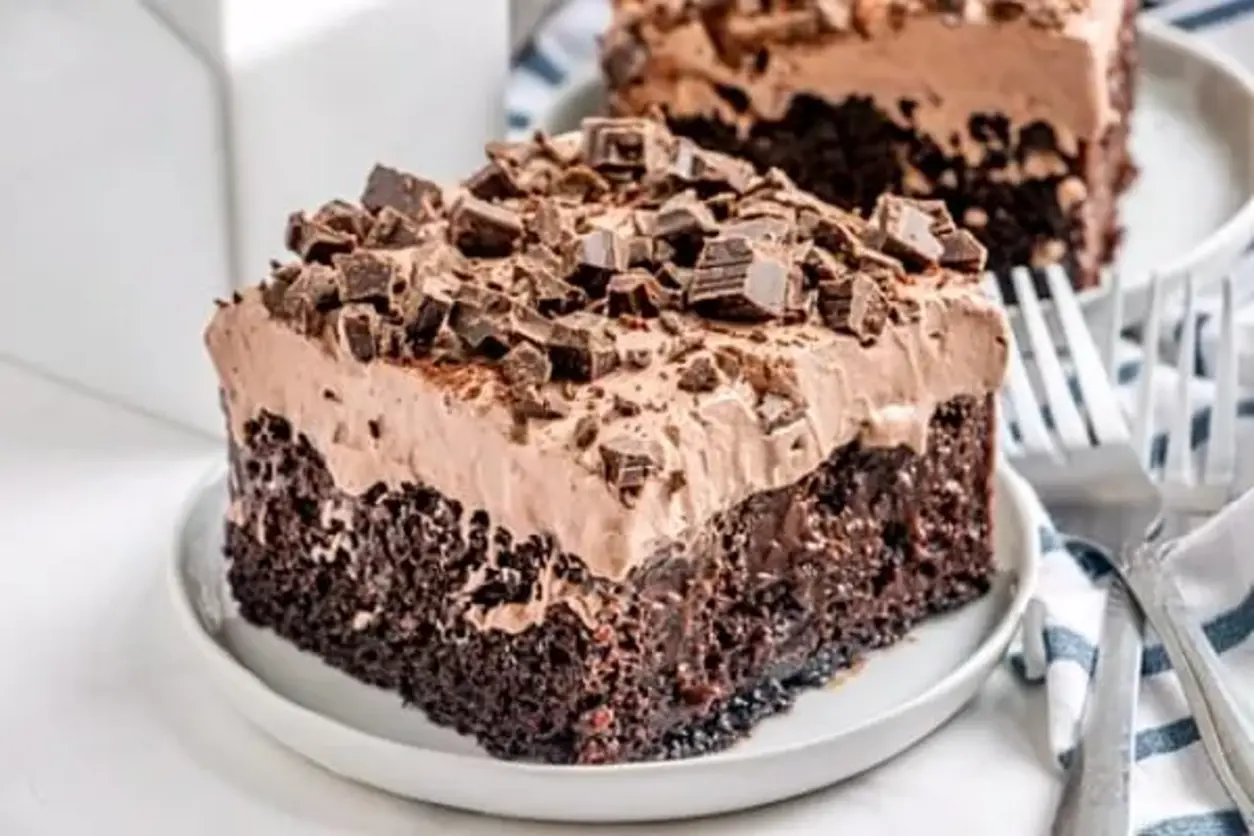
Decadent Death By Chocolate Poke Cake Recipe

Death By Chocolate Poke Cake: Ultimate Chocolate Indulgence

⚖️
Difficulty
Easy
⏲️
Prep Time
20
🕒
Cook Time
35
⏱️
Total Time
4 hours 55 mins
🍽️
Servings
12-16

Oh, my dears, today we are diving headfirst into a dessert that is as dramatic and decadent as a midnight stroll through Times Square – the Death By Chocolate Poke Cake! This isn’t just any chocolate cake; it’s an experience. I remember a time, back in my mother’s bustling kitchen in Marrakech, where every dessert was an outpouring of love, rich with spices and deep flavors. This poke cake, with its layers of moist chocolate cake, creamy pudding, and intense chocolate ganache, reminds me of that same spirit of generous, unforgettable sweetness, but with a New York City twist of pure, unadulterated chocolate joy. It’s a dessert that lives up to its name and then some!

Imagine sinking your fork into a perfectly tender dark chocolate cake, already infused with pockets of luscious, dark chocolate pudding. Then, there’s this impossibly smooth, rich chocolate topping that blankets the entire creation, followed by a cloud-like layer of whipped cream and pudding mixture, all crowned with generous shards of dark chocolate. The aroma alone is enough to make your heart sing – it’s that deep, comforting scent of pure cocoa, intensified by the warmth of baked cake. This is a dessert that celebrates texture as much as flavor: the delicate crumb of the cake, the silky pudding, the slight snap of the chocolate garnish, and the airy lightness of the whipped topping. It’s pure bliss in every bite.

What I love most about this Death By Chocolate Poke Cake recipe is how approachable it is, even with its show-stopping appearance. I’ve refined it to ensure that even if you’re new to baking, you’ll achieve spectacular results. We’ll use a fantastic shortcut that brings out incredible chocolate depth without being overly complicated. I’ll be sharing my secret to ensuring those pudding pockets are perfectly distributed, and I’ll warn you about a common pitfall that can easily be avoided. Prepare yourselves, because this chocolate poke cake recipe is about to become your new obsession. It’s an easy chocolate cake that tastes like pure luxury!

Why This Death By Chocolate Poke Cake Recipe Is the Best

This recipe truly shines because it strikes the perfect balance between intense chocolate flavor and delightful texture, all while being incredibly easy to assemble. I’ve taken inspiration from my French pastry training and Moroccan roots to elevate a classic poke cake into a truly gourmet experience that’s still achievable for the home baker. The use of dark chocolate throughout, from the cake mix to the pudding and toppings, ensures a deep, robust cocoa flavor that’s anything but one-dimensional.

My secret to achieving that moist, fudgy texture lies in a simple technique: using the hot cake to absorb the pudding mixture. This allows the flavors to meld beautifully and creates those irresistible pockets of creamy goodness. From my Parisian culinary school days, I learned the importance of layering flavors and textures, and this poke cake really delivers. It’s a symphony of soft cake, luscious pudding, and rich ganache that creates an extraordinary dessert without any fuss.

Beyond the incredible taste and texture, this chocolate fudge cake is remarkably forgiving. It’s the perfect dessert for when you need an impressive treat without spending hours in the kitchen. Whether you’re a seasoned baker or just starting, the steps are clear and straightforward, meaning you can confidently pull off a showstopper every single time. It’s proof that an easy chocolate cake can be just as decadent as anything more complex.

Death By Chocolate Poke Cake Ingredients

When I’m developing recipes here in my New York City kitchen, I always think about what’s readily available at our fantastic local grocery stores and farmers’ markets. For this Death By Chocolate Poke Cake, most ingredients are pantry staples, readily found at any supermarket. I love the deep flavor that Hershey’s Special Dark brings to both the cake and the pudding, it’s a classic for a reason! If I’m feeling particularly inspired, I might grab an extra dark chocolate bar from a specialty shop in the West Village for an even richer topping.

Ingredients List

  • 1 package dark chocolate cake mix (15.25 oz.)
  • Ingredients listed on the box to make the cake (typically eggs, oil, water)
  • 1 box instant Hershey’s Special Dark Chocolate Pudding mix (3.56 oz.)
  • 4 cups milk (divided)
  • 1 box Hershey’s Special Dark Chocolate topping (12.8 oz.)
  • 1 box instant Hershey’s Special Dark Chocolate Pudding mix (3.56 oz.)
  • 1 container frozen whipped topping, thawed (8 oz.)
  • 1 Giant Hershey Dark Chocolate candy bar, chopped (6.8 oz.)

Ingredient Spotlight

Dark Chocolate Cake Mix: This forms the base of our decadent dessert. Look for a good quality dark or devil’s food cake mix for the deepest flavor. Many brands available in the US offer excellent results. The box will list exactly what you need, usually eggs, oil, and water. Ensure you have these on hand!

Instant Chocolate Pudding Mix: We’re using Hershey’s Special Dark, which adds a wonderful, rich chocolate flavor and creamy texture to the filling. The “instant” type is crucial here for ease and speed. You can find this in the baking or dessert aisle of most US supermarkets. It sets up beautifully and creates those signature moist pockets when poked into the cake.

Hershey’s Special Dark Chocolate Topping: This jarred topping is a fantastic shortcut for a quick, luscious chocolate layer. It’s essentially a pre-made chocolate fudge sauce that melts down beautifully. It’s widely available and adds an intense chocolate punch that’s smooth and velvety. A quick microwave is all it takes to make it pourable and ready to grace our cake.

Giant Hershey Dark Chocolate Bar: For a final flourish, we’re topping the poke cake with chunks of this dark chocolate bar. It provides a delightful textural contrast and an extra burst of chocolatey goodness. You can find these in the candy aisle. For a more artisanal touch, feel free to substitute with a good quality dark chocolate chopped from a bar.

Original IngredientBest SubstitutionFlavor / Texture Impact
Dark Chocolate Cake MixDevil’s Food Cake Mix or your favorite rich chocolate cake mixSlightly lighter or deeper chocolate flavor, but the fundamental structure remains.
Instant Hershey’s Special Dark PuddingInstant milk chocolate pudding mix (richer, sweeter) or cheesecake pudding for a tangy twistChanges the intensity and sweetness of the pudding filling. Milk chocolate will be sweeter; cheesecake adds a pleasant tang.
Hershey’s Special Dark ToppingMelted dark chocolate ganache (half heavy cream, half chopped dark chocolate) or hot fudge sauceGanache offers a richer, silkier texture and more complex chocolate flavor. Hot fudge sauce is typically sweeter and less intense.
Giant Hershey Dark Chocolate BarDark chocolate chips, finely chopped bittersweet chocolate, or chocolate shavingsChips might not melt as uniformly. Chopped bittersweet chocolate offers a more refined cocoa flavor. Shavings provide a delicate finish.

How to Make Death By Chocolate Poke Cake — Step-by-Step

Making this unbelievably decadent poke cake is a joy, and I promise it’s simpler than it looks. Each step builds on the last to create a dessert that’s truly a celebration of chocolate in every way possible. Let’s get started!

Step 1: Bake the Chocolate Cake

Preheat your oven and prepare a 9×13-inch baking pan according to your cake mix package directions, which usually involves greasing and flouring. Bake the cake mix according to the package instructions for about 30-35 minutes, or until a toothpick inserted into the center comes out clean. Let the cake cool in the pan for about 10-15 minutes before proceeding; we want it warm enough to absorb the pudding, but not so hot that it crumbles.

💡 mia’s Pro Tip: Don’t overbake your cake! A slightly underbaked, very moist cake will absorb the pudding even better and result in a more tender crumb. Keep an eye on it closely towards the end of the baking time.

Step 2: Prepare and Poke the Cake

While the cake is still warm, prepare the first pudding mixture. In a medium bowl, whisk together one box of instant Hershey’s Special Dark Chocolate Pudding mix with 2 cups of milk. Whisk until it starts to thicken. Then, using the round end of a wooden spoon (or a large skewer), poke holes all over the surface of the warm cake. Don’t be shy – make plenty of holes, reaching almost to the bottom of the pan. Slowly and evenly pour the thickened pudding mixture over the top of the cake, making sure to let it seep into as many holes as possible.

⚠️ Common Mistake to Avoid: Poking holes when the cake is completely cool. The pudding won’t absorb as well into a cold cake. Ensure your cake is still warm when you poke and pour the pudding for maximum delicious penetration!

Step 3: Add the Chocolate Topping

Gently warm the Hershey’s Special Dark Chocolate topping (with the lid *off*, please!) in your microwave. It usually takes about 45 seconds to 1 minute on high power, stirring halfway through, until it’s smooth and pours easily. Drizzle this luscious chocolate topping evenly over the pudding-coated cake. Try to spread it gently to cover the entire surface. Once the topping is on, let the cake cool completely at room temperature. This allows the pudding to fully set and the topping to become wonderfully fudgy.

Step 4: Create the Chocolate Pudding Filling

Once the cake is fully cooled, it’s time for the final creamy layer. In a medium bowl, combine the second box of instant Hershey’s Special Dark Pudding mix with the remaining 2 cups of milk. Whisk until the pudding begins to thicken. Then, gently fold in the thawed frozen whipped topping until just combined. Do not overmix, as you want to maintain the airy texture. Carefully spread this light and fluffy chocolate mixture evenly over the cooled cake.

💡 mia’s Pro Tip: For an even more luxurious filling, ensure your whipped topping is fully thawed but still cold. Gently folding it in preserves its lightness, creating a beautiful contrast to the denser pudding and cake layers. Don’t whip it further; just fold until streaks disappear.

Step 5: Chill and Serve

As the grand finale, sprinkle the chopped Giant Hershey Dark Chocolate candy bar all over the top of the whipped topping layer. This adds a delightful crunch and visual appeal. Now, cover the cake tightly with plastic wrap or a lid and refrigerate it for at least 4 hours, but overnight is even better. This chilling time is crucial to allow all the flavors to meld together and for the cake to set properly, ensuring easy slicing and maximum deliciousness.

StepActionDurationKey Visual Cue
1Bake cake30-35 minsToothpick inserted comes out clean.
2Prepare and poke cake with pudding10 minsPudding mixture covers cake, seeps into holes.
3Add chocolate topping and cool~1 hour (cooling)Even layer of melted topping on cake.
4Create and spread pudding filling10 minsLight, fluffy chocolate mixture covers cake.
5Chill and garnishMinimum 4 hoursCake is firm, topped with chocolate bar pieces.

Serving & Presentation

Serving this Death By Chocolate Poke Cake is the moment of truth! I like to use a sharp knife dipped in hot water for the cleanest slices, revealing those incredible layers of chocolatey goodness. Garnish with a few extra shavings of dark chocolate, or even a single raspberry if you want a pop of color. It’s divine served on its own, but if you’re aiming for that extra touch of New York flair, perhaps a dollop of freshly whipped cream or a small scoop of high-quality vanilla bean ice cream would be absolutely divine.

In Morocco, a rich dessert like this would often be served with mint tea to cut through the sweetness, a tradition I cherish. Here in NYC, I often pair it with a robust cup of dark roast coffee or even a drizzle of espresso. For a truly decadent dessert experience, consider serving it as part of a dessert buffet alongside lighter options like fruit tarts or panna cotta. It’s a guaranteed showstopper that will have everyone asking for the recipe!

Pairing TypeSuggestionsWhy It Works
Side DishFresh Raspberries or StrawberriesThe slight tartness of berries cuts through the richness of the chocolate and adds a refreshing contrast.
Sauce / DipRaspberry Coulis or Fresh Whipped CreamCoulis adds a vibrant fruity note. Whipped cream provides a creamy, lighter counterpoint to the dense chocolate.
BeverageStrong Coffee, Espresso, or Dark Roast TeaThe bitterness and intensity of coffee or tea perfectly balance the sweetness and richness of the chocolate cake.
GarnishChocolate Shavings or Dark Chocolate CurlsEnhances the visual appeal and delivers an extra layer of pure chocolate flavor and texture.

Make-Ahead, Storage & Reheating

Life in New York City is always on the go, so I know how important it is to have reliable make-ahead desserts. This Death By Chocolate Poke Cake is a dream for meal prep! You can easily assemble it the day before your event, or even up to two days in advance, and it only gets better as the flavors meld. Just keep it covered and refrigerated. It’s the perfect stress-free dessert for dinner parties or potlucks.

MethodContainerDurationReheating Tip
RefrigeratorAirtight container or tightly covered with plastic wrap3-4 daysServe chilled directly from the refrigerator. No reheating needed.
FreezerFreezer-safe container, well-wrapped in plastic wrap and foilUp to 2 monthsThaw overnight in the refrigerator. The texture of the whipped topping might change slightly after freezing.
Make-AheadSame 9×13 inch pan, coveredUp to 2 days in advanceFinish with chopped chocolate bar just before serving if possible, or immediately after coming to room temp from the fridge.

When it comes to reheating, for the most part, this poke cake is best enjoyed chilled. If it’s been in the fridge for a few days and the topping has firmed up a bit, I sometimes like to let it sit at room temperature for about 15-20 minutes before serving. This brings it back to a lovely creamy texture. However, I generally find that the cold, rich chocolate flavor is irresistible and requires no revival!

Variations & Easy Swaps

VariationKey ChangeBest ForDifficulty Impact
Fudge Bomb TwistAdd chocolate ganache between pudding layer and whipped topping layer.Serious chocolate lovers, special occasions.Slightly more effort, but minimal skill increase.
Gluten-Free/Dairy-FreeUse GF cake mix, GF/DF pudding mix alternatives, and dairy-free whipped topping.Dietary restrictions without sacrificing flavor.Requires careful ingredient sourcing; no change in technique.
Seasonal Berry SwirlSwirl fresh berry puree into the whipped topping layer.Summer gatherings, lighter chocolate option.Minimal extra effort, easy to achieve.

Fudge Bomb Twist

For those who truly believe more chocolate is always better, I have a secret weapon inspired by my travels to Paris: a rich chocolate ganache layer. After pouring the chocolate topping over the pudding-soaked cake and letting it cool, prepare a simple ganache by heating 1/2 cup of heavy cream until simmering, then pouring it over 4 oz. of chopped dark chocolate. Let sit for 5 minutes, then whisk until smooth. Let this cool slightly before spreading over the cake before adding the whipped topping layer. This creates an unbelievably rich, fudgy “bomb” of chocolate.

Gluten-Free and Dairy-Free Options

Living in a diverse city like New York means catering to various dietary needs. For a gluten-free version, simply swap your favorite gluten-free dark chocolate cake mix. You’ll need to find instant dairy-free chocolate pudding mix (many brands are available using plant-based ingredients) and a dairy-free whipped topping like coconut cream-based whipped topping. The process remains identical, and the results are surprisingly delicious, offering that classic poke cake experience without gluten or dairy.

Seasonal Berry Swirl

To add a touch of freshness and vibrant color, especially when the summer bounty is at its peak at the Union Square Greenmarket, try swirling some fresh berry puree into the whipped topping. Simply mash or puree about 1/2 cup of fresh raspberries or strawberries, strain if you prefer a smoother texture, and gently swirl it into the whipped topping mixture before spreading it on the cake. This adds a delightful fruity counterpoint to the intense chocolate, making it feel slightly lighter and incredibly festive.

What is the best way to poke the holes in a Death By Chocolate Poke Cake so the filling doesn’t overflow?

The key to preventing overflow is to poke the holes while the cake is still warm, right after it has cooled slightly from baking. Use the round end of a wooden spoon or a large skewer and make holes all over the surface, going almost to the bottom. This creates channels for the pudding to seep into, rather than sit on top. Pour the pudding mixture slowly over the poking implement or in a circular motion to distribute it evenly. Most of the liquid will be absorbed, and any that pools slightly on top can be gently spread.

Can I use a different type of chocolate pudding or cake mix for a Death By Chocolate Poke Cake?

Absolutely! While I love the depth of Hershey’s Special Dark for this recipe, feel free to experiment. For the pudding, milk chocolate will make it sweeter, and even white chocolate or cheesecake pudding can offer interesting flavor twists. For the cake mix, any dark chocolate or devil’s food cake mix will work beautifully. If you want an even richer flavor, you could consider a triple-layer chocolate cake recipe, though it will increase the complexity and baking time considerably. The goal is a moist, tender chocolate base!

How long should I let a Death By Chocolate Poke Cake chill before serving?

For this Death By Chocolate Poke Cake to reach its peak deliciousness, chilling time is crucial. I recommend a minimum of 4 hours in the refrigerator. This allows the pudding to set completely and lets all those wonderful chocolate flavors meld together. However, if you can resist, chilling it overnight is even better! The texture becomes more cohesive, and the entire cake becomes incredibly moist and decadent, making it easier to slice and serve. It truly transforms during that longer chill time.

Can I make a Death By Chocolate Poke Cake ahead of time and store it overnight?

Yes, you absolutely can! This poke cake is a fantastic make-ahead dessert because its flavor actually improves with time. I often assemble it a day in advance for busy weeks here in New York. Simply cover it tightly with plastic wrap or an airtight lid once it’s fully assembled and chilled. It’s best stored in the refrigerator. When ready to serve, you can add the final chocolate bar crunch just before taking it out, or right after, ensuring it stays crispier. It’s perfect for stress-free entertaining.

What kind of chocolate makes the best topping for this poke cake?

For this Death By Chocolate Poke Cake, using Hershey’s Special Dark chocolate topping is a fantastic shortcut that provides a smooth, rich chocolate layer. It’s designed to melt easily and pour beautifully over the cake. If you want to elevate it further, consider making a dark chocolate ganache by melting good quality dark chocolate (60-70% cocoa solids) with warm heavy cream. This will give you a more intense, complex chocolate flavor and a silkier texture. Ensuring the chocolate is of good quality is key for the best taste!

Why is my poke cake filling not setting properly?

There are a few common reasons why your poke cake filling might not be setting as expected. First, ensure you used instant pudding mix, not cook-and-serve, as the instant varieties are specifically formulated to set without cooking. Second, double-check that you used the correct amount of milk as specified in the recipe; too much liquid will prevent it from thickening. Lastly, make sure the cake is sufficiently cooled before adding the whipped topping mixture if you added that as a second layer. If the cake is still too warm, it can warm the pudding and affect its setting process.

Share Your Version!

I truly hope you adore this Death By Chocolate Poke Cake as much as I do. It’s my go-to when I need a serious chocolate fix. If you make it, please leave a star rating and a comment below – I love hearing your thoughts and feedback! And for goodness sake, if you snap a picture, share it on Instagram or Pinterest and tag me @exorecipes. I’m always so excited to see your delicious creations coming out of your kitchens!

From my NYC kitchen to yours — I hope this recipe brings as much warmth to your table as it does to mine. — mia 🧡

📌

Love This Recipe? Save It to Pinterest!

If you enjoyed this Death By Chocolate Poke Cake recipe, don’t let it get lost in your browser tabs! 😄 Pin it now so you can find it again anytime — and explore hundreds more tried-and-tested recipes waiting for you on my Pinterest boards.

👉 Follow mia on Pinterest @chefrecipes2

📌 Pin this recipe · 🔁 Re-pin your favorites · 💬 Tag me when you make it — I love seeing your creations!

Print

clock clock iconcutlery cutlery iconflag flag iconfolder folder iconinstagram instagram iconpinterest pinterest iconfacebook facebook iconprint print iconsquares squares iconheart heart iconheart solid heart solid icon

Death By Chocolate Poke Cake

  • Author: Chef Mia

Description

This Death By Chocolate Poke Cake is for the serious chocolate lover! A chocolate cake that has been poked, filled, and covered with so much chocolate … Can you handle it?!


Ingredients

Scale
  • 1 package dark chocolate cake mix (15.25 oz. )
  • Ingredients listed on the box to make the cake
  • 1 box instant Hershey's Special Dark Chocolate Pudding mix (3.56 oz. )
  • 4 cups milk (divided)
  • 1 box Hershey's Special Dark Chocolate topping (12.8 oz. )
  • 1 box instant Hershey's Special Dark Chocolate Pudding mix (3.56 oz. )
  • 1 container frozen whipped topping, thawed (8 oz. )
  • 1 Giant Hershey Dark Chocolate candy bar, chopped (6.8 oz. )

Instructions

  1. Bake the cake according to package directions using a 9×13-inch baking pan.
  2. Mix the pudding mix with 2 cups of milk in a medium bowl. Poke holes in the hot cake with the round end of a wooden spoon and slowly pour this mixture over the cake, trying to fill the holes.
  3. Microwave the chocolate topping (with the lid off) for about 45 seconds or until it pours easily. Pour evenly over the top of the cake. Let the cake cool completely.
  4. In a medium bowl, combine the second pudding mix with the additional 2 cups of milk. Carefully fold in the whipped topping. Spread the mixture evenly over the top of the cake. Sprinkle the chopped candy bar over the top.
  5. Refrigerate for at least 4 hours. Store the cake (covered) in the refrigerator.


Nutrition

  • Calories: 252 kcal
  • Sugar: 23 g
  • Fat: 10 g
  • Carbohydrates: 37 g
  • Protein: 4 g


Death By Chocolate Poke Cake

50+ Low Calorie High Protein Meals That Keep You Full

50+ Low Calorie High Protein Meals: Spicy Chicken Tortilla Soup – Slow Cooker Magic

⚖️
Difficulty
Easy

⏲️
Prep Time
15 mins

🕒
Cook Time
4 hours

⏱️
Total Time
4 hours 15 mins

🍽️
Servings
6

Living in New York City, I’m constantly surrounded by incredible food, from the bustling street carts to the Michelin-starred restaurants. But even here, finding meals that are simultaneously healthy, satisfying, and quick can be a challenge. For years, my readers and I have explored ways to create delicious, *low calorie high protein meals* that don’t leave you feeling deprived. When I first developed this *Spicy Chicken Tortilla Soup*, I knew it was a winner. It’s a testament to how simple ingredients, prepared with a little care, can transform into something truly special. This recipe is designed to be incredibly easy, making it a perfect addition to your rotation of *easy high protein meals*.

Imagine a bowl bursting with vibrant colors and comforting aromas: tender shredded chicken swimming in a rich, smoky broth, studded with tender corn, black beans, and just the right hint of spice. The magic comes from the slow cooker, which does all the heavy lifting, infusing every ingredient with deep, complex flavors. My roots in Moroccan cooking taught me the importance of building layers of flavor, and my French training instilled a discipline in technique. This soup blends those influences perfectly, creating a dish that’s both rustic and refined. It’s one of those *healthy low calorie dinners* that tastes like a splurge but is packed with goodness.

What sets this *filling low calorie recipe* apart is its foolproof simplicity and incredible flavor payoff. I’ve focused on maximizing taste with minimal effort, a philosophy I carry from my mother’s kitchen in Marrakech to my own here in NYC. I’ll share a few *low calorie high protein tips* that make this soup sing, including a common mistake many home cooks make when shredding chicken. This recipe is a prime example of how **easy high protein meals** can be incredibly delicious and satisfying, proving you don’t need to sacrifice flavor for health. Ready to make magic in your slow cooker?

Why This Slow Cooker Chicken Tortilla Soup Recipe is the Best

The flavor secret to this soup lies in the simplicity of slow cooking, allowing humble ingredients like tomatoes, chili powder, and cumin to meld into a rich, savory broth. My background in Moroccan cuisine, where spices are used with a masterful hand, inspires me to create depth of flavor. For this soup, it means letting the slow cooker work its magic, transforming basic pantry staples into something extraordinary. This approach ensures that every spoonful is packed with authentic, comforting Mexican-inspired notes, proving that delicious food doesn’t need to be complicated. It’s a true representation of *easy high protein meals*.

The texture is something I obsess over as a professional cook. The slow cooker tenderizes the chicken perfectly, making it fall-apart soft and easy to shred. The balance of textures – the tender chicken, the slightly firm corn kernels, the creamy black beans – is key to making this a truly *filling low calorie recipe*. I learned in Paris that the right texture is as important as the taste, and this soup delivers. It’s a delightful contrast that keeps you engaged with every bite, making it one of the most satisfying *low calorie high protein meals* you’ll find.

This recipe is the epitome of foolproof cooking. You essentially toss everything into the slow cooker and let it do its thing. It’s perfect for busy weeknights or when you just don’t have the energy for elaborate cooking. Even if you’re new to making *high protein low calorie recipes*, this soup is incredibly forgiving. I’ve tested it countless times, and it always turns out wonderfully. It’s a reliable go-to for a healthy, delicious, and remarkably *easy high protein meal* that always hits the spot.

Low Calorie High Protein Meals Ingredients

When I’m in NYC, I love sourcing my ingredients from places like the Union Square Greenmarket, but for everyday convenience, a good supermarket works perfectly. For this soup, finding fresh produce is key, though frozen corn and beans are perfectly acceptable shortcuts. My mother always said the best ingredients are the ones you select with care. This recipe is no different; paying a little attention to your produce will elevate the final dish, even from the humble slow cooker.

Ingredients List

  • 2 lbs boneless, skinless chicken breasts
  • 1 (15 oz) can black beans, rinsed and drained
  • 1 (15 oz) can diced tomatoes, undrained
  • 1 (10 oz) can Rotel (diced tomatoes and green chilies), undrained
  • 1 cup frozen corn
  • 1 large onion, chopped
  • 2 cloves garlic, minced
  • 4 cups low-sodium chicken broth
  • 1 tbsp chili powder
  • 1 tsp cumin
  • 1/2 tsp smoked paprika
  • Salt and freshly ground black pepper to taste
  • Optional Garnishes: fresh cilantro, avocado, lime wedges, reduced-fat sour cream, crushed tortilla chips

Ingredient Spotlight

Boneless, skinless chicken breasts are the star protein source here. They cook beautifully in the slow cooker and are easy to shred. In US supermarkets, you’ll find them readily available. Look for chicken that is pink and firm. A great substitution would be chicken thighs, which are more forgiving and incredibly flavorful, though slightly higher in fat. The calorie count will also increase slightly, so keep that in mind for your *low calorie high protein meals*.

Tomatoes and Rotel (diced tomatoes with green chilies) form the flavorful base of our soup. These canned staples are essential for that authentic Mexican flavor. You can find them in any grocery aisle. If you want a milder soup, use regular diced tomatoes and omit the Rotel, adding a small jalapeño for heat if desired. This substitution maintains the liquid base while allowing for flavor customization in your *healthy low calorie dinners*.

Spices are where the magic truly happens. Chili powder, cumin, and smoked paprika create a complex, smoky, and slightly spicy profile. They are pantry staples for a reason! You can usually find good quality versions at any supermarket. If you’re feeling adventurous, try adding a pinch of cayenne pepper for extra heat, or a bit of coriander for a citrusy note. Adjusting spices is a fantastic way to customize your *easy high protein meals* without adding calories.

Original IngredientBest SubstitutionFlavor / Texture Impact
Chicken BreastsChicken ThighsRichness and tenderness increase; slight increase in fat/calories.
Rotel (mild)Diced tomatoes + 1 minced jalapeñoAdds controlled heat and fresh flavor without the processed chili taste.
Frozen CornFresh corn kernels (cut off cob)Slightly sweeter and crisper texture.
Chicken BrothVegetable BrothMakes the soup vegetarian-friendly; may slightly reduce overall savoriness.

How to Make Slow Cooker Chicken Tortilla Soup — Step-by-Step

This recipe is as straightforward as it gets; let’s get your slow cooker working its magic!

Step 1: Combine Main Ingredients

Place the chicken breasts in the bottom of your slow cooker. Add the rinsed and drained black beans, undrained diced tomatoes, undrained Rotel, frozen corn, chopped onion, and minced garlic. Pour in the low-sodium chicken broth.

💡 mia’s Pro Tip: To build even more flavor, you can lightly sear the chicken breasts in a hot skillet for 1-2 minutes per side before adding them to the slow cooker. This creates a richer base, but it’s not essential for this easy recipe.

Step 2: Season the Soup

Sprinkle the chili powder, cumin, and smoked paprika evenly over the ingredients in the slow cooker. Season generously with salt and freshly ground black pepper. Give it a gentle stir to distribute the spices.

⚠️ Common Mistake to Avoid: Don’t be shy with the spices! Canned tomatoes can dilute flavors, so ensure you season well. You can always adjust salt and pepper at the end, but the initial seasoning is crucial for developing the deep flavor profile needed in *low calorie high protein meals*.

Step 3: Slow Cook Until Tender

Cover the slow cooker and cook on HIGH for 3-4 hours or on LOW for 6-8 hours, or until the chicken is cooked through and very tender. The exact time will depend on your slow cooker model.

Step 4: Shred the Chicken

Once the chicken is tender, carefully remove the chicken breasts from the slow cooker and place them on a cutting board. Using two forks, shred the chicken into bite-sized pieces. This makes it easy to scoop and eat, contributing to the satisfying texture of these *easy high protein meals*.

💡 mia’s Pro Tip: For the easiest shredding, use the forks to press down and apart on the chicken. It should fall apart with very little resistance. If it feels tough, it needs more cooking time.

Step 5: Return Chicken & Adjust Seasoning

Return the shredded chicken to the slow cooker and stir it into the soup. Taste and adjust seasonings, adding more salt, pepper, or spices as needed. If the soup is too thick, you can add a little more chicken broth or water to reach your desired consistency.

StepActionDurationKey Visual Cue
1Combine Ingredients5 minsAll base ingredients in slow cooker
2Season2 minsSpices visible on top of ingredients
3Slow Cook3-8 hoursBubbling liquid, tender chicken
4Shred Chicken5 minsChicken easily pulls apart
5Combine & Adjust3 minsShredded chicken mixed into soup, seasoned to taste

Serving & Presentation

Serving this soup is all about adding those little touches that make it special. I love ladling the rich, steamy soup into colorful bowls. A sprinkle of fresh cilantro adds a burst of green and freshness, reminiscent of the vibrant herb gardens I remember from my mother’s home. A squeeze of lime brightens all the flavors, cutting through the richness beautifully. You can offer reduced-fat sour cream or Greek yogurt for a creamy counterpoint, and a small handful of crushed tortilla chips for a delightful crunch. It’s these thoughtful additions that elevate simple *low calorie high protein meals*.

For those mindful of extra calories, I suggest a light garnish of diced avocado for healthy fats and creaminess, or simply a touch more fresh cilantro and lime. A very small portion of baked tortilla chips on the side allows guests to add crunch as they please. This approach ensures that the *filling low calorie recipe* remains the star, while offering customizable elements that cater to different dietary needs and preferences. It’s a fantastic way to serve *healthy low calorie dinners* that feel indulgent.

Pairing TypeSuggestionsWhy It Works
Side DishSmall side salad with lime vinaigrette, black beans & corn saladComplements the soup without overpowering it; adds extra fiber and nutrients.
Sauce / DipSalsa Fresca, Guacamole (small portion), Plain Greek Yogurt/Sour CreamAdds freshness, creaminess, or a cool contrast to the spices.
BeverageSparkling water with lime, light lager, unsweetened iced teaCleanses the palate without adding heavy calories or interfering with flavors.
GarnishFresh Cilantro, Chopped Green Onions, Lime Wedges, Crushed Tortilla Chips (sparingly)Adds visual appeal, aromatic freshness, and textural contrast.

Make-Ahead, Storage & Reheating

As a busy New Yorker, meal prepping is my secret weapon. This slow cooker chicken tortilla soup is a dream for it! I often make a double batch on Sunday and portion it out into containers for lunches throughout the week. It’s incredibly convenient and ensures I always have a healthy, *filling low calorie recipe* on hand, even on the most hectic days. Knowing I have delicious *low calorie high protein meals* ready to go makes navigating my schedule so much easier.

MethodContainerDurationReheating Tip
RefrigeratorAirtight container3-4 daysMicrowave or stovetop until heated through. Add a splash of broth if needed.
FreezerFreezer-safe container or heavy-duty resealable bag2-3 monthsThaw overnight in the refrigerator, then reheat as above.
Make-AheadIndividual portions in containersUp to 3 days in fridgeSimply reheat and add fresh garnishes like cilantro and lime.

When reheating, I find that a gentle simmer on the stovetop is best for preserving texture. Break up any clumps of chicken and add a splash of water or broth if the soup seems too thick after sitting in the fridge. Microwave reheating is faster of course; just ensure it’s heated thoroughly. For frozen portions, thawing in the fridge overnight is ideal to prevent uneven cooking. These *healthy low calorie dinners* are designed for convenience, so don’t stress the reheating process!

Variations & Easy Swaps

VariationKey ChangeBest ForDifficulty Impact
Heartier VarietyAdd a second can of beans or add cooked quinoa.Sustained fullness, growing appetites.No change
Vegan SpinReplace chicken with firm or extra-firm tofu (cubed/pressed) or chickpeas. Use vegetable broth.Vegetarian/vegan diners.Ensure tofu is well-pressed and perhaps pan-fried for texture.
Quick Weeknight SwapUse pre-cooked shredded chicken (rotisserie).Time-crunched evenings.Reduces cook time significantly, focus on flavor infusion.

Heartier Variety

To make this soup even more substantial and satisfying, consider adding another can of black beans or a can of kidney beans. Alternatively, stir in about 1 cup of cooked quinoa or brown rice during the last 30 minutes of cooking. These additions increase the fiber content and provide complex carbohydrates, making the *low calorie high protein meals* even more *filling low calorie recipes*. My Moroccan grandmother would often add grains to her stews for heartiness, a technique I love to adapt.

Vegan Spin

For a delicious vegan version, simply swap the chicken breasts for 1-2 blocks of extra-firm tofu, pressed and cubed, or an additional can of chickpeas. Ensure you’re using low-sodium vegetable broth. The tofu will absorb the flavors of the broth and spices wonderfully; for best texture, you can pan-fry the tofu cubes until golden before adding them to the slow cooker. This makes for fantastic *high protein low calorie recipes* that fit a plant-based lifestyle.

Quick Weeknight Swap

On nights when time is truly of the essence, using pre-cooked shredded chicken, like that from a rotisserie chicken, is a game-changer for these *easy high protein meals*. You can simply add the shredded chicken during the last 30-60 minutes of cooking, or even stir it in just before serving to warm through. This shortcut drastically reduces the cook time while still allowing the other flavors to meld beautifully in your *healthy low calorie dinners*.

What are the best low calorie high protein meals to keep you full during the day?

The best low calorie high protein meals are those that combine lean protein sources with fiber-rich ingredients like vegetables, beans, and whole grains. Think dishes similar to this soup, or baked salmon with roasted asparagus, lentil soup, grilled chicken salads with plenty of greens, or Greek yogurt bowls with berries and nuts. The combination of protein and fiber digests slowly, promoting satiety and preventing energy crashes. These types of meals are perfect for maintaining energy levels throughout the day without the feeling of deprivation often associated with calorie restriction.

Can you make high protein low calorie meals without using protein powder?

Absolutely! Protein powder is a supplement, not a necessity for high protein, low calorie meals. Many whole foods are naturally packed with protein. Excellent sources include lean meats like chicken breast and turkey, fish, eggs, dairy products like Greek yogurt and cottage cheese, legumes such as lentils and beans, and even certain grains and nuts. Building meals around these ingredients is a delicious and effective way to increase protein intake while keeping calories in check, offering a more natural and satisfying approach.

How do you cook low calorie high protein meals in under 30 minutes?

To cook *easy high protein meals* in under 30 minutes, focus on quick-cooking proteins and simple preparations. Think pre-cooked rotisserie chicken for salads or wraps, canned tuna or salmon for quick meals, eggs for omelets or scrambles, and lean ground turkey or beef stir-fries. Pair these with quick-cooking vegetables like spinach, bell peppers, or broccoli florets, and pre-cooked grains like quinoa. Sheet pan meals where protein and vegetables cook together are also fantastic time-savers for *healthy low calorie dinners*. Minimal prep and quick cooking are key.

What are common ingredient swaps to lower calories but keep protein high in meals?

You can effectively lower calories while maintaining high protein by making smart swaps. For example, opt for lean protein sources like chicken breast over fattier cuts, or use beans and lentils as a primary protein. Replace calorie-dense sauces with lighter alternatives like a lemon-herb vinaigrette or a splash of broth. Swap out refined grains for whole grains or cauliflower rice. Use cooking methods like baking, grilling, or steaming instead of frying. Even small changes, like using less oil in cooking or choosing low-fat dairy, add up significantly when creating *high protein low calorie recipes*.

Is this chicken tortilla soup a good option for meal prep?

Yes, this chicken tortilla soup is an excellent choice for meal prep! The flavors actually deepen and meld beautifully as it sits, making it even tastier on subsequent days. It stores well in the refrigerator for 3-4 days or can be frozen for longer storage. Just portion it into individual containers for grab-and-go lunches or dinners. Reheating is simple, either on the stovetop or in the microwave. It’s one of my go-to *filling low calorie recipes* for busy weeks in NYC.

Can I make this soup spicier?

Absolutely! If you love a spicy kick, you can easily increase the heat level. Add a minced fresh jalapeño or serrano pepper along with the garlic and onion in Step 1. You can also add a pinch of cayenne pepper or a dash of hot sauce to the soup mixture. For a milder heat, stick to the Rotel and consider adding a small amount of diced green chilies. Adjusting the spice is a great way to customize these *low calorie high protein meals* to your preference.

What if I don’t have a slow cooker?

No slow cooker? No problem! You can adapt this recipe for the stovetop. After sautéing the onion and garlic, add all the other ingredients (except the chicken breasts and garnishes) to a large pot. Place the chicken breasts on top. Bring to a simmer, then reduce heat, cover, and cook for 45-60 minutes, or until chicken is cooked through and tender. Shred chicken and return to pot. This method works well for *easy high protein meals*.

How can I thicken this soup if it’s too thin?

If your soup ends up thinner than you prefer, there are a few easy ways to thicken it without adding many calories. You can mash some of the black beans against the side of the pot with your spoon, which will release their starch and thicken the broth naturally. Another option is to create a slurry by whisking together 1-2 tablespoons of cornstarch or arrowroot powder with an equal amount of cold water, then stirring it into the simmering soup until thickened. Both methods are great for *healthy low calorie dinners* that need a bit more body.

Share Your Version!

I truly hope you enjoy this flavorful and satisfying **low calorie high protein meal**. It’s a recipe that brings comfort and ease to my busy life here in New York City, and I’m so excited for you to try it! Please, if you make this soup, leave a star rating and a comment below to let me know how it turned out. Your feedback means the world to me! I also adore seeing your creations – share a photo on Instagram or Pinterest and tag me @exorecipes. I can’t wait to see your delicious bowls!

From my NYC kitchen to yours — I hope this recipe brings as much warmth to your table as it does to mine. — mia 🧡

📌

Love This Recipe? Save It to Pinterest!

If you enjoyed this 50+ Low Calorie High Protein Meals recipe, don’t let it get lost in your browser tabs! 😄 Pin it now so you can find it again anytime — and explore hundreds more tried-and-tested recipes waiting for you on my Pinterest boards.

👉 Follow mia on Pinterest @chefrecipes2

📌 Pin this recipe · 🔁 Re-pin your favorites · 💬 Tag me when you make it — I love seeing your creations!

Print

clock clock iconcutlery cutlery iconflag flag iconfolder folder iconinstagram instagram iconpinterest pinterest iconfacebook facebook iconprint print iconsquares squares iconheart heart iconheart solid heart solid icon

50+ Low Calorie High Protein Meals (Easy Recipes That Keep You Full)

  • Author: Chef Mia

Description

27g protein, 259 calories. A spicy and satisfying chicken tortilla soup made in the slow cooker. This low calorie high protein soup is packed with Mexican-inspired flavors.


Instructions


    50+ Low Calorie High Protein Meals (Easy Recipes That Keep You Full)