Easy Cucumber Tomato Avocado Salad Recipe

Cucumber Tomato Avocado Salad: The Freshest Summer Salad Recipe with Lemon Dressing

⚖️
Difficulty
Easy
⏲️
Prep Time
15
🕒
Cook Time
0
⏱️
Total Time
15
🍽️
Servings
4-6

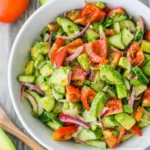
New York City’s farmers markets are bursting with vibrant produce during the summer months, and nothing captures that freshness quite like a simple, yet utterly delicious cucumber tomato avocado salad. For years, I’ve loved making a classic cucumber and tomato salad, a staple from my childhood in Morocco that my mother would prepare with the ripest tomatoes and crispest cucumbers she could find. But lately, I’ve been elevating it with the creamy addition of avocado and a bright, zesty lemon dressing, turning it into something truly special. This improved version is the ultimate easy avocado salad, perfect for those sweltering summer days when you want something light, healthy, and bursting with flavor.

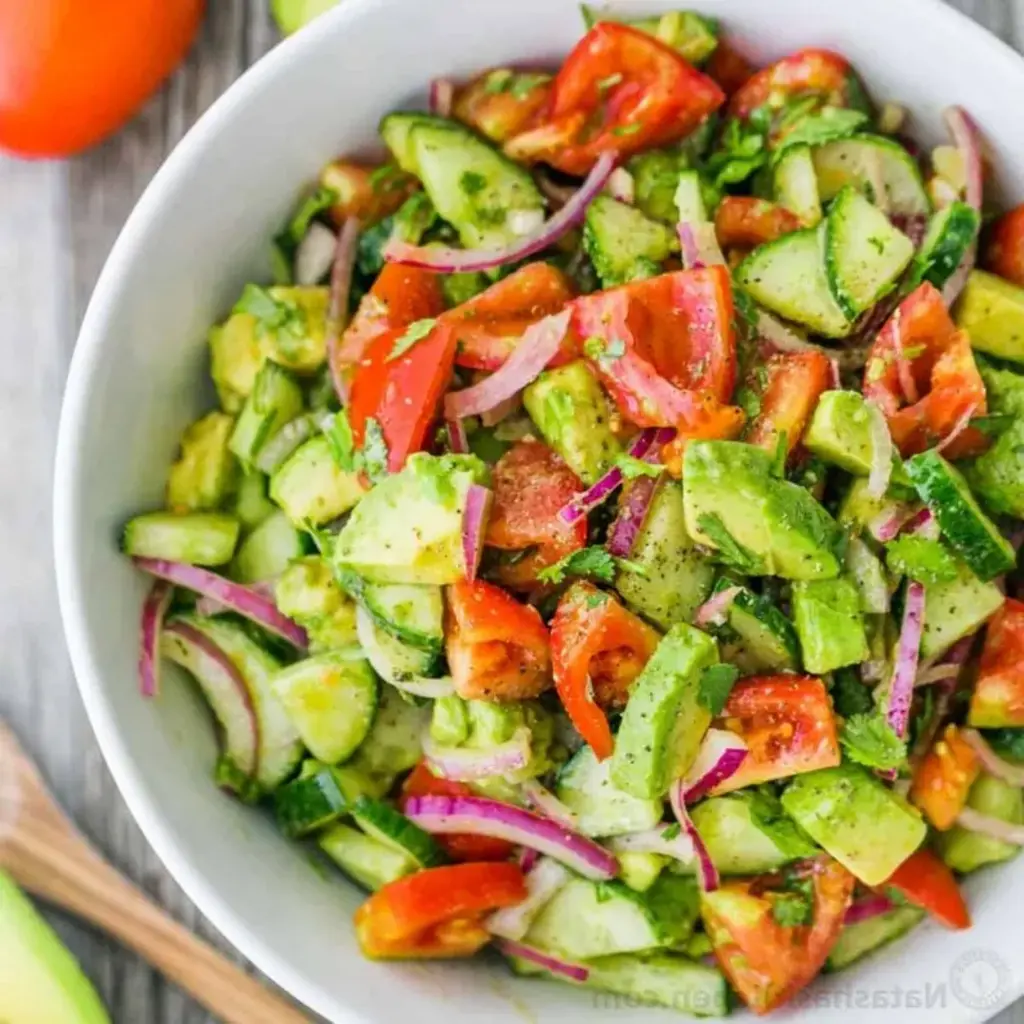
Imagine perfectly ripe, juicy Roma tomatoes bursting with sweetness, juxtaposed with the cool, refreshing crunch of an English cucumber. A whisper of sharp red onion adds just the right amount of bite, while creamy avocado melts in your mouth, creating a luxurious texture that’s simply divine. The dressing, a vibrant blend of extra virgin olive oil and fresh lemon juice, coats every ingredient with a tangy brightness, a technique honed during my culinary training in Paris. A generous shower of fresh cilantro ties it all together, its herbaceous notes singing with the summer bounty. This fresh summer salad recipe is a sensory delight, a true celebration on a plate.

What makes my cucumber tomato avocado salad truly stand out is the careful balance of flavors and textures, achieved through a few simple chef-inspired techniques. I’ll be sharing a pro tip on how to keep your salad perfectly crisp, even when made ahead, avoiding the dreaded watery pitfall. We’ll also touch on a common mistake many home cooks make that can dull the vibrant flavors. This easy avocado salad isn’t just beautiful; it’s designed for busy New Yorkers like me, proving that healthy eating can be both quick and incredibly satisfying. It’s the perfect healthy vegetable salad for any occasion.

Why This Cucumber Tomato Avocado Salad Recipe Is the Best

My culinary journey, from the bustling souks of Morocco to the elegant kitchens of Paris and now the vibrant food scene of NYC, has taught me the importance of simple ingredients prepared with intention. This **cucumber tomato avocado salad** recipe is a culmination of that experience. I’ve taken a beloved classic and infused it with the creamy richness of avocado and a perfectly balanced lemon vinaigrette, creating a dish that’s both comforting and sophisticated. It respects the integrity of the fresh produce while elevating it to new heights, satisfying both the craving for comfort and the desire for something new and exciting.

The secret to the perfect texture in this **avocado cucumber salad** lies in the cut of the vegetables and the timing of the dressing. French culinary training emphasized precision, and I apply that here by ensuring the tomatoes and cucumbers are diced to a similar size for consistent mouthfuls. The avocado is added just before serving to maintain its creamy texture and prevent it from becoming mushy, a detail that makes a significant difference. The simple lemon and olive oil dressing is emulsified just enough to coat every piece without overpowering the natural flavors of the vegetables, a technique I learned when perfecting classic European sauces.

This dish is a testament to how a **fresh summer salad recipe** can be both incredibly easy and remarkably impressive. It requires no cooking, making it the perfect make-ahead option for picnics, potlucks, or a quick weeknight meal. The combination of healthy fats from the avocado, fiber from the vegetables, and bright acidity from the lemon results in a salad that’s not only delicious but also incredibly satisfying and nourishing. It’s the kind of **easy avocado salad** that becomes a go-to, a reliable star for any table, proving that simple can indeed be spectacular.

Cucumber Tomato Avocado Salad Ingredients

When I’m developing recipes, I always think about sourcing the best ingredients. In New York City, I love visiting the Union Square Greenmarket for the freshest produce, especially the ripe Roma tomatoes and crisp English cucumbers that are perfect for this salad. If you can’t find Roma tomatoes, any ripe, firm tomato will work. My mother used to say the best salads are made with love and the freshest ingredients available, a philosophy I carry with me from my Moroccan kitchen to yours.

Ingredients List

  • 1 lb Roma tomatoes
  • 1 English cucumber
  • 1/2 medium red onion (thinly sliced)
  • 2 ripe avocados (diced)
  • 2 Tbsp extra virgin olive oil or sunflower oil
  • 2 Tbsp fresh lemon juice ((from 1 medium lemon))
  • 1/4 cup (about 1/2 bunch) fresh cilantro, chopped
  • 1 tsp sea salt or 3/4 tsp table salt
  • 1/8 tsp black pepper

Ingredient Spotlight

Tomatoes: I prefer Roma tomatoes for their firm flesh and lower water content, which helps prevent a watery salad. They also hold their shape well when diced. If you can’t find Roma, use any ripe, firm variety like Beefsteak or vine-ripened tomatoes. Just be extra diligent about tasting and adjusting seasoning at the end.

English Cucumber: These cucumbers have a thin skin and fewer seeds than regular cucumbers, making them ideal for raw preparations. They add a wonderful crispness and hydration without making the salad soggy. Persian cucumbers are a great substitute, or you can de-seed and peel a regular cucumber if necessary.

Avocado: The star of our modern twist! The creamy, buttery texture of ripe avocado adds a luxurious element to this fresh summer salad. It’s essential to use avocados that are perfectly ripe—yield slightly to gentle pressure but not mushy. If your avocados aren’t ripe yet, you can try using a dollop of crème fraîche or a small amount of crumbled feta cheese for creaminess, though the flavor profile will change.

Fresh Lemon Juice: This isn’t just for brightness; the acidity in lemon juice also helps to “set” the vegetables slightly and emulsify the dressing, binding the flavors. Freshly squeezed is non-negotiable for this recipe! It adds a zesty zing that you just can’t get from a bottle. A lime would be a more tart substitute, while a splash of white wine vinegar could offer a milder acidity.

Original IngredientBest SubstitutionFlavor / Texture Impact
Roma TomatoesVine-ripened Tomatoes (diced); Cherry Tomatoes (halved)Slightly softer texture, may release more juice. Cherry tomatoes add bursts of sweetness.
English CucumberPersian Cucumbers (sliced); Regular Cucumber (peeled & seeded)Similar crispness; regular cucumbers may have tougher skin and more seeds.
AvocadosCrumbled Feta Cheese; Cubed Fresh MozzarellaCreamy texture replaced by salty, slightly chewy (feta) or mild, milky (mozzarella).
CilantroFresh Parsley (flat-leaf); Fresh MintLess peppery, more herbaceous (parsley); refreshing and slightly sweet (mint).

How to Make Cucumber Tomato Avocado Salad — Step-by-Step

Putting together this vibrant salad is incredibly straightforward, perfect for even the busiest weeknights in my NYC apartment.

Step 1: Prepare the Vegetables

Start by dicing the Roma tomatoes into roughly 1/2-inch pieces. Slice the English cucumber into similar-sized pieces. Thinly slice half a medium red onion. Place all these prepared vegetables into a large salad bowl. If your red onion is particularly pungent, you can soak the slices in cold water for 10 minutes and then drain them well to mellow out the flavor.

💡 mia’s Pro Tip: For the best texture and to prevent your salad from becoming watery, ensure your tomatoes and cucumbers are dry after washing and chopping. Pat them gently with paper towels before adding them to the bowl.

Step 2: Add Avocado and Herbs

Dice the two ripe avocados and add them to the bowl with the tomatoes, cucumber, and red onion. Chop the fresh cilantro and add it to the mixture as well. Toss everything gently to combine, being careful not to mash the avocados.

Step 3: Prepare and Add Dressing

In a small separate bowl or directly over the salad, whisk together the 2 tablespoons of extra virgin olive oil and 2 tablespoons of fresh lemon juice. Drizzle this dressing over the salad ingredients. Toss the salad very gently to ensure everything is lightly coated with the dressing. At this stage, you can taste and adjust the oil and lemon ratio if you prefer it tangier or richer.

⚠️ Common Mistake to Avoid: Adding the salt and pepper too early, especially right after adding the salt, can draw out too much moisture from the tomatoes and cucumber, making the salad watery. Wait until just before serving to season.

Step 4: Season and Serve

Just before serving, sprinkle the salad with 1 teaspoon of sea salt and 1/8 teaspoon of black pepper. Give it one final, gentle toss to distribute the seasoning evenly. Serve immediately to enjoy the ingredients at their freshest and most vibrant.

StepActionDurationKey Visual Cue
1Prep Vegetables5-7 minsUniformly diced tomatoes, cucumbers, and thinly sliced onion.
2Add Avocado & Herbs2-3 minsAvocado diced, cilantro chopped and mixed in.
3Prepare & Add Dressing1 minEvenly coated ingredients with glistening dressing.
4Season and Serve1 minBright, fresh salad with visible seasoning.

Serving & Presentation

This salad is a showstopper as is, but I love to plate it elegantly, especially when entertaining. For a true Moroccan flair, I might serve it in a shallow ceramic bowl, perhaps one similar to those found in the markets of Marrakech. In my NYC kitchen, a simple white serving dish allows the vibrant colors of the tomatoes, cucumber, and avocado to truly pop. A tiny garnish of extra cilantro leaves or a sprinkle of smoked paprika can add another layer of visual appeal and subtle flavor.

The beauty of this cucumber tomato avocado salad is its versatility. It pairs wonderfully with grilled chicken or fish, acting as a refreshing counterpoint. You can also serve it alongside a hearty grain like quinoa or couscous for a more substantial vegetarian meal. Think of it as the perfect accompaniment to a summer barbecue, cutting through richer flavors and offering a burst of freshness. It’s the kind of dish that looks and tastes sophisticated but is delightfully easy to prepare, a balance I’ve strived for since my Paris culinary school days.

Pairing TypeSuggestionsWhy It Works
Side DishGrilled Chicken or Fish; Lentil Soup; Quinoa SaladThe salad’s acidity and freshness complement rich proteins and hearty grains.
Sauce / DipTzatziki Sauce; Hummus; PestoLending a cooling, creamy, or herbaceous contrast to the salad’s flavors.
BeverageSparkling Water with Lemon; Dry Rosé Wine; Iced Green TeaRefreshing options that echo the salad’s brightness and complement its zestiness.
GarnishToasted Pepitas; Crumbled Feta; A Pinch of Smoked PaprikaAdding texture, a salty tang, or a hint of smoky warmth.

Make-Ahead, Storage & Reheating

As a busy New Yorker, I often rely on meal prep to keep my kitchen running smoothly. This salad is fantastic for making ahead, but requires a slight shift in assembly to maintain its best quality. The key is to keep the avocado separate until just before serving to prevent it from browning and becoming mushy.

MethodContainerDurationReheating Tip
RefrigeratorAirtight container1-2 days (if avocado is added separately)Best served cold. If avocado was included, a gentle toss might be needed.
FreezerN/AN/ANot recommended due to the fresh vegetables and avocado changing texture.
Make-AheadSeparate containers for dressing and prepped vegetables (excluding avocado)Up to 1 day in advanceCombine prepped vegetables, add diced avocado and dressing just before serving.

If you’re packing this for lunch, I recommend keeping the undressed vegetables and avocado in one container, and the dressing in a small, separate container. Once you’re ready to eat, toss everything together. This ensures the vegetables stay crisp and the avocado remains beautifully green and creamy, just as it should be.

For best results, aim to enjoy this fresh summer salad recipe within a day or two of making it. The vibrant flavors are truly best when the ingredients are at their peak. Remember, this is a raw preparation, so while some elements can hold up, it’s not designed for extensive reheating.

Variations & Easy Swaps

VariationKey ChangeBest ForDifficulty Impact
Mediterranean TwistAdd Kalamata olives, cucumber, and a sprinkle of feta. Replace cilantro with parsley.Those craving Greek flavors.Easy
Vegan & Dairy-Free SwapsEnsure no dairy used (recipe is naturally dairy-free). For avocado substitute, use chickpeas for creaminess.Strictly vegan or dairy-free diets.Easy
Spicy Southwest FlavorAdd corn kernels, black beans, and a pinch of cumin to the dressing. Garnish with a jalapeño slice.Those who love a kick.Easy

Mediterranean Twist

To infuse a vibrant Mediterranean essence, I love adding a handful of briny Kalamata olives and some crumbled feta cheese for that salty tang. I also swap the cilantro for fresh parsley, which offers a cleaner, more herbaceous note beloved in Mediterranean cooking. For an extra layer of flavor, a tiny pinch of dried oregano can be added to the dressing. This takes the salad from simple to sophisticated in minutes.

Vegan & Dairy-Free Swaps

This recipe is naturally vegan and dairy-free, which makes it wonderfully accessible! The creamy texture is provided by the avocado. If you need to substitute the avocado for any reason or want a different texture, I’ve found that adding a small can of drained chickpeas to the salad can provide a satisfying chewiness and subtle creaminess. Ensure your olive oil and lemon juice are the only liquid components for a true vegan dish.

Spicy Southwest Flavor

For a delightful Southwest flair, simply add a cup of sweet corn, ideally roasted for a smoky depth, and half a cup of rinsed black beans to the salad. Tossing in a teaspoon of ground cumin with the olive oil and lemon juice for the dressing adds an earthy warmth perfect for this variation. If you enjoy a bit of heat, consider finely dicing a quarter of a jalapeño and adding it to the mix or using it as a garnish.

How do you keep cucumber tomato avocado salad from getting watery?

The key to a non-watery cucumber tomato avocado salad lies in two main techniques. First, choose vegetables with lower water content like Roma tomatoes and English cucumbers, and pat them dry after washing and chopping. Second, and most importantly, is timing your seasoning. Salt, when added too early, will draw out moisture from the vegetables, creating a watery base. Wait until just before serving to sprinkle your salt and pepper for the freshest, crispest salad.

What can I substitute for avocado in a cucumber tomato salad?

If avocados aren’t your favorite or aren’t available, you have a few excellent alternatives for a cucumber tomato salad. Crumbled feta cheese offers a salty, tangy creaminess that complements the other ingredients well. Cubes of fresh mozzarella provide a mild, milky counterpoint. For a healthier, plant-based option, consider adding a cup of rinsed and drained chickpeas; they provide a pleasant chewiness and subtle creaminess that works beautifully in this fresh summer salad recipe.

How long does cucumber tomato avocado salad last in the fridge?

To enjoy this easy avocado salad at its best, it’s recommended to consume it within a day, especially if the avocado has already been added. The ingredients will start to soften and the avocado may brown over prolonged periods. If you’re preparing it ahead, store the chopped vegetables (excluding avocado) and dressing separately. This way, you can combine and add the avocado just before serving, extending the salad’s freshness for up to 2 days.

What dressing goes best with cucumber tomato avocado salad?

The dressing that pairs perfectly with a cucumber tomato avocado salad is one that is bright, zesty, and light, allowing the fresh flavors of the produce to shine. My go-to is a simple vinaigrette made from extra virgin olive oil, fresh lemon juice, a pinch of sea salt, and black pepper. This combination enhances the natural sweetness of the tomatoes, the coolness of the cucumber, and the creaminess of the avocado without overpowering them. For a hint of herbal freshness, I always add chopped cilantro.

Can I add other vegetables to this salad?

Absolutely! This fresh summer salad recipe is quite versatile and welcomes the addition of other garden-fresh vegetables. Bell peppers (any color, diced) add a lovely crunch and sweetness. Finely diced celery provides a crisp texture and subtle flavor. Sweet corn kernels, especially roasted, bring a delightful pop. For a bit of bite, thin slices of radishes or even some chopped green beans can be incorporated. Just remember to keep the vegetable sizes relatively uniform for the best eating experience.

Why is my avocado turning brown in the salad?

Avocado turns brown due to oxidation, a natural chemical process that occurs when the fruit is exposed to air. This is why it’s crucial to prepare and serve this avocado cucumber salad promptly, or to add the diced avocado just before serving. If you absolutely must prepare it further in advance, you can toss the avocado cubes lightly with a little extra lemon juice or lime juice before adding them to the salad. This acidic coating helps to slow down the browning process.

Is this a healthy vegetable salad recipe?

Yes, this cucumber tomato avocado salad is an exceptionally healthy vegetable salad recipe! It’s packed with vitamins, minerals, and fiber from the fresh produce. The avocado provides healthy monounsaturated fats, which are great for heart health and satiety. The simple lemon-olive oil dressing uses healthy fats and is free from excessive sugar or sodium, unlike many store-bought dressings. It’s a light, nutritious, and satisfying dish perfect for a balanced diet.

Can I make this salad ahead for a party?

You can certainly make elements of this salad ahead for a party, and it’s highly recommended for the best results. Prepare and chop all your vegetables (tomatoes, cucumber, red onion) and store them in an airtight container in the refrigerator. Keep the diced avocado separate, perhaps tossed with a bit of lemon juice. Prepare the dressing in a small jar. Then, about 15-20 minutes before serving, combine the vegetables, add the avocado and dressing, season, and toss gently. This ensures everything is fresh, vibrant, and not watery.

Share Your Version!

I absolutely love hearing from you and seeing how you bring my recipes to life in your own kitchens! If you’ve whipped up this delightful cucumber tomato avocado salad, please consider leaving a star rating and a comment below. Your feedback helps me and other home cooks immensely! If you share a photo on Instagram or Pinterest, don’t forget to tag me @exorecipes – I’d be thrilled to see your beautiful creation!

I’m always curious about how you adapt recipes! Did you try any of the variations, or perhaps a substitution for the avocado? I’d love to know what you paired with it or how you adjusted the lemon dressing. Sharing your culinary adventures helps us all discover new possibilities!

From my NYC kitchen to yours — I hope this recipe brings as much warmth to your table as it does to mine. — mia 🧡

📌

Love This Recipe? Save It to Pinterest!

If you enjoyed this Cucumber Tomato Avocado Salad recipe, don’t let it get lost in your browser tabs! 😄 Pin it now so you can find it again anytime — and explore hundreds more tried-and-tested recipes waiting for you on my Pinterest boards.

👉 Follow mia on Pinterest @chefrecipes2

📌 Pin this recipe · 🔁 Re-pin your favorites · 💬 Tag me when you make it — I love seeing your creations!
Print

clock clock iconcutlery cutlery iconflag flag iconfolder folder iconinstagram instagram iconpinterest pinterest iconfacebook facebook iconprint print iconsquares squares iconheart heart iconheart solid heart solid icon

Cucumber Tomato Avocado Salad

  • Author: Chef Mia

Description

Our classic cucumber and tomato salad just got better with the addition of avocado, a lemon dressing and fresh cilantro.


Ingredients

Scale
  • 1 lb Roma tomatoes
  • 1 English cucumber
  • 1/2 medium red onion (sliced)
  • 2 avocados (diced)
  • 2 Tbsp extra virgin olive oil or sunflower oil
  • 2 Tbsp fresh lemon juice ((from 1 medium lemon))
  • 1/4 cup 1/2 bunch cilantro, chopped
  • 1 tsp sea salt or 3/4 tsp table salt
  • 1/8 tsp black pepper

Instructions

  1. Place chopped tomatoes, sliced cucumber, sliced red onion, diced avocado, and chopped cilantro into a large salad bowl.
  2. Drizzle with 2 Tbsp olive oil and 2 Tbsp lemon juice. Toss gently to combine. Just before serving, toss with 1 tsp sea salt and 1/8 tsp black pepper.


Nutrition

  • Calories: 261 kcal
  • Sugar: 5 g
  • Fat: 22 g
  • Carbohydrates: 17 g
  • Protein: 3 g


Cucumber Tomato Avocado Salad

Easy 10-Minute Chili Cheese Dip (4 Ingredients!)

Chili Cheese Dip: The 10-Minute Shortcut to Crazy Delicious

⚖️
Difficulty
Easy
⏲️
Prep Time
5 mins
🕒
Cook Time
5 mins
⏱️
Total Time
10 mins
🍽️
Servings
6-8

Oh, game day! In my bustling NYC life, where every minute counts, I live for those moments that bring people together over delicious food. This easy chili cheese dip recipe is my secret weapon for impromptu gatherings or when I need a crowd-pleasing appetizer in a flash. It’s so simple, it feels almost magical – a true testament to how a few quality ingredients, handled with a bit of care, can create something truly spectacular. Forget complicated recipes; this is about pure, unadulterated cheesy, chili goodness, ready in mere minutes for any occasion, ensuring you spend less time in the kitchen and more time with your loved ones. I first dreamt this up on a chilly New York autumn evening, craving comfort food that didn’t require hours of simmering. My Parisian culinary training taught me the importance of technique, but my Moroccan roots, where simple ingredients shine, inspired this shortcut. Now, it’s a staple in my recipe repertoire!

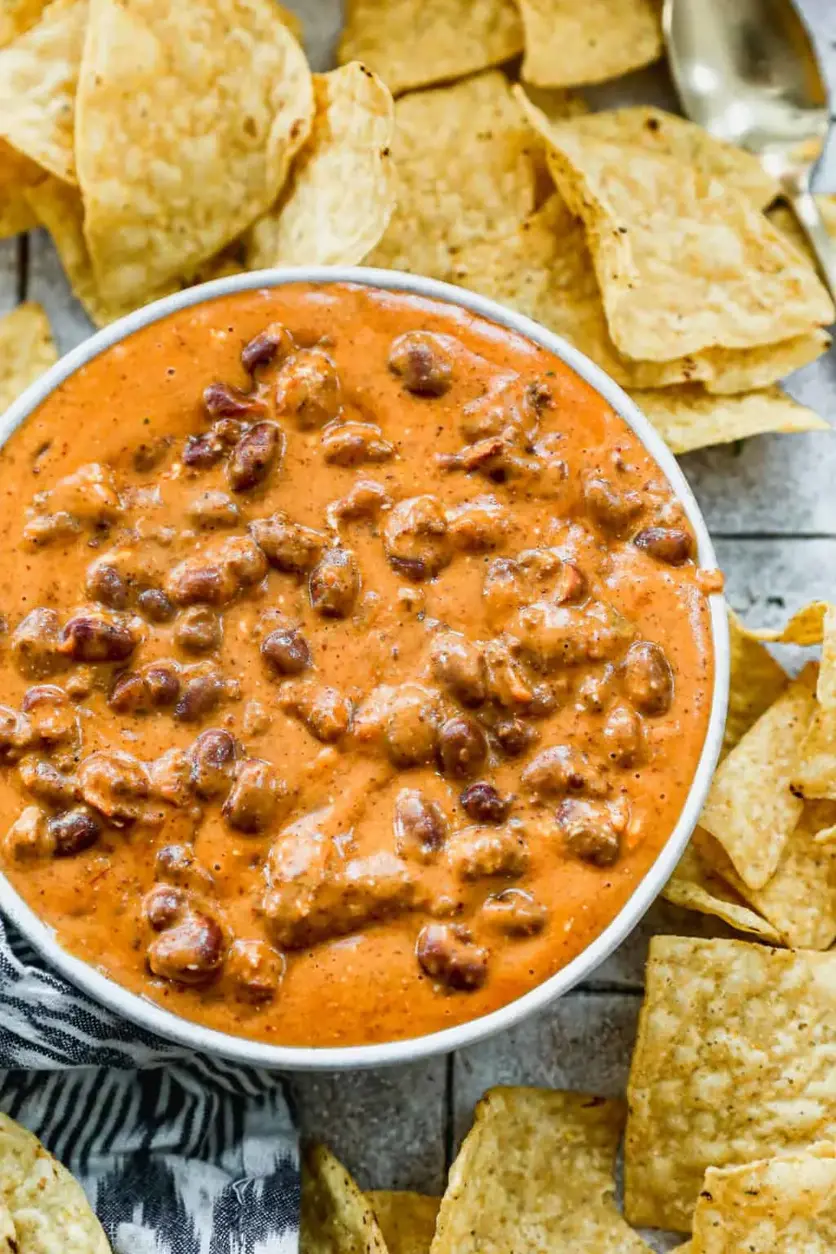
Imagine a velvety, molten blend of rich chili and creamy cheese, bubbling with anticipation. The aroma alone is enough to draw everyone to the kitchen – a warm, inviting scent of slow-cooked spices mixed with sharp cheddar and a hint of tangy salsa. The texture is pure decadence: each spoonful is a delightful contrast of tender chili, gooey, melted cheese, and the subtle kick from the salsa. It’s that perfect, comforting embrace of flavors and textures that makes you close your eyes and savor the moment. It’s a dish that feels both rustic and refined, a balance I’ve always strived for, reminiscent of the vibrant spice markets of Marrakech and the sophisticated bistros of Paris, all brought together with that undeniable New York energy.

What makes this chili cheese dip recipe truly special is its speed and simplicity without sacrificing flavor. I’ve perfected the balance so that even with minimal ingredients, you get maximum taste. You’ll discover my secret to achieving that perfect creamy consistency, a technique I picked up from a sauce master in Paris. Furthermore, I’ll share a common pitfall many home cooks fall into that can lead to a greasy dip, and how to easily avoid it. This is more than just a dip; it’s an experience—a guaranteed hit that will have your guests raving and asking for the recipe. Get ready to impress with this incredibly easy, yet undeniably gourmet, party appetizer.

Why This Chili Cheese Dip Recipe Is the Best

The secret to this chili cheese dip recipe’s success lies in its masterful simplicity, a philosophy I deeply cherish. Drawing inspiration from my Moroccan heritage, where the quality of raw ingredients is paramount, and my Parisian culinary training, where technique elevates even the simplest dishes, I’ve honed this recipe to deliver maximum flavor with minimum effort. The unique combination of store-bought chili, cream cheese, and salsa creates a depth of flavor and a luxurious texture that’s far beyond what you’d expect from a few ingredients, making it my ultimate game day dip.

As a professional cook, I understand the science behind achieving that perfect, creamy consistency without any separation or greasiness. The trick here is the careful balance of fat content in the cheeses and the emulsifying properties of the cream cheese, warmed gently. This ensures a smooth, homogenous dip that coats your dippers beautifully. It’s a small detail from classic French saucier techniques that makes a world of difference, turning a simple dip into something truly elegant and satisfying, a true testament to the power of professional cooking simplified for your home kitchen.

This recipe is a lifesaver for busy home cooks. It requires only a handful of pantry staples and comes together in about 10 minutes, making it the ideal party appetizer for any occasion, from Super Bowl Sunday to a casual weeknight get-together. The instructions are straightforward, and the optional additions allow for complete customization. You can confidently whip this up even if you’re new to cooking, and the results will be nothing short of spectacular – a truly foolproof cheesy chili dip that’s sure to become a family favorite.

Chili Cheese Dip Ingredients

When I’m in New York City, I love sourcing my ingredients. For this ridiculously easy chili cheese dip, I often grab a good quality canned chili from Zabars or Fairway. The cream cheese and cheese are usually from my local grocery store’s dairy aisle – I like to get a mix of sharp cheddar for its classic flavor and pepper jack for a little heat. Fresh ingredients like my go-to salsa often come from the Union Square Greenmarket when in season. It’s about finding the best quality available, even for a simple dip.

Ingredients List

  • 2 1/2 cups chili (homemade, or 2 (14 oz cans) store-bought)
  • 4 ounces cream cheese, cut into cubes
  • 2 cups shredded cheese (I use pepperjack and sharp cheddar)
  • 1/4 cup salsa
  • Cayenne pepper or hot sauce (optional, for heat)

Ingredient Spotlight

Chili: This is the backbone of our dip. Whether you make your chili from scratch – a labor of love from my mother’s kitchen in Morocco, infused with cumin and paprika – or opt for high-quality store-bought chili (look for one with hearty meat and a rich sauce, not too watery), it needs to be flavorful. I prefer a medium-spicy chili for this recipe. If your chili is very bland, you might find yourself needing to add more seasoning later, so starting with a good base is key.

Cream Cheese: Don’t skip this! Softened cream cheese is crucial for achieving that incredibly smooth, luxurious texture that distinguishes this dip. It acts as a binder and an emulsifier, ensuring the cheese melts evenly without getting oily. When buying, look for full-fat cream cheese for the best texture. If you accidentally use reduced-fat, the dip might be a bit looser.

Shredded Cheese: A blend of cheeses is where the magic happens. I adore using a mix of sharp cheddar for its classic, tangy bite and pepper jack for a subtle, peppery warmth. Pre-shredded cheese is convenient, but for the smoothest melt, I highly recommend shredding your own cheese from blocks. The anti-caking agents in pre-shredded cheese can sometimes affect the texture, leading to a slightly grainy dip.

Salsa: This adds a zesty tang and a bit of moisture without making the dip too liquidy. Your favorite store-bought salsa works perfectly, or you can use a homemade pico de gallo if you have it handy. I choose a medium heat salsa that complements the chili, but feel free to adjust based on your spice preference. It brings a fresh element to the richness of the cheese and chili.

Original IngredientBest SubstitutionFlavor / Texture Impact
ChiliA good quality canned vegetarian chili or a meatless chili base.Will result in a vegetarian version. Flavor profile will depend heavily on the chosen vegetarian chili.
Cream CheeseNeufchâtel cheese or a dairy-free cream cheese alternative.Neufchâtel will be slightly softer and less rich. Dairy-free alternatives vary in texture and meltability; results may differ.
Shredded Cheese BlendA single type of cheese like Monterey Jack, Colby, or a Mexican blend.Monotony in flavor; a blend gives complexity. You might need to add a pinch of spices for depth.
SalsaDiced tomatoes with green chilies (like Rotel) or a tomato-based hot sauce.Diced tomatoes will add more liquid and texture. Hot sauce will increase heat without the chunky texture.

How to Make Chili Cheese Dip — Step-by-Step

Making this cheesy chili dip is incredibly straightforward. Just follow these simple steps, and you’ll have a warm, bubbling dip ready in no time, perfect for any party or casual get-together.

Step 1: Combine Ingredients

In a medium saucepan, combine the chili, cubed cream cheese, shredded cheese, and salsa. If you like your dip with a bit more heat, now is the time to stir in a pinch of cayenne pepper or a dash of your favorite hot sauce. Starting with medium-low heat is key – don’t rush this process!

💡 mia’s Pro Tip: For the smoothest melt, ensure your cream cheese is at room temperature or cut into small cubes. This helps it incorporate more evenly with the other ingredients without clumping.

Step 2: Heat and Stir

Cook over medium-low heat, stirring constantly. You want the ingredients to meld together beautifully. Keep stirring gently to prevent anything from sticking to the bottom of the pan. You’ll see the cheese begin to melt and the cream cheese will soften and disappear into the mixture.

⚠️ Common Mistake to Avoid: Overheating! Cooking on excessively high heat can cause the cheese to separate or scorch. Maintain a gentle, consistent medium-low heat to ensure a creamy, perfectly blended dip.

Step 3: Melt Until Bubbly

Continue cooking and stirring for about 5 minutes, or until all the ingredients are thoroughly combined, the cheese is completely melted, and the dip is delightfully bubbly. The texture should be thick and creamy, absolutely irresistible. Taste and adjust seasoning if needed – maybe an extra dash of hot sauce for kick!

Step 4: Serve Immediately

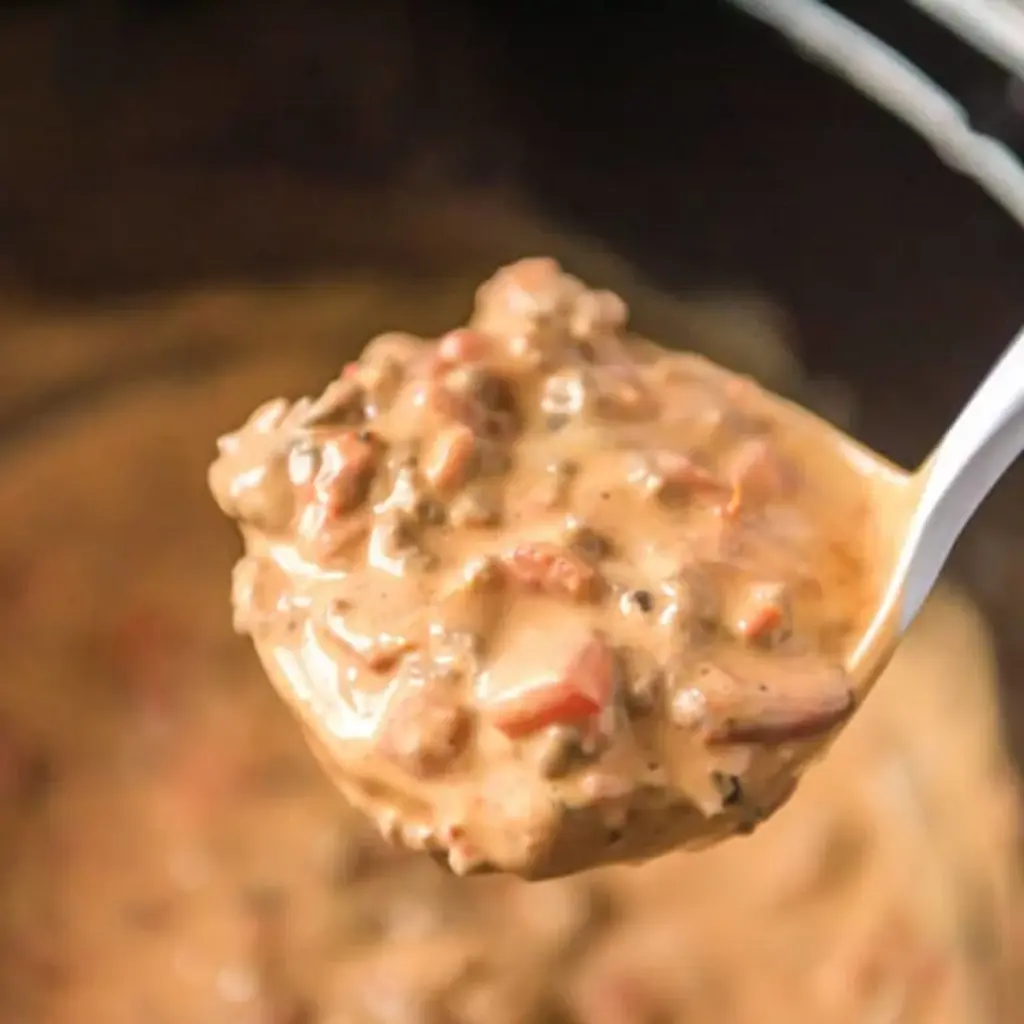
Once it reaches that perfect, gooey consistency, ladle the chili cheese dip into a serving bowl. Serve it while it’s hot and bubbly, accompanied by a variety of dippers. The aroma alone will make it the star of any party appetizer spread!

StepActionDurationKey Visual Cue
1Combine chili, cream cheese, shredded cheese, salsa, and optional heat.~2 minutesAll ingredients are in the saucepan.
2Heat over medium-low, stirring constantly.~3 minutesCream cheese begins to soften and melt into chili.
3Continue cooking until cheese is bubbly and fully melted.~5 minutesSmooth, thick, bubbly dip with no visible cheese clumps.
4Serve hot.ImmediateSteaming and rich in serving bowl.

Serving & Presentation

This chili cheese dip is incredibly versatile when it comes to serving. I love presenting it in a rustic ceramic bowl, perhaps one I picked up on a trip to Morocco or a chic find from a Chelsea market, to enhance its warm, inviting appeal. A sprinkle of fresh chopped cilantro or a few jalapeño slices on top adds a pop of color and freshness that brightens the whole dish. It’s a centerpiece that screams comfort and deliciousness, inviting everyone to dig in.

For a truly New York experience, try serving this dip alongside some of the amazing artisanal bread I find at my local bakery. Imagine thick slices of sourdough or a crusty baguette for dipping. Alternatively, classic tortilla chips, sturdy pretzel bites, or even fresh vegetable sticks like bell peppers and celery work wonderfully. It’s all about the contrast in textures and the joy of scooping up that rich, cheesy goodness.

Pairing TypeSuggestionsWhy It Works
DippersTortilla chips, Fritos, pretzel bites, baguette slices, sturdy crackers, carrot sticks, bell pepper strips.Provides a satisfying crunch or chew to contrast the dip’s creaminess and soak up its flavor. Variety caters to all preferences.
Serving IdeasServe on top of hot dogs, nachos, baked potatoes, or as a filling for grilled cheese.Elevates other dishes with its rich, cheesy, and savory flavor profile, transforming simple meals into hearty fare.
BeverageCold beer, craft soda, iced tea, or a flavorful, slightly acidic white wine.The crispness of beer or soda cuts through the richness of the dip, while iced tea or wine offer a refreshing palate cleanser.
GarnishFresh cilantro, chopped green onions, diced red onion, pickled jalapeños, a dollop of sour cream or Greek yogurt.Adds freshness, a hint of sharpness, or a cooling element that balances the savory depth and spice of the dip.

Make-Ahead, Storage & Reheating

In my busy NYC life, make-ahead meals are essential, and this chili cheese dip is no exception. I often prepare it a day in advance to save time. Once it’s cooled, I transfer it to an airtight container and store it in the refrigerator. This allows the flavors to meld beautifully. You can also easily whip up a fresh batch just before guests arrive in under 15 minutes, making it perfect for any last-minute entertaining.

MethodContainerDurationReheating Tip
RefrigeratorAirtight container or bowl with plastic wrap.3-4 daysReheat gently on the stovetop over low heat, stirring frequently, or in short bursts in the microwave with stirring in between. Add a splash of milk or water if it seems too thick.
FreezerFreezer-safe container or heavy-duty freezer bag.1-2 monthsThaw overnight in the refrigerator. Reheat as above. Some texture change might occur; stir well. Some say freezing can affect the cheese’s smoothness.
Make-AheadAssemble and store unheated.1 day in advanceCan be made ahead and reheated right before serving. The stovetop method is best for reheating a make-ahead batch to ensure even melting.

When reheating, whether from the fridge or after thawing from the freezer, my top tip is to do it slowly and gently. Avoid high heat, as this can cause the cheese to become oily or separate. Stirring is your best friend here. If the dip seems a bit thick after reheating, a tablespoon or two of milk, water, or even a little more salsa can help loosen it up and bring back that perfect creamy consistency. For the stovetop, a small, heavy-bottomed saucepan over very low heat works wonders.

Variations & Easy Swaps

VariationKey ChangeBest ForDifficulty Impact
Spicy KickAdd extra chili powder, diced jalapeños, or hot sauce.Those who love heat.No change; simply adjust spice levels.
Gluten-Free/Dairy-FreeUse GF chili, DF cream cheese, and DF shredded cheese.Dietary restrictions.Slightly higher difficulty due to sourcing specific ingredients; results may vary with DF cheese.
Veggie BoostStir in cooked corn, black beans, or sautéed bell peppers.Added nutrition and texture.Minimal change; may require slightly longer cooking if adding raw veggies.

Spicy Kick Variation

For those who crave a fiery kick, inspired by the vibrant spices in Moroccan tagines, I love to amp up the heat. Stir in a teaspoon of your favorite chili powder alongside the cayenne, or toss in some finely diced fresh jalapeños (seeds removed for less heat, kept in for more!). A liberal dash of a smoky chipotle hot sauce also adds a wonderful depth of flavor and a pleasant warmth that lingers without overwhelming the other ingredients. This variation is perfect for game nights when you want something with a real punch.

Gluten-Free & Dairy-Free Twist

Accommodating dietary needs is second nature in my kitchen. For a gluten-free version, simply ensure your chosen chili is certified gluten-free. To make it dairy-free, I’ve had great success using a good quality vegan cream cheese alternative – look for one that’s firm and easily spreadable. For the shredded cheese, a dairy-free cheddar or pepper jack style shred will work. The key is to choose brands known for their meltability to ensure a creamy texture, similar to the dairy version. While the flavor will be different, it’s still incredibly satisfying!

Seasonal Veggie Boost

I love to incorporate seasonal produce, inspired by the bounty at NYC farmers’ markets. In the summer, a handful of fresh corn kernels (grilled first for extra sweetness!) is a delightful addition. During cooler months, I’ll often stir in some sautéed mushrooms or roasted red peppers for added depth and texture. Don’t be afraid to add cooked black beans or pinto beans for extra heartiness. These additions make the dip even more substantial and visually appealing, turning it into a more complete snack.

How do you make chili cheese dip from scratch?

While this recipe uses store-bought chili for speed, making chili cheese dip completely from scratch means making your own chili first. Simmer ground meat (or your preferred base) with diced onions, garlic, tomatoes, beans (optional), and a blend of chili powder, cumin, oregano, and paprika until rich and flavorful. Once your homemade chili is ready, you can use approximately 2.5 cups of it in place of canned chili in this recipe, combining it with cream cheese, your favorite shredded cheese, and salsa, then heating until melted and bubbly.

What are the best cheeses to use in chili cheese dip?

A blend of cheeses is ideal for the best flavor and texture. I personally love a mix of sharp cheddar for its classic, tangy flavor and pepper jack for a mild, peppery kick. Other excellent choices include Monterey Jack, Colby, a good Mexican blend, or even a smoked gouda for a deeper flavor profile. The key is to use cheeses that melt well and complement the savory notes of the chili. Shredding your own cheese from a block will yield the smoothest, creamiest results.

Can I make chili cheese dip in a slow cooker?

Absolutely! Making chili cheese dip in a slow cooker is incredibly convenient, especially for parties. Simply grease your slow cooker insert, then add the cream cheese cubes. Top with the chili, then the salsa, and finally the shredded cheese. Cook on LOW for 1-3 hours, or on HIGH for about 1 hour, stirring occasionally until everything is melted and combined. The slow cooker keeps it warm for an extended period, making it a perfect game day appetizer without the need for constant stovetop attention.

What can I serve with chili cheese dip?

The possibilities are endless and delicious! Classic choices include sturdy tortilla chips, Fritos, or even corn chips for that extra crunch. Pretzel bites are also a fantastic, slightly salty option. For a more wholesome approach, offer fresh vegetable sticks like carrots, celery, bell peppers, or cucumber slices. You can also serve it as a topping for baked potatoes, hot dogs, burgers, or nachos to elevate your meal. Crusty bread or even thick crackers are also great dippers.

How do I prevent chili cheese dip from becoming greasy?

The key to preventing a greasy dip lies in the ingredients and the cooking method. Using cream cheese helps bind the fats from the chili and cheese, emulsifying them into a creamy, cohesive dip. Avoid using excessively fatty chili or low-quality shredded cheeses, which can release more oil. Cooking over medium-low heat and stirring constantly also ensures the fats are incorporated rather than pooling on top. If it does seem a bit greasy, stirring in a tablespoon of milk or a little cornstarch slurry can sometimes help to re-emulsify it.

Can I use different types of chili?

Yes, you absolutely can! This recipe is very forgiving. If you have leftover homemade chili, that’s fantastic. You can also use vegetarian chili for a meatless option, or adjust the spice level by choosing mild, medium, or hot canned chili. Just be mindful that the flavor profile of your dip will be significantly influenced by the type of chili you use. A chili with a thicker sauce and more robust seasoning will yield the best results.

What’s the easiest way to shred cheese for this dip?

For the smoothest melting and best texture, I always recommend shredding your own cheese from blocks, even though pre-shredded is convenient. The easiest way is using the large holes on a box grater. If you’re short on time or have weak wrists, a food processor with a shredding disc attachment is a game-changer – it shreds large quantities in seconds! Just be sure to use block cheese, as pre-shredded often contains anti-caking agents that can affect the dip’s creaminess.

Does this chili cheese dip reheat well?

Yes, this chili cheese dip reheats quite well. The best methods are on the stovetop over low heat or in the microwave in short intervals, stirring frequently. As it reheats, the cream cheese helps maintain its creamy texture. If it appears a bit thick, you can add a splash of milk or water to loosen it up. Avoid overheating, which can sometimes cause the cheese to separate, but with gentle reheating, it’s almost as good as fresh!

Share Your Version!

I absolutely love seeing how you bring my recipes to life in your own kitchens! If you make this irresistible chili cheese dip recipe (and I truly hope you do!), please leave a star rating and a comment below. Your feedback helps me and other cooks so much. And if you snap a photo of your amazing creation, share it on Instagram or Pinterest and tag me @exorecipe – I can’t wait to see your beautifully styled game day dip!

From my NYC kitchen to yours — I hope this recipe brings as much warmth to your table as it does to mine. — mia 🧡

📌

Love This Recipe? Save It to Pinterest!

If you enjoyed this Chili Cheese Dip recipe, don’t let it get lost in your browser tabs! 😄 Pin it now so you can find it again anytime — and explore hundreds more tried-and-tested recipes waiting for you on my Pinterest boards.

👉 Follow mia on Pinterest @chefrecipes2

📌 Pin this recipe · 🔁 Re-pin your favorites · 💬 Tag me when you make it — I love seeing your creations!

Print

clock clock iconcutlery cutlery iconflag flag iconfolder folder iconinstagram instagram iconpinterest pinterest iconfacebook facebook iconprint print iconsquares squares iconheart heart iconheart solid heart solid icon

Chili Cheese Dip

  • Author: Chef Mia

Description

This easy Chili Cheese Dip is made in just 10 minutes with only 4 ingredients (chili, cheese, cream cheese, and salsa)! Make it on the stovetop or slow cooker.


Ingredients

Scale
  • 2 1/2 cups chili (homemade, or 2 (14 oz cans) store-bought (625g))
  • 4 ounces cream cheese (, cut into cubes (113g))
  • 2 cups shredded cheese (, I use pepperjack and sharp cheddar (226g))
  • 1/4 cup salsa ((60g))
  • cayenne pepper or hot sauce (, optional, for heat)

Instructions

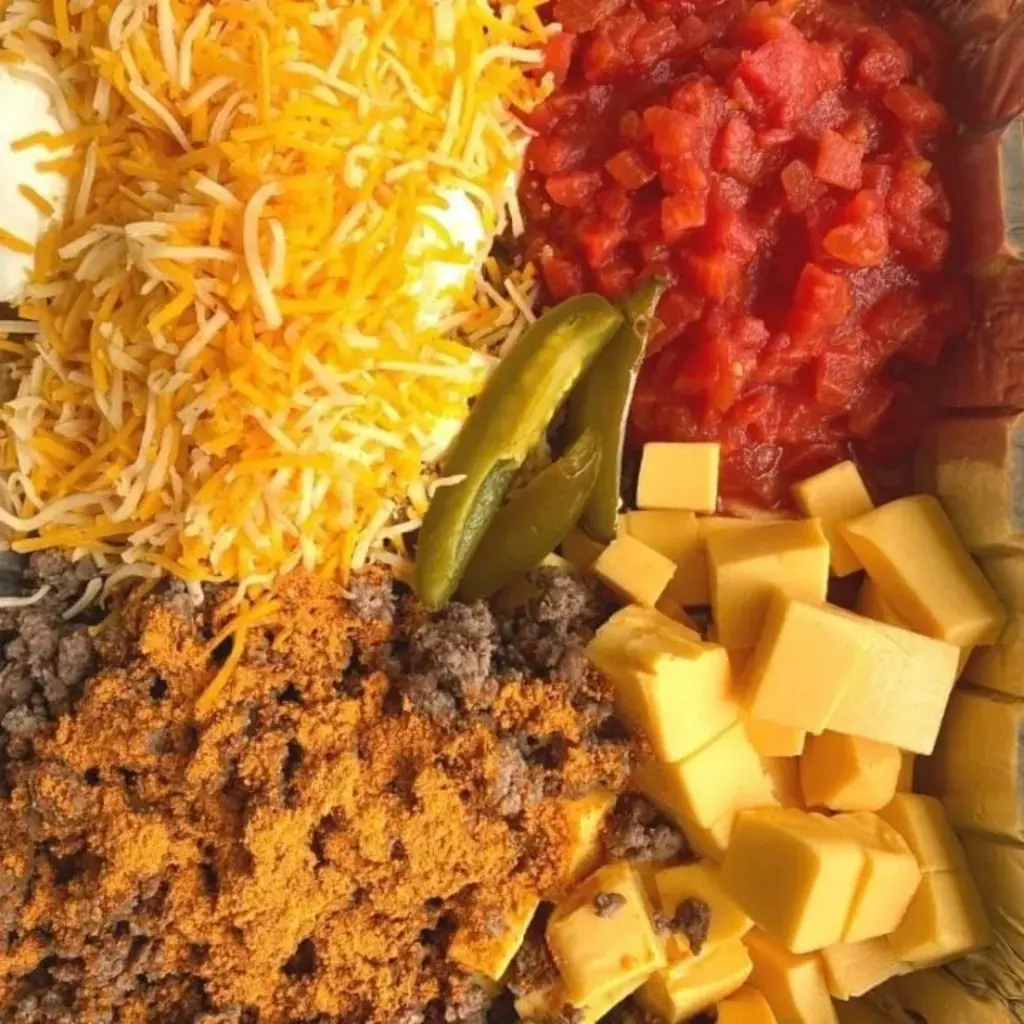
  1. Place all ingredients in a medium saucepan over medium-low heat. Cook, stirring constantly, until all ingredients are thoroughly combined and the cheese is bubbly and melted, about 5 minutes.
  2. Serve with tortilla chips, bread cubes or vegetables. Serve with a chili hot dog, over nachos, or baked potatoes.
  3. Spray the bottom of your slow cooker with non-stick cooking spray (or use a liner). Place cream cheese cubes in the slow cooker. Smoother them with chili, then salsa, then the cheddar cheese. Cook on LOW for 1-3 hours. Stir and serve.


Nutrition

  • Calories: 322 kcal
  • Sugar: 3 g
  • Fat: 23 g
  • Carbohydrates: 15 g
  • Protein: 16 g


Chili Cheese Dip

ph">For more delicious inspiration, follow me on Pinterest!
TikTok Smoked Queso – Easy Cheesy Dip Recipe

“`html

TikTok Smoked Queso: Easy Velveeta, Hamburger & Rotel Dip

⚖️
Difficulty
Easy
⏲️
Prep Time
10
🕒
Cook Time
25
⏱️
Total Time
35
🍽️
Servings
6-8

Oh, the magic of a creamy, cheesy dip! Growing up in my mother’s kitchen in Morocco, we often made dips with warm spices and simple, fresh ingredients. But living in New York City, you learn to embrace shortcuts that don’t compromise on flavor. When I first saw this TikTok smoked queso blowing up my feed, I knew I had to try it. This recipe is my take on that viral sensation, an incredibly easy Velveeta, hamburger, and Rotel concoction that you can whip up in under an hour. It’s perfect for game day, a casual get-together, or just a cozy night in with a movie.

Imagine a bubbling cauldron of golden cheese, infused with the subtle smokiness from a grill or smoker, studded with juicy bits of seasoned beef and the bright zest of tomatoes and chilies. The aroma alone is enough to make your guests gather around the kitchen. This dish is pure comfort, a melody of savory, tangy, and slightly spicy notes that dance on your palate. The texture is unbelievably smooth and luscious, thanks to the Velveeta, making every scoop an indulgence.

What I love most about this TikTok smoked queso is its adaptability. While the classic combination is irresistible, I’ve found a few secrets to elevate it even further. I’ll share my favorite pro tip for achieving an extra velvety smoothness that will impress even the most discerning palates. Plus, I’ll guide you on a common mistake many home cooks make that can leave your queso a little less than perfect. Get ready to master this addictive dip!

Why This TikTok Smoked Queso Recipe Is the Best

My culinary journey, from the vibrant spice markets of Morocco to the refined kitchens of Paris and now the bustling streets of NYC, has taught me the art of balance – how to honor tradition while embracing innovation. This TikTok smoked queso recipe is a perfect example. I’ve refined the popular online version by incorporating a few key techniques that ensure a superior flavor profile and texture, making it truly the best, most reliable smoked queso you’ll ever make. It’s a dish that feels both familiar and excitingly new.

The magic lies in the “smoked” aspect, whether you achieve it on a grill, a smoker, or even a stovetop with a touch of liquid smoke (though I highly recommend the real deal!). This method adds a depth of flavor that simply baking in the oven can’t replicate. It transforms a simple cheese dip into something truly special. And the combination of creamy Velveeta with sharp, shredded cheese and the kick from Rotel and jalapeños creates a complex flavor profile that’s utterly addictive.

One of the biggest draws of this recipe is its sheer simplicity. It’s incredibly beginner-friendly, requiring minimal prep and cooking skills. Even if you’ve never used a smoker before, the instructions are clear and foolproof. We’re talking about combining a few key ingredients and letting them work their magic. This easy smoked queso recipe proves that you don’t need hours in the kitchen or complicated steps to create a crowd-pleasing dip that tastes gourmet.

TikTok Smoked Queso Ingredients

When I’m putting together a batch of this delicious smoked cheese dip, I love to swing by my local Union Square Greenmarket for fresh produce, but for the pantry staples, my go-to is usually Trader Joe’s or Fairway. It’s amazing how a few well-chosen ingredients, many found easily in any US grocery store, can come together to create something so spectacular. This recipe relies on simple components that pack a serious flavor punch, and I’ve tested them thoroughly to ensure the best results every time.

Ingredients List

  • 1 pound ground beef
  • 1 can (14.5 oz) Rotel Diced Tomatoes with Green Chilies, undrained
  • 7 oz. can Sliced Jalapeños, drained
  • 1 block (8 oz) cream cheese, cut into cubes
  • 2 cups shredded taco-flavored cheese blend
  • 1 packet (1 oz) taco seasoning mix
  • 16 oz. Velveeta cheese, cut into 1-inch cubes
  • 2 tablespoons whole whipping cream (optional, for smoother consistency)
  • Diced red onion (optional topping)
  • Fresh cilantro, chopped (optional topping)
  • Tortilla chips, for serving

Ingredient Spotlight

Velveeta Cheese: This is the creamy backbone of our smoked queso. Don’t shy away from it! Velveeta’s unique blend of cheese and other ingredients melts down into an incredibly smooth, stable base that holds all the other flavors together without becoming oily or grainy. Look for the standard yellow block in the dairy aisle of any major supermarket.

Rotel Diced Tomatoes: This canned product is a pantry staple for a reason. I prefer the “Original” or “Mild” versions that already contain green chilies, as they add a fantastic layer of flavor and a bit of heat. The whole can, undrained, adds crucial liquid and tomatoey tang to the cheese dip. Any variety works, but those with added spices will boost the flavor even more.

Taco-Flavored Shredded Cheese Blend: While you can use a cheddar blend, a pre-shredded taco cheese blend often includes Monterey Jack, Colby, and other mild cheeses that melt beautifully and complement the taco seasoning. I always opt for shredded cheese over pre-grated if I can, as it melts better. If you can find it, a Mexican blend is also a fantastic choice.

Original IngredientBest SubstitutionFlavor / Texture Impact
Velveeta CheeseWhite American Cheese (from a deli counter) + 1/4 cup evaporated milkSlightly sharper cheese flavor, potentially a bit less stable melt. Evaporated milk helps with creaminess.
Rotel Diced TomatoesDiced tomatoes (canned, drained) + 1-2 diced pickled jalapeños + 1 tsp chili powderLess liquid, so adjust creaminess. Adds a more ‘from scratch’ tomato flavor and heat.
Taco-Flavored Cheese Blend1 cup shredded Monterey Jack + 1 cup shredded Sharp Cheddar + 1 tbsp taco seasoningMore robust cheese flavor, potential for a slightly less uniform melt depending on the cheeses used.

How to Make TikTok Smoked Queso — Step-by-Step

Making this TikTok smoked queso is so straightforward, you’ll wonder why you haven’t made it sooner. Just follow these simple steps for cheesy perfection.

Step 1: Preheat Oven, Grill, or Smoker

If you’re using an oven, preheat it to 375°F (190°C). If you’re opting for the smoky route, prepare your grill or smoker to maintain a temperature of around 250-275°F (120-135°C). This lower temperature is ideal for allowing the flavors to meld and the cheese to melt gently without scorching.

💡 mia’s Pro Tip: For a truly authentic smoked flavor without a smoker, use a stovetop smoker or even a foil packet of wood chips on your grill. A little goes a long way to impart that irresistible smoky essence.

Step 2: Cook Hamburger Beef

In a skillet over medium-high heat, brown the ground beef, breaking it up with a spoon as it cooks. Once it’s fully cooked through, drain off any excess grease thoroughly. This step is crucial for preventing your queso from becoming too greasy.

⚠️ Common Mistake to Avoid: Don’t overcook the beef to the point of dryness. You want it to remain tender and moist, as it will continue to cook slightly in the queso. Undrained grease is also a big no-no for the best texture!

Step 3: Combine Ingredients

Grab a disposable aluminum foil pan (a 9×13 inch pan works perfectly for this recipe). Add the cooked, drained hamburger meat. Now, add all the remaining ingredients: the undrained can of Rotel tomatoes, the drained sliced jalapeños, the cubed cream cheese, the shredded taco cheese, the taco seasoning, and the cubed Velveeta. Give everything a good stir to ensure the ingredients are well distributed. This helps prevent the meat from clumping and ensures even melting.

Step 4: Bake or Smoke

Place the pan in the preheated oven or in your prepared smoker/grill. If baking, cook for about 15-20 minutes, stirring halfway through, until everything is gloriously melted and bubbly. If smoking, aim for 30-45 minutes, stirring occasionally, until the cheese is fully melted and the dip is heated through.

💡 mia’s Pro Tip: Stirring halfway through is key, especially in the oven! It prevents the bottom from scorching and ensures all that cheesy goodness melts evenly. If smoking, stirring every 15 minutes is usually sufficient.

Step 5: Add Whipping Cream

Carefully remove the pan from the oven or smoker. If the queso seems a little too thick for your liking, stir in the 2 tablespoons of whole whipping cream. This is optional, but it adds an extra layer of silkiness and makes the dip even more dippable. Stir until just combined.

Step 6: Serve Immediately

Pour the hot, melty TikTok smoked queso into a serving bowl or serve directly from the foil pan. Garnish with diced red onion and fresh cilantro, if desired. Serve immediately with plenty of tortilla chips or your favorite dippers. This is a dish best enjoyed warm!

StepActionDurationKey Visual Cue
1Preheat10-15 mins (oven), ongoing (smoker)Target temperature reached
2Cook Beef8-10 minsNo pink visible, grease drained
3Combine5 minsAll ingredients mixed in pan
4Bake/Smoke15-45 minsMelted, bubbly cheese
5Add Cream1 minCream incorporated, desired consistency reached
6ServeImmediateHot and ready for dipping

Serving & Presentation

This TikTok smoked queso is a star on its own, but presentation can elevate it from a casual snack to a party favorite. I love serving it in a rustic ceramic bowl or directly from the aluminum pan if I’m going for a more casual, backyard BBQ vibe. For a touch of elegance inspired by my time in Paris, a sprinkle of finely diced red onion and a scattering of fresh cilantro add a burst of color and freshness that cuts through the richness.

The classic pairing, of course, is tortilla chips. I recommend using a sturdy, house-made style chip that can stand up to the thick, cheesy dip. If you’re feeling ambitious, I have a fantastic recipe for homemade tortilla chips on my site! You can also get creative with other vessels – think sturdy vegetable sticks like carrots and bell peppers, or even slices of toasted baguette for a nod to my French culinary training.

To make it a complete meal, this smoked queso acts as a fantastic topping or side. Imagine it drizzled over grilled chicken or steak, used as a dip for loaded baked potatoes, or even as a component in a hearty nacho platter. And for drinks? A crisp lager, a refreshing margarita, or even a cool glass of water will complement the richness perfectly. It’s all about balance and enjoyment, the cornerstones of any good meal.

Pairing TypeSuggestionsWhy It Works
Side DishDrizzled over grilled chicken or steak; Topping for loaded baked potatoes; Base for loaded nachosAdds a creamy, savory, and slightly spicy element that complements grilled meats and hearty starches.
Sauce / DipClassic tortilla chips; Fresh vegetable sticks (carrots, celery, bell peppers); Toasted baguette slicesProvides a satisfying vehicle for the rich queso, from crunchy to crisp to chewy textures.
BeverageCold Mexican lager; Classic margarita; Sparkling water or lemonadeThe crispness of beer or tartness of margarita cuts through the richness of the cheese. Simple water is refreshing.
GarnishDiced red onion; Fresh cilantro; A dollop of sour cream or guacamoleAdds contrasting textures, freshness, and visual appeal, enhancing the overall flavor experience.

Make-Ahead, Storage & Reheating

As a busy New Yorker, I often rely on make-ahead dishes to simplify weeknight meals and party prep. This smoked queso is fantastic for that! You can prepare the beef and combine all the ingredients (except maybe the whipping cream) a day in advance. Store it covered in the refrigerator, then just pop it into the oven or smoker when you’re ready to serve.

MethodContainerDurationReheating Tip
RefrigeratorAirtight container or covered foil pan3-4 daysReheat gently on the stovetop over low heat, stirring until smooth, or in a 300°F oven. Add a splash of milk or cream if it thickens too much.
FreezerFreezer-safe container or heavy-duty foil pan with tight lid2-3 monthsThaw overnight in the refrigerator. Then reheat as above. Keep in mind that freezing and thawing can slightly alter the texture of Velveeta cheese.
Make-AheadCovered foil pan with all ingredients combined (un-cooked)1-2 days in advance (refrigerated)Bake or smoke as directed. Stir in whipping cream just before serving if desired.

When reheating, the key is to do it gently. Overheating can cause the cheese to separate or become tough. If you’re reheating smaller portions, the microwave on 50% power, stirring every 30 seconds, is a quick option. For stovetop reheating, a heavy-bottomed saucepan over low heat, stirring constantly, is ideal. I often find myself adding a tablespoon of milk or even a bit more whipping cream to revive the creaminess if it has thickened too much during storage.

Variations & Easy Swaps

VariationKey ChangeBest ForDifficulty Impact
Spicy Carnitas QuesoAdd shredded slow-cooked carnitas instead of ground beef; increase jalapeños or add a pinch of chipotle powder.Carnitas lovers; those seeking a deeper, richer flavor.Slightly more prep if making carnitas from scratch.
Gluten-Free / Dairy-Free Smoked QuesoUse dairy-free cheese alternatives suitable for melting; ensure taco seasoning is GF; beef is naturally GF. For DF, use plant-based milk/cream and dairy-free Velveeta-style cheese.Dietary restrictions; vegan/vegetarian guests (if using all plant-based).Finding good DF cheese alternatives can be tricky; may affect melt/flavor.
Seasonal Veggie TwistAdd sautéed corn, black beans, or roasted bell peppers and onions to the mix.Farmers market enthusiasts; adding extra fiber and flavor.Minimal additional prep time for sautéing veggies.

Spicy Carnitas Queso

For a decadent twist, swap the ground beef for tender, shredded carnitas. This adds a wonderful depth of flavor and a slightly different texture. You can achieve this by slow-cooking pork shoulder until it’s fall-apart tender, then shredding and crisping it in a pan. It brings a touch of celebratory flair, reminiscent of the robust flavors you find in some of my favorite Moroccan tagines, but with a Tex-Mex swagger. This variation is perfect for a special occasion.

Gluten-Free / Dairy-Free Smoked Queso

Making this dip accessible for everyone is important to me. For a gluten-free version, simply ensure your taco seasoning is certified gluten-free. For a dairy-free adaptation, you’ll want to seek out dairy-free Velveeta-style cheese alternatives and dairy-free shredded cheese blends. These can be found in most well-stocked supermarkets. The texture might be slightly different, and the flavor can vary depending on the brands you choose, but it’s definitely achievable!

Seasonal Veggie Twist

Think of the changing seasons here in NYC! In the summer, I love to stir in some quick-sautéed corn kernels and black beans for added texture and sweetness. In the fall, roasted bell peppers and onions bring a lovely caramelized flavor. These additions are simple to incorporate after cooking the beef but before baking, and they make your smoked queso even more vibrant and nutritious. It’s my nod to the fresh, seasonal produce I adore.

What is the best type of cheese to use for TikTok smoked queso?

For the quintessential TikTok smoked queso, Velveeta is the star. Its unique emulsifying properties create that signature smooth, creamy, and stable texture that doesn’t break or get oily, even when heated. I also like to add a good melting cheese like a shredded taco blend, Monterey Jack, or sharp cheddar for added depth of flavor. The combination ensures both creaminess and delicious cheesy taste.

How long do you smoke queso on a pellet grill for the best flavor?

When smoking queso on a pellet grill, aim for a temperature of around 250-275°F (120-135°C). This lower heat allows the smoke to infuse gently without scorching the cheese. The duration can range from 30 to 45 minutes, depending on your grill and how quickly the cheese melts. Stirring every 15 minutes helps ensure even melting and smoke absorption. You’re looking for a fully melted, bubbly consistency.

Can you make TikTok smoked queso without Velveeta?

Yes, absolutely! While Velveeta is key for that classic, ultra-smooth melt, you can achieve a delicious queso without it. I recommend using a blend of good melting cheeses like Monterey Jack, sharp cheddar, and perhaps some pepper jack for a kick. For creaminess, you might want to add a bit of evaporated milk or heavy cream, and a tablespoon of cornstarch can help stabilize the melt so it doesn’t separate. It will have a slightly different texture but will still be incredibly tasty.

What are the best toppings or mix-ins for smoked queso dip?

The possibilities for toppings and mix-ins are endless and make this smoked queso dip so versatile! For fresh accents, I love adding finely diced red onion, fresh cilantro, or a dollop of pico de gallo. For extra texture and flavor, consider adding cooked and crumbled chorizo or bacon, sautéed mushrooms and onions, or even some seasoned black beans or corn. A drizzle of your favorite hot sauce or a swirl of crema can also be delightful additions.

How do you make queso smokier?

To amp up the smoky flavor in your queso, the most direct route is to use a smoker or grill with wood chips. Experiment with different wood types like hickory, mesquite, or pecan for varying smoke profiles. If you don’t have a smoker, you can use liquid smoke; start with just 1/2 teaspoon and add more to taste, as it’s quite potent. Another trick is to briefly smoke the Rotel tomatoes or even the cooked ground beef before combining them with the cheese.

Can I make this queso in a slow cooker?

Absolutely! A slow cooker is another fantastic, fuss-free way to make this TikTok smoked queso. Simply combine all the prepped ingredients (cooked beef, Rotel, jalapeños, cheeses, and taco seasoning) in your slow cooker. Cook on low for 1.5 to 2 hours, stirring occasionally, until everything is melted and well combined. You can then switch the slow cooker to the “warm” setting to keep it perfectly dippable throughout your gathering.

Share Your Version!

I always love to hear from you, my dear readers! Did you try this TikTok smoked queso? What did you think of the Velveeta-Rotel combination? Please share your experience by leaving a star rating and a comment below. Your feedback helps me and other home cooks immensely! And if you share a photo of your creation on Instagram or Pinterest, please tag me @exorecipe – I can’t wait to see your delicious party dip!

From my NYC kitchen to yours — I hope this recipe brings as much warmth to your table as it does to mine. — mia 🧡

📌

Love This Recipe? Save It to Pinterest!

If you enjoyed this TikTok Smoked Queso recipe, don’t let it get lost in your browser tabs! 😄 Pin it now so you can find it again anytime — and explore hundreds more tried-and-tested recipes waiting for you on my Pinterest boards.

👉 Follow mia on Pinterest @chefrecipes2

📌 Pin this recipe · 🔁 Re-pin your favorites · 💬 Tag me when you make it — I love seeing your creations!

“`

Print

clock clock iconcutlery cutlery iconflag flag iconfolder folder iconinstagram instagram iconpinterest pinterest iconfacebook facebook iconprint print iconsquares squares iconheart heart iconheart solid heart solid icon

TikTok Smoked Queso

  • Author: Chef Mia

Description

Easy Velveeta, Hamburger and Rotel make up a delicious quick heat and heat melty Queso Dip. Add to grill, smoker or oven bake. Super dippable over and over again, a just cannot be ignored Dip!


Ingredients

Scale
  • 1 pound hamburger meat (cooked)
  • 1 can Rotel Diced Tomatoes (14.5 oz – any flavor, but the ones with spices work great for this dip)
  • 7 oz. Sliced Jalapenos
  • 1 block of Cream Cheese
  • 2 cups of shredded Cheese (taco flavored)
  • 1 pack Taco Seasoning
  • 16 oz. Velveeta Cheese (cubed)
  • 2 tablespoons whole whipping cream
  • diced onions (optional topping)
  • Tortilla Chips (fresh ones are amazing, here is a recipe how to make homemade tortilla chips)

Instructions

  1. Preheat Oven to 375 (or warm up grill, smoker)
  2. Cook hamburger beef, drain any excess oil if necessary.
  3. Combine cooked beef and all other prepped ingredients together in tin foil disposable dish. Mix ingredients up (this helps the meat not dry out).
  4. Place in oven for 15 minutes or until melted, stirring at the halfway point.
  5. Pull out of oven and add 2 tablespoons whole whipping cream and mix (optional but makes a little smoother if too thick).
  6. Serve Queso Dip immediately with Scoops or Tortilla Chips.


Nutrition

  • Calories: 115 kcal
  • Sugar: 1 g
  • Fat: 9 g
  • Carbohydrates: 1 g
  • Protein: 8 g


TikTok Smoked Queso

ph">For more delicious inspiration, follow me on Pinterest!

Easy Cowboy Queso Recipe Loaded with Meat & Cheese

Cowboy Queso: Loaded with Flavor – An Easy Game Day Dip

⚖️
Difficulty
Easy
⏲️
Prep Time
10
🕒
Cook Time
20
⏱️
Total Time
30
🍽️
Servings
8-10

Hello, food lovers! It’s mia from my NYC kitchen, and today we’re diving headfirst into a recipe that screams comfort, celebration, and pure cheesy joy: Cowboy Queso. This isn’t just any queso dip; it’s a hearty, flavor-packed concoction that’s become a staple in my home, especially during football season. Growing up in Morocco, my mother’s kitchen was always filled with the aroma of spices and bubbling tagines, a testament to the power of simple, quality ingredients transformed into something magical. This cowboy queso dip recipe brings that same spirit of generous, soulful cooking to your table, blending familiar American favorites with a touch of my culinary heritage.

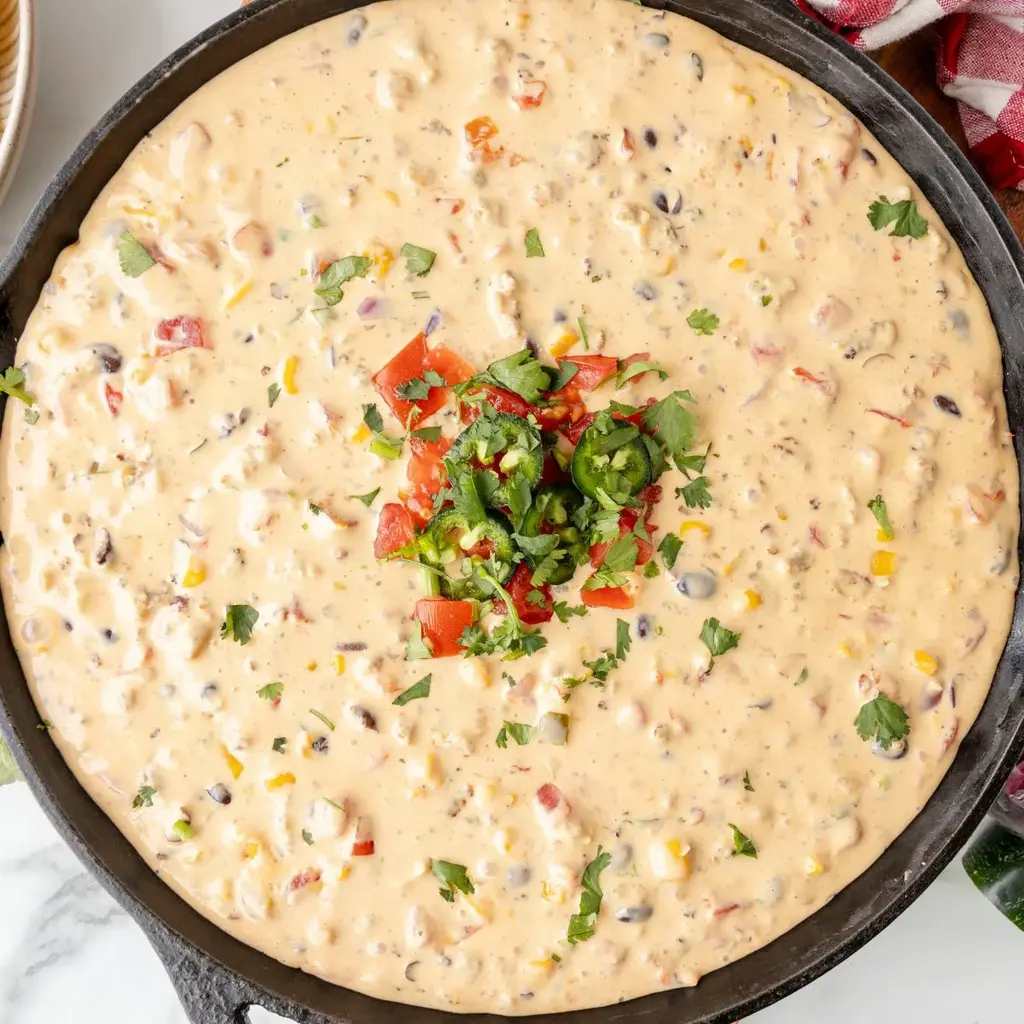
Imagine this: a velvety, molten cheese base, studded with savory ground pork sausage, tender black beans, sweet corn, and the subtle tang of Rotel tomatoes, all brought together with the richness of Velveeta and cream cheese. The aroma alone is enough to make your stomach rumble – a warm, savory, slightly spicy bouquet that promises pure indulgence. The texture is key: smooth and luxurious, yet with delightful little bursts of texture from the beans, corn, and meat. It’s a feast for the senses, a dish that’s as beautiful to look at as it is delicious to eat, a perfect canvas for vibrant garnishes like fresh cilantro and a squeeze of lime.

What elevates this queso dip with ground beef (or in this case, sausage!) above the rest? It’s the thoughtful layering of flavors and textures, ensuring every spoonful is a delight. I’ve tested countless variations, and this particular blend strikes the perfect balance. I’ll be sharing my best tips, including how to achieve that impossibly smooth texture, and also highlight a common mistake many home cooks make that can leave your queso less than perfect. Get ready to impress your friends and family with this easy game day queso that’s guaranteed to be a crowd-pleaser!

Why This Cowboy Queso Recipe Is the Best

The Flavor Secret: My approach to this cowboy queso dip recipe is rooted in my culinary training in Paris and my North African upbringing. Instead of just relying on processed cheese, I balance the creaminess of Velveeta with the sharp nuttiness of a good sharp cheddar blend and the indulgent richness of cream cheese. This creates a depth of flavor that’s simply unmatched. Plus, I learned from my mother that a hint of acidity, like the lime juice here, is crucial for cutting through the richness and brightening the entire dish. This careful balance is what makes my cowboy queso a standout.

Perfected Texture: Achieving that legendary smooth, dippable texture in queso can be tricky. The key, as I learned in pastry school, is gentle heat and consistent stirring. This recipe uses a combination of Velveeta and cream cheese which melts beautifully without breaking. By adding the shredded cheese gradually and stirring until just melted, we avoid a greasy texture. I also ensure the liquid from the Rotel and the corn is well-incorporated, creating a luscious, flowing dip that’s perfect for scooping. It’s a simple technique, but it makes all the difference for a truly professional result.

Foolproof & Fast: Despite its rich flavor and impressive presentation, this queso dip with ground beef (or sausage, as in my version) is incredibly easy to make. It comes together in about 30 minutes from start to finish, making it perfect for last-minute get-togethers or when you need a quick appetizer. The ingredient list is straightforward, readily available at any US grocery store, and the steps are forgiving. Even if you’re new to cooking, you can successfully whip up this easy game day queso and wow everyone with your culinary skills!

Cowboy Queso Ingredients

One of the best things about this cowboy queso is that all the ingredients are easily found at your local grocery store. I often find myself at the Union Square Greenmarket here in NYC, grabbing fresh cilantro and onions, but for the core ingredients, any supermarket will do. This recipe is built on pantry staples and beloved cheesy goodness, making it accessible for everyone.

Ingredients List

  • 1 pound ground pork sausage (or ground beef)
  • 32 ounces Velveeta cheese (cubed)
  • 1 bag (8 oz) shredded taco cheese blend (like Monterey Jack and Cheddar)
  • 1 bar (8 oz) cream cheese (cubed)
  • 2 cans (10 oz each) Rotel diced tomatoes and green chilies (mild or original)
  • 1 can (15 oz) corn (drained)
  • 1 can (15 oz) black beans (drained & rinsed)
  • 1/2 cup finely chopped red onion
  • 1 lime (juiced)
  • 2 tablespoons chopped fresh cilantro, plus more for garnish
  • Tortilla chips or corn chips for serving

Ingredient Spotlight

Velveeta Cheese: This is the quintessential base for any great queso, and it’s non-negotiable for that signature smooth, slightly processed texture that melts so beautifully. Its unique emulsifying properties ensure that our cowboy queso dip recipe stays creamy and doesn’t separate. You’ll find Velveeta in the dairy or cheese aisle of most US supermarkets. While some try to substitute, nothing quite replicates its melty magic.

Rotel Diced Tomatoes and Green Chilies: Rotel is what gives queso that classic Tex-Mex kick and a hint of acidity. The diced tomatoes add a touch of fresh sweetness and vibrant color, while the green chilies provide a gentle warmth. Look for it in the canned goods aisle, usually near the other canned tomatoes. You can choose mild or original based on your spice preference. Ensure you drain off some of the excess liquid if you prefer a thicker dip, but I like to leave a little for flavor and body.

Ground Pork Sausage: While many recipes use ground beef, I adore using flavorful ground pork sausage for this queso dip with ground beef style recipe. It brings a fantastic savory depth and often has a blend of seasonings already incorporated, which really steps up the flavor profile. You can find a wide variety of pork sausages in the meat section of your grocery store – opt for a medium-mild one unless you prefer a lot of heat. If you’re vegetarian, omit this and perhaps add some sautéed mushrooms for an earthy flavor.

Original IngredientBest SubstitutionFlavor / Texture Impact
Ground Pork SausageGround Beef or ChorizoBeef provides a more classic savory flavor. Chorizo adds spice and paprika notes.
Velveeta CheeseProcessed American cheese slices (melted) or a blend of evaporated milk and cheddar.May result in a slightly less smooth texture or a more pronounced dairy flavor. Evaporated milk needs careful heating to prevent breaking.
Taco Cheese BlendSharp Cheddar and Monterey Jack (equal parts)Enhances the cheesy flavor with a sharper profile. Texture remains similar.
CornPinto Beans or Diced JalapeñosPinto beans add similar texture and protein. Jalapeños increase the spice level significantly.

How to Make Cowboy Queso — Step-by-Step

Making this delicious queso dip is wonderfully straightforward. Follow these simple steps, and you’ll have a bubbling pot of cheesy goodness ready in no time!

Step 1: Cook the Sausage

In a large skillet (a cast iron one works beautifully and keeps things warm!), cook the ground pork sausage over medium-high heat. Break it up with a spoon as it cooks until it’s no longer pink. Drain off any excess grease to ensure your queso isn’t oily. This step builds the savory foundation of our cowboy queso.

💡 mia’s Pro Tip: Don’t overcook the sausage; you want it just done. If you’re using a leaner sausage or don’t wish to drain, you can leave a tablespoon or two of the flavorful drippings in the pan for extra depth.

Step 2: Melt the Cheeses

Reduce the heat to medium-low. Add the cubed Velveeta cheese, the shredded taco cheese blend, and the cubed cream cheese directly into the skillet with the cooked sausage. Stir gently and continuously over low heat. It might seem like a lot of cheese, but patience is key here. Keep stirring until everything is completely melted and smooth. This process should take about 5-8 minutes.

⚠️ Common Mistake to Avoid: Resist the urge to crank up the heat to speed this up! High heat can cause the cheese to scorch on the bottom or become oily and separated. Gentle, consistent heat is crucial for a silky-smooth queso.

Step 3: Combine and Warm Through

Once the cheese is beautifully melted and combined with the sausage, stir in the drained corn, the undrained Rotel, the drained and rinsed black beans, the finely chopped red onion, and the fresh lime juice. Continue to cook and stir for about 5 minutes, allowing all the ingredients to meld together and warm through. The mixture should be thick and luscious.

Step 4: Garnish and Serve

Remove the skillet from the heat. Taste and add a pinch of salt or pepper if needed (though the sausage and Rotel usually provide enough). Garnish generously with chopped fresh cilantro. Serve the cowboy queso immediately, right from the skillet for a rustic presentation, or transfer it to your favorite serving bowl. It’s absolutely essential to serve this with plenty of sturdy tortilla chips or corn chips for shoveling up every last delicious bite!

💡 mia’s Pro Tip: For a party, transfer the entire skillet of queso to a small slow cooker and set it to “Warm.” This keeps it perfectly dippable throughout the event. Other fantastic optional garnishes include diced fresh tomatoes, chopped green onions, or thinly sliced fresh jalapeños for those who love extra heat.

StepActionDurationKey Visual Cue
1Cook Sausage8-10 minsSausage browned, no pink
2Melt Cheeses5-8 minsSmooth, creamy, fully melted
3Combine Ingredients5 minsThickened, ingredients well distributed
4Garnish & ServeImmediatelyBubbling hot, topped with cilantro

Serving & Presentation

This cowboy queso dip recipe is meant to be shared and enjoyed! Serve it piping hot, straight from the skillet or a slow cooker, with an abundance of your favorite sturdy tortilla chips or Fritos scoops. The texture is perfect for dipping, and the hearty additions mean it’s almost a meal in itself. For a more refined presentation, I sometimes transfer it to a beautiful ceramic crock, especially when entertaining guests in my NYC apartment.

Don’t forget the garnishes! A generous sprinkle of fresh cilantro adds a pop of color and a refreshing herbaceous note that cuts through the richness. A squeeze of fresh lime juice right before serving brightens everything up beautifully. If you’re feeling adventurous, mimic the vibrant market stalls of Marrakech with finely diced tomatoes or thinly sliced red onions for added crunch and zest. This easy game day queso is all about abundance and flavor!

Pairing TypeSuggestionsWhy It Works
DippersSturdy tortilla chips, Fritos Scoops, corn chips, pretzel crisps, vegetable sticks (celery, bell peppers)Provide the perfect vehicle for scooping while holding up to the hearty dip. Vegetables add a refreshing crunch.
Main Dish CompanionTacos, enchiladas, grilled chicken, burgers, chiliComplements a variety of main courses, adding a cheesy, flavorful side without overpowering other dishes.
BeverageMargarita, cold beer (lager or Mexican lager), sparkling water with limeTangy and refreshing drinks cut through the richness of the cheese, while beer complements the savory flavors.
Optional GarnishesDiced tomatoes, sliced jalapeños, chopped green onions, a dollop of sour cream, a sprinkle of cotija cheeseAdd freshness, heat, visual appeal, and extra layers of flavor.

Make-Ahead, Storage & Reheating

As a busy New Yorker, I rely on smart make-ahead strategies, and this cowboy queso is perfect for it. You can prepare the base (steps 1-3) a day ahead, let it cool completely, and store it in an airtight container in the refrigerator. This makes game day prep a breeze – just reheat gently on the stovetop or in the slow cooker and add fresh garnishes before serving.

MethodContainerDurationReheating Tip
RefrigeratorAirtight container or original skillet (covered)3-4 daysGently reheat over low heat on stovetop, stirring frequently. Add a splash of milk or water if it appears too thick.
FreezerFreezer-safe container2-3 monthsThaw overnight in the refrigerator. Reheat gently on stovetop or in slow cooker as above. The texture can change slightly after freezing.
Make-Ahead (Base)Airtight containerUp to 2 days in advanceReheat the base, then stir in fresh corn, beans, and lime juice just before serving for optimal freshness.

When reheating, remember that cheese can be a bit finicky. It’s best to use low to medium heat and stir constantly. If it seems too thick after refrigeration, a tablespoon or two of milk or even a bit of water can help restore its creamy consistency. For parties, the slow cooker set to warm is your best friend for keeping this easy game day queso perfectly scoopable for hours.

Variations & Easy Swaps

VariationKey ChangeBest ForDifficulty Impact
Spicy Chorizo Cowboy QuesoSubstitute ground chorizo for pork sausage; add finely diced jalapeños.Spice lovers, adventurous palates.Easy
Vegetarian Black Bean Cowboy QuesoOmit meat; add extra black beans and sautéed mushrooms or corn.Vegetarians, lighter appetites.Easy
Smoky Chipotle Cowboy QuesoAdd 1-2 canned chipotle peppers in adobo sauce (minced) and a teaspoon of the sauce.Those who love smoky, complex flavors.Easy

Spicy Chorizo Cowboy Queso

For a fiery twist, substitute the ground pork sausage with Mexican chorizo. Chorizo is seasoned with paprika and chilies, giving the queso a beautiful reddish hue and an unmistakable spicy kick. I love this variation for truly special occasions. Just be sure to cook the chorizo thoroughly and drain any excess reddish fat before proceeding with the cheese. This swaps the savory pork flavor for something bolder and more complex.

Hearty Black Bean Cowboy Queso (Vegetarian Option)

To make this a vegetarian delight, simply omit the meat altogether. To compensate for the lost savory notes, I recommend adding an extra can of black beans or some sautéed mushrooms for an earthy depth. You could also add more corn for sweetness. This creates a wonderfully hearty and satisfying queso dip that’s perfect for grazing, and it’s just as delicious as the original.

Smoky Chipotle Cowboy Queso

If you’re looking for a sophisticated, smoky flavor profile, stir in a couple of minced chipotle peppers in adobo sauce along with a teaspoon of the sauce itself when you add the other ingredients. The smoky heat of chipotle is intense but incredibly rewarding. This variation brings a depth that reminds me of some of the slow-cooked stews from my grandmother’s kitchen in Morocco, but with a distinct Tex-Mex flair. Adjust the amount based on your heat tolerance!

What is the best cheese to use for cowboy queso?

For the creamiest, most authentic cowboy queso, Velveeta is essential due to its superior melting properties and smooth texture. I also like to add some shredded Monterey Jack or a taco blend for extra flavor. Combining Velveeta with cream cheese, as in this recipe, provides an ultra-luxurious base that’s rarely achieved with other cheeses alone.

Can I make cowboy queso in a slow cooker?

Absolutely! In fact, I highly recommend using a slow cooker, especially if you’re serving it at a party. You can prepare the queso on the stovetop according to the recipe and then transfer it to a slow cooker set to “Warm.” This keeps it perfectly melted and dippable for hours without scorching or thickening too much, ensuring it’s ready whenever your guests want a scoop.

How do you keep cowboy queso from getting clumpy?

The key to preventing clumpy queso is to use low, gentle heat and stir constantly when melting the cheeses. Velveeta and cream cheese are your best friends here, as they are formulated to melt smoothly. Avoid high heat, and if the queso seems a bit thick after cooking, stir in a splash of milk or water to achieve a creamier consistency. Also, don’t overcook it once the main ingredients are combined.

What can I substitute for Velveeta in cowboy queso?

While Velveeta is ideal for that signature texture, if you absolutely must substitute, consider using processed American cheese slices melted down, or a blend of evaporated milk and sharp cheddar cheese. However, be aware that the texture might be slightly different – potentially less smooth or prone to separation. For this cowboy queso dip recipe, I find Velveeta delivers the most reliable and enjoyable results.

Can I add other ingredients to my cowboy queso?

Yes, the beauty of this queso dip recipe is its versatility! Feel free to add other ingredients that you love. Some popular additions include diced green chilies for extra heat, finely chopped bell peppers (sautéed first for best flavor), cooked chorizo instead of pork sausage for a spicier profile, or even some shredded chicken. Just ensure you drain any excess liquid from added ingredients to maintain the desired consistency.

Is cowboy queso supposed to be spicy?

Cowboy queso can range in spice level, but it generally has a pleasant, mild heat. The Rotel diced tomatoes and green chilies provide a foundational spice. For more heat, choose the original or hot version of Rotel, add fresh jalapeños (with or without seeds), or incorporate spicy sausage like chorizo. This recipe offers a good starting point, and you can easily adjust the spice by selecting milder or hotter chili components.

How many servings does this cowboy queso recipe make?

This recipe is designed to be generous, perfect for a crowd or a dedicated snack session! It typically yields about 8-10 appetizer servings. If you’re serving it as a main dish alongside other items or as part of a larger spread, it can easily serve more people. The recipe uses larger quantities of cheese and meat to ensure it goes around!

Share Your Version!

I pour so much love and expertise into every recipe I share, and I truly hope this Cowboy Queso recipe brings as much joy and deliciousness to your kitchen as it does to mine here in New York City. If you make this easy game day queso, please leave a star rating and a comment below to let me know how it turned out! Your feedback is invaluable to me and helps other cooks succeed.

And please, share your culinary triumphs with me on social media! Tag @exorecipes on Instagram or Pinterest with a photo of your Cowboy Queso. I absolutely adore seeing your beautiful creations and how you adapt these recipes. I’m always curious to hear—did you find the balance of Velveeta and other cheeses to be just right for that perfect, smooth texture, or did you experiment with a different cheese blend?

From my NYC kitchen to yours — I hope this recipe brings as much warmth to your table as it does to mine. — mia 🧡

📌

Love This Recipe? Save It to Pinterest!

If you enjoyed this Cowboy Queso recipe, don’t let it get lost in your browser tabs! 😄 Pin it now so you can find it again anytime — and explore hundreds more tried-and-tested recipes waiting for you on my Pinterest boards.

👉 Follow mia on Pinterest @chefrecipes2

📌 Pin this recipe · 🔁 Re-pin your favorites · 💬 Tag me when you make it — I love seeing your creations!

Print

clock clock iconcutlery cutlery iconflag flag iconfolder folder iconinstagram instagram iconpinterest pinterest iconfacebook facebook iconprint print iconsquares squares iconheart heart iconheart solid heart solid icon

Cowboy Queso

  • Author: Chef Mia

Description

This Cowboy Queso recipe is the ultimate cheesy queso dip loaded with smooth velveeta cheese, beef, beans, Rotel, corn, and lots of cheese. It’s the perfect appetizer or the best game day treat for football season.


Ingredients

Scale
  • 1 pound ground pork sausage
  • 32 ounces Velveeta cheese (cubed)
  • 1 bag (8 oz) shredded taco cheese blend
  • 1 bar (8 oz) cream cheese (cubed)
  • 2 cans (10 oz each) Rotel
  • 1 can (15 oz) corn (drained)
  • 1 can (15 oz) black beans (drained & rinsed)
  • 1/2 cup finely chopped red onion
  • 1 lime (juiced)
  • 2 tablespoons chopped fresh cilantro
  • tortilla chips or corn chips for serving

Instructions

  1. Cook and crumble the ground sausage inside a large skillet pan, like a cast iron skillet, over medium high heat until the meat is no longer pink. Drain the excess grease from the pan.
  2. Reduce the heat to medium-low and add the velveeta cheese, shredded taco cheese blend, and cream cheese to the skillet pan. Cook until the cheese is melted and smooth.
  3. Stir in the corn, Rotel, black beans, red onion, and lime juice. Cook and stir for about 5 minutes until everything is combined and warmed through.
  4. Garnish the cowboy queso with the chopped cilantro and serve with tortilla chips or Fritos scoops. * Serve the dip right from the skillet pan or you can remove it to a serving platter or dish if wanted.* To keep the dip warm for a party or event, transfer the queso dip to a slow cooker and turn it on WARM. * Other optional garnishes are chopped tomatoes, green onion, sliced jalapeños .


Nutrition

  • Calories: 254 kcal
  • Sugar: 5 g
  • Fat: 15 g
  • Carbohydrates: 15 g
  • Protein: 15 g


Cowboy Queso

ph">For more delicious inspiration, follow me on Pinterest!

Creamy Slow Cooker Queso Dip Recipe

The Best Slow Cooker Queso Dip: The Ultimate Easy Crockpot Creamy Cheese Dip

⚖️
Difficulty
Easy
⏲️
Prep Time
15 mins
🕒
Cook Time
1 hr 30 mins
⏱️
Total Time
1 hr 45 mins
🍽️
Servings
10-12

Growing up in my mother’s bustling kitchen in Morocco, I learned early on that food is about connection and comfort. The air was always thick with the aromas of cumin, paprika, and slowly simmered tagines, forming the foundation of my culinary soul. When I moved to Paris to hone my skills, I embraced the precision of French sauces and the art of pastry. Now, here in vibrant New York City, I love blending those global influences. This best slow cooker queso dip recipe is one such creation – a testament to taking simple, beloved ingredients and elevating them for an unforgettable crowd-pleaser, perfectly capturing that spirit of warm hospitality.

Imagine a ridiculously creamy, utterly luscious cheese dip, warming your soul with every scoop. The subtle tang of green chiles mingles with the rich, mellow cheese, while savory ground beef adds a hearty depth that is simply irresistible. It’s the kind of dip that becomes the star of any party, drawing everyone in with its comforting aroma. It’s smooth, velvety, and just decadent enough without being heavy. This is a dish that doesn’t need fussy techniques; it relies on the magic of simple, quality ingredients coming together beautifully, a philosophy I learned from generations of home cooks and refined in professional kitchens.

What makes this crockpot queso dip recipe my absolute favorite? It’s the foolproof method combined with a special little touch that ensures unparalleled creaminess and prevents that dreaded separation. I’ll share a pro tip that’s a game-changer for achieving that perfect, consistent texture every time, and I’ll also highlight a common pitfall many home cooks run into when making cheese dips. Trust me, once you try this version, you’ll never reach for a store-bought jar again. It’s a truly easy queso dip slow cooker recipe that delivers maximum flavor and minimum fuss.

Why This The Best Slow Cooker Queso Dip Recipe Is the Best

The real secret to this slow cooker queso dip’s incredible flavor lies in the careful balance of simple ingredients, elevated by a touch of culinary expertise. Drawing on my background, I’ve found that the quality of your base matters, even in something as seemingly straightforward as queso. The combination of perfectly melted Velveeta and the zesty kick from the diced tomatoes with green chiles creates a flavor profile that’s both comforting and exciting, a true reflection of the vibrant food scene here in NYC.

Achieving that signature velvety smooth texture, without any graininess or oil separation, is crucial. This isn’t just about melting cheese; it’s about how you bring the elements together. My approach incorporates a specific order of operations and a gentle heating process, refined through years of sauce work in professional kitchens. This ensures the cheese emulsifies beautifully, resulting in a dip that’s consistently creamy and luxurious, perfect for dipping everything from crispy tortilla chips to fresh veggies.

Beyond the professional techniques, this crockpot queso dip recipe is designed for real life. It’s incredibly easy to whip up, making it perfect for busy weeknights or last-minute gatherings. The slow cooker does all the heavy lifting, minimizing your active cooking time and freeing you up to enjoy your guests. It’s a truly beginner-friendly recipe that yields restaurant-quality results, proving that delicious, homemade dips don’t need to be complicated.

Best Slow Cooker Queso Dip Ingredients

One of the joys of living in New York is the access to incredible ingredients from all over the world. For this easy queso dip slow cooker recipe, I love sourcing my Velveeta from a local supermarket and picking up fresh produce from my favorite farmers market in Union Square. The inspiration for a truly great, simple queso comes from the humble yet satisfying dishes my family would make back home in Morocco – emphasizing flavor through accessible ingredients.

Ingredients List

  • 16 ounces Velveeta cheese, cubed
  • 2 cans diced tomatoes with green chiles, drained (10 ounces each)
  • 1 pound ground beef
  • 1 packet taco seasoning
  • 1/4 cup water (for taco seasoning)

Ingredient Spotlight

Velveeta Cheese: This processed cheese is the backbone of any classic queso dip, offering a uniquely smooth melt and creamy texture that’s hard to replicate. It’s what gives this slow cooker queso dip its signature consistency. You can find it in the dairy aisle of almost any US grocery store. While some cooks experiment with other cheeses, Velveeta is key for that authentic, gooey melt. It’s also very forgiving, making it ideal for a beginner-friendly crockpot queso dip.

Diced Tomatoes with Green Chiles: These small but mighty cans pack a punch! They provide a delightful acidity and a mild, pleasant heat that cuts through the richness of the cheese. I always look for brands that have “mild” or “medium” heat profiles at my local grocery in NYC. The texture of the diced tomatoes also adds a lovely bit of interest to the dip. If you can’t find them, you can substitute with one can of diced tomatoes and one can of diced green chiles, drained separately.

Ground Beef & Taco Seasoning: This duo transforms our queso from a simple cheese dip into a hearty, flavorful centerpiece. Using 1 pound of ground beef ensures every bite is satisfying. The taco seasoning packet provides an effortless blend of spices that perfectly complements the cheese and chiles. I prefer to brown my beef separately to control the fat content and ensure it’s fully cooked before adding it to the slow cooker. For a spicier kick, look for a “hot” taco seasoning or add a pinch of cayenne pepper.

Original IngredientBest SubstitutionFlavor / Texture Impact
16 oz Velveeta Cheese2 cups shredded Monterey Jack or Colby Jack cheese + 4 oz Neufchâtel cheeseLess processed, more authentic cheese flavor. May require more stirring to fully combine; risk of graininess is higher. Adds a slight tang from Neufchâtel.
10 oz can Diced Tomatoes with Green Chiles1 can (10 oz) Rotel Diced Tomatoes (drained) + 2-3 tbsp diced jalapeños (fresh or jarred)Slightly less homogenous spiciness. Fresh jalapeños may offer a brighter, sharper heat. The texture remains similar.
1 lb Ground Beef1 lb ground turkey or plant-based groundGround turkey is leaner, resulting in a slightly less rich dip. Plant-based grounds can vary in texture and flavor absorption; choose one with a neutral profile.

How to Make The Best Slow Cooker Queso Dip — Step-by-Step

Making this easy queso dip slow cooker recipe is a breeze. Just follow these simple steps for the creamiest, most delicious dip you’ve ever made!

Step 1: Prep Slow Cooker

Start by giving the inside of your slow cooker a light coating of nonstick cooking spray. This ensures that no delicious queso gets left behind, and makes cleanup a dream. I like to use a spray that contains a bit of flour, like Baker’s Joy, for an extra insurance policy against sticking.

💡 mia’s Pro Tip: Don’t skip the cooking spray! It’s a small step that makes a big difference for easy cleanup, especially after a party.

Step 2: Brown Ground Beef

In a skillet over medium heat, brown the ground beef, breaking it up with a spoon, until it’s fully cooked through. You’re looking for no pink remaining. Once cooked, drain off any excess grease very thoroughly. This step is important for a cleaner flavor and a less oily queso.

⚠️ Common Mistake to Avoid: Draining the fat is crucial! If you leave too much grease in the skillet, your queso could become greasy and separate.

Step 3: Cook Taco Seasoning

Follow the directions on your taco seasoning packet for adding water. Stir the seasoning mix with the specified amount of water in the same skillet where you cooked the beef. Cook this mixture for a minute or two, stirring occasionally, until most of the liquid has evaporated and the seasoning has developed into a thick paste. This helps bloom the spices.

Step 4: Combine Ingredients

Now for the easy part! Add the cooked ground beef mixture, the cubed Velveeta cheese, and the drained cans of diced tomatoes with green chiles directly into your prepared slow cooker. Make sure the Velveeta is cut into roughly 1-inch cubes so it melts evenly.

Step 5: Melt Cheese

Stir everything together gently but well. Cover the slow cooker and cook on the LOW setting for about 1 to 1.5 hours, or until the Velveeta cheese is completely melted and the dip is smooth and creamy. Stir occasionally during this time to ensure even melting and distribution of the ingredients.

💡 mia’s Pro Tip: Resist the urge to crank the heat to HIGH. Low and slow is the secret to perfectly melted, non-separated cheese dip. This method prevents the cheese solids from becoming too hot and breaking down.

Step 6: Serve Warm

Once the cheese is fully melted and the queso is beautifully smooth, set your slow cooker to the WARM setting for serving. This keeps the dip at the perfect temperature for hours, ideal for any party or get-together. Serve hot with plenty of tortilla chips, and watch it disappear!

StepActionDurationKey Visual Cue
1Prep Slow Cooker2 minsLight coating of nonstick spray
2Brown Ground Beef8-10 minsNo pink remaining; drained
3Cook Taco Seasoning2-3 minsThick paste, most liquid evaporated
4Combine Ingredients3 minsAll ingredients in slow cooker
5Melt Cheese1 – 1.5 hrsCompletely melted, smooth, creamy
6Serve WarmOngoingSet to WARM

Serving & Presentation

This slow cooker queso dip is a showstopper and deserves a grand entrance! I love serving it directly from the slow cooker set to the ‘warm’ setting, placed centrally on a buffet table. The aroma alone will draw guests in. For an extra touch inspired by the vibrant culinary scene in NYC, I often garnish the top generously. Think fresh cilantro, a sprinkle of finely diced red onion, or even a few sliced jalapeños for those who like a bit more heat. It’s a simple update that makes the dip visually appealing and hints at the layers of flavor within.

When it comes to serving, the classic pairing is, of course, tortilla chips! I like to offer a variety – some plain, some lightly salted, and maybe even some blue corn chips for color. But don’t stop there! The richness of this dip pairs beautifully with lighter, palate-cleansing options. Think of it like enjoying a rich tagine in Morocco or a sauce in Paris; contrasting textures and flavors make the meal. Fresh vegetable crudités like bell pepper strips, cucumber slices, and carrot sticks are fantastic for scooping and offer a healthy counterpoint.

Pairing TypeSuggestionsWhy It Works
DippersTortilla chips (various types), pretzel crisps, pita bread, fresh vegetable sticks (carrots, celery, bell peppers)Provides a textural contrast and vehicle for the creamy dip. Veggies offer a refreshing crunch.
On Tacos/BurritosDrizzle over tacos, burritos, nachos, or loaded baked potatoes.Adds an extra layer of creamy, savory goodness, transforming a simple dish into something more decadent.
Beverage PairingCold lager, refreshing margarita, sparkling water with lime, crisp white wine (e.g., Sauvignon Blanc)The crispness and light effervescence cut through the richness of the cheese, cleansing the palate.
GarnishFresh cilantro, finely diced red onion, sliced jalapeños, a dollop of sour cream or Greek yogurtAdds freshness, texture, and visual appeal, enhancing the overall sensory experience of the dip.

Make-Ahead, Storage & Reheating

As a busy New Yorker, I live by the motto “prep ahead whenever possible.” This easy queso dip slow cooker recipe is fantastic for this, as it can be made partially or fully in advance, saving you precious time on game days or party nights. It’s perfect for a quick, satisfying snack or part of a larger spread.

MethodContainerDurationReheating Tip
RefrigeratorAirtight container or the slow cooker insert with lid3-4 daysStir well, reheat gently on stovetop or in microwave, adding a splash of milk or water if too thick.
FreezerFreezer-safe airtight container1-2 monthsThaw in refrigerator overnight. Reheat as above, potentially needing more liquid. Texture might be slightly altered.
Make-AheadStore cooked beef/seasoning mixture and cheese mixture separately in the fridge.Up to 2 days in advanceCombine all ingredients in the slow cooker on the morning of your event and cook as directed.

When reheating, always stir thoroughly. The key is gentle heat to re-melt the cheese without scorching it. If your queso seems a bit too thick after reheating, a tablespoon of milk or even a tiny splash of water can help restore its velvety consistency. Think of it like reviving a delicate French sauce; patience and gentle heat are your best tools. I find that reheating on the stovetop over very low heat, stirring constantly, yields the best results for a smooth texture, but the microwave is also a quick option for smaller portions.

Variations & Easy Swaps

VariationKey ChangeBest ForDifficulty Impact
Hearty Mexican Fiesta QuesoAdd black beans, corn, and cilantro.Appetizer or light mealEasy
Gluten-Free & Dairy-Free SwapsUse GF taco seasoning, omit beef or use plant-based, substitute with dairy-free cheese alternatives and a splash of plant-based milk.Dietary restrictionsModerate (DF cheese can be tricky)
Smoky Chipotle QuesoAdd chipotle peppers in adobo sauce and smoked paprika.Appetizer with a kickEasy

Hearty Mexican Fiesta Queso

For a truly satisfying dip that feels like a meal, add 1 cup of rinsed and drained black beans and 1 cup of fresh or frozen corn to the slow cooker along with the cheese mixture. Stir in about 1/4 cup of fresh chopped cilantro just before serving. This variation is perfect for game day or as a hearty appetizer that guests can’t get enough of. It adds texture and substance, making it a wonderful, filling option.

Gluten-Free & Dairy-Free Queso Swaps

To make this best slow cooker queso dip gluten-free, ensure your taco seasoning packet is certified gluten-free. For a dairy-free version, omit the Velveeta and use a good quality dairy-free cheddar or nacho-style shredded cheese alternative. You may need to add a splash of unsweetened plant-based milk (like almond or cashew milk) to help it melt smoothly. Dairy-free cheeses can sometimes be finicky, so stir frequently and consider adding a tablespoon of cornstarch mixed with a little water to help thicken and stabilize the dip.

Smoky Chipotle Queso

Elevate your queso with a touch of smokiness and heat! Finely mince 1-2 chipotle peppers from a can of chipotles in adobo sauce and stir them into the meat mixture. Add 1 teaspoon of smoked paprika to the taco seasoning as well. This adds a deep, complex flavor profile that’s reminiscent of some of the richer stews and sauces I’ve encountered or developed in my culinary training, giving the queso a gourmet edge.

How do you keep slow cooker queso dip from getting grainy or separating?

The key to a smooth, non-grainy slow cooker queso dip is gentle, consistent heat and proper emulsification. Firstly, always use a good quality processed cheese like Velveeta, as its composition helps it melt smoothly. Avoid overheating; cook on LOW and stir frequently. If you’re using a mix of cheeses, ensure they melt at similar temperatures. Some home cooks swear by adding a tablespoon of cream cheese or a splash of milk/water towards the end of the cooking process if it seems too thick, but always stir it in gently. My French pastry training taught me about gentle heat for delicate ingredients, and that applies here too!

Can I use Velveeta instead of shredded cheese for slow cooker queso dip?

Absolutely! In fact, Velveeta is one of the best cheeses to use for a foolproof slow cooker queso dip precisely because it’s designed to melt into a consistently smooth and creamy texture. While many recipes call for a blend of shredded cheeses (like cheddar, Monterey Jack, or Pepper Jack), achieving that perfect, stable melt can be challenging and often requires careful attention to avoid graininess or separation. The recipe I’ve provided here uses Velveeta for its reliability and classic queso flavor, making it a favorite among many.

How long can you leave slow cooker queso dip on the warm setting?

You can safely keep slow cooker queso dip on the “warm” setting for several hours, typically anywhere from 2 to 4 hours, without significantly affecting its texture or quality. The WARM setting is designed to maintain a safe serving temperature without cooking the dip further, which could lead to scorching or separation of ingredients. If you plan to keep it warm for an extended period, it’s a good idea to give it a gentle stir every hour or so to ensure it remains evenly heated and smooth. For longer events, refreshing it briefly on LOW heat might be needed.

What are the best mix-ins to add to slow cooker queso dip for extra flavor?

For extra flavor, the possibilities are endless! My personal favorites include finely chopped chipotle peppers in adobo sauce for a smoky heat, diced jalapeños (fresh or pickled) for a brighter spice, and a generous handful of fresh cilantro stirred in at the end. You can also add cooked, crumbled chorizo or bacon for an extra savory layer. Roasted corn kernels or seasoned black beans add texture and heartiness, turning it into a more substantial dish. Don’t forget a pinch of smoked paprika or a dash of hot sauce for nuanced depth!

Can I use different types of cheese in this slow cooker queso recipe?

While Velveeta is recommended for its foolproof melting properties, you can experiment with other cheeses if you’re feeling adventurous! A blend of shredded Monterey Jack, mild cheddar, and a bit of cream cheese can create a delicious queso. However, be aware that these cheeses may require more stirring and a lower heat setting to prevent graininess or separation. Unlike Velveeta, which melts evenly due to its processed nature, natural cheeses can sometimes break down and become oily. Always melt them slowly and stir frequently for the best results.

What’s the best way to serve slow cooker queso dip at a party?

Serving this crockpot queso dip at a party is all about convenience and appeal! The best method is to keep it warm in the slow cooker itself, placed on a sturdy surface accessible to your guests. Ensure you have plenty of serving utensils and a large bowl or basket filled with fresh tortilla chips or crusty bread. Offering a variety of dippers, like colorful vegetable sticks and pretzel crisps, caters to different preferences. Don’t forget to have smaller spoons or ladles available for guests to serve themselves without overloading their plates. Garnishing right before guests arrive with fresh cilantro or diced chives adds a beautiful touch!

Is this recipe suitable for a potluck?

Absolutely! This easy queso dip slow cooker recipe is a potluck perfect dish. Its main advantage is that it can be made ahead and kept warm in the slow cooker, making transport and serving incredibly simple. Just bring the slow cooker insert (or transfer to a heat-safe container) and a way to plug it in at the event location. The crowd-pleasing nature of this creamy cheese dip means it’s always a hit, and it holds up well for hours, unlike some dips that might degrade in quality over time.

Can I make this queso dip spicier?

Yes, you can definitely make this slow cooker queso dip spicier! The easiest way is to use a hotter variety of diced tomatoes with green chiles, like Rotel’s “hot” or “extra hot” versions. You could also add a few finely minced fresh jalapeños or serrano peppers, seeds and all, along with the ground beef. For a smoky heat, incorporate chipotle peppers in adobo sauce, as mentioned in the variations. A dash of your favorite chili-hot sauce stirred in at the end can also boost the heat level to your preference.

Share Your Version!

I absolutely love hearing from you and seeing your creations in your own kitchens! If you’ve made this best slow cooker queso dip, please consider leaving a star rating and a thoughtful comment below. Your feedback truly helps other cooks and inspires me! And if you share a photo of your queso masterpiece on Instagram or Pinterest, don’t forget to tag me @exorecipe – I can’t wait to see your beautiful dips!

From my NYC kitchen to yours — I hope this recipe brings as much warmth to your table as it does to mine. — mia 🧡

📌

Love This Recipe? Save It to Pinterest!

If you enjoyed this The Best Slow Cooker Queso Dip recipe, don’t let it get lost in your browser tabs! 😄 Pin it now so you can find it again anytime — and explore hundreds more tried-and-tested recipes waiting for you on my Pinterest boards.

👉 Follow mia on Pinterest @chefrecipes2

📌 Pin this recipe · 🔁 Re-pin your favorites · 💬 Tag me when you make it — I love seeing your creations!

Print

clock clock iconcutlery cutlery iconflag flag iconfolder folder iconinstagram instagram iconpinterest pinterest iconfacebook facebook iconprint print iconsquares squares iconheart heart iconheart solid heart solid icon

The Best Slow Cooker Queso Dip

  • Author: Chef Mia

Description

This slow cooker queso dip recipe is hands down the best youll ever try! Very creamy, hearty, and perfect for serving to a large crowd.


Ingredients

Scale
  • 16 ounces Velveeta cheese, cubed
  • 2 cans diced tomatoes with green chiles, drained (10 ounces each)
  • 1 pound ground beef
  • 1 packet taco seasoning

Instructions

  1. Start by spraying the inside of your slow cooker with nonstick cooking spray.
  2. Brown the ground beef over medium heat until meat is cooked through; drain.
  3. Add taco seasoning and water according to package directions. Cook until all liquid has been evaporated and remove from heat.
  4. Add the meat, cheese, and canned diced tomatoes with green chiles to the slow cooker.
  5. Stir well and cook on low until cheese is completely melted (about an hour an hour and 30 minutes).
  6. Keep the slow cooker set to warm to serve during your party and serve with tortilla chips. Enjoy!


Nutrition

  • Calories: 219 kcal
  • Sugar: 6 g
  • Fat: 12 g
  • Carbohydrates: 11 g
  • Protein: 18 g


The Best Slow Cooker Queso Dip

ph">For more delicious inspiration, follow me on Pinterest!