Table of Contents
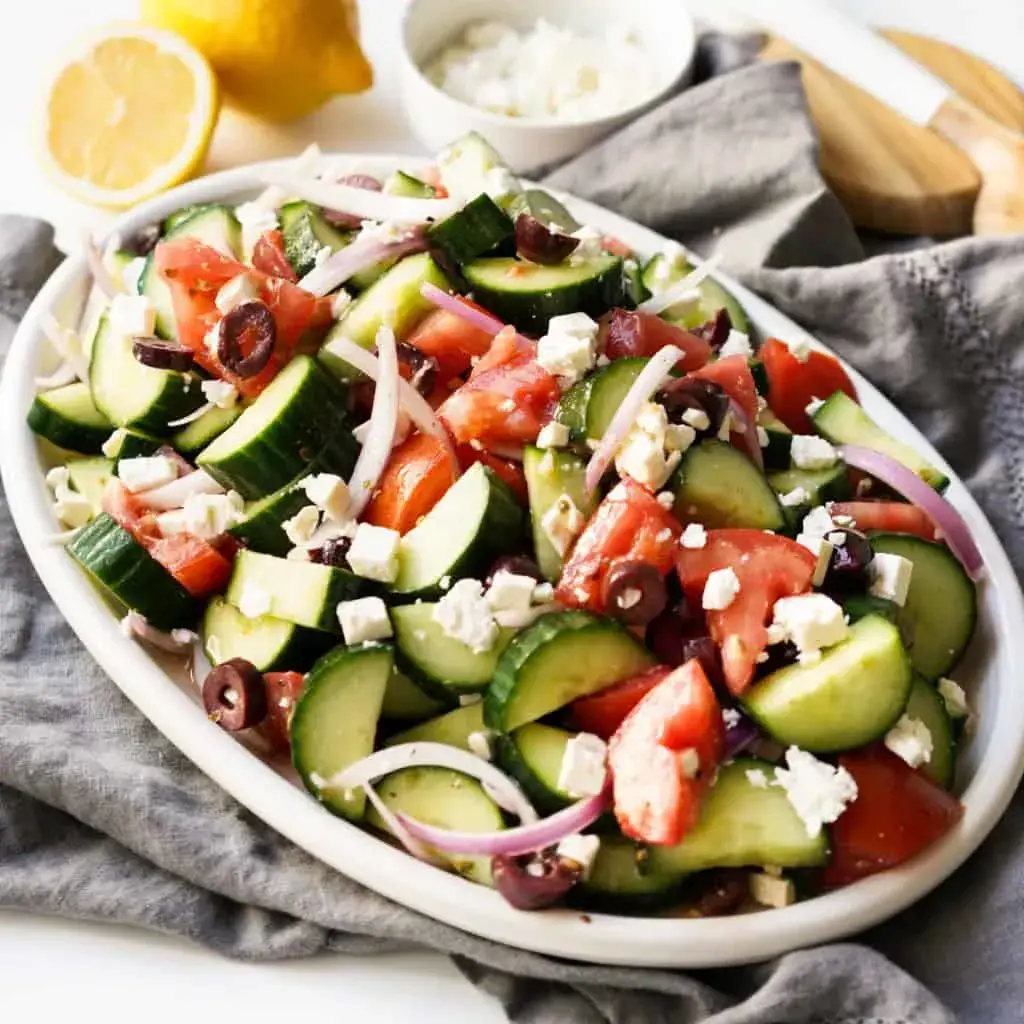
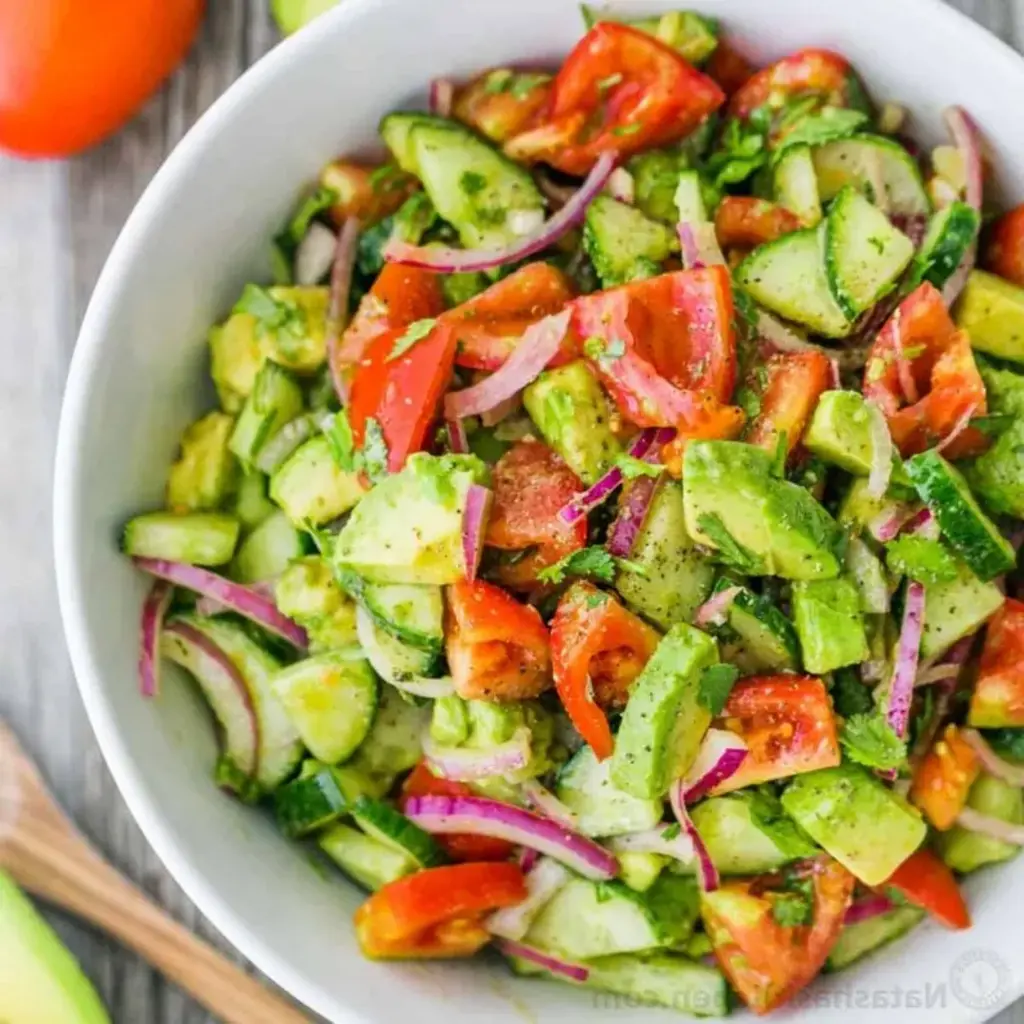
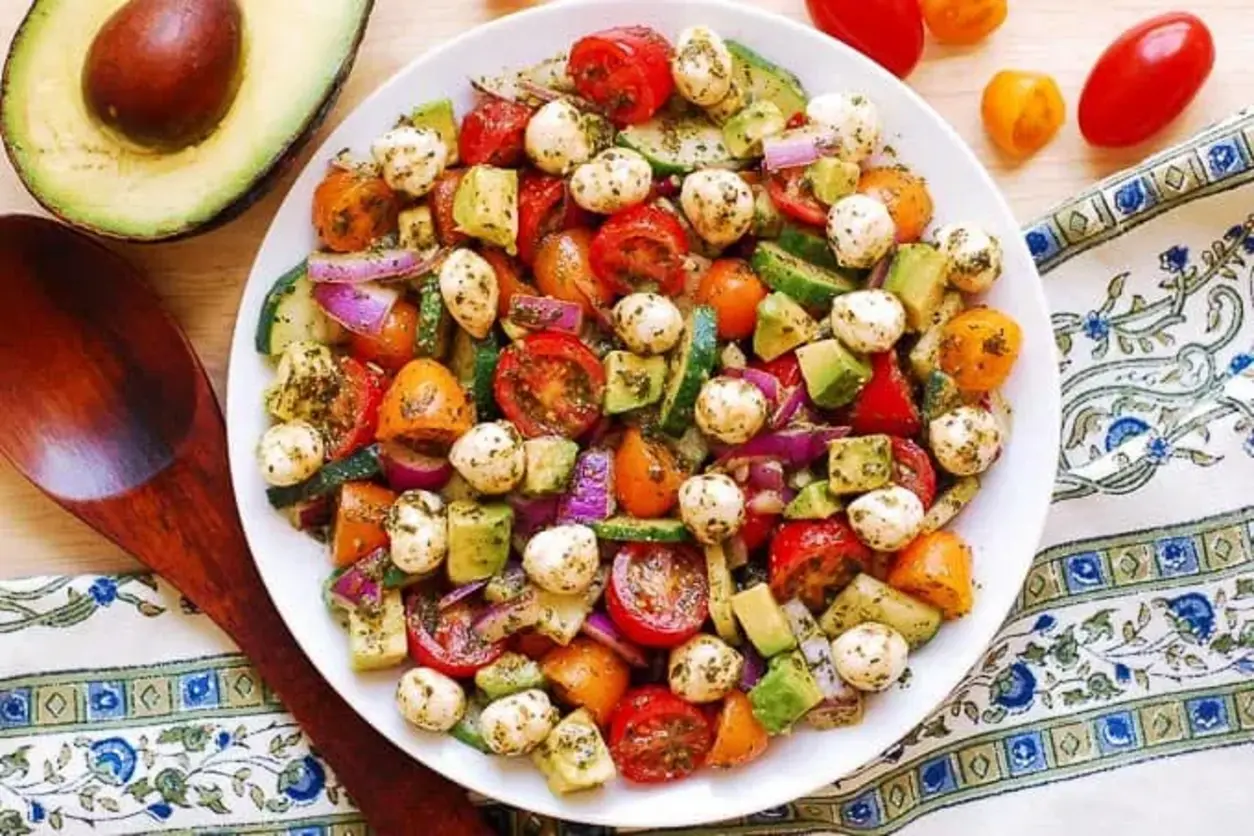
Tomato Cucumber Avocado Salad with Mozzarella and Basil Pesto – A Vibrant Summer Delight
When the New York City heat truly kicks in, my cravings shift towards dishes that are as refreshing as they are satisfying. This Tomato Cucumber Avocado Salad with Mozzarella and Basil Pesto is my answer to those summer days when the thought of turning on the oven feels like a crime. It’s a dish that bursts with colors and flavors, a true celebration of peak-season produce. I remember my mother making similar vibrant salads back in my hometown in Morocco, using the freshest ingredients from the local market, and this recipe feels like a beautiful echo of those sunny days, infused with my own New York City flair and a touch of Parisian elegance from my training.
Imagine biting into the juicy sweetness of ripe cherry tomatoes, the crisp, cool crunch of cucumber, the creamy lusciousness of avocado, all brought together by the pungent, herbaceous notes of basil pesto and the mild, chewy texture of fresh mozzarella. It’s a symphony of textures and tastes that dance on your palate. The acidity from the lemon juice cuts through the richness, making every bite invigorating. It’s the kind of dish that looks as spectacular as it tastes, making it perfect for those al fresco summer dinners or a light lunch that transports you straight to the Mediterranean coast – even if you’re in your own backyard.
What I love most about this recipe, beyond its incredible taste, is its simplicity and versatility. It comes together in just 15 minutes, making it a lifesaver for busy weeknights or last-minute gatherings. I’ve honed this recipe over years, finding the perfect balance of ingredients and techniques to ensure optimal flavor and texture. In this post, I’ll share my secret for keeping the avocado perfectly green, a common pitfall for many home cooks. Plus, I’ll reveal a classic French technique that elevates the pesto’s flavor, and highlight a mistake many people make that dulls the salad’s vibrancy.
Why This Tomato Cucumber Avocado Salad Recipe Is the Best
The true magic of this Tomato Cucumber Avocado Salad lies in its thoughtful composition. My unique angle comes from blending the rustic simplicity of my Moroccan roots with the refined techniques I learned in Parisian kitchens. Instead of just tossing everything together, I ensure each ingredient is prepared to contribute its best texture and flavor. For instance, using a mix of red and yellow cherry tomatoes not only adds visual appeal but also a nuanced sweetness. The key is balancing the creamy avocado and mozzarella with the bright acidity of lemon juice and the robust basil pesto, creating a salad that is anything but boring. It’s a testament to how a few carefully chosen ingredients, prepared with intention, can create something truly extraordinary and satisfying.
From a professional cook’s perspective, achieving the perfect texture in a no-cook salad is all about understanding how ingredients interact. I find that slicing the cucumber thinly and no more than a few hours before serving preserves its delightful crunch, preventing it from becoming waterlogged. The avocado, when diced just before mixing, maintains its creamy texture without becoming mushy. This careful attention to texture ensures every bite is a delightful contrast – the yielding avocado, the firm tomatoes, the crisp cucumber, and the soft mozzarella pearls all working in harmony. It’s this textural interplay that elevates a simple salad into a gourmet experience.
This recipe is designed to be incredibly approachable, even if you’re new to cooking. The steps are straightforward, and the ingredients are readily available at any US grocery store. There’s no complex cooking or specialized equipment needed; it’s a true no-cook salad that relies on the freshness of its components. I’ve tested this countless times to ensure it’s foolproof, guaranteeing delicious results every single time. It’s the perfect dish to impress guests or to simply treat yourself to a healthy, flavorful meal without any fuss. Its ease makes it a staple in my own household, especially during the bustling summer months.
Tomato Cucumber Avocado Salad Ingredients
Living in New York City means I have access to some of the best produce year-round, from the Union Square Greenmarket to the diverse array of smaller grocers. For this salad, I always seek out the brightest, ripest cherry tomatoes, and I love the contrast of red and yellow for visual appeal. My mother’s kitchen in Marrakech was always filled with the scent of fresh herbs, especially basil, so I’m quite particular about my pesto – a good quality store-bought one is fine, but homemade is truly divine. I also love visiting Italian specialty shops in Little Italy for the freshest mozzarella balls. It’s these connections to incredible ingredients that inspire my cooking and bring such vibrant life to this simple yet elegant salad.
Ingredients List
- 1/2 pound red cherry tomatoes (or grape tomatoes, halved)
- 1/2 pound yellow cherry tomatoes (or grape tomatoes, halved)
- 2 ripe avocados, diced
- 1 medium cucumber, sliced into 1/2-inch rounds or half-moons
- 1/3 cup red onion, finely diced
- 8 ounces small fresh mozzarella cheese balls (bocconcini or ciliegine), drained
- 1/4 cup good-quality basil pesto
- 1 tablespoon fresh lemon juice
- Salt and freshly ground black pepper, to taste
Ingredient Spotlight
The star of this salad is undoubtedly the combination of fresh, vibrant produce. Cherry tomatoes, whether red or yellow, provide bursts of sweetness that are essential to the salad’s profile. When shopping in the US, look for tomatoes that are firm, plump, and free from bruises. Roma or grape tomatoes are excellent substitutes if cherry tomatoes are not in season or if you prefer a slightly less sweet flavor, but ensure they are halved to release their juiciness. If you’re looking for a different variety, heirloom tomatoes, chopped into bite-sized pieces, also add a beautiful complexity.
Avocado is key for that luxurious, creamy texture. For the best results, choose avocados that yield slightly to gentle pressure but are not mushy. Hass avocados are typically the best choice due to their creamy texture and rich flavor. To prevent browning, I’ll share a tip shortly, but if you absolutely must prepare the avocados further in advance, tossing them with a little extra lemon or lime juice is a good safeguard. If avocados are unavailable or not to your liking, consider adding some creamy cannellini beans or even chilled, diced sweet potato for a different kind of soft texture.
Fresh mozzarella brings a delightful chewiness and mild, milky flavor that beautifully complements the other ingredients. I prefer using small mozzarella balls, often called bocconcini or ciliegine, as they are perfectly portioned and require no cutting. When buying in the States, always opt for fresh mozzarella packed in water, as it has the best texture. If you can’t find small mozzarella balls, a larger ball of fresh mozzarella, torn into bite-sized pieces, will work just fine. For a dairy-free option, consider using small cubes of firm tofu that have been marinated in a little olive oil and Italian herbs, or a plant-based mozzarella alternative.
| Original Ingredient | Best Substitution | Flavor / Texture Impact |
|---|---|---|
| Cherry Tomatoes | Grape Tomatoes or Heirloom Tomatoes (chopped) | Grape tomatoes offer a similar sweetness and firmness. Heirloom tomatoes add a more complex, sometimes earthier flavor and softer texture. |
| Avocado | Cannellini Beans or Diced Sweet Potato (chilled) | Beans provide a creamy, mild texture. Sweet potato offers a soft, slightly sweet, and starchy element. |
| Fresh Mozzarella Balls | Feta cheese (crumbled) or Marinated Tofu (cubed) | Feta adds a salty, tangy bite. Tofu offers a neutral, chewy texture, especially when marinated. |
| Basil Pesto | Sundried Tomato Pesto or Arugula Pesto | Sundried tomato pesto provides a richer, sweeter, tomato-forward flavor. Arugula pesto offers a peppery, slightly bitter note. |
How to Make Tomato Cucumber Avocado Salad – Step-by-Step
This easy avocado salad recipe is so simple, you’ll be making it all summer long! Let’s get started.
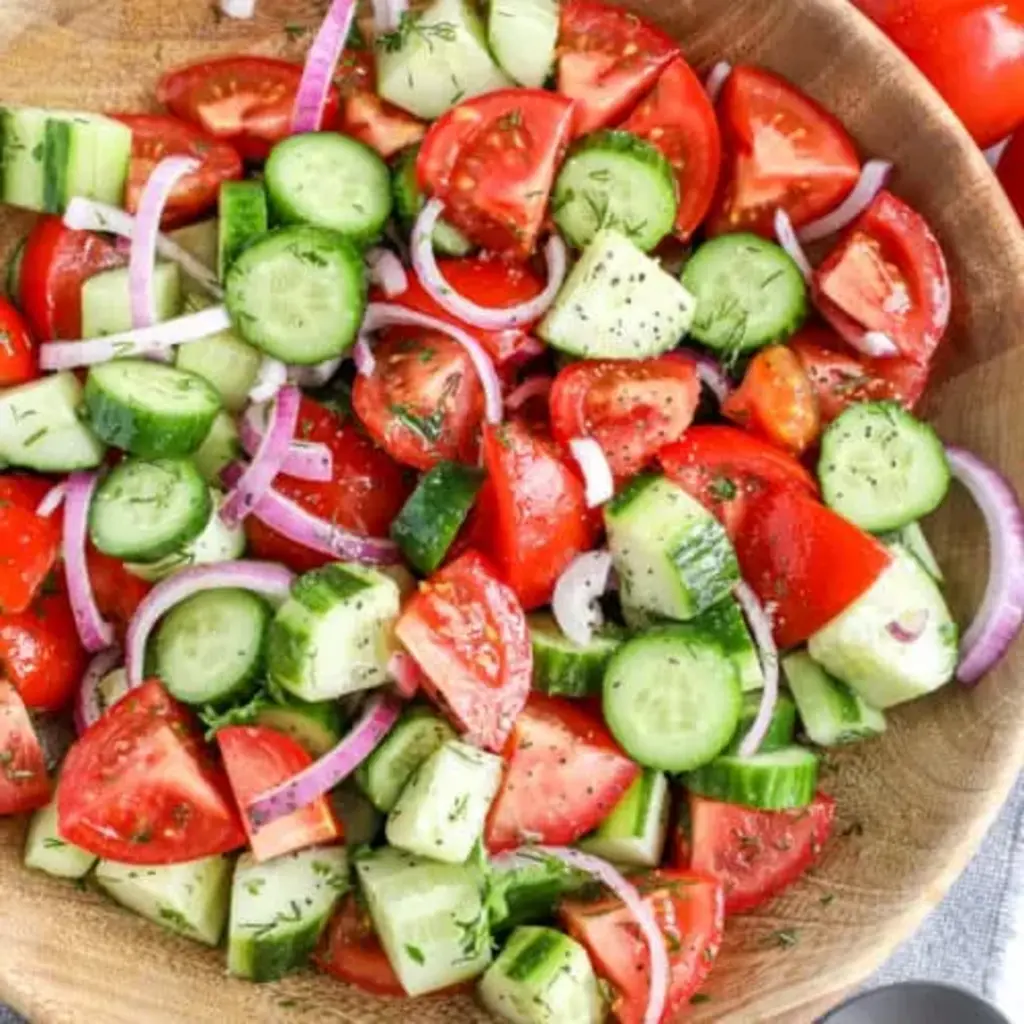
Step 1: Prepare the Vegetables and Herbs
Thoroughly wash and halve all the cherry or grape tomatoes. Slice the cucumber into 1/2-inch thick rounds or half-moons, depending on your preference. Finely dice the red onion. If your basil pesto is very thick, you might want to stir in an extra teaspoon of olive oil to loosen it slightly, making it easier to coat the salad evenly.
💡 mia’s Pro Tip: For the freshest flavor and best texture, I recommend slicing the cucumber and dicing the red onion just before you plan to assemble the salad. This helps maintain the cucumber’s crispness and prevents the onion from becoming overly pungent.
Step 2: Combine Salad Ingredients
In a large mixing bowl, combine the halved cherry tomatoes, sliced cucumber, diced red onion, and the small fresh mozzarella cheese balls. Add the diced avocados last to minimize bruising. Gently toss these ingredients together to distribute them evenly.
Step 3: Dress and Season the Salad
Drizzle the basil pesto and fresh lemon juice over the ingredients in the bowl. Gently toss everything together until all components are lightly coated with the pesto and lemon juice. Be careful not to overmix, especially once the avocado is added, to avoid making it mushy. Season generously with salt and freshly ground black pepper to taste. Taste and adjust seasonings if needed – you might want a little more pesto or lemon juice depending on your preference.
💡 mia’s Pro Tip: To prevent the avocado from turning brown, add it to the bowl right before you toss the salad with the dressing. The acidity from the lemon juice in the pesto also helps to slow down oxidation. If you’re making this salad more than 30 minutes ahead, consider adding the avocado as the very last step before serving.
| Step | Action | Duration | Key Visual Cue |
|---|---|---|---|
| 1 | Prepare Vegetables | 5-7 minutes | Halved tomatoes, sliced cucumber, diced onion. |
| 2 | Combine Ingredients | 2 minutes | All ingredients gently mixed in a bowl. |
| 3 | Dress & Season | 3 minutes | Salad lightly coated, seasoned to taste. |
Serving & Presentation
This Tomato Cucumber Avocado Salad is a showstopper on its own, but I love to elevate its presentation just a bit. For a pop of color and freshness, I often garnish it with a few extra fresh basil leaves, torn or roughly chopped. A drizzle of extra virgin olive oil just before serving adds a lovely sheen and a touch more flavor. In NYC, we’re all about maximizing flavor and visual appeal, even in the simplest dishes. This salad is perfect served chilled in a beautiful glass bowl, allowing its vibrant colors to shine, or portioned into individual bowls for an elegant touch at any meal.
When serving this as a side dish, it pairs wonderfully with grilled chicken, fish, or steak – think of it as the perfect accompaniment to a summer barbecue, much like side salads are a staple in Moroccan homes during gatherings. For a lighter meal, serve it alongside crusty bread for dipping into the delicious pesto-infused juices. If you’re looking for a vegetarian main, consider serving it with quinoa or couscous, reflecting my North African heritage. The bright, fresh flavors cut through richer dishes beautifully, making it incredibly versatile for any occasion.
| Pairing Type | Suggestions | Why It Works |
|---|---|---|
| Side Dish | Grilled Chicken or Fish, Pan-Seared Steak, Roasted Vegetables | The salad’s freshness and acidity cut through the richness of grilled or roasted meats and vegetables, providing balance. |
| Main Course | Served over Quinoa or Couscous, accompanied by crusty bread | Adds a light, refreshing component to grains and complements the bread for a satisfying, balanced meal. |
| Beverage | Dry Rosé, Crisp Sauvignon Blanc, Sparkling Water with Lemon | Light alcoholic and non-alcoholic beverages complement the salad’s fresh, bright flavors without overpowering them. |
| Garnish | Fresh Basil Leaves, Toasted Pine Nuts, Red Pepper Flakes | Enhances color, adds a subtle herby aroma, a sweet crunch, and a touch of heat. |
Make-Ahead, Storage & Reheating
I often prepare components of this salad ahead of time to make assembly even quicker, especially on busy New York days. You can chop the tomatoes, cucumber, and red onion a few hours in advance and store them separately in airtight containers in the refrigerator. The mozzarella balls can also be drained and kept ready. The key is to add the avocado and the pesto dressing just before serving to ensure maximum freshness and prevent browning and sogginess.
| Method | Container | Duration | Reheating Tip |
|---|---|---|---|
| Refrigerator | Airtight container | 1-2 days (best if avocado and dressing are added just before serving) | Serve chilled. For best texture, combine avocado and dressing just before serving. |
| Freezer | Not recommended. | N/A | The fresh ingredients (especially avocado and mozzarella) do not freeze well and will lose their texture and flavor. |
| Make-Ahead | Separate airtight containers for dry ingredients | Up to 4 hours ahead (add avocado and dressing just before serving) | Combine all ingredients, including avocado and dressing, directly before serving for optimal freshness. |
If you have leftovers, store them in an airtight container in the refrigerator. The salad is best enjoyed within 24 hours, as the ingredients, particularly the avocado and cucumber, can start to soften. While I don’t recommend freezing this salad because the texture of the fresh ingredients would be compromised, any leftovers are perfect for a quick lunch the next day. Remember, the lemon juice and pesto act as natural preservatives, so it holds up quite well for a day or two.
Variations & Easy Swaps
| Variation | Key Change | Best For | Difficulty Impact |
|---|---|---|---|
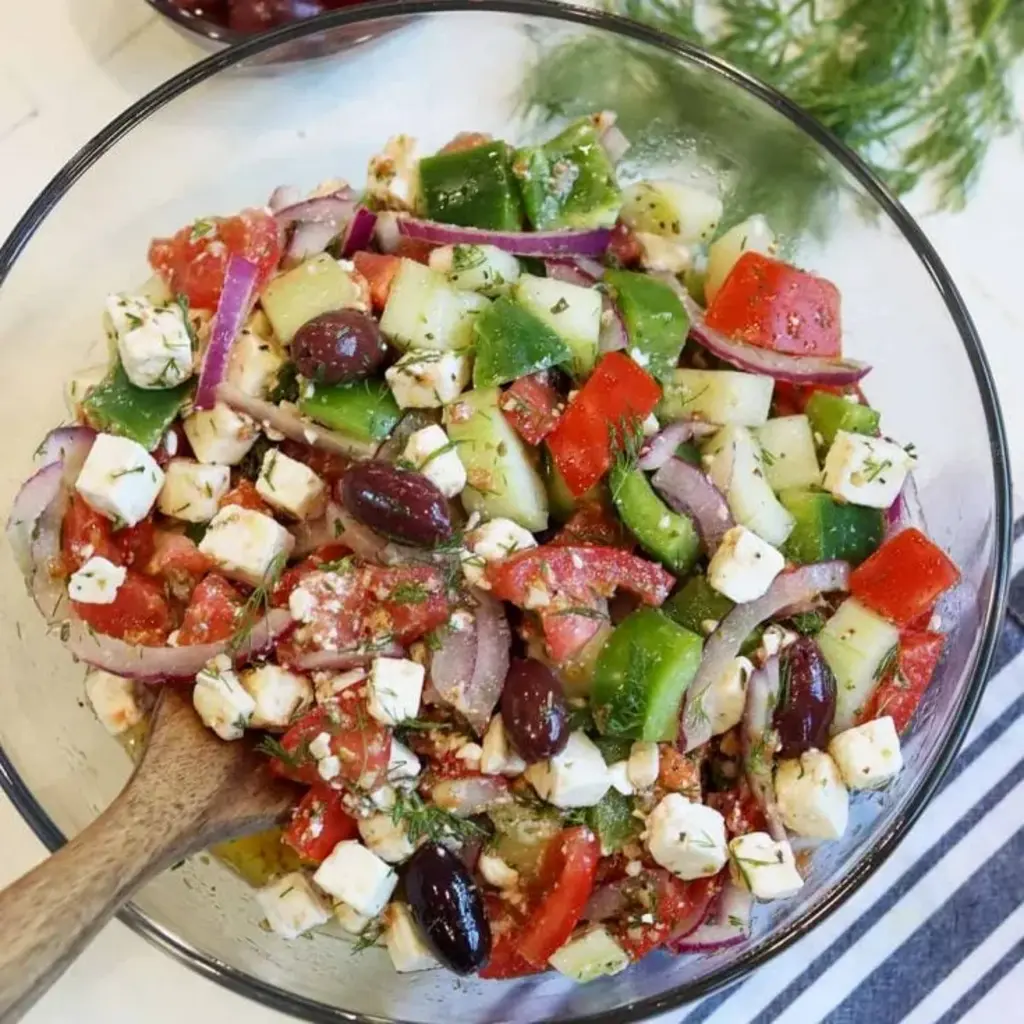
| Mediterranean Twist | Add Kalamata olives and crumbled feta; swap lemon juice for red wine vinegar. | Adding depth and a salty tang. | Easy |
| Vegan & Dairy-Free Option | Omit mozzarella; add cubed firm tofu marinated in olive oil and herbs, or use a vegan mozzarella substitute. Use a vegan pesto. | Accommodating dietary needs without sacrificing flavor. | Easy |
| Spicy Kick | Add a pinch of red pepper flakes with the pesto, or a finely minced jalapeño. | Adding a subtle warmth or a bolder heat. | Easy |
Mediterranean Twist
For a delightful Mediterranean twist, I love to add a generous handful of pitted Kalamata olives, halved, and some crumbled feta cheese. The briny, salty punch of the olives and feta is incredible with the fresh components. Instead of lemon juice, a splash of good quality red wine vinegar adds a different kind of brightness. This variation is perfect for those days when I want to evoke the flavors of the Greek islands, using ingredients easily found in NYC specialty stores and that my Parisian culinary instructors would surely approve of.
Vegan & Dairy-Free Option
To make this recipe entirely vegan and dairy-free, I simply omit the mozzarella balls. For a satisfying alternative, I often add cubes of firm or extra-firm tofu that I’ve marinated for at least 30 minutes in a blend of olive oil, garlic, dried oregano, and a pinch of salt. Alternatively, many excellent vegan mozzarella substitutes are available in US supermarkets now. Ensure your basil pesto is also made without cheese, or use a store-bought vegan version. This swap keeps the creamy texture and herbaceous notes intact.
Spicy Kick
If you enjoy a little heat, as I do when cooking Moroccan tagines, adding a touch of spice is a fantastic variation. A small pinch of red pepper flakes stirred into the pesto can provide a gentle warmth that complements the other flavors beautifully. For a more pronounced kick, finely mince half a jalapeño pepper and add it along with the red onion. This adds a fresh, bright heat that I find wakes up the palate beautifully, making the salad even more exciting for a warm evening.
How do you keep avocado from turning brown in a tomato cucumber avocado salad?
To keep avocado from turning brown in this salad, the best strategy is to add it just before serving. The acidity from the lemon juice and pesto does help slow down oxidation, but avocado is sensitive. If you must add it earlier, toss the diced avocado with a little extra lemon juice or lime juice immediately after dicing, before adding it to the salad bowl. This creates a protective barrier against the air, helping to maintain its vibrant green color. I typically prepare all other ingredients first, then dice the avocado and gently fold it in right at the end.
Can I use a different cheese instead of mozzarella in this salad?
Absolutely! While fresh mozzarella offers a wonderful mildness and delightful chewiness, you can certainly substitute it with other cheeses. Crumbled feta cheese is a fantastic substitute, adding a salty, tangy counterpoint that works beautifully with the tomatoes and basil. Goat cheese, crumbled or in small logs, also brings a pleasant tang. If you prefer a sharper flavor, small cubes of fresh, mild cheddar or even torn pieces of burrata (drained) can be used. Just ensure the cheese complements the other fresh ingredients without overpowering them.
How long should you let this salad sit before serving for best flavor?
This Tomato Cucumber Avocado Salad is best served immediately after it’s made, especially if you want to enjoy the crispness of the cucumber and the perfect texture of the avocado. However, it can sit at room temperature for about 30 minutes, which allows the flavors to meld slightly without compromising the ingredients. If you need to prepare it further in advance, I recommend keeping the avocado and the pesto dressing separate and combining them with the rest of the salad ingredients just before serving. This ensures the best taste and texture.
What can I substitute for basil pesto in this tomato cucumber avocado salad?
If you’re not a fan of basil pesto or can’t find it, there are several delicious substitutes that will still make this salad shine. A sundried tomato pesto offers a richer, sweeter, and more intense tomato flavor. Alternatively, a pesto made with arugula can provide a peppery, slightly bitter contrast. For a completely different but equally delicious dressing, consider a light lemon-tahini dressing for a nutty creaminess, or a simple balsamic vinaigrette. Even a good quality olive oil and herb dressing with extra garlic and lemon juice will work wonderfully.
Can I add other vegetables to this salad?
Yes, absolutely! This salad is wonderfully adaptable. You can add bell peppers (any color, diced) for a bit of sweetness and crunch, or some chopped red onion for a sharper bite. Artichoke hearts, quartered, or capers can add a briny, sophisticated flavor. For a heartier salad, consider adding cooked and cooled pasta, chickpeas, or even some grilled corn kernels. My mother used to add thinly sliced radishes in Morocco for a peppery crunch, which is a lovely addition if you find them at your local market. Just ensure any additions are fresh and complement the overall flavor profile.
Is this salad suitable for a potluck or picnic?
This tomato cucumber avocado salad is absolutely perfect for potlucks and picnics! It’s a no-cook recipe that travels well, provided you take a moment to add the avocado and dressing just before serving if possible. Its vibrant colors make it visually appealing on any buffet table, and its refreshing taste is always a crowd-pleaser, especially on warm days. Many guests appreciate a lighter, healthier option among heavier picnic fare. Just pack the dressing and avocado separately if you’re worried about longevity, and toss it all together on-site!
What makes this salad a “no-cook” recipe?
This salad is considered a “no-cook” recipe because it requires no actual cooking on the stovetop or in the oven. All of the ingredients are fresh and are simply prepared by chopping, slicing, or dicing, and then tossed together. This makes it incredibly quick to assemble and ideal for when you want a delicious and satisfying meal without the need to heat up your kitchen, especially during hot summer months. It relies entirely on the fresh, vibrant flavors of its raw ingredients.
Can I make the basil pesto for this salad from scratch?
Yes, you absolutely can! Making basil pesto from scratch is a fantastic way to elevate this salad. While I’ve provided a link to my own recipe for a 20-Minute Homemade Basil Pesto, you can use any well-loved recipe. The process involves blending fresh basil leaves, pine nuts, garlic, Parmesan cheese, and good quality olive oil. Freshly made pesto will have an even more vibrant color and intense aroma. If you’re making it, I recommend using the freshest basil you can find, perhaps from a local farmer’s market here in NYC, for the best impact.
Share Your Version!
I truly hope you enjoy making and savoring this Tomato Cucumber Avocado Salad with Mozzarella and Basil Pesto as much as I do! It’s a recipe that brings freshness and joy to any table. If you whip up this delightful dish, please consider leaving a star rating and a comment below – your feedback means the world to me. I also adore seeing your culinary creations! Tag me on Instagram or Pinterest at @chefrecipes2, and don’t forget to use the hashtag #exorecipes. I’m always curious to hear how you put your own spin on my recipes, so tell me: what other fresh herbs do you love to add to your summer salads?
From my NYC kitchen to yours — I hope this recipe brings as much warmth to your table as it does to mine. — mia 🧡
Love This Recipe? Save It to Pinterest!
If you enjoyed this Tomato Cucumber Avocado Salad recipe, don’t let it get lost in your browser tabs! 😄 Pin it now so you can find it again anytime — and explore hundreds more tried-and-tested recipes waiting for you on my Pinterest boards.
👉 Follow mia on Pinterest @chefrecipes2
📌 Pin this recipe · 🔁 Re-pin your favorites · 💬 Tag me when you make it — I love seeing your creations!
Tomato Cucumber Avocado Salad with Mozzarella and Basil Pesto
Description
Tomato Cucumber Avocado Salad with Mozzarella and Basil Pesto is a healthy recipe packed with nutrients and lots of fresh ingredients! Perfect Spring and Summer salad! Serve it as a side dish or as a complete meal! This recipe can be easily made ahead and is perfect for potlucks, picnics, block parties, and other Summer festivities.
Ingredients
- 1/2 pound red cherry tomatoes (or grape tomatoes, halved)
- 1/2 pound yellow cherry tomatoes (or grape tomatoes, halved)
- 2 avocados (, diced)
- 1 cucumber (, sliced)
- 1/3 cup red onion (, diced)
- 8 ounces small fresh mozzarella cheese balls
- 1/4 cup basil pesto
- 1 tablespoon lemon juice
- salt and pepper to taste
Instructions
- In a large bowl, combine halved red and yellow cherry or grape tomatoes, diced avocado, sliced cucumber, diced red onion, small fresh mozzarella cheese balls.
- Add basil pesto and lemon juice to the salad and toss to combine. Season with salt and pepper, if desired. Use more basil pesto, if desired.
- Want to make basil pesto from scratch? Here is a super flavorful and creamy 20-Minute Homemade Basil Pesto Recipe.
Nutrition
- Calories: 264 kcal
- Sugar: 2 g
- Fat: 21 g
- Carbohydrates: 11 g
- Protein: 9 g

Tried This Recipe? Leave a Comment!
Did you make this recipe? I’d love to hear how it turned out! Please leave a comment and a rating below. Your feedback helps other home cooks and supports cheerychop.com!
For more delicious inspiration, follow me on Pinterest!