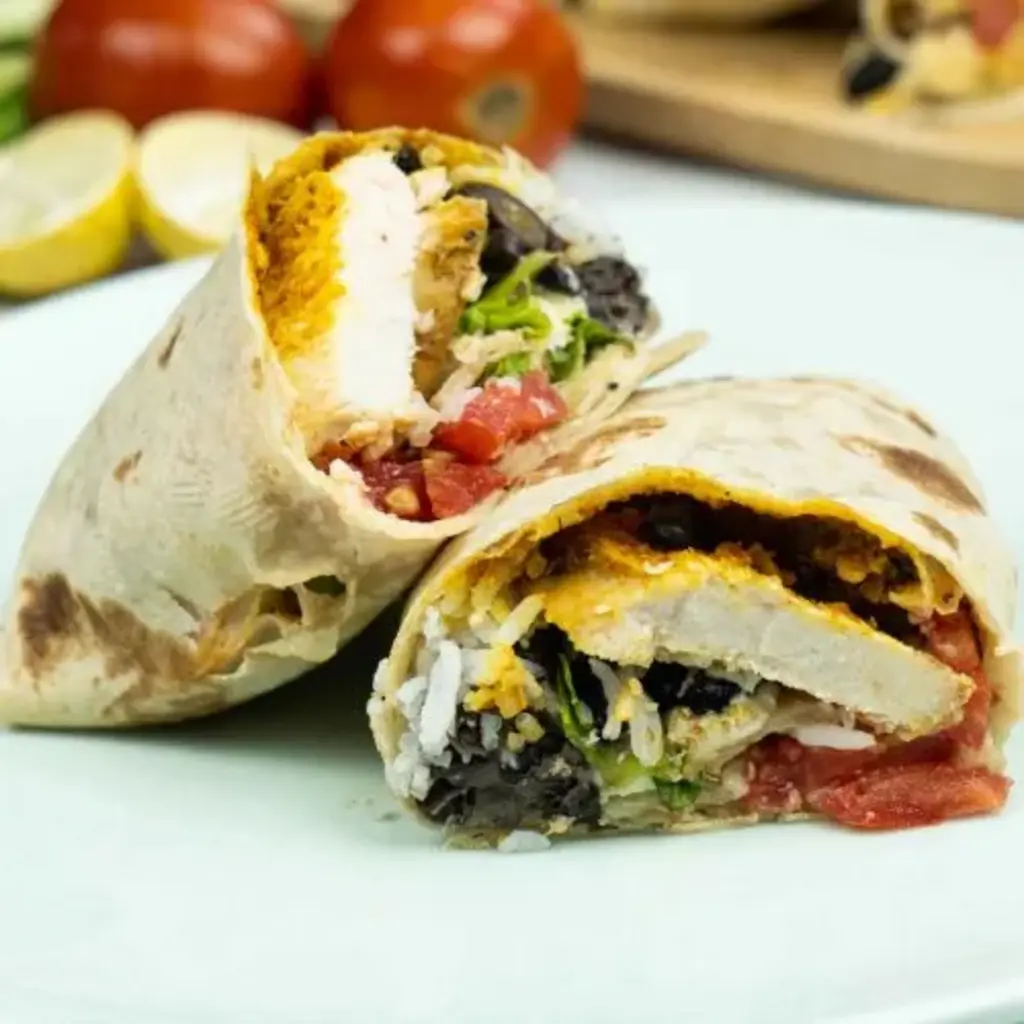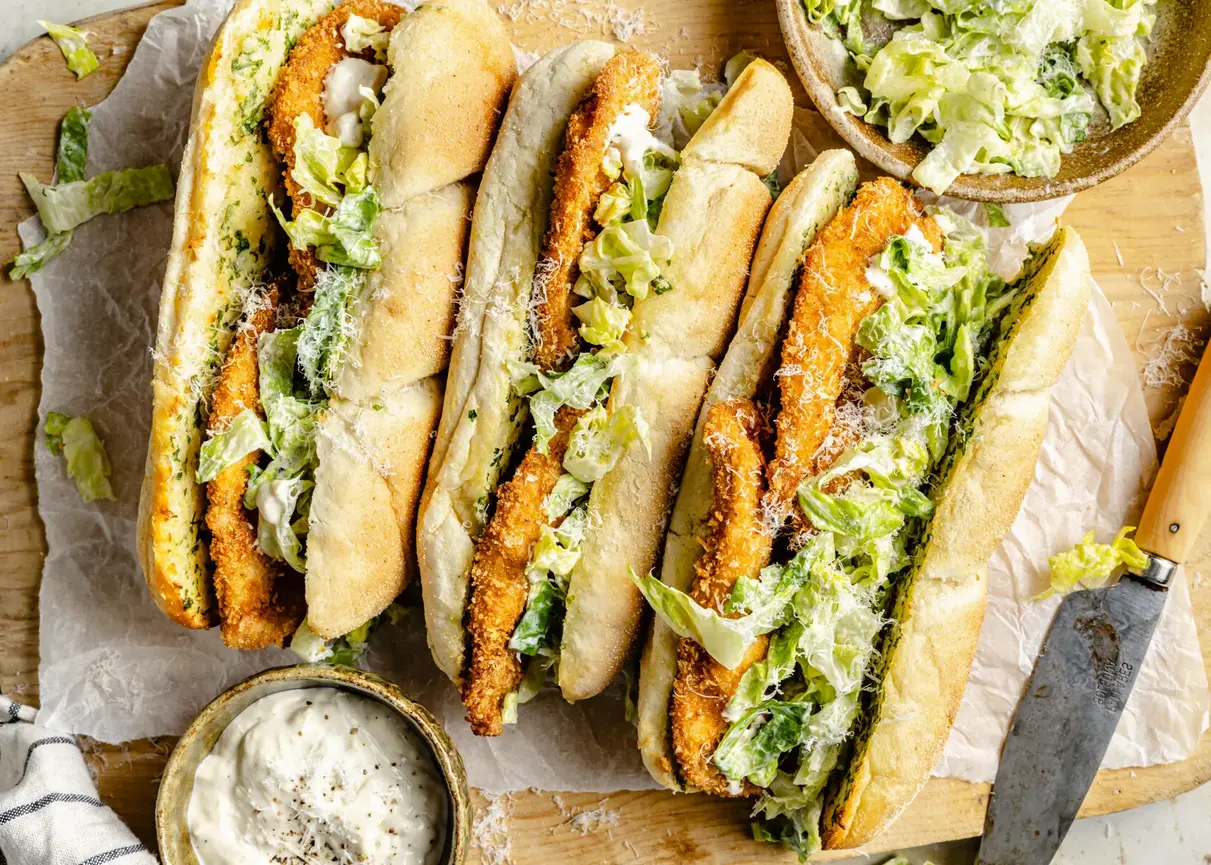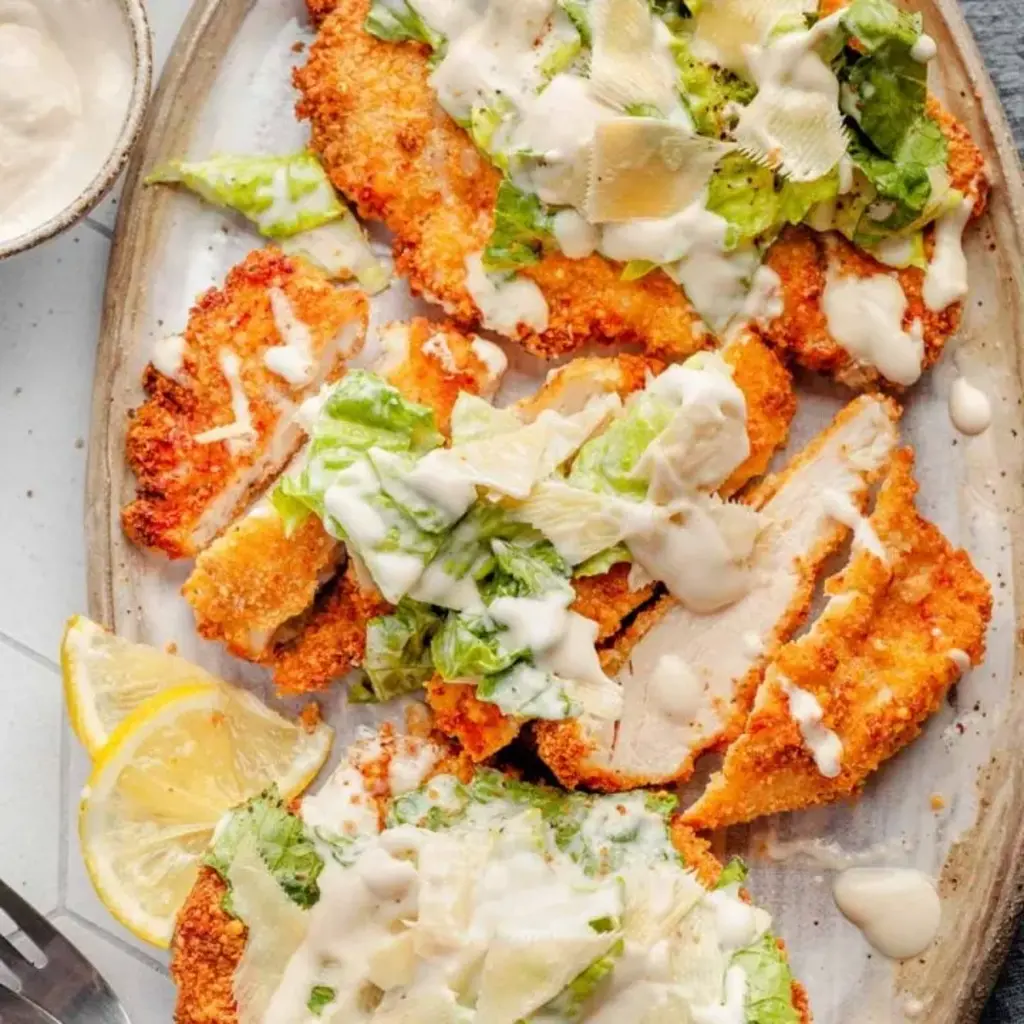
Crispy Chicken Caesar Cutlets Done in Minutes

Chicken Caesar Cutlets: Crispy and Caesar Flavor Explosion – An Easy Weeknight Delight

⚖️
Difficulty
Easy
⏲️
Prep Time
20

mins

🕒
Cook Time
15

mins

⏱️
Total Time
35

mins

🍽️
Servings
4

Living in New York City, I’m always looking for ways to bring vibrant, craveable flavors into my busy weeknights without sacrificing quality or taste. My mother’s kitchen in Morocco was a symphony of spices and fresh ingredients, while my training in Paris taught me the finesse of classic techniques. This recipe for “Chicken Caesar Cutlets” is a perfect fusion of those worlds, creating an easy chicken Caesar dinner that’s both exciting and comforting. It takes the beloved flavors of a classic Caesar salad and transforms them into a crispy, delightful main course that your whole family will adore. It’s my go-to when I need something quick, satisfying, and packed with flavor, proving that delicious homemade meals don’t have to be complicated.

Imagine bite-sized pieces of juicy chicken, coated in a perfectly seasoned, crunchy panko crust, nestled beside a vibrant Caesar salad. The aroma alone is enough to make your mouth water – a hint of garlic, savory Parmesan, and that unmistakable tang of Caesar dressing. The contrast in textures is divine: the satisfying crunch of the cutlets against the crisp romaine lettuce, all brought together by a creamy, zesty dressing that I whipped up from scratch. I love to incorporate a touch of my Moroccan heritage by sometimes adding a pinch of smoked paprika to the breadcrumbs, or a whisper of cumin to the dressing, just to give it that unexpected depth. It’s a dish that truly engages all your senses and feels like a special meal, even when it’s just a Tuesday night.

What makes this recipe a winner in my book is how I’ve streamlined the process without compromising on taste or texture. We’re using the air fryer for ultimate crispiness – a technique I picked up from adapting my French pastry methods to modern kitchens. I’ll share a crucial tip on achieving that golden brown crust every single time, and reveal a common mistake many home cooks make that can lead to soggy cutlets. Get ready for an incredibly satisfying **crispy chicken cutlets Caesar** experience that you’ll want to make again and again. This is more than just a meal; it’s a simple way to elevate your dinner routine.

Why This Chicken Caesar Cutlets Recipe Is the Best

My approach to this **Chicken Caesar Cutlets recipe** is all about capturing that perfect balance of classic Caesar joy with an effortless preparation. Drawing from my Moroccan roots, I’ve infused the dressing with a depth that store-bought versions often lack, making it punchy, fresh, and incredibly versatile. In Paris, I learned the art of building layers of flavor and texture, which I’ve translated here by using a dual breadcrumb mixture that ensures maximum crisp when air-fried. You get that restaurant-quality crunch that is absolutely addictive, transforming simple chicken breasts into something extraordinary.

The magic happens in the air fryer. This method is a game-changer for achieving that perfectly crispy exterior without the greasiness of deep-frying. I’ve fine-tuned the cooking time and temperature to ensure the chicken is cooked through to juicy perfection. It’s a cooking technique that yields incredible results with minimal fuss. I’ve also obsessed over the breading: a triple threat of flour, egg, and a robust breadcrumb and Parmesan mix that clings beautifully and fries up to an irresistible golden-brown hue. You get that satisfying crunch with every single bite, a testament to precise technique.

This recipe is designed for busy lives, whether you’re juggling work in Manhattan or managing a household. It’s an easy chicken Caesar dinner that comes together in under an hour, making it perfect for a weeknight meal. I’ve broken down each step with clear instructions and helpful tips so even a beginner can achieve chef-level results. Forget complicated marinades or lengthy cooking processes; this dish proves that delicious, healthy meals can be incredibly simple and quick to prepare. It’s a straightforward recipe that guarantees success and rave reviews.

Chicken Caesar Cutlets Ingredients

As a chef living in New York City, I’m lucky to have access to the best ingredients. I often pick up my produce from the Union Square Greenmarket and my go-to proteins from local butchers. For this **Chicken Caesar Cutlets recipe**, I’m using ingredients that are readily available at any well-stocked grocery store. The homemade Caesar dressing is key, and using fresh ingredients like garlic and anchovies makes all the difference. Back in my mother’s kitchen, we always used the freshest ingredients, a philosophy I carry with me to this day.

Ingredients List

  • 1/4 cup whole egg mayonnaise (full fat or reduced fat recommended for richness)
  • 1/3 cup Greek yogurt or sour cream (full fat or reduced fat)
  • 2 tablespoons olive oil
  • 1 clove garlic (crushed or grated, using a microplane for best results)
  • 2 anchovy fillets (finely chopped – these are essential for authentic Caesar flavor!)
  • 2 tablespoons fresh lemon juice
  • 1 teaspoon Dijon mustard
  • 1 teaspoon Worcestershire sauce
  • 2 tablespoons freshly grated Parmesan cheese
  • Salt and freshly ground black pepper for dressing seasoning
  • Water (as needed for thinning dressing)
  • 2 LARGE boneless, skinless chicken breasts (about 2 pounds total, cut in half horizontally to make 4 even fillets)
  • Salt and freshly ground black pepper (for seasoning chicken)
  • 1/2 cup all-purpose flour
  • 2 large eggs
  • 1/2 cup panko breadcrumbs
  • 1/2 cup Italian seasoned breadcrumbs
  • 1/2 cup grated Parmesan cheese (for breading)
  • Avocado or olive oil spray (for air fryer)
  • 4 hearts of Romaine lettuce (washed, dried, and torn into bite-sized pieces)
  • 1/2 Cup shaved Parmesan cheese (for salad)

Ingredient Spotlight

Anchovy Fillets: Don’t shy away from these little flavor bombs! They are the secret to authentic Caesar dressing, providing a deep umami richness without any fishiness when finely chopped and emulsified. You can find them jarred or canned in olive oil at most specialty grocery stores or even larger supermarkets. If you absolutely cannot find them, a tiny splash of fish sauce can mimic some of the depth, but it’s not quite the same.

Panko Breadcrumbs: For that ultimate crispy chicken cutlets Caesar experience, panko is your best friend. These Japanese-style breadcrumbs are larger and coarser than standard breadcrumbs, creating an airy, super-crispy texture when cooked. Look for them in the international aisle or the baking section of your grocery store. Italian breadcrumbs add a good base flavor, but panko guarantees the crunch!

Greek Yogurt: I love using Greek yogurt in my Caesar dressing for a creamy tang that’s lighter than tradition dictates. It adds a wonderful body and subtle acidity. Full-fat versions will yield a richer dressing, similar to using mayonnaise alone, while low-fat offers a lighter touch. Ensure it’s plain, unsweetened Greek yogurt. A good quality sour cream is a decent substitute if you don’t have Greek yogurt on hand.

Original IngredientBest SubstitutionFlavor / Texture Impact
Anchovy FilletsFish Sauce (1/2 tsp – 1 tsp) or finely minced capers (1 tsp)Fish sauce adds umami but can be saltier and less traditional. Capers offer brininess but a lighter flavor.
Greek YogurtFull-fat Sour Cream or MayonnaiseSour cream provides a similar tang and creaminess. All mayonnaise will be richer and less tangy.
Panko BreadcrumbsRegular Italian Breadcrumbs (use all for crispness) or crushed cornflakesRegular breadcrumbs will be less airy and crisp. Cornflakes offer good crunch but a different texture.

How to Make Chicken Caesar Cutlets — Step-by-Step

Let’s get cooking! This recipe is designed to be straightforward and enjoyable, even for those new to the kitchen. Follow these steps for **homemade chicken Caesar salad** perfection transformed into crispy cutlets!

Step 1: Make the Caesar Dressing

In a small bowl or a mini food processor, whisk together the mayonnaise, Greek yogurt (or sour cream), olive oil, crushed garlic, finely chopped anchovy fillets, lemon juice, Dijon mustard, Worcestershire sauce, and 2 tablespoons of grated Parmesan. Blend or whisk until the dressing is smooth and well combined. Season with salt and pepper to your liking. If the dressing is too thick, add a teaspoon of water at a time until it reaches your desired consistency. Taste and adjust seasonings – this is your chance to make it perfectly yours!

💡 mia’s Pro Tip: For a truly emulsified dressing with no lumps of garlic or anchovy, use an immersion blender or a small food processor. A microplane is your best friend for grating garlic finely!

Step 2: Prep the Chicken

Take your large chicken breasts and place them on a clean cutting board. Cover them with a piece of plastic wrap or a sturdy zip-top bag. Using the flat side of a meat mallet or a rolling pin, gently but firmly pound the chicken breasts to an even thickness, about 1/2 inch thick. This ensures even cooking and tender results. Once pounded, season both sides of each chicken fillet generously with salt and pepper.

Step 3: Set Up Breading Stations

Prepare three shallow bowls or plates for your breading process. In the first bowl, place the 1/2 cup of flour. In the second bowl, crack the 2 large eggs and beat them lightly with a fork. In the third bowl, combine the panko breadcrumbs, Italian breadcrumbs, and the remaining 1/2 cup of grated Parmesan cheese. Stir these together until well mixed. This setup is crucial for efficient breading.

Step 4: Bread the Chicken

Now it’s time to bread the chicken! Take each pounded chicken fillet and dredge it first in the flour, ensuring it’s lightly coated on all sides. Shake off any excess flour. Next, dip the floured chicken into the beaten eggs, letting any excess drip off. Finally, press the chicken firmly into the breadcrumb and Parmesan mixture. Use your fingers to really pack the breadcrumbs onto the surface, ensuring an even and generous coating. Place the breaded cutlets onto a clean plate or baking sheet.

💡 mia’s Pro Tip: For the best adhesion, make sure the chicken is fully coated in egg, and don’t be shy with pressing the breadcrumbs on! This helps create that thick, crispy crust we’re aiming for.

Step 5: Air Fry the Chicken

Preheat your air fryer to 390°F (200°C). Lightly spray the air fryer basket with avocado or olive oil spray. Carefully place the breaded chicken cutlets in a single layer in the basket, being sure not to overcrowd it. You might need to cook in batches of two. Spray the tops of the cutlets with cooking spray. Air fry for 12-13 minutes total. After about 7 minutes, carefully open the air fryer, flip each cutlet, and spray the other side. Continue cooking for another 5-6 minutes, or until golden brown and the chicken is cooked through (internal temperature of 165°F or 74°C).

⚠️ Common Mistake to Avoid: Overcrowding the air fryer basket. This is a surefire way to steam your cutlets instead of crisping them. Cook in batches if necessary to ensure excellent air circulation around each piece, resulting in maximum crispiness.

Step 6: Prepare the Salad

While the chicken is air frying, prepare your Caesar salad. In a large bowl, combine the torn Romaine lettuce leaves and the shaved Parmesan cheese. Add about half of your prepared Caesar dressing and toss gently until the greens are evenly coated. Add more dressing as needed, but be careful not to overdress and make the lettuce soggy.

Step 7: Serve and Enjoy

To serve your delicious **easy chicken Caesar dinner**, place a generous portion of the dressed Caesar salad on a plate. Top the salad with one or two of the crispy chicken Caesar cutlets. Finish with an extra sprinkle of freshly grated Parmesan cheese and a bright squeeze of fresh lemon juice. Serve immediately and savor every bite!

StepActionDurationKey Visual Cue
1Make Caesar Dressing10 minsSmooth, creamy, well-emulsified
2Prep & Season Chicken5 minsEven 1/2-inch thickness, well-seasoned
3Set Up Breading Stations3 mins3 distinct shallow bowls ready
4Bread Chicken7 minsEven coating, breadcrumbs adhere well
5Air Fry Chicken12-13 minsGolden brown, juicy, 165°F internal
6Prepare Salad5 minsCrisp greens lightly coated in dressing
7ServeImmediateBeautifully plated with cutlets & salad

Serving & Presentation

For a truly exquisite presentation, I love to serve these Chicken Caesar Cutlets family-style or plated individually. Arrange a bed of the dressed Caesar salad on each plate, then artfully place one or two of the golden-brown cutlets on top. A final dusting of freshly grated Parmesan and a wedge of lemon on the side adds elegance and freshness. Think of how it looks in the upscale bistros of Paris – simple, refined, and letting the quality of the ingredients shine.

In my bustling NYC life, I sometimes opt for a more casual, hearty approach. I’ll pile the greens and cutlets high in a large serving bowl, making it perfect for a family dinner or a casual get-together. A scattering of crunchy croutons (homemade, if you have time!) or some toasted pine nuts can add another layer of texture. This dish is also fantastic for meal prep lunches – just pack the dressed salad separately to keep it crisp until ready to eat.

Pairing TypeSuggestionsWhy It Works
Side DishRoasted Asparagus, Garlic Parmesan Roasted Broccoli, or a simple Quinoa Pilaf.These offer a healthy, slightly earthy or nutty counterpoint to the rich Caesar flavors and crispy chicken.
Sauce / DipExtra Caesar Dressing, a mild Tzatziki sauce, or a light Lemon-Herb Vinaigrette for dipping.Provides extra moisture and flavor. Tzatziki offers a cool, refreshing contrast, while lemon-herb adds a bright herbaceous note.
BeverageCrisp Italian White Wine (e.g., Pinot Grigio), Sparkling Water with Lemon, or a light Lager Beer.The acidity of white wine cuts through the richness. Sparkling water is refreshing, while a light beer complements the savory notes without overpowering.
GarnishFreshly grated Parmesan, cracked black pepper, lemon wedges, or fresh parsley/chives.Adds visual appeal and enhances the core flavors of the dish. Fresh herbs bring a touch of brightness.

Make-Ahead, Storage & Reheating

As a busy New Yorker, I rely on smart meal prep. Making these Chicken Caesar Cutlets ahead of time is completely feasible. You can prepare the dressing up to 3 days in advance and store it in an airtight container in the refrigerator. The chicken can be breaded and refrigerated for up to 24 hours before air frying. For the salad, wash and tear the romaine and store it in a bag with a paper towel. It’s best to dress the salad right before serving, but if you must prepare it ahead, keep the dressing separate!

MethodContainerDurationReheating Tip
RefrigeratorAirtight container3-4 days (chicken cooked) / 5-7 days (dressing)Reheat chicken in air fryer or oven at 350°F (175°C) for 5-7 mins until crisp.
FreezerFreezer-safe bag/container2-3 months (cooked chicken)Thaw overnight in fridge. Reheat in air fryer or oven for best crispness, as it can become soggy in the microwave.
Make-AheadSeparate containers for chicken and salad1-2 days in advanceAssemble salad with dressing just before serving for maximum crispness; reheat chicken if desired.

When reheating the chicken cutlets, the goal is to restore that glorious crispness. I found that a few minutes in a hot oven or air fryer works wonders. Microwaving them can result in a softer, less appealing texture, so I generally avoid it for the best results. Remember, the fresh components of the salad hold up best when added just before serving.

Variations & Easy Swaps

VariationKey ChangeBest ForDifficulty Impact
Spicy Caesar KickAdd cayenne pepper or red pepper flakes to breadcrumbs.Spice lovers, bold flavors.Minimal, just adds a spice element. Easy.
Gluten-Free & Dairy-FreeUse GF breadcrumbs, almond flour, and dairy-free mayo/parm.Dietary restrictions, health-conscious.Slightly more effort to source ingredients.
Mediterranean TwistAdd za’atar to breadcrumbs, use feta cheese instead of Parmesan.Flavor adventurers, unique pairings.Easy swap, adds a unique profile.

Spicy Caesar Kick

For those who love a little heat, I recommend adding 1/4 to 1/2 teaspoon of cayenne pepper or red pepper flakes directly into the breadcrumb mixture. This will give your crispy chicken cutlets a pleasant warmth that beautifully complements the savory Caesar flavors. You might also consider adding a pinch of smoked paprika to the mix for an extra layer of smoky depth from my Moroccan heritage.

Gluten-Free and Dairy-Free Options

To make this recipe gluten-free, simply switch out the all-purpose flour for a gluten-free flour blend and the breadcrumbs for your favorite gluten-free panko or Italian-style breadcrumbs. For a dairy-free version, use a dairy-free mayonnaise and vegan Parmesan cheese alternative in both the dressing and the breading. The texture might be slightly different, but the flavor profile will still be delightful. I’ve tested these swaps myself and they work beautifully, especially when using a good quality vegan Parmesan that melts well.

Mediterranean-Inspired Twist

Channeling my love for the vibrant spices of North Africa, try incorporating za’atar into the breadcrumb mixture – about 1 tablespoon should do it. It adds a wonderful herby, tangy, and slightly nutty flavor that pairs surprisingly well with Caesar. You could also swap the Parmesan in the dressing for a small amount of finely crumbled feta cheese for a salty, tangy Mediterranean flair, reminiscent of flavors found across the region.

What is the best way to keep chicken cutlets moist when making Chicken Caesar Cutlets?

To ensure your chicken cutlets remain moist, it’s crucial to pound them to an even thickness. This prevents them from cooking unevenly, where parts might become dry while others are still undercooked. Seasoning both sides generously with salt and pepper also helps the chicken retain moisture. Most importantly, avoid overcooking them in the air fryer; use a meat thermometer to check for an internal temperature of 165°F (74°C). Removing them just as they reach this temperature is key to a juicy result.

Can I use store-bought Caesar dressing for Chicken Caesar Cutlets, or should I make it from scratch?

While you can certainly use store-bought Caesar dressing for these cutlets, I highly recommend making it from scratch if time permits. The homemade dressing, with its fresh garlic, anchovy, and quality Parmesan, provides a depth of flavor that elevates the entire dish. It ties the crispy chicken and fresh salad together harmoniously. If you are short on time, opt for a high-quality artisan pre-made dressing. Just be sure to taste it first and adjust seasonings as needed.

How long should I cook Chicken Caesar Cutlets to ensure they are fully cooked without drying out?

For cutlets that are about 1/2 inch thick, cooking them at 390°F (200°C) in the air fryer usually takes between 12 to 13 minutes in total. You’ll flip them halfway through. The best way to guarantee they are cooked through without drying out is to use an instant-read meat thermometer. Insert it into the thickest part of the cutlet, and it should register 165°F (74°C). If they reach temperature sooner, remove them immediately to prevent overcooking and keep them moist.

What can I serve with Chicken Caesar Cutlets for a complete meal?

These Chicken Caesar Cutlets are fantastic served as the star with a side of classic Caesar salad. However, for a more complete meal, consider adding a starchy side like roasted potatoes, a simple garlic bread, or a light couscous if you’re feeling inspired by my Moroccan roots. A simple green vegetable like steamed broccoli, asparagus, or green beans also adds color and nutrients. The key is to balance the richness of the chicken and dressing with lighter elements.

Are anchovies essential for Chicken Caesar Cutlets, and can I omit them?

Ah, the anchovy! While you can omit them, I strongly advise against it if you’re aiming for authentic Caesar flavor. Anchovies are the secret ingredient that provides a deep, savory umami base to the dressing. When finely chopped and incorporated, they don’t taste fishy at all; rather, they enhance all the other flavors beautifully. If you have an absolute aversion or an allergy, a small amount of Worcestershire sauce or even a tiny bit of miso paste can provide some depth, but the classic Caesar flavor will be less pronounced.

Can I bake these instead of air frying them?

Absolutely! If you don’t have an air fryer, you can definitely bake these Chicken Caesar Cutlets. Preheat your oven to 400°F (200°C). Place the breaded cutlets on a baking sheet lined with parchment paper and lightly sprayed with oil. Bake for about 15-20 minutes, flipping them halfway through, until golden brown and cooked through. Keep in mind that the air fryer tends to yield a slightly crispier result due to the convection, but baking will still produce a delicious, tender cutlet with a nice crust.

What other types of chicken can I use for this recipe?

While boneless, skinless chicken breasts are ideal for their even thickness and quick cooking time, you could adapt this recipe for boneless, skinless chicken thighs. Thighs are naturally more forgiving and tend to stay moister. They might require a slightly longer cooking time in the air fryer, so always rely on a meat thermometer to ensure they reach 165°F (74°C). The flavor will be a bit richer due to the higher fat content in thighs.

How can I make the Caesar dressing healthier?

To make the Caesar dressing healthier, you can use low-fat Greek yogurt and reduced-fat mayonnaise, as noted in the ingredients. You can also slightly increase the lemon juice and lemon zest for a brighter, more tangy flavor that reduces the need for as much creamy base. Adding a bit more Dijon mustard can also boost the flavor without adding fat. Experiment with these adjustments to find a balance you enjoy that still delivers that classic Caesar punch.

Share Your Version!

I pour so much of my heart and culinary passion into each recipe, and nothing makes me happier than seeing you recreate my dishes in your own kitchens! If you’ve made these incredible Chicken Caesar Cutlets, I’d be absolutely thrilled if you’d leave a star rating and a comment below to share your experience. Your feedback lets me know what you loved and helps other home cooks too!

Did you try one of my variations, or perhaps add your own secret ingredient? Share a photo of your culinary creation on Instagram or Pinterest and tag me! I’m always looking for inspiration and love to see your beautiful plating. And please, if you have any questions about achieving that perfect crispiness or adapting the recipe, don’t hesitate to ask them below – I’m eager to help you succeed!

From my NYC kitchen to yours — I hope this recipe brings as much warmth to your table as it does to mine. — mia 🧡

📌

Love This Recipe? Save It to Pinterest!

If you enjoyed this Chicken Caesar Cutlets recipe, don’t let it get lost in your browser tabs! 😄 Pin it now so you can find it again anytime — and explore hundreds more tried-and-tested recipes waiting for you on my Pinterest boards.

👉 Follow mia on Pinterest @exorecipe

📌 Pin this recipe · 🔁 Re-pin your favorites · 💬 Tag me when you make it — I love seeing your creations!

Print

clock clock iconcutlery cutlery iconflag flag iconfolder folder iconinstagram instagram iconpinterest pinterest iconfacebook facebook iconprint print iconsquares squares iconheart heart iconheart solid heart solid icon

Chicken Caesar Cutlets

  • Author: Chef Mia

Description

These Chicken Caesar Cutlets are a quick and delicious meal combining crispy chicken with classic Caesar salad flavors. Perfect for lunch, dinner, or meal prep, these cutlets are cooked in the air fryer and paired with fresh romaine and Parmesan. Easy to make and family-friendly.


Ingredients

Scale
  • 1/4 cup whole egg mayo (full fat or reduced fat)
  • 1/3 cup Greek yogurt or sour cream (full fat or reduced fat)
  • 2 tablespoons olive oil
  • 1 clove garlic (crushed or grated, using microplane)
  • 2 anchovy fillets (finely chopped)
  • 2 tablespoons lemon juice
  • 1 teaspoon Dijon mustard
  • 1 teaspoon Worcestershire sauce
  • 2 tablespoons freshly grated Parmesan cheese
  • Salt and pepper for seasoning
  • Water (as needed)
  • 2 LARGE boneless skinless chicken breasts (2 pounds, cut in half horizontally to make 4 fillets)
  • Salt and pepper (to taste)
  • 1/2 cup flour
  • 2 large eggs
  • 1/2 cup panko breadcrumbs
  • 1/2 cup Italian breadcrumbs
  • 1/2 cup grated Parmesan cheese
  • Avocado or olive oil spray
  • 4 hearts of Romaine (torn into pieces)
  • 1/2 Cup shaved Parmesan

Instructions

  1. Make the Caesar Dressing: Combine all the dressing ingredients in a small bowl or blender. Mix or blend until well combined and smooth. Add salt and pepper to taste, then mix or blend again. If needed, add some water to thin it out. Taste test to adjust seasoning if needed.
  2. Prep the Chicken: Place the chicken on a cutting board, cover with plastic wrap, and pound evenly with a rolling pin or meat tenderizer. Season both sides with salt and pepper.
  3. Place the flour in a large shallow bowl.
  4. Beat the eggs in a second large shallow bowl.
  5. In a third large shallow bowl, stir together the panko, Italian breadcrumbs, and Parmesan.
  6. Dredge each chicken fillet in flour, then egg, then the breadcrumb mixture (press the breadcrumbs on with your fingers) and place in your air fryer basket. Spray with cooking oil spray.
  7. Cook the Chicken: Air fry at 390°F (200°C) for 12-13 minutes. After 7 minutes, open the air fryer and carefully flip the chicken, and spray with cooking oil spray again. Continue cooking for an additional 5-6 minutes, depending on the size of the chicken breast. You might need to cook it in batches of two.
  8. Prepare the Salad: Toss the romaine and shaved Parmesan with half of the Caesar dressing, adding more as needed.
  9. Serve the salad on top of the chicken with some freshly grated Parmesan and a squeeze of lemon.
  10. Enjoy!


Nutrition

  • Calories: 413 kcal
  • Sugar: 2 g
  • Fat: 18 g
  • Carbohydrates: 21 g
  • Protein: 37 g


Chicken Caesar Cutlets

k">

Tried This Recipe? Leave a Comment!

Did you make this recipe? I’d love to hear how it turned out! Please leave a comment and a rating below. Your feedback helps other home cooks and supports cheerychop.com!

For more delicious inspiration, follow me on Pinterest!
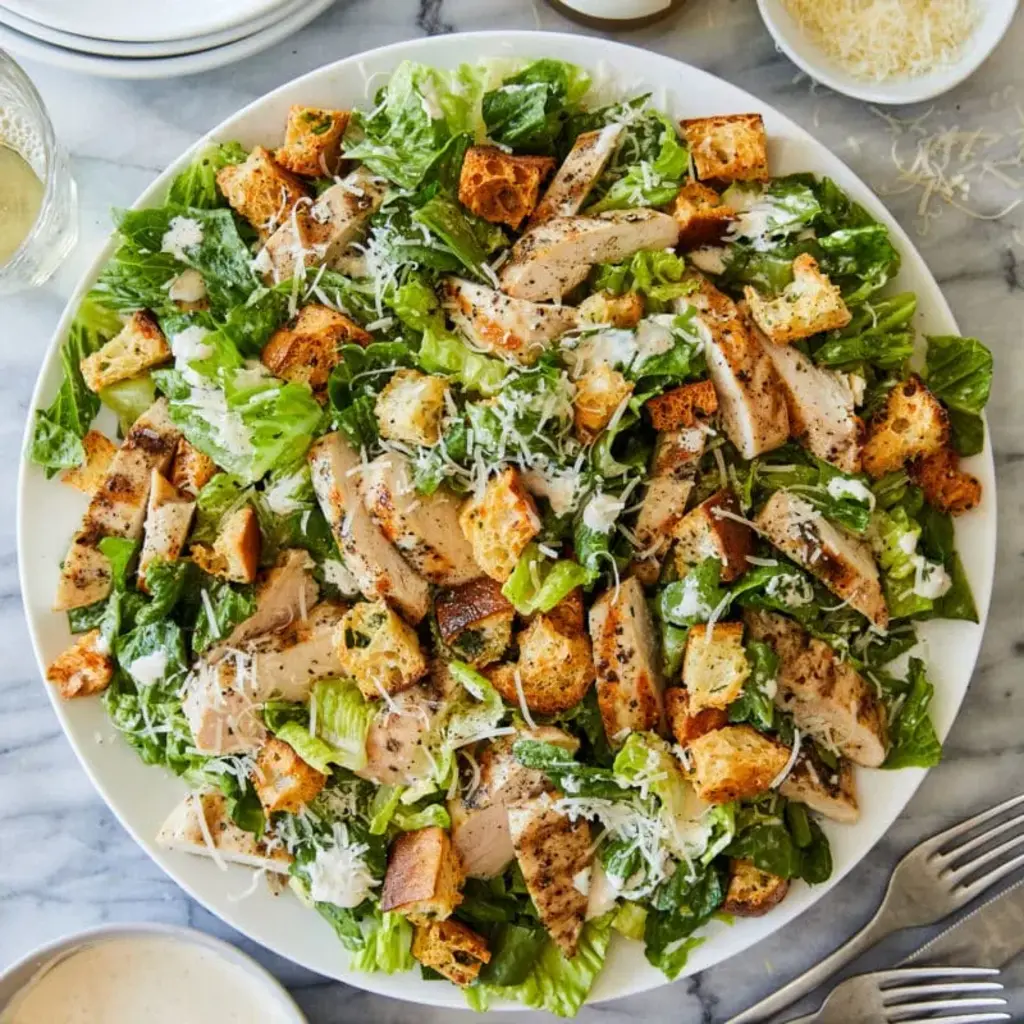
Best-Ever Chicken Caesar Salad with Homemade Croutons

Best Chicken Caesar Salad with Homemade Croutons: Crispy, Creamy, and Deliciously Simple

⚖️
Difficulty
Easy
⏲️
Prep Time
15
🕒
Cook Time
20
⏱️
Total Time
35
🍽️
Servings
4

There are salads, and then there are *salads*. The kind that make you sit up and pay attention, that feel like a true meal, a comforting embrace on a plate. This, my friends, is one of those salads. I’ve spent years perfecting what I believe is the absolute best chicken Caesar salad recipe, and today I’m sharing it with you. It starts with the croutons – forget the store-bought stuff; we’re making them from scratch, infused with garlic and herbs, impossibly crispy. Then, tender grilled chicken, marinated in a bright lemon-garlic mixture, finds its place atop crisp romaine. And the dressing? A creamy, dreamy, easy Caesar dressing that’s perfectly balanced. This isn’t just lunch; it’s an experience.

Imagine biting into a crouton so perfectly golden and crunchy that it shatters slightly, releasing a whisper of garlic and fresh parsley. Next, you encounter the succulent, grilled chicken, its subtle char adding a layer of complexity, followed by the cool, crisp romaine. All of this is brought together by a dressing that’s luscious yet bright, clinging to every leaf and morsel. It’s a symphony of textures and flavors – salty, tangy, a hint of umami, and that satisfying crunch. My journey from my mother’s kitchen in Morocco, where fresh herbs and vibrant flavors are paramount, to the bustling culinary scene of Paris where sauces were king, has taught me to layer these elements with care. This salad is a testament to that fusion, right here in my New York City kitchen.

What makes this the best chicken Caesar salad recipe? It’s in the details. My unique approach to marinating the chicken ensures it’s incredibly juicy and flavorful. And those homemade croutons? They’re seasoned with a simple yet potent mix that elevates them from mere bread cubes to irresistible flavor bombs. I’ll also share a common mistake most home cooks make that can lead to a soggy salad, and how to avoid it. Get ready for a classic Caesar salad that’s both easy to make and a guaranteed crowd-pleaser, bringing a touch of restaurant-quality perfection to your home dining.

Why This Best Chicken Caesar Salad Recipe Is the Best

This recipe elevates the humble Caesar salad into a spectacular dish because of a few intentional choices I’ve made. My unique angle lies in the harmonious blend of a deeply flavorful yet simple marinade for the chicken, which is based on a technique I learned in Paris for ensuring maximum flavor penetration without toughing the meat. This, combined with perfectly crisp, herb-infused homemade croutons, creates a textural and taste sensationalism that store-bought ingredients simply cannot match. It’s a commitment to fresh, vibrant ingredients and well-executed techniques that truly makes a difference.

From a professional cook’s perspective, achieving the perfect texture is key. The chicken is grilled to moist perfection, and the romaine is chopped just before dressing, ensuring maximum crispness. My homemade croutons are tossed in a fragrant garlic-parsley oil before baking, guaranteeing an even golden-brown crust and a satisfying crunch that lasts. This attention to texture, ensuring that each bite offers crispness, tenderness, and chew, is what sets this classic Caesar salad recipe apart. It’s the kind of polish you’d expect from a New York bistro, but made easily in your own kitchen.

One of the most rewarding aspects of this best chicken Caesar salad recipe is its accessibility. Despite the restaurant-quality results, it’s surprisingly easy to assemble. The steps are straightforward, and the ingredients are readily available at any well-stocked supermarket here in the US. I’ve designed this to be a foolproof meal that’s perfect for a weeknight dinner or a weekend lunch. You get all the satisfaction of a homemade dish without any unnecessary fuss, making it an ideal choice for busy home cooks looking for a reliable, delicious meal.

Homemade Caesar Salad with Croutons Ingredients

A great salad starts with great ingredients. For this recipe, I love sourcing my produce from the Union Square Greenmarket here in NYC whenever possible – the freshness is unparalleled. But even if you’re not in a big city, most of these items are staples you can find anywhere. My mother in Morocco always used the freshest garlic and parsley, and I carry that tradition here. The key is quality; it makes all the difference from the first bite to the last.

Ingredients List

  • 3 tablespoons extra-virgin olive oil (for croutons)
  • 2 tablespoons chopped fresh parsley leaves (for croutons)
  • 1 clove garlic, grated (for croutons)
  • Kosher salt and freshly ground black pepper, to taste (for croutons)
  • 4 cups ciabatta bread cubes (about 1-inch)
  • 3 tablespoons extra-virgin olive oil (for chicken marinade)
  • 2 tablespoons freshly squeezed lemon juice (for chicken marinade)
  • 2 teaspoons lemon zest (for chicken marinade)
  • 1 clove garlic, grated (for chicken marinade)
  • Kosher salt and freshly ground black pepper, to taste (for chicken marinade)
  • 1 1/2 pounds boneless, skinless chicken breasts
  • 1/4 cup mayonnaise
  • 1/4 cup buttermilk
  • 3 tablespoons freshly grated Parmesan cheese
  • 1 clove garlic, grated (for dressing)
  • 1 tablespoon freshly squeezed lemon juice (for dressing)
  • 1 1/2 teaspoons Dijon mustard
  • 1/2 teaspoon Worcestershire sauce
  • Kosher salt and freshly ground black pepper, to taste (for dressing)
  • 2 heads romaine lettuce, roughly chopped
  • 1/4 cup freshly grated Parmesan cheese (for serving)

Ingredient Spotlight

Ciabatta Bread: The unsung hero of the Caesar salad. Its sturdy structure and open crumb, when cubed and toasted, create the most delightful crunch. Look for a slightly stale loaf, as it holds up better to the oil and toasting. If you can’t find ciabatta, a day-old baguette or a good quality sourdough will also work beautifully; they just offer a slightly different texture.

Romaine Lettuce: The classic choice for good reason. Its crisp leaves provide that essential crunch and a fresh, slightly bitter counterpoint to the rich dressing and savory chicken. Choose heads that are firm and vibrant green, avoiding any that look wilted or have brown spots. For an easy chicken Caesar, thicker rib sections are best for that satisfying bite. Ensure it’s thoroughly washed and dried – water is the enemy of crisp slaw!

Parmesan Cheese: Grated Parmesan is a must for both the dressing and as a topping. For the best flavor, always opt for a block of good quality Parmigiano-Reggiano and grate it yourself just before using. Pre-shredded cheese often contains anti-caking agents that can affect the texture and flavor of your dressing. The nutty, salty notes of fresh Parmesan are irreplaceable in a classic Caesar.

Original IngredientBest SubstitutionFlavor / Texture Impact
Ciabatta BreadStale baguette or sourdoughSlightly denser croutons, more chewy interior.
Boneless, Skinless Chicken BreastsBoneless, skinless chicken thighsThighs are more forgiving and tend to stay juicier. May require slightly longer cooking time.
Buttermilk1/4 cup milk + 1/4 tsp lemon juice or white vinegar, let sit for 5 minsVery similar tang and tenderizing effect.

How to Make Best Chicken Caesar Salad with Homemade Croutons — Step-by-Step

Let’s get cooking! Follow these steps to create the best chicken Caesar salad you’ve ever tasted.

Step 1: Prepare the Croutons

Preheat your oven to 400 degrees F (200 degrees C). In a small bowl, whisk together 3 tablespoons of extra-virgin olive oil, 2 tablespoons of chopped fresh parsley leaves, and 1 grated clove of garlic. Season generously with salt and freshly ground black pepper to taste. Spread 4 cups of ciabatta bread cubes in a single layer on a baking sheet. Drizzle the olive oil mixture over the bread cubes and gently toss to ensure they are evenly coated. Place the baking sheet into the preheated oven and bake for about 13-15 minutes, or until the croutons are crisp and golden brown. Keep an eye on them as they can go from perfect to burnt quickly. Once done, remove from the oven and set aside to cool.

💡 mia’s Pro Tip: For extra flavor, you can add a pinch of dried Italian herbs or a sprinkle of garlic powder to the oil mixture for the croutons. Also, make sure your bread isn’t too fresh; slightly stale bread cubes are key for achieving that perfect crispness without becoming tough.

Step 2: Marinate the Chicken

While the croutons are baking or cooling, prepare the chicken marinade. In a small bowl or a gallon-size Ziploc bag, combine 3 tablespoons of extra-virgin olive oil, 2 tablespoons of freshly squeezed lemon juice, 2 teaspoons of lemon zest, 1 grated clove of garlic, and season with kosher salt and freshly ground black pepper to taste. Add the 1 1/2 pounds of boneless, skinless chicken breasts to the marinade. Ensure the chicken is well coated. If using a bag, seal it well, removing as much air as possible. Marinate in the refrigerator for at least 2 hours, turning the bag occasionally. For deeper flavor, you can marinate it longer, up to 4-6 hours.

Step 3: Grill the Chicken

Preheat your grill to medium-high heat. Once the grill is hot, drain the chicken from the marinade, discarding the excess liquid. Place the chicken breasts on the grill grates. Cook for about 4-5 minutes per side, turning occasionally, until the chicken is completely cooked through and reaches an internal temperature of 165 degrees F (74 degrees C). The exact cooking time will vary depending on the thickness of the chicken breasts. Remove the chicken from the grill and let it cool on a cutting board for at least 5-10 minutes before dicing it into bite-size pieces. This resting period is crucial for juicy chicken.

💡 mia’s Pro Tip: If you don’t have a grill, you can pan-sear the chicken in a hot skillet with a little olive oil, or bake it at 400°F (200°C) for about 20-25 minutes, until cooked through. Just be sure to reach that safe internal temperature of 165°F.

Step 4: Make the Dressing

In a medium bowl, whisk together 1/4 cup of mayonnaise, 1/4 cup of buttermilk, 3 tablespoons of freshly grated Parmesan cheese, 1 grated clove of garlic, 1 tablespoon of freshly squeezed lemon juice, 1 1/2 teaspoons of Dijon mustard, and 1/2 teaspoon of Worcestershire sauce. Season the dressing with kosher salt and freshly ground black pepper to taste. Whisk until smooth and creamy. Taste and adjust seasonings as needed; you might want a little more lemon for tang or pepper for a kick. This homemade Caesar dressing is where the magic happens!

Step 5: Assemble the Salad

To assemble the salad, place the roughly chopped romaine lettuce in a large serving bowl. Add the diced grilled chicken and the cooled homemade croutons. Pour the creamy Caesar dressing over the top. Gently toss everything together to combine, ensuring each piece of lettuce and chicken is coated with the delicious dressing. Top generously with 1/4 cup of freshly grated Parmesan cheese right before serving. Serve immediately for the best texture and flavor.

⚠️ Common Mistake to Avoid: Dressing the salad too early! This can lead to wilted lettuce and soggy croutons. It’s best to toss everything together just before you plan to serve to maintain that delightful crunch.

StepActionDurationKey Visual Cue
1Prepare & Bake Croutons13-15 minsCrisp and golden brown
2Marinate ChickenAt least 2 hoursChicken fully coated in marinade
3Grill Chicken8-10 mins totalInternal temp 165°F (74°C), cooked through
4Whisk Dressing~5 minsSmooth, creamy, well-combined
5Assemble Salad~5 minsEvenly coated, ready to serve

Serving & Presentation

This Best Chicken Caesar Salad recipe is a showstopper on its own, but how you serve it can elevate the experience even further. For a truly New York moment, I like to serve it family-style directly from a large, beautiful ceramic bowl. A generous sprinkle of fresh Parmesan cheese and a final crack of black pepper are non-negotiable garnishes. It evokes that feeling of a lively bistro where conversations flow as freely as the wine.

If I’m feeling a bit more Parisian chic, I might plate individual servings for a more elegant presentation. A bed of the romaine, topped artfully with the chicken and scattered croutons, then drizzled with dressing, and finished with microgreens or a few fresh parsley sprigs. It’s amazing how a simple garnish can transform a dish visually and add a delicate fresh note. It’s a reminder that even in a classic dish, there’s always room for personal flair and culinary artistry.

Pairing TypeSuggestionsWhy It Works
Side DishGarlic Bread, Roasted Asparagus, Simple Green Salad (if not making Caesar)Complements the richness without overpowering.
Sauce / DipExtra Caesar dressing on the side (for dipping croutons!)Satisfies those who love extra dressing.
BeverageCrisp Sauvignon Blanc, Iced Tea, Sparkling Water with LemonRefreshing and cuts through the richness of the dressing.
GarnishFresh Parsley Sprigs, Shaved Parmesan, Black PepperAdds freshness, visual appeal, and extra flavor.

Make-Ahead, Storage & Reheating

As a busy New Yorker, I rely on smart meal prep! For this easy chicken Caesar salad, the components can absolutely be prepared ahead of time. This way, you can have a delicious, healthy meal ready to go with minimal fuss. I often make the croutons and dressing on a Sunday for the week ahead. The chicken can be grilled and refrigerated, then simply sliced or diced before assembling.

MethodContainerDurationReheating Tip
RefrigeratorAirtight containersDressing: 5-7 days. Croutons: 3-4 days (lose crispness sooner). Cooked Chicken: 3-4 days.Reheat chicken slightly if desired, but it’s also great chilled. Croutons will soften; consider making fresh for ultimate crispness.
FreezerFreezer-safe containersDressing and cooked chicken can be frozen for up to 2-3 months. Croutons are not ideal for freezing as they lose their texture.Thaw overnight in the refrigerator. Reheat chicken gently.
Make-AheadComponents stored separatelyPrep dressing & croutons 2-3 days in advance; cook chicken 1-2 days in advance.Assemble RIGHT before serving to ensure peak freshness and crispness. Toss lettuce with dressing first, then add chicken and croutons.

When assembling a make-ahead salad, my secret is to store the dressing separately and then toss the lettuce with it just before serving. This preserves the crisp texture of the romaine. If you’ve stored cooked chicken, you can gently warm it in a skillet or microwave, or serve it cold. The croutons are best stored at room temperature in an airtight container to maintain some crispness, though they will soften over time. Don’t be afraid to experiment with how you store and reheat; finding what works best for your routine is key!

Variations & Easy Swaps

VariationKey ChangeBest ForDifficulty Impact
Spicy Chicken CaesarAdd a pinch of cayenne or red pepper flakes to the marinade or dressing.Those who love a little heat.No change.
Shrimp Caesar SaladSubstitute grilled shrimp for chicken.A lighter, seafood twist.Requires adjusting cook time for shrimp.
Vegetarian CaesarOmit chicken, add roasted chickpeas or grilled halloumi.Meat-free diets.No change in difficulty.

The Ultimate Chicken Caesar Twist

To truly embrace my Moroccan roots, I sometimes add a subtle twist to the marinade or dressing. A whisper of cumin and smoked paprika in the chicken marinade brings an earthy depth, reminiscent of tagines, while still complementing the classic Caesar flavors. Alternatively, a tiny pinch of ras el hanout in the dressing can add a complex, exotic aroma that delights the palate. These subtle additions make this already amazing dish truly unique.

Gluten-Free & Dairy-Free Chicken Caesar Delight

Making this recipe gluten-free and dairy-free is quite simple! For gluten-free croutons, use a gluten-free bread and bake as directed. For dairy-free, you’ll replace the Parmesan in the dressing with nutritional yeast (start with 2-3 tablespoons and adjust to taste for cheesiness) and use a dairy-free mayonnaise and milk in place of buttermilk. Ensure your Worcestershire sauce is also dairy-free if needed. Dairy-free cheese alternatives can be used as a topping, though they won’t melt quite the same.

Seasonal Spin on Classic Caesar

From my NYC kitchen, I love adapting recipes to the seasons. In spring and summer, I’ll add fresh blanched asparagus spears or snap peas to the salad for vibrant color and fresh flavor. For a fall or winter twist, I’ll sometimes incorporate roasted butternut squash cubes or crisp apple slices for a touch of sweetness. These additions bring a delightful freshness and seasonality that keeps this classic Caesar salad exciting year-round.

How do you make homemade croutons for a Caesar salad from scratch?

Making homemade croutons is simple! Start with day-old crusty bread like ciabatta or baguette, cubed into about 1-inch pieces. Toss them with olive oil, garlic (grated or minced), and herbs like parsley and oregano. Spread them in a single layer on a baking sheet and bake at around 375-400°F (190-200°C) for 10-15 minutes, or until golden brown and crisp. Watch them closely to prevent burning. They add an incredible crunch and flavor that store-bought croutons just can’t match.

What is the best type of chicken to use for a chicken Caesar salad?

Boneless, skinless chicken breasts are a popular choice for their lean protein content and ease of grilling or pan-searing. However, for extra moisture and flavor, boneless, skinless chicken thighs are also an excellent option. They tend to stay juicier and are more forgiving if slightly overcooked. Whichever you choose, marinating it beforehand, as in this recipe, will ensure it’s incredibly tender and packed with flavor, complementing the creamy dressing perfectly.

Can I make the dressing and croutons ahead of time for this salad?

Yes, absolutely! Both the Caesar dressing and the homemade croutons can be made a day or two in advance. Store the dressing in an airtight container in the refrigerator. For the croutons, store them at room temperature in an airtight container or a sealed bag to maintain their crispness for as long as possible; however, they are best used within 2-3 days. Having these components ready makes assembling the salad on demand incredibly quick and easy, perfect for weeknight meals.

What can I substitute for anchovies in a traditional Caesar salad dressing?

Traditional Caesar dressing often uses anchovy paste or fillets for its unique umami depth. If you prefer to omit or substitute anchovies, capers (chopped finely) can provide a briny, salty complexity. A small amount of fish sauce can also work, offering that savory punch without the fishy flavor. Alternatively, a dash of soy sauce or Worcestershire sauce (which often contains anchovies but is a more subtle flavor) can help build that savory foundation if anchovies are not your preference.

How do I prevent my chicken Caesar salad from becoming soggy?

The key to a non-soggy chicken Caesar salad is timing and proper storage of components. Always dress the salad just before serving. Store the lettuce, chicken, and croutons separately. If making ahead, keep the dressing in its own airtight container. Toss the romaine with the dressing first to lightly coat, then add the chicken and croutons. This ensures the lettuce stays crisp and the croutons retain their crunch for that satisfying bite.

Can I use pre-cooked chicken for this recipe?

Yes, you can definitely use pre-cooked chicken to make this Caesar salad even easier and faster! Rotisserie chicken, grilled chicken strips from the deli, or even leftover cooked chicken from another meal can be used. Simply shred or dice the pre-cooked chicken and add it to the salad when you assemble it. While it won’t have the marinated flavor from this recipe, it still makes for a delicious and quick meal. Ensure the chicken is fully cooked and ready to eat.

What kind of bread is best for homemade Caesar croutons?

For the best homemade Caesar croutons, a crusty, somewhat stale bread works wonders. Ciabatta, French baguette, or a hearty sourdough are excellent choices because their open crumb structure absorbs the oil nicely and crisps up beautifully. Avoid very soft or fresh bread, as it can become overly soggy. Day-old bread is ideal. The type of bread will slightly influence the final texture; ciabatta offers a lighter crunch, while sourdough might be a bit chewier.

How can I make a lighter version of Caesar dressing?

To create a lighter Caesar dressing, you can reduce the amount of mayonnaise and substitute it with plain Greek yogurt or a lower-fat sour cream. This adds creaminess while cutting down on fat and calories. You can also increase the amount of lemon juice and Dijon mustard to maintain a vibrant tanginess. Blending in a bit of extra olive oil (a good quality one, of course!) can provide richness without the heaviness of all mayonnaise, making for a wonderful, bright dressing.

Share Your Version!

I pour so much love and expertise into every recipe I share, and I truly hope this Best Chicken Caesar Salad with Homemade Croutons brings you as much joy as it brings me to cook it. If you make this, please consider leaving a star rating and a helpful comment below. Your feedback is incredibly valuable and helps other cooks decide to try the recipe!

And please, share your photos! Tag me on Instagram or Pinterest using @exorecipes – I absolutely adore seeing your creations and how you make this salad your own. I’m always curious to hear: what’s your go-to spice or herb for adding an unexpected twist to classic salads like this one? I can’t wait to see your beautiful salads!

From my NYC kitchen to yours — I hope this recipe brings as much warmth to your table as it does to mine. — mia 🧡

📌

Love This Recipe? Save It to Pinterest!

If you enjoyed this Best Chicken Caesar Salad with Homemade Croutons recipe, don’t let it get lost in your browser tabs! 😄 Pin it now so you can find it again anytime — and explore hundreds more tried-and-tested recipes waiting for you on my Pinterest boards.

👉 Follow mia on Pinterest @chefrecipes2

📌 Pin this recipe · 🔁 Re-pin your favorites · 💬 Tag me when you make it — I love seeing your creations!

Print

clock clock iconcutlery cutlery iconflag flag iconfolder folder iconinstagram instagram iconpinterest pinterest iconfacebook facebook iconprint print iconsquares squares iconheart heart iconheart solid heart solid icon

Best Chicken Caesar Salad with Homemade Croutons

  • Author: Chef Mia

Description

Truly THE BEST ever. With crispy, seasoned croutons, grilled chicken and an easy dressing!


Ingredients

Scale
  • 3 tablespoons extra-virgin olive oil
  • 2 tablespoons chopped fresh parsley leaves
  • 1 clove garlic (grated)
  • Kosher salt and freshly ground black pepper (to taste)
  • 4 cups ciabatta bread cubes
  • 3 tablespoons extra-virgin olive oil
  • 2 tablespoons freshly squeezed lemon juice
  • 2 teaspoons lemon zest
  • 1 clove garlic (grated)
  • Kosher salt and freshly ground black pepper (to taste)
  • 1 1/2 pounds boneless, skinless chicken breasts
  • 1/4 cup mayonnaise
  • 1/4 cup buttermilk
  • 3 tablespoons freshly grated Parmesan
  • 1 clove garlic (grated)
  • 1 tablespoon freshly squeezed lemon juice
  • 1 1/2 teaspoons Dijon mustard
  • 1/2 teaspoon Worcestershire sauce
  • Kosher salt and freshly ground black pepper (to taste)
  • 2 heads romaine (roughly chopped)
  • 1/4 cup freshly grated Parmesan

Instructions

  1. Preheat oven to 400 degrees F.
  2. In a small bowl, whisk together olive oil, parsley and garlic; season with salt and pepper, to taste.
  3. Spread bread cubes in a single layer on a baking sheet. Stir in olive oil mixture and gently toss to combine. Place into oven and bake until crisp and golden, about 13-15 minutes; set aside.
  4. In a small bowl, combine olive oil, lemon juice, lemon zest, garlic, 1 teaspoon salt and 1/2 teaspoon pepper.
  5. In a gallon size Ziploc bag or large bowl, combine chicken and olive oil mixture; marinate for at least 2 hours, turning the bag occasionally. Drain the chicken from the marinade.
  6. Preheat grill to medium high heat.
  7. Add chicken to grill, and cook, turning occasionally, until chicken is completely cooked through, reaching an internal temperature of 165 degrees F, about 4-5 minutes per side. Let cool before dicing into bite-size pieces.
  8. In a medium bowl, whisk together mayonnaise, buttermilk, Parmesan, garlic, lemon juice, Dijon and Worcestershire; season with salt and pepper, to taste.
  9. To assemble the salad, place romaine in a large bowl; top with chicken and croutons. Pour the dressing on top of the salad and gently toss to combine. Top with Parmesan.


Best Chicken Caesar Salad with Homemade Croutons

k">

Tried This Recipe? Leave a Comment!

Did you make this recipe? I’d love to hear how it turned out! Please leave a comment and a rating below. Your feedback helps other home cooks and supports cheerychop.com!

For more delicious inspiration, follow me on Pinterest!

Crunchy Chicken Caesar Wrap with Parmesan Crust

Chicken Caesar Wrap Recipe: Crispy Chicken Version for the Lunchbox Hero

⚖️
Difficulty
Easy
⏲️
Prep Time
20
🕒
Cook Time
15
⏱️
Total Time
35
🍽️
Servings
4

Growing up in my mother’s kitchen in Marrakech, vibrant flavors and satisfying textures were always the stars of the show. We’d often have simple, yet delicious, stuffed flatbreads that packed a punch. Today, I’m bringing that spirit to New York City with a riff on a classic: my easy chicken Caesar wrap recipe. It’s that perfect balance of homemade goodness and weeknight convenience, transforming simple ingredients into something truly special, just like we used to do back home. This is more than just a wrap; it’s a taste of my heritage blended with the fast-paced energy of city living.

Imagine this: perfectly golden, crispy chicken cutlets, tender on the inside, nestled amongst crisp romaine lettuce, crunchy croutons, and a generous shower of salty Parmesan cheese. All of this is tossed in a creamy, tangy Caesar dressing, then snugly wrapped in a large, soft tortilla. The aroma alone is enough to make your stomach rumble! It’s a symphony of textures and tastes – the crunch of the panko, the chew of the wrap, the sharp bite of the cheese, and the creamy dressing tying it all together. It reminds me of the diverse street food you find here in NYC, a delightful mix of cultures and flavors.

What makes this homemade Caesar wrap recipe a standout is the panko-parmesan crusted chicken. It’s a little trick I learned in culinary school in Paris, perfecting the art of the crispy coating that stays that way. I’ll share my secret for achieving that ultimate crunch without any fuss. We’ll also touch on a common mistake many home cooks make, which can leave their chicken wraps soggy and uninspired. Get ready for a chicken wrap recipe that’s both impressive and wonderfully simple!

Why This Chicken Caesar Wrap Recipe Is the Best

The secret to this flavor explosion lies in the double-duty of the Parmesan cheese. Not only does it infuse the panko breadcrumbs with a nutty, salty depth that elevates the chicken beyond your average wrap, but it also adds a delightful savory note to the salad filling itself. Drawing on my North African roots, where spices are layered for complexity, I apply this principle to classic European flavors, creating a truly unique profile that’s more than just a standard Caesar wrap. It’s this thoughtful layering that makes the dish truly sing.

From my days mastering French sauces, I know that texture is paramount. That’s why we pound the chicken to an even 1/4-inch thickness. This ensures even cooking, so every bite is tender, never tough or dry. The panko-parmesan coating then creates a beautiful, shatteringly crisp exterior once fried. It’s these simple, precise techniques, often overlooked, that separate a good wrap from an exceptional one, giving you that satisfying crunch that holds up even when tossed with the dressing.

This recipe is designed to be incredibly approachable, even if you’re new to making things from scratch. The ingredients are readily available at any New York City grocery store, and the steps are straightforward. I’ve streamlined the process so you can confidently create a restaurant-worthy chicken Caesar wrap in under an hour. It’s the perfect answer for a healthy, protein-packed lunch or a quick, satisfying dinner that the whole family will love.

Chicken Caesar Wrap Recipe Ingredients

One of the joys of living in NYC is the access to incredible ingredients. I love grabbing my crisp romaine from the Union Square Greenmarket and the best quality chicken from my local butcher. If you can’t find specific items, don’t worry – I’ve included some fantastic substitutions that will work beautifully. My mother always said that a good cook can make magic with whatever is at hand, and that’s the spirit I want to share with you here!

Ingredients List

  • 2 large chicken breasts (~1.5lbs)
  • 1 cup all-purpose flour
  • 1/2 tsp salt
  • 1/2 tsp black pepper
  • 2 large eggs
  • 2 cups panko breadcrumbs
  • 1 cup grated Parmesan cheese (for breading)
  • 1/4 cup neutral oil, with more as needed (vegetable, smooth olive oil, avocado oil)
  • 1 large head romaine lettuce, chopped small
  • 1 cup croutons
  • 1 cup shredded Parmesan (for salad)
  • 1/2 cup Caesar dressing (use your favorite, or try my homemade version if you’re feeling adventurous!)
  • 4 extra large burrito wraps (flour tortillas)

Ingredient Spotlight

Chicken Breasts: I always opt for plump, boneless, skinless chicken breasts for this recipe. Look for ones that are similar in size for even cooking. In NYC, I find the best quality at Zabars or my local kosher butcher. The protein in the chicken makes this a truly satisfying meal.

Panko Breadcrumbs: Panko is a Japanese-style breadcrumb that is lighter and airier than traditional breadcrumbs. This creates an exceptionally crispy coating that holds up well, even when mixed into the salad. If you can’t find panko, regular fine breadcrumbs will work, but the texture will be less crisp.

Parmesan Cheese: Freshly grated Parmesan is key here. It not only provides a wonderful salty, nutty depth to the chicken crust but also adds a savory kick to the Caesar salad filling. For the crust, finely grated is best, while shredded works perfectly for the salad. If you must use pre-grated, aim for the highest quality you can find, as it truly makes a difference in flavor.

Extra Large Burrito Wraps: These are essential for properly encasing all the delicious filling. Look for wraps that are at least 10-12 inches in diameter. If you can only find standard-sized tortillas, you might need to use two per serving or slightly reduce the filling.

Original IngredientBest SubstitutionFlavor/Texture Impact
Panko BreadcrumbsPlain fine breadcrumbs or crushed cornflakesLess crisp texture; cornflakes add a slight sweetness.
Parmesan Cheese (for breading)Grana Padano or Pecorino RomanoSimilar salty, nutty profile; Pecorino is sharper and saltier.
Buttermilk (for dressing)Plain yogurt or sour cream mixed with milkThicker consistency; yogurt adds tang, sour cream adds richness.
Romaine LettuceIceberg or chopped kaleIceberg is crunchier, kale is heartier but may need massaging.

How to Make Chicken Caesar Wrap Recipe — Step-by-Step

Don’t be intimidated by the breading process! It’s straightforward and the key to that incredible crispy chicken that makes this homemade Caesar wrap recipe so satisfying.

Step 1: Butterfly and Pound the Chicken

Take your two large chicken breasts and carefully slice them horizontally through the middle, almost like butterflying them but cutting all the way through to create four thinner pieces. Then, place each piece between two sheets of parchment paper or inside a large zip-top bag. Using a meat mallet or the bottom of a heavy pan, gently pound each piece to an even 1/4-inch thickness. This is crucial for quick, even cooking.

💡 mia’s Pro Tip: Pounding the chicken not only ensures even cooking but also tenderizes the meat, giving you a melt-in-your-mouth texture that’s essential for a perfect wrap.

Step 2: Set Up Breading Station

Prepare a breading station by lining up three shallow bowls or pie plates. In the first bowl, whisk together the flour with salt and pepper. In the second bowl, whisk your eggs until smooth. In the third bowl, combine the panko breadcrumbs with the 1 cup of grated Parmesan cheese.

Step 3: Bread the Chicken

Working with one piece of chicken at a time, dredge it thoroughly in the seasoned flour, tapping off any excess. Next, dip it into the whisked egg, ensuring it’s fully coated, and let any excess drip off. Finally, press the chicken firmly into the panko-Parmesan mixture, coating both sides completely. Press the breadcrumbs onto the chicken to help them adhere. Set the coated chicken aside on a clean plate or wire rack, and repeat with the remaining pieces.

⚠️ Common Mistake to Avoid: Don’t skip the flour dredging! It acts as a ‘glue’ for the egg, ensuring the panko mixture sticks much better to the chicken, preventing a patchy coating.

Step 4: Heat the Pan

Place a large skillet (cast iron works wonderfully here!) over medium-high heat. Add about 1/4 cup of neutral oil. You want the oil to be shimmering but not smoking. If it starts to smoke, your pan is too hot, so reduce the heat slightly.

Step 5: Cook the Chicken

Carefully place two coated chicken cutlets into the hot oil, being careful not to overcrowd the pan. Cook for 4-5 minutes per side, until golden brown and cooked through. The internal temperature should reach 165°F (74°C). Transfer the cooked chicken to a plate lined with paper towels to drain any excess oil. Repeat with the remaining two chicken cutlets, adding more oil to the pan if needed.

StepActionDurationKey Visual Cue
1Butterfly & Pound Chicken5 minsEven 1/4-inch thickness
2Set up Breading Station3 minsThree bowls ready
3Bread Chicken7 minsEven, well-adhered coating
4Heat Pan5 minsShimmering oil
5Cook Chicken8-10 mins per batchGolden brown, 165°F internal temp

Slice the Chicken and Toss the Salad

Step 6: Prepare the Filling

While the chicken is resting, grab a large bowl. Add your chopped romaine lettuce, croutons, shredded Parmesan cheese, and about 1/2 cup of your chosen Caesar dressing. Toss everything together until well combined and the lettuce is lightly coated. Don’t overdress it at this stage; you can always add more.

Step 7: Assemble the Wraps

Slice the cooked chicken cutlets into bite-sized strips or cubes. Add the sliced chicken to the salad mixture and toss gently to combine everything. Now, take your large burrito wraps. Spoon a generous amount of the filling down the center of each wrap. Fold in the sides, then tightly roll up from the bottom to create a secure wrap. If desired, cut each wrap in half for easier handling and a more appealing presentation.

💡 mia’s Pro Tip: Warm your tortillas slightly before assembling the wraps – this makes them more pliable and easier to roll without tearing.

Serving & Presentation

These vibrant Chicken Caesar Wraps are beautiful on their own, but a little extra flair never hurts! I love serving them cut in half, revealing the colorful layers within. For a touch of Moroccan flair, I sometimes add a sprinkle of sumac or a drizzle of my favorite harissa-spiced yogurt sauce on the side, offering a contrasting flavor profile to the creamy Caesar. It’s all about balancing those classic flavors with a hint of something unexpected, something I learned from my travels and my mom’s cooking.

Here in NYC, we eat with our eyes first! A few extra croutons sprinkled on top or a fresh sprig of parsley can elevate the presentation. They’re perfect for a quick lunch at your desk, a picnic in Central Park, or even a casual dinner party where guests can customize their own. The ultimate goal is a meal that looks as good as it tastes, bringing a little joy and indulgence to any occasion.

Pairing TypeSuggestionsWhy It Works
Side DishSweet potato fries, Simple green salad with lemon vinaigrette, Fruit saladComplements the rich wrap with contrasting flavors and textures.
Sauce / DipExtra Caesar dressing, Spicy aioli, Lemon-herb yogurt dipAdds moisture and an extra layer of flavor, especially for dipping.
BeverageIced tea, Sparkling water with lemon, Light lagerRefreshing drinks cut through the richness of the wrap.
GarnishFresh parsley, Cracked black pepper, Lemon wedgesAdds visual appeal and a burst of fresh flavor.

Make-Ahead, Storage & Reheating

As a busy New Yorker, I rely on smart meal prep! These chicken Caesar wraps are fantastic for making ahead. I like to prepare the chicken and the salad mixture separately. Then, right before I pack them for lunch the next day, I assemble the final wrap to keep the lettuce crisp and the chicken coating crunchy.

MethodContainerDurationReheating Tip
RefrigeratorAirtight container (separate components recommended)2-3 daysAssemble just before eating. Reheat chicken briefly if desired.
FreezerAirtight container or freezer bag1-2 months (best quality)Thaw in refrigerator. Assemble fresh for best texture.
Make-Ahead (Component Prep)Airtight containersCooked chicken: 3 days; Chopped lettuce: 2 daysAssemble just before serving for maximum crispness.

If you are making the wraps entirely ahead of time for lunch, I strongly advise keeping the dressing separate until just before eating. This is my biggest tip to prevent a soggy wrap! Toss your salad components with dressing and add the chicken right before wrapping. Even better, layer your wrap components carefully: start with the wrap, then a light smear of dressing, then lettuce, chicken, and top with cheese and croutons as close to the eating time as possible. This keeps everything fresh and texturally delightful.

Variations & Easy Swaps

VariationKey ChangeBest ForDifficulty Impact
Meal Prep PowerhousePrepare components separately. Include dressing in a small container.Busy work lunches, Quick weeknight dinners.Slightly more prep time, but quicker assembly later.
Gluten & Dairy-FreeUse gluten-free breadcrumbs, dairy-free Parmesan alternative, and check dressing.Dietary restrictions, Health-conscious eaters.Minor ingredient swaps, no change in technique.
Spicy Moroccan TwistAdd a pinch of cayenne to breadcrumbs, serve with a harissa-yogurt drizzle.Adventurous eaters, Those craving a flavor kick.Easy flavor addition, minimal extra effort.

Meal Prep Powerhouse

To make these wraps ahead of time for easy lunches, I follow a similar strategy to what my grandmother used when preparing mezze platters in Morocco. Components are prepped and stored separately. Cook the chicken, chop the lettuce and other salad ingredients, and have your dressing ready. The key is to assemble the wrap *just* before you plan to eat it, or at least within a few hours, to maintain the crispness of the lettuce and the chicken coating.

Gluten and Dairy-Free Delight

For a gluten-free version, simply swap out the all-purpose flour for a gluten-free all-purpose flour blend and use gluten-free panko breadcrumbs for the chicken coating. Ensure your Caesar dressing is also gluten-free. To make it dairy-free, use a good quality dairy-free Parmesan alternative in the breading and salad. Checked your dressing ingredients too, as some contain cheese. The texture might be slightly different from the original, but the flavor will still be delightful and satisfying.

Spicy Moroccan Twist

If you love a little heat, as we often do in Moroccan cuisine, add a pinch of cayenne pepper or smoked paprika to the panko-Parmesan mixture for the chicken. Serve the finished wraps with a dollop of Greek yogurt mixed with a teaspoon of harissa paste and a squeeze of lemon. This adds a lovely creamy texture with a fiery kick that beautifully complements the savory Caesar flavors, much like the way spices are balanced in a tagine.

How do you keep a chicken Caesar wrap from getting soggy?

The number one way to prevent a soggy chicken Caesar wrap is to control moisture. I always recommend keeping the dressing separate until you’re ready to assemble the wrap, or at least dress the salad components right before wrapping. If you’re meal prepping, store the dressing in a small, sealed container and add it right before eating. Another tip is to drain the cooked chicken well on paper towels to remove excess oil, and ensure your lettuce is thoroughly dried after washing.

What can I use instead of Caesar dressing in a chicken Caesar wrap?

There are many delicious alternatives to traditional Caesar dressing! For a lighter option, a lemon-herb vinaigrette or a simple Dijon mustard-based dressing works wonderfully. If you prefer something creamier, a ranch dressing or a creamy avocado dressing can be excellent. For a bit of a flavor twist, consider a tahini-based dressing, reminiscent of flavors from my Moroccan heritage, or even a light balsamic glaze for a touch of sweetness.

How long should you cook the chicken for a chicken Caesar wrap?

Since we pound the chicken to about 1/4-inch thickness, it cooks very quickly. In a medium-high heat pan with oil, it typically takes only about 4-5 minutes per side. The key is to ensure it reaches an internal temperature of 165°F (74°C). Using a meat thermometer is the most accurate way to check. Overcooked chicken will be dry and tough, so keep an eye on it and remove it from the pan as soon as it’s cooked through.

Can I make chicken Caesar wraps ahead of time for lunch?

Yes, you absolutely can make chicken Caesar wraps ahead of time, but with a small caveat: to maintain crispness, I highly recommend keeping the components separate until just before you eat. Cook the chicken and store it in an airtight container. Prepare the salad mixture (lettuce, cheese, etc.) and store it separately. Keep the dressing in its own small container. Assemble the wrap right before you pack it for lunch or when you’re ready to eat it. This simple step makes all the difference!

Why is my chicken Caesar wrap filling soggy?

The most common reason for a soggy chicken Caesar wrap filling is excess moisture. This can come from a few sources: not draining the lettuce properly after washing, over-dressing the salad, or adding warm chicken directly to the wrap without letting it cool and drain. If the chicken is still very hot when assembled, it can also steam the lettuce. My tip is to ensure all components are as dry as possible and that dressing is added sparingly and right before serving.

What are the best types of wraps to use for a chicken Caesar wrap?

For the most satisfying chicken Caesar wrap experience, I prefer using large, pliable flour tortillas, often labeled as “burrito size” or “jumbo.” These are best because they are large enough to hold a generous amount of filling without tearing and have a soft texture that complements the crispy chicken and crisp lettuce. You can also use whole wheat wraps for a healthier option, or even large spinach or tomato-flavored tortillas for a bit of added color and flavor.

Can I air fry or bake the chicken for a chicken Caesar wrap instead of frying?

Absolutely! If you prefer to avoid frying, baking or air frying the chicken is a fantastic alternative. For baking, spread the breaded chicken on a wire rack set over a baking sheet and bake at 400°F (200°C) for about 18-22 minutes, flipping halfway through, until golden and cooked through. For air frying, place the breaded chicken in the air fryer basket in a single layer and cook at 380°F (190°C) for about 10-12 minutes, flipping once, until crispy and cooked. The coating will be slightly less uniformly crisp than fried, but still delicious!

Share Your Version!

I truly hope you adore this easy chicken Caesar wrap recipe as much as I do! It brings me so much joy to share these dishes that are close to my heart, blending flavors from my Moroccan roots with my life here in New York. If you try this recipe, please consider leaving a star rating and a comment below. It helps other home cooks find the recipe and lets me know what you loved!

And if you snap a photo of your beautiful creation, I’d be thrilled if you’d share it with me on Instagram or Pinterest and tag me @exorecipe! I genuinely love seeing your take on my recipes. Do you think you might try the spicy Moroccan twist next time, or are you sticking to the classic for your first go? Let me know your thoughts!

From my NYC kitchen to yours — I hope this recipe brings as much warmth to your table as it does to mine. — mia 🧡

📌

Love This Recipe? Save It to Pinterest!

If you enjoyed this Chicken Caesar Wrap Recipe recipe, don’t let it get lost in your browser tabs! 😄 Pin it now so you can find it again anytime — and explore hundreds more tried-and-tested recipes waiting for you on my Pinterest boards.

👉 Follow mia on Pinterest @chefrecipes2

📌 Pin this recipe · 🔁 Re-pin your favorites · 💬 Tag me when you make it — I love seeing your creations!

Print

clock clock iconcutlery cutlery iconflag flag iconfolder folder iconinstagram instagram iconpinterest pinterest iconfacebook facebook iconprint print iconsquares squares iconheart heart iconheart solid heart solid icon

Chicken Caesar Wrap Recipe

  • Author: Chef Mia

Description

Fill up on a protein-rich, satisfying Chicken Caesar Wrap Recipe made with parmesan cheese, panko breadcrumbs, and a mouth watering homemade dressing.


Ingredients

Scale
  • 2 large chicken breasts (~1.5lbs)
  • 1 cup flour
  • 1/2 tsp salt
  • 1/2 tsp pepper
  • 2 eggs
  • 2 cups panko breadcrumb
  • 1 cup grated parmesan cheese
  • 1/4 cup neutral oil, with more as needed (vegetable, smooth olive oil, avocado oil)
  • 1 large head romaine lettuce, chopped small
  • 1 cup croutons
  • 1 cup shredded parmesan (or more grated)
  • 1/2 cup caesar dressing (I used this one)
  • 4 extra large burrito wraps

Instructions

  1. Slice chicken in half through the width, like butterflying but cutting all the way through.
  2. Pound each of the 4 chicken pieces into 1/4 inch thick using a meat pounder or rolling pin.
  3. Set up a station in three wide bowls. In the first bowl, mix the flour and salt and pepper. In the second bowl, whisk both eggs. In the third bowl, mix together the panko and parmesan cheese.
  4. Coat each chicken breast evenly in flour on both sides, then dip the chicken breasts into the egg mixture and coat well. After the egg mixture, dip into the breadcrumb mixture and coat very well, pressing into breadcrumbs and covering the whole surface of chicken on both sides. Repeat until all chicken has been coated.
  5. Heat a large saucepan over medium-high heat and add the oil.
  6. Once hot, add two chicken breasts at a time, cooking for 4-5 minutes on each side. Set chicken breasts aside on paper towel lined plate and repeat until all are cooked.
  7. Meanwhile, in a bowl, add lettuce, croutons, parmesan, and caesar dressing. Toss till combined.
  8. Slice chicken cutlets into bite sized pieces. Add to salad mixture and toss.
  9. In a large wrap, add salad mixture and wrap tightly. Cut in half and serve.


Nutrition

  • Calories: 1192 calories
  • Sugar: 8.8 g
  • Fat: 57.2 g
  • Carbohydrates: 100.6 g
  • Protein: 66.9 g


Chicken Caesar Wrap Recipe

ph">For more delicious inspiration, follow me on Pinterest!

Chipotle Ranch Grilled Chicken Burrito – Smoky & Juicy

Chipotle Ranch Grilled Chicken Burrito with Chipotle Ranch Dressing: The Ultimate Weeknight Meal

⚖️
Difficulty
Easy
⏲️
Prep Time
25
🕒
Cook Time
15
⏱️
Total Time
40
🍽️
Servings
4

Growing up in my mother’s bustling kitchen in Marrakech, Morocco, the air was always thick with the aroma of spices and slow-cooked tagines. While my heart is forever tied to those North African flavors, my culinary journey, including my training in Paris and my life now in New York City, has taught me to embrace bold, global fusions. This Chipotle Ranch Grilled Chicken Burrito is a testament to that, combining the smoky heat of chipotle with the cool, tangy embrace of ranch, all wrapped up in a convenient, portable package. It’s the kind of meal that feels both comforting and exciting, a true reflection of the vibrant city I call home. It’s an easy burrito dinner that delivers immense flavor without fuss.

Imagine this: succulent chicken, kissed by the grill and infused with a medley of smoky, earthy spices, nestled alongside fluffy rice and hearty black beans. Then comes the textural symphony – the crisp crunch of fresh lettuce, the bright burst of diced tomatoes, and a generous shower of melty cheese. All of this is brought together by my signature chipotle ranch dressing, a creamy, zesty concoction that ties every element into a harmonious bite. It’s a complex layering of flavors and textures, a culinary dance that will make your taste buds sing. This grilled chicken burrito recipe is a flavor explosion waiting to happen.

What sets my Chipotle Ranch Grilled Chicken Burrito apart is the careful balance of heat, tang, and smokiness, achieved through a specific marinade technique I learned in culinary school in Paris. I also believe in the power of fresh, quality ingredients, which I often source from the vibrant Union Square Greenmarket here in NYC. I’m going to share a pro tip on achieving perfectly grilled chicken every time, and also highlight a common mistake many home cooks make that can leave your burrito less than satisfying. Get ready for a dish that’s as easy to prepare as it is delicious to devour.

Why This Chipotle Ranch Grilled Chicken Burrito Recipe Is the Best

The secret to this truly exceptional chipotle ranch chicken wrap lies in the marinade. Drawing from my North African heritage, I’ve infused the chicken with a robust blend of chipotle chili powder and smoked paprika, creating a deep, smoky foundation. This isn’t just about heat; it’s about complex flavor depth. My time in Paris taught me the importance of balancing bold flavors, which is why the cooling, tangy chipotle ranch dressing cuts through the richness perfectly, creating a dynamic contrast that sings on the palate. It’s a fusion of my culinary journey, from Moroccan spice markets to French kitchens and finally, to the heart of NYC.

From a professional cook’s perspective, the texture is paramount. I focus on marinating the chicken thoroughly to ensure it’s not just flavorful but incredibly tender. Grilling it to perfection, then letting it rest, is crucial for juicy, succulent meat. When assembling the burrito, layering the ingredients strategically also matters for that perfect bite. We’re aiming for a soft tortilla embracing a heartiness of seasoned chicken, creamy dressing, fluffy rice, and crisp veggies. This attention to detail elevates a simple wrap into a gourmet experience, accessible for any home cook.

This recipe is designed to be incredibly approachable, even for those new to making burritos from scratch. The steps are straightforward, and the marinade does most of the heavy lifting for flavor. I’ve also included easy swaps and tips to make it even faster if you’re short on time – think pre-cooked rice or rotisserie chicken. It’s the perfect “easy burrito dinner” for busy weeknights or a relaxed weekend lunch. You get restaurant-quality taste with minimal stress, proving that delicious meals don’t need to be complicated.

Chipotle Ranch Grilled Chicken Burrito Ingredients

When I’m developing a recipe like this chipotle ranch chicken wrap, I always think about accessibility for my readers here in the U.S. I’m fortunate to live in a city like New York, where I can find fantastic ingredients at my local grocery stores or discover unique spices at places like Kalustyan’s or at the farmer’s market. For this recipe, I’ve outlined the core ingredients needed for that signature smoky, zesty flavor profile. Feel free to adapt based on what’s fresh and available to you. Remember, cooking is about creativity and making the dish your own!

Ingredients List

  • 2 boneless, skinless chicken breasts
  • 2 tablespoons olive oil
  • 2 tablespoons lime juice
  • 1 tablespoon chipotle chili powder
  • 1 teaspoon smoked paprika
  • 1 teaspoon garlic powder
  • 1 teaspoon onion powder
  • 1 teaspoon cumin
  • Salt and pepper to taste
  • 4 large flour tortillas
  • 1 cup cooked white or brown rice
  • 1 cup black beans, drained and rinsed
  • 1 cup shredded cheddar or Monterey Jack cheese
  • 1 cup shredded lettuce
  • 1/2 cup diced tomatoes
  • 1/2 cup corn kernels (optional)
  • 1/4 cup chopped cilantro (optional)
  • 1/2 cup chipotle ranch dressing

Ingredient Spotlight

Chipotle Chili Powder: This is the star for smoky heat. It’s made from dried, smoked jalapeños. Look for it in the spice aisle of any well-stocked grocery store. If you can’t find chipotle chili powder, you can substitute with a mix of regular chili powder and a pinch of smoked paprika, though the smoky depth won’t be as pronounced. Ensure it’s fresh for the best flavor.

Smoked Paprika: Beyond just color, smoked paprika (pimentón de la Vera) brings a distinct, campfire-like aroma and flavor that complements the chipotle beautifully. It’s a staple in my pantry, a must-have for adding depth to rubs, stews, and marinades. There isn’t a direct substitute that captures its unique smoky essence; regular paprika will lack that distinct characteristic.

Lime Juice: Fresh lime juice provides a crucial acidic brightness that cuts through the richness of the chicken and dressing. It also helps tenderize the chicken during marination. Always opt for fresh-squeezed lime juice over bottled for the most vibrant flavor. Lemon juice could be substituted in a pinch, but lime offers a more authentic Southwestern flair.

Chipotle Ranch Dressing: This is the creamy, zesty binder. You can use your favorite store-bought version or easily make your own by whisking together ranch dressing with a tablespoon or two of adobo sauce from a can of chipotle peppers, or finely minced chipotle peppers themselves. The intensity can be adjusted to your heat preference.

Original IngredientBest SubstitutionFlavor / Texture Impact
Chicken BreastsBoneless, skinless chicken thighsSlightly richer flavor, more forgiving to cook, but may take a minute or two longer on the grill.
Chipotle Chili PowderAncho chili powder + a pinch of cayenne pepperAncho is milder and fruitier; cayenne adds heat. The smoky depth may be slightly less pronounced.
Cheddar or Monterey Jack CheesePepper Jack or Cotija cheesePepper Jack adds more heat; Cotija offers a salty, crumbly texture that’s distinctly Mexican.
Black BeansPinto beans or refried beansPinto beans will be softer; refried beans will add a creamier texture. The flavor profile remains similar.
Flour TortillasCorn tortillas (warmed and doubled up) or large lettuce wrapsCorn tortillas will have a more corn-forward flavor and might be more prone to tearing; lettuce wraps offer a low-carb, crisp alternative.

How to Make Chipotle Ranch Grilled Chicken Burrito — Step-by-Step

Making this flavorful chicken burrito with chipotle is simpler than you might think. Follow these steps, and you’ll have a delicious meal in no time. My culinary training emphasizes clear, precise instructions, so let’s get cooking!

Step 1: Prepare the Marinade

In a medium bowl, whisk together the olive oil, lime juice, chipotle chili powder, smoked paprika, garlic powder, onion powder, cumin, salt, and pepper until well combined. This blend of spices is what gives our chicken its signature smoky, slightly spicy flavor, reminiscent of vibrant Mexican street food.

💡 mia’s Pro Tip: For an even deeper flavor infusion, you can add a minced clove of garlic or a teaspoon of finely minced adobo sauce from a can of chipotle peppers to the marinade. This adds another layer of complexity that I love!

Step 2: Marinate the Chicken

Place the chicken breasts in the bowl with the marinade, ensuring they are fully coated. Cover the bowl tightly with plastic wrap or place the chicken and marinade in a resealable plastic bag. Refrigerate for at least 20 minutes, or up to 2 hours. Anything longer than 2 hours with the lime juice can start to break down the chicken’s texture too much.

Step 3: Preheat the Grill

Preheat your outdoor grill or indoor grill pan to medium-high heat. It’s important to have a hot surface to get those beautiful grill marks and ensure the chicken cooks quickly and evenly. A well-heated grill is key to locking in the juices.

Step 4: Grill the Chicken

Carefully place the marinated chicken breasts onto the hot grill. Grill for approximately 6-8 minutes per side. The exact time will depend on the thickness of the chicken. You’re looking for beautiful grill marks and an internal temperature of 165°F (74°C) when checked with a meat thermometer.

💡 mia’s Pro Tip: Don’t overcrowd the grill! Cook the chicken in batches if necessary to ensure even cooking and proper searing. Overcrowding can steam the chicken rather than grill it.

Step 5: Rest and Slice Chicken

Once cooked, remove the chicken from the grill and let it rest on a clean cutting board for about 5 minutes. This resting period is crucial as it allows the juices to redistribute throughout the meat, ensuring it stays moist and tender when sliced. After resting, slice the chicken into strips against the grain.

Step 6: Warm Tortillas

While the chicken rests, warm your large flour tortillas. You can do this by heating them for about 20 seconds per side in a dry skillet over medium heat, or by wrapping them in a damp paper towel and microwaving for 30-45 seconds. Warm tortillas are more pliable and easier to roll without tearing.

⚠️ Common Mistake to Avoid: Using cold, stiff tortillas! They will crack and tear when you try to roll them, leading to a messy, split burrito. Always warm them until they are soft and flexible.

Step 7: Prepare Fillings

Lightly heat the black beans and cooked rice in a small saucepan or in the microwave if they aren’t already warm. This ensures that all the components of your burrito are at a pleasant serving temperature.

Step 8: Assemble the Burrito

Lay one warmed tortilla flat on your work surface. Spread about 1-2 tablespoons of chipotle ranch dressing evenly across the center of the tortilla, leaving a border around the edges. This dressing acts as both a flavor enhancer and a binder for the fillings.

Step 9: Add Fillings

On top of the dressing, layer your ingredients: a portion of the warm rice, followed by the black beans, generous strips of grilled chicken, shredded cheese, crisp lettuce, diced tomatoes, and corn kernels if you’re using them. Don’t overload the tortilla, as this will make rolling difficult.

Step 10: Add Cilantro (Optional)

If using, sprinkle fresh chopped cilantro over the other fillings for an extra burst of herbaceous freshness. Cilantro adds a bright, clean flavor that perfectly complements the smoky and spicy notes of the chipotle.

Step 11: Roll the Burrito

To roll, fold the two sides of the tortilla inward towards the center, creating a neat pocket. Then, starting from the bottom edge closest to you, roll the tortilla up tightly, tucking the filling as you go. Aim for a compact, even roll.

Step 12: Serve or Grill

Serve your Chipotle Ranch Grilled Chicken Burrito immediately. For an extra touch of deliciousness and a wonderfully crispy exterior, you can lightly grill the rolled burrito in a dry skillet over medium heat for a couple of minutes per side until golden brown and slightly toasted.

StepActionDurationKey Visual Cue
1Prepare Marinade5 minsThick, well-combined spice paste
2Marinate Chicken20-120 minsChicken submerged in marinade
3Preheat Grill10 minsGrill grates hot, slight sizzle when tested
4Grill Chicken12-16 minsCooked through, internal temp 165°F
5Rest & Slice Chicken5 minsResisted juices, even slices
6Warm Tortillas1 minSoft and pliable
7Prepare Fillings1-2 minsWarm consistency
8Assemble Burrito1 min per burritoSpread dressing evenly
9Add Fillings1 min per burritoNeatly layered
10Add Cilantro30 secs per burritoEven sprinkle
11Roll Burrito1 min per burritoTight, compact roll
12Serve or Grill1-3 minsGolden brown and slightly crisp (if grilled)

Serving & Presentation

For a truly satisfying meal, serving this Chipotle Ranch Grilled Chicken Burrito is all about balance and presentation. I love to serve them on a simple platter, perhaps with a few extra lime wedges on the side. A sprinkle of fresh cilantro on top just before serving adds a vibrant pop of color and aroma that signals freshness. If you enjoyed my tagines back home, you’ll appreciate how this burrito offers a similarly comforting yet exciting flavor profile, adapted for a quick weeknight dinner.

In my NYC kitchen, I often pair these burritos with a simple side salad dressed with a light vinaigrette to balance the richness, or some sweet potato fries for a more indulgent meal. A dollop of my homemade salsa verde or a side of guacamole is always a welcome addition. Remember, the goal is to complement the complex flavors of the burrito without overpowering them. Think of the vibrant colors and fresh ingredients, much like the bustling food scene in Manhattan.

Pairing TypeSuggestionsWhy It Works
Side DishSimple green salad with lime vinaigrette, Sweet potato fries, Elote (Mexican street corn)The salad offers freshness and acidity; fries provide a satisfying crunch and sweetness; elote mirrors the theme with a smoky, cheesy component.
Sauce / DipSalsa verde, Guacamole, Sour cream with a hint of limeVerde adds herbaceous notes; guacamole offers creamy richness; lime-infused sour cream provides a cool, tangy contrast.
BeverageMargarita, Mexican Lager, Cucumber-Lime Agua FrescaA classic margarita or lager complements the Mexican flavors; agua fresca offers a refreshing, non-alcoholic option.
GarnishExtra chopped cilantro, Thinly sliced jalapeños, Sliced avocadoAdds freshness, a kick of heat, and creamy texture, respectively, enhancing the overall eating experience.

Make-Ahead, Storage & Reheating

As a busy New Yorker, I rely on smart meal prep to keep my kitchen running smoothly. This Chipotle Ranch Grilled Chicken Burrito is fantastic for making ahead. You can prepare the chicken, cook the rice and beans, and even make the chipotle ranch dressing a day or two in advance. Store them separately in airtight containers in the refrigerator. When you’re ready to assemble, just warm the fillings, chop fresh veggies, and roll your burritos.

MethodContainerDurationReheating Tip
RefrigeratorAirtight containersCooked chicken & fillings: 3-4 days. Assembled burritos: 1-2 days.Reheat filling components separately, then assemble with fresh toppings and warm the assembled burrito/tortilla.
FreezerFreezer-safe bags or containersCooked chicken & fillings: 2-3 months. Assembled burritos (un-sauced/un-leafy): 1 month.Thaw overnight in fridge. Reheat fillings, assemble with fresh toppings. For pre-made burritos, thaw then reheat in oven or skillet.
Make-AheadMeal prep containersUp to 2 days in advance for all components.Assemble just before serving to maintain crispness of lettuce and tomatoes.

When reheating assembled burritos, I often recommend assembling them *after* heating the main components rather than freezing fully assembled ones with delicate ingredients like lettuce. This prevents sogginess. If reheating a pre-made burrito from the fridge, a few minutes in a dry skillet creates a lovely toasted exterior, far superior to microwaving alone. For frozen burritos, I find baking them wrapped in foil at 375°F (190°C) until heated through yields the best result, often followed by a quick pan-sear.

For meal prep, I like to portion out the chicken, rice, and beans into individual containers. Then, I pack the shredded lettuce, diced tomatoes, cheese, and dressing in separate small containers or bags to add just before eating. This keeps everything fresh and prevents the shredded lettuce from wilting. It’s the best way to ensure your Chipotle Ranch Grilled Chicken Burrito is as perfect for lunch on Thursday as it was on Monday.

Variations & Easy Swaps

VariationKey ChangeBest ForDifficulty Impact
Protein SwapUse seasoned ground turkey, shredded pork, or even grilled tofu/tempeh.Variety seekers, vegetarians/vegans.Easy. Adjust cooking times accordingly.
Rice & BeansSwap white rice for quinoa or cauliflower rice; swap black beans for pinto beans or chickpeas.Dietary needs, texture preference.Easy. Cook quinoa or cauliflower rice separately.
Veggie BoostAdd roasted sweet potatoes, bell peppers, onions, or spinach.Adding more nutrients and flavor.Easy. Prep veggies while chicken marinates.

Smoky Chipotle Chicken Wrap Twist

For those who love an extra punch of smoky flavor, reminiscent of the grills in my Moroccan homeland, I suggest adding a teaspoon of liquid smoke to the chicken marinade. You can also incorporate some finely diced chipotle peppers in adobo sauce right into the marinade for an intense, complex heat. If you enjoy a bit of char, consider grilling your corn kernels alongside the chicken for a smoky-sweet addition. This twist is perfect for anyone who believes more smoke equals more flavor!

Gluten-Free & Dairy-Free Chicken Burrito with Chipotle

Making this a gluten-free and dairy-free meal is quite simple and something I’ve perfected for friends with dietary needs. Ensure you use certified gluten-free flour tortillas or large lettuce leaves (like romaine or butter lettuce) as your wrap. For a dairy-free option, substitute the shredded cheese with your favorite dairy-free shredded cheese alternative, or simply omit it. Many store-bought ranch dressings contain dairy, so look for a dairy-free ranch or make your own using a dairy-free mayo base blended with herbs and spices.

Seasonal Veggies Chicken Burrito with Chipotle

Drawing inspiration from the ever-changing produce at NYC’s Union Square Greenmarket, I love incorporating seasonal vegetables. In the summer, I’ll roast some zucchini and bell peppers to add. In the fall, roasted butternut squash or sweet potatoes make a wonderfully hearty addition, adding sweetness and vibrant color. Simply roast your chosen vegetables until tender and add them to your burrito assembly line. This variation keeps the dish fresh and exciting throughout the year.

What is the best way to season the chicken for a Chipotle Ranch Grilled Chicken Burrito?

The best way to season the chicken involves a flavorful marinade that balances smoky, spicy, and tangy notes. My recipe uses a blend of chipotle chili powder, smoked paprika, garlic powder, onion powder, cumin, lime juice, and olive oil. This combination not only infuses the chicken with deep flavor but also helps tenderize it, ensuring a succulent bite. Grilling the marinated chicken is key to achieving that characteristic smoky char that makes this burrito so irresistible.

Can I use a store-bought ranch dressing for the Chipotle ranch sauce, or should I make it from scratch?

Absolutely, you can use a good quality store-bought ranch dressing as a base! To transform it into a “chipotle ranch” sauce, simply stir in a tablespoon or two of adobo sauce from a can of chipotle peppers, or add finely minced chipotle peppers themselves. This is a fantastic shortcut. Tasting as you go is important to get the spice level just right. If you have more time, making ranch from scratch and then infusing it with chipotle is also wonderful.

How long should I marinate the chicken for a Chipotle Ranch Grilled Chicken Burrito to get the most flavor?

For the most robust flavor, I recommend marinating the chicken for at least 20 minutes and ideally up to 2 hours. This allows the spices and lime juice to penetrate the chicken. Marinating for too long, especially with acidic ingredients like lime juice, can start to break down the chicken’s texture too much, making it mushy. The 20-minute minimum is effective for a quick weeknight meal, while the 2-hour mark offers a more intense flavor profile.

What are good substitutions for the tortilla in a Chipotle Ranch Grilled Chicken Burrito if I want a low-carb option?

For a low-carb alternative to traditional flour tortillas, you have several excellent options. Large lettuce leaves, such as iceberg, romaine, or butter lettuce, create a crisp and refreshing wrap. You can also use large collard green leaves (blanched briefly to make them pliable) or even thinly sliced jicama for a unique crunch. If you prefer something closer to a wrap, consider low-carb or keto-specific tortillas, which are readily available in most major supermarkets.

Can I make the chipotle ranch dressing ahead of time?

Yes, absolutely! Making the chipotle ranch dressing ahead of time is a great meal prep strategy. I often make a batch and store it in an airtight container in the refrigerator for up to 3-4 days. This way, it’s ready to go when you are assembling your burritos. For the best flavor and texture, give it a good stir before using, especially if any separation has occurred.

What kind of rice works best in this burrito?

You can use either white or brown rice, depending on your preference and what you have on hand. I often use a medium-grain white rice for its slightly sticky texture that holds well in the burrito. Brown rice offers more fiber and a nuttier flavor, which also works beautifully. For convenience, seasoned rice mixes or even leftover rice from another meal are perfect additions. Just ensure it’s cooked and slightly cooled before adding to the burrito.

How do I prevent my burrito from falling apart when rolling and eating?

There are a few key strategies to ensure a secure burrito. First, don’t overfill it – leave a good amount of space around the edges. Second, warm your tortillas until they are very pliable; this is crucial. Third, fold the sides in tightly before rolling from the bottom upwards. A neat, compact roll is essential. If you plan to grill the burrito after rolling, this seals it even further and adds a lovely crispiness.

Can I make this burrito spicy without adding more chipotle?

Yes! If you want to increase the heat without overwhelming the chipotle flavor, consider adding finely diced fresh jalapeños or serrano peppers to the filling, or sprinkle them on top. You could also incorporate a dash of your favorite hot sauce into the chipotle ranch dressing. For a different kind of heat, a pinch of cayenne pepper in the chicken marinade will provide a sharp, lingering warmth.

Share Your Version!

I would absolutely love to see your creations! If you whip up this Chipotle Ranch Grilled Chicken Burrito, please leave a star rating and a comment below to let me know how it turned out. Your feedback helps other home cooks too! For those who love sharing their culinary adventures, snap a photo and tag me on Instagram or Pinterest at @exorecipe. I can’t wait to see how you personalize this recipe – especially if you try adding a unique seasonal vegetable based on my NYC market finds!

From my NYC kitchen to yours — I hope this recipe brings as much warmth to your table as it does to mine. — mia 🧡

📌

Love This Recipe? Save It to Pinterest!

If you enjoyed this Chipotle Ranch Grilled Chicken Burrito recipe, don’t let it get lost in your browser tabs! 😄 Pin it now so you can find it again anytime — and explore hundreds more tried-and-tested recipes waiting for you on my Pinterest boards.

👉 Follow mia on Pinterest @chefrecipes2

📌 Pin this recipe · 🔁 Re-pin your favorites · 💬 Tag me when you make it — I love seeing your creations!

Print

clock clock iconcutlery cutlery iconflag flag iconfolder folder iconinstagram instagram iconpinterest pinterest iconfacebook facebook iconprint print iconsquares squares iconheart heart iconheart solid heart solid icon

Chipotle Ranch Grilled Chicken Burrito

  • Author: Chef Mia

Description

The Chipotle Ranch Grilled Chicken Burrito is a flavorful and satisfying Mexican-inspired dish thats perfect for a quick weeknight dinner or a hearty lunch.Juicy grilled chicken is seasoned with smoky spices and paired with rice, beans, fresh vegetables, and a tangy chipotle ranch dressing, all wrapped in a warm tortilla.


Ingredients

Scale
  • 2 boneless (skinless chicken breasts)
  • 2 tablespoons olive oil
  • 2 tablespoons lime juice
  • 1 tablespoon chipotle chili powder
  • 1 teaspoon smoked paprika
  • 1 teaspoon garlic powder
  • 1 teaspoon onion powder
  • 1 teaspoon cumin
  • Salt and pepper to taste
  • 4 large flour tortillas
  • 1 cup cooked white or brown rice
  • 1 cup black beans (drained and rinsed)
  • 1 cup shredded cheddar or Monterey Jack cheese
  • 1 cup shredded lettuce
  • 1/2 cup diced tomatoes
  • 1/2 cup corn kernels (optional)
  • 1/4 cup chopped cilantro (optional)
  • 1/2 cup chipotle ranch dressing

Instructions

  1. In a bowl, whisk together olive oil, lime juice, chipotle chili powder, smoked paprika, garlic powder, onion powder, cumin, salt, and pepper.
  2. Coat the chicken breasts in the marinade. Cover and refrigerate for at least 20 minutes (or up to 2 hours for more flavor).
  3. Preheat your grill or grill pan to medium-high heat.
  4. Grill the marinated chicken breasts for 6-8 minutes per side, or until the internal temperature reaches 165°F (74°C).
  5. Remove from heat and let rest for 5 minutes before slicing into strips.
  6. Warm the tortillas in a dry skillet or microwave until pliable.
  7. Heat the black beans and rice if they are not already warm.
  8. Lay each tortilla flat and spread 1-2 tablespoons of chipotle ranch dressing in the center.
  9. Add a layer of rice, black beans, grilled chicken strips, shredded cheese, lettuce, tomatoes, and corn (if using).
  10. Sprinkle chopped cilantro on top for added freshness.
  11. Fold the sides of the tortilla inward, then roll it up tightly from the bottom to form a burrito.
  12. Serve immediately or lightly grill the wrapped burrito for a crispy exterior.


Nutrition

  • Calories: 550 kcal


Chipotle Ranch Grilled Chicken Burrito

ph">For more delicious inspiration, follow me on Pinterest!

Easy Chicken Caesar Sandwiches – Crispy & Creamy

Chicken Caesar Sandwiches: Garlic Butter Twist – A Flavor Explosion

⚖️
Difficulty
Easy
⏲️
Prep Time
15
🕒
Cook Time
15
⏱️
Total Time
30
🍽️
Servings
4

Oh, New York! This city never sleeps, and neither does its culinary scene. From the bustling food carts on one corner to the chic bistros on another, inspiration is everywhere. My own culinary journey began in my mother’s fragrant Marrakech kitchen, a world away from the concrete jungle, but the spirit of vibrant, bold flavors is something I carry with me. Over the years, training in Paris and now cooking here in NYC, I’ve learned to blend traditions. Today, I want to share a recipe that perfectly captures this fusion: the ultimate Chicken Caesar Sandwich, elevated with a simple yet decadent garlic butter crust. It’s my little twist on a classic, designed to pack a punch of flavor in under 30 minutes. Forget bland, boring lunches; this is a sandwich that sings!

Imagine this: golden, crispy fried chicken cutlets, seasoned to perfection, nestled in a gloriously toasted hoagie roll. The bread itself is a masterpiece, brushed with a fragrant garlic-parsley butter that bakes into a savory crust, offering that irresistible crunch with every bite. Inside, you’ll find a generous toss of crisp romaine lettuce, coated in a creamy, tangy Caesar dressing that I’ve always found myself perfecting with a touch of Dijon to balance the richness. Each component is intentionally crafted to deliver a symphony of textures and tastes – the crunch of the chicken, the soft chew of the bread, the crispness of the lettuce, and the creamy, umami-rich dressing. It smells divine, looks incredible, and tastes even better.

What makes this Caesar chicken sandwich recipe stand out from the rest? It’s in the details, much like the intricate tile work you find in Moroccan riads or the delicate layers in a French pastry. I’ve incorporated a garlic butter toast that provides a fantastic flavor base and crisp texture, a common mistake often overlooked. Plus, I’ll share my secret for achieving perfectly crispy chicken every single time, without it being greasy. This isn’t just another chicken sandwich; it’s a culinary experience that’s surprisingly achievable for any home cook. Get ready to impress yourself and anyone lucky enough to share this meal with you!

Why This Chicken Caesar Sandwiches Recipe Is the Best

My inspiration for this twist on the classic Chicken Caesar Sandwich comes from my time perfecting sauces in Paris. Great sauces and dressings are all about balance – a little acidity, a little richness, a little savory depth. The Caesar dressing in this recipe is no exception. I’ve found that using a combination of mayonnaise and sour cream (or Greek yogurt) creates a magnificent creamy texture without being too heavy, further enhanced by the sharp tang of Dijon and the subtle funk of anchovy paste – a tiny ingredient that makes a world of difference. This careful balance ensures the dressing complements, rather than overpowers, the star ingredients, creating a cohesive and utterly delicious sandwich experience that you’ll crave again and again.

The secret to truly exceptional fried chicken, a technique I honed through countless early mornings at culinary school, lies in the breading and frying technique. For these sandwiches, I’m recommending a dual breadcrumb coating – standard breadcrumbs for a good base and Panko for that ultimate shatteringly crisp finish. By ensuring the chicken is pounded thin and fried at the correct temperature (medium-high, not screaming hot!), you achieve a golden-brown crust that’s miles away from greasy. This method guarantees a delightful crunch that holds up beautifully within the soft bread, preventing a soggy disappointment and providing that satisfying textural contrast that makes every bite exciting.

As a busy New Yorker, I know convenience is key. This easy chicken sandwich recipe is designed for those days when you want something substantial and flavorful without spending hours in the kitchen. From start to finish, it comes together in about 30 minutes. The chicken fries quickly, the garlic butter takes moments to whip up, and toasting the bread is a breeze. Even the salad dressing can be made while the chicken cooks. It’s perfect for a quick weeknight dinner, a spectacular packed lunch, or even a casual gathering. You get gourmet flavor with minimal fuss, proving that delicious meals don’t always require a long commitment.

Chicken Caesar Sandwich Ingredients

Living in New York City means I have access to the most incredible ingredients year-round. For my chicken Caesar sandwiches, I love sourcing my chicken from a local butcher in the West Village, but any good quality chicken breast from your neighborhood grocery store will work beautifully. For the greens, I always opt for the freshest romaine from Union Square Greenmarket. And those crusty hoagies? There’s nothing like a fresh baguette from a local bakery. If you can’t find these specific items, don’t worry! I’ve included some fantastic substitutions below to help you achieve perfection no matter where you are.

Ingredients List

  • 2 boneless, skinless chicken breasts
  • 1 large egg whisked with a splash of milk (about 1 tbsp)
  • ¼ teaspoon garlic powder
  • ¼ teaspoon salt
  • ¼ teaspoon black pepper
  • ½ cup all-purpose breadcrumbs
  • ½ cup Panko breadcrumbs
  • Vegetable oil, for frying (about 1-inch depth in a pan)
  • 4 Tablespoons salted butter, slightly melted
  • 2–3 cloves garlic, minced (for garlic butter)
  • 2 Tablespoons chopped fresh parsley (for garlic butter)
  • 4 hoagie rolls or small baguettes
  • • For the Caesar Dressing:
  • ½ cup mayonnaise
  • ¼ cup sour cream or plain Greek yogurt
  • ¼ cup finely grated Parmesan cheese
  • 1 Tablespoon fresh lemon juice
  • 1 teaspoon Dijon mustard
  • 1 teaspoon anchovy paste (optional, but highly recommended!)
  • 1 teaspoon Worcestershire sauce
  • 1 clove garlic, grated or finely minced
  • Salt and freshly ground black pepper, to taste
  • • For the Salad:
  • 3–4 cups Romaine lettuce, chopped or shredded
  • Extra grated Parmesan cheese, for topping

Ingredient Spotlight

Chicken Breasts: For this recipe, choose boneless, skinless chicken breasts. When selecting them at the US supermarket, look for pieces that are relatively uniform in thickness. If they are very thick, you’ll want to pound them thin, as instructed in the recipe. This ensures even cooking and a tender bite. If you prefer darker meat, chicken thighs work too, though they may require a slightly longer cooking time. The key is to get them thin for that perfect crisp-to-tender ratio.

Panko Breadcrumbs: These Japanese-style breadcrumbs are coarser and airier than regular breadcrumbs, which is precisely why they make fried foods so incredibly crispy. You can find them in nearly every major grocery store in the baking aisle. If you can’t find Panko, regular breadcrumbs will work in a pinch, but the texture won’t be quite as light and airy. For an extra boost of flavor, consider toasting your regular breadcrumbs lightly before using them.

Anchovy Paste: Don’t be scared! This ingredient is the secret weapon of many great Caesar dressings. It dissolves into the dressing, providing a deep, savory, umami flavor that makes the dressing incredibly complex and addictive, without tasting fishy. You’ll usually find it in a small tube near the canned fish or condiments section of your supermarket. If you absolutely cannot use it, a dash of extra Worcestershire sauce or a tiny pinch of MSG can offer a similar depth, but anchovy paste is truly best.

Hoagie Rolls/Baguettes: The bread is the vessel, and it needs to be sturdy enough to hold all those delicious fillings, yet soft enough to bite through easily. A classic hoagie roll or a fresh baguette is perfect. Look for ones with a good crust that will toast up nicely. As much as possible, try to get them from a local bakery; their freshness makes a noticeable difference in the final sandwich texture and flavor profile.

Romaine Lettuce: For that quintessential crunch and fresh, slightly bitter counterpoint to the rich chicken and dressing, Romaine lettuce is king. When buying it, look for bright green, firm leaves. You can chop it into bite-sized pieces or shred it finely, depending on your preference. If Romaine isn’t available, a mix of iceberg and a touch of kale could be an alternative, though the flavor profile will change slightly.

Substitutions

Original IngredientBest SubstitutionFlavor / Texture Impact
Panko BreadcrumbsRegular breadcrumbs + ½ tsp Italian seasoningLess crispy, slightly denser coating.
Anchovy Paste1 tsp extra Worcestershire sauce; or 1/4 tsp fish sauceSlightly less complex umami, may be a tiny bit saltier.
Sour Cream/Greek YogurtHeavy cream; or an extra 2 tbsp mayonnaiseDressing might be richer or slightly less tangy.
Hoagie RollsCiabatta rolls, thick-sliced sourdough, or large brioche bunsTexture and crust profile will change; ensure they toast well.
Fresh ParsleyDried parsley (1/4 the amount)Less vibrant flavor and aroma; color will be less bright.

How to Make Chicken Caesar Sandwiches — Step-by-Step

Follow these simple steps, and you’ll have a gourmet sandwich on your table faster than you can decide what to watch on TV tonight!

Step 1: Prep the Chicken

Start by preparing your chicken cutlets. Place the chicken breasts on a clean cutting board. Using a sharp knife, carefully slice each breast horizontally into 2 or 3 thinner cutlets to create more surface area. This helps them cook faster and more evenly. In a shallow bowl, whisk together the egg with a splash of milk, ¼ tsp garlic powder, ¼ tsp salt, and ¼ tsp pepper. In a separate bowl or on a plate, combine the breadcrumbs and Panko breadcrumbs. Dredge each chicken cutlet first in the egg mixture, ensuring it’s fully coated, then press firmly into the breadcrumb mixture to create a solid, even coating. Repeat for all cutlets.

💡 mia’s Pro Tip: For an extra-tender chicken cutlet, you can place the sliced chicken between two sheets of plastic wrap and gently pound it with a mallet or a heavy pan to an even ¼-inch thickness before breading. This also ensures uniform cooking.

Step 2: Make the Garlic Butter and Toast the Bread

While the chicken is resting, let’s get the bread ready for its transformation. In a small bowl, combine the slightly melted butter with the minced garlic and chopped fresh parsley. Mix well until it’s fragrant and luscious. Slice your hoagie rolls or baguettes in half lengthwise. Generously spread the garlic butter mixture evenly over the cut sides of the bread. Place the buttered bread halves cut-side up on a baking sheet. Pop them under a preheated broiler or in a 450ºF (230ºC) oven for about 3-4 minutes, or until they are beautifully golden brown and toasted. Watch them closely – they can go from perfect to burnt in seconds!

💡 mia’s Pro Tip: Adding a pinch of red pepper flakes to the garlic butter can give it a subtle warmth that pairs wonderfully with the rich Caesar flavors.

Step 3: Toss the Romaine

Now for the dressing and salad. In a clean bowl or a mason jar, whisk together all the ingredients for the Caesar dressing: mayonnaise, sour cream (or Greek yogurt), grated Parmesan cheese, lemon juice, Dijon mustard, anchovy paste (if using), grated garlic, and Worcestershire sauce. Season with salt and pepper to your taste. Give it a good whisk until it’s smooth and emulsified. In a large salad bowl, place your chopped or shredded romaine lettuce. Drizzle about 3-4 tablespoons of the dressing over the lettuce and toss gently until the leaves are evenly coated. You want the lettuce to be dressed, not drowning. Reserve any extra dressing for serving or dipping.

⚠️ Common Mistake to Avoid: Don’t overdress the salad. Too much dressing can make the lettuce overly soupy and heavy. Start with a smaller amount and add more as needed. You’re aiming for lightly coated, crisp leaves.

Step 4: Assemble the Sandwiches

It’s time for the grand finale! Heat about 1-inch of vegetable oil in a large skillet or cast-iron pan over medium-high heat until shimmering (around 350ºF/175ºC). Carefully place the breaded chicken cutlets into the hot oil, being careful not to overcrowd the pan (fry in batches if necessary). Fry for about 3-5 minutes per side, until golden brown and cooked through. Drain the crispy chicken on a paper towel-lined plate. Once your bread is toasted and chicken is fried, begin assembling. Lay a generous portion of the dressed romaine lettuce onto the bottom half of each toasted roll. Top the lettuce with the crispy chicken cutlets and finish with a good grating of extra Parmesan cheese over the chicken. Place the top half of the roll over the filling. Serve immediately and prepare for smiles!

💡 mia’s Pro Tip: While frying, keep the cooked chicken warm in a single layer on a wire rack set over a baking sheet in a low oven (around 200°F / 95°C). This keeps it crisp while you finish the rest.

StepActionDurationKey Visual Cue
1Prep & Bread Chicken10 minsEvenly coated cutlets
2Make Garlic Butter & Toast Bread5 minsGolden brown, toasted bread
3Toss Romaine3 minsLightly coated, crisp leaves
4Fry Chicken & Assemble12 minsCrispy chicken, assembled sandwich

Serving & Presentation

These Chicken Caesar Sandwiches are designed to be a showstopper, even in the most casual setting. For that perfect NYC deli vibe, serve them immediately after assembly while the chicken is still warm and impossibly crisp, and the bread is perfectly toasted. I often like to slice them in half diagonally to reveal the layers of chicken, lettuce, and creamy dressing – it makes for a more dramatic presentation, reminiscent of the elegant plating I learned in Paris. A final flourish of freshly grated Parmesan cheese over the top adds a beautiful speckled finish.

Don’t forget to serve them with any extra Caesar dressing on the side for dipping – it’s a personal favorite of mine! For a full meal experience, consider pairing these sandwiches with something refreshing to balance the richness. A simple side salad, some crispy oven fries, or even a light coleslaw would be wonderful. Thinking back to bustling food markets in Marrakech, the vibrant colors and fresh flavors always inspired me, and I aim for that same cheerful, satisfying experience on a plate here.

Pairings

Pairing TypeSuggestionsWhy It Works
Side DishCrispy French Fries or Sweet Potato Fries; Creamy Coleslaw; Simple Arugula Salad with Lemon VinaigretteFries provide a satisfying crunch; coleslaw offers a cool, tangy contrast; arugula salad adds a fresh, peppery bite.
Sauce / DipExtra Caesar Dressing; Garlic Aioli; Spicy Sriracha MayoEnhances the sandwich flavor; the aioli adds an extra garlic punch; Sriracha mayo brings a welcome heat.
BeverageCrisp Lager or Pilsner; Dry White Wine (like Sauvignon Blanc); Sparkling LemonadeThe beer’s carbonation cuts through richness; wine’s acidity complements the savory dressing; lemonade offers a refreshing, non-alcoholic option.
GarnishFreshly Grated Parmesan Cheese; Toasted Croutons; Cracked Black Pepper; Fresh Parsley SprigsAdds extra flavor and visual appeal; croutons echo the crispness; pepper adds a final kick; parsley brightens it up.

Make-Ahead, Storage & Reheating

For my busy New York life, meal prep is a lifesaver. While these sandwiches are best enjoyed fresh for maximum crispness, you can certainly prepare components ahead of time for a quicker assembly. I like to make a big batch of the Caesar dressing over the weekend and store it in an airtight container in the refrigerator. The chicken can also be breaded and prepped, ready to be fried. However, the bread should be toasted just before serving, and the chicken should ideally be fried right before you plan to eat to maintain its delightful crunch.

MethodContainerDurationReheating Tip
RefrigeratorAirtight containerUp to 3 days (for cooked chicken and dressing separately)Reheat chicken in a 375°F oven or toaster oven until crisp; gently warm dressing if desired.
FreezerFreezer-safe bag/containerUp to 1 month (for cooked chicken only, un-assembled)Reheat from frozen in a 350°F oven until hot and crisp; this may affect crispiness significantly.
Make-AheadComponents stored separatelyUp to 2 days in advanceAssemble just before serving. Toast bread and fry chicken fresh if possible for best texture.

When reheating the fried chicken, my top recommendation is to use your oven or a toaster oven set to a moderate temperature, around 375°F (190°C). Spread the chicken out on a baking sheet and reheat until it’s heated through and its glorious crispiness has returned. Avoid the microwave at all costs, as it tends to make fried foods soggy and sad. For the dressed lettuce, it’s best to use it fresh. If you have leftover chicken, consider tossing it into a fresh salad the next day, rather than attempting to re-sandwich it.

Variations & Easy Swaps

VariationKey ChangeBest ForDifficulty Impact
Grilled Chicken Caesar WrapGrill chicken instead of frying; use a large tortilla instead of a roll.Lighter option; meal prep friendly.Easy
Gluten-Free Caesar SandwichUse gluten-free bread and gluten-free breadcrumbs.Dietary needs.Easy
Spicy Moroccan Caesar SandwichAdd a pinch of chili flakes to the breading; a dash of harissa to the dressing.Flavor adventurers!Easy

Grilled Chicken Caesar Wrap Variation

If you’re aiming for a slightly lighter sandwich or something that travels exceptionally well for lunch on the go, try the grilled chicken Caesar wrap. Instead of frying, grill your seasoned chicken cutlets until cooked through. Slice them into strips and then wrap them in large flour tortillas along with the dressed romaine and extra Parmesan. This variation is quick, requires less oil, and is fantastic for meal prepping ahead. The smoky char from the grill adds another layer of flavor that complements the Caesar dressing beautifully.

Gluten-Free Caesar Sandwich Variation

For those avoiding gluten, this sandwich is easily adaptable. Simply swap out the hoagie rolls for your favorite gluten-free bread or buns, ensuring they toast up nicely. For the chicken breading, use gluten-free breadcrumbs or even crushed gluten-free crackers. The Panko can be replaced with more gluten-free breadcrumbs or almond flour for a nutty twist. I tested this with a good quality GF baguette, and the result was surprisingly satisfying, with only a slight difference in the bread’s chewiness.

Spicy Moroccan Caesar Sandwich

To infuse a taste of my Moroccan heritage, try adding a touch of heat! Mix a pinch of cayenne pepper or a tiny bit of harissa paste into the breadcrumb mixture for the chicken. For an extra kick, whisk a teaspoon of harissa or a few dashes of your favorite hot sauce into the Caesar dressing. This creates a dynamic flavor experience, balancing the creamy, savory notes with a delightful warmth. It’s a small change that makes a big impact, transforming this classic sandwich into something truly unique and exciting.

What is the best way to keep the chicken moist for a Chicken Caesar Sandwich?

To ensure your chicken stays moist for a Chicken Caesar Sandwich, it’s crucial to avoid overcooking it. Pounding the chicken to an even thickness before breading helps it cook quickly and uniformly. Also, the breading itself acts as a protective layer, sealing in moisture during frying. If you’re prepping ahead, store the cooked chicken separately from the lettuce and bread, and reheat it gently in the oven rather than the microwave to preserve crispness and tenderness.

Can I use a rotisserie chicken instead of cooking fresh chicken for this sandwich?

Yes, absolutely! Using rotisserie chicken is a fantastic shortcut for making this sandwich even quicker. Shred or slice the rotisserie chicken meat and warm it up slightly if you prefer. While it won’t have the crispy coating of the fried version, it offers excellent flavor that still works beautifully with the Caesar dressing and toasted bread. You could even lightly toss the shredded rotisserie chicken with a little bit of the Caesar dressing and some extra Parmesan before adding it to your sandwich.

What kind of bread holds up best for a Chicken Caesar Sandwich without getting soggy?

For a Chicken Caesar Sandwich that resists sogginess, choose a bread with a good crust that can be toasted well. Hoagie rolls or crusty baguettes are ideal because their sturdy exterior provides a barrier against moisture. Toasting the bread, especially with garlic butter as in this recipe, further strengthens its structure. If you’re making wraps, a sturdy flour tortilla that’s lightly toasted or warmed will also hold up better than a very soft and thin wrap.

How do you make a creamy Caesar dressing without anchovies for the sandwich?

To create a creamy Caesar dressing without anchovies, you’ll rely on the other savory and umami-rich ingredients. The combination of mayonnaise, Parmesan cheese, Dijon mustard, and Worcestershire sauce provides a good depth of flavor. You can slightly increase the amount of Dijon or Worcestershire, add a tiny pinch of garlic powder or onion powder for more savoriness, or even incorporate a half-teaspoon of miso paste for that fermented umami kick. While the anchovies are a secret weapon, these alternatives can still yield a delicious and creamy dressing.

Can I make the Caesar dressing ahead of time?

Yes, you can absolutely make the Caesar dressing ahead of time! In fact, I often prepare a batch of dressing over the weekend to have on hand for quick lunches during the week, just like I do in my busy NYC kitchen. Simply whisk all the dressing ingredients together until well combined, then store it in an airtight container in the refrigerator. It will keep well for up to 3-4 days. Give it a quick stir or whisk before using, as the ingredients might separate slightly.

How do I get the chicken coating to stick and not fall off?

Achieving a coating that sticks well to your chicken is a common goal! The key is a proper dredging technique. First, ensure the chicken cutlet is patted dry, which helps the egg wash adhere better. Then, thoroughly coat the chicken in the egg mixture, letting any excess drip off. Immediately before moving it to the breadcrumbs, press the chicken firmly into the breading mixture. Coating it twice (egg, then breadcrumbs, then egg again, then breadcrumbs again) can also create a thicker, more robust coating that stays on wonderfully!

Is it better to pan-fry or bake the chicken for these sandwiches?

For these specific Chicken Caesar Sandwiches, pan-frying the chicken is strongly recommended for the best flavor and texture. Pan-frying, especially with the Panko breadcrumb coating, creates that irresistibly crispy, golden-brown crust that is a signature of this recipe. While baking can be a healthier option, it generally doesn’t achieve the same level of crispiness. If you do opt to bake, ensure the oven is very hot and consider using a wire rack to allow hot air to circulate for better browning.

What can I serve with a Chicken Caesar Sandwich if I want something light?

If you’re looking for a lighter accompaniment to your Chicken Caesar Sandwich, I highly recommend a fresh, bright salad. A simple mixed greens salad with a light vinaigrette, perhaps featuring some seasonal fruits like berries or apple slices, offers a refreshing contrast. Another excellent light option is a cucumber and tomato salad, dressed simply with herbs, lemon juice, and olive oil. Even just a handful of fresh, crisp greens on the side, perhaps with a squeeze of lemon, can cut through the richness of the sandwich beautifully.

Share Your Version!

I absolutely adore seeing how you bring my recipes to life in your own kitchens! If you’ve made these Chicken Caesar Sandwiches, please take a moment to leave a star rating and your thoughts in the comments below. Your feedback truly helps others decide to try the recipe, and I love reading every single one. If you captured a photo of your creation, I’d be thrilled if you shared it on Instagram or Pinterest and tagged me @chefrecipes2!

I’m always curious – did you try any of the variations, or perhaps add your own unique twist? Let me know in the comments what your favorite part of this sandwich was – was it that crispy chicken, the garlicky bread, or the perfectly balanced dressing? I’m eager to hear your culinary adventures!

From my NYC kitchen to yours — I hope this recipe brings as much warmth to your table as it does to mine. — mia 🧡

📌

Love This Recipe? Save It to Pinterest!

If you enjoyed this Chicken Caesar Sandwiches recipe, don’t let it get lost in your browser tabs! 😄 Pin it now so you can find it again anytime — and explore hundreds more tried-and-tested recipes waiting for you on my Pinterest boards.

👉 Follow mia on Pinterest @chefrecipes2

📌 Pin this recipe · 🔁 Re-pin your favorites · 💬 Tag me when you make it — I love seeing your creations!

Print

clock clock iconcutlery cutlery iconflag flag iconfolder folder iconinstagram instagram iconpinterest pinterest iconfacebook facebook iconprint print iconsquares squares iconheart heart iconheart solid heart solid icon

Chicken Caesar Sandwiches

  • Author: Chef Mia

Description

Chicken Caesar Sandwiches feature well-seasoned, crispy chicken, Caesar salad and Parmesan cheese layered on soft bread toasted with garlic butter. Perfect for a hearty lunch or dinner that’s packed with incredible flavor in under 30 minutes!


Ingredients

Scale
  • 2 chicken breasts
  • 1 egg whisked with a splash of milk
  • ¼ teaspoon EACH garlic powder, salt, pepper
  • 1/2 cup breadcrumbs
  • 1/2 cup Panko
  • Vegetable oil for frying
  • 4 Tablespoons salted butter (slightly melted)
  • 2 Tablespoons mayo
  • 23 cloves garlic (minced)
  • 23 Tablespoons chopped fresh parsley
  • 1/4 cup finely grated Parmesan
  • 1/2 cup mayo
  • 1/4 cup sour cream or Greek yogurt
  • 1/4 cup finely grated parmesan cheese
  • 1 Tablespoon lemon juice
  • 1 teaspoon Dijon Mustard
  • 1 teaspoon anchovy paste
  • 1 teaspoon Worcestershire sauce
  • 1 clove garlic (grated)
  • Salt & pepper (to taste)
  • 4 hoagies or baguette
  • 34 cups romaine lettuce (chopped or shredded)

Instructions

  1. Make the chicken cutlets. On a cutting board or flat surface, slice the chicken cutlets in half or third horizontally to make 4-6 thin cutlets. In a small bowl whisk an egg with a splash of milk, garlic powder, salt, and pepper. In another bowl, combine the breadcrumbs. Bread your chicken by dipping it into the eggs then breadcrumbs, and fry in a shallow pan in 1-inch deep oil over medium-high heat until golden brown and crispy (about 5 minutes), set aside on a paper towel-lined pan.
  2. In a small bowl, combine all the ingredients for the garlic butter. Split your bread in half lengthwise, Spread the garlic butter on each half from inside. Place in a 450ºF oven or under a broiler to toast (about 3-4 minutes).
  3. Whisk all the ingredients for the dressing in a bowl or mason jar. In a large salad bowl, toss 3-4 tablespoons of the dressing with the chopped romaine.
  4. When ready to serve, build the sandwich by layering chicken cutlets, salad, and extra grating of parmesan cheese on the bread. Enjoy immediately!


Nutrition

  • Calories: 664 kcal
  • Sugar: 6 g
  • Fat: 38 g
  • Carbohydrates: 43 g
  • Protein: 37 g


Chicken Caesar Sandwiches

ph">For more delicious inspiration, follow me on Pinterest!