Easy Chicken Enchilada Rice Casserole Ready in 35 Minutes

Chicken Enchilada Rice Casserole: Mexican Chicken Casserole – Easy Weeknight Wonder

⚖️
Difficulty
Easy
⏲️
Prep Time
10 mins
🕒
Cook Time
25 mins
⏱️
Total Time
35 mins
🍽️
Servings
6-8

Living in a bustling city like New York, weeknights can feel like a marathon. Between work, errands, and the sheer energy of the city, the last thing I want to worry about is a complicated dinner. That culinary chaos is exactly what inspired this Chicken Enchilada Rice Casserole. It’s my shortcut to that comforting, familiar taste of enchiladas without any of the fuss, using readily available ingredients that sing with flavor. This isn’t just any casserole; it’s a homage to the vibrant flavors I grew up with, simplified for modern life.

Imagine it: fluffy rice, tender shredded chicken, hearty black beans, and sweet corn, all swaddled in a rich, smoky enchilada sauce and topped with a blanket of perfectly melted cheese. The aroma alone is enough to transport you. The secret to its magic lies in a simple emulsion technique, much like my mother would use in her Marrakesh kitchen, combined with the boldness of New World ingredients. It’s a dish that brings people together, offering a spectrum of textures – from the soft rice and beans to the slightly crisp edges and gooey cheese.

What sets this Enchilada Rice Bake apart is its incredible speed and simplicity, a hallmark of my Parisian culinary training where efficiency is key. I’ve streamlined it so you get all the big enchilada flavors in a fraction of the time. I’ll share a pro tip that guarantees cheesy perfection and pinpoint a common mistake most people make that can lead to a dry, lackluster dish. Prepare for a weeknight rescue that tastes like a weekend feast!

Why This Chicken Enchilada Rice Casserole Recipe Is the Best

The flavor secret in this Chicken Enchilada Rice Casserole is all about layering and balance. While I draw inspiration from my Moroccan roots for warmth and spice, and my Parisian training for finesse, this dish is truly New York street food elevated. I’ve found the perfect synergy between classic enchilada flavors and the heartiness of a rice bake, creating a symphony that’s both exciting and deeply comforting. It’s the kind of meal that makes you feel good from the inside out.

From a chef’s perspective, the key to a perfect casserole is texture. This Enchilada Rice Bake achieves that by ensuring the rice isn’t mushy and the chicken remains tender. We achieve this through a careful combination of ingredients and bake time, ensuring every bite is a delight. It’s about creating a harmonious blend where nothing is overpowering, and everything comes together beautifully in the oven. This attention to detail is what I learned in culinary school and it elevates even the simplest dishes.

This Mexican Chicken Casserole is genuinely foolproof, even if you’re new to cooking. The beauty of a casserole is its forgiving nature, and this recipe is designed for maximum flavor with minimal effort. I’ve tested it countless times to ensure it’s accessible for any home cook. You’ll be amazed at how a few simple steps can result in such a satisfying and delicious Cheesy Chicken Enchilada Casserole. It’s the ultimate easy chicken casserole for busy evenings.

Chicken Enchilada Rice Casserole Ingredients

When I first moved to NYC, discovering the fantastic variety of ingredients at places like the Union Square Greenmarket and the diverse ethnic markets was a revelation. This recipe relies on those accessible, vibrant ingredients. On a trip back to my mother’s kitchen in Morocco, I found many of the same warming spices we use there are echoed in Mexican cuisine, which is why these flavors harmonize so beautifully. Even if you can’t visit a NYC market, you’ll find these staples easily at your local supermarket.

Ingredients List

  • 2 cups cooked shredded chicken (rotisserie chicken makes this a true weeknight wonder!)
  • 2 cups cooked rice (white or brown, leftover rice is perfect here)
  • 1 can (15 oz) black beans, drained and rinsed
  • 1 can (10 oz) diced tomatoes with green chilies (like Ro-Tel), undrained
  • 1 cup corn kernels (fresh, frozen, or canned and drained)
  • 1 can (10 oz) red enchilada sauce (mild or medium, your preference!)
  • 1 cup shredded cheddar cheese
  • 1 cup shredded Monterey Jack cheese
  • 1/2 cup chopped fresh cilantro
  • 1/4 cup sliced black olives, drained (optional, adds a briny bite!)
  • 2 green onions, thinly sliced (for garnish)

Ingredient Spotlight

The shredded chicken is our protein backbone, and I highly recommend using a good quality pre-cooked rotisserie chicken. It saves so much time and adds a wonderful savory depth. If you have leftover grilled or baked chicken, that works beautifully too. I avoid boiling plain chicken breasts for this, as they can become dry when shredded.

Diced tomatoes with green chilies are essential for that “enchilada” flavor profile, adding a touch of acidity and a gentle warmth. Look for brands like Ro-Tel, which are readily available in most US supermarkets. If you can’t find them, you can substitute with one 14.5-ounce can of diced tomatoes mixed with 1-2 tablespoons of diced green chilies. This substitution will offer a similar flavor but might be slightly less zesty.

The enchilada sauce ties everything together. I prefer a good quality red enchilada sauce from a can or jar for convenience, but if you’re feeling adventurous, a homemade sauce is wonderful. My mother’s Moroccan spice blends often feature paprika and cumin, which are foundations in many Mexican sauces, so I always look for a sauce with those rich, warm notes. Ensure it’s not too watery, or your casserole might become soupy.

Original IngredientBest SubstitutionFlavor / Texture Impact
Rotisserie ChickenShredded cooked chicken (baked, grilled)Slightly less savory but still tender.
Diced Tomatoes w/ Green Chilies1 can Diced Tomatoes + 2 tbsp Diced Green ChiliesSimilar, but may be a little less “punchy”.
Red Enchilada SauceGreen enchilada sauce or Mole sauceEnchilada bake will have a different flavor profile (tangier with green, richer and complex with mole).
Cheddar/Monterey Jack Cheese blendMexican blend cheese or Pepper JackSlightly different spice profile (Pepper Jack) or a more traditional Mexican flavor.

How to Make Chicken Enchilada Rice Casserole — Step-by-Step

Making this Cheesy Chicken Enchilada Casserole is as simple as stirring and baking. Let’s get this delicious meal on your table!

Step 1: Preheat and Prepare

Preheat your oven to 375°F (190°C). Lightly grease a 9×13 inch baking dish. This step ensures your casserole won’t stick, making cleanup a breeze.

Step 2: Combine the Filling

In a large bowl, combine the shredded chicken, cooked rice, black beans, diced tomatoes with green chilies (undrained!), and corn kernels. Add about half of the red enchilada sauce and mix everything together gently until well combined. Don’t overmix; we want to keep our rice fluffy!

💡 mia’s Pro Tip: For the best flavor and texture, use rice that’s a day old. It holds its shape better than freshly cooked rice, preventing a mushy casserole. If you must use fresh, cool it down completely before mixing!

Step 3: Layer the Casserole

Spread half of the chicken and rice mixture evenly into the prepared baking dish. Sprinkle half of the shredded cheddar and Monterey Jack cheese over this first layer. This creates a cheesy middle layer that’s truly divine.

Step 4: Add Second Layer

Gently add the remaining chicken and rice mixture on top of the cheese layer. Make sure it’s spread out evenly to create a nice top surface for the sauce and remaining cheese.

Step 5: Sauce and Cheese

Pour the remaining enchilada sauce evenly over the entire top of the casserole. Then, sprinkle the rest of the shredded cheddar and Monterey Jack cheese over the sauce. If using, scatter the sliced black olives over the cheese.

⚠️ Common Mistake to Avoid: Don’t drown the casserole in *too much* sauce. While enchilada sauce is key, an excessive amount can make the rice gummy and the casserole watery. Stick to the recipe amounts for that perfect saucy-yet-structured consistency.

Step 6: Bake to Perfection

Bake in the preheated oven for 20-25 minutes, or until the cheese is melted, bubbly, and lightly golden brown around the edges. The casserole should be heated through.

Step 7: Rest and Garnish

Once out of the oven, let the casserole rest for 5 minutes. This is crucial for the cheese and sauce to set slightly, making it easier to serve. Just before serving, sprinkle generously with fresh cilantro and sliced green onions.

StepActionDurationKey Visual Cue
1Preheat & Grease DishN/AOven at 375°F (190°C) and dish oiled.
2Combine Filling5 minsIngredients evenly distributed in bowl.
3Layer First Half2 minsDish has an even layer of mixture & half the cheese.
4Add Second Half1 minEven top layer of chicken & rice mixture.
5Sauce & Top Cheese2 minsSauce poured evenly, cheese & olives (if using) covering all.
6Bake20-25 minsCheese melted, bubbly, and lightly browned.
7Rest & Garnish5 mins restCasserole slightly set, topped with fresh herbs.

Serving & Presentation

This Chicken Enchilada Rice Casserole is a star on its own, but I love to plate it with a flourish. A generous sprinkle of fresh, vibrant cilantro and bright green onions adds a pop of color and freshness that contrasts beautifully with the rich, cheesy layers. Think of it like adding a final, delicate garnish to a dish at a chic NYC bistro – it makes all the difference.

For a truly complete meal inspired by the vibrant flavors of the Southwest and my Moroccan heritage, I often serve this alongside a dollop of cool sour cream or a spoonful of creamy guacamole. A simple side salad with a lime vinaigrette also cuts through the richness wonderfully, making it a balanced and satisfying meal. It’s about creating a harmonious plate that appeals to all the senses.

Pairing TypeSuggestionsWhy It Works
Side DishSimple Green Salad with Lime Vinaigrette, Mexican RiceThe salad offers a refreshing counterpoint; extra rice adds to the comfort.
Sauce / DipSour Cream, Guacamole, Pico de GalloCreamy tang (sour cream), cool fat (guacamole), and fresh acidity (pico) balance the casserole’s richness.
BeverageMargarita, Mexican Beer, Agua FrescaClassic pairings that complement the Mexican flavors. Agua Fresca offers a light, cooling option.
GarnishFresh Cilantro, Chopped Green Onions, Diced JalapeñoAdds vibrant color, fresh herbaceous notes, and optional heat.

Make-Ahead, Storage & Reheating

As a busy New Yorker, I rely on smart meal prep to keep my kitchen humming. This Chicken Enchilada Rice Casserole is a dream for make-ahead meals. You can assemble the entire casserole (up to the baking step) the night before, cover it tightly with plastic wrap, and refrigerate it. Then, simply pop it in the oven when you’re ready to eat, adding a few extra minutes to the bake time.

MethodContainerDurationReheating Tip
RefrigeratorAirtight container or with plastic wrap3-4 daysReheat individual portions in microwave or oven until hot.
FreezerFreezer-safe container or heavy-duty foil2-3 monthsThaw overnight in the refrigerator, then reheat as above. For best texture, reheat from thawed.
Make-AheadAssembled in baking dish, coveredUp to 1 day before bakingBake covered for first 15 mins, then uncover to brown cheese. Add 5-10 mins to bake time.

When reheating, I prefer the oven. It helps maintain the texture of the rice and chicken better than a microwave, and it ensures the cheese gets beautifully gooey again. For individual servings, a small oven-safe dish works perfectly. Just cover it loosely with foil to prevent the top from burning before the inside is warm.

Variations & Easy Swaps

VariationKey ChangeBest ForDifficulty Impact
Quick Enchilada BakeUse pre-cooked rice and rotisserie chickenBusy weeknightsEasiest
Gluten-FreeEnsure enchilada sauce and all other ingredients are GF; use GF rice or quinoaDietary needsEasy
Spicy KickUse hot enchilada sauce, add diced jalapeños or a dash of hot sauce to the fillingThose who love heatEasy

Quick Enchilada Bake

This is essentially the recipe as written! The focus here is speed and convenience. I always keep cooked rice and shredded chicken on hand, or rely on my trusty rotisserie chicken from Whole Foods. It’s the ultimate assembly job, akin to building a beautiful charcuterie board in Paris – simple components creating a stunning result with minimal fuss.

Gluten-Free Enchilada Casserole

Making this gluten-free is straightforward. Simply ensure your chosen enchilada sauce is certified gluten-free, as some can contain wheat thickeners. If you’re using pre-made rice, verify it’s GF. You could also swap the white or brown rice for quinoa for a nutty flavor and added protein, which holds up beautifully in casseroles. The texture will be slightly different but equally delicious.

Seasonal Spin with Corn and Peppers

For a fresh twist, especially in the summer when New York’s markets are overflowing, I love adding roasted bell peppers (any color works) or extra corn. If you have a few minutes, charring some poblano peppers adds a smoky, complex layer that’s truly special. You can also toss in some sautéed zucchini or mushrooms for added vegetables. This seasonal approach brings vibrancy and depth.

Can I use leftover chicken in a chicken enchilada rice casserole?

Absolutely! Leftover cooked chicken is perfect for this Chicken Enchilada Rice Casserole. In fact, I often plan my meals around using up leftover roasted chicken from the weekend. Just make sure it’s shredded or diced into bite-sized pieces. Rotisserie chicken is my absolute favorite shortcut, as it’s already seasoned and tender, making this recipe incredibly fast for a weeknight dinner.

How do I keep the rice from getting mushy in this casserole?

The key to preventing mushy rice in this Enchilada Rice Bake is to use cooked rice that is not overly moist. Day-old rice, kept in the refrigerator, is ideal because it firms up slightly. If you’re cooking rice fresh, make sure it’s cooked slightly al dente and allowed to cool completely before mixing it into the casserole. Also, be careful not to add too much liquid from other ingredients to the mix; the enchilada sauce should be enough.

What can I substitute for cream of chicken soup in chicken enchilada rice casserole?

This particular Chicken Enchilada Rice Casserole recipe is designed *without* cream of chicken soup, which many traditional casseroles use. Instead, we rely on red enchilada sauce for moisture and flavor, which provides a more authentic Mexican taste profile. If you were adapting a recipe that *did* call for cream of chicken soup, you could substitute it with a homemade béchamel sauce mixed with chicken broth and seasonings or even a can of condensed cream of mushroom soup for a similar creamy base.

How long should I bake a chicken enchilada rice casserole for best results?

For the best results, this Chicken Enchilada Rice Casserole should bake for about 20-25 minutes at 375°F (190°C). You’re looking for the cheese to be fully melted and bubbly, with perhaps a few golden-brown spots. The casserole should be heated through to its core. Allowing it to rest for 5 minutes after baking helps set the layers and makes serving much neater, ensuring everything holds together beautifully on the plate.

Can I make this enchilada rice bake ahead of time?

Yes, this Enchilada Rice Bake is an excellent candidate for making ahead! You can assemble the entire casserole, from mixing the ingredients to adding the final cheese topping, up to one day in advance. Cover it tightly with plastic wrap and refrigerate. When you’re ready to bake, simply remove the plastic wrap, and add about 5-10 minutes to the baking time to ensure it heats through thoroughly. It’s a true lifesaver for busy evenings!

What kind of rice is best for this casserole?

You can use either white or brown rice for this Chicken Enchilada Rice Casserole, and the key is that it should be already cooked. Leftover rice works exceptionally well because it tends to be a bit drier and firmer, which helps prevent your casserole from becoming mushy. If you cook the rice specifically for this recipe, aim for a slightly al dente texture and let it cool completely before mixing it with the other ingredients. Fluffy, separate grains are what you’re aiming for.

Is enchilada sauce the only sauce option for this Mexican chicken casserole?

While red enchilada sauce is traditional and provides the signature flavor for this Mexican Chicken Casserole, you have some flexibility. You could certainly use green enchilada sauce for a tangier, spicier profile, or even a mole sauce for a richer, more complex flavor, though that would significantly change the dish. For a milder option, a combination of tomato sauce, cumin, and chili powder can be used. However, the canned or jarred red enchilada sauce offers the best balance of convenience and authentic flavor for this specific recipe.

Can I add other vegetables to this easy chicken casserole?

Absolutely! This easy chicken casserole is very adaptable. I love adding sautéed onions and bell peppers to the mix for extra flavor and texture. Zucchini, corn (even more!), or even some spinach wilted down would all be delicious additions. When adding vegetables, consider sautéing them first to remove excess moisture and concentrate their flavors. This ensures they integrate well without making the casserole watery. It’s a fantastic way to boost the nutritional content too.

Share Your Version!

I absolutely adore seeing how you bring my recipes to life in your own kitchens! If you’ve made this Chicken Enchilada Rice Casserole, please leave a star rating and a comment below. Your feedback helps other cooks and inspires me endlessly. I’d also be thrilled if you shared a photo of your creation on Instagram or Pinterest, tagging me @exorecipes. I can’t wait to see your delicious adaptations and hear what you think!

From my NYC kitchen to yours — I hope this recipe brings as much warmth to your table as it does to mine. — mia 🧡

📌

Love This Recipe? Save It to Pinterest!

If you enjoyed this Chicken Enchilada Rice Casserole recipe, don’t let it get lost in your browser tabs! 😄 Pin it now so you can find it again anytime — and explore hundreds more tried-and-tested recipes waiting for you on my Pinterest boards.

👉 Follow mia on Pinterest @chefrecipes2

📌 Pin this recipe · 🔁 Re-pin your favorites · 💬 Tag me when you make it — I love seeing your creations!

Print

clock clock iconcutlery cutlery iconflag flag iconfolder folder iconinstagram instagram iconpinterest pinterest iconfacebook facebook iconprint print iconsquares squares iconheart heart iconheart solid heart solid icon

Chicken Enchilada Rice Casserole

  • Author: Chef Mia

Description

This Chicken Enchilada Rice Casserole is a delicious, easy-to-make meal that combines the flavors of traditional enchiladas with the convenience of a casserole. Perfect for busy weeknights, it takes just 35 minutes from start to finish


Ingredients

Scale
  • 2 cups cooked shredded chicken (rotisserie chicken works great!)
  • 2 cups cooked rice (white or brown)
  • 1 can (15 oz) black beans, drained and rinsed
  • 1 can (10 oz) diced tomatoes with green chilies
  • 1 cup corn kernels (fresh, frozen, or canned)
  • 1 can (10 oz) red enchilada sauce
  • 1 cup shredded cheddar cheese
  • 1 cup shredded Monterey Jack cheese
  • 1/2 cup chopped fresh cilantro
  • 1/4 cup sliced black olives (optional)
  • 2 green onions, thinly sliced

Instructions

  1. Preheat your oven to 375°F (190°C). Grease a 9×13 inch baking dish.
  2. In a large bowl, combine the shredded chicken, cooked rice, black beans, diced tomatoes with green chilies, corn, and half of the enchilada sauce. Mix well.
  3. Spread half of the mixture in the prepared baking dish.
  4. Sprinkle half of each cheese over the mixture.
  5. Add the remaining chicken and rice mixture on top.
  6. Pour the remaining enchilada sauce over everything.
  7. Top with the rest of the cheese, olives, and green onions.
  8. Bake for 20-25 minutes, or until the cheese is melted and bubbly.
  9. Remove from the oven and let it cool for 5 minutes.
  10. Sprinkle fresh cilantro over the top before serving.


Nutrition

  • Calories: 420 kcal


Chicken Enchilada Rice Casserole

Easy Cream Cheese Chicken – 30-Minute Creamy Skillet Dinner

Easy Cream Cheese Chicken: Creamy Garlic Herb Wonder

⚖️
Difficulty
Easy
⏲️
Prep Time
10 mins
🕒
Cook Time
20 mins
⏱️
Total Time
30 mins
🍽️
Servings
4

When I first moved to New York City, I was on a mission to find quick, delicious weeknight meals that could impress without requiring hours in the kitchen. My days are packed, from recipe testing to exploring the vibrant food scene here, and by the time evening rolls around, I crave comfort and flavor. This Easy Cream Cheese Chicken recipe became my secret weapon. It transforms simple pantry staples into an incredibly creamy, garlicky, herb-infused chicken dish in under 30 minutes. It’s proof that you don’t need fancy ingredients to create something truly special, a lesson I learned from my mother’s bustling kitchen in Morocco, where resourcefulness and flavor always went hand-in-hand.

Imagine this: tender chicken breasts bathed in a luscious, velvety sauce that’s rich with the tang of cream cheese, fragrant with garlic and fresh herbs, and kissed with just a hint of spice. The aroma alone is intoxicating, filling your home with a warmth that’s utterly irresistible. The sauce is so dreamy, you’ll want to lick your plate clean! It coats the chicken beautifully, creating a dish that’s both elegant enough for guests and comforting enough for a cozy Tuesday night. It’s a symphony of textures and tastes, a testament to the magic that happens when humble ingredients are treated with care and a touch of culinary flair.

What makes this recipe a standout, beyond its incredible speed and flavor, is the ingenious way we coax maximum creaminess from a simple block of cream cheese. I’ve also perfected a few tricks over the years to ensure the sauce is always smooth and never greasy – a common pitfall for creamy sauces. For instance, ensuring your cream cheese is properly softened is key, and I’ll share that little secret with you soon. You’ll also learn about a critical step that prevents the sauce from becoming too thick or too thin, guaranteeing a perfect consistency every time, which is something I honed during my pastry training in Paris.

Why This Easy Cream Cheese Chicken Recipe Is the Best

My French training taught me the art of sauce-making, where technique is paramount for achieving sublime textures. This recipe takes that foundational knowledge and applies it to an ingredient we all love: cream cheese. Instead of a complex béchamel or reduction, we build flavor and creaminess instantly. By softening the cream cheese and whisking it into a fragrant garlic-onion base with chicken broth, we create a luxurious sauce that’s unbelievably quick. It’s my way of bringing professional technique to your home kitchen, proving that restaurant-worthy flavor doesn’t always require hours of simmering.

Achieving that perfectly velvety, emulsified sauce is all about managing heat and ingredients correctly. In this recipe, we’re not just dumping cream cheese in; we’re carefully incorporating it into a warm, savory liquid base. This gentle integration, along with the slight acidity from the cream cheese, creates a stable, luxurious emulsion. This method ensures the sauce is rich and coating, rather than oily or broken, a technique vital for any creamy sauce, whether it’s for pasta, chicken, or vegetables. It’s a small step that makes a world of difference in the final dish.

This recipe is genuinely fool-proof, making it an ideal weeknight dinner solution, even for novice cooks. The ingredients are readily available at any US grocery store, and the steps are straightforward and clearly explained. I designed this to be a 30-minute meal from start to finish, which means you can have a satisfying, delicious dinner on the table with minimal stress. The forgiving nature of the sauce means even if you’re a bit off on timing or measurements, it will still turn out beautifully. It’s the kind of meal that builds confidence in the kitchen.

Easy Cream Cheese Chicken Ingredients

One of the things I adore about this easy cream cheese chicken recipe is how it relies on pantry staples. I can usually find everything I need at my local Brooklyn Whole Foods or the Italian specialties shop in Greenwich Village. Thinking about my mother’s spice rack in Morocco makes me smile; she always had the perfect blend for every dish. For this recipe, I try to use high-quality chicken and fresh garlic, but honestly, it’s forgiving enough that even if you’re using frozen chicken or garlic powder in a pinch, it will still be delicious.

Ingredients List

  • 8 ounces cream cheese (a block of Philly works perfectly) (softened)
  • 2 large boneless, skinless chicken breasts
  • 1/2 teaspoon garlic powder
  • Salt and freshly ground black pepper (to taste)
  • 1 tablespoon unsalted butter
  • 1 tablespoon olive oil
  • 1/2 medium yellow onion (chopped)
  • 3 cloves garlic (minced)
  • 3/4 cup low-sodium chicken broth
  • 1/2 teaspoon Italian seasoning blend
  • 1/4 teaspoon crushed red pepper flakes (optional, for a little heat)
  • Fresh chopped parsley (optional, for garnish)

Ingredient Spotlight

Cream Cheese: This is the star of our sauce! Use a full-fat block of cream cheese, like Philadelphia brand, as it provides the best creamy texture and rich flavor. For easy incorporation, ensure it’s softened to room temperature. You can usually find it in the dairy aisle of any US grocery store. If you need a dairy-free option, a high-quality dairy-free cream cheese alternative can be used, though the tanginess and richness might differ slightly.

Chicken Breasts: I prefer using boneless, skinless chicken breasts for their quick cooking time and lean profile. When shopping, look for plump, evenly sized breasts. Cutting them in half lengthwise helps them cook faster and more evenly. If you only have boneless, skinless thighs, they work beautifully too, offering a richer flavor and more forgiving texture; just adjust the cooking time as needed.

Fresh Garlic & Onion: The aromatics form the flavor foundation of our dish. Minced fresh garlic and chopped yellow onion sautéed until tender and slightly browned add a depth of flavor that dried spices alone can’t replicate. When buying, choose firm onions with no soft spots and garlic bulbs that are firm and dry. You can substitute garlic powder and onion powder in a pinch, but the fresh versions offer a brighter, more robust taste.

Chicken Broth: Low-sodium chicken broth allows you to control the saltiness of the dish. It also helps create the smooth, sauce-like consistency. I like to keep a carton of good quality low-sodium broth in my pantry. If you don’t have chicken broth, vegetable broth or even water can be used, but your sauce might have a slightly less developed flavor profile.

Original IngredientBest SubstitutionFlavor / Texture Impact
Cream CheeseDairy-free cream cheese alternative / Mascarpone cheeseDF version may be tangier/less rich. Mascarpone will be richer, sweeter, and less tangy.
Chicken BreastsBoneless, skinless chicken thighsThighs are more tender and flavorful but require slightly longer cooking.
Fresh GarlicGarlic powderLess pungent, more mellow flavor. Use 1/4 tsp garlic powder for each clove.
Chicken BrothVegetable broth or waterVegetable broth is a good neutral option. Water will result in a less savory sauce.

How to Make Easy Cream Cheese Chicken — Step-by-Step

Follow these simple steps to achieve restaurant-quality creamy chicken right in your home kitchen!

Step 1: Prepare the Cream Cheese

Microwave the 8-ounce block of cream cheese for about 20-30 seconds, just until it’s very soft and pliable. You don’t want it melted, just easily stir-able. Cut it into smaller cubes to help it incorporate smoothly into the sauce later. Set it aside at room temperature while you prepare the other ingredients.

💡 mia’s Pro Tip: Softening cream cheese in the microwave is a speedy trick, but don’t overdo it! If it becomes liquid, it can be harder to emulsify. If you forget to soften it, you can let it sit in a warm spot on your counter for about 30 minutes.

Step 2: Prepare and Season the Chicken

Take your two large chicken breasts and cut each one in half horizontally. This creates four thinner chicken cutlets, which cook much faster and more evenly. Season both sides generously with 1/2 teaspoon garlic powder, salt, and freshly ground black pepper. Aim for pieces that are about 1/2 inch thick.

Step 3: Sear the Chicken

Melt the 1 tablespoon of butter and 1 tablespoon of olive oil in a large skillet over medium-high heat. Once the pan is hot and the butter is foamy, carefully add the seasoned chicken cutlets. Sear for about 5-6 minutes per side, until golden brown and cooked through to an internal temperature of 165°F (74°C). Transfer the cooked chicken to a clean plate and set aside.

⚠️ Common Mistake to Avoid: Don’t overcrowd the pan when searing the chicken. If you put too many pieces in at once, they will steam instead of sear, and you won’t get that beautiful golden-brown crust that adds so much flavor. Cook in batches if necessary.

Step 4: Sauté the Onions

Reduce the heat to medium. Add the chopped 1/2 medium onion to the same skillet (no need to clean it – those browned bits are flavor gold!). Sauté the onions for 5-7 minutes, stirring occasionally, until they are softened and begin to turn lightly golden brown.

Step 5: Add Garlic

Stir in the 3 minced cloves of garlic. Cook for about 30 seconds, just until fragrant. Be careful not to burn the garlic, as it can become bitter.

Step 6: Create the Cream Sauce

Pour in the 3/4 cup chicken broth. Add the softened cream cheese, 1/2 teaspoon Italian seasoning, and 1/4 teaspoon crushed red pepper flakes (if using). Stir continuously with a whisk or wooden spoon until the cream cheese has melted and the sauce is smooth and creamy. This might take a couple of minutes. Scrape up any browned bits from the bottom of the pan as you stir.

⚠️ Common Mistake to Avoid: Adding cold cream cheese directly to a boiling liquid can cause it to seize up and become lumpy. Make sure the cream cheese is soft and introduced to a medium-heat liquid base, stirring constantly as it incorporates.

Step 7: Combine and Serve

Return the seared chicken cutlets to the skillet, nestling them into the creamy sauce. Let them warm through for a minute or two. If the sauce seems too thick, you can stir in a splash more chicken broth until you reach your desired consistency. Taste and adjust seasoning with additional salt and pepper if needed. Sprinkle with fresh chopped parsley, if desired, and serve immediately.

StepActionDurationKey Visual Cue
1Soften Cream Cheese20-30 seconds (microwave)Pliable, not melted
2Prep & Season Chicken~5 minsEvenly cut pieces
3Sear Chicken10-12 mins totalGolden brown, cooked through
4Sauté Onions5-7 minsSoftened, lightly browned
5Add Garlic~30 secondsFragrant
6Create Cream Sauce2-3 minsSmooth and creamy
7Combine & Serve1-2 minsChicken warmed through, sauce coats evenly

Serving & Presentation

This dish is wonderfully versatile. For a quick weeknight meal, I love serving it with a simple green salad, perhaps with a light lemon vinaigrette, or some tender steamed asparagus. If I’m aiming for something more substantial, a side of fluffy quinoa, creamy mashed potatoes, or even a crusty baguette (perfect for soaking up that glorious sauce!) makes it a complete feast. For a touch of my Moroccan heritage, I sometimes serve it with couscous, seasoned with a pinch of saffron for color and aroma.

Presentation-wise, the creamy sauce provides a beautiful golden hue. A sprinkle of fresh chopped parsley adds a pop of vibrant green, making the dish visually appealing. A drizzle of good quality olive oil just before serving can also add a lovely sheen. Remember, the goal is to make it look as delicious as it tastes, a principle I learned observing the artistry in Parisian bistros – simple, elegant, and utterly mouthwatering.

Pairing TypeSuggestionsWhy It Works
Side DishSteamed asparagus, roasted Brussels sprouts, fluffy quinoa, mashed potatoes, couscous.These provide a neutral base to complement the rich sauce, or absorb it beautifully.
Sauce / DipCrusty bread, pasta, rice.Perfect for scooping up every last bit of the delicious cream sauce.
BeverageA crisp white wine like Sauvignon Blanc or Pinot Grigio, light-bodied red like Pinot Noir, sparkling water with lemon.The acidity cuts through the richness of the cream sauce, cleansing the palate.
GarnishFresh parsley, chives, a sprinkle of red pepper flakes, lemon zest.Adds freshness, color, and a subtle layer of flavor.

Make-Ahead, Storage & Reheating

As a busy New Yorker, I often rely on smart meal prep, and this cream cheese chicken is perfect for that. I might cook the chicken and make the sauce ahead of time and store them separately. Then, on a busy evening, I can quickly combine and reheat everything in under 10 minutes. It’s a lifesaver when you want a home-cooked meal but have zero time.

MethodContainerDurationReheating Tip
RefrigeratorAirtight container3-4 daysGently reheat on the stovetop over low heat, adding a splash of chicken broth or water if the sauce has thickened. Stir constantly.
FreezerFreezer-safe container or bag2-3 monthsThaw overnight in the refrigerator. Reheat on the stovetop as above. The sauce might separate slightly upon reheating; whisking vigorously usually restores it.
Make-AheadStore cooked chicken and sauce separately2 days in advanceCombine chicken and sauce in skillet and gently reheat until warmed through, adding a splash of broth if needed.

When reheating, always use low to medium heat. High heat can cause the cream sauce to break. If it seems too thick, a little extra liquid is your best friend. If reheating from frozen, ensure it’s fully thawed before applying heat. Some people find a quick burst in the microwave before transferring to the stovetop helps, but I usually just go straight to the pan for the best texture control.

Variations & Easy Swaps

VariationKey ChangeBest ForDifficulty Impact
Spicy KickAdd more crushed red pepper flakes, a pinch of cayenne, or a dash of hot sauce.Those who love heat.None. Simply adjust spice level.
Lemon Herb ChickenAdd lemon zest to the softened cream cheese and a squeeze of fresh lemon juice at the end.A brighter, fresher flavor profile.None. Essential pantry spices.
Cream Cheese Chicken with MushroomsSauté sliced mushrooms with the onions until golden.Adding earthy depth.Slightly longer cooking for mushrooms.

Keto-Friendly Cream Cheese Chicken

This recipe is naturally quite keto-friendly! The sauce is low in carbohydrates. For a full keto meal, serve it alongside cauliflower rice, sauteed zucchini noodles, or a generous green salad with a keto-approved dressing. You can use heavy cream instead of chicken broth for an even richer, carb-free sauce, though the tanginess will be reduced. Adjusting the chicken broth amount is key for keto consistency.

Gluten-Free and Dairy-Free Options

This recipe is already gluten-free if you use gluten-free chicken broth and avoid any cross-contamination. For a dairy-free version, substitute the cream cheese with a good quality plain dairy-free cream cheese alternative. The texture and tanginess might vary slightly, but it will still be delicious. Some dairy-free cream cheeses can be thinner, so you might need to let the sauce simmer a moment longer to thicken. I’ve tested this with a few brands from Whole Foods and found success.

Moroccan-Inspired Twist

To give this a Moroccan flair, I love to add a pinch of cinnamon and a touch of cumin to the sautéed onions and garlic. You could also stir in some preserved lemon rind (finely chopped) into the cream sauce along with the Italian seasoning, or a handful of Kalamata olives for a briny, salty kick. Serve with fluffy couscous and a side of preserved lemons for an authentic touch, reminiscent of my childhood meals.

How do you keep cream cheese chicken from curdling?

The key to preventing cream cheese chicken from curdling is temperature control and proper emulsification. Always ensure your cream cheese is softened before adding it to the pan. Introduce it to a gently simmering liquid base over medium-low heat, and stir constantly until fully incorporated. Adding cold ingredients to a rapidly boiling sauce or using too high a heat can shock the fats in the cream cheese, causing them to separate. If your sauce does start to look a bit oily, remove it from the heat immediately and whisk vigorously; sometimes a splash of broth or water can help bring it back together.

What can I substitute for cream cheese in easy cream cheese chicken?

If you need to substitute cream cheese, several options can work, each with a slightly different result. Mascarpone cheese is a decadent substitute that will make the sauce even richer and creamier, though it’s less tangy. For a dairy-free option, a good quality plain dairy-free cream cheese alternative is your best bet; choose one that’s known for its good texture. Greek yogurt or sour cream can be used in a pinch, but they don’t emulsify as smoothly and can curdle more easily, so incorporate them off the heat and serve immediately. These substitutions still offer creaminess but might alter the final flavor profile.

How long does it take to cook easy cream cheese chicken in the oven?

While this recipe is designed for the stovetop and takes about 30 minutes total, you can adapt it for the oven. First, prepare the sauce on the stovetop as directed until it’s smooth. Make sure your chicken is seared or mostly cooked. Then, place the chicken in a baking dish, pour the sauce over it, and bake in a preheated oven at 375°F (190°C) for about 15-20 minutes, or until the chicken is fully cooked through and the sauce is bubbly. This oven method is great if you want to bake other items alongside it or prefer less hands-on cooking time.

What goes well as a side dish with cream cheese chicken?

This creamy chicken dish is incredibly versatile and pairs well with a variety of side dishes. For a light and healthy option, steamed or roasted vegetables like broccoli, asparagus, green beans, or spinach are excellent choices. If you’re looking for something more filling, consider serving it over pasta, rice, quinoa, or mashed potatoes, as these bases are perfect for soaking up the rich cream sauce. Cauliflower rice is a popular low-carb option. A simple green salad with a bright vinaigrette also offers a nice contrast to the richness of the chicken.

Can I use chicken thighs instead of breasts?

Absolutely! Boneless, skinless chicken thighs are a fantastic alternative to chicken breasts in this recipe. They tend to be more tender and flavorful due to their higher fat content, which means they are also more forgiving and less likely to dry out. The cooking time might need a slight adjustment; usually, thighs take a few minutes longer to cook through than thinner breast cutlets. Just ensure they reach an internal temperature of 165°F (74°C) before adding them back to the sauce. The rich flavor of the thighs complements the creamy sauce beautifully.

How do I make the sauce thicker or thinner?

Adjusting the sauce consistency is simple! To thicken a sauce that’s too thin, you can let it simmer gently uncovered for a few extra minutes, allowing some of the liquid to evaporate. Alternatively, you can create a slurry by mixing 1 teaspoon of cornstarch or arrowroot powder with 2 teaspoons of cold water, then whisking it into the simmering sauce. For a sauce that’s too thick, simply stir in more chicken broth, a tablespoon at a time, until you reach your desired consistency. Remember that the sauce will also thicken slightly as it cools.

What kind of onion is best for this recipe?

For this Easy Cream Cheese Chicken recipe, a medium yellow onion is my top choice. Yellow onions have a good balance of sweetness and pungency when sautéed, developing a lovely mild flavor that complements the creamy sauce without overpowering it. A sweet onion like Vidalia would also work well for a slightly sweeter profile. Red onions might add a bit too much sharp bite unless cooked down considerably. If you don’t have fresh onions available, about 1 teaspoon of onion powder can be added with the garlic powder, though it won’t provide the same depth of flavor.

Can I make this dairy-free?

Yes, you can absolutely make this recipe dairy-free! The key is to substitute the cream cheese with a high-quality plain dairy-free cream cheese alternative. Many brands are available in supermarkets now, so experiment to find one you like. The flavor and tanginess might differ slightly from dairy cream cheese, and some dairy-free options can be thinner, so you might need to simmer the sauce a bit longer to achieve the desired thickness. Ensure your chicken broth is also dairy-free. This adaptation still yields a wonderfully creamy and satisfying dish.

Share Your Version!

I truly hope you enjoy this Easy Cream Cheese Chicken recipe as much as I do! It’s a recipe that brings me so much joy because it’s simple, quick, and reliably delicious. If you give it a try, please consider leaving a star rating and a comment below – your feedback helps me immensely! I also love seeing your culinary creations; if you share a photo on Instagram or Pinterest, please tag me at @chefrecipes2 – I’m always thrilled to see how my recipes turn out in your kitchens, whether they’re in NYC or across the globe!

I’m curious, when you make this, do you find yourself reaching for Italian seasoning, or do you prefer to mix your own herbs? Let me know in the comments! From my NYC kitchen to yours — I hope this recipe brings as much warmth to your table as it does to mine. — mia 🧡

📌

Love This Recipe? Save It to Pinterest!

If you enjoyed this Easy Cream Cheese Chicken recipe, don’t let it get lost in your browser tabs! 😄 Pin it now so you can find it again anytime — and explore hundreds more tried-and-tested recipes waiting for you on my Pinterest boards.

👉 Follow mia on Pinterest @chefrecipes2

📌 Pin this recipe · 🔁 Re-pin your favorites · 💬 Tag me when you make it — I love seeing your creations!

Print

clock clock iconcutlery cutlery iconflag flag iconfolder folder iconinstagram instagram iconpinterest pinterest iconfacebook facebook iconprint print iconsquares squares iconheart heart iconheart solid heart solid icon

Easy Cream Cheese Chicken

  • Author: Chef Mia

Description

This easy cream cheese chicken is a 30-minute meal made with pantry staples! Transform a block of cream cheese into the best creamy garlic herb sauce.


Ingredients

Scale
  • 8 ounces cream cheese (a block of Philly) (softened)
  • 2 large chicken breasts
  • 1/2 teaspoon garlic powder
  • Salt & pepper (to taste)
  • 1 tablespoon butter
  • 1 tablespoon olive oil
  • 1/2 medium onion (chopped)
  • 3 cloves garlic (minced)
  • 3/4 cup chicken broth
  • 1/2 teaspoon Italian seasoning
  • 1/4 teaspoon crushed red pepper flakes
  • Fresh chopped parsley (optional, to taste)

Instructions

  1. Microwave the cream cheese until very soft. Cut it into smaller pieces and set aside until needed.
  2. Cut the chicken breasts in half lengthwise so you have 4 thinner pieces. Season them with the garlic powder and some salt & pepper.
  3. Melt the butter and oil in a skillet over medium-high heat. When the pan is hot, add the chicken and cook for about 5-6 minutes/side or until golden and cooked through (165F). Transfer the chicken to a plate.
  4. Reduce the heat to medium, then add the onions to the skillet and sauté for 5-7 minutes or until softened and lightly browned.
  5. Stir in the garlic and cook for 30 seconds.
  6. Add in the chicken broth, cream cheese, Italian seasoning, and crushed red pepper flakes. Stir until the sauce is smooth (this may take a few minutes).
  7. Add the chicken back to the skillet and warm through. If you need to thin the sauce, add a splash more chicken broth. Season with extra salt & pepper if needed, sprinkle with parsley if desired, and serve immediately.


Nutrition

  • Calories: 397 kcal
  • Sugar: 3 g
  • Fat: 29 g
  • Carbohydrates: 6 g
  • Protein: 28 g


Easy Cream Cheese Chicken

Irresistible Butterfinger Balls – Easy No-Bake Dessert

Butterfinger Balls Recipe: No-Bake Wonder for Any Occasion

⚖️
Difficulty
Easy
⏲️
Prep Time
25 mins
🕒
Cook Time
5 mins
⏱️
Total Time
30 mins (+ chilling)
🍽️
Servings
24

From the bustling streets of New York City to the sun-drenched kitchens of my childhood in Morocco, food has always been my language of love. Today, I’m thrilled to share a recipe that perfectly bridges my Moroccan heritage with my French training and my New York culinary adventures: these no-bake Butterfinger Balls. They’re a delightful explosion of textures and flavors, a true testament to how simple ingredients can create something utterly magnificent. If you’re searching for an easy peanut butter dessert that’s guaranteed to impress, this Butterfinger Balls recipe is your golden ticket to sweet success.

Imagine biting into a rich, creamy center, a harmonious blend of smooth peanut butter, tender butter, and crushed graham crackers, all elevated by the unmistakable, crisp, flaky, peanut-buttery crunch of Butterfinger candy bars. Then, that delightful core is enrobed in a luxurious shell of smooth chocolate, creating a symphony in your mouth. The aroma alone, a comforting mix of chocolate and peanut butter, will transport you. This isn’t just candy; it’s an experience, a handcrafted treat reminiscent of those special occasions where every bite was pure joy. My mother in Morocco always said that the best sweets are those made with patience and a good dose of sunshine – these Butterfinger Balls capture that spirit, with a NYC-made twist.

What sets my Butterfinger Balls recipe apart? It’s all about balance and technique, honed during my pastry studies in Paris. I’ve fine-tuned the ratios to ensure a perfect, scoopable dough that holds its shape beautifully, and developed a simple method for achieving that professional chocolate coating without a fuss. We’ll also dive into a common mistake that many home cooks make, which can lead to a crumbly disaster, and I’ll share a little secret that guarantees a smooth, even coating every single time. Get ready to elevate your homemade candy game with these irresistible, no-bake Butterfinger Balls; they are truly a crowd-pleaser.

Why This Butterfinger Balls Recipe Is the Best

The magic of these no-bake Butterfinger Balls lies in the intentional layering of textures and tastes, a principle I learned deeply during my French culinary training where precision in flavor profiles is paramount. The inherent sweetness and unique crunch of Butterfinger bars, when combined with the familiar comfort of peanut butter and graham crackers, create a flavor profile that is both nostalgic and excitingly new. My secret? It’s the specific ratio of creamy peanut butter to butter, which ensures a dough that is pliable enough to roll but firm enough to hold its shape, and the careful addition of finely crushed graham crackers that act as a binder and add a subtle spiced note, reminiscent of my mother’s spice blends back home.

Achieving that perfect, smooth chocolate coating on no-bake treats can seem daunting, but I’ve perfected a method using chocolate bark that guarantees a beautiful sheen and a satisfying snap every time. Unlike temperamental melted chocolate, chocolate bark is designed to set up beautifully without the need for complex tempering techniques. This means even if you’re new to candy making, you’ll achieve a professional-looking finish. This ease is crucial for any busy home cook, especially here in NYC, where time is often a luxury; these Butterfinger Balls are incredibly easy to make on a weeknight or for last-minute guests.

For anyone intimidated by candy making, this Butterfinger Balls recipe is your gateway. The process is incredibly straightforward, requiring no baking and minimal special equipment. The chilling step is key to success, ensuring your balls are firm for dipping, preventing them from melting into a chocolaty mess. It’s a foolproof method that delivers consistently delicious results, making it perfect for novice bakers and seasoned pros alike. You get the decadent taste of gourmet candy without the fuss, making these an ideal easy peanut butter dessert for parties, holidays, or just a sweet treat for yourself.

Butterfinger Balls Ingredients

One of the joys of creating homemade candy is sourcing uncomplicated, readily available ingredients, which is easy to do at any of my favorite NYC markets, like Eataly for fine chocolates or Whole Foods for quality pantry staples. This recipe celebrates the simple magic of everyday pantry items transformed into something truly special. For me, it brings back fond memories of my mother’s kitchen, where simple ingredients were always elevated with love and a touch of spice.

Ingredients List

  • 4 tablespoons softened butter (½ stick)
  • 1 teaspoon vanilla extract
  • 8 ounces chocolate bark or chocolate chips
  • ½ cup Butterfinger bars (crushed)
  • 1 cup powdered sugar
  • 1 cup peanut butter (avoid all-natural varieties)
  • ¾ cup crumbs from graham crackers
  • Optional garnishes: additional crushed Butterfinger bars, festive sprinkles, or coarse sea salt

Ingredient Spotlight

Peanut Butter: The heart of our Butterfinger Balls. For this recipe, I strongly recommend using a conventional peanut butter like Jif or Skippy. These brands contain stabilizers that help create a firmer, more cohesive dough for rolling and dipping. All-natural peanut butters can be oily and prone to separating, which can make the candy balls difficult to form and prone to falling apart. When shopping in the US, look for the creamy or crunchy varieties in the baking aisle. If you must use natural, ensure it’s well-stirred and consider draining off any excess oil.

Butterfinger Bars: This is where our candy gets its signature flavor and irresistible crunch! While you can find these in almost any US candy aisle, for the best texture, try to crush them finely but not into a powder. I like to pulse them a few times in a food processor or place them in a sturdy bag and crush them with a rolling pin. The goal is to retain some small, distinct pieces for that classic Butterfinger bite. If you can’t find Butterfingers, a similar crispety, crunchety bar with a peanut and candy coating could work as a substitute, though the flavor will differ.

Chocolate Bark: This is my secret weapon for a foolproof glossy coating! Chocolate bark, often found in candy-making sections of craft stores or supermarkets, is formulated to melt smoothly and set up firm without the need for tempering. It comes in various flavors, but I usually opt for milk chocolate or semi-sweet varieties for these balls. If you prefer to use chocolate chips, choose good quality ones, and be aware you might need to add a teaspoon of vegetable shortening or coconut oil to help them achieve a smoother consistency when melted, especially if you’re not tempering them.

Original IngredientBest SubstitutionFlavor / Texture Impact
Peanut Butter (Conventional)Natural Peanut Butter (well-stirred, excess oil drained)May result in softer dough, requires more careful rolling. Coating might be less smooth.
Butterfinger BarsCrushed Reese’s Peanut Butter Cups or Heath BarsChanges flavor profile significantly. Reese’s will be more distinctly peanut butter cup flavored; Heath will add toffee notes. Texture will remain crunchy.
Chocolate BarkHigh-quality Chocolate Chips + 1 tsp shortening/coconut oilMay require more careful melting and stirring to achieve smooth consistency. Setting may be slightly less firm and glossy than bark.

How to Make Butterfinger Balls — Step-by-Step

Crafting these homemade delights is a joy, and I’ve broken down each step to ensure perfection, just like the precise methods I learned in Paris. Follow along, and you’ll have a batch of stunning Butterfinger Balls ready in no time!

Step 1: Prepare the Dough

In a large mixing bowl, combine the peanut butter and softened butter. Using an electric mixer on medium speed, blend until the mixture is smooth, creamy, and well-combined. This forms the rich base for our balls.

💡 mia’s Pro Tip: Ensure your butter is truly softened but not melted. It should yield to gentle pressure but not be greasy. This creaminess is key for a smooth dough texture.

Step 2: Add Aromatic Notes

Incorporate the vanilla extract into the peanut butter and butter mixture. Blend thoroughly with your mixer until it’s fully incorporated and fragrant, adding that essential warm flavor note.

Step 3: Sweeten the Deal

Gradually add the powdered sugar to the bowl, about a cup at a time, blending on a low speed. Don’t forget to scrape down the sides of the bowl with a spatula between additions to ensure everything is evenly mixed and no dry pockets remain.

⚠️ Common Mistake to Avoid: Adding all the powdered sugar at once can create a stiff, crumbly dough that’s hard to work with. Gradual addition ensures that perfect, pliable consistency.

Step 4: Crunch Time

Gently fold in the graham cracker crumbs and the crushed Butterfinger bars using a sturdy spatula. Mix until they are evenly distributed throughout the dough. This adds the signature crunch and flavor burst.

Step 5: Shape ’em Up

Line a large baking sheet with parchment paper. Scoop about 1 to 1½ tablespoons of the dough for each ball. Roll the dough into neat, uniform balls using your hands and place them on the prepared cookie sheet.

Step 6: Chilling Phase

Place the cookie sheet with the dough balls into the freezer for approximately 30 minutes, or until they are completely firm. This chilling step is crucial for easy chocolate coating.

Step 7: Melting the Chocolate

Once the dough balls are chilled and firm, it’s time for the chocolate coating. Place the chocolate bark or chips in a microwave-safe bowl. Heat in 30-second intervals at 50% power, stirring well after each interval. Be cautious not to overheat; some small lumps are okay as they will melt into the rest of the chocolate with stirring.

💡 mia’s Pro Tip: For perfectly smooth melted chocolate, use a double boiler method if you’re concerned about overheating or scorching. It’s a gentler way to melt, just like we often do for delicate Parisian ganaches.

Step 8: Coat and Decorate

Take a chilled dough ball and submerge it completely into the luscious melted chocolate using a fork or dipping tool. Lift it out, allowing excess chocolate to drip back into the bowl. You can fully coat the balls or leave a small section of the peanut butter mixture exposed for visual contrast.

Step 9: Finishing Touches

Immediately after dipping, while the chocolate is still wet, add your desired garnishes. A sprinkle of additional crushed Butterfinger bars adds an extra crunch and visual cue. Festive sprinkles are fun for holidays, and a pinch of flaky sea salt can wonderfully balance the sweetness.

Step 10: The Grand Finale

Place the finished Butterfinger Balls back onto the parchment-lined baking sheet. Allow the chocolate to solidify completely at room temperature, or speed it up by placing them back in the refrigerator for about 10-15 minutes. Once firm, they are ready to be enjoyed!

StepActionDurationKey Visual Cue
1Prepare Dough Base5 minutesSmooth, creamy, uniform mixture
2Add Vanilla1 minuteFragrant, well-blended mixture
3Incorporate Powdered Sugar4 minutesThick, pliable dough
4Fold in Crumbs & Butterfinger2 minutesEvenly distributed texture
5Shape Balls5 minutesUniform, neat balls
6Chill Balls30 minutesFirm to the touch
7Melt Chocolate2-3 minutesSmooth and pourable
8Coat Balls4-5 minutesEven coating, excess dripping off
9Garnish1 minuteDecorative elements applied
10Set Chocolate10-15 minutesChocolate is fully solidified and firm

Serving & Presentation

These Butterfinger Balls are little jewels that bring cheer to any dessert table. For a sophisticated New York touch, I love presenting them in a delicate pastry box or nestled in colorful cupcake liners arranged on a tiered serving stand. They look especially festive alongside other small treats, perhaps some French macarons or date-filled Moroccan cookies for a true international flair. The key is abundance; let people graze and enjoy these delightful bites.

For an extra touch of elegance, consider the optional garnishes. A drizzle of contrasting chocolate (like white chocolate over milk chocolate) can create a stunning visual pattern. If serving at a party, a small tent card identifying them as “Butterfinger Balls” is always appreciated. They’re perfect for holiday cookie platters, Halloween treats, or even as a small, sweet wedding favor. Their portable nature makes them fantastic for potlucks and office parties, as they travel well tucked into a sturdy container.

Pairing TypeSuggestionsWhy It Works
Side DishN/A – These are meant to be a standalone treatTheir rich flavor profile is best enjoyed on its own.
Sauce / DipRaspberry Coulis or Caramel SauceComplements the chocolate and peanut butter with fruity or buttery notes.
BeverageCoffee, Milk, Espresso, or a Sweet Dessert WineThe richness of the balls pairs well with both creamy and robust beverages.
GarnishExtra crushed Butterfinger, sea salt flakes, sprinklesAdds visual appeal, texture, and a pop of flavor.

Make-Ahead, Storage & Reheating

As a busy New Yorker, I cherish recipes that can be prepped ahead. These Butterfinger Balls are perfect for that! I often make a double batch on a Sunday afternoon, storing them for easy grab-and-go treats throughout the week or for unexpected guests. They truly are a lifesaver when you need something sweet in a hurry.

MethodContainerDurationReheating Tip
RefrigeratorAirtight container2-3 weeksServe chilled or let sit at room temp for 10 mins before serving.
FreezerFreezer-safe airtight container or bag2-3 monthsThaw overnight in the refrigerator.
Make-AheadAirtight containerUp to 3 days before coatingRoll dough balls and freeze until firm before dipping in chocolate.

For best results, I always recommend storing these candies in an airtight container. If the weather is warm where you are, or if you prefer your chocolate treats with a firmer bite, keeping them in the refrigerator is ideal. Freezing is also a great option for longer storage, but be sure to allow them ample time to thaw gently to prevent the chocolate from cracking. I’ve found that thawing them in the fridge overnight is the safest bet to maintain their beautiful finish.

Variations & Easy Swaps

VariationKey ChangeBest ForDifficulty Impact
Classic Butterfinger BallsFollow the recipe as isPure Butterfinger enthusiastsEasy
Gluten-Free & Dairy-FreeUse GF graham crackers; DF butter & chocolateDietary needsEasy (ensure substitutions are tested)
Seasonal & Flavor TwistSwap Butterfinger for other candies or add spicesHoliday baking or adventurous palatesEasy to Medium (depending on swap)

Classic Butterfinger Balls

This is the recipe as written, a true celebration of the iconic Butterfinger candy bar. The interplay between the smooth peanut butter base and the airy, crispy, peanut-buttery shards encased in chocolate is simply undeniable. It’s the flavor profile that most people know and love, a perfect balance of sweet and slightly salty. This classic version is what I bring to any gathering when I want a guaranteed crowd-pleaser.

Gluten-Free and Dairy-Free Butterfinger Balls

To make these Butterfinger Balls gluten-free, simply substitute the graham crackers with a gluten-free brand or use finely crushed gluten-free cookies like shortbread. For a dairy-free option, use dairy-free butter substitutes (like a good quality vegan butter stick) and dairy-free chocolate bark or chips. These substitutions maintain the integrity of the recipe without compromising on taste or texture, making them accessible to more people. I’ve tested this, and the result is just as delicious, with the dairy-free chocolate setting up beautifully.

Seasonal and Flavor Twist Butterfinger Balls

Embrace the seasons! For fall, consider crushing Heath bars instead of Butterfingers for a delightful toffee crunch. At Christmas, I love adding a pinch of cinnamon and nutmeg to the dough, and perhaps a swirl of red and green candy melts on top. For a lighter twist, try swapping half the Butterfinger for finely chopped peanuts or even some toasted coconut for a tropical feel. These small changes can completely transform the flavor profile, making them feel new and exciting for every occasion.

How do you keep Butterfinger Balls from falling apart when dipping them in chocolate?

The most critical step to prevent Butterfinger Balls from falling apart during dipping is to ensure they are thoroughly chilled and firm before you begin coating them in chocolate. Freezing the rolled dough balls for at least 30 minutes until they are solid is essential. A firm ball will hold its shape when submerged in warm chocolate. If the dough is too soft, it will easily break apart. Also, be gentle when handling them; use a fork or a dipping tool to minimize direct contact which can cause them to crumble.

Can I use creamy peanut butter instead of crunchy in Butterfinger Balls?

Yes, you can absolutely use creamy peanut butter in this Butterfinger Balls recipe. The primary role of the peanut butter in the dough is to provide flavor and act as a binder. While crunchy peanut butter adds another layer of texture, creamy peanut butter will still yield a delicious result. The crushed Butterfinger bars and graham cracker crumbs will provide plenty of crunch, so the peanut butter’s texture is less critical. Just ensure you’re using a conventional peanut butter for the best binding properties.

How long do Butterfinger Balls need to chill before serving?

The Butterfinger Balls need to chill until they are completely firm before they can be dipped in chocolate. This typically takes about 30 minutes in the freezer. After dipping and the chocolate has set, they can be served immediately. If you are planning to store them for later, they will firm up further in the refrigerator, which can take a few hours. For best eating texture, I like to let them sit at room temperature for about 10-15 minutes before serving if they’ve been refrigerated.

What is the best way to crush Butterfinger candy bars for this recipe?

The best way to crush Butterfinger candy bars is to ensure you get a nice, varied texture – not too fine a powder, but not large chunks either. My preferred method is to place the unwrapped Butterfinger bars into a sturdy zip-top bag, seal it tightly, and then use a rolling pin or the flat side of a meat mallet to gently crush them. Alternatively, you can pulse them a few times in a food processor. The goal is to break them down into smaller pieces that will distribute evenly within the candy dough, offering that signature Butterfinger crunch in every bite.

Can I make Butterfinger Balls ahead of time?

Absolutely! These Butterfinger Balls are perfect for making ahead. You can prepare the dough, roll them into balls, and freeze them prior to dipping. Store these frozen dough balls in an airtight container for up to 2-3 months. When you’re ready to finish them, you can dip them directly from the freezer – just allow a little extra time for the chocolate to set. The fully completed candies also store wonderfully in an airtight container in the refrigerator for up to 2-3 weeks, making them a fantastic make-ahead dessert.

Why is my chocolate coating not smooth when melting?

If your chocolate coating isn’t smooth, it’s usually due to overheating or moisture. When melting chocolate in the microwave, it’s crucial to use short intervals (30 seconds max) at reduced power (50%), stirring thoroughly between each. Overheating can cause chocolate to seize and become grainy or thick. Also, even a tiny bit of water can make chocolate seize unexpectedly. If you’re using chocolate chips, they can sometimes be trickier to melt smoothly than chocolate bark; adding a teaspoon of neutral oil or shortening can help achieve a silkier texture.

Share Your Version!

I pour so much love and culinary expertise into each recipe, and I truly hope you enjoy making and sharing these Butterfinger Balls as much as I do. If this recipe brought a smile to your face and a delicious treat to your table, please consider leaving a star rating down below and sharing your thoughts in the comments section. Your feedback helps me and other home cooks make the best recipes! You can also tag me on Instagram or Pinterest @exorecipes – I absolutely adore seeing your creations and how you put your own spin on my recipes!

Did you try any fun garnishes or variations with your Butterfinger Balls? I’m always curious to know how you adapt recipes, especially when it comes to adding a personal touch. Let me know in the comments below!

From my NYC kitchen to yours — I hope this recipe brings as much warmth to your table as it does to mine. — mia 🧡

📌

Love This Recipe? Save It to Pinterest!

If you enjoyed this Butterfinger Balls recipe, don’t let it get lost in your browser tabs! 😄 Pin it now so you can find it again anytime — and explore hundreds more tried-and-tested recipes waiting for you on my Pinterest boards.

👉 Follow mia on Pinterest @chefrecipes2

📌 Pin this recipe · 🔁 Re-pin your favorites · 💬 Tag me when you make it — I love seeing your creations!

Print

clock clock iconcutlery cutlery iconflag flag iconfolder folder iconinstagram instagram iconpinterest pinterest iconfacebook facebook iconprint print iconsquares squares iconheart heart iconheart solid heart solid icon

Butterfinger Balls

  • Author: Chef Mia

Description

Indulge your taste buds with these irresistible Butterfinger Bliss Balls, where creamy peanut butter harmoniously melds with the crunch of graham crackers and Butterfinger candy bars, all cloaked in sumptuous melted chocolate. Perfect for social soirées and festive occasions, these heavenly morsels will vanish before you know it!


Ingredients

Scale
  • 4 tablespoons softened butter (½ stick)
  • 1 teaspoon vanilla extract
  • 8 ounces chocolate bark or chocolate chips
  • ½ cup Butterfinger bars (crushed)
  • 1 cup powdered sugar
  • 1 cup peanut butter (avoid all-natural varieties)
  • ¾ cup crumbs from graham crackers
  • Optional garnishes: additional crushed Butterfinger bars (festive sprinkles, or coarse sea salt)

Instructions

  1. Prepare the Dough: In a mixing bowl, combine the peanut butter and softened butter. Use an electric or stand mixer set to medium speed and blend until the mixture is creamy and uniform.
  2. Add Aromatic Notes: Incorporate the vanilla extract and blend thoroughly.
  3. Sweeten the Deal: Gradually add the powdered sugar in increments, blending at a low speed. Don't forget to scrape down the sides of the bowl to ensure even mixing.
  4. Crunch Time: Gently fold in the graham cracker crumbs and crushed Butterfinger bars.
  5. Shape 'em Up: Align a large cookie sheet with parchment paper. Scoop out approximately 1 to 1½ tablespoons of the dough, roll into neat balls, and place on the cookie sheet.
  6. Chilling Phase: Freeze the dough balls on the sheet for roughly 30 minutes until they are completely firm.
  7. Melting the Chocolate
  8. Chocolate Symphony: Once the dough balls are chilled, proceed to melt the chocolate. Utilize a microwave-safe bowl and heat in 30-second spurts at 50% power, stirring in between each interval. Be cautious not to overheat; some lumps should remain and will melt as you stir.
  9. Coat and Decorate: Submerge each chilled ball into the luscious melted chocolate. You can fully coat them or leave a bit of the peanut butter mixture exposed.
  10. Finishing Touches: Add a sprinkle of additional crushed Butterfinger bars, holiday-themed sprinkles, or a dash of flaky sea salt for that extra pop.
  11. The Grand Finale: Allow the chocolate to solidify completely before indulging in your Butterfinger Bliss Balls.


Butterfinger Balls

k">

Tried This Recipe? Leave a Comment!

Did you make this recipe? I’d love to hear how it turned out! Please leave a comment and a rating below. Your feedback helps other home cooks and supports cheerychop.com!

For more delicious inspiration, follow me on Pinterest!
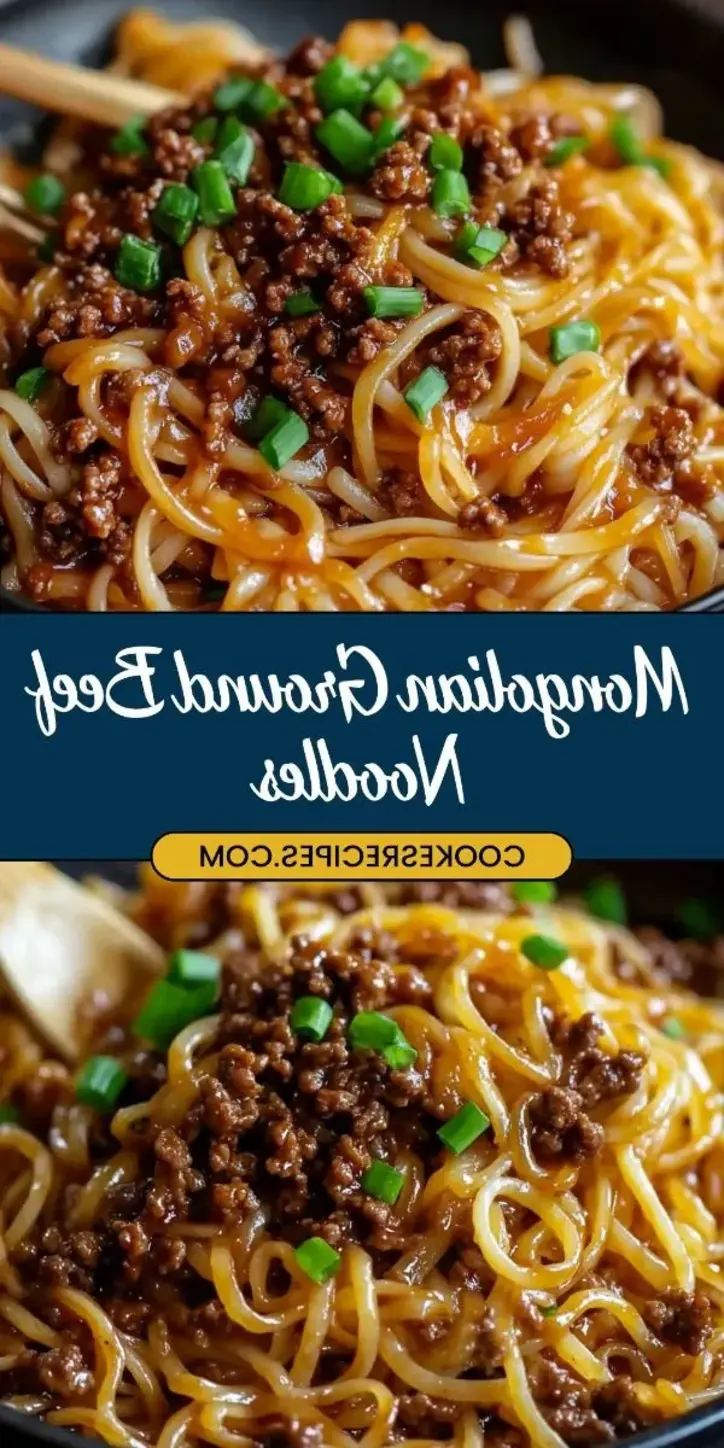
Easy Mongolian Ground Beef Noodles Recipe in 30 Minutes

Mongolian Ground Beef Noodles: A Quick and Flavorful Weeknight Marvel

⚖️
Difficulty
Easy
⏲️
Prep Time
15
🕒
Cook Time
20
⏱️
Total Time
35
🍽️
Servings
4

Living in a city as vibrant and fast-paced as New York, I know how precious weeknight evenings are. After a day spent bustling around my kitchen or sourcing the freshest ingredients at the Union Square market, the last thing I want is a complicated dinner. That’s where this Mongolian Ground Beef Noodles recipe comes in. It’s my secret weapon for a quick and deeply satisfying meal that tastes like it came from a beloved Chinatown restaurant, but can be on your table in less than 40 minutes. This easy Mongolian beef noodles recipe transforms humble ground beef and everyday pantry staples into something truly special, offering all the savory-sweet, umami-rich goodness you crave.

Imagine tender linguine tangled with perfectly cooked ground beef, all coated in a glossy, deeply flavorful sauce that hits every note: a hint of sweetness from brown sugar, the salty depth of soy sauce, and the complex richness of hoisin. The aroma alone, with fragrant garlic and a whisper of ginger, is enough to make your stomach rumble. I learned so much about sauces during my training in Paris, and this Mongolian sauce is a testament to balancing sweet, savory, and a touch of spice, creating a delightful contrast to the satisfying chew of the noodles. It’s a ground beef noodle stir fry that feels gourmet yet is completely approachable for any home cook.

What makes my version stand out? It’s all about achieving that perfect sauce consistency and flavor resonance without any fuss. I’ll share my little trick for getting the sauce just right, which is something I often stress in my cooking classes. Plus, I’ll guide you on a common mistake many home cooks make that can lead to a watery or bland sauce. This quick Mongolian noodles dinner is designed to be your new go-to, proving that incredible flavor doesn’t require hours in the kitchen or exotic ingredients. It’s a true testament to how simple components can be elevated to something spectacular.

Why This Mongolian Ground Beef Noodles Recipe Is the Best

My culinary journey, from my mother’s fragrant tagine pots in Morocco to the refined kitchens of Paris and now the dynamic culinary scene of NYC, has taught me that the best dishes are often born from simplicity elevated with technique. This ground beef noodle stir fry recipe is no exception. It captures the essence of classic Mongolian flavors but streamlines the process, making it an accessible yet utterly delicious beef lo mein recipe that’s perfect for any night of the week. It’s the kind of meal that impresses without the stress.

The secret to this easy Mongolian beef noodles recipe truly lies in a few key elements. First, it’s the specific ratio of ingredients in the sauce that creates that irresistible sweet and savory balance. My French training emphasized the importance of a well-emulsified sauce, and by employing a simple cornstarch slurry, we achieve a beautiful glossy glaze that clings perfectly to every strand of noodle. It’s a technique that instantly elevates the dish, giving it a professional finish that’s surprisingly easy to replicate at home.

Beyond the flavor, this quick Mongolian noodles dinner is designed for maximum efficiency. I’ve chosen ground beef because it cooks rapidly and absorbs the sauce beautifully, making it a more budget-friendly and time-saving alternative to sliced steak often found in traditional Mongolian beef. The use of linguine, readily available in any US supermarket, also cooks quickly and provides a satisfying texture. This makes it a foolproof and fast meal, perfect for beginners or anyone looking for a comforting, restaurant-quality dish on a busy weeknight.

Mongolian Ground Beef Noodles Ingredients

When I’m creating this dish, I often think about the vibrant marketplaces of Marrakech or the curated selections at Eataly here in NYC. For these Mongolian ground beef noodles, the beauty is in its accessibility. You can find everything you need at your local grocery store, and with a few pantry staples, you’re ready to go. My mother always taught me to select ingredients with care, and the same applies here to ensure the best flavor for this easy Mongolian beef noodles recipe.

Ingredients List

  • 1 lb ground beef
  • 5 cloves garlic, minced
  • 1/3 cup brown sugar
  • 1/4 cup beef broth
  • 1/3 cup soy sauce
  • 3 tablespoons hoisin sauce
  • 1/2 teaspoon ground ginger
  • 1/2 teaspoon ground black pepper
  • Pinch of red pepper flakes (optional for a spicy kick)
  • 10 oz linguine
  • 1 tablespoon cornstarch
  • 2 tablespoons water
  • 4 green onions, sliced for garnish

Ingredient Spotlight

Ground Beef: I opt for 80/20 ground beef for this recipe. The fat content renders beautifully, adding richness and flavor to the sauce. When you’re shopping in the US, look for fresh, bright red beef. It should have a subtle beefy aroma. If you want a leaner option, 90/10 works, but you might want to add a touch more oil to compensate for the less rendered fat. A good quality ground beef is the foundation of this delicious ground beef noodle stir fry, ensuring a hearty base.

Hoisin Sauce: Hoisin sauce is a thick, dark, sweet and savory condiment made from soybeans, garlic, chili peppers, and various spices. It’s the heart of many Cantonese dishes and provides a unique umami depth that soy sauce alone can’t replicate. Look for it in the international aisle of your grocery store. Brands like Lee Kum Kee are widely available and excellent. This is key for the authentic Mongolian beef noodles flavor.

Linguine: While traditional Mongolian beef might use rice noodles or wider wheat noodles, I find linguine to be a fantastic shortcut and wonderfully accessible choice for this easy Mongolian beef noodles recipe. It holds up well to the robust sauce and adds a satisfying texture. Any long pasta like spaghetti or fettuccine will also work, offering that familiar comfort food element that makes this a great quick Mongolian noodles dinner.

Original IngredientBest SubstitutionFlavor / Texture Impact
Ground Beef (80/20)Ground Turkey or PorkSlightly less richness, may require more seasoning.
LinguineSpaghetti, Fettuccine, or wider egg noodlesSubtle change in chewiness. Wider noodles might absorb slightly more sauce.
Hoisin SauceA mix of soy sauce, plum jam, and a touch of five-spice powderMimics the sweet and savory profile, potentially with a slightly fruitier note.

How to Make Mongolian Ground Beef Noodles — Step-by-Step

This quick Mongolian noodles dinner is designed to be straightforward. Follow these steps, and you’ll have a delicious meal ready in no time!

Step 1: Cook the Noodles

Begin by cooking the linguine according to the package instructions in a large pot of generously salted boiling water. Once perfectly al dente, drain them well in a colander and set aside. I like to give them a quick rinse with cool water to prevent them from sticking together while I prepare the sauce.

Step 2: Brown the Beef

In a large skillet or wok, cook the ground beef over medium-high heat. Break it up with a spoon as it cooks until it’s nicely browned and no pink remains. This usually takes about 5-7 minutes. Once browned, drain off any excess fat; this step is crucial for a lighter, cleaner flavor in your ground beef noodle stir fry.

💡 mia’s Pro Tip: For extra flavor in your ground beef, you can add a splash of soy sauce to the beef as it browns. This caramelizes slightly and adds a wonderful depth.

Step 3: Add Aromatics and Sauce Base

To the browned beef in the skillet, add the minced garlic and cook for about 30-60 seconds until it becomes wonderfully fragrant. Be careful not to burn the garlic! Then, stir in the brown sugar, beef broth, soy sauce, hoisin sauce, ground ginger, and black pepper. If you desire a little heat, now is the time to add your pinch of red pepper flakes. Stir everything together well, letting it all mingle for a minute.

Step 4: Thicken the Sauce

In a small bowl, whisk together the cornstarch and 2 tablespoons of water to create a smooth slurry. Pour this slurry into the skillet with the beef and sauce. Stir continuously until the sauce begins to bubble and thicken to a beautiful, glossy consistency. This should take about 2-3 minutes. This is what gives the Mongolian beef noodles that signature glossy coating.

⚠️ Common Mistake to Avoid: Don’t add the cornstarch slurry directly to the hot sauce. Always mix it with cold water first to prevent clumps and ensure a smooth, integrated sauce.

Step 5: Combine with Noodles

Once the sauce has thickened to your desired consistency, add the cooked and drained linguine directly into the skillet. Toss everything together gently but thoroughly, ensuring every strand of noodle and all the ground beef are lovingly coated in that rich, savory sauce. This is where the beef lo mein recipe truly comes together.

Step 6: Garnish and Serve

Finally, transfer the Mongolian ground beef noodles to a serving dish. Garnish generously with the sliced green onions for a touch of freshness and color. Serve immediately while hot for the best texture and flavor experience of this quick Mongolian noodles dinner.

StepActionDurationKey Visual Cue
1Cook Noodles8-10 minsAl dente pasta
2Brown Beef5-7 minsFully browned, no pink
3Add Aromatics & Sauce1-2 minsFragrant garlic, ingredients combined
4Thicken Sauce2-3 minsGlossy, thickened sauce
5Combine with Noodles1-2 minsNoodles evenly coated
6Garnish & ServeFew minsFresh green onions on top

Serving & Presentation

Presenting this Mongolian ground beef noodles is all about simple elegance. I love to serve it directly from the skillet onto individual plates, ensuring each serving gets a generous amount of the glossy sauce. A final sprinkle of vibrant green onions not only adds a pop of color but also a fresh, mild oniony bite that cuts through the richness of the dish. This is a dish that shines with its own deliciousness, and doesn’t need much adornment.

My inspiration here sometimes comes from the bustling food stalls in NYC, where a humble dish is made extraordinary with thoughtful garnishes and perfect cooking. The contrast between the soft, yielding noodles and the slight bite of the green onions is a classic example of how texture plays a vital role in overall satisfaction. It’s a dish that’s both comforting and exciting, perfect for a casual weeknight meal or even a laid-back gathering with friends.

For a complete meal, consider plating this quick Mongolian noodles dinner with a side of steamed or stir-fried vegetables like broccoli, snap peas, or bell peppers. A small dish of my quick pickled daikon and carrots would also add a fantastic tangy crunch, much like you’d find in some of my favorite Moroccan preserved lemon salads, offering a bright counterpoint to the savory noodles.

Pairing TypeSuggestionsWhy It Works
Side DishSteamed Broccoli, Stir-Fried Bok Choy, Garlic Green BeansAdds a fresh, slightly crisp counterpoint to the rich noodles.
Sauce / DipSriracha Mayo, Sweet Chili Sauce, Ginger-Scallion OilOffers a creamy, spicy, or aromatic boost that complements the main dish.
BeverageChilled Green Tea, Light Lager, Dry RieslingRefreshing beverages cut through the savory sauce and complement the umami flavors.
GarnishSesame Seeds, Sliced Red Chili, Chopped CilantroAdds visual appeal, texture, and bursts of flavor, similar to Moroccan herb garnishes.

Make-Ahead, Storage & Reheating

As a busy New Yorker, I live for great make-ahead meals! This Mongolian ground beef noodles recipe is fantastic for meal prep. I often cook a double batch on Sunday, portioning it into individual containers for quick lunches throughout the week. The flavors meld beautifully, making it just as delicious, if not more so, on day three.

MethodContainerDurationReheating Tip
RefrigeratorAirtight container3-4 daysMicrowave or stovetop with a splash of water/broth.
FreezerFreezer-safe container/bag1-2 monthsThaw overnight in fridge, then reheat as above.
Make-Ahead (Sauce & Beef)Airtight container2 days in advanceCook fresh noodles, reheat sauce/beef, then combine.

When reheating, I find a quick stir-fry in a skillet over medium heat is best for retaining the texture of the noodles and beef. Add a tablespoon or two of water or beef broth to the pan before adding the leftovers. This helps loosen the sauce and prevents it from becoming too thick or dry. Then, toss vigorously for a couple of minutes until heated through. Microwaving is also an option; just be sure to cover your dish and stir halfway through for even heating. Avoid over-reheating, as the noodles can become mushy.

Variations & Easy Swaps

VariationKey ChangeBest ForDifficulty Impact
Hearty Beef Lo Mein StyleUse thicker lo mein noodles and add mixed stir-fry vegetables.More substantial meal, weeknight dinner.Slightly higher difficulty due to vegetable cooking.
Gluten-Free & Veggie-PackedUse gluten-free noodles (rice noodles) and add bell peppers, carrots, and zucchini.Dietary needs, added nutrition.Easy swap, minimal impact.
Spicy Sichuan-InspiredIncrease red pepper flakes, add a teaspoon of chili paste (like Doubanjiang), and a dash of Szechuan peppercorns.Those who love heat.Easy spice adjustment.

Hearty Beef Lo Mein Style

To transform this into a more traditional beef lo mein, I recommend swapping the linguine for thicker, chewier lo mein noodles. You can find these fresh or dried in most Asian markets or the international aisle of larger supermarkets. When adding the noodles, also toss in a cup or two of your favorite stir-fried vegetables – think thinly sliced bell peppers, carrots, and crisp snow peas. My French culinary training always taught me the importance of ‘mise en place’ (everything in its place), which is essential when stir-frying vegetables to ensure they cook perfectly.

Gluten-Free and Veggie-Packed

For a gluten-free version of this easy Mongolian beef noodles recipe, I simply swap the linguine for gluten-free rice noodles or your favorite gluten-free pasta. Tamari can be used as a 1:1 substitute for soy sauce to ensure it remains gluten-free. To amp up the nutrition and add vibrant color, I love to toss in a medley of stir-fried vegetables like broccoli florets, thinly sliced carrots, and red bell peppers along with the noodles. This makes it a wonderfully complete and balanced meal, proving that dietary restrictions don’t mean sacrificing flavor.

Spicy Sichuan-Inspired

If you’re a fan of heat, like I am when I’m craving something bold, don’t hesitate to turn up the spice! For a Sichuan-inspired kick, I increase the red pepper flakes significantly and, my little secret, add about a teaspoon of fermented chili bean paste (Doubanjiang) to the sauce when you add the garlic. A tiny pinch of ground Szechuan peppercorns, toasted briefly, can also impart that unique numbing tingle. This variation takes the quick Mongolian noodles dinner from subtly spicy to wonderfully fiery.

What is the best type of noodles to use for Mongolian ground beef noodles?

While this easy Mongolian beef noodles recipe is written using linguine for convenience, traditional Mongolian beef often uses wider, flatter wheat noodles or even rice noodles. For a beef lo mein style, lo mein noodles are excellent. The key is to choose noodles that are robust enough to hold up to the rich, savory sauce without becoming mushy. Linguine, spaghetti, fettuccine, or even hearty ramen noodles all work wonderfully for this ground beef noodle stir fry.

Can I substitute ground beef with another protein in this recipe?

Absolutely! This quick Mongolian noodles dinner is quite versatile. Ground turkey or pork are excellent substitutes for ground beef, offering a slightly different but equally delicious flavor profile. For a leaner option, ground chicken works well, though you might want to ensure you add a little extra oil to the pan during browning to prevent sticking, mirroring some techniques I use in my Moroccan cooking. You could even try it with finely chopped firm tofu for a vegetarian twist; just be sure to press it well to remove excess water.

How do I thicken the sauce for Mongolian ground beef noodles?

The best and most foolproof way to thicken the sauce for this Mongolian ground beef noodles recipe is by using a cornstarch slurry. In a small bowl, whisk together 1 tablespoon of cornstarch with 2 tablespoons of cold water until it’s completely smooth and there are no lumps. Then, pour this mixture into the simmering sauce in your skillet and stir constantly. It will thicken in about 2-3 minutes as it heats through, creating that beautiful, glossy coating that clings perfectly to the noodles and beef.

How long does it take to cook Mongolian ground beef noodles from start to finish?

This easy Mongolian beef noodles recipe is designed for speed! From start to finish, you can expect this delicious ground beef noodle stir fry to take approximately 35 minutes. This includes about 15 minutes for prep (mincing garlic, measuring ingredients) and around 20 minutes for cooking. The noodles cook quickly while the sauce is prepared, and everything comes together in the skillet for the final toss. It’s truly one of my go-to quick Mongolian noodles dinners for busy evenings.

Can I make this recipe spicy?

Absolutely! If you love a bit of heat, this dish is perfect for adding a spicy kick. In Step 3 of the recipe, when you’re adding the sauce ingredients, include a pinch of red pepper flakes. For a bolder heat, I recommend increasing this amount to 1/4 teaspoon or even 1/2 teaspoon, depending on your tolerance. You could also incorporate a teaspoon of chili paste, such as sriracha or gochujang, into the sauce for an extra layer of flavor and spice.

What is the role of hoisin sauce in this recipe?

Hoisin sauce is a crucial ingredient in this easy Mongolian beef noodles recipe, providing an irreplaceable depth of flavor. It’s a thick, dark, and complex condiment that offers a unique balance of sweet, salty, and savory notes, with a hint of umami that soy sauce alone cannot replicate. It contributes significantly to the rich, glossy glaze that coats the noodles and beef, making it a staple in many East Asian stir-fries and a key component for achieving that authentic Mongolian beef taste.

What are the best vegetables to add to Mongolian ground beef noodles?

For this delicious ground beef noodle stir fry, I love adding vegetables that offer a good crunch and vibrant color. Broccoli florets, thinly sliced carrots, crisp snow peas, and diagonally cut green beans are fantastic choices. Bell peppers, especially red and yellow ones, add sweetness and visual appeal. You can stir-fry them briefly before adding the sauce, or toss them in with the noodles in Step 5 for a quicker method. My Moroccan roots inspire me to always seek a balance of flavors and textures!

Can I use a different type of beef cut for Mongolian beef noodles?

While this recipe is specifically designed for ground beef for ease and speed, you can absolutely use other beef cuts if you prefer. For a more traditional Mongolian beef experience, thinly sliced flank steak or sirloin is excellent, though it will increase the cooking time. If you do use sliced beef, I recommend marinating it briefly in soy sauce, cornstarch, and a bit of sesame oil before stir-frying it quickly. Then, proceed with making the sauce and combining it with the beef and noodles for your quick Mongolian noodles dinner.

Share Your Version!

I truly hope you enjoy making and eating this Mongolian ground beef noodles recipe as much as I do! It’s a dish that brings so much comfort and flavor to my table here in NYC. If you give it a try, please consider leaving a star rating and a comment below to let me know how it turned out. Your feedback means the world to me!

I also absolutely love seeing your creations! Tag me on Instagram or Pinterest (@exorecipe) when you share your photos – it makes my day to see how this recipe comes to life in your kitchens. And tell me, what’s your go-to spice level for this dish? I’m always curious to hear about your personal twists!

From my NYC kitchen to yours — I hope this recipe brings as much warmth to your table as it does to mine. — mia 🧡

📌

Love This Recipe? Save It to Pinterest!

If you enjoyed this Mongolian Ground Beef Noodles recipe, don’t let it get lost in your browser tabs! 😄 Pin it now so you can find it again anytime — and explore hundreds more tried-and-tested recipes waiting for you on my Pinterest boards.

👉 Follow mia on Pinterest @chefrecipes2

📌 Pin this recipe · 🔁 Re-pin your favorites · 💬 Tag me when you make it — I love seeing your creations!

Print

clock clock iconcutlery cutlery iconflag flag iconfolder folder iconinstagram instagram iconpinterest pinterest iconfacebook facebook iconprint print iconsquares squares iconheart heart iconheart solid heart solid icon

Mongolian Ground Beef Noodles

  • Author: Chef Mia

Description

This Mongolian Ground Beef Noodles dish is a quick and flavorful meal combining savory ground beef, a rich and slightly sweet sauce, and tender linguine. It’s perfect for a weeknight dinner thats both satisfying and easy to make.


Ingredients

Scale
  • 1 lb ground beef
  • 5 cloves garlic, minced
  • 1/3 cup brown sugar
  • 1/4 cup beef broth
  • 1/3 cup soy sauce
  • 3 tablespoons hoisin sauce
  • 1/2 teaspoon ground ginger
  • 1/2 teaspoon ground black pepper
  • Pinch of red pepper flakes (optional for a spicy kick)
  • 10 oz linguine
  • 1 tablespoon cornstarch
  • 2 tablespoons water
  • 4 green onions, sliced for garnish

Instructions

  1. Begin by cooking the linguine according to the package instructions. Once cooked, drain and set aside.
  2. In a large skillet, cook the ground beef over medium heat until it is browned and cooked through. Drain any excess fat.
  3. Add the minced garlic to the browned beef and cook for about 1 minute until fragrant. Stir in the brown sugar, beef broth, soy sauce, hoisin sauce, ground ginger, ground black pepper, and red pepper flakes if using. Stir well to combine all the flavors.
  4. In a small bowl, mix the cornstarch with water to create a slurry. Add this mixture to the skillet and stir until the sauce thickens, about 2-3 minutes.
  5. Once the sauce has thickened, add the cooked linguine to the skillet. Toss the noodles in the sauce until they are well coated.
  6. Garnish the dish with sliced green onions and serve hot.


Nutrition

  • Calories: 520kcal
  • Sugar: 12g
  • Fat: 20g
  • Carbohydrates: 60g
  • Protein: 25g


Mongolian Ground Beef Noodles

ph">For more delicious inspiration, follow me on Pinterest!
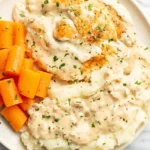
Easy Hibachi Steak Bowls Recipe with Yum Yum Sauce

Hibachi Steak Bowls: Easy Weeknight Favorite

⚖️
Difficulty
Easy
⏲️
Prep Time
30

mins

🕒
Cook Time
25

mins

⏱️
Total Time
55

mins

🍽️
Servings
4-6

Living in New York City, I’ve developed a deep appreciation for the vibrant culinary scene, which often means embracing quick, flavorful, and satisfying meals. My “Sol-Moroccan” upbringing, with its emphasis on aromatic spices and communal eating, blends beautifully with the French techniques I honed in Paris and the dynamic energy of NYC. This passion for fusion is exactly what led me to create these incredible Hibachi Steak Bowls. They are my answer to those nights when I crave the excitement of a steakhouse experience but need something I can realistically whip up after a long day at my studio. Drawing inspiration from the theatrical sizzle of hibachi grills and the comforting bowls I remember from my mother’s kitchen, these hibachi steak bowls are designed to be both impressive and incredibly approachable, making them a perfect weeknight entrée.

Imagine this: tender, marinated sirloin steak, seared to perfection with those delightful crispy edges, tossed in a glistening, savory-sweet glaze. Accompanying this are vibrant, crisp-tender vegetables – think bright orange carrots, tender zucchini, and earthy mushrooms – all sautéed to unlock their natural sweetness. Served atop a bed of fluffy fried rice and finished with a creamy, tangy drizzle of Yum Yum sauce, each bite is a symphony of textures and tastes. The aroma alone, a delightful mix of garlic, ginger, and sesame, is intoxicating. This dish captures the essence of a beloved restaurant classic, right in your own kitchen, using a simple yet effective stir-frying technique I learned during my culinary training.

What sets my hibachi steak bowl recipe apart is its unwavering commitment to both authenticity of flavor and the reality of a busy schedule. I’ve meticulously tested every step to ensure maximum flavor with minimal fuss, a philosophy deeply ingrained from my years in professional kitchens. You’ll find that the marinade isn’t just for show; it’s designed to tenderize and infuse the steak deeply. I’m also going to share a pro tip on how to achieve that coveted restaurant-style sear without needing a specialized grill. And, of course, I’ll point out a common mistake that can turn your steak tough, ensuring yours is always perfectly succulent. Let’s get cooking!

Why This Hibachi Steak Bowls Recipe Is the Best

My love for combining global flavors truly shines in this hibachi steak recipe. While French cuisine taught me precision and balance, my Moroccan roots instilled a love for warm spices and slow-cooked richness. For these hibachi steak bowls, I’ve incorporated a touch of mirin for a subtle sweetness and depth that perfectly complements the savory steak, much like how a hint of orange blossom water can elevate a tagine. This unique marinade, along with precise cooking temperatures, ensures a steak that’s both incredibly tender and bursting with flavor, a signature touch that elevates it beyond a simple stir-fry. It’s this thoughtful layering of influences that makes my approach to classic dishes so special.

Achieving that perfect sear on your steak is crucial, and it’s a technique I’ve refined over years of restaurant service. The key lies in using a screaming hot pan and not overcrowding it. By cooking the steak in batches if necessary and ensuring your pan is properly heated before adding the meat, you create a beautiful Maillard reaction, locking in juices and developing that irresistible crust. I’ve also found that using a combination of butter and sesame oil creates a higher smoke point and adds a nutty depth that’s hard to beat. This attention to detail in the cooking process ensures that each piece of steak in your hibachi beef bowl is a delight.

This recipe is a testament to the fact that you don’t need to be a classically trained chef to recreate restaurant-quality meals at home. I’ve designed every step to be straightforward and forgiving, allowing you to focus on enjoying the cooking process. From the simple marinade that does most of the flavor work to the quick sauté of vibrant vegetables, these hibachi steak and rice bowls come together remarkably fast. It’s the perfect example of how I like to bring sophisticated flavors into everyday cooking, making impressive dishes accessible for anyone looking to elevate their weeknight dinners.

Hibachi Steak Bowls Ingredients

For this recipe, I like to make a trip to my local farmers market here in NYC for the freshest produce, but you can find everything you need at your neighborhood grocery store. My mother always said that the best meals start with the best ingredients, and for these hibachi steak bowls, that means good quality sirloin and crisp vegetables. If I’m feeling fancy, I might even pick up some extra shiitake mushrooms from the specialty aisle!

Ingredients List

  • 2 lbs top sirloin steak, cut into rough chunks
  • 1 tablespoon mirin
  • 6 cloves of garlic, finely minced or pressed
  • 2 teaspoons ginger paste
  • 2 tablespoons plus 1 teaspoon sesame oil, divided
  • ½ teaspoon ground white pepper (or black pepper)
  • Kosher salt, to taste
  • 4 tablespoons unsalted butter, divided
  • 3 medium carrots, thinly cut on a bias
  • 2 medium zucchinis, sliced in half lengthwise & then cut into half moons
  • 4-5 ounces sliced mushrooms (I use baby bella)
  • ½ teaspoon garlic powder
  • 1-2 tablespoons teriyaki sauce or Japanese BBQ Sauce (we love Bachans!)
  • For serving: Fried rice & store-bought Yum Yum Sauce

Ingredient Spotlight

Top Sirloin Steak: This cut is my go-to for these hibachi steak bowls because it offers a fantastic balance of flavor and tenderness without breaking the bank. When shopping in the US, look for bright red, well-marbled cuts. Ensure it’s at least 1-inch thick for best results when searing. If you can’t find sirloin, a good quality flank steak or even ribeye would work, though cooking times might need adjustment.

Mirin: This is a sweet Japanese rice wine that adds a subtle sweetness and umami depth to the marinade. It’s essential for achieving that authentic hibachi flavor. You can usually find it in the international aisle of most major supermarkets or at an Asian grocery store. If you absolutely cannot find mirin, a dry sherry mixed with a teaspoon of sugar can be a close substitute, though the flavor profile will be slightly different.

Sesame Oil: I prefer to use toasted sesame oil for its rich, nutty aroma and flavor, which is a staple in my Moroccan kitchen for many of the same aromatic reasons. Use it sparingly, as its flavor is potent! Make sure you’re buying toasted sesame oil for cooking and marinades; regular sesame oil is much milder. You’ll find this easily in the condiment aisle of any US grocery store.

Original IngredientBest SubstitutionFlavor / Texture Impact
Top Sirloin SteakRibeye or Flank SteakRibeye will be richer and more tender. Flank steak will be leaner; slice against the grain for tenderness.
MirinDry Sherry + 1 tsp SugarSlightly dryer and less sweet, but still adds good depth.
Toasted Sesame OilToasted Walnut Oil or just skipLoss of nutty depth; rely more on other aromatics.
Baby Bella MushroomsShiitake or Cremini MushroomsShiitake will add more umami; cremini are a very similar earthy flavor.

How to Make Hibachi Steak Bowls — Step-by-Step

Taking inspiration from Parisian kitchens, where mise en place is king, let’s get all your ingredients prepped and ready before we start cooking. This ensures a smooth and efficient cooking process for your hibachi steak bowls.

Step 1: Marinate the Steak

Place the sirloin into a large bowl (or inside a large plastic baggie). Add the mirin, 4 cloves of minced garlic (save the other 2 for the veggies), 2 teaspoons ginger paste, 1 teaspoon sesame oil, and white pepper (or black pepper). Add salt to taste, ensuring the steak chunks are thoroughly coated. Let the steak marinate for at least 30 minutes at room temperature, or up to 2 hours in the refrigerator.

💡 mia’s Pro Tip: For maximum flavor infusion, feel free to marinate the steak overnight in the refrigerator. Just remember to bring it to room temperature for about 30 minutes before cooking to ensure even cooking.

Step 2: Sauté the Vegetables

In a wok or large skillet, heat 2 tablespoons of butter and 1 tablespoon of sesame oil over medium heat. When the butter is melted and shimmering, add the sliced carrots, zucchini, and mushrooms. Cook the veggies, tossing them often, until they are tender-crisp and golden brown, about 10-15 minutes. Season the vegetables with the remaining 2 cloves of minced garlic, garlic powder, and salt and pepper to taste. Transfer the sautéed vegetables to a clean plate and set aside. If your pan has any burnt bits, carefully wipe it clean with a damp paper towel.

⚠️ Common Mistake to Avoid: Don’t overcrowd the pan with vegetables! Cooking them in batches ensures they sauté properly and develop a nice caramelization, rather than steaming and becoming mushy.

Step 3: Sear the Steak

In the same pan (no need to wash), add the remaining 2 tablespoons of butter and 1 tablespoon of sesame oil over medium-high heat. Once the butter is melted and the oil is shimmering hot, add the marinated steak in a single layer. Cook, tossing the beef often, until it’s nicely seared on all sides, about 3-4 minutes. Be careful not to overcook the steak, as it can become tough quickly. Remove the pan from the heat, then drizzle in the teriyaki sauce or Japanese BBQ sauce, and toss the steak well to coat each piece in the glossy sauce until it glistens.

💡 mia’s Pro Tip: To achieve a restaurant-level sear, ensure your pan is very hot before adding the steak. This encourages a quick crust formation, sealing in the juices and preventing the meat from steaming.

Step 4: Assemble the Bowls

To serve, evenly divide the cooked steak and sautéed vegetables into shallow bowls. Add a generous portion of your prepared fried rice to each bowl. Finish each hibachi steak bowl with a drizzle of store-bought Yum Yum sauce (or feel free to serve it on the side for guests to add themselves) to complete this incredibly flavorful and satisfying meal.

⚠️ Common Mistake to Avoid: Don’t let the steak rest for too long after searing if you plan to serve it immediately. Over-resting can lead to juices pooling and the steak cooling down too much, affecting the overall warmth of the dish.

StepActionDurationKey Visual Cue
1Marinate Steak30+ minsSteak coated evenly with marinade
2Sauté Vegetables10-15 minsTender-crisp, golden brown
3Sear Steak3-4 minsNicely seared, glistening
4Assemble Bowls5 minsEvenly divided ingredients

Serving & Presentation

When I think about serving these bowls, I’m reminded of the beautiful presentation we aimed for at my culinary school in Paris – elegant yet approachable. For your hibachi steak bowls, aim for a bowl that’s wide enough to showcase the colorful layers. Start with the fried rice as your base, then artfully arrange the sautéed vegetables and the glistening, saucy steak on top. A final drizzle of Yum Yum sauce adds a creamy, bright finish that pulls everything together visually and gastronomically. It’s a feast for the eyes before it even becomes a feast for the palate.

Here in NYC, presentation is key, and these bowls are all about vibrant colors and appealing textures. The key is to ensure each component is distinct yet harmonious. Don’t be afraid to let a little sauce from the steak drip onto the rice; that’s where the magic happens! If you want to elevate it further, consider a sprinkle of toasted sesame seeds or finely chopped green onions for a pop of freshness and visual contrast. It’s these little touches that transform a good meal into a memorable one, echoing the care I learned to put into every dish.

Pairing TypeSuggestionsWhy It Works
Side DishSteamed White or Brown Rice, or additional Fried RiceProvides a perfect neutral base to soak up all the delicious flavors.
Sauce / DipYum Yum Sauce, Teriyaki Glaze, Spicy MayoComplements the savory steak and vegetables with creaminess or a touch of heat.
BeverageCold Green Tea, Sake, or a Light LagerRefreshing palate cleansers that pair well with Asian-inspired flavors.
GarnishToasted Sesame Seeds, Sliced Green Onions, Pickled GingerAdds visual appeal, a slight crunch, and a bright, zesty contrast.

Make-Ahead, Storage & Reheating

As a busy New Yorker, meal prepping is a lifesaver! These hibachi steak bowls are perfect for making ahead. The components can be prepared separately and assembled just before serving, or you can portion them into individual containers for grab-and-go lunches throughout the week. Just ensure you cool each component completely before packing them away.

MethodContainerDurationReheating Tip
RefrigeratorAirtight containers3-4 daysGently reheat steak and vegetables in a skillet or microwave. Rice can be reheated separately. Avoid overheating steak.
FreezerFreezer-safe containers1-2 monthsThaw overnight in the refrigerator. Reheat as per refrigerator instructions. Texture of vegetables may soften slightly.
Make-AheadSeparate containers for components1-2 days in advanceReheat steak and veggies, then assemble with fresh or reheated rice. Add sauce just before serving.

When reheating, I find that the best way to maintain the steak’s texture is to warm it gently. If using a microwave, heat in short bursts, stirring occasionally, until just warmed through. For a slightly better result, especially if you have a few minutes, a quick sear in a hot skillet with a tiny bit of oil over medium-high heat will revive the steak beautifully. Remember to toss the rice separately until heated through. This technique ensures you get the best possible texture, even from leftovers.

Variations & Easy Swaps

VariationKey ChangeBest ForDifficulty Impact
Spicy KickAdd red pepper flakes or sriracha to marinade/sauceThose who love a bit of heatNo change
Veggie LoverAdd broccoli florets, snap peas, or bell peppersVegetable enthusiastsSlightly increased cook time for veggies
Protein SwapUse chicken breast, shrimp, or firm tofuAlternative protein preferencesAdjust cooking times for protein

Gluten-Free Hibachi Steak Bowls

To make this steak hibachi bowl gluten-free, ensure you use gluten-free tamari instead of soy sauce if your teriyaki sauce contains it, or use a dedicated gluten-free teriyaki sauce. Many brands are now available in US supermarkets. The mirin and other ingredients are naturally gluten-free. This modification has no significant impact on the flavor or texture, making it an easy swap for those with gluten sensitivities.

Vegetarian Hibachi Tempeh Bowls

For a delicious vegetarian option, swap the steak for firm tempeh or extra-firm tofu. Press the tempeh or tofu well to remove excess water, then cut it into bite-sized cubes. Marinate it in the same mixture as the steak for at least 30 minutes. Pan-fry until golden brown and slightly crispy, then toss with the teriyaki sauce. This substitution offers a satisfying, plant-based protein that absorbs flavors wonderfully, just like the steak.

Seasonal Vegetable Swap

Embrace the bounty of the NYC seasons by swapping the vegetables based on what’s fresh. In the spring and summer, I love adding crisp asparagus or snap peas. For an autumn twist, consider adding chunks of sweet potato or Brussels sprouts, roasted until tender before adding to the bowl. These seasonal additions bring unique flavors and textures, keeping your hibachi steak and rice bowl exciting year-round.

What cuts of steak work best for hibachi steak bowls?

For the best hibachi steak bowls, I recommend cuts that are tender and flavorful. Top sirloin is my preferred choice as it offers a great balance and cooks quickly. Ribeye is another excellent option for its richness and marbling, ensuring a super tender steak. Flank steak can also work, but be sure to slice it thinly against the grain after cooking to maximize tenderness. The key is to choose a cut that can withstand high-heat searing without becoming tough or dry.

Can I make hibachi steak bowls without a flat top grill?

Absolutely! You don’t need a specialized flat-top grill to make delicious hibachi steak bowls. A good quality wok or a large, heavy-bottomed skillet (like cast iron) works perfectly. The most important thing is to get your pan very hot before adding the ingredients, especially the steak, to achieve that desirable sear. The high heat mimics the conditions of a hibachi grill and ensures your steak cooks quickly and develops a beautiful crust.

How do I get a good sear on the steak for hibachi-style bowls?

Achieving a great sear is all about heat and technique. First, ensure your steak is patted completely dry before marinating and again before cooking. This removes surface moisture that steams the meat instead of searing it. Then, heat your pan (cast iron or stainless steel is best) until it’s smoking hot. Add a high-smoke-point oil like avocado or grapeseed oil (or the butter/sesame oil combo I use). Don’t overcrowd the pan; cook the steak in batches if necessary. Sear for just a few minutes per side until a nice brown crust forms.

What sauces go well with hibachi steak bowls?

Beyond the teriyaki or Japanese BBQ sauce used in the recipe, classic hibachi steak bowls are wonderfully complemented by a variety of sauces. My personal favorite, as mentioned, is a creamy, tangy Yum Yum sauce, which adds a delightful richness. Another popular choice is a spicy mayonnaise, easily made by whisking sriracha into mayonnaise. A simple drizzle of extra teriyaki sauce or even a garlic butter sauce can also elevate the dish beautifully. The key is a sauce that adds moisture and a burst of flavor.

Can I substitute the vegetables in this hibachi steak bowl recipe?

Absolutely! The beauty of these hibachi steak bowls is their versatility. While carrots, zucchini, and mushrooms are a classic combination, feel free to use your favorite vegetables or whatever you have on hand. Broccoli florets, bell peppers (any color), snow peas, asparagus, green beans, or even onions would be fantastic additions. Just ensure you chop them into similar-sized pieces for even cooking and adjust the sauté time as needed based on their density.

What is the purpose of mirin in the steak marinade?

Mirin is a Japanese rice wine that plays a crucial role in marinades for dishes like these hibachi steak bowls. It contributes a subtle sweetness that balances savory elements and helps to tenderize the meat, breaking down some of the protein fibers. It also adds a touch of umami, that pleasant savory depth, which enhances the overall flavor profile of the steak without being overpowering. It’s a key ingredient for achieving that authentic, slightly sweet and savory, glazed finish characteristic of hibachi-style cooking.

How do I make fried rice to go with my hibachi steak bowls?

Making fried rice is surprisingly simple and a perfect accompaniment. The trick is to use day-old, cold cooked rice, which is drier and less likely to clump. Sauté some aromatics like garlic and onion, add your desired vegetables (peas, carrots, corn are classic), then push them to the side of the pan. Add beaten eggs and scramble them, then add the cold rice. Stir-fry everything together, seasoning with soy sauce or tamari, and a touch of sesame oil. It comes together quickly and is much more satisfying than plain rice.

Can I use a different type of steak than sirloin?

Yes, absolutely! While top sirloin is my go-to for its excellent flavor and tenderness at a reasonable price point, other cuts can work well for hibachi steak bowls. Ribeye is a fantastic substitute if you want something richer and more decadent, thanks to its marbling. Flank steak is a leaner option and becomes very tender if you remember to slice it thinly against the grain after cooking. Even a tenderloin or a good quality New York strip would yield delicious results, though they tend to be more expensive.

Share Your Version!

I would absolutely love to see what you create with this hibachi steak bowl recipe! If you’ve tried it, please consider leaving a star rating and a comment below – your feedback helps me immensely. And if you’ve made this dish, snap a photo and share it on Instagram or Pinterest, tagging me @exorecipes. I’m always eager to see your delicious creations! What’s your favorite vegetable to add when you make these steak hibachi bowls?

From my NYC kitchen to yours — I hope this recipe brings as much warmth to your table as it does to mine. — mia 🧡

📌

Love This Recipe? Save It to Pinterest!

If you enjoyed this Hibachi Steak Bowls recipe, don’t let it get lost in your browser tabs! 😄 Pin it now so you can find it again anytime — and explore hundreds more tried-and-tested recipes waiting for you on my Pinterest boards.

👉 Follow mia on Pinterest @chefrecipes2

📌 Pin this recipe · 🔁 Re-pin your favorites · 💬 Tag me when you make it — I love seeing your creations!

Print

clock clock iconcutlery cutlery iconflag flag iconfolder folder iconinstagram instagram iconpinterest pinterest iconfacebook facebook iconprint print iconsquares squares iconheart heart iconheart solid heart solid icon

Hibachi Steak Bowls

  • Author: Chef Mia

Description

These Hibachi Steak Bowls are loaded with tender, flavorful pieces of sirloin, sautéed vegetables, and fried rice. If you love Benihana and Kobé Japanese steakhouses, you’ll enjoy these bowls inspired by those restaurants! This recipe is wildly easy and perfect for a delicious weeknight-friendly dinner or meal prepping!


Ingredients

Scale
  • 2 lbs top sirloin steak, cut into rough chunks
  • 1 tablespoon mirin
  • 6 cloves of garlic, finely minced or pressed
  • 2 teaspoons ginger paste
  • 2 tablespoons plus 1 teaspoon sesame oil, divided
  • ½ teaspoon ground white pepper (or black pepper)
  • Kosher salt, to taste
  • 4 tablespoons unsalted butter, divided
  • 3 medium carrots, thinly cut on a bias
  • 2 medium zucchinis, sliced in half lengthwise & then cut into half moons
  • 45 ounces sliced mushrooms (I use baby bella)
  • ½ teaspoon garlic powder
  • 12 tablespoons teriyaki sauce or Japanese BBQ Sauce (we love Bachans!)
  • For serving: Fried rice & store-bought Yum Yum Sauce

Instructions

  1. Place the sirloin into a large bowl (or inside a large plastic baggie). Add the mirin, garlic, ginger, 1 teaspoon sesame oil, white pepper (or black pepper), and salt-to taste. Toss all ingredients to fully combine, ensuring steak chunks are thoroughly coated. Then set the steak aside to marinate for at least 30 minutes.
  2. In a wok or large skillet, heat 2 tablespoons of butter and 1 tablespoon of sesame oil over medium heat. When hot, add the carrots, zucchini, and mushrooms. Cook the veggies, tossing often, until tender and golden brown, about 10-15 minutes. Season the veggies with garlic powder and salt/pepper- to taste. Then transfer the sautéed veggies to a clean plate and set aside. If needed, carefully wipe the pan clean with a damp paper towel.
  3. In the same pan, add remaining 2 tablespoons butter and 1 tablespoon sesame oil over medium-high heat. When hot, add the steak. Cook, tossing beef often, until nicely seared, about 3-4 minutes- careful not to overcook steak into toughness. Then remove from heat, and drizzle in the teriyaki sauce or Japanese BBQ sauce, toss well to coat steak in sauce until chunks are glistening.
  4. Evenly divide the cooked steak and sautéed veggies into shallow bowls, along with fried rice. Finish off bowls with a drizzle of store-bought Yum Yum sauce (or feel free to serve it on the side) to complete these hibachi steak bowls. Enjoy!


Hibachi Steak Bowls

ph">For more delicious inspiration, follow me on Pinterest!