“`html
Table of Contents
- Introduction: The Ultimate Seafood Comfort
- Ingredients for the Creamy Seafood Filling
- Prepare Your Perfect Bread Bowls
- The Timing of Your Culinary Masterpiece
- Step-by-Step Instructions to Seafood Bread Bowl Perfection
- Nutritional Highlights
- Healthier Alternatives Without Sacrificing Flavor
- Serving Suggestions: Elevate Your Dish
- Common Mistakes to Avoid
- Storing Your Seafood Bread Bowl Masterpiece
- Conclusion: A Seafood Dream Come True
- Frequently Asked Questions About Stuffed Seafood Bread Bowls
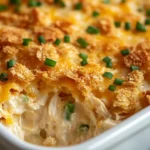
Stuffed Seafood Bread Bowl: A Delicious Treat
Introduction: The Ultimate Seafood Comfort
Are you searching for a dish that perfectly blends comforting textures with rich, oceanic flavors? In a world of quick meals, how often do we crave something truly special, a centerpiece that warms the soul and tantalizes the taste buds? This Stuffed Seafood Bread Bowl recipe is that answer. Imagine a hollowed-out, crusty bread bowl, toasted to golden perfection, acting as the edible vessel for a luxuriously creamy, decadent seafood filling. It’s more than just a meal; it’s an experience. Whether you’re planning a cozy night in or hosting a gathering of loved ones, this dish promises to be a showstopper, a true testament to the joys of comfort food elevated with the finest seafood. Get ready to embark on a culinary journey that seafood lovers will adore.
Ingredients for the Creamy Seafood Filling
Crafting this delightful seafood bread bowl requires a medley of fresh ingredients that sing together. The key is to use quality seafood and build layers of flavor.
- For the Bread Bowls:
- 4 large, round loaves of crusty artisan bread (like sourdough or ciabatta), about 6-8 inches in diameter. These will form the sturdy, edible containers for our delicious filling.
- For the Creamy Seafood Filling:
- 1 lb mixed seafood (shrimp, crab meat, scallops, flaky white fish like cod or haddock), chopped into bite-sized pieces. Choose a mix that offers varied textures and flavors. Substitution: Use all shrimp, or a blend of canned crab and canned tuna for a more budget-friendly and quicker option.
- 2 tablespoons unsalted butter. The foundation for our sauté and sauce, adding a rich, velvety base.
- 1 medium yellow onion, finely diced. Provides a sweet, aromatic foundation.
- 2 cloves garlic, minced. Infuses a pungent, savory depth.
- 1 red bell pepper, finely diced. Adds a touch of sweetness and a vibrant pop of color.
- 4 ounces cremini mushrooms, sliced. For an earthy, umami richness.
- 1/4 cup all-purpose flour. The thickening agent for our luscious sauce.
- 1 ½ cups milk (whole milk recommended for creaminess). The liquid base of our sauce. Substitution: Use half-and-half for an even richer sauce, or non-dairy milk like unsweetened cashew or soy milk for a dairy-free option, though texture may vary.
- 1/2 cup heavy cream (optional, for extra richness). Adds a decadent, velvety finish.
- 1/4 cup dry white wine (like Sauvignon Blanc or Pinot Grigio). Lends a subtle acidity to cut through the richness. Substitution: Use chicken or vegetable broth, or even a splash of lemon juice for a similar brightness.
- 1 tablespoon fresh lemon juice. Brightens all the flavors.
- 2 tablespoons chopped fresh parsley. For a burst of fresh, herbaceous flavor and a lovely green garnish.
- 1 teaspoon Old Bay seasoning (or your favorite seafood blend). Essential for that quintessential seafood taste.
- Salt and freshly ground black pepper, to taste. To enhance and balance all the flavors.
- 1/4 cup shredded cheddar or Gruyere cheese (optional, for topping). Adds a beautiful golden crust and extra gooeyness.
Prepare Your Perfect Bread Bowls
The bread bowl itself is a crucial component, providing both structure and a delightful chewy-crisp texture.
- Using a sharp serrated knife, carefully slice off the top 1 to 1.5 inches of each bread loaf, creating a lid.
- Gently hollow out the inside of each bread bowl, leaving about a 1/2 to 1-inch thick wall to hold the filling. You can repurpose the bread removed from the inside (cubed and toasted) for dipping or as croutons.
- Lightly brush the inside of the hollowed bread bowls with a little olive oil or melted butter.
- Place the hollowed bread bowls and their tops on a baking sheet. Bake in a preheated oven at 350°F (175°C) for 10-15 minutes, or until lightly golden and toasted. This step prevents the bread from becoming soggy.

The Timing of Your Culinary Masterpiece
Precision in timing ensures a perfectly cooked and assembled dish. This recipe is designed for efficiency without sacrificing quality.
Our Stuffed Seafood Bread Bowl comes together slightly faster than the average similar recipe, thanks to efficient prep and a straightforward cooking process.
Step-by-Step Instructions to Seafood Bread Bowl Perfection
Step 1: Prep Your Seafood
If using whole shrimp, peel and devein them. Cut any larger pieces of fish or scallops into bite-sized portions, roughly 1-inch pieces. Ensure all your seafood is ready to go before you start sautéing.
Step 2: Sauté the Aromatics
In a large skillet or pot over medium heat, melt the butter. Add the diced onion and sauté until softened and translucent, about 5-7 minutes. Stir in the minced garlic and cook for another minute until fragrant, being careful not to burn it. Add the diced red bell pepper and sliced mushrooms, and cook until they are tender-crisp and the mushrooms have released their moisture, about 5-7 minutes.
Step 3: Create the Creamy Sauce
Sprinkle the flour over the sautéed vegetables and stir well to coat. Cook for 1-2 minutes, stirring constantly, to cook out the raw flour taste. Gradually whisk in the milk, ensuring no lumps form. Bring the mixture to a gentle simmer, stirring occasionally, until it begins to thicken. Stir in the heavy cream (if using) and white wine (or broth). Let it simmer gently for another 5 minutes until the sauce is creamy and has reached your desired consistency.
Step 4: Combine and Heat
Gently fold in all the prepared seafood (shrimp, crab, scallops, fish). Stir in the lemon juice, chopped parsley, and Old Bay seasoning. Cook, stirring gently, for about 5-8 minutes, or just until the seafood is cooked through and opaque. Be careful not to overcook the seafood, as it can become tough. Season with salt and freshly ground black pepper to taste. The consistency should be thick and creamy, coating the seafood generously.
Step 5: Stuff and Bake
Spoon the creamy seafood mixture generously into the hollowed-out, pre-toasted bread bowls. Fill them right to the brim, and even mound some on top. If desired, sprinkle with shredded cheese. Place the stuffed bread bowls back on the baking sheet. Bake in the preheated oven at 350°F (175°C) for 15-20 minutes, or until the filling is hot and bubbly and the cheese is melted and golden brown.
Nutritional Highlights
While exact nutritional values vary based on ingredients and portion sizes, this dish is typically rich in protein, with a good contribution of carbohydrates from the bread. It also offers vitamins and minerals from the vegetables and seafood.
- Protein: High, from various seafood sources.
- Carbohydrates: Moderate to High, primarily from the bread bowl.
- Fat: Moderate, from butter, cream, and potentially cheese.
- Vitamins & Minerals: Good source of B vitamins, Omega-3 fatty acids (from fish), Vitamin C, and fiber (from vegetables and whole-grain bread if used).
Healthier Alternatives Without Sacrificing Flavor
You can lighten up this indulgent dish without sacrificing its comforting appeal:
- Bread Bowl: Opt for whole wheat artisan loaves for added fiber, or use smaller rolls for portion control. Consider serving the filling over rice or quinoa for a gluten-free option.
- Creaminess: Use low-fat milk and reduce or omit the heavy cream. Greek yogurt or a light béchamel sauce can also be used for thickening, offering a tangier profile.
- Fat Content: Reduce the amount of butter used by sautéing vegetables in a little broth or water.
- Sodium: Use low-sodium broth and control the salt added at the end.
Serving Suggestions: Elevate Your Dish
This Stuffed Seafood Bread Bowl is a meal in itself, but here are a few ideas to complement it:
- Side Salads: A crisp green salad with a light vinaigrette or a simple coleslaw provides a refreshing contrast.
- Vegetables: Steamed green beans, asparagus, or roasted broccoli offer a healthy and colorful addition.
- Dipping: Serve with extra bread (from the removed insides) for dipping into any extra creamy sauce.
- Garnish: A final sprinkle of fresh parsley or a squeeze of lemon juice enhances the presentation and flavor.
Common Mistakes to Avoid
Steer clear of these pitfalls for the best results:
- Overcooking Seafood: This is the most common mistake. Cook seafood just until it’s opaque and firm, not rubbery. It will continue to cook slightly in the sauce and oven.
- Soggy Bread Bowls: Failing to toast the bread bowls adequately before filling.
- Underspicing: Seafood can be delicate; ensure you season generously with salt, pepper, and your chosen seasonings.
- Too Thin or Too Thick Sauce: Adjust milk or cream as needed to achieve a hearty, coating consistency.
Storing Your Seafood Bread Bowl Masterpiece
Leftovers can be stored, but are best enjoyed fresh. If you have any remaining:
- Refrigerate: Store any remaining stuffed bread bowls in an airtight container in the refrigerator for up to 1-2 days. The bread might soften considerably upon storage.
- Reheating: Reheat gently in a 300°F (150°C) oven until warmed through. Avoid microwaving, as it can make the bread tough and the filling unevenly heated. If the bread becomes too soft, you can scoop out the filling and reheat it separately. For best results, consider serving the filling in fresh bread bowls if reheating a large batch.
Conclusion: A Seafood Dream Come True
This Stuffed Seafood Bread Bowl recipe is an absolute triumph for any seafood enthusiast. It’s a dish that feels both rustic and elegant, perfect for a special occasion or simply when you crave something extraordinarily delicious. The combination of creamy, flavorful seafood nestled within a warm, crusty bread bowl is incredibly satisfying. We encourage you to try this recipe and experience the ultimate comfort food. Gather your ingredients, invite your friends, and prepare to be amazed by this culinary delight!
Frequently Asked Questions About Stuffed Seafood Bread Bowls
***Can I use pre-cooked seafood?***
Yes, you can, but be very careful not to overcook it when adding it to the sauce. Pre-cooked shrimp or crab meat can be added towards the very end of the cooking time, just to warm through.
***What kind of bread is best for bread bowls?***
Crusty artisan breads work best. Sourdough, ciabatta, and French boules are excellent choices because they have a sturdy crust and a chewy interior that holds up well to the filling.
***Can I make the filling ahead of time?***
The filling can be prepared a few hours in advance and refrigerated. However, it’s best to assemble and bake the bread bowls just before serving to ensure the bread is crisp and the filling is perfectly heated.
***My filling seems too thick/thin. What should I do?***
If too thick, gradually whisk in a little more milk or cream until it reaches your desired consistency. If too thin, let it simmer uncovered for a few more minutes to reduce and thicken. A teaspoon of cornstarch mixed with a tablespoon of cold water (a slurry) can also be stirred in and simmered to thicken quickly.
***Can this be made vegetarian?***
Absolutely! Omit the seafood and add more vegetables like broccoli, peas, corn, spinach, or even hearty mushrooms and artichoke hearts. You might also consider adding some diced firm tofu or cooked white beans for added protein and texture.
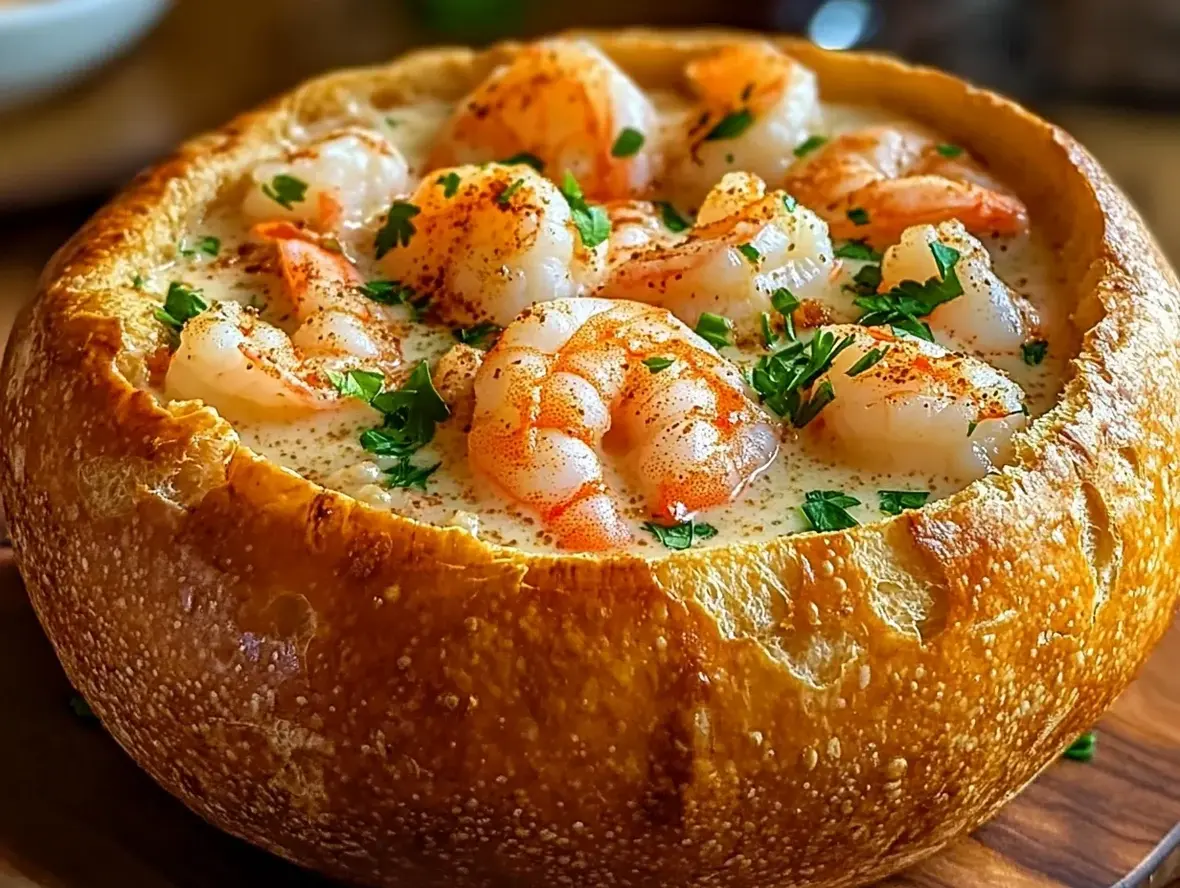
Stuffed Seafood Soup Bread Bowl
Description
A decadent and hearty dish, this creamy seafood soup served in a toasted bread bowl is the ultimate comfort food. With tender shrimp, crab meat, and white fish, this recipe is perfect for a special dinner or a cozy night in.
Ingredients
- 2 tablespoonsbutter1medium onion, diced3cloves garlic, minced1red bell pepper, diced1celery stalk, chopped1/4 cupall-purpose flour4 cupsseafood stock (or chicken stock)1 cupheavy cream or half-and-half1/2pound shrimp, peeled and deveined1/2pound lump crab meat1/2pound white fish fillet (e.g., cod, halibut), diced1 teaspoonOld Bay seasoning1/2 teaspoonsmoked paprikaSalt and black pepper, to taste1/4 cupfresh parsley, choppedOptional: A squeeze of fresh lemon juice
- 1medium onion, diced3cloves garlic, minced1red bell pepper, diced1celery stalk, chopped1/4 cupall-purpose flour4 cupsseafood stock (or chicken stock)1 cupheavy cream or half-and-half1/2pound shrimp, peeled and deveined1/2pound lump crab meat1/2pound white fish fillet (e.g., cod, halibut), diced1 teaspoonOld Bay seasoning1/2 teaspoonsmoked paprikaSalt and black pepper, to taste1/4 cupfresh parsley, choppedOptional: A squeeze of fresh lemon juice
- 3cloves garlic, minced1red bell pepper, diced1celery stalk, chopped1/4 cupall-purpose flour4 cupsseafood stock (or chicken stock)1 cupheavy cream or half-and-half1/2pound shrimp, peeled and deveined1/2pound lump crab meat1/2pound white fish fillet (e.g., cod, halibut), diced1 teaspoonOld Bay seasoning1/2 teaspoonsmoked paprikaSalt and black pepper, to taste1/4 cupfresh parsley, choppedOptional: A squeeze of fresh lemon juice
- 1red bell pepper, diced1celery stalk, chopped1/4 cupall-purpose flour4 cupsseafood stock (or chicken stock)1 cupheavy cream or half-and-half1/2pound shrimp, peeled and deveined1/2pound lump crab meat1/2pound white fish fillet (e.g., cod, halibut), diced1 teaspoonOld Bay seasoning1/2 teaspoonsmoked paprikaSalt and black pepper, to taste1/4 cupfresh parsley, choppedOptional: A squeeze of fresh lemon juice
- 1celery stalk, chopped1/4 cupall-purpose flour4 cupsseafood stock (or chicken stock)1 cupheavy cream or half-and-half1/2pound shrimp, peeled and deveined1/2pound lump crab meat1/2pound white fish fillet (e.g., cod, halibut), diced1 teaspoonOld Bay seasoning1/2 teaspoonsmoked paprikaSalt and black pepper, to taste1/4 cupfresh parsley, choppedOptional: A squeeze of fresh lemon juice
- 1/4 cupall-purpose flour4 cupsseafood stock (or chicken stock)1 cupheavy cream or half-and-half1/2pound shrimp, peeled and deveined1/2pound lump crab meat1/2pound white fish fillet (e.g., cod, halibut), diced1 teaspoonOld Bay seasoning1/2 teaspoonsmoked paprikaSalt and black pepper, to taste1/4 cupfresh parsley, choppedOptional: A squeeze of fresh lemon juice
- 4 cupsseafood stock (or chicken stock)1 cupheavy cream or half-and-half1/2pound shrimp, peeled and deveined1/2pound lump crab meat1/2pound white fish fillet (e.g., cod, halibut), diced1 teaspoonOld Bay seasoning1/2 teaspoonsmoked paprikaSalt and black pepper, to taste1/4 cupfresh parsley, choppedOptional: A squeeze of fresh lemon juice
- 1 cupheavy cream or half-and-half1/2pound shrimp, peeled and deveined1/2pound lump crab meat1/2pound white fish fillet (e.g., cod, halibut), diced1 teaspoonOld Bay seasoning1/2 teaspoonsmoked paprikaSalt and black pepper, to taste1/4 cupfresh parsley, choppedOptional: A squeeze of fresh lemon juice
- 1/2pound shrimp, peeled and deveined1/2pound lump crab meat1/2pound white fish fillet (e.g., cod, halibut), diced1 teaspoonOld Bay seasoning1/2 teaspoonsmoked paprikaSalt and black pepper, to taste1/4 cupfresh parsley, choppedOptional: A squeeze of fresh lemon juice
- 1/2pound lump crab meat1/2pound white fish fillet (e.g., cod, halibut), diced1 teaspoonOld Bay seasoning1/2 teaspoonsmoked paprikaSalt and black pepper, to taste1/4 cupfresh parsley, choppedOptional: A squeeze of fresh lemon juice
- 1/2pound white fish fillet (e.g., cod, halibut), diced1 teaspoonOld Bay seasoning1/2 teaspoonsmoked paprikaSalt and black pepper, to taste1/4 cupfresh parsley, choppedOptional: A squeeze of fresh lemon juice
- 1 teaspoonOld Bay seasoning1/2 teaspoonsmoked paprikaSalt and black pepper, to taste1/4 cupfresh parsley, choppedOptional: A squeeze of fresh lemon juice
- 1/2 teaspoonsmoked paprikaSalt and black pepper, to taste1/4 cupfresh parsley, choppedOptional: A squeeze of fresh lemon juice
- Salt and black pepper, to taste1/4 cupfresh parsley, choppedOptional: A squeeze of fresh lemon juice
- 1/4 cupfresh parsley, choppedOptional: A squeeze of fresh lemon juice
- Optional: A squeeze of fresh lemon juice
- 4large round bread rolls (e.g., sourdough or ciabatta)2 tablespoonsolive oil or melted butter
- 2 tablespoonsolive oil or melted butter
Instructions
- Preheat your oven to375°F (190°C).
- Cut the tops off the bread rolls and hollow out the insides to create bowls. Set aside the tops and reserved bread pieces for another use, such as croutons.Brush the inside and edges of the bread bowls with olive oil or melted butter.Place the bread bowls on a baking sheet and bake for8–10 minutes, or until lightly toasted and crisp. Set aside.2️⃣ Cook the Seafood SoupIn a large pot, melt the butter over medium heat. Add the diced onion, garlic, red bell pepper, and celery. Sauté for5–7 minutes, or until the vegetables are softened.Stir in the flour and cook for1–2 minutesto form a roux, stirring constantly to prevent burning.Gradually whisk in the seafood stock. Bring the mixture to a simmer and cook for5 minutesto allow the soup to thicken slightly.Stir in the heavy cream, Old Bay seasoning, smoked paprika, salt, and black pepper. Mix until fully incorporated.Gently add the shrimp, crab meat, and white fish to the soup. Simmer for5–7 minutes, or until the seafood is cooked through and tender. Be careful not to overcook the seafood.Taste and adjust the seasoning as needed. Stir in the fresh parsley and a squeeze of lemon juice for brightness, if desired.3️⃣ Assemble the Bread BowlsLadle the hot seafood soup into the toasted bread bowls.Garnish with additional parsley or a sprinkle of Old Bay seasoning for extra flavor.4️⃣ Serve and EnjoyServe immediately, with the tops of the bread rolls on the side for dipping. Enjoy the creamy soup and edible bread bowl together for a comforting and satisfying meal.
- Brush the inside and edges of the bread bowls with olive oil or melted butter.Place the bread bowls on a baking sheet and bake for8–10 minutes, or until lightly toasted and crisp. Set aside.2️⃣ Cook the Seafood SoupIn a large pot, melt the butter over medium heat. Add the diced onion, garlic, red bell pepper, and celery. Sauté for5–7 minutes, or until the vegetables are softened.Stir in the flour and cook for1–2 minutesto form a roux, stirring constantly to prevent burning.Gradually whisk in the seafood stock. Bring the mixture to a simmer and cook for5 minutesto allow the soup to thicken slightly.Stir in the heavy cream, Old Bay seasoning, smoked paprika, salt, and black pepper. Mix until fully incorporated.Gently add the shrimp, crab meat, and white fish to the soup. Simmer for5–7 minutes, or until the seafood is cooked through and tender. Be careful not to overcook the seafood.Taste and adjust the seasoning as needed. Stir in the fresh parsley and a squeeze of lemon juice for brightness, if desired.3️⃣ Assemble the Bread BowlsLadle the hot seafood soup into the toasted bread bowls.Garnish with additional parsley or a sprinkle of Old Bay seasoning for extra flavor.4️⃣ Serve and EnjoyServe immediately, with the tops of the bread rolls on the side for dipping. Enjoy the creamy soup and edible bread bowl together for a comforting and satisfying meal.
- Place the bread bowls on a baking sheet and bake for8–10 minutes, or until lightly toasted and crisp. Set aside.
- In a large pot, melt the butter over medium heat. Add the diced onion, garlic, red bell pepper, and celery. Sauté for5–7 minutes, or until the vegetables are softened.Stir in the flour and cook for1–2 minutesto form a roux, stirring constantly to prevent burning.Gradually whisk in the seafood stock. Bring the mixture to a simmer and cook for5 minutesto allow the soup to thicken slightly.Stir in the heavy cream, Old Bay seasoning, smoked paprika, salt, and black pepper. Mix until fully incorporated.Gently add the shrimp, crab meat, and white fish to the soup. Simmer for5–7 minutes, or until the seafood is cooked through and tender. Be careful not to overcook the seafood.Taste and adjust the seasoning as needed. Stir in the fresh parsley and a squeeze of lemon juice for brightness, if desired.3️⃣ Assemble the Bread BowlsLadle the hot seafood soup into the toasted bread bowls.Garnish with additional parsley or a sprinkle of Old Bay seasoning for extra flavor.4️⃣ Serve and EnjoyServe immediately, with the tops of the bread rolls on the side for dipping. Enjoy the creamy soup and edible bread bowl together for a comforting and satisfying meal.
- Stir in the flour and cook for1–2 minutesto form a roux, stirring constantly to prevent burning.
- Gradually whisk in the seafood stock. Bring the mixture to a simmer and cook for5 minutesto allow the soup to thicken slightly.Stir in the heavy cream, Old Bay seasoning, smoked paprika, salt, and black pepper. Mix until fully incorporated.Gently add the shrimp, crab meat, and white fish to the soup. Simmer for5–7 minutes, or until the seafood is cooked through and tender. Be careful not to overcook the seafood.Taste and adjust the seasoning as needed. Stir in the fresh parsley and a squeeze of lemon juice for brightness, if desired.3️⃣ Assemble the Bread BowlsLadle the hot seafood soup into the toasted bread bowls.Garnish with additional parsley or a sprinkle of Old Bay seasoning for extra flavor.4️⃣ Serve and EnjoyServe immediately, with the tops of the bread rolls on the side for dipping. Enjoy the creamy soup and edible bread bowl together for a comforting and satisfying meal.
- Stir in the heavy cream, Old Bay seasoning, smoked paprika, salt, and black pepper. Mix until fully incorporated.Gently add the shrimp, crab meat, and white fish to the soup. Simmer for5–7 minutes, or until the seafood is cooked through and tender. Be careful not to overcook the seafood.Taste and adjust the seasoning as needed. Stir in the fresh parsley and a squeeze of lemon juice for brightness, if desired.3️⃣ Assemble the Bread BowlsLadle the hot seafood soup into the toasted bread bowls.Garnish with additional parsley or a sprinkle of Old Bay seasoning for extra flavor.4️⃣ Serve and EnjoyServe immediately, with the tops of the bread rolls on the side for dipping. Enjoy the creamy soup and edible bread bowl together for a comforting and satisfying meal.
- Gently add the shrimp, crab meat, and white fish to the soup. Simmer for5–7 minutes, or until the seafood is cooked through and tender. Be careful not to overcook the seafood.
- Taste and adjust the seasoning as needed. Stir in the fresh parsley and a squeeze of lemon juice for brightness, if desired.3️⃣ Assemble the Bread BowlsLadle the hot seafood soup into the toasted bread bowls.Garnish with additional parsley or a sprinkle of Old Bay seasoning for extra flavor.4️⃣ Serve and EnjoyServe immediately, with the tops of the bread rolls on the side for dipping. Enjoy the creamy soup and edible bread bowl together for a comforting and satisfying meal.
- Ladle the hot seafood soup into the toasted bread bowls.
- Garnish with additional parsley or a sprinkle of Old Bay seasoning for extra flavor.4️⃣ Serve and EnjoyServe immediately, with the tops of the bread rolls on the side for dipping. Enjoy the creamy soup and edible bread bowl together for a comforting and satisfying meal.
- Serve immediately, with the tops of the bread rolls on the side for dipping. Enjoy the creamy soup and edible bread bowl together for a comforting and satisfying meal.
Notes
Seafood options: Feel free to swap the seafood for scallops, clams, or other shellfish based on your preference.Stock substitution: If seafood stock isn’t available, chicken stock with a splash of clam juice works well.Make-ahead: Prepare the soup in advance and reheat gently before serving in the bread bowls.Leftovers: Store leftover soup in an airtight container in the refrigerator for up to2 days. Reheat gently to avoid overcooking the seafood.
Stock substitution: If seafood stock isn’t available, chicken stock with a splash of clam juice works well.Make-ahead: Prepare the soup in advance and reheat gently before serving in the bread bowls.Leftovers: Store leftover soup in an airtight container in the refrigerator for up to2 days. Reheat gently to avoid overcooking the seafood.
Make-ahead: Prepare the soup in advance and reheat gently before serving in the bread bowls.Leftovers: Store leftover soup in an airtight container in the refrigerator for up to2 days. Reheat gently to avoid overcooking the seafood.
Leftovers: Store leftover soup in an airtight container in the refrigerator for up to2 days. Reheat gently to avoid overcooking the seafood.
“`