Best Butter Pecan Praline Poke Cake Recipe

best-butter-pecan-praline-cake

Introduction

Is there anything more comforting than the warm, buttery aroma of toasted pecans filling your kitchen? That feeling of pure, nostalgic bliss is exactly what you get with every single bite of this incredible Butter Pecan Praline Poke Cake. This dessert is a true showstopper, and it masterfully combines rich, decadent flavors with an almost magically easy preparation process. You are going to adore how the sweet praline sauce soaks into the tender cake, creating an unbelievably moist and flavorful treat that will have everyone begging for the recipe.

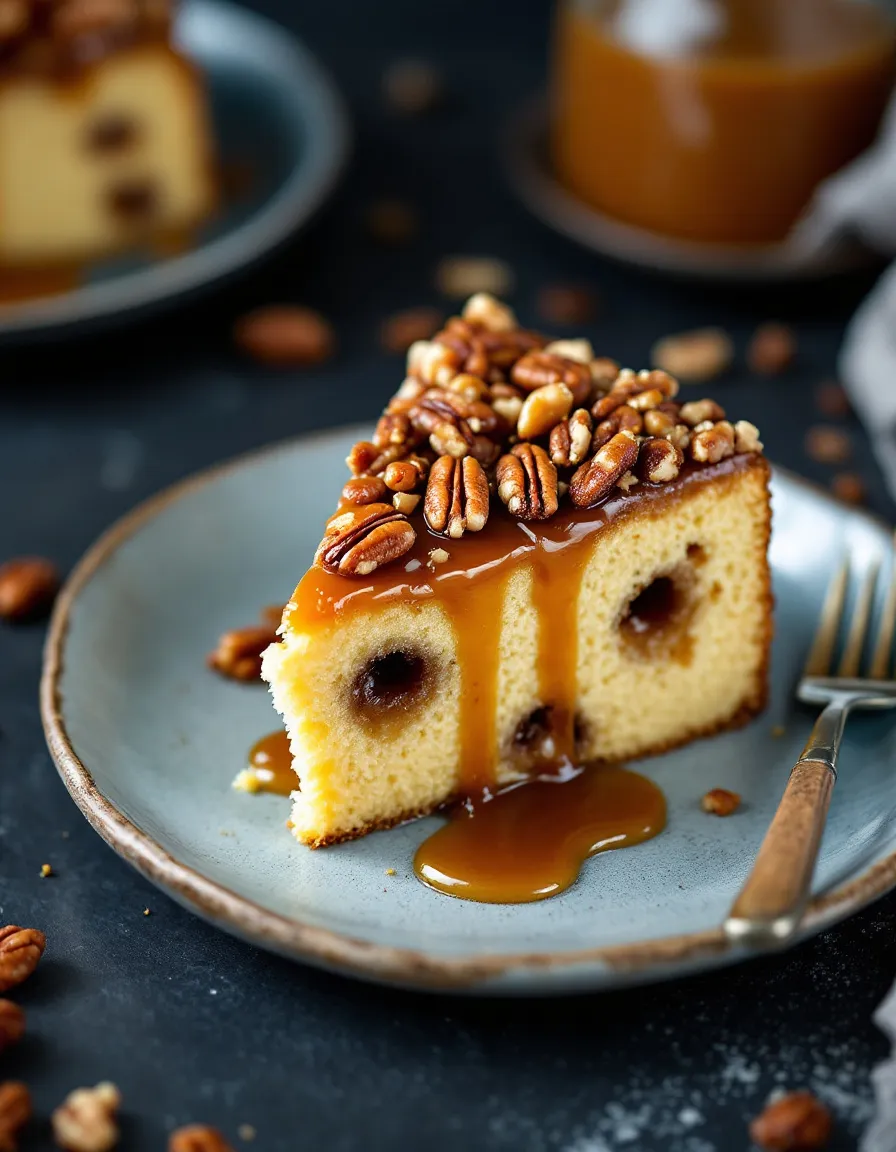
Butter Pecan Praline Poke Cake is a spectacular Southern-inspired dessert that starts with a simple butter pecan cake base. After baking, you poke holes all over the warm cake, which then acts like a sponge to absorb a luxurious homemade butter pecan praline sauce. The final crowning glory is a layer of fluffy whipped cream cheese frosting and a generous sprinkle of crunchy pecans. This cake is significant because it delivers a complex, bakery-quality taste and texture without any of the fuss. It perfectly aligns with my mission to share decadent, crowd-pleasing desserts that are surprisingly simple to make. If you are a fan of easy cakes with amazing texture, you must also try my recipe for Easy Homemade Baklava, as it offers a similarly satisfying contrast of crunchy and sweet. Furthermore, the poke cake method is a fantastic technique for ensuring every slice is bursting with moisture and flavor, much like the approach used in my favorite Creamy Coconut Cake.

Why I Love This Recipe

I absolutely love this Butter Pecan Praline Poke Cake because it instantly transports me back to my grandmother’s house during the holidays. She always had a similar nutty, buttery cake on her counter, and the smell was pure heaven. This recipe captures that same soul-warming essence, yet it is so straightforward that I can whip it up for a weeknight treat without any stress. The joy on my family’s faces when I bring this cake to the table is everything, and it truly proves that the best recipes are the ones that create lasting memories.

Health and Nutrition

Why it’s good for your body

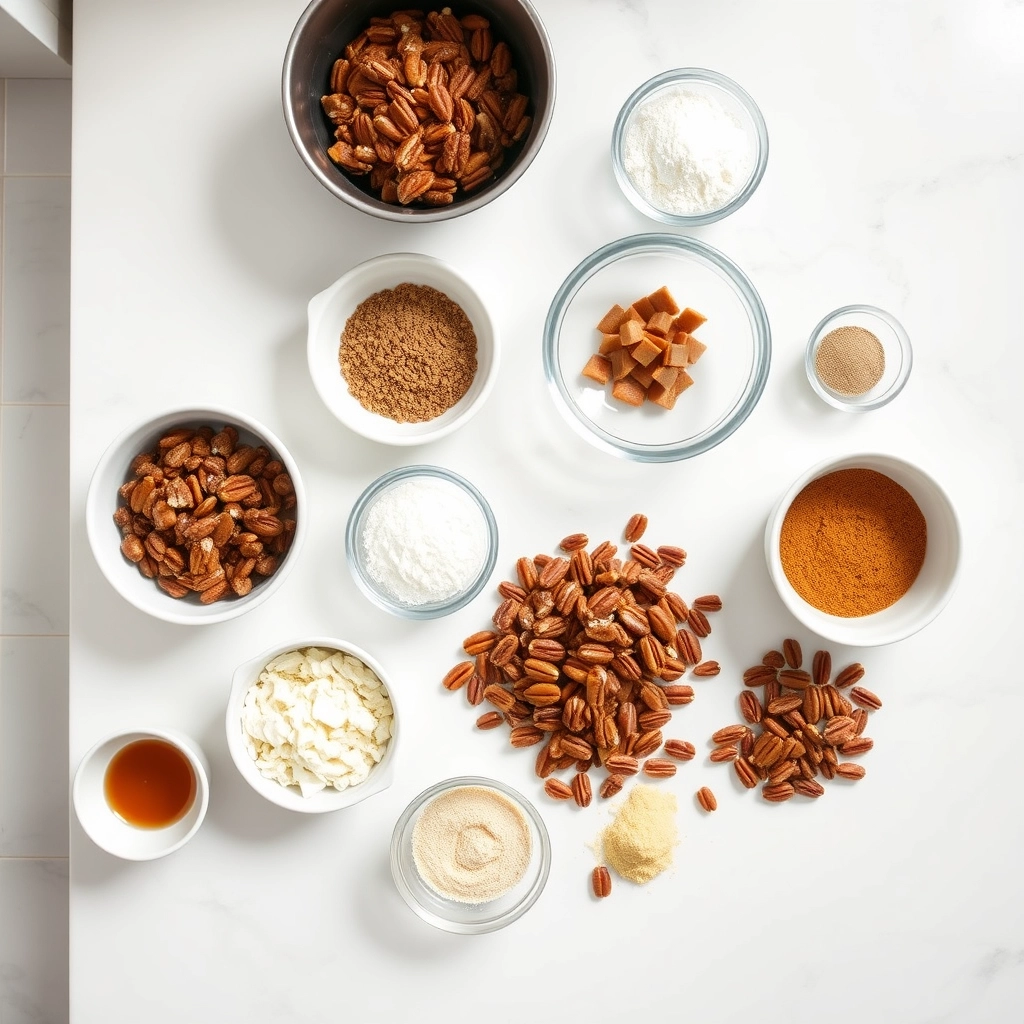
Butter Pecan Praline Poke Cake delivers genuine nutritional benefits alongside its rich flavor. Pecans serve as a true superfood because they pack heart-healthy monounsaturated fats. These good fats actively combat bad cholesterol while promoting cardiovascular wellness. Furthermore, pecans supply essential minerals like manganese and zinc, so they boost metabolism and immune function effectively.

Although it is a dessert, this cake provides a quick energy source from its carbohydrates. That makes Butter Pecan Praline Poke Cake ideal for a post-workout treat or a midday energy lift. The eggs and dairy in the recipe also contribute high-quality protein and calcium, because they support muscle repair and bone strength directly. Even though it feels indulgent, you get real nutritional value from each slice of Butter Pecan Praline Poke Cake.

How it fits in a healthy lifestyle

This cake fits perfectly into a balanced diet when enjoyed in moderation. View it as a celebratory food rather than a daily staple, so you can enjoy it without guilt. For specific dietary needs, you can easily adapt the Butter Pecan Praline Poke Cake recipe. Use a gluten-free flour blend for a celiac-friendly version, or try sugar alternatives to reduce carbs.

Pair a small slice with a protein source like Greek yogurt or a glass of milk to balance blood sugar and enhance fullness. This strategy supports practical eating habits that mix pleasure and nutrition seamlessly. A healthy lifestyle always includes room for treats that bring joy. For more ideas on incorporating desserts into a balanced routine, check out our tips for building a healthy weekly meal plan.

How to Prepare This Dish

Steps and time-saving tips

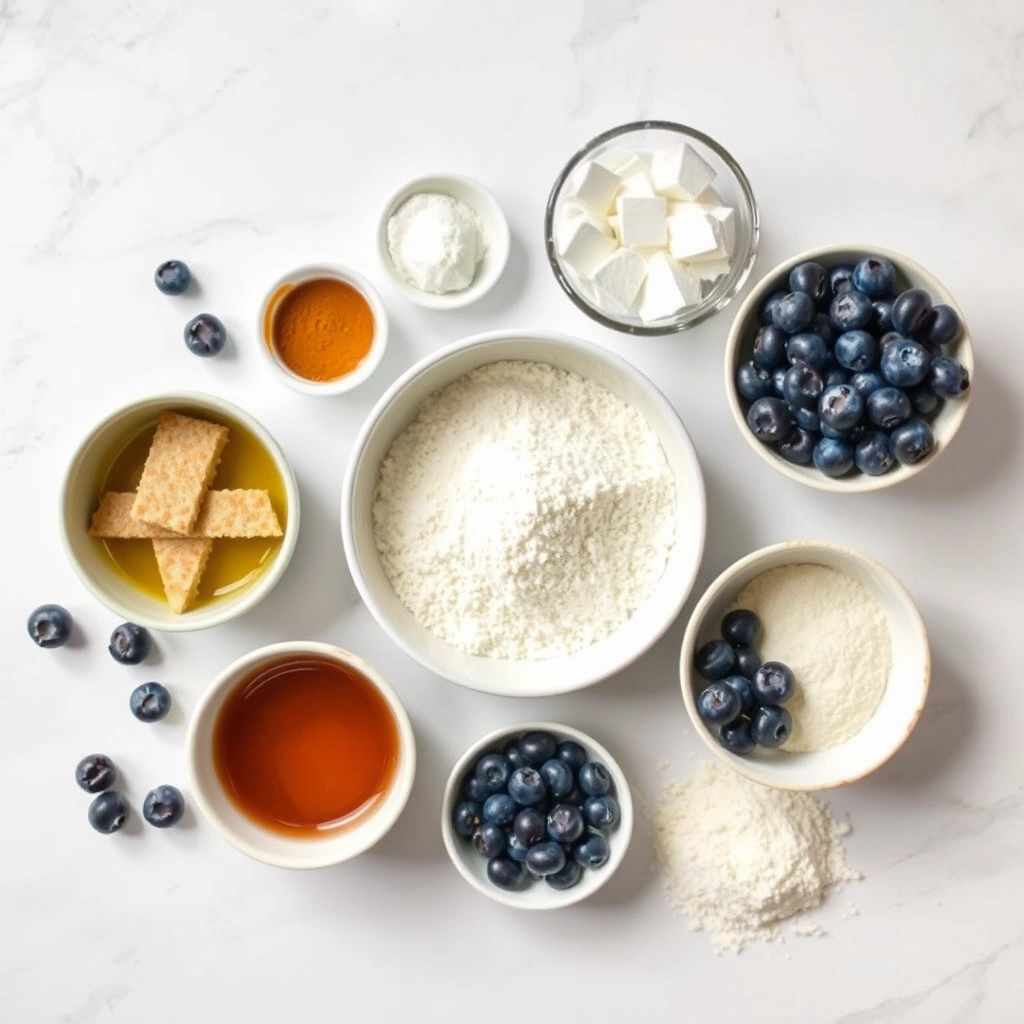
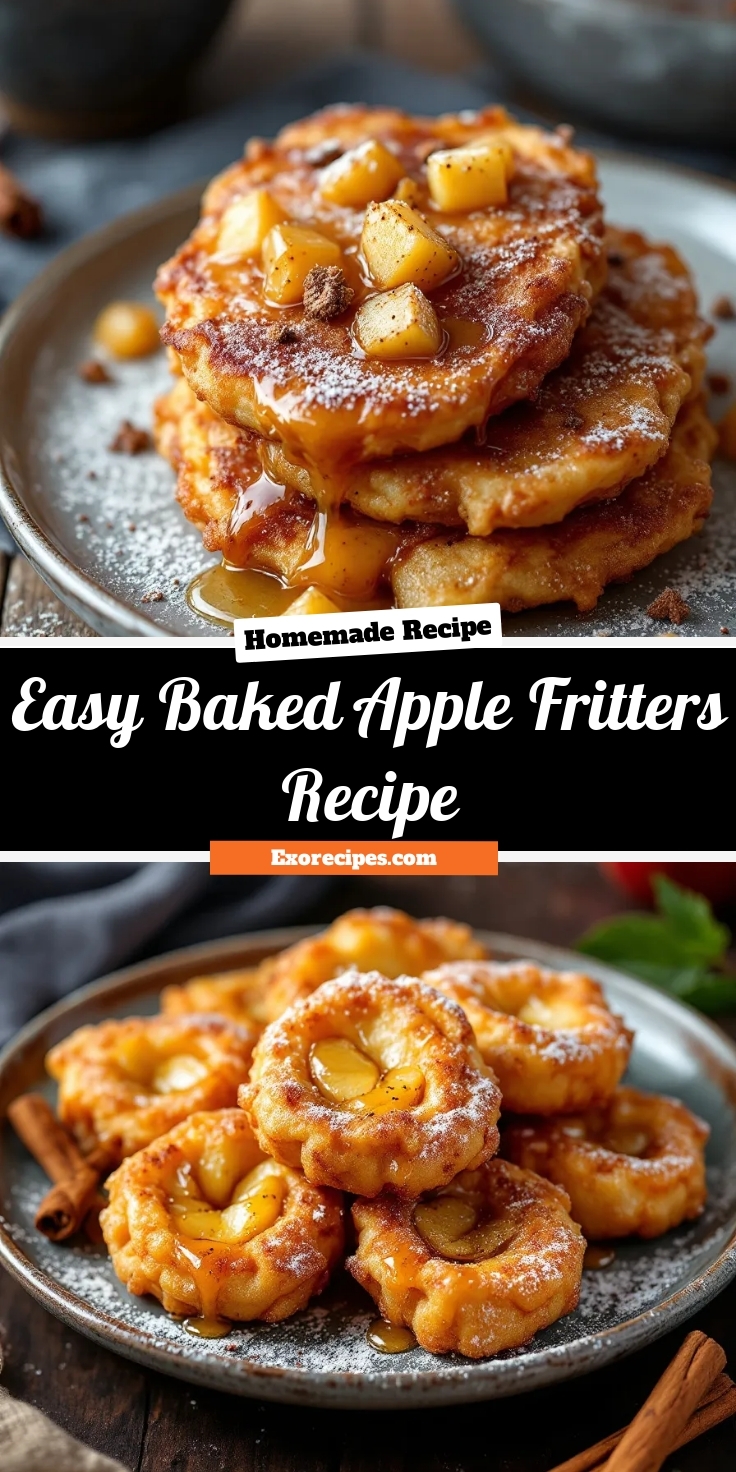
First, preheat your oven and generously grease your baking pan. Next, combine your cake mix, water, oil, and eggs in a large bowl. Then, use an electric mixer on medium speed for two minutes until the batter is perfectly smooth. Meanwhile, pour the batter into your prepared pan and immediately place it in the center of the oven. While the cake bakes, you can quickly prepare the sweetened condensed milk and caramel sauce mixture for the filling. As soon as the cake comes out of the oven, use the handle of a wooden spoon to poke holes all over the top. Subsequently, slowly pour your caramel mixture over the warm cake, allowing it to seep deep into every hole. After that, let the cake cool completely on a wire rack. Finally, spread your homemade buttercream frosting over the top and generously sprinkle on the chopped pecans. For the best texture and flavor, however, you must chill the entire Butter Pecan Praline Poke Cake for at least two hours before serving. This crucial step allows all the incredible flavors to meld together beautifully.

Mistakes I’ve made and learned from

I once rushed the poking process and created huge, cavernous holes that made the cake structurally unsound. Consequently, the entire filling pooled at the bottom, creating a soggy layer. I learned to use the round end of a wooden spoon for uniform, moderate-sized holes that distribute the caramel sauce evenly. Another time, I frosted the cake while it was still slightly warm because I was impatient. Unfortunately, my beautiful buttercream frosting melted into an unappetizing, runny mess. Now, I always practice patience and wait for the cake to cool completely, which is a lesson I also learned from my perfect moist cake experiments. Furthermore, toasting the pecans is non-negotiable for that deep, nutty flavor, a tip I picked up from my adventures with salted caramel pecan bars.

Cultural Connection and Variations

Where this recipe comes from

This decadent dessert is a true Southern belle, born from a beautiful collision of two classic traditions. Although the poke cake technique is a more modern invention from the mid-20th century, its heart and soul belong entirely to the American South. The star of the show, the praline, has deep roots in Louisiana, where French settlers used local sugarcane and pecans to create the iconic candy. So when you make a Butter Pecan Praline Poke Cake, you are essentially baking a piece of history.

Families often pass down their prized praline recipes through generations, and this cake is a fantastic way to enjoy those flavors in a simpler, crowd-feeding form. It’s a staple at potlucks and church suppers because it travels so well and serves a crowd. The warm, buttery, and nutty notes are pure comfort, evoking memories of family gatherings and holiday tables laden with love. Every bite of this Butter Pecan Praline Poke Cake tells a story of resourcefulness and sweetness.

How it fits in today’s cooking

This cake remains a beloved favorite because it perfectly balances nostalgia with incredible ease. It’s a superstar during the holidays, especially Thanksgiving and Christmas, where its rich flavors complement the season perfectly. Even though it feels special, it’s simple enough for a weeknight treat when you need a major dose of comfort.

Modern home cooks are constantly putting new spins on it. Some are making it with a from-scratch vanilla cake as the base for an even more homemade feel. Others are adapting it for different diets by using gluten-free cake mixes or dairy-free alternatives for the caramel and whipped topping. You can even experiment with different nuts, although toasted pecans are truly irreplaceable for that authentic taste. For another fantastic make-ahead dessert that’s always a hit, this cake shares that same crowd-pleasing spirit as our popular banana pudding cheesecake. Ultimately, its versatility and foolproof method ensure the Butter Pecan Praline Poke Cake will stay on our tables for years to come.

Taste and Texture

What makes it delicious

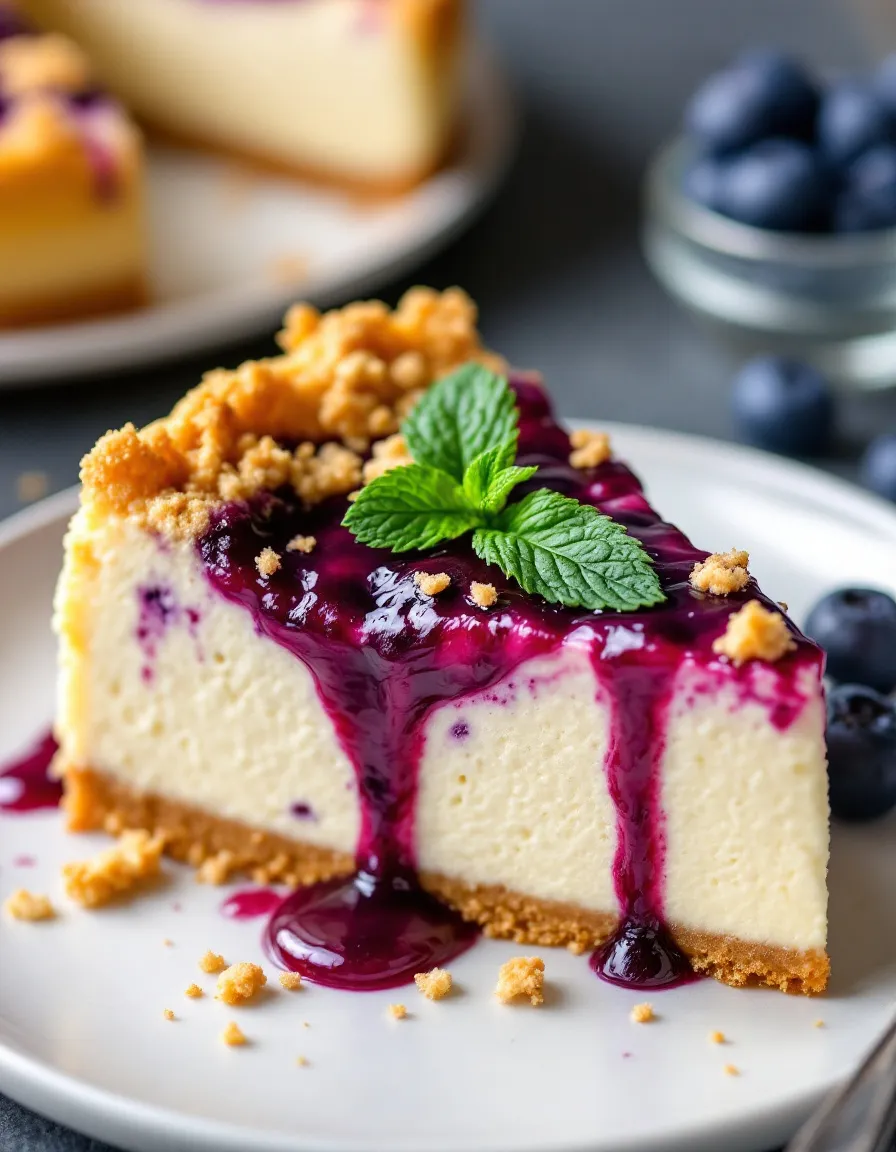
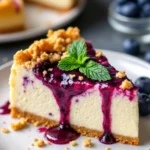
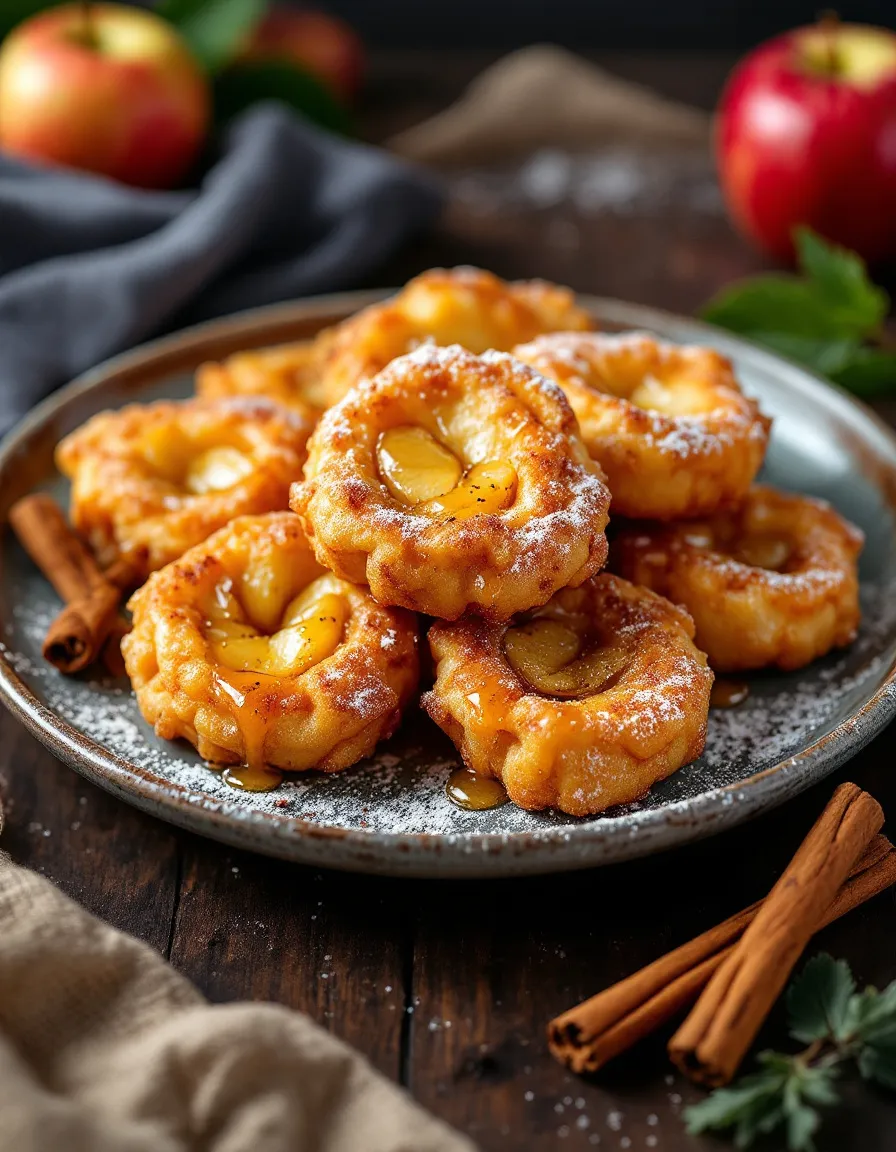
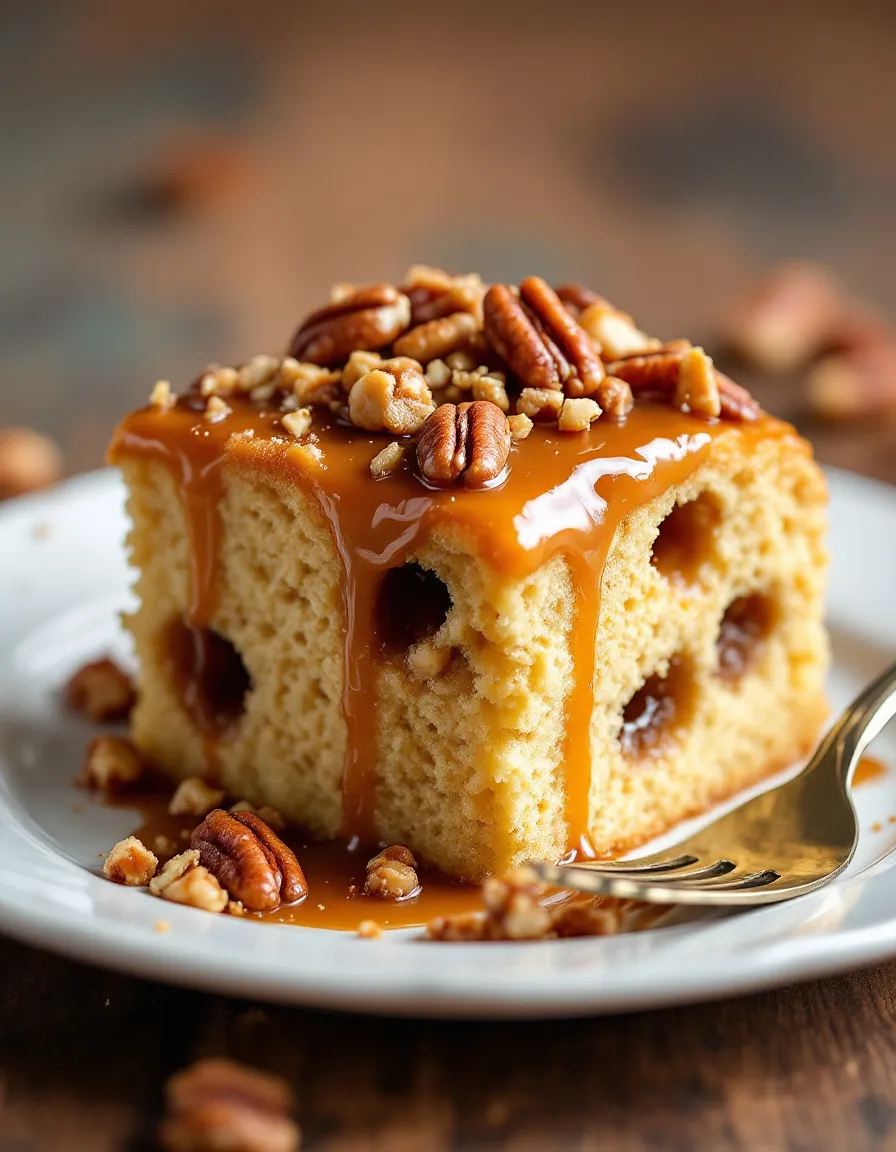
This Butter Pecan Praline Poke Cake delivers a symphony of textures and flavors in every single bite. You are first greeted by the rich, buttery fragrance of toasted pecans, a scent that promises pure comfort. The cake itself is incredibly tender and airy, because the warm pokes allow the luscious caramel sauce to seep deep into its crumb. Each forkful is a perfect balance of soft, moist cake and the sweet, gooey filling. The toasted pecans provide a delightful and essential crisp contrast, adding a nutty depth that keeps the dessert from being overly sweet. Although the cake is decadent, the overall experience remains beautifully balanced and never cloying. The final layer of creamy frosting, often a buttercream or whipped topping, melts luxuriously on the tongue, so it creates a cool, smooth contrast to the warm spices. This Butter Pecan Praline Poke Cake is a masterclass in contrasting textures, from the chewy caramel pockets to the crunchy nut topping, making it an utterly irresistible treat for any occasion.

Boosting the flavor

You can easily elevate this fantastic dessert with a few simple tweaks. Consider swapping the traditional vanilla cake base for a brown sugar cake, because it will deepen the caramel notes and add a molasses-like richness that pairs wonderfully with the pecans. A pinch of flaky sea salt sprinkled over the finished cake just before serving creates a magnificent sweet-and-salty dynamic that makes the flavors pop. For an extra layer of warmth and spice, a teaspoon of cinnamon or even a dash of nutmeg added to the cake batter works wonders. A generous dollop of freshly whipped cream or a scoop of vanilla bean ice cream on the side provides a cool, creamy contrast that is simply divine. If you are a fan of complementary sauces, a drizzle of homemade salted caramel sauce or even a butterscotch sauce adds another level of indulgence. For another great way to use toasted pecans, try our classic pecan pie recipe. And if you love the combination of cake and creamy fillings, you will adore our Boston cream poke cake as a delicious alternative.

Tips for Success

Best practices for results

Always use room temperature ingredients, particularly the eggs and dairy, because they emulsify more easily into the batter for a uniformly tender crumb in your Butter Pecan Praline Poke Cake. Furthermore, make sure you poke the cake while it is still very warm so the holes remain open and the luscious caramel sauce can penetrate deeply into every layer. For the best texture and to allow the flavors to meld together beautifully, you must chill the assembled cake for at least four hours, although overnight is even better. Finally, toast the pecans beforehand to unlock their rich, nutty flavor, which is a cornerstone of this dessert’s profile.

Mistakes to avoid

A common error is poking the holes with a utensil that is too thin, such as a skewer, so the caramel simply pools on the surface instead of soaking in; instead, use the handle of a wooden spoon to create adequately sized channels. Another frequent oversight is pouring the entire can of sweetened condensed milk over the top, which can make the final result overly dense and cloyingly sweet; instead, follow the measured amounts in the recipe for a perfect balance. Be cautious not to overmix the cake batter after adding the flour, as this will develop too much gluten and lead to a tough cake, even though you might be eager to eliminate all lumps. For more guidance on achieving the ideal cake texture, our guide on common baking mistakes is an excellent resource. Moreover, ensure your caramel sauce is the perfect pourable consistency, similar to what you would use for our salted caramel apple pie, because if it is too thick, it will not absorb properly.

Serving and Pairing Suggestions

How to serve this dish

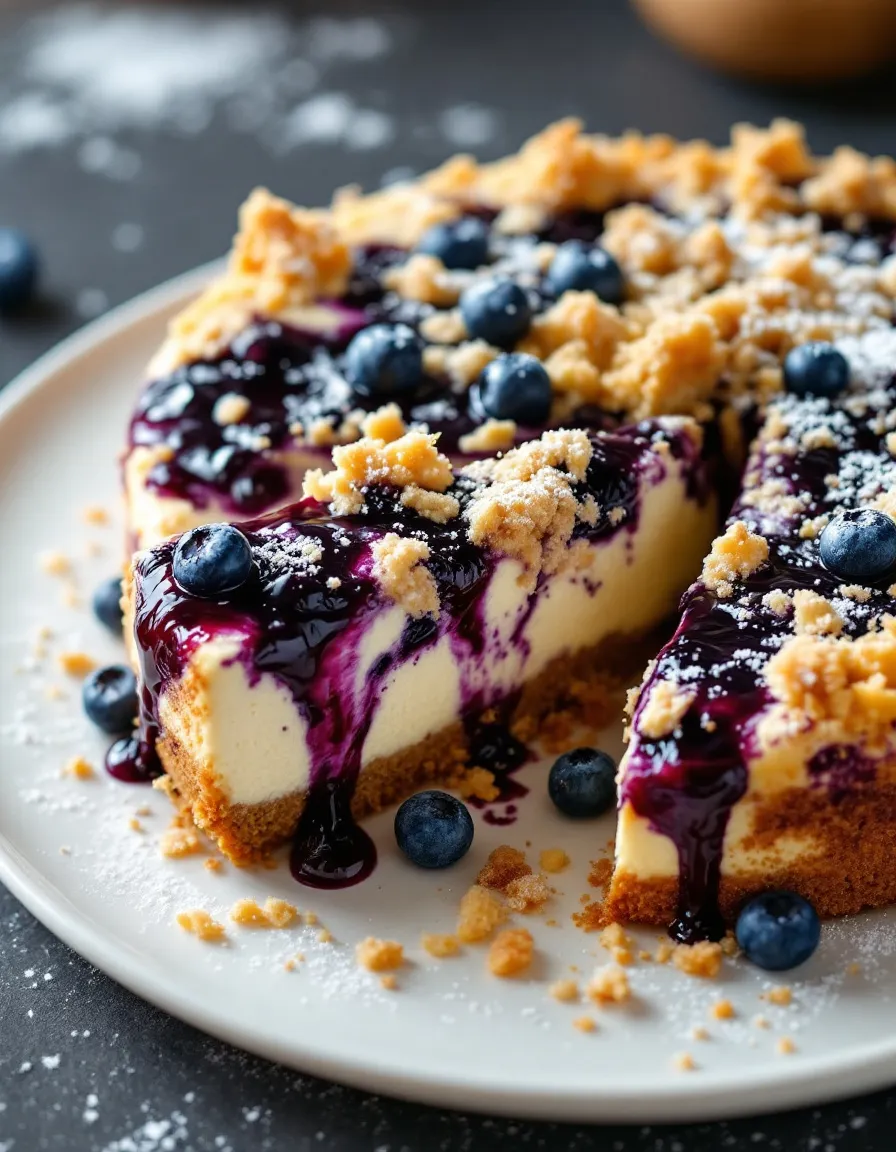
For a truly stunning presentation, serve each slice of this Butter Pecan Praline Poke Cake on a clean, white plate. Consequently, the beautiful layers and rich caramel glaze will stand out beautifully. Moreover, a final flourish of chopped toasted pecans and a tiny sprinkle of sea salt just before serving adds fantastic texture and a touch of elegance. This cake is the ultimate showstopper for holiday gatherings, potlucks, or any celebration where you want to impress your guests.

Alternatively, you can keep things simple and casual. For instance, serve it straight from the baking dish for a cozy family dessert night. Ultimately, its comforting aroma and decadent flavor make it a perfect treat for any occasion.

What goes well with it

A hot cup of coffee is a classic pairing that cuts through the sweetness beautifully. Furthermore, the robust flavor of the brew creates a wonderful balance with the rich buttery and caramel notes of the cake. For a chilly evening, a glass of cold milk is another fantastic choice that complements every single bite.

If you want to turn this dessert into an even more luxurious experience, consider adding a scoop of vanilla bean ice cream. The warm cake and cold, creamy ice cream create a delightful contrast that is simply irresistible. For another incredible dessert pairing, consider our Salted Caramel Apple Pie, as the flavors harmonize perfectly. Additionally, a simple side of fresh fruit, like our Berry Salad with Honey Lime Dressing, provides a light, refreshing counterpoint to the decadent cake.

What is a poke cake?

A poke cake is a type of cake where you bake a simple sheet cake, then poke holes all over the top of it while it’s still warm. You then pour a liquid filling, like sweetened condensed milk, pudding, or caramel sauce, over the cake so it soaks down into the holes, making the final dessert incredibly moist and flavorful. This technique is what gives the Butter Pecan Praline Poke Cake its signature rich and decadent texture.

How do you store poke cake?

You should always store a poke cake in the refrigerator because the moist filling requires refrigeration. Cover the Butter Pecan Praline Poke Cake tightly with plastic wrap or store it in an airtight container. It will keep well for 3-4 days, and the flavors often meld and become even more delicious the next day.

Can you freeze poke cake?

Yes, you can freeze poke cake successfully. For best results, freeze the cake without any whipped topping garnish. Wrap the entire cake or individual slices tightly in plastic wrap and then a layer of aluminum foil to prevent freezer burn. Thaw it overnight in the refrigerator before serving and adding any fresh toppings.

What is praline sauce made of?

Traditional praline sauce is a rich, buttery sauce made from brown sugar, butter, cream, and pecans. It’s cooked on the stovetop until the sugar dissolves and the mixture thickens slightly. This warm sauce is perfect for pouring over the warm cake base of a Butter Pecan Praline Poke Cake, allowing it to soak deep into every bite.

Print
clock clock iconcutlery cutlery iconflag flag iconfolder folder iconinstagram instagram iconpinterest pinterest iconfacebook facebook iconprint print iconsquares squares iconheart heart iconheart solid heart solid icon
best-butter-pecan-praline-cake

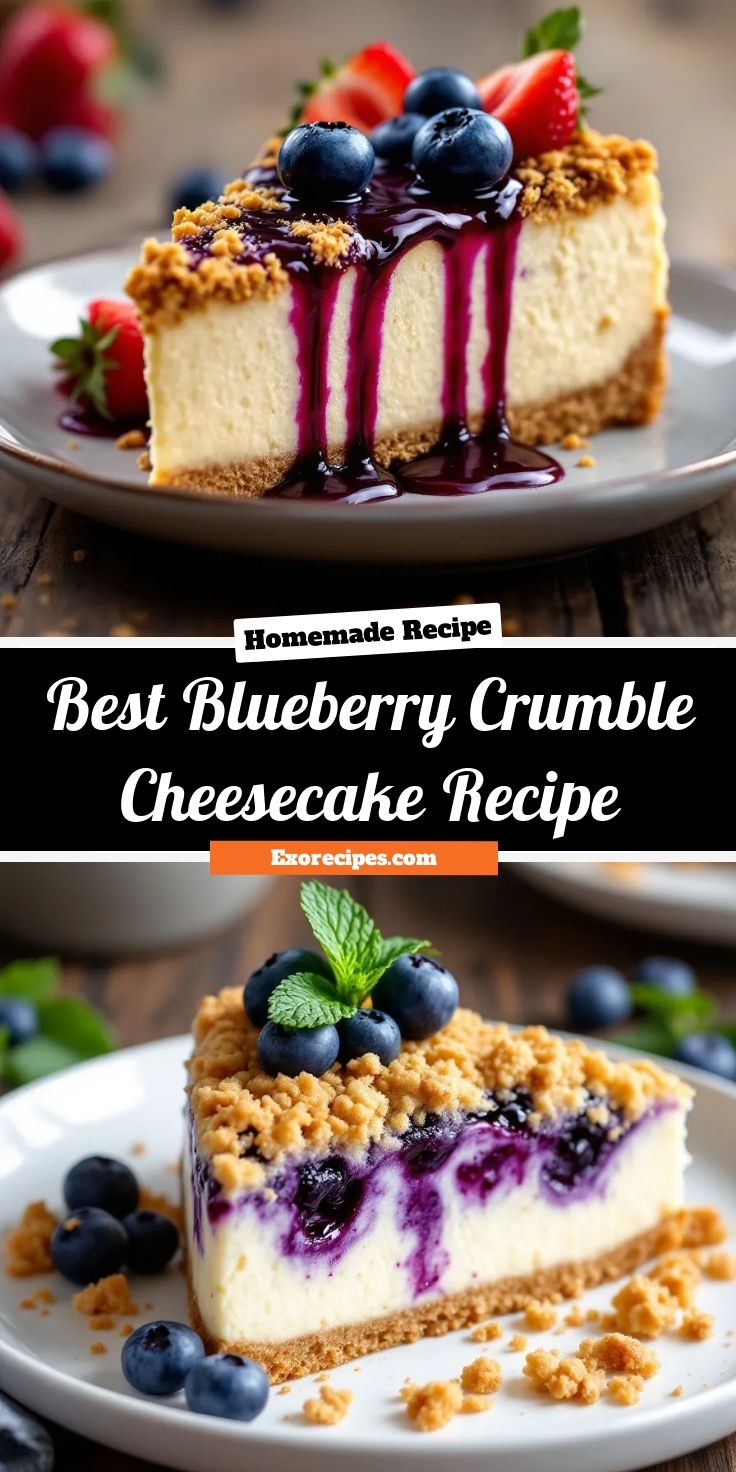
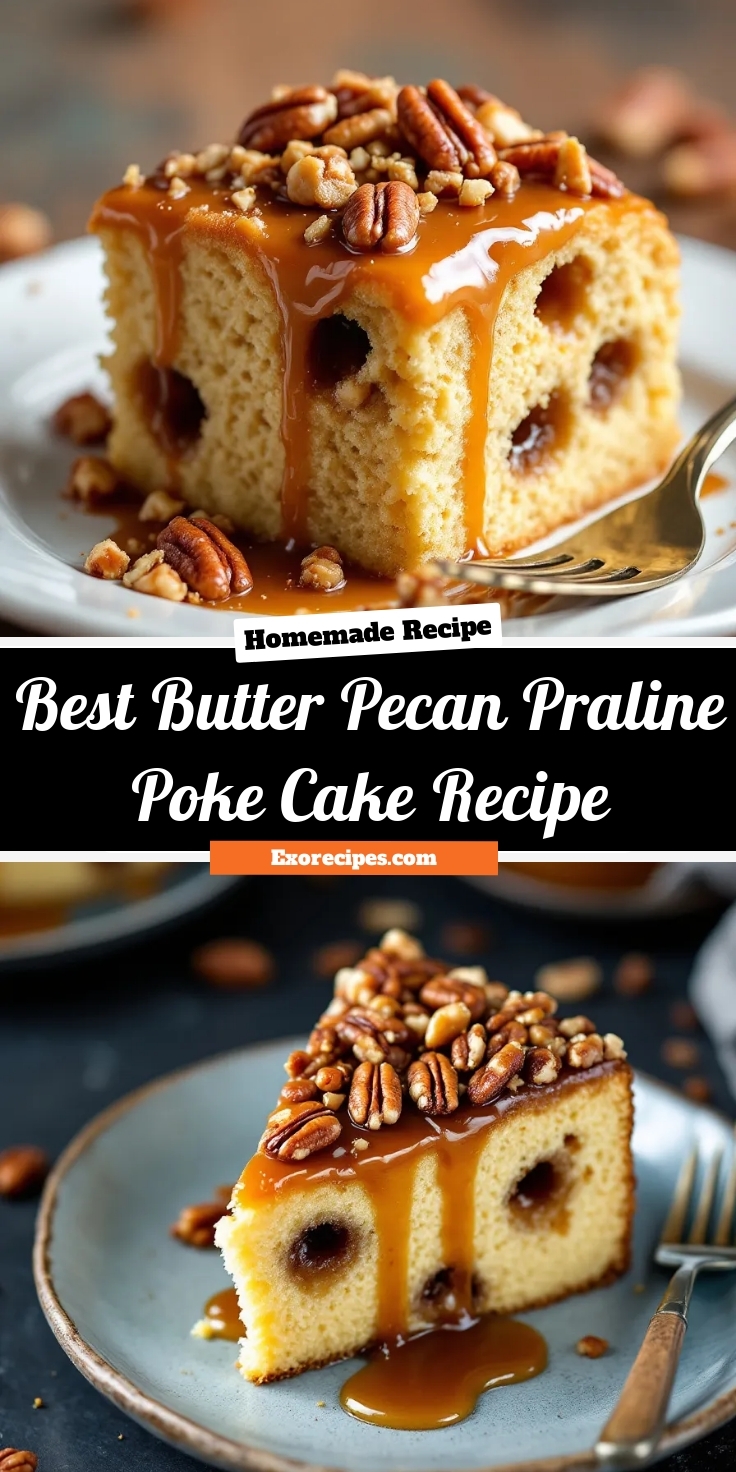
Butter Pecan Praline Poke Cake – Recipes by Lina

  • Author: Lina Evans

Description

This moist and decadent Butter Pecan Praline Poke Cake is filled with a rich praline sauce, topped with homemade whipped cream, and loaded with buttery


Ingredients

For the Crust:


Instructions

1. Prepare the Crust:


    Best Blueberry Crumble Cheesecake Recipe

    best-blueberry-crumble-cheesecake

    Introduction

    There’s something truly magical about a dessert that feels both comforting and decadently special. If you’re searching for a show-stopping treat that will have everyone asking for the recipe, your quest ends right here. This Blueberry Crumble Cheesecake is the ultimate dessert mashup, combining the creamy, tangy bliss of classic cheesecake with the warm, fruity crunch of a homemade blueberry crumble. It’s the perfect centerpiece for any celebration or a fantastic way to turn an ordinary weeknight into something extraordinary.

    So, what exactly is a Blueberry Crumble Cheesecake? Imagine a velvety smooth, no-bake cheesecake filling that’s incredibly light yet rich. This luxurious base is then generously topped with a vibrant layer of sweet, juicy blueberries, which we gently cook down into a simple compote. The crowning glory is a buttery, oat-filled crumble that adds a delightful texture and that classic baked dessert flavor, all without ever turning on your oven. This dessert is significant because it delivers the complex taste and satisfying texture of a professionally baked good with the straightforward, approachable method of a no-bake recipe. It perfectly aligns with our mission to create stunning, crowd-pleasing desserts that are accessible for home cooks of every skill level. You can easily use this same simple no-bake cheesecake method as a base for other creations, like our popular No-Bake Strawberry Cheesecake, proving its incredible versatility. The beauty of this recipe lies in its layers of flavor and texture, creating a symphony in every single bite. While it looks impressive, the process is broken down into simple steps that anyone can follow. The crumble topping, for instance, uses a method similar to our favorite Classic Apple Crisp, ensuring a perfect, crunchy result every time. This Blueberry Crumble Cheesecake is the ultimate dessert for anyone who loves to combine fabulous flavors into one unforgettable experience.

    Why I Love This Recipe

    I absolutely adore this Blueberry Crumble Cheesecake because it never fails to bring back wonderful memories of summer picnics and family gatherings. It truly represents the best of both worlds for me: the nostalgic, homey comfort of a fruit crumble and the indulgent, celebratory feel of a rich cheesecake. I love how the bright, tangy blueberries cut through the sweetness of the filling, while the oat crumble provides that essential crunchy contrast. It’s my go-to dessert when I want to make something that feels incredibly special without spending the whole day in the kitchen.

    Health and Nutrition

    Why it’s good for your body

    This Blueberry Crumble Cheesecake offers more than just incredible flavor because it packs a surprising nutritional punch. The star ingredient, blueberries, is loaded with powerful antioxidants called anthocyanins, which give the berries their vibrant color. These compounds actively fight oxidative stress in your body, so they help protect your cells from damage. Furthermore, blueberries provide a good dose of vitamin C and fiber, even though they are naturally sweet.

    Meanwhile, the creamy cheesecake layer contributes a valuable source of calcium and protein from the cream cheese and eggs. Calcium is essential for maintaining strong bones and teeth, while protein helps keep you feeling satisfied. Although it is a dessert, this Blueberry Crumble Cheesecake delivers beneficial nutrients. Therefore, you can truly enjoy each delicious bite, because you are also nourishing your body with wholesome ingredients.

    How it fits in a healthy lifestyle

    Enjoying a slice of Blueberry Crumble Cheesecake fits perfectly into a balanced diet because it is all about moderation. You can savor it as a celebratory treat or a special weekend dessert without derailing your wellness goals. For those with specific dietary needs, simple swaps can make this dessert more inclusive. Use almond flour for the crumble to create a gluten-free version that everyone can enjoy.

    Pairing a smaller portion with a source of protein, like a handful of nuts, can help manage blood sugar levels and keep cravings at bay. Ultimately, a healthy lifestyle includes foods that bring joy and satisfaction. This cheesecake does exactly that, especially when you focus on the quality of its ingredients. For more inspiration on incorporating sweet treats into your plan, explore our guide on healthy dessert options that delight your taste buds.

    How to Prepare This Dish

    Steps and time-saving tips

    First, preheat your oven and prepare your pan. Meanwhile, make the crust by mixing graham cracker crumbs with melted butter and sugar. Firmly press this mixture into the bottom of your springform pan. Next, bake the crust for about ten minutes until it sets. For the cheesecake filling, use room temperature cream cheese to ensure a perfectly smooth texture without any lumps. Beat the cream cheese with sugar until it becomes completely creamy. Then, add the eggs one at a time, blending just until each yolk disappears into the mixture. Finally, gently fold in the sour cream and vanilla. Pour this luxurious filling over your pre-baked crust. Now, generously sprinkle the homemade blueberry compote and the buttery crumble topping over the cheesecake layer. Subsequently, bake your Blueberry Crumble Cheesecake until the edges are set but the center still has a slight jiggle. After baking, let the cheesecake cool completely in the oven with the door slightly ajar. This crucial step prevents unsightly cracks. Finally, transfer it to the refrigerator to chill for at least six hours, or ideally overnight, for the best flavor and texture.

    Mistakes I’ve made and learned from

    I have definitely learned a few lessons the hard way with this recipe. Initially, I used cold cream cheese straight from the fridge, which resulted in a lumpy batter that no amount of mixing could fix. Now, I always plan ahead to let my ingredients properly come to room temperature, which makes the process so much smoother. Another mistake was overbaking; I once left it in just five minutes too long, causing the center to crack as it cooled. I’ve since learned to trust the jiggle test and remember that carryover cooking will finish the job. For more tips on avoiding common pitfalls, check out my guide on achieving the perfect cheesecake. Also, if your crumble topping softens, my tricks for a crispy crumble topping will save the day every time.

    Cultural Connection and Variations

    Where this recipe comes from

    Our Blueberry Crumble Cheesecake feels like a warm hug from a grandmother’s kitchen because it represents a beautiful fusion of two beloved traditions. The creamy, rich cheesecake layer has its roots in ancient Greece, although American delis perfected the version we know today. Meanwhile, the humble fruit crumble topping is a quintessential British and North American dessert, born from the need to create comfort from seasonal, foraged fruits.

    When you combine these two classics, you get a dessert that speaks a universal language of comfort. In many families, a Blueberry Crumble Cheesecake becomes the star of summer gatherings, especially when wild blueberries are at their peak. The act of baking it turns into a ritual, so it celebrates the season’s bounty while creating lasting memories around the table. This dessert effortlessly bridges the gap between a rustic fruit crisp and an elegant cheesecake, making it perfect for any occasion.

    How it fits in today’s cooking

    This dessert remains a modern favorite because it is incredibly versatile. It fits right into today’s cooking as a stunning centerpiece for a holiday feast, a show-stopping potluck contribution, or even a special weeknight treat. Its combination of fresh fruit, creamy filling, and crunchy topping hits all the right textural and flavor notes that contemporary palates crave.

    Modern home cooks constantly find new ways to adapt and reimagine this classic. Some create individual mason jar versions for easy portion control, while others experiment with gluten-free flour blends in the crumble for dietary needs. The fruit component is also highly adaptable; although blueberries are classic, you could easily swap them for a cherry and almond combination for a different twist. For those seeking a simpler, equally satisfying fruity dessert, a batch of classic strawberry shortcake is always a wonderful option. Ultimately, this cheesecake’s enduring appeal lies in its perfect balance of tradition and delicious potential for innovation.

    Taste and Texture

    What makes it delicious

    This Blueberry Crumble Cheesecake delivers a phenomenal sensory experience from the very first bite. You are first greeted by a crisp and buttery graham cracker crust, which provides a sturdy foundation. The star of the show is the impossibly creamy and rich cheesecake layer, because it strikes a perfect balance between tangy and sweet. That creamy filling is then generously studded with juicy, bursting blueberries that offer a tender, jammy texture. A fragrant and oat-filled crumble topping crowns the dessert, adding a delightful chewy and crisp contrast to the smooth filling. When warm, the blueberries become even more vibrant and saucy, while the chilled cheesecake remains luxuriously firm and cool. The overall flavor is a sophisticated harmony, although the bright, slightly tart berries beautifully cut through the decadent richness of the cheese. Every forkful of this Blueberry Crumble Cheesecake is a textural adventure, so you get creamy, crunchy, and juicy all at once. The aroma alone, with its notes of vanilla, toasted oats, and sweet fruit, is utterly irresistible.

    Boosting the flavor

    You can easily elevate your Blueberry Crumble Cheesecake with a few simple tweaks. Consider swapping the fresh blueberries for a homemade blueberry compote swirl within the batter for a more intense, concentrated berry flavor. A pinch of warm spices like cinnamon or a dash of nutmeg in the crumble topping will add a wonderfully fragrant and cozy depth. For a bright, fresh finish, serve each slice with a dollop of lightly sweetened whipped cream or a scoop of vanilla bean ice cream. A drizzle of a complementary sauce, such as a simple lemon curd, introduces a zesty contrast that highlights the creamy filling. Even though the dessert is fantastic on its own, a topping of lemon zest or a sprinkle of flaky sea salt just before serving can make the flavors pop even more. For another fantastic pairing idea, consider serving it alongside a creamy latte because the coffee notes complement the sweet and tangy notes of the cheesecake perfectly.

    Tips for Success

    Best practices for results

    Always ensure your cream cheese is at room temperature before you begin, because this is the single most important step for achieving a perfectly smooth and lump-free filling for your Blueberry Crumble Cheesecake. Furthermore, use parchment paper to line your springform pan for easy and clean removal after baking. For the best texture and to prevent a soggy bottom crust, you should pre-bake your graham cracker crust until it is lightly golden and fragrant. When swirling the blueberry compote into the cheesecake batter, use a knife or a skewer and avoid over-mixing, so you can create beautiful, defined marbling. Finally, allow the cheesecake to cool gradually in the turned-off oven with the door slightly ajar to prevent it from cracking, as this gentle process is key for a flawless finish.

    Mistakes to avoid

    A common mistake is overmixing the batter once the eggs are added, which can incorporate too much air and lead to the cheesecake puffing up and then cracking as it cools. Instead, mix on low speed just until each ingredient is combined. Another error to avoid is using cold ingredients, particularly the cream cheese and eggs, because they will not emulsify properly and can result in a grainy texture. Although it is tempting to dig in right away, you must avoid slicing the Blueberry Crumble Cheesecake before it has chilled for the full recommended time; otherwise, the slices will not be clean and the structure may be too soft. For more guidance on achieving the perfect creamy consistency, you can read our detailed guide on how to make cheesecake filling. Moreover, even though a water bath might seem intimidating, skipping it is a frequent misstep that often leads to uneven baking and cracks, so consider it a non-negotiable step for a professional-grade dessert, just like we recommend for our Classic New York Cheesecake.

    Serving and Pairing Suggestions

    How to serve this dish

    For a truly stunning presentation, serve each slice of Blueberry Crumble Cheesecake on a simple white plate. Consequently, the vibrant purple-blue hue of the fruit and the golden-brown crumble topping will truly stand out. A light dusting of powdered sugar or a fresh mint leaf makes for an elegant, final touch.

    This dessert is incredibly versatile for any occasion. For instance, it brings a touch of elegance to a holiday dinner table, yet it is also casual enough for a weekend family gathering. Moreover, it is the perfect show-stopping finale for a celebratory brunch or a summer potluck.

    What goes well with it

    A hot cup of coffee is a classic pairing that cuts through the richness of the cheesecake. Alternatively, a glass of cold milk provides a refreshing contrast that highlights the creamy texture and sweet blueberries. For a more sophisticated option, a dessert wine like a late-harvest Riesling beautifully complements the fruit flavors.

    If you want to add another element, a scoop of vanilla bean ice cream melting over the warm crumble topping is simply divine. Furthermore, a simple side of fresh seasonal fruit, like the berries in our Mixed Berry Salad, adds a bright, juicy component. Finally, for a brunch pairing, consider serving it alongside a savory dish like our Herb Scrambled Eggs to balance the sweet and creamy notes of your Blueberry Crumble Cheesecake.

    Can you use frozen blueberries for cheesecake?

    Yes, you can absolutely use frozen blueberries for your Blueberry Crumble Cheesecake. Toss the frozen berries in a little cornstarch to absorb the extra juice they release during baking and prevent a soggy dessert.

    Why did my blueberry cheesecake crack?

    Cheesecakes crack from overmixing the batter or a drastic temperature change. Avoid overbeating after adding eggs and let your Blueberry Crumble Cheesecake cool gradually in the oven to prevent cracks.

    What is the difference between New York cheesecake and regular cheesecake?

    New York cheesecake is denser and richer due to extra cream cheese and heavy cream. A Blueberry Crumble Cheesecake often uses this New York-style base for a decadent texture.

    How do you know when a crumble is done?

    The crumble topping turns a deep golden brown and feels crisp. You will also see the blueberry filling bubbling around the edges of your Blueberry Crumble Cheesecake.

    Print
    clock clock iconcutlery cutlery iconflag flag iconfolder folder iconinstagram instagram iconpinterest pinterest iconfacebook facebook iconprint print iconsquares squares iconheart heart iconheart solid heart solid icon
    best-blueberry-crumble-cheesecake

    Blueberry Crumble Cheesecake

    • Author: Julie Marie

    Description

    This blueberry crumble cheesecake is a delicious dessert with a graham cracker crust, creamy cheesecake filling, blueberry pie filling, and a buttery crumble topping.


    Ingredients

    Scale

    For the Crust:

    • 1 1/2 cups graham cracker crumbs
    • 1/4 cup granulated sugar
    • 1/2 cup unsalted butter, melted
    • 3 (8-ounce) packages cream cheese, softened
    • 1 cup granulated sugar
    • 3 large eggs
    • 1 teaspoon vanilla extract
    • 1 (21-ounce) can blueberry pie filling
    • 1 cup all-purpose flour
    • 1/2 cup old-fashioned oats
    • 1/2 cup brown sugar
    • 1/2 teaspoon ground cinnamon
    • 1/4 cup unsalted butter, melted

    Instructions

    1. Prepare the Crust:

    1. Preheat oven to 325°F (163°C).
    2. In a medium bowl, mix graham cracker crumbs, 1/4 cup granulated sugar, and 1/2 cup melted butter until combined.
    3. Press the mixture into the bottom of a 9-inch springform pan.
    4. Bake for 10 minutes, then remove from oven and let cool.
    5. In a large bowl, beat cream cheese and 1 cup granulated sugar until smooth.
    6. Add eggs one at a time, beating well after each addition.
    7. Stir in vanilla extract.
    8. Pour the cheesecake batter over the cooled crust.
    9. Spoon blueberry pie filling evenly over the cheesecake batter.
    10. In a small bowl, combine flour, oats, brown sugar, and cinnamon.
    11. Add 1/4 cup melted butter and mix until crumbly.
    12. Sprinkle the crumble topping over the blueberry layer.
    13. Bake for 50-60 minutes, or until the center is almost set.
    14. Turn off the oven and let the cheesecake cool in the oven with the door slightly open for 1 hour.
    15. Remove from oven and refrigerate for at least 4 hours or overnight before serving.

    Best Blueberry Crumble Cheesecake Recipe

    best-blueberry-crumble-cheesecake

    Introduction

    Is there anything more comforting than the nostalgic taste of a homemade dessert? That feeling of pure joy when a sweet, buttery aroma fills your kitchen is simply unmatched. Today, I am so excited to share a recipe that perfectly captures that magic: my incredible Blueberry Crumble Cheesecake. This stunning dessert masterfully combines two beloved classics into one unforgettable showstopper that is guaranteed to become your new favorite.

    So, what exactly is a Blueberry Crumble Cheesecake? It is a decadent dessert featuring a creamy, rich cheesecake layer nestled on a buttery graham cracker crust. This is then generously topped with a vibrant layer of sweet, juicy blueberries and finished with a buttery, brown sugar crumble that bakes up to a delightful crunch. The significance of this recipe lies in its brilliant fusion of textures and flavors. You get the smooth, tangy creaminess of the cheesecake, the bright, jammy burst of fruit, and the cozy, crisp topping all in a single bite. This dessert is a true celebration of flavor, making it perfect for special occasions, holiday gatherings, or whenever you need an impressive treat. It aligns perfectly with my blog’s theme of creating approachable yet elevated recipes that bring people together around the table. For another fantastic fruity dessert option, you must try my Classic Strawberry Rhubarb Pie. And if you are looking for the perfect base, my guide on how to make a graham cracker crust is an essential read for any baker.

    Why I Love This Recipe

    I absolutely adore this Blueberry Crumble Cheesecake because it reminds me of summer evenings spent picking fresh berries with my family. Although it looks incredibly fancy and complex, the process is actually quite straightforward and forgiving, even for beginner bakers. I love how the tangy cheesecake perfectly balances the sweet berry filling, while the crumble topping adds that essential textural contrast that makes every single bite exciting. It is the ultimate dessert for making any regular day feel like a special celebration.

    Health and Nutrition

    Why it’s good for your body

    This Blueberry Crumble Cheesecake offers a surprising number of nutritional benefits. Blueberries are the true star because they are packed with powerful antioxidants. These compounds actively fight oxidative stress in your body. Consequently, they support cellular health and may even boost brain function. Furthermore, the creamy cheese filling provides a solid source of calcium and protein. Calcium is essential for strong bones, while protein helps you feel full and satisfied. Even though it’s a dessert, this treat contains real, whole-food ingredients. Although it contains sugar, you can enjoy it mindfully. The delightful Blueberry Crumble Cheesecake is a more nourishing option than many other desserts. So, you can savor a slice knowing it contributes to your well-being.

    How it fits in a healthy lifestyle

    This dessert fits perfectly into a balanced diet when enjoyed in moderation. It provides a satisfying end to a meal, so you are less likely to crave additional sweets. For specific dietary goals, you can easily adapt the recipe. Use almond flour for a gluten-free crumble base. You can also opt for a sugar substitute to reduce the carbohydrate content. The key is to view this Blueberry Crumble Cheesecake as a special occasion treat, not an everyday item. Pairing a small slice with a healthy lifestyle makes it a sustainable choice. For more ideas on incorporating treats into your plan, explore our guide on healthy meal prep. Ultimately, this cheesecake proves that you can enjoy delicious flavors while still honoring your health goals.

    How to Prepare This Dish

    Steps and time-saving tips

    First, preheat your oven and grab a 9-inch springform pan. Meanwhile, make your graham cracker crust by mixing the crumbs with melted butter and sugar. Firmly press this mixture into the bottom of your pan and slightly up the sides. For a time-saving tip, you can use a pre-made crust from the store. Next, bake the crust for about 10 minutes and then let it cool completely. While the crust cools, start your cheesecake filling. Use a stand mixer to beat the cream cheese until it becomes perfectly smooth. Gradually add the sugar and then the eggs, one at a time. Finally, gently fold in the sour cream and vanilla. Pour this creamy filling over your cooled crust and smooth the top with a spatula.

    After that, bake your Blueberry Crumble Cheesecake until the edges are set but the center still has a slight jiggle. Turn off the oven and crack the door open, letting the cake cool slowly inside to prevent cracking. Meanwhile, prepare the blueberry topping and the simple crumble. Once the cake has cooled in the oven for an hour, transfer it to a wire rack. Finally, top it with the blueberries and crumble, then chill it in the refrigerator for at least four hours, or ideally overnight. This chilling time is crucial for the perfect sliceable texture.

    Mistakes I’ve made and learned from

    I have absolutely overmixed my cheesecake batter, which unfortunately incorporated too much air and caused the surface to crack while baking. Now, I simply stop mixing as soon as the last ingredient is incorporated. Another common mistake I made was not letting all my ingredients reach room temperature first. Using cold cream cheese and eggs resulted in a lumpy batter that I could not fix no matter how long I mixed. My best advice is to plan ahead. Furthermore, I learned the hard way that a springform pan can leak. To avoid a watery mess in your oven, always place your pan on a baking sheet. For more essential tips, check out my guide on common baking mistakes. And if you love this dessert, you must try my Classic New York Cheesecake recipe next.

    Cultural Connection and Variations

    Where this recipe comes from

    This dessert feels like a warm hug from generations past. Although its exact origin is a happy mystery, the Blueberry Crumble Cheesecake is a beautiful fusion of two beloved traditions. It marries the creamy, rich indulgence of the classic New York-style cheesecake with the rustic, fruit-forward comfort of a British or Scandinavian crumble. Imagine a family gathering where someone’s famous cheesecake met another’s legendary berry crisp, and this glorious hybrid was born.

    Many families have their own version, often tied to summer vacations spent berry picking. The recipe gets passed down on stained index cards, with handwritten notes in the margins about using wild blueberries for a more intense flavor. In some households, making a Blueberry Crumble Cheesecake is a cherished ritual, signaling the start of a holiday weekend or a special celebration. It’s the kind of dessert that tells a story of abundance and shared joy around the table.

    How it fits in today’s cooking

    This dessert has effortlessly found its place in modern cooking because it perfectly balances nostalgia with contemporary tastes. It’s a show-stopping centerpiece for holiday feasts and Fourth of July barbecues, while also being simple enough for a comforting weeknight treat. Today’s cooks are brilliantly adapting the formula to fit various dietary needs and to utilize seasonal produce.

    You might see a gluten-free version using oat flour in the crumble or a vegan iteration with cashew-based filling. Some bakers are even reimagining it in smaller formats, creating individual jarred cheesecakes for easy entertaining. The beauty of this dessert is its versatility; you can easily swap the blueberries for other fruits depending on what’s fresh. For another fantastic way to use seasonal fruit, try our popular Classic Strawberry Rhubarb Pie. And if you’re looking for more creamy, no-bake inspiration, our Easy No-Bake Chocolate Cheesecake is a reader favorite that proves simple desserts are often the best.

    Taste and Texture

    What makes it delicious

    This Blueberry Crumble Cheesecake delivers a spectacular sensory experience from the very first bite. You are immediately greeted by a crisp, buttery oat crumble topping that provides a delightful crunch. That satisfying texture gives way to an impossibly creamy and rich cheesecake layer, which is perfectly tangy and sweet. Each forkful then sinks into a tender, chewy graham cracker crust that anchors the entire dessert. The star of the show, however, is the vibrant blueberry layer, which bursts with a sweet and slightly tart jammy flavor. When warmed, the blueberries become even more fragrant and juicy, creating a beautiful sauce that seeps into the surrounding layers. The entire dessert smells like a warm, sugary bakery, with the comforting aroma of baked cinnamon and vanilla beans. Ultimately, the magic of this Blueberry Crumble Cheesecake lies in its brilliant contrast of temperatures and textures, making it an unforgettable treat.

    Boosting the flavor

    You can easily amplify the flavor of your creation with a few simple tweaks. For an extra citrusy zing, add the zest of one lemon to your cheesecake batter, because the bright acidity cuts through the richness beautifully. Consider swapping the blueberries for a marionberry and blackberry mix, as their deeper, more complex flavor profile creates a stunning compote. A drizzle of homemade salted caramel sauce right before serving introduces a wonderful salty-sweet element that complements the berries. A pinch of cardamom or a splash of almond extract in the crumble topping will add a warm, fragrant note that makes the dessert even more aromatic. For an elegant finish, serve each slice with a dollop of lightly sweetened whipped cream or a scoop of vanilla bean ice cream. If you love experimenting with fruit desserts, our perfect berry compote is an excellent topping alternative. Furthermore, a buttery shortbread crust can be a delicious substitute for the graham cracker base, adding a richer, more tender foundation.

    Tips for Success

    Best practices for results

    Always ensure your cream cheese reaches room temperature before you begin, because this step creates a perfectly smooth and lump-free filling for your Blueberry Crumble Cheesecake. Use a water bath to bake the cheesecake gently, which prevents cracking and ensures a creamy texture. Furthermore, allow the baked cheesecake to cool completely in the turned-off oven with the door slightly ajar to prevent sudden temperature changes that could cause sinking. For the best flavor and texture, always chill your Blueberry Crumble Cheesecake for at least four hours, although overnight chilling lets the flavors meld together perfectly.

    Mistakes to avoid

    A common mistake is overmixing the batter after adding the eggs, because this incorporates too much air and can lead to puffing and cracking as it cools. Be sure to mix just until the ingredients combine. Another error is using frozen blueberries without thawing and draining them first; this extra moisture can make your blueberry layer runny and prevent your crumble topping from staying crisp. For a foolproof crumble every time, consider the techniques in our guide on how to make crispy crumble topping. Finally, do not attempt to slice the cheesecake before it is fully chilled, as a warm cheesecake will not hold its shape. If you want a fantastic base recipe to practice these techniques, our classic New York cheesecake offers a masterclass in the foundational method.

    Serving and Pairing Suggestions

    How to serve this dish

    Present your Blueberry Crumble Cheesecake with style for a truly memorable dessert. For instance, serve each chilled slice on a pristine white plate to make the vibrant purple-blueberry swirls pop. Next, garnish with a fresh mint sprig and a light dusting of powdered sugar for a simple yet elegant finish. This stunning dessert shines at holiday gatherings and celebratory brunches alike. Alternatively, for a casual family dinner, simply scoop it straight from the pan for a comforting, shareable treat everyone will love.

    Moreover, consider warming individual slices slightly to release the aromatic spices in the crumble topping. Consequently, you will experience the wonderful contrast of cool, creamy cheesecake and warm, fragrant blueberries. Ultimately, serving this Blueberry Crumble Cheesecake is always a special occasion, whether you are ending a festive meal or enjoying a sweet weekend indulgence.

    What goes well with it

    Pair your slice with a hot beverage for a perfect match. A robust cup of coffee cuts through the richness of the cheesecake, while a light herbal tea like chamomile complements the fruity blueberry notes without overpowering them.

    For a delightful contrast in temperature and texture, add a small scoop of vanilla bean ice cream. The melting creaminess alongside the cool cheesecake and crunchy topping creates an incredible sensory experience. Furthermore, if you are looking for another fantastic dessert option to serve a crowd, our popular Easy Chocolate Lava Cakes make a wonderful choice.

    Finally, a simple side of fresh seasonal fruit provides a light, refreshing balance. A small fruit salad, perhaps featuring some of the berries from our Berry Spinach Salad, adds a bright, juicy component that cleanses the palate between each luxurious bite.

    Why is my blueberry cheesecake soggy?

    A soggy bottom on your Blueberry Crumble Cheesecake usually happens when the crust isn’t properly pre-baked or sealed. To prevent this, make sure you bake the crust until it’s golden and let it cool completely before adding the filling. This creates a solid barrier against moisture from the creamy cheesecake layer.

    How do you know when a no-bake cheesecake is set?

    A no-bake Blueberry Crumble Cheesecake is set when it’s firm to the touch and doesn’t jiggle loosely in the center. The best test is to gently nudge the pan; if the filling moves as a single, cohesive unit, it’s ready. Always chill it for the full recommended time, usually at least 6-8 hours or overnight, for the perfect sliceable texture.

    Can you freeze cheesecake with fruit topping?

    Yes, you can freeze a Blueberry Crumble Cheesecake, but it’s best to freeze it without the fresh fruit component of the topping. The creamy cheesecake and crumble base freeze very well for up to 2 months. Thaw it overnight in the refrigerator and add fresh blueberries just before serving for the best texture.

    What is the difference between New York style cheesecake and regular?

    New York-style cheesecake is denser, richer, and creamier than regular cheesecake due to extra egg yolks and cream cheese, and it typically has no crust. In contrast, a classic Blueberry Crumble Cheesecake features a buttery graham cracker crust and a lighter, more balanced filling that complements the fruit and crumble topping.

    Print
    clock clock iconcutlery cutlery iconflag flag iconfolder folder iconinstagram instagram iconpinterest pinterest iconfacebook facebook iconprint print iconsquares squares iconheart heart iconheart solid heart solid icon
    best-blueberry-crumble-cheesecake

    Blueberry Crumble Cheesecake

    • Author: Julie Marie

    Description

    Indulge in the delicious fusion of blueberry crumble and cheesecake with this incredible Blueberry Crumble Cheesecake recipe. It has a luscious cookie crust, velvety smooth cheesecake filling, and a generous topping of juicy blueberries and crumble. This dessert is a delicious symphony of textures and tastes.


    Ingredients

    Scale

    For the Crust:

    • 250 g digestive or graham crackers
    • 2 tbsp granulated sugar
    • 75 g butter
    • 300 g fresh blueberries
    • 1 tbsp granulated sugar
    • 1 tbsp all-purpose flour
    • 2 tsp lemon juice
    • 110 g all-purpose flour
    • 80 g dark brown sugar
    • 70 g butter
    • 800 g full fat cream cheese (room temperature)
    • 260 g granulated sugar
    • 200 g sour cream (18% room temperature)
    • 1 1/2 tbsp cornstarch
    • 2 1/2 tsp vanilla extract
    • 4 large eggs

    Instructions

    1. Prepare the Crust:

    1. Before starting, preheat the oven to 160ºC/ 325ºF conventional oven. Prepare a 23 cm/9 inch springform tin lined with parchment paper in the bottom.
    2. In a food processor, add the cookies and granulated sugar and blend it all together until a fine sand-like texture. Melt the butter. Add the melted butter to the food processor and blend it together with the blended cookies.
    3. Add the cookie crumbs to the springform and press the cookie crumbs down with the bottom of a glass, and up against the side of the pan, so it’s well packed together and flattened out.
    4. Bake it for 10 minutes. Then let it cool down so that it’s cool to touch. Keep the oven turned on.
    5. While the crust bakes, prepare the blueberries and the crumble.
    6. In a small bowl, mix together the blueberries, granulated sugar and all-purpose flour. Then add the lemon juice and mix it all together until there is no dry flour left. Set it aside.
    7. For the crumble, add all-purpose flour and brown sugar to another bowl and mix it together. Melt the butter and pour it over the flour mixture. With a fork mix it together until it forms a crumbled structure and there is no dry flour left. Set aside both toppings while making the cheesecake filling.
    8. With a hand mixer or in a stand mix using the paddle attachment, cream the cream cheese for 1 minute on low speed. Then add the granulated sugar and let it mix for 1 minute on low speed. Scrape down the side of bowl mix it together for another 30 seconds.
    9. In a small bowl, mix together the sour cream and cornstarch until smooth. Add it to the cream cheese with the vanilla extract and let it mix on low speed until combined.
    10. Then add two eggs at a time and let it mix on low speed until combined. Once all the eggs have mixed in, scrape down the sides of the bowl and give it a final mix to make sure all the ingredients have incorporated.
    11. Pour the cheesecake batter into the spring pan. Gently divide the blueberries first on top of the cheesecake, followed by the crumble.
    12. Boil up water in a kettle. Place the springform pan in a 30 cm/12 inch cake pan. Place the cake pan in another baking pan or roasting pan and fill it with hot water. This method will prevent water from getting into the crust.
    13. Alternatively, add a triple layer of aluminium foil around the cake pan to safely seal it from the water before placing it in a water bath. There might be a possibility of water leaking in, so make sure it’s covered well if choosing this method.
    14. Bake for 1 hour and 20-30 minutes.
    15. Once the time has passed, give the tray a very gentle shake. The cheesecake should still be a small wobbly in the middle. Turn off the oven and have the oven door slightly open and let the cheesecake cool down in the oven for 1 hour.
    16. Then take it out of the oven and remove it from the water bath and place the cheesecake on a cooling rack. Let it cool down fully for about 1 hour to room temperature.
    17. Finally, once at room temperature, place it in the fridge and let it set for at least 6 hours, preferable overnight before eating.

    Best Blueberry Crumble Cheesecake Recipe

    best-blueberry-crumble-cheesecake

    Introduction

    Is there anything more comforting than the promise of a decadent dessert waiting for you? We all deserve a slice of pure joy, especially when it combines classic flavors into one spectacular treat. That’s precisely why I’m so excited to share my ultimate recipe for this stunning Blueberry Crumble Cheesecake. It’s the perfect dessert for any occasion, promising to wow your family and friends with its incredible taste and beautiful appearance.

    This Blueberry Crumble Cheesecake is a magnificent fusion of two beloved desserts. It features a velvety, rich cheesecake base that is perfectly set and tangy, topped with a layer of sweet, juicy blueberries, and finished with a generous, buttery crumble topping that bakes to a delightful golden crunch. The combination of textures and temperatures—the cool, creamy filling against the warm, crisp crumble—is nothing short of magical. This dessert is significant because it feels both elegantly gourmet and wonderfully familiar, like a fancy version of your favorite blueberry muffin or pie. It aligns perfectly with our blog’s mission to create approachable yet impressive homemade desserts that become instant classics. While it looks like it came from a professional bakery, the method is straightforward, using simple techniques similar to making a classic no-bake cheesecake for the base, ensuring a successful and rewarding baking experience every single time.

    Why I Love This Recipe

    I absolutely adore this Blueberry Crumble Cheesecake because it never fails to bring people together. I first made it for a summer potluck, and the way everyone’s eyes lit up after the first bite created a core memory for me. It’s my go-to celebration dessert now, and I love how the vibrant blueberry topping makes the whole table look more festive. For me, this recipe represents the perfect balance of simplicity and show-stopping flavor, which is always my ultimate goal in the kitchen.

    Health and Nutrition

    Why it’s good for your body

    This Blueberry Crumble Cheesecake offers a surprising number of nutritional benefits because of its key ingredients. Blueberries, for instance, are a true superfood packed with antioxidants and vitamins. These powerful compounds actively combat oxidative stress in your body, even though they are in a dessert. The creamy filling provides a good source of calcium and protein from the dairy, which is essential for strong bones and muscles. Furthermore, the oat-based crumble delivers a dose of soluble fiber, so it can help support healthy digestion and keep you feeling satisfied. Although it is a treat, this cheesecake is a more mindful choice than many other desserts. Enjoying a slice means you are treating yourself to something delicious while also giving your body valuable nutrients. Ultimately, this Blueberry Crumble Cheesecake proves that indulgence and wellness can happily coexist on your plate.

    How it fits in a healthy lifestyle

    This dessert fits perfectly into a balanced diet when enjoyed in moderation. You can easily make it align with specific dietary goals, because simple substitutions are very effective. For a gluten-free version, use certified gluten-free oats in the crumble topping. If you are looking for a higher-protein option, consider blending silken tofu or Greek yogurt into the filling. For those managing sugar intake, natural sweeteners like maple syrup or monk fruit can work wonderfully. This flexibility makes the Blueberry Crumble Cheesecake a fantastic recipe for meal prep for busy families who want healthy desserts ready to go. It teaches that healthy eating is not about deprivation, but about making smarter choices. Savoring a reasonable portion satisfies your sweet tooth without derailing your progress. Pairing a slice with a cup of tea turns it into a mindful moment of enjoyment. For more ideas on creating nutritious meals that everyone will love, explore our guide on quick healthy family dinners.

    How to Prepare This Dish

    Steps and time-saving tips

    First, gather all your ingredients and preheat your oven. This simple step saves you from frantic searching later. Meanwhile, make your graham cracker crust by mixing the crumbs with melted butter and sugar. Firmly press this mixture into your springform pan and bake it for about eight minutes. Let this base cool completely before you add the filling. For the cheesecake layer, beat your room-temperature cream cheese until it becomes perfectly smooth. Gradually add the sugar and then the eggs, one at a time. Finally, gently fold in the sour cream and vanilla. Pour this luxurious filling over your cooled crust and smooth the top. Next, prepare the blueberry crumble topping by combining oats, flour, brown sugar, and cinnamon. Cut cold butter into the dry mix until it forms lovely, coarse crumbs. Sprinkle this over the unbaked cheesecake and pop the whole pan into the oven. Bake until the edges are set but the center still has a slight jiggle. Afterwards, turn the oven off and let the cheesecake cool inside for an hour to prevent cracking. Finally, chill your beautiful Blueberry Crumble Cheesecake for at least four hours, or ideally overnight, for the best flavor and texture.

    Mistakes I’ve made and learned from

    I have definitely learned a few lessons the hard way with this recipe. Initially, I used cold cream cheese straight from the fridge, which resulted in a lumpy filling no matter how long I mixed it. Now, I always ensure my dairy ingredients are at room temperature for a flawlessly smooth texture. Another common mistake I made was rushing the chilling process. I once served it after only two hours, and while tasty, it was too soft to slice neatly. Patience is truly key here; an overnight chill makes all the difference. For more tips on avoiding common pitfalls, check out my guide on achieving the perfect cheesecake texture. Also, if you love the crumble part as much as I do, you must try my classic apple crisp, which uses a very similar technique for the topping.

    Cultural Connection and Variations

    Where this recipe comes from

    This dessert feels like a warm hug from generations past because it masterfully weaves together two beloved traditions. The creamy, rich cheesecake component has its deepest roots in ancient Greece, although it truly found its iconic form in New York City delis. Meanwhile, the humble fruit crumble tells a story of frugality and comfort from both British and American home kitchens, where cooks would use fresh, seasonal fruit and a simple oat or flour topping. The genius of Blueberry Crumble Cheesecake lies in its fusion of these two distinct classics into one unforgettable experience.

    Many families have their own version of Blueberry Crumble Cheesecake, often passed down on a stained index card. In some households, they always use wild blueberries for a more intense, tart flavor, while others might swear by a specific spice like a dash of cardamom or a sprinkle of lemon zest in the filling. The preparation itself becomes a ritual, whether for a summer potluck where it sits proudly next to a classic Classic Potato Salad or as the grand finale to a holiday feast. No matter its origin story, a slice of this dessert always tastes like home.

    How it fits in today’s cooking

    This dessert has seamlessly transitioned into modern cooking even though it feels timeless. It remains a superstar for summer celebrations and Thanksgiving alike because its combination of fresh fruit and decadent cheese appeals to nearly everyone. Today’s home cooks also find brilliant new ways to adapt the recipe so it fits into various dietary needs and busy schedules.

    You often see gluten-free flour blends in the crumble or plant-based cream cheese alternatives for a vegan version. Some bakers even prepare individual portions in mason jars for easy entertaining. Its versatility is its greatest strength, allowing it to be both a show-stopping centerpiece and a simple weeknight treat. It pairs wonderfully with a cup of coffee for an afternoon pick-me-up or as the perfect sweet ending to a lighter meal like Grilled Lemon Herb Chicken. Ultimately, Blueberry Crumble Cheesecake continues to earn its place in our recipe boxes by being both comfortingly familiar and endlessly adaptable.

    Taste and Texture

    What makes it delicious

    This Blueberry Crumble Cheesecake delivers a spectacular play of textures and flavors in every single bite. You first encounter the crisp, buttery crumble topping, which provides a delightful crunch that gives way to the luxurious filling. The cheesecake layer itself is phenomenally creamy and rich, with a perfect tang that beautifully cuts through the sweetness. Meanwhile, the blueberry layer bursts with a bright, jammy fruitiness that is both sweet and slightly tart. Each component works in harmony, because the fragrant, warm spices from the crumble mingle with the cool, creamy cheese and the vibrant berry notes. The graham cracker crust offers a final textural surprise, as it is steadfastly chewy and tender, anchoring the entire dessert. This Blueberry Crumble Cheesecake is a true masterpiece of contrast, so it feels both decadently indulgent and wonderfully balanced. The aroma alone is intoxicating, as it blends the comforting scent of baked cinnamon with the sweet perfume of bubbling blueberries and the rich promise of cream cheese. It is an unforgettable sensory experience that feels both rustic and elegant.

    Boosting the flavor

    You can easily elevate your Blueberry Crumble Cheesecake with a few simple tweaks. Consider swapping the blueberries for a marionberry and blackberry mix, which will create a deeper, more complex berry flavor profile, especially if you use a technique from our guide on how to make the best berry compote. For a brighter citrus note, add a teaspoon of lemon zest to the cheesecake batter. A pinch of cardamom or a dash of almond extract in the crumble topping will also introduce a wonderfully warm and fragrant dimension. Serving a dollop of freshly whipped cream or a scoop of vanilla bean ice cream on the side is always a winning move, because the cool creaminess complements the dessert’s rich density. For an extra special finish, drizzle each slice with a quick salted caramel sauce, as the salty sweetness creates an incredible contrast with the tangy cheesecake and tart berries. Finally, always remember to use high-quality, pure vanilla extract for the most aromatic and flavorful result.

    Tips for Success

    Best practices for results

    Always use full-fat, room temperature cream cheese for your Blueberry Crumble Cheesecake because it will blend smoothly and create a luxuriously creamy filling without any lumps. Furthermore, press the crumble topping firmly into an even layer before baking so it holds together well and creates those perfect crunchy clusters. For the cleanest slices, chill the entire cheesecake for at least four hours, or even overnight, before you attempt to cut it. This crucial resting period allows the structure to fully set, ensuring every piece holds its beautiful shape when served.

    Mistakes to avoid

    A common error is overmixing the batter after adding the eggs, which can incorporate too much air and lead to the cheesecake cracking during the baking process. Instead, mix on low speed just until each ingredient is combined for a perfectly smooth and dense texture. Although it might be tempting to check on your dessert, avoid opening the oven door during the initial bake time because a sudden drop in temperature can cause the center to fall. For a flawless release every time, remember to properly prepare your pan, a technique we detail in our guide on how to grease a pan. Finally, do not skip the step of cooling the cheesecake gradually in the turned-off oven with the door slightly ajar, as this gentle process prevents the dreaded sink in the middle that can ruin its appearance. For more insights on achieving the ideal texture, you can explore our article on common baking mistakes and how to fix them.

    Serving and Pairing Suggestions

    How to serve this dish

    Present your Blueberry Crumble Cheesecake with style for a truly memorable dessert. For instance, serve each slice on a chilled plate to keep it perfectly firm. Next, garnish with a few fresh mint leaves and a light dusting of powdered sugar for a beautiful, elegant finish. This stunning dessert absolutely shines at holiday gatherings and celebratory brunches alike.

    Alternatively, embrace a more rustic charm for casual dinners. Simply place the whole cheesecake on the table with a cake server and let everyone dig in. Ultimately, this approach creates a wonderfully warm and inviting atmosphere. No matter the occasion, a Blueberry Crumble Cheesecake always feels like a special treat.

    What goes well with it

    A hot cup of coffee makes an excellent partner for this dessert. Specifically, its rich, bitter notes cut through the sweetness of the cheesecake and enhance the tangy cream cheese flavor. Similarly, a glass of cold milk provides a classic, comforting pairing that everyone will love.

    For a truly decadent experience, consider a scoop of vanilla bean ice cream. The melting creaminess creates a luxurious sauce that melds perfectly with the crunchy topping and creamy filling. If you enjoy fruit-forward desserts, a simple fresh berry salad on the side offers a refreshing, light contrast.

    Finally, a sweet dessert wine like a late-harvest Riesling pairs beautifully. Its honeyed apricot and peach flavors complement the blueberries without overpowering the dish. For another fantastic fruity pairing, try our popular sparkling raspberry lemonade for a refreshing non-alcoholic option.

    What is the difference between a cheesecake and a crumble?

    A cheesecake is a rich, creamy dessert with a soft filling, while a crumble is a baked fruit dessert with a streusel-like topping. This Blueberry Crumble Cheesecake uniquely combines both, featuring a creamy cheesecake base topped with sweet blueberries and a buttery, crunchy oat crumble topping.

    How do you keep cheesecake from cracking?

    Avoid overmixing the batter, which incorporates too much air. Bake the cheesecake in a water bath to provide gentle, even heat and moisture. Most importantly, let it cool gradually in the turned-off oven with the door slightly ajar to prevent sudden temperature changes that cause cracks.

    Can you use frozen blueberries for crumble?

    Yes, you can use frozen blueberries without thawing them first. Toss them in a little cornstarch or flour to help absorb the extra juice they release while baking. This prevents the filling of your Blueberry Crumble Cheesecake from becoming too runny.

    Why is my crumble topping not crunchy?

    This usually happens if the butter was too warm or overworked into the flour. For a crunchy topping, use cold butter and mix just until coarse crumbs form. Also, ensure you bake your Blueberry Crumble Cheesecake long enough for the topping to turn golden brown and crisp.

    Print
    clock clock iconcutlery cutlery iconflag flag iconfolder folder iconinstagram instagram iconpinterest pinterest iconfacebook facebook iconprint print iconsquares squares iconheart heart iconheart solid heart solid icon
    best-blueberry-crumble-cheesecake

    Blueberry Crumble Cheesecake

    • Author: Julie Marie

    Description

    Indulge in the delicious fusion of blueberry crumble and cheesecake with this incredible Blueberry Crumble Cheesecake recipe. It has a luscious cookie crust, velvety smooth cheesecake filling, and a generous topping of juicy blueberries and crumble. This dessert is a delicious symphony of textures and tastes.


    Ingredients

    Scale

    For the Crust:

    • 250 g digestive or graham crackers
    • 2 tbsp granulated sugar
    • 75 g butter
    • 300 g fresh blueberries
    • 1 tbsp granulated sugar
    • 1 tbsp all-purpose flour
    • 2 tsp lemon juice
    • 110 g all-purpose flour
    • 80 g dark brown sugar
    • 70 g butter
    • 800 g full fat cream cheese (room temperature)
    • 260 g granulated sugar
    • 200 g sour cream (18% room temperature)
    • 1 1/2 tbsp cornstarch
    • 2 1/2 tsp vanilla extract
    • 4 large eggs

    Instructions

    1. Prepare the Crust:

    1. Before starting, preheat the oven to 160ºC/ 325ºF conventional oven. Prepare a 23 cm/9 inch springform tin lined with parchment paper in the bottom.
    2. In a food processor, add the cookies and granulated sugar and blend it all together until a fine sand-like texture. Melt the butter. Add the melted butter to the food processor and blend it together with the blended cookies.
    3. Add the cookie crumbs to the springform and press the cookie crumbs down with the bottom of a glass, and up against the side of the pan, so it’s well packed together and flattened out.
    4. Bake it for 10 minutes. Then let it cool down so that it’s cool to touch. Keep the oven turned on.
    5. While the crust bakes, prepare the blueberries and the crumble.
    6. In a small bowl, mix together the blueberries, granulated sugar and all-purpose flour. Then add the lemon juice and mix it all together until there is no dry flour left. Set it aside.
    7. For the crumble, add all-purpose flour and brown sugar to another bowl and mix it together. Melt the butter and pour it over the flour mixture. With a fork mix it together until it forms a crumbled structure and there is no dry flour left. Set aside both toppings while making the cheesecake filling.
    8. With a hand mixer or in a stand mix using the paddle attachment, cream the cream cheese for 1 minute on low speed. Then add the granulated sugar and let it mix for 1 minute on low speed. Scrape down the side of bowl mix it together for another 30 seconds.
    9. In a small bowl, mix together the sour cream and cornstarch until smooth. Add it to the cream cheese with the vanilla extract and let it mix on low speed until combined.
    10. Then add two eggs at a time and let it mix on low speed until combined. Once all the eggs have mixed in, scrape down the sides of the bowl and give it a final mix to make sure all the ingredients have incorporated.
    11. Pour the cheesecake batter into the spring pan. Gently divide the blueberries first on top of the cheesecake, followed by the crumble.
    12. Boil up water in a kettle. Place the springform pan in a 30 cm/12 inch cake pan. Place the cake pan in another baking pan or roasting pan and fill it with hot water. This method will prevent water from getting into the crust.
    13. Alternatively, add a triple layer of aluminium foil around the cake pan to safely seal it from the water before placing it in a water bath. There might be a possibility of water leaking in, so make sure it’s covered well if choosing this method.
    14. Bake for 1 hour and 20-30 minutes.
    15. Once the time has passed, give the tray a very gentle shake. The cheesecake should still be a small wobbly in the middle. Turn off the oven and have the oven door slightly open and let the cheesecake cool down in the oven for 1 hour.
    16. Then take it out of the oven and remove it from the water bath and place the cheesecake on a cooling rack. Let it cool down fully for about 1 hour to room temperature.
    17. Finally, once at room temperature, place it in the fridge and let it set for at least 6 hours, preferable overnight before eating.

    Easy Baked Apple Fritters Recipe

    easy-baked-apple-fritters-recipe

    Introduction

    Is there anything more comforting than the smell of warm apples and cinnamon wafting through your kitchen? That exact feeling is what inspired me to create this incredible recipe for Baked Apple Fritters. These little pillows of joy capture all the cozy, spiced flavor of the classic fair treat, but I made them so much simpler and healthier because they are baked, not fried. You are going to absolutely adore how easy they are to whip up for a special weekend breakfast or a satisfying afternoon snack.

    So, what exactly are these Baked Apple Fritters? Essentially, they are a delightful cross between a fluffy muffin and a soft, apple-packed doughnut. The batter comes together quickly with simple pantry staples, and it is loaded with fresh, tender apple pieces. After a quick bake in the oven, they get brushed with a simple vanilla glaze that takes them completely over the top. This method is a fantastic alternative to traditional frying, as it delivers that same irresistible flavor and tender texture without the mess or extra grease. This recipe perfectly aligns with my mission to share delicious, from-scratch baked goods that feel indulgent but are approachable for bakers of any skill level. They are the ultimate homemade treat that will make your entire house smell incredible. If you are looking for another fantastic way to use a bounty of fresh apples, you must try my incredible Apple Pie Cupcakes. And for those mornings when you need a quick and healthy start, these fritters pair wonderfully with my favorite Green Smoothie Bowl.

    Why I Love This Recipe

    I have a serious soft spot for these Baked Apple Fritters because they remind me of autumn weekends growing up. My mom would always make a version of these, and the whole family would crowd into the kitchen, eagerly waiting for the first batch to come out of the oven. I love that I can now recreate that same warm, happy feeling for my own family so easily. They are my go-to recipe when I want to create a special moment without spending all day in the kitchen, and seeing everyone’s face light up is always worth it.

    Health and Nutrition

    Why it’s good for your body

    Baked Apple Fritters offer a surprisingly wholesome twist on a classic treat because they are baked and not fried. This cooking method preserves the natural goodness of the main ingredients while significantly reducing fat content. Apples provide a powerful dose of soluble fiber, which supports healthy digestion and promotes fullness. Even though it feels like an indulgence, you are fueling your body with real fruit. Each Baked Apple Fritter delivers essential vitamins like Vitamin C for immunity. Furthermore, warming spices like cinnamon possess anti-inflammatory properties, so they add more than just flavor. You can savor a delicious Baked Apple Fritter while also doing something positive for your well-being. Enjoying this pastry means you choose a smarter snack that doesn’t sacrifice taste.

    How it fits in a healthy lifestyle

    These fritters can be a delightful part of a balanced diet when enjoyed mindfully. They work perfectly as a planned treat or a satisfying breakfast alongside a protein source. You can easily adapt the recipe to meet various dietary needs. For a gluten-free version, simply use your favorite one-to-one baking flour. If you monitor sugar intake, consider reducing the sweetener or using a natural alternative like maple syrup. For those focused on high-protein meal prep, enjoy half a fritter with Greek yogurt. This approach fits seamlessly into practical eating habits, proving that health-conscious choices don’t have to be boring. Pair your Baked Apple Fritter with a green smoothie for a complete and energizing start to your day.

    How to Prepare This Dish

    Steps and time-saving tips

    First, preheat your oven to 375°F and line a baking sheet with parchment paper. Meanwhile, whisk your dry ingredients—flour, baking powder, and warming spices—in a large bowl. In a separate bowl, combine the wet ingredients like milk, egg, and melted butter. Next, gently fold the wet mixture into the dry ingredients until they just combine; however, do not overmix the batter. Immediately after, fold in your finely diced apples. Using a cookie scoop or two spoons, drop generous mounds of the thick batter onto your prepared sheet. Then, pop them into the preheated oven and bake for 14-16 minutes until they turn a beautiful golden brown. While they bake, whisk together the simple vanilla glaze. Finally, as soon as the fritters cool slightly, drizzle that sweet glaze over the top for the perfect finish. For a major time-saver, you can use a food processor to quickly chop the apples and even mix the dry ingredients. Additionally, clean up becomes a breeze if you mix everything in just two bowls. Consequently, you get warm, delicious Baked Apple Fritters with minimal effort and maximum flavor.

    Mistakes I’ve made and learned from

    I have absolutely overmixed this batter in the past, which resulted in tough, dense fritters instead of the light, cakey texture we all love. I learned the hard way that a few lumps in the batter are perfectly fine! Another common challenge is ending up with soggy fritters, often because I used the wrong apple type. Through trial and error, I discovered that firm, tart apples like Granny Smith hold their shape and moisture much better during baking. Now, I always check my pantry staples for the right flour and make sure to use the best apples for baking. This simple switch, along with a light hand when mixing, guarantees a perfect batch every single time. For more tips on selecting the perfect fruit, my guide on selecting produce is a great resource.

    Cultural Connection and Variations

    Where this recipe comes from

    There is something deeply comforting about the scent of apples and cinnamon filling a kitchen, a tradition that spans continents and generations. The story of the Baked Apple Fritter is a beautiful tapestry of frugality and celebration. In many European countries, particularly in Germany and the Netherlands, fried apple treats were a clever way to use up the last of the harvest before winter. Families would gather to peel and core baskets of apples, transforming them into golden, sugary fritters for special occasions and community gatherings.

    Although the deep-fried version is classic, the modern Baked Apple Fritter is a wonderful twist that honors that history while adapting to our kitchens today. The method might be different, but the soul of the dish remains the same: a simple, spiced dough wrapped around tender fruit. In many American households, this recipe became a cherished weekend project, often passed down on a stained index card. The act of making them is as important as eating them, creating a warm, personal connection to the past with every batch of Baked Apple Fritters.

    How it fits in today’s cooking

    This recipe has found a perfect home in modern cooking because it balances nostalgic flavor with a healthier, easier preparation. Baked Apple Fritters are a star of autumn and holiday breakfasts, filling the home with an irresistible aroma that feels both festive and cozy. They fit seamlessly into today’s routines, whether you are meal prepping a special weekend treat or needing a quick dessert that feels homemade.

    Contemporary cooks are constantly reimagining this classic. Some are adding a handful of oats or whole wheat flour for extra fiber, while others are experimenting with different fruits. For a similar seasonal twist, you might love the apple flavors in these Healthy Apple Cinnamon Muffins. The versatility of the baked fritter also means it is a fantastic base for dietary adaptations, easily becoming vegan or gluten-free. It is a recipe that encourages creativity, much like putting a new spin on a traditional favorite such as Classic Banana Bread. Ultimately, this dish remains relevant because it delivers warmth and comfort in every single bite.

    Taste and Texture

    What makes it delicious

    These Baked Apple Fritters deliver a symphony of comforting textures and cozy flavors. You are first greeted by a wonderfully crisp and golden-brown exterior, which gives way to an incredibly soft, cake-like, and tender interior. Each bite is studded with juicy, warm apple pieces that soften during baking, so they become meltingly tender and release their sweet, slightly tart flavor. The warm spices, particularly cinnamon and nutmeg, create a fragrant and deeply aromatic experience that fills your kitchen with an irresistible, homely scent. Because the fritters are baked, not fried, they achieve a surprisingly airy and light crumb while still feeling satisfyingly rich. A simple vanilla glaze seeps into the warm nooks and crannies, adding a sweet, creamy finish that perfectly complements the spiced apples. This combination of soft, chewy dough, tender fruit, and a delicate sugary crust makes every mouthful absolutely delightful. The overall experience of these Baked Apple Fritters is like enjoying the best parts of apple pie and a fluffy doughnut in one perfectly handheld treat.

    Boosting the flavor

    You can easily boost the flavor of your Baked Apple Fritters with a few simple tweaks. For a deeper, more complex spice profile, try adding a pinch of cardamom or a dash of ginger to your batter. Although the classic vanilla glaze is perfect, a drizzle of rich salted caramel sauce introduces a wonderful buttery sweetness that pairs beautifully with the apples. If you prefer a tangy contrast, a cream cheese frosting instead of glaze provides a lovely creamy sharpness. For an extra textural crunch, consider rolling the warm, glazed fritters in chopped toasted pecans or walnuts. Even though they are delicious plain, serving them warm alongside a scoop of vanilla bean ice cream transforms them into a decadent dessert. So, feel free to get creative and make this recipe your own.

    Tips for Success

    Best practices for results

    Always chill your dough for at least thirty minutes before baking because this crucial step prevents the fritters from spreading too much in the oven, ensuring they hold their shape perfectly. Use a cookie scoop to portion the dough onto your baking sheet for uniformly sized Baked Apple Fritters that bake evenly, and do not overcrowd the pan so the hot air can circulate properly for an even golden-brown finish. Lightly brush the tops with melted butter before baking, as this simple trick promotes a delightfully crisp exterior while keeping the interior wonderfully soft and fluffy.

    Mistakes to avoid

    A common error is using the wrong type of apple, which can lead to a soggy or mushy texture; instead, always choose a firm, tart variety like Granny Smith for the best structure and flavor in your finished fritters. Another frequent mistake is overmixing the batter, so gently fold the wet and dry ingredients together until just combined, even though a few lumps are perfectly fine, to avoid developing too much gluten and creating a tough final product. Furthermore, never skip preheating your oven, as a properly hot oven is essential for that initial lift and perfect rise; for more on this, see our guide on common baking mistakes and how to fix them. Finally, be sure to let your fritters cool on the pan for a few minutes before transferring them to a wire rack, because moving them too quickly can cause them to break apart, and this resting period allows them to set properly for the ideal texture, much like when making our favorite classic apple muffins.

    Serving and Pairing Suggestions

    How to serve this dish

    Serve these warm Baked Apple Fritters straight from the oven for the ultimate cozy experience. For a beautiful brunch spread, arrange them on a rustic wooden board dusted with powdered sugar. Alternatively, stack them high on a vintage cake stand for a stunning centerpiece at your next holiday gathering. A final drizzle of warm caramel sauce and a sprinkle of cinnamon transforms them into a truly celebratory dessert.

    These fritters are incredibly versatile for any occasion. Consequently, they shine as a special weekend breakfast, a satisfying afternoon snack with coffee, or a comforting end to a casual family dinner. Remember to provide small plates and napkins, as these delightful treats are best enjoyed with your fingers.

    What goes well with it

    Firstly, a hot beverage is a non-negotiable pairing. A strong cup of coffee or a steaming chai latte beautifully cuts through the sweetness of the Baked Apple Fritters. For a chilly evening, a mug of our rich spiced hot chocolate creates a decadent and memorable combination.

    Secondly, consider a cool and creamy contrast. A scoop of vanilla bean ice cream slowly melting over a warm fritter is a classic for good reason. Similarly, a dollop of freshly whipped cream or a tangy Greek yogurt dip provides a lovely balance to the warm spices and soft apple chunks.

    Finally, for a more substantial offering, pair your fritters with a savory breakfast item. A slice of crispy herb and sausage breakfast casserole creates a perfect sweet and savory equilibrium on your plate. This combination is ideal for a leisurely weekend brunch where you want to offer a variety of flavors.

    What is the best apple for fritters?

    Firm, tart apples like Granny Smith or Honeycrisp are the best choice. They hold their shape during baking and provide a nice contrast to the sweet glaze on your Baked Apple Fritters, preventing them from becoming mushy.

    Are baked apple fritters healthy?

    Baked apple fritters are a healthier alternative to the traditional deep-fried version because they use significantly less oil. While they still contain sugar and carbs, baking them reduces the overall fat and calorie content.

    Can you freeze baked apple fritters?

    Yes, you can freeze them for up to 3 months. Ensure the Baked Apple Fritters are completely cooled, then place them in a single layer on a baking sheet to freeze solid before transferring to an airtight freezer bag to prevent freezer burn.

    How do you keep fritters from getting soggy?

    To prevent sogginess, avoid overmixing the batter and thoroughly drain any excess liquid from your grated apples by wringing them in a clean kitchen towel. Also, allow your fritters to cool on a wire rack instead of a plate so air can circulate.

    Print
    clock clock iconcutlery cutlery iconflag flag iconfolder folder iconinstagram instagram iconpinterest pinterest iconfacebook facebook iconprint print iconsquares squares iconheart heart iconheart solid heart solid icon
    easy-baked-apple-fritters-recipe

    Baked Apple Fritters

    • Author: Scarlett

    Description

    Savor the delightful taste of Baked Apple Fritters, crafted with a blend of all-purpose and whole wheat flours, enriched with brown sugar, spices, and chopped apples, topped with a sweet vanilla glaze. These fritters offer a perfect, healthier alternative to fried desserts, ideal for cozy fall mornings.


    Ingredients

    Scale

    For the Crust:

    • 3/4 cup all-purpose flour
    • 3/4 cup white whole wheat flour
    • 1/2 cup brown sugar
    • 2 teaspoons baking powder
    • 1 teaspoon cinnamon
    • 1/2 teaspoon nutmeg
    • 1/4 teaspoon allspice
    • 1/4 teaspoon salt
    • 6 tablespoons butter (cold and cubed)
    • 1/2 cup milk (preferably with high fat content)
    • 1 large egg
    • 1 teaspoon vanilla extract
    • 1 cup finely chopped apples
    • 1 cup confectioners’ sugar
    • 2 tablespoons milk (with a high percentage of fat for best results)
    • 1 teaspoon vanilla extract

    Instructions

    1. Prepare the Crust:

    1. Oven Preparation: Begin by preheating your oven to 400 degrees Fahrenheit. Prepare a baking sheet by lining it with a silicone baking mat to prevent sticking; ensure the mat is suitable for use under a broiler.
    2. Dry Ingredients Mixture: In a large mixing bowl, sift together the all-purpose flour, white whole wheat flour, brown sugar, baking powder, cinnamon, nutmeg, allspice, and salt. Integrate the cold, cubed butter into the dry ingredients using a pastry blender or two forks, until the mixture resembles coarse crumbs.
    3. Wet Ingredients Mixture: In a separate, smaller bowl, whisk together the milk, egg, and vanilla extract.
    4. Forming the Fritter Dough: Add the liquid mixture to the dry ingredients, stirring just until combined to avoid overworking the dough. Fold in the chopped apples gently.
    5. Shaping the Fritters: Using a 1/4 cup measure, drop the dough onto the prepared baking sheet. For smaller fritters, a heaping tablespoon may be used instead.
    6. Baking: Bake in the preheated oven for approximately 11-13 minutes, or until the bottoms of the fritters are golden brown and the centers are set. If preparing smaller fritters, begin checking for doneness at around 8 minutes.
    7. Broiling: After baking, remove the fritters from the oven and increase the temperature to broil.
    8. Preparing the Glaze: While the oven adjusts, whisk together the confectioners’ sugar, milk, and vanilla extract in a bowl until smooth.
    9. Applying the Glaze: Brush a thin layer of the glaze over each fritter, then place them under the broiler for 2-4 minutes, or until the tops are golden and the glaze begins to bubble.
    10. Final Glazing: Remove the fritters from the oven and place on a wire rack. Apply a second coating of glaze while the fritters are still warm.
    11. Serving: Allow the glaze to set before serving the fritters, ideally when they are still warm for best flavor and texture.
    12. Storage Recommendation: These fritters are optimally enjoyed on the day of baking but can be stored in an airtight container at room temperature for up to 24 hours for short-term enjoyment.