“`html
Table of Contents
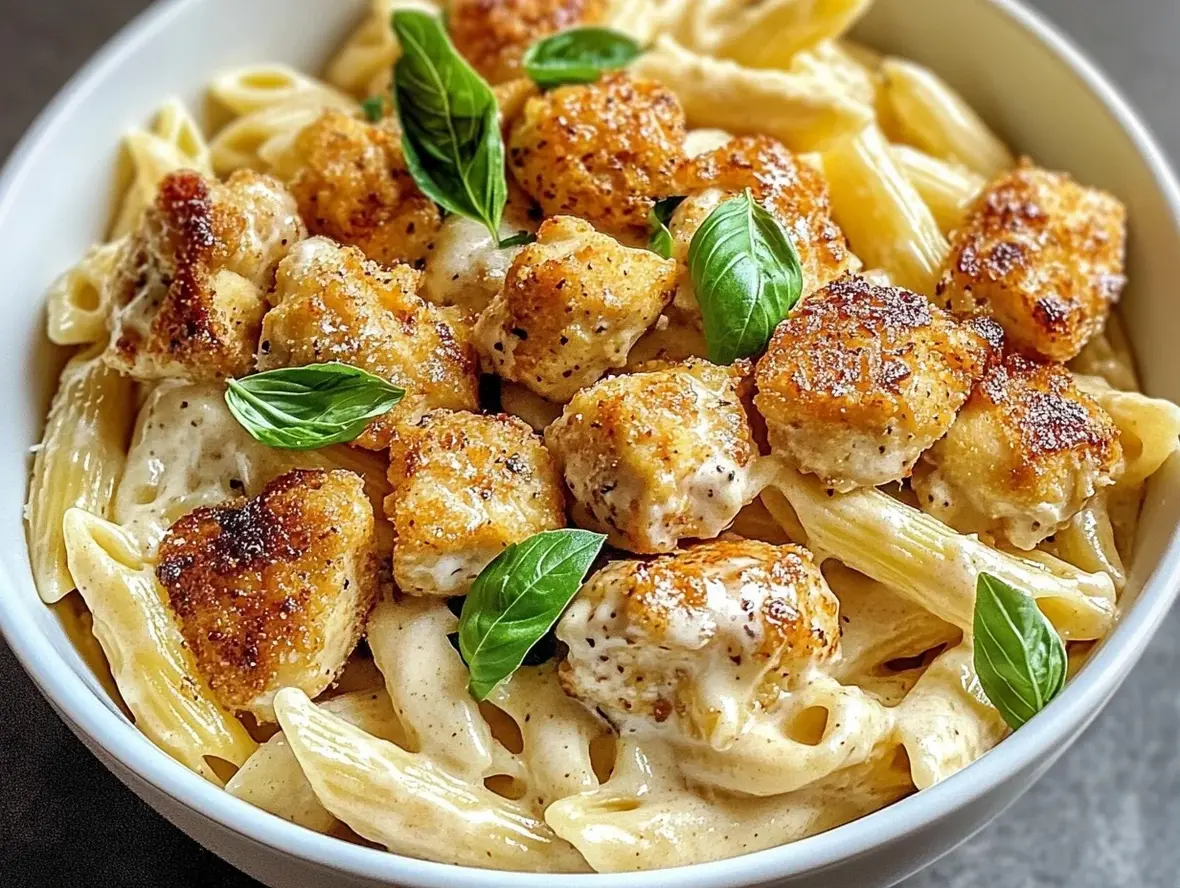
Creamy Parmesan Pasta with Garlic Butter Chicken Bites
Craving a Weeknight Wonder?
Are you looking for a dish that’s both incredibly satisfying and surprisingly easy to make? In a world full of culinary complexities, sometimes the best meals are the ones that unite simple, high-quality ingredients into a symphony of flavor. If you’re nodding along, then you’re in the right place! This Creamy Parmesan Pasta with Garlic Butter Chicken Bites is designed to be your new go-to. Imagine tender, succulent chicken bites, kissed with fragrant garlic and butter, nestled amongst a bed of al dente pasta coated in a rich, velvety parmesan sauce. It’s comfort food at its finest, perfect for those busy weeknights when you want something special without the fuss, or for those moments when you want to impress guests with minimal effort but maximum deliciousness. Let’s dive into how to create this crowd-pleasing masterpiece that will have everyone asking for seconds!
The Star Ingredients
The magic of this dish lies in the quality of its components. Fresh ingredients transform a simple pasta dish into an unforgettable culinary experience. Here’s what you’ll need to gather:
For the Creamy Parmesan Pasta:
- 1 pound pasta (fettuccine, linguine, or penne work beautifully): Choose a pasta shape that holds sauce well for maximum deliciousness. Al dente is key!
- 2 tablespoons unsalted butter: The foundation of our luscious sauce, providing richness and a smooth texture.
- 2 cloves garlic, minced: Adds that pungent, aromatic depth that complements the parmesan perfectly.
- 1 ½ cups heavy cream: The secret to a truly decadent and creamy sauce that coats every strand of pasta. (See Healthier Alternatives for a lighter option.)
- 1 cup freshly grated Parmesan cheese: Use the good stuff! Freshly grated Parmesan melts better and offers a sharper, more complex flavor than pre-shredded. It should be nutty and slightly salty.
- ½ teaspoon salt, or to taste: Essential for bringing out all the flavors.
- ¼ teaspoon black pepper, or to taste: A hint of spice to balance the creaminess.
- Optional: ¼ cup reserved pasta water: This starchy liquid is gold for achieving the perfect sauce consistency.
For the Garlic Butter Chicken Bites:
- 1 ½ pounds boneless, skinless chicken breasts or thighs, cut into 1-inch bite-sized pieces: Thighs tend to be more forgiving and moist, but breasts are leaner.
- 1 tablespoon olive oil: For searing the chicken and building flavor.
- 2 tablespoons unsalted butter: To create that irresistible garlic butter coating.
- 3 cloves garlic, minced: Double the garlic, double the deliciousness!
- ½ teaspoon dried Italian seasoning (or a mix of dried oregano, basil, and thyme): Adds a subtle herby note.
- Salt and freshly ground black pepper, to taste: Season generously for maximum flavor impact.
- Optional garnish: Fresh parsley, chopped: For a pop of color and fresh herbaceousness.
Timing is Everything
This recipe is designed for efficiency, coming together in about 40 minutes from start to finish. This is notably faster than many other complex pasta dishes, making it ideal for weeknight dinners. Most family-favorite pasta recipes average around 45-60 minutes, so you’re saving precious time while still delivering a gourmet meal!

Crafting Your Culinary Masterpiece
Step 1: Prepare the Chicken
Start by ensuring your chicken is cut into uniform, bite-sized pieces. This guarantees even cooking. Pat the chicken dry with paper towels – this is crucial for achieving a beautiful sear and preventing steaming. Season generously with salt and pepper. Set aside.
Step 2: Cook the Pasta
Bring a large pot of generously salted water to a rolling boil. Add your chosen pasta and cook according to package directions until al dente – it should still have a slight bite. Before draining, reserve about 1 cup of the starchy pasta water. Drain the pasta and set it aside. Do not rinse!
Step 3: Make the Garlic Butter Sauce
While the pasta cooks, melt 2 tablespoons of butter in a large skillet or saucepan over medium heat. Add the minced garlic and sauté for about 1 minute until fragrant, being careful not to burn it. Pour in the heavy cream and bring it to a gentle simmer. Let it bubble softly for 2-3 minutes to thicken slightly. Stir in the grated Parmesan cheese, salt, and pepper until the cheese is fully melted and the sauce is smooth and creamy. If the sauce seems too thick, you can add a splash of the reserved pasta water to reach your desired consistency.
Step 4: Cook the Chicken Bites
In a separate skillet, heat 1 tablespoon of olive oil over medium-high heat. Add the seasoned chicken pieces in a single layer (you may need to cook in batches to avoid crowding the pan). Sear the chicken for about 3-4 minutes per side, until golden brown and cooked through. Once the chicken is cooked, add the remaining 2 tablespoons of butter and the minced garlic (the second batch of garlic!) and Italian seasoning to the skillet. Swirl the pan until the butter is melted and the garlic is fragrant. Toss the chicken in this glorious garlic butter for about 1 minute, ensuring each piece is coated.
Step 5: Combine and Finish
Add the drained pasta directly into the skillet with the creamy Parmesan sauce. Toss gently to coat all the pasta strands. Now, add the garlic butter chicken bites to the pasta. Toss everything together to combine. If the sauce is too thick, add a little more of the reserved pasta water to loosen it up. Taste and adjust seasoning if needed.
Nutritional Highlights
While this dish is a decadent treat, here’s a general idea of what you can expect per serving (assuming 4 servings). Exact values will vary based on ingredients used.
- Calories: Approx. 650-750
- Protein: Approx. 30-40g
- Fat: Approx. 40-50g
- Carbohydrates: Approx. 40-50g
Note: This is an estimation. For precise nutritional information, it’s recommended to use a nutritional calculator with your specific ingredients and portion sizes.
Making it Lighter Without Sacrificing Flavor
Want to enjoy this creamy delight with fewer calories or less fat? Try these smart swaps:
- Lighter Cream Sauce: Swap half of the heavy cream with half-and-half or whole milk. For an even lighter version, use evaporated milk (seasons and thickens well) or a blend of low-fat milk and a cornstarch slurry (1 tbsp cornstarch mixed with 2 tbsp cold water, simmered into the sauce until thickened).
- Leaner Chicken: Chicken breast is inherently leaner than thighs.
- Whole Wheat Pasta: Opt for whole wheat pasta for added fiber and nutrients.
- Vegetable Boost: Stir in steamed broccoli florets, sautéed spinach, or peas with the pasta for added fiber and vitamins.
- Reduced Cheese: Use slightly less Parmesan, or supplement with nutritional yeast for a cheesy flavor boost with fewer calories.
Serving Suggestions
This pasta dish is quite hearty on its own, but here are a few ideas to complete your meal:
- A Crisp Green Salad: A simple side salad with a light vinaigrette cuts through the richness beautifully.
- Garlic Bread: What’s pasta without a side of crusty garlic bread for dipping into any leftover sauce?
- Steamed Asparagus or Broccoli: Adds a fresh, vibrant element and extra nutrients.
- A glass of crisp white wine like Pinot Grigio or Sauvignon Blanc.
Common Mistakes to Avoid
Ensure your pasta night is a success by avoiding these common pitfalls:
- Overcooking the Pasta: Mushy pasta is a tragedy! Always cook to al dente, remembering it will continue to cook slightly when mixed with the sauce.
- Not Salting the Pasta Water: This is your only chance to season the pasta itself. Make it taste like the sea!
- Burning the Garlic: Burnt garlic turns bitter. Sauté it gently until fragrant, not browned.
- Rinsing the Pasta: This washes away the starch that helps the sauce cling to the pasta.
- Using Pre-Shredded Parmesan: It often contains anti-caking agents that prevent it from melting smoothly.
Storing and Reheating Leftovers
Leftovers can be stored in an airtight container in the refrigerator for up to 3 days. The sauce may thicken considerably upon cooling.
To reheat: Gently warm the pasta and chicken in a skillet over low heat, adding a splash of milk, cream, or pasta water to loosen the sauce. You can also microwave, but be sure to stir halfway through and add a little liquid to prevent drying out.
A Comforting Classic, Elevated
There you have it – a restaurant-worthy Creamy Parmesan Pasta with Garlic Butter Chicken Bites ready in under an hour! This dish strikes a perfect balance between indulgent comfort and weeknight practicality. The creamy, cheesy sauce is a hug in a bowl, while the tender, garlicky chicken bites add a delightful protein punch. It’s versatile, delicious, and guaranteed to become a family favorite. Don’t wait – gather your ingredients and bring this delightful meal to your table tonight!
Give this recipe a try and let us know what you think! Tag us in your creations or share your favorite pasta tips in the comments below!
FAQs
***What kind of pasta is best for this recipe?***
Long pastas like fettuccine or linguine are fantastic as they get coated evenly in the creamy sauce. However, shorter shapes like penne, farfalle, or rotini also work well and trap the sauce beautifully.
***Can I make this dish vegetarian?***
Absolutely! Simply omit the chicken. You can add sautéed mushrooms, roasted bell peppers, or steamed broccoli for extra texture and flavor. You might want to sauté some extra garlic and herbs in the butter before adding the cream to enhance the non-chicken flavors.
***Why is my sauce not creamy?***
Ensure you are using heavy cream, not milk or half-and-half for the richest sauce. Also, make sure your Parmesan cheese is freshly grated and melted slowly over medium-low heat. Don’t boil the sauce vigorously after adding the cheese, as it can cause it to break.
***Can I use pre-cooked chicken?***
Yes, you can! If using pre-cooked chicken (like rotisserie chicken), simply add it to the garlic butter for the last minute of cooking to warm it through and coat it. You won’t need to sear it.
Garlic Butter Chicken Bites with Creamy Parmesan Pasta
Description
This delightful dish combines tender, garlicky chicken bites with a rich and creamy Parmesan pasta for the ultimate comfort food. It’s an easy, satisfying meal that’s perfect for busy weeknights or a cozy dinner.
Ingredients
- 1lb chicken breast, cubed8 ozpasta (penne or rotini)4 tbspbutter2cloves garlic, minced1 cupheavy cream1 cupgrated Parmesan cheeseSalt and pepper, to tasteFresh basil, for garnish
- 8 ozpasta (penne or rotini)4 tbspbutter2cloves garlic, minced1 cupheavy cream1 cupgrated Parmesan cheeseSalt and pepper, to tasteFresh basil, for garnish
- 4 tbspbutter2cloves garlic, minced1 cupheavy cream1 cupgrated Parmesan cheeseSalt and pepper, to tasteFresh basil, for garnish
- 2cloves garlic, minced1 cupheavy cream1 cupgrated Parmesan cheeseSalt and pepper, to tasteFresh basil, for garnish
- 1 cupheavy cream1 cupgrated Parmesan cheeseSalt and pepper, to tasteFresh basil, for garnish
- 1 cupgrated Parmesan cheeseSalt and pepper, to tasteFresh basil, for garnish
- Salt and pepper, to tasteFresh basil, for garnish
- Fresh basil, for garnish
Instructions
- 1️⃣Cook the Pasta:Bring a large pot of salted water to a boil.Cook the pasta according to package directions until al dente. Drain and set aside.2️⃣Cook the Chicken:Heat a large skillet over medium heat and melt the butter.Add the minced garlic and sauté for 1-2 minutes, until fragrant.Add the cubed chicken, cooking for 6-8 minutes, stirring occasionally, until golden brown and fully cooked. Season with salt and pepper.3️⃣Make the Sauce:Lower the heat and stir in the heavy cream, scraping up any browned bits from the skillet for extra flavor.Gradually add the Parmesan cheese, stirring until the sauce is smooth and creamy. Adjust seasoning with salt and pepper as needed.4️⃣Combine and Serve:Add the cooked pasta to the skillet and toss to coat it evenly in the creamy sauce.Garnish with fresh basil leaves and serve immediately.
- Bring a large pot of salted water to a boil.
- Cook the pasta according to package directions until al dente. Drain and set aside.2️⃣Cook the Chicken:Heat a large skillet over medium heat and melt the butter.Add the minced garlic and sauté for 1-2 minutes, until fragrant.Add the cubed chicken, cooking for 6-8 minutes, stirring occasionally, until golden brown and fully cooked. Season with salt and pepper.3️⃣Make the Sauce:Lower the heat and stir in the heavy cream, scraping up any browned bits from the skillet for extra flavor.Gradually add the Parmesan cheese, stirring until the sauce is smooth and creamy. Adjust seasoning with salt and pepper as needed.4️⃣Combine and Serve:Add the cooked pasta to the skillet and toss to coat it evenly in the creamy sauce.Garnish with fresh basil leaves and serve immediately.
- 2️⃣Cook the Chicken:Heat a large skillet over medium heat and melt the butter.Add the minced garlic and sauté for 1-2 minutes, until fragrant.Add the cubed chicken, cooking for 6-8 minutes, stirring occasionally, until golden brown and fully cooked. Season with salt and pepper.3️⃣Make the Sauce:Lower the heat and stir in the heavy cream, scraping up any browned bits from the skillet for extra flavor.Gradually add the Parmesan cheese, stirring until the sauce is smooth and creamy. Adjust seasoning with salt and pepper as needed.4️⃣Combine and Serve:Add the cooked pasta to the skillet and toss to coat it evenly in the creamy sauce.Garnish with fresh basil leaves and serve immediately.
- Heat a large skillet over medium heat and melt the butter.
- Add the minced garlic and sauté for 1-2 minutes, until fragrant.Add the cubed chicken, cooking for 6-8 minutes, stirring occasionally, until golden brown and fully cooked. Season with salt and pepper.3️⃣Make the Sauce:Lower the heat and stir in the heavy cream, scraping up any browned bits from the skillet for extra flavor.Gradually add the Parmesan cheese, stirring until the sauce is smooth and creamy. Adjust seasoning with salt and pepper as needed.4️⃣Combine and Serve:Add the cooked pasta to the skillet and toss to coat it evenly in the creamy sauce.Garnish with fresh basil leaves and serve immediately.
- Add the cubed chicken, cooking for 6-8 minutes, stirring occasionally, until golden brown and fully cooked. Season with salt and pepper.3️⃣Make the Sauce:Lower the heat and stir in the heavy cream, scraping up any browned bits from the skillet for extra flavor.Gradually add the Parmesan cheese, stirring until the sauce is smooth and creamy. Adjust seasoning with salt and pepper as needed.4️⃣Combine and Serve:Add the cooked pasta to the skillet and toss to coat it evenly in the creamy sauce.Garnish with fresh basil leaves and serve immediately.
- 3️⃣Make the Sauce:
- Lower the heat and stir in the heavy cream, scraping up any browned bits from the skillet for extra flavor.Gradually add the Parmesan cheese, stirring until the sauce is smooth and creamy. Adjust seasoning with salt and pepper as needed.4️⃣Combine and Serve:Add the cooked pasta to the skillet and toss to coat it evenly in the creamy sauce.Garnish with fresh basil leaves and serve immediately.
- Gradually add the Parmesan cheese, stirring until the sauce is smooth and creamy. Adjust seasoning with salt and pepper as needed.4️⃣Combine and Serve:Add the cooked pasta to the skillet and toss to coat it evenly in the creamy sauce.Garnish with fresh basil leaves and serve immediately.
- 4️⃣Combine and Serve:
- Add the cooked pasta to the skillet and toss to coat it evenly in the creamy sauce.Garnish with fresh basil leaves and serve immediately.
- Garnish with fresh basil leaves and serve immediately.
Notes
For a touch of heat, add a pinch of red pepper flakes to the butter while cooking the garlic.Substitute half-and-half for a lighter version of the sauce, but the texture may be less creamy.Pair with a side salad or garlic bread for a complete meal.
Substitute half-and-half for a lighter version of the sauce, but the texture may be less creamy.Pair with a side salad or garlic bread for a complete meal.
Pair with a side salad or garlic bread for a complete meal.
“`