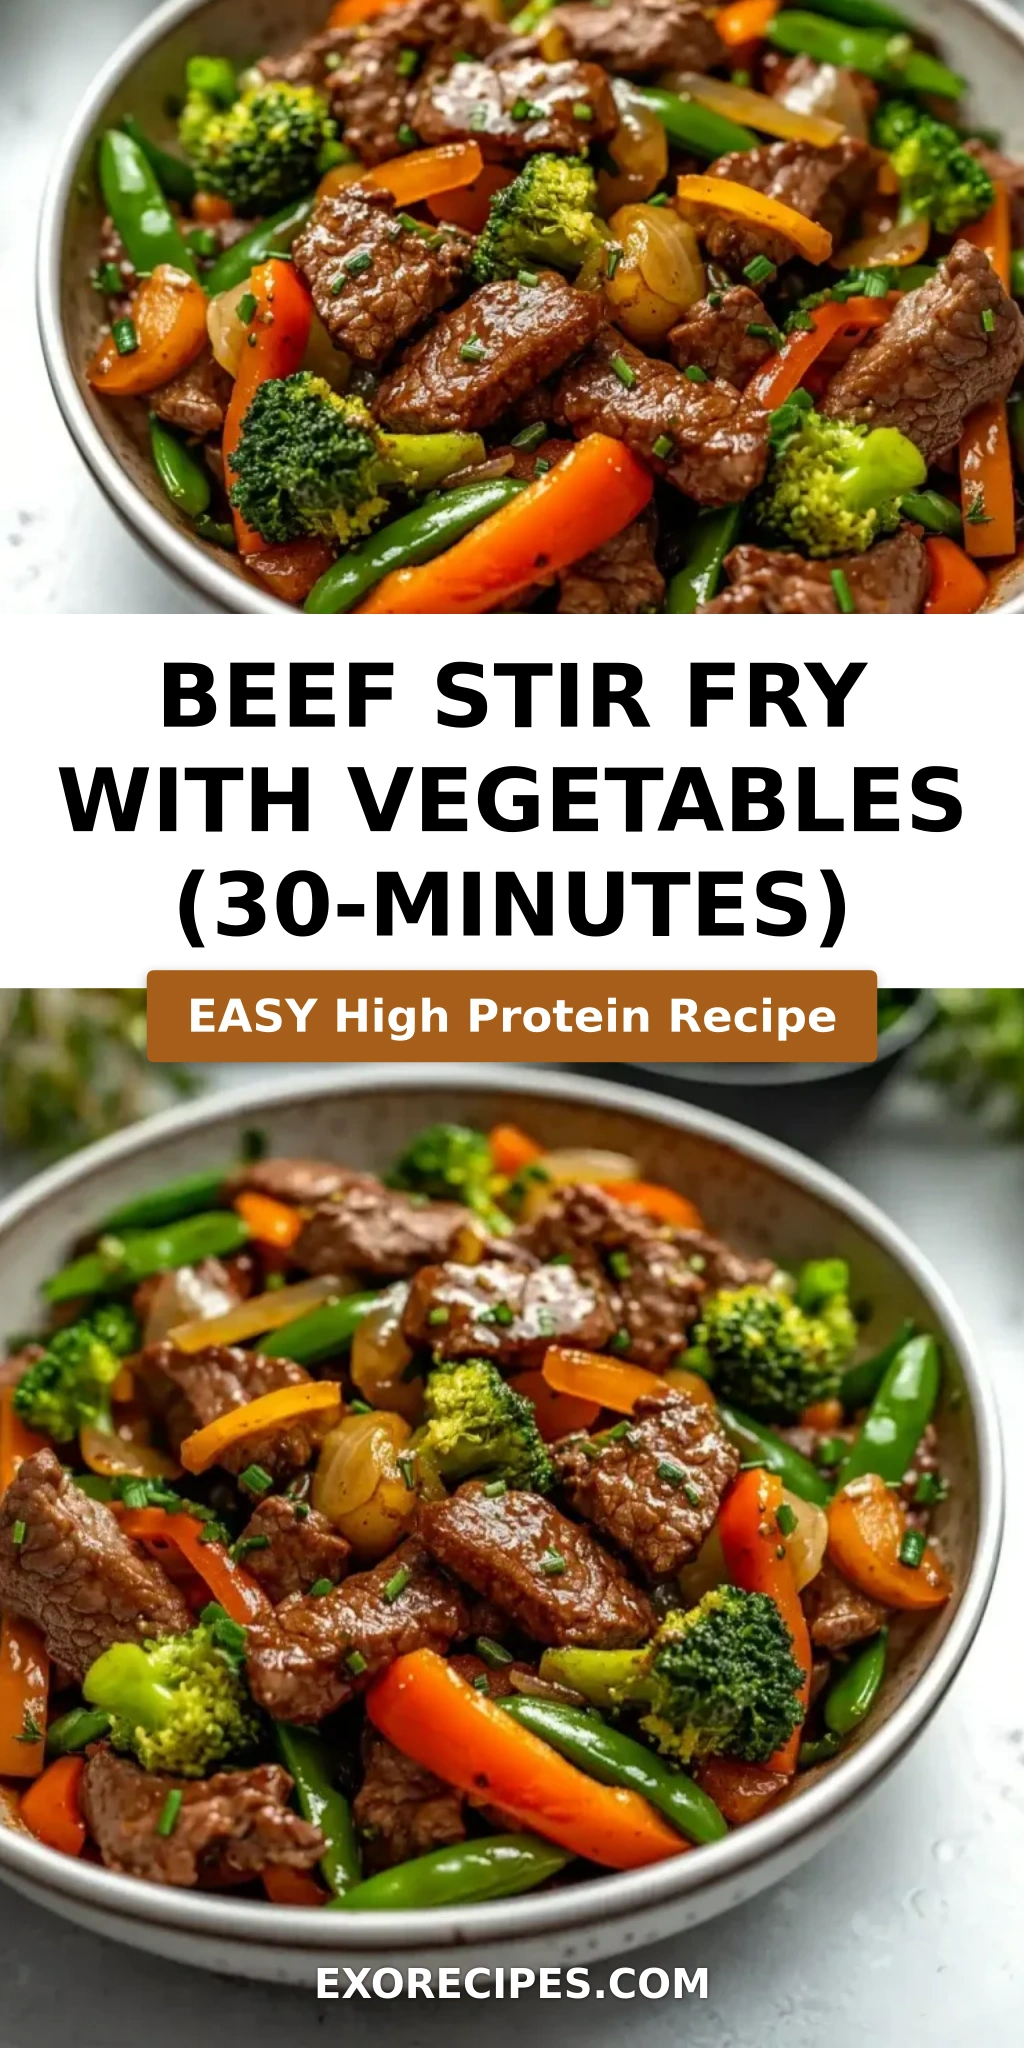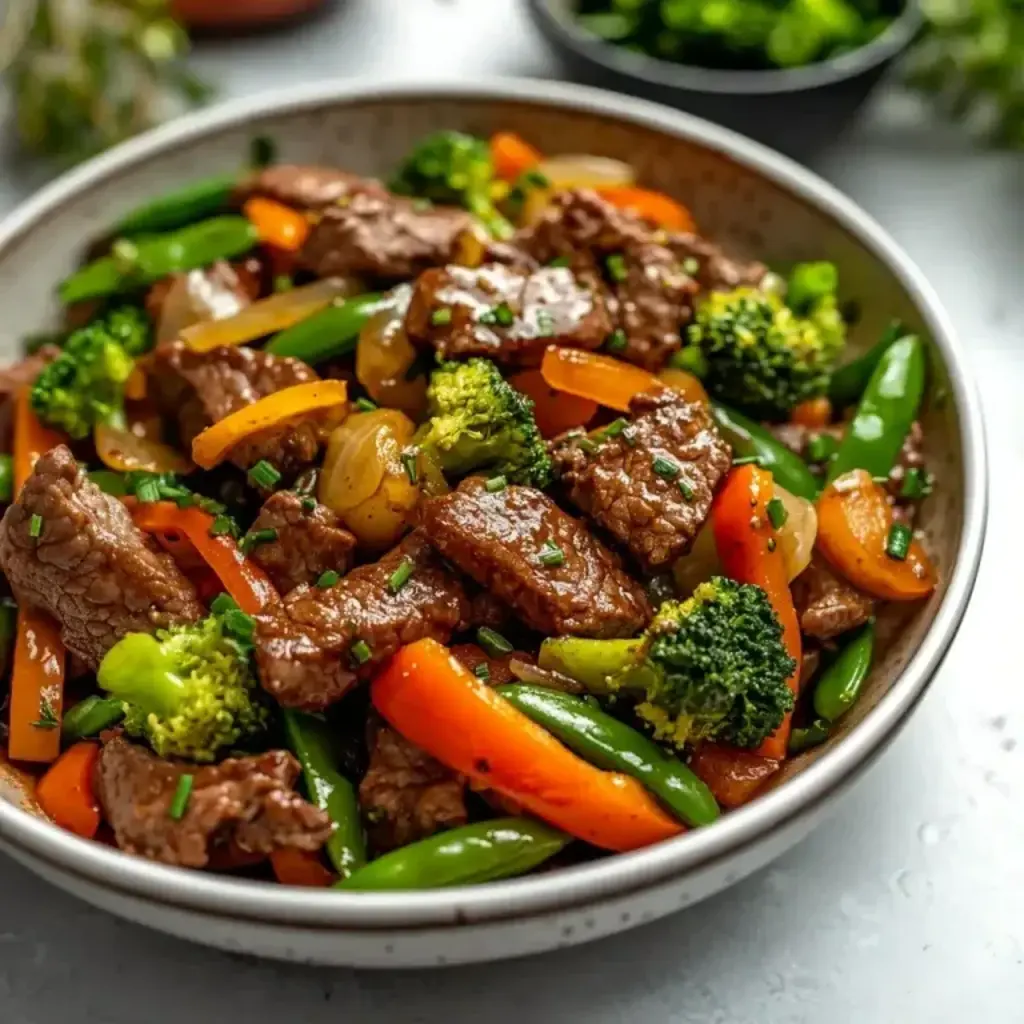
Easy 30-Minute Beef Stir Fry with Vegetables

Beef Stir Fry with Vegetables (30-Minutes) Quick and Easy for Busy Weeknights

⚖️
Difficulty
Easy
⏲️
Prep Time
10

mins

🕒
Cook Time
20

mins

⏱️
Total Time
30

mins

🍽️
Servings
4

New York City is a whirlwind, isn’t it? Between culinary school in Paris and my Moroccan roots, I’ve learned to appreciate a dish that’s both incredibly flavorful and remarkably fast. This 30-minute beef stir fry recipe is my answer to those evenings when inspiration strikes but time is short. It’s a weeknight marvel, transforming simple ingredients into a vibrant meal that feels celebratory, not rushed. I love sourcing my produce from the Union Square Greenmarket, and this quick beef stir fry always tastes best with the freshest seasonal finds.

Imagine this: tender, succulent slices of beef, kissed by a hot wok and coated in a glistening, savory-sweet sauce, mingling with crisp-tender vegetables bursting with color and flavor. The aroma fills your kitchen – a harmonious blend of garlic, ginger, and the subtle nuttiness of sesame. It’s a feast for the senses, a balanced dance between protein and produce, all brought together by a sauce that’s anything but basic. This is the kind of dish that makes you pause and savor each bite, a testament to how simple ingredients can create culinary magic.

My approach to this easy beef stir fry builds on classic techniques, adapted for speed and simplicity. I’ll share a little secret from my Paris training that ensures the beef is always melt-in-your-mouth tender, never chewy. We’ll get a beautiful sear on the beef without overcrowding the pan, a crucial step many home cooks overlook. And for those of you looking for a truly perfect 30 minute stir fry, I’ll guide you through selecting vegetables that maintain their vibrant color and delightful crunch, ensuring every element on your plate sings. Get ready for a quick beef stir fry that will become a staple in your recipe rotation!

Why This Beef Stir Fry with Vegetables Recipe Is the Best

The secret to this beef and vegetable stir fry lies in a simple yet effective sauce my mother used to make on special occasions in Morocco, adapted with a touch of French precision. It’s a perfect balance of salty soy, sweet honey, umami-rich hoisin, and aromatic sesame oil, infused with fresh garlic and ginger. This flavor profile isn’t just delicious; it’s versatile enough to complement any vegetable you choose, making it a truly customizable experience that beats any bottled sauce.

From my culinary training in Paris, I learned the importance of high heat and minimal cooking time for stir-fries. For this recipe, we achieve perfectly tender beef by slicing it thinly against the grain and searing it quickly in a single layer, ensuring a beautiful crust without overcooking. The vegetables are added in stages, respecting their cooking times to maintain their vibrant colors and satisfying crisp-tender texture, a hallmark of professional stir-fry technique.

This quick beef stir fry is designed to be incredibly fool-proof and fast, making it ideal for busy weeknights or when you’re new to cooking. The ingredient list is straightforward, and the steps are clear and concise. Even a beginner cook can follow along and achieve restaurant-quality results in just 30 minutes. It’s a recipe that builds confidence in the kitchen while delivering maximum flavor with minimal effort.

Beef Stir Fry Recipe Ingredients

One of the joys of living in NYC is the access to incredible ingredients. I often find myself at local farmers’ markets or specialty Asian grocers for the best produce and cuts of meat. This beef stir fry recipe is designed to be flexible, using ingredients readily available in most supermarkets. If I’m feeling nostalgic for my mother’s cooking, I’ll often add a pinch of cumin or coriander to the sauce, a little Moroccan flair to my New York kitchen.

Ingredients List

  • 1 lb (450g) beef (flank steak, sirloin, or ribeye), thinly sliced against the grain
  • 2 tablespoons soy sauce
  • 1 tablespoon hoisin sauce
  • 1 tablespoon sesame oil (toasted is best for flavor)
  • 1 tablespoon honey
  • 2 garlic cloves, minced
  • 1 teaspoon fresh ginger, grated
  • 2 tablespoons vegetable oil (or other high-heat oil like avocado or canola), divided
  • 1 bell pepper (any color), thinly sliced
  • 1 cup broccoli florets
  • 1 carrot, julienned
  • 1/2 cup snap peas, ends trimmed
  • 2 green onions, chopped (for garnish)
  • 1 tablespoon sesame seeds (optional, for garnish)
  • Steamed rice (optional, for serving)

Ingredient Spotlight

Beef: For this quick beef stir fry, I recommend cuts like flank steak, sirloin, or ribeye. Look for well-marbled cuts for tender results. In the US, you can find these at any supermarket butcher counter. When slicing, make sure it’s chilled or even slightly frozen to make it easier to get those thin, even slices against the grain. This is key for preventing chewiness.

Bell Peppers: Use any color bell pepper you like – red, yellow, or orange will add beautiful sweetness and visual appeal. Green bell peppers tend to be a bit more bitter but also work well. I usually pick up a mix from my local grocery store or a farmer’s market if they have them. Ensure they are sliced thinly so they cook quickly and evenly with the other vegetables.

Broccoli: Fresh broccoli florets are essential for that satisfying bite and vibrant green color. You can often find pre-cut florets in the produce section of your supermarket, which is a great time-saver. If you’re using a whole head, make sure to cut the florets into bite-sized pieces, similar in size to the bell peppers and carrots, for even cooking.

Original IngredientBest SubstitutionFlavor / Texture Impact
Beef (Flank/Sirloin)Chicken breast or thighs, thinly sliced; Pork tenderloin, thinly sliced; Firm Tofu, cubedChicken and pork will cook faster and be slightly more tender; Tofu will absorb sauce beautifully but will have a softer texture.
Broccoli floretsCauliflower florets, sugar snap peas, green beans (trimmed)Cauliflower offers a similar texture but a milder flavor. Green beans and snap peas add a different crispness.
HoneyMaple syrup, agave nectar, brown sugarMaple syrup and agave will provide a similar sweetness with a slight flavor difference; brown sugar adds a deeper caramelized note.

How to Make Beef Stir Fry with Vegetables — Step-by-Step

Follow these simple steps for a delicious and quick beef stir fry that will impress at your dinner table.

Step 1: Prepare the Beef and Sauce

Thinly slice the beef against the grain for maximum tenderness. If you have time, marinate the beef in 1 tablespoon of soy sauce, minced garlic, and grated ginger for 15-30 minutes for added flavor. In a separate small bowl, whisk together the remaining 1 tablespoon of soy sauce, hoisin sauce, sesame oil, honey, minced garlic, and grated ginger. Set this flavorful sauce aside.

💡 mia’s Pro Tip: Slicing the beef when it’s partially frozen makes it much easier to achieve thin, uniform cuts essential for stir-frying. It also helps the beef absorb marinades better.

Step 2: Sear the Beef

Heat 1 tablespoon of vegetable oil in a wok or large skillet over medium-high heat until shimmering hot. Add the beef in a single layer, ensuring not to overcrowd the pan. Let it sear undisturbed for 2-3 minutes to develop a beautiful, crispy crust. Once seared, remove the beef from the pan and set it aside on a plate. This high-heat searing locks in the juices.

⚠️ Common Mistake to Avoid: Overcrowding the pan! Adding too much beef at once lowers the pan’s temperature, causing the meat to steam instead of sear, resulting in a less flavorful and tougher texture.

Step 3: Stir-Fry the Harder Vegetables

In the same hot pan, add the remaining tablespoon of vegetable oil. Add the julienned carrots, sliced bell pepper, and broccoli florets. Stir-fry vigorously for about 3-5 minutes. You want the vegetables to start to soften but still maintain a pleasant crispness – they should be vibrant and tender-crisp.

Step 4: Add Softer Vegetables

Add the snap peas to the pan with the other vegetables. Continue stir-frying for another 2-3 minutes until the snap peas are bright green and just tender. The goal is to cook everything quickly to retain maximum nutrients and a delightful crunch.

Step 5: Combine and Sauce

Return the seared beef to the pan along with all the pre-made sauce. Toss everything together quickly, ensuring the beef and vegetables are evenly coated. Let it cook for another 1-2 minutes, allowing the sauce to thicken slightly and coat everything beautifully.

💡 mia’s Pro Tip: Don’t overcook the sauce! It should just thicken enough to coat the ingredients. If it gets too thick, a splash of water or broth can help loosen it.

Step 6: Garnish and Serve

Remove the wok or skillet from the heat. Garnish generously with freshly chopped green onions and a sprinkle of sesame seeds, if desired. Serve this delicious beef and vegetable stir fry immediately over steamed rice or as a standalone dish.

StepActionDurationKey Visual Cue
1Prep Beef & Sauce15-30 mins (prep) + 5 mins (sauce)Thinly sliced beef; sauce ingredients whisked.
2Sear Beef2-3 minsBeef has a golden-brown crust.
3Stir-fry Harder Veggies3-5 minsBrightly colored, tender-crisp vegetables.
4Add Softer Veggies2-3 minsSnap peas are bright green.
5Combine & Sauce1-2 minsSauce coats ingredients, slightly thickened.
6Garnish & ServeImmediateFresh green onions and sesame seeds.

Serving & Presentation

To serve this delightful beef stir fry, I love plating it over a bed of fluffy steamed jasmine or brown rice. The rice acts as a perfect canvas, soaking up any extra sauce. For a restaurant-worthy presentation, arrange the stir-fry artfully in a bowl or on a plate, ensuring the colorful vegetables are visible. A final sprinkle of toasted sesame seeds and fresh green onions adds both texture and a pop of visual freshness.

In my Moroccan heritage, meals are always communal and visually appealing. I often draw inspiration from that by making sure the vibrant colors of the vegetables shine through. In NYC, we have such amazing influences; sometimes I’ll serve this with a side of kimchi for a Korean twist or even a dollop of harissa-spiced yogurt if I’m feeling particularly adventurous, echoing my North African roots.

Pairing TypeSuggestionsWhy It Works
Side DishSteamed Jasmine Rice, Brown Rice, Quinoa, Cauliflower RiceProvides a neutral base to soak up the flavorful sauce and adds substance to the meal.
Sauce / DipSriracha, Chili Garlic Sauce, Peanut Sauce, Tzatziki (for a Greek twist)Adds an extra layer of spice, creaminess, or flavor complexity to complement the stir-fry.
BeverageCold Green Tea, Light Lager, Dry Riesling, Sparkling Water with LimeRefreshing drinks cut through the savory flavors and cleanse the palate.
GarnishToasted Sesame Seeds, Sliced Green Onions, Fresh Cilantro, Red Pepper FlakesAdds visual appeal, contrasting textures (crunchy seeds), and fresh aromatic notes.

Make-Ahead, Storage & Reheating

As a busy New Yorker, I rely on meal prep to keep my healthy eating on track. This beef stir fry is perfect for that! I often prepare the sauce and chop all the vegetables the night before, storing them separately in airtight containers in the refrigerator. This cuts down the active cooking time to mere minutes when you’re ready to eat.

MethodContainerDurationReheating Tip
RefrigeratorAirtight container3-4 daysGently reheat in a skillet or microwave until warmed through. For best texture, add a splash of water or broth if it seems dry.
FreezerFreezer-safe container or bag1-2 monthsThaw overnight in the refrigerator. Reheat gently in a pan, as the texture of the vegetables might change slightly upon freezing and thawing.
Make-AheadSeparate containers for beef, sauce, and chopped veggies2 days in advanceCombine ingredients and stir-fry just before serving for the freshest texture.

When reheating, I find that a quick stir-fry in a skillet over medium heat is the best way to revive the dish, especially the beef and vegetables. Add a tiny bit of oil if needed. Avoid microwaving on high heat for too long, as this can make the beef tough and the vegetables mushy. If your sauce has solidified, a tablespoon of water or broth will help loosen it right up.

Variations & Easy Swaps

VariationKey ChangeBest ForDifficulty Impact
Hearty Stir FryAdd extra broccoli florets, mushrooms, and maybe some water chestnuts. Add a touch more soy sauce to the sauce.Those who want a very substantial meal.No change.
Gluten-Free & Dairy-FreeUse Tamari instead of soy sauce, ensure hoisin is GF. Naturally dairy-free.Those with gluten sensitivities or preferences.No change.
Spicy KickAdd red pepper flakes to the sauce or a bit of chili paste.Spice lovers.No change.

Hearty Beef and Broccoli Stir Fry

To make this a truly hearty beef and broccoli stir fry, I love to add more broccoli florets and perhaps some shiitake mushrooms for an earthy depth. You can also add some baby corn or water chestnuts for extra texture. I often find myself adding a touch more soy sauce to the sauce to ensure the flavors can stand up to the extra ingredients. This makes it a complete meal, satisfying and filling without needing a side dish.

Gluten-Free and Dairy-Free Beef Stir Fry

Making this gluten-free and dairy-free is wonderfully straightforward. Simply swap the soy sauce for tamari, which is a gluten-free soy sauce. You’ll want to check your hoisin sauce label, as some contain wheat products; opt for a certified gluten-free version. Honey and sesame oil are naturally dairy-free. This adaptation doesn’t compromise the flavor much, maintaining that savory profile you love.

Spicy Sichuan-Style Beef Stir Fry

For a spicy Sichuan-style twist, I like to add a pinch of red pepper flakes directly into the sauce mixture. You could also add a teaspoon of chili paste or even a few dried red chilies when you’re searing the beef for an extra kick. This variation transforms the dish into something with a bit more fire and complexity, perfect for those who enjoy a little heat. It’s a quick way to bring a whole new dimension to this versatile recipe.

How do you make beef stir fry with vegetables tender and not chewy?

The key to tender beef in stir-fry is to slice it thinly against the grain before cooking. Marinating it briefly can also help. Crucially, you must cook the beef quickly over high heat, searing it in a single layer without overcrowding the pan. Overcrowding will cause the beef to steam rather than sear, making it tough and chewy. Removing the beef once seared and returning it at the end, after the vegetables are cooked, prevents it from overcooking.

What vegetables go best in a beef stir fry?

A good beef stir fry benefits from a variety of textures and colors. Classic choices include broccoli, bell peppers (any color), carrots, snap peas, onions, and mushrooms. For this specific recipe, I’ve chosen a mix of broccoli, bell peppers, carrots, and snap peas for their color, flavor, and crisp-tender texture. You can also experiment with zucchini, snow peas, bok choy, or green beans, just be mindful of adding them at the right time based on their cooking speed.

Can I use a different cut of beef for a 30-minute stir fry?

Absolutely! While flank steak, sirloin, and ribeye are excellent choices known for their tenderness, you can use other cuts if sliced very thinly against the grain. Consider top round or skirt steak. The key is the thin slicing and quick cooking over high heat. Avoid tougher, more connective cuts like chuck unless you plan to marinate them for an extended period and cook them longer, which would exceed the 30-minute total time.

What is the best sauce to use for beef and vegetable stir fry?

The best stir-fry sauce balances savory, sweet, and aromatic notes. For this recipe, I’ve crafted a sauce with soy sauce for saltiness and umami, hoisin sauce for depth and a touch of sweetness, honey for sweetness, sesame oil for nutty aroma, and fresh garlic and ginger for pungency. This combination is incredibly flavorful and coats the ingredients beautifully. While store-bought sauces can work, making your own allows for better control over ingredients and flavor intensity.

How do I get the vegetables crispy-tender and not mushy?

Achieving that perfect crispy-tender texture is all about the cooking technique. First, cut your vegetables into uniform, bite-sized pieces so they cook evenly. Second, use high heat and stir frequently. Add vegetables that take longer to cook (like carrots and broccoli) first, and then add quicker-cooking ones (like snap peas or leafy greens) towards the end. Don’t overcrowd the pan, as this lowers the temperature and steams the vegetables, making them mushy instead of stir-fried.

Can I marinate the beef for longer than 30 minutes?

Yes, you can absolutely marinate the beef for longer than 30 minutes, and I often do for extra flavor! If you have the time, you can let it marinate for a few hours in the refrigerator. Just be mindful of the ingredients in your marinade. If it contains acidic components like citrus juice or vinegar (though this recipe’s marinade doesn’t), prolonged marination can start to “cook” the beef, potentially affecting its texture. For this soy-based marinade, longer is fine.

What’s the best oil for stir-frying?

For stir-frying, you need an oil with a high smoke point so it doesn’t burn and impart an unpleasant flavor. Vegetable oil, canola oil, grapeseed oil, peanut oil, and avocado oil are all excellent choices that work perfectly for this beef stir fry recipe. Olive oil, especially extra virgin olive oil, has a lower smoke point and is generally not recommended for high-heat stir-frying, though a light olive oil might be acceptable in a pinch.

Can I add other vegetables to this stir fry?

Absolutely! This beef stir fry is incredibly versatile. Feel free to add other vegetables you have on hand. Great additions include mushrooms (sliced), zucchini (halved and sliced), bamboo shoots, water chestnuts, snow peas, green beans (trimmed), onions (sliced), or even leafy greens like spinach or bok choy (add these in the last minute of cooking). Adjust cooking times based on the vegetable’s density to ensure everything is perfectly tender-crisp.

Share Your Version!

I truly hope you enjoy making and eating this quick beef stir fry! It’s a recipe that brings me so much joy, and I’d be thrilled to see how it turns out in your kitchen. Please take a moment to leave a star rating and a comment below to share your thoughts – your feedback helps other cooks immensely! If you share a photo of your creation on Instagram or Pinterest, don’t forget to tag me @chefrecipes2; I absolutely love seeing your culinary adventures!

Did this speedy beef and vegetable stir fry inspire you to try other quick weeknight dinners? Or maybe you experimented with a unique vegetable combination? I’m always curious to hear about your cooking process and any twists you’ve added!

From my NYC kitchen to yours — I hope this recipe brings as much warmth to your table as it does to mine. — mia 🧡

📌

Love This Recipe? Save It to Pinterest!

If you enjoyed this Beef Stir Fry with Vegetables recipe, don’t let it get lost in your browser tabs! 😄 Pin it now so you can find it again anytime — and explore hundreds more tried-and-tested recipes waiting for you on my Pinterest boards.

👉 Follow mia on Pinterest @chefrecipes2

📌 Pin this recipe · 🔁 Re-pin your favorites · 💬 Tag me when you make it — I love seeing your creations!

Print

clock clock iconcutlery cutlery iconflag flag iconfolder folder iconinstagram instagram iconpinterest pinterest iconfacebook facebook iconprint print iconsquares squares iconheart heart iconheart solid heart solid icon

Beef Stir Fry with Vegetables (30-Minutes)

  • Author: Chef Mia

Description

Beef Stir Fry with Vegetables is an easy, healthy, and versatile dish thats perfect for a busy weeknight dinner.With tender slices of beef, a colorful medley of vegetables, and a savory-sweet sauce, it offers both nutrition and flavor in every bite.


Ingredients

Scale
  • 1 lb 450g beef (flank steak, sirloin, or ribeye), thinly sliced
  • 2 tablespoons soy sauce
  • 1 tablespoon hoisin sauce
  • 1 tablespoon sesame oil
  • 1 tablespoon honey
  • 2 garlic cloves (minced)
  • 1 teaspoon fresh ginger (grated)
  • 2 tablespoons vegetable oil (for stir frying)
  • 1 bell pepper (thinly sliced)
  • 1 cup broccoli florets
  • 1 carrot (julienned)
  • 1/2 cup snap peas (ends trimmed)
  • 2 green onions (chopped (for garnish))
  • 1 tablespoon sesame seeds (optional, for garnish)
  • Steamed rice (optional, for serving)

Instructions

  1. Thinly slice the beef against the grain for maximum tenderness. If you have time, marinate the beef in soy sauce, garlic, and ginger for 1530 minutes for added flavor.
  2. In a small bowl, whisk together 2 tablespoons soy sauce, hoisin sauce, sesame oil, honey, minced garlic, and grated ginger. Set aside.
  3. Heat 1 tablespoon of vegetable oil in a wok or large skillet over medium-high heat. Once hot, add the beef in a single layer. Let it sear for 2-3 minutes without stirring, so it forms a nice crispy crust. Once seared, remove the beef and set it aside.
  4. In the same pan, add the remaining tablespoon of vegetable oil. Add the carrots, bell pepper, and broccoli. Stir-fry for about 3-5 minutes until the vegetables start to become tender but still crisp.
  5. Add the snap peas to the pan and continue stir-frying for another 2-3 minutes.
  6. Return the beef to the pan along with the pre-made sauce. Stir everything together, making sure the beef and vegetables are evenly coated. Let it cook for another 1-2 minutes, allowing the sauce to thicken slightly.
  7. Remove from heat and garnish with chopped green onions and sesame seeds, if desired. Serve over steamed rice or enjoy it on its own.


Nutrition

  • Calories: 375 kcal


Beef Stir Fry with Vegetables (30-Minutes)

k">

Tried This Recipe? Leave a Comment!

Did you make this recipe? I’d love to hear how it turned out! Please leave a comment and a rating below. Your feedback helps other home cooks and supports cheerychop.com!

For more delicious inspiration, follow me on Pinterest!
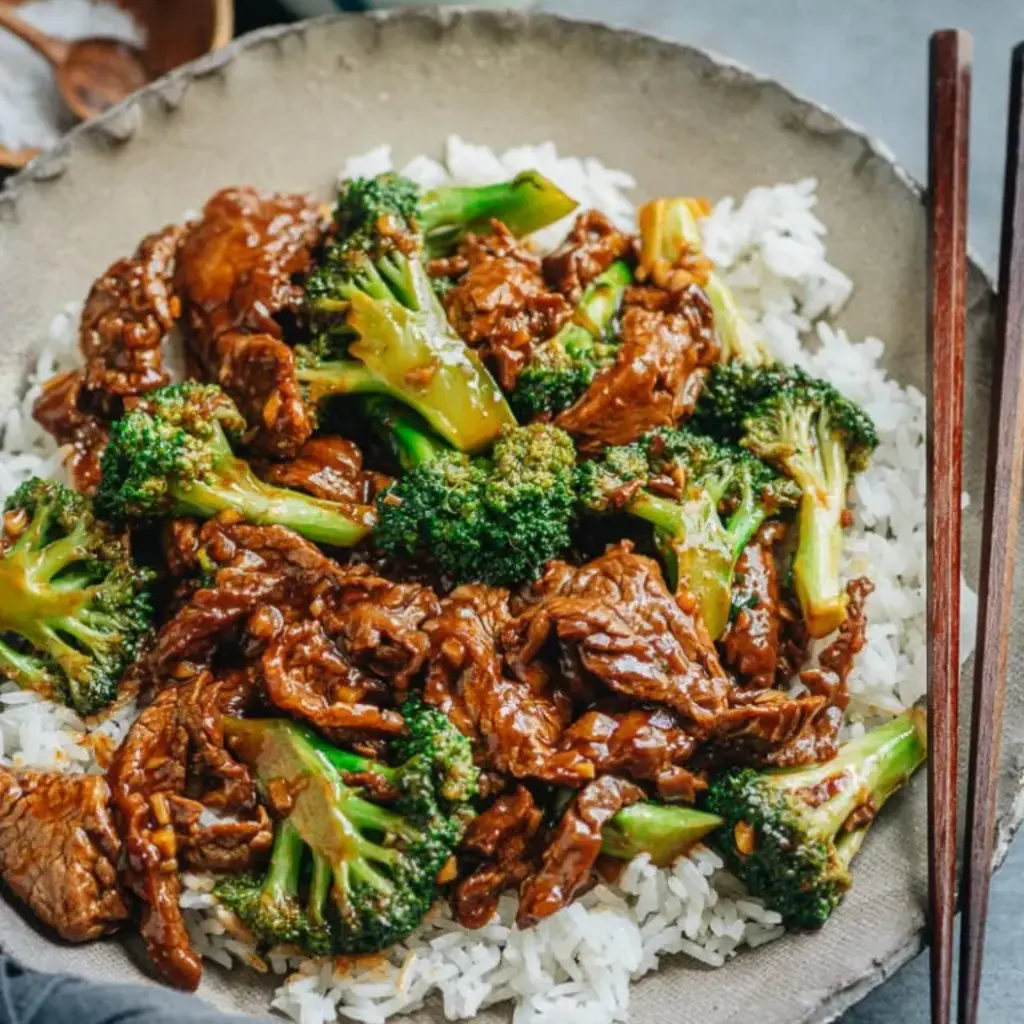
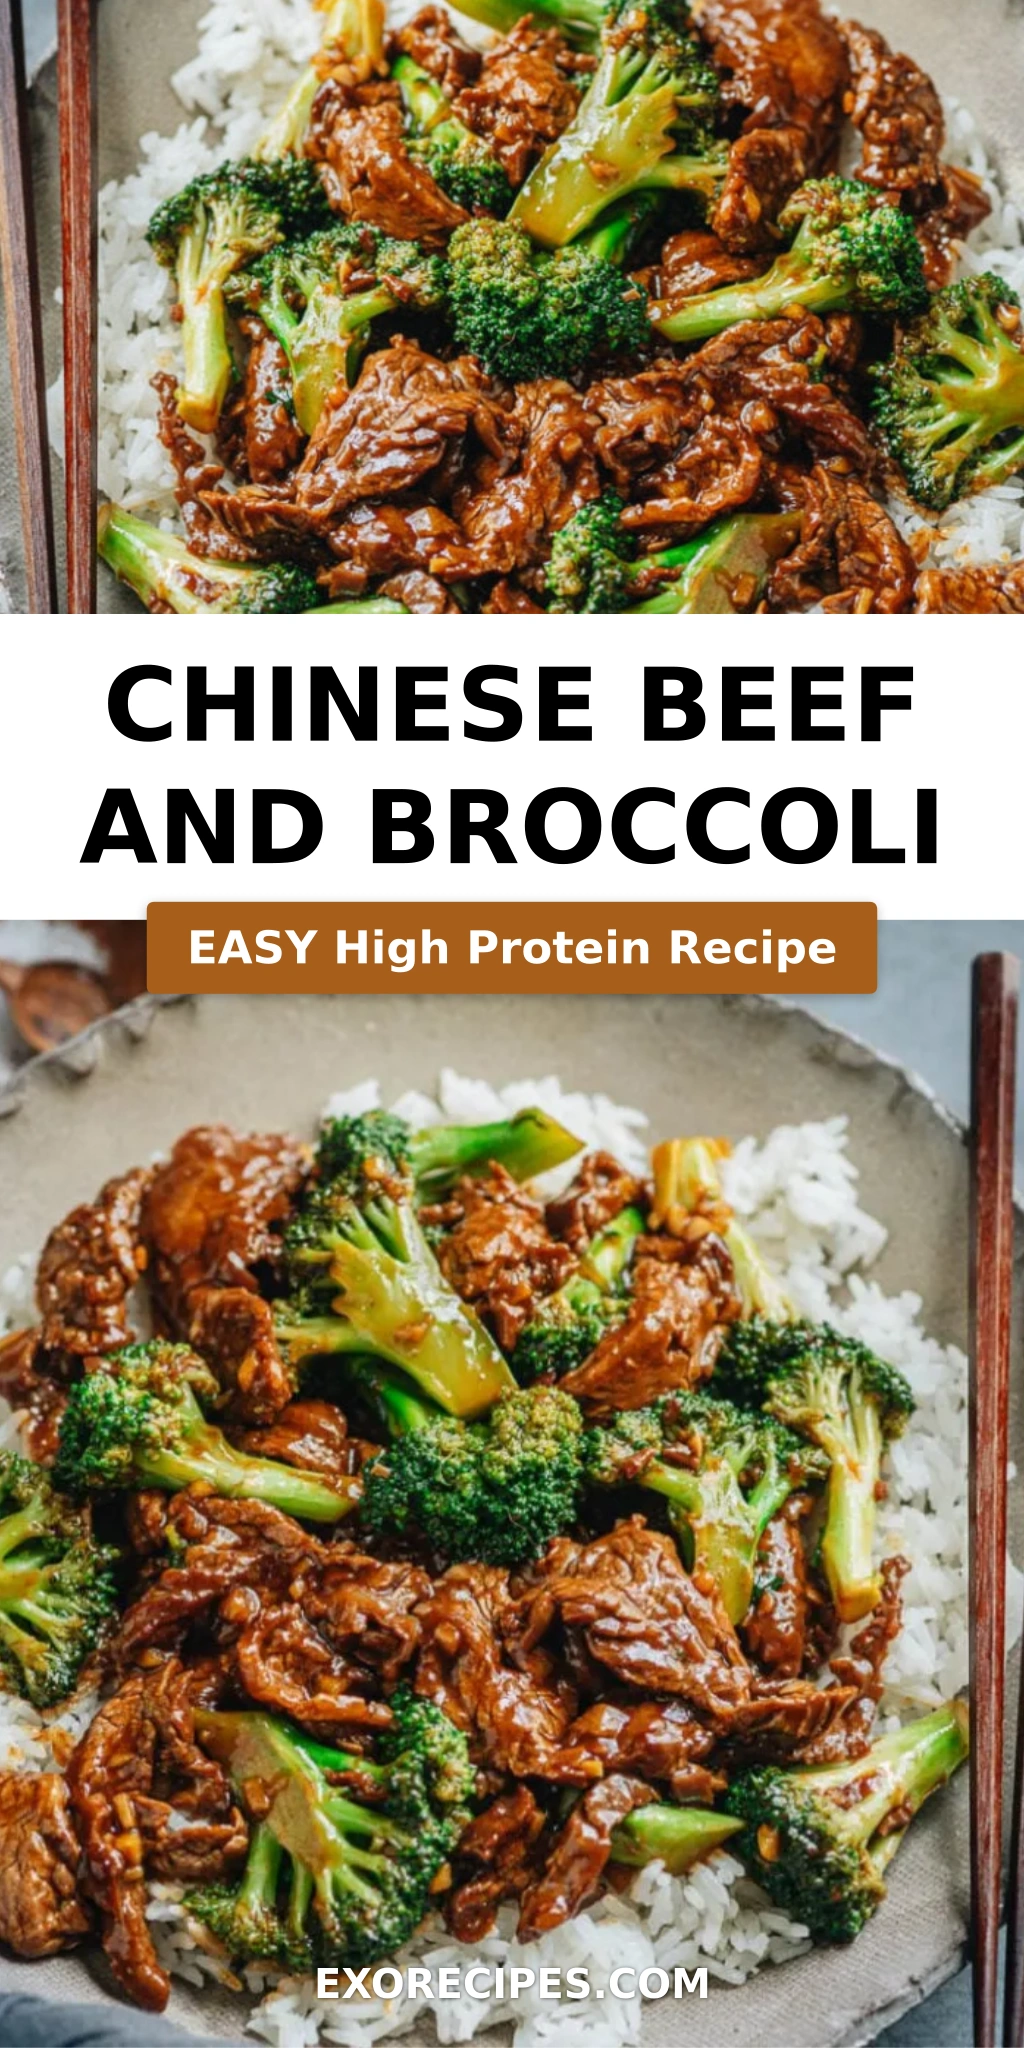
Easy Chinese Beef and Broccoli – Better Than Takeout!

Chinese Beef and Broccoli: Easy Homemade Takeout Favorite

⚖️
Difficulty
Easy
⏲️
Prep Time
15
🕒
Cook Time
15
⏱️
Total Time
30
🍽️
Servings
4

Ah, beef and broccoli! It’s a dish that instantly transports me back to bustling food courts and cozy family dinners, a true classic that’s found its way onto tables worldwide. Growing up in Morocco, we had our own incredible stir-fries, but when I first arrived in New York City and discovered the magic of American Chinese takeout, beef and broccoli was an immediate favorite. I remember countless Friday nights, after long hours practicing French pastry techniques in Paris, craving that familiar, comforting taste. This recipe, my easy Beef and Broccoli, is my heartfelt attempt to recreate that perfect takeout experience at home, but with a touch of my culinary expertise and a lot more wholesome goodness. It’s simpler than you think and incredibly rewarding!

Imagine this: tender, juicy slices of beef, marbled just so, seared to a perfect char and then coated in a rich, savory sauce that’s both slightly sweet and deeply umami. Beside them, vibrant green broccoli florets, steamed to that ideal crisp-tender state – not mushy, not raw, but just right. The aroma alone, a fragrant blend of garlic, ginger, and that signature soy-based sauce, is enough to make your mouth water. This isn’t just food; it’s a symphony of textures and flavors, a delicious dance between succulent meat and crisp vegetables. It’s the kind of dish that looks and tastes like it took hours, but in reality, we’re going to whip it up in under an hour, making it a weeknight dinner hero.

What makes my homemade beef and broccoli recipe stand out? It’s all about technique and balance, skills I honed in both my mother’s kitchen in Marrakech and the professional kitchens of Paris. I’ll share a little trick for ensuring the beef is melt-in-your-mouth tender every single time (hint: it involves an almost secret ingredient!). I’ll also guide you on achieving that perfect broccoli texture without resorting to overcooking. Plus, we’ll dive into the nuances of the sauce, ensuring it’s glossy, flavorful, and clings beautifully to every component. Forget the greasy gloppiness of some takeout versions; this is clean, bright, and incredibly satisfying. Ready to elevate your weeknight meals?

Why This Chinese Beef and Broccoli Recipe Is the Best

My approach to this classic Chinese Beef and Broccoli recipe always starts with respecting the ingredients and employing foundational culinary principles. From my days mastering French sauces, I learned the importance of building layers of flavor, and that’s precisely what we do with the sauce here. We’re not just throwing soy sauce in a pan; we’re creating a harmonious blend that complements the beef and broccoli perfectly, resulting in a depth that store-bought versions often miss. This is about achieving restaurant-quality taste with honest, wholesome ingredients.

The texture is key to a truly great beef and broccoli. I’ve spent years perfecting the method for tenderizing the beef, ensuring it’s incredibly succulent and not at all tough, even when cooked quickly over high heat. Similarly, the broccoli is steamed *just* enough to be vibrant and crisp, retaining its delicious bite and bright green color. This precise cooking method is something I’ve adapted from my professional training and is crucial for that satisfying contrast that makes this dish so addictive. It’s the difference between good and truly *great*.

I designed this recipe to be incredibly approachable for home cooks, even if you’re new to stir-frying. We’re using readily available ingredients found in any major US grocery store, and the steps are broken down clearly to minimize any confusion. The technique for searing the beef ensures a beautiful crust and perfect doneness without overcooking, and the simple sauce comes together in minutes. It’s the kind of fuss-free homemade Beef and Broccoli that delivers big on flavor and makes you look like a pro, proving that delicious, authentic-tasting Chinese takeout is absolutely achievable right in your own kitchen.

Chinese Beef and Broccoli Ingredients

One of the joys of making this easy Beef and Broccoli at home is sourcing the ingredients. I often find the best quality flank steak at my local butcher in the West Village, or even at larger supermarkets likeWhole Foods. For the broccoli, I love grabbing fresh, vibrant heads from the Union Square Greenmarket when they’re in season. You’ll likely find everything else you need right in your pantry or at any neighborhood grocery store. It’s a testament to how simple ingredients can create something truly spectacular!

Ingredients List

  • 1 lb flank steak (or skirt steak)
  • 1 tablespoon soy sauce (for marinade)
  • 1 tablespoon peanut oil (or vegetable oil, for marinade)
  • 1 tablespoon cornstarch (for marinade)
  • 1/2 teaspoon baking soda (Optional, for extra tenderizing)
  • 1/2 cup chicken stock (or beef stock)
  • 2 tablespoons Shaoxing wine (or dry sherry for gluten-free)
  • 2 tablespoons soy sauce (for sauce)
  • 1 teaspoon dark soy sauce (for color and depth)
  • 2 teaspoons brown sugar (or white sugar)
  • 1 tablespoon cornstarch (for sauce)
  • 1 head broccoli (cut into bite-size florets)
  • 1 tablespoon peanut oil (or vegetable oil, for stir-fry)
  • 3 garlic cloves (minced)
  • 2 teaspoons ginger (minced)

Ingredient Spotlight

Flank Steak: This cut is fantastic for stir-fries because it’s relatively lean yet packs a lot of beefy flavor. When sliced thinly against the grain, it becomes incredibly tender. If you can’t find flank steak, skirt steak is a great substitute, offering a similar texture and robust flavor. For a more budget-friendly option, sirloin steak works, just be sure to slice it equally thin. The key is to cut it against the grain to break up those muscle fibers, ensuring a melt-in-your-mouth experience.

Shaoxing Wine: This is a staple in Chinese cooking, imparting a unique, slightly nutty, and complex flavor that’s hard to replicate. It’s crucial for that authentic Chinese takeout Beef and Broccoli taste. If you’re making this gluten-free or simply can’t find it, don’t worry! Dry sherry is the closest American substitute and works wonderfully. For an alcohol-free version, plain chicken broth or even a splash of rice vinegar can add a touch of acidity and body, though the complexity will be slightly different.

Dark Soy Sauce: While regular soy sauce provides saltiness and umami, dark soy sauce is primarily used for color and a hint of molasses-like sweetness. It gives the sauce its beautiful rich, dark brown hue without making it overly salty. If you’re struggling to find dark soy sauce, you can substitute with an equal amount of regular soy sauce plus a tiny pinch of sugar, but the visual appeal might be slightly less intense. For a gluten-free option, ensure your dark soy sauce is made with tamari or a gluten-free alternative.

Original IngredientBest SubstitutionFlavor / Texture Impact
Flank SteakSkirt Steak or Sirloin SteakVery similar texture and beefy flavor. Sirloin might be slightly less tender.
Shaoxing WineDry Sherry or MirinDry sherry offers a comparable complexity. Mirin will add more sweetness.
Dark Soy SauceRegular Soy Sauce + pinch of sugarMaintains saltiness and umami, adds some color (less intense than dark soy).
BroccoliBroccolini or Snow PeasBroccolini is similar; snow peas offer a crispier, sweeter bite. Adjust cooking time.

How to Make Chinese Beef and Broccoli — Step-by-Step

Follow these simple steps, and you’ll have a restaurant-worthy homemade Beef and Broccoli ready in no time. My method ensures every component is perfectly cooked!

Step 1: Marinate the Beef

First, slice your beef thinly against the grain. This is crucial for tenderness! Transfer the slices to a small bowl. Drizzle with 1 tablespoon of soy sauce, 1 tablespoon of peanut oil, and 1 tablespoon of cornstarch. If you’re using it, add the 1/2 teaspoon of baking soda for an extra tenderizing boost. Gently mix everything by hand, ensuring each slice is coated. Let it marinate for at least 10 minutes while you prep the other ingredients.

💡 mia’s Pro Tip: For even better results and more tender beef, marinate for up to 30 minutes. The cornstarch not only tenderizes but also creates a protective coating that helps the beef sear beautifully and remain juicy.

Step 2: Prepare the Sauce

In a medium-sized bowl, combine all the ingredients for the sauce: 1/2 cup chicken stock, 2 tablespoons Shaoxing wine (or dry sherry), 2 tablespoons soy sauce, 1 teaspoon dark soy sauce, 2 teaspoons brown sugar, and 1 tablespoon cornstarch. Whisk everything together until the cornstarch is fully dissolved and you have a smooth, well-mixed sauce. Set aside.

Step 3: Steam the Broccoli

Add about 1/4 cup of water to a large nonstick skillet or wok over medium-high heat. Once the water begins to boil, add your broccoli florets, then cover the pan. Steam for about 1 to 2 minutes, just until the broccoli turns bright green and is crisp-tender – you don’t want it mushy! Carefully transfer the steamed broccoli to a plate. If there’s any residual water in the pan, wipe it out with a paper towel held by tongs.

💡 mia’s Pro Tip: Don’t overcrowd the pan when steaming broccoli, or it will steam unevenly instead of cooking quickly. If you have a lot of broccoli, steam it in batches.

Step 4: Sear the Beef

Add 1 tablespoon of peanut oil to the same skillet and swirl to coat the bottom. Heat over medium-high heat until shimmering hot. Add the marinated beef in a single layer, being careful not to overcrowd the pan (work in batches if necessary). Let it sear undisturbed for about 30 seconds until browned. Flip the pieces and cook for just a few more seconds until lightly charred and still pink inside. Remove the beef to the plate with the broccoli.

⚠️ Common Mistake to Avoid: Overcrowding the pan! This will cause the beef to steam instead of sear, leading to a gray, tough texture. Cook the beef in batches, ensuring there’s plenty of space between each piece for optimal browning.

Step 5: Add Aromatics

If needed, add a tiny bit more oil to the pan. Add the minced garlic and ginger, and stir-fry for about 30 seconds until fragrant. Be careful not to burn them.

Step 6: Finish the Stir-Fry

Return the steamed broccoli and seared beef to the skillet with the aromatics. Give your prepared sauce a quick whisk to ensure the cornstarch is re-dissolved. Pour the sauce into the skillet. Cook and stir constantly for about 1 minute, until the sauce thickens and beautifully coats the beef and broccoli. Serve immediately over hot rice for that authentic Chinese takeout Beef and Broccoli experience!

StepActionDurationKey Visual Cue
1Marinate Beef10 mins (minimum)Beef evenly coated with marinade
2Prepare Sauce5 minsSmooth, lump-free mixture
3Steam Broccoli1-2 minsBright green, crisp-tender
4Sear Beef~1 min totalLightly charred, pink inside
5Add Aromatics30 secsFragrant aroma
6Finish Stir-Fry~1 minThickened, glossy sauce coating ingredients

Serving & Presentation

To serve this delightful homemade Beef and Broccoli, I like to spoon it over a bed of fluffy steamed white or brown rice. The rice acts as the perfect canvas, soaking up all that incredible sauce. For a touch of elegance, reminiscent of the plating I learned in Paris, make sure the broccoli is distributed evenly amongst the beef. A sprinkle of toasted sesame seeds or thinly sliced green onions adds a final flourish, bringing a lovely contrast in color and texture. It’s simple, classic, and utterly satisfying!

In my NYC kitchen, I often make a big batch on Sunday for easy meals throughout the week. Presentation is key to making any meal feel special, even a weeknight stir-fry. I love adding a few fresh cilantro leaves if I have them on hand, a nod to the vibrant flavors of my Moroccan heritage. It’s these small touches that transform a simple dish into something truly memorable. Don’t be afraid to experiment with garnishes!

Pairing TypeSuggestionsWhy It Works
Side DishSteamed Jasmine or Basmati Rice, Brown Rice, QuinoaProvides a neutral base to soak up the savory sauce, making it a complete meal.
Sauce / DipExtra Stir-Fry Sauce, Sriracha or Chili CrispEnhances the flavors or adds a kick of heat for those who like it spicy.
BeverageGreen Tea, Oolong Tea, Light LagerCleanses the palate and complements the savory notes without overpowering them.
GarnishToasted Sesame Seeds, Sliced Green Onions, Fresh CilantroAdds textural crunch, fresh oniony notes, or aromatic herbaceousness.

Make-Ahead, Storage & Reheating

As a busy New Yorker, I know the value of a good make-ahead meal! This Chinese Beef and Broccoli is perfect for prepping ahead. You can prepare the sauce and marinate the beef up to a day in advance, storing them separately in the refrigerator. The broccoli can also be steamed a day ahead and stored in an airtight container. This makes the final cooking process incredibly fast, cutting down your active kitchen time significantly, and ensures you always have a healthy, delicious meal ready to go.

MethodContainerDurationReheating Tip
RefrigeratorAirtight container3-4 daysGently reheat in a skillet over medium-low heat with a splash of water or broth, or microwave. Avoid overcooking.
FreezerFreezer-safe container/bag1-2 monthsThaw overnight in the refrigerator. Reheat as above. Texture may be slightly softer.
Make-AheadPrepared sauce, marinated beef, steamed broccoliUp to 1 day in advanceCombine and cook as per steps 4-6 just before serving to maintain best texture.

When reheating, the goal is to warm everything through without overcooking the beef or turning the broccoli mushy. A quick stir-fry in a hot skillet is my preferred method, as it helps to revive the colors and crispness. If microwaving, use a microwave-safe dish and heat in short intervals, stirring in between. Adding a tiny splash of water or extra sauce can help keep things moist and flavorful as it reheats.

Variations & Easy Swaps

VariationKey ChangeBest ForDifficulty Impact
Spicy Szechuan StyleAdd dried chili flakes or chili oil to the sauce.Spice lovers.No change.
Gluten-FreeUse tamari instead of soy sauce, dry sherry instead of Shaoxing wine.Those with gluten sensitivities.None.
Seasonal Veggie BoostSwap broccoli for snap peas, bell peppers, or mushrooms.Maximizing seasonal produce.May require slight adjustment to cooking time.

Spicy Szechuan Style

For those who love a little heat, transforming this into a Szechuan-style dish is a breeze. Simply add 1/2 teaspoon of red pepper flakes or a tablespoon of chili oil to the sauce mixture before cooking. You could also add a few slivers of fresh red chili to the aromatics for an extra layer of spicy complexity. This variation brings a fiery kick that complements the savory beef and tender broccoli beautifully, a delicious nod to another favorite Chinese regional cuisine.

Gluten-Free Versions

Making this recipe gluten-free is straightforward and requires only a couple of pantry swaps. For the marinade and sauce, use tamari instead of soy sauce. Tamari is naturally gluten-free and provides a similar salty, umami flavor. Also, swap the Shaoxing wine for dry sherry, which is also typically gluten-free. I tested this extensively, and the results are just as delicious, proving that dietary needs don’t mean sacrificing flavor or that authentic Chinese takeout Beef and Broccoli taste. Just double-check your labels!

Seasonal Vegetable Boost

While broccoli is classic, I love to pepper in other vegetables depending on what’s fresh and exciting at the market. In the spring, crisp snap peas or tender asparagus spears are fantastic. Summer brings juicy bell peppers in various colors, and fall offers hearty mushrooms like shiitake or cremini. Just be mindful of their cooking times; some veggies might need to be added earlier or later than broccoli to achieve that perfect crisp-tender texture. This adaptability is what makes stir-frying so wonderful!

How do you make Chinese beef and broccoli taste like takeout?

To get that authentic takeout flavor, focus on high heat searing for the beef and a well-balanced sauce. Using ingredients like Shaoxing wine, dark soy sauce, garlic, and ginger is key. Marinating the beef with cornstarch also helps create a glossy coating typical of takeout dishes. Ensure the broccoli is cooked crisp-tender, not mushy. Finally, serving it immediately over hot steamed rice is essential for the full experience.

What is the best cut of beef to use for beef and broccoli?

The best cuts of beef for beef and broccoli are tender, lean cuts that cook quickly. Flank steak and skirt steak are excellent choices because they have great flavor and can be sliced thinly against the grain to achieve tenderness. Sirloin steak is also a good option if you prefer something readily available. The key is slicing it very thinly and against the grain to ensure a tender bite.

Can I use frozen broccoli for Chinese beef and broccoli?

Yes, you can absolutely use frozen broccoli! It’s a convenient option, especially when fresh broccoli isn’t readily available. However, it’s best to thaw it slightly and pat it very dry before adding it to the pan to avoid adding excess moisture, which can make the stir-fry watery. You might need to adjust the steaming time slightly as frozen vegetables can cook a bit faster.

What can I use instead of oyster sauce in beef and broccoli?

While this recipe doesn’t call for oyster sauce, it’s a common ingredient. If you don’t have it, you can substitute with hoisin sauce for a similar savory-sweet profile, or use an equal amount of soy sauce or tamari mixed with a teaspoon of sugar and a pinch of cornstarch to thicken. Another option is a vegetarian oyster sauce made from mushrooms. These substitutions will alter the flavor slightly but still yield a delicious dish.

Why is my beef and broccoli tough?

Tough beef in stir-fries usually comes down to two main reasons: the cut of meat used or how it was cooked. If you don’t slice against the grain, the muscle fibers remain long and tough. Overcrowding the pan also causes the beef to steam rather than sear, resulting in a grey, chewy texture. Using a tender cut like flank steak and slicing it thinly against the grain, along with high heat searing in batches, is crucial.

How do I keep the broccoli from getting mushy?

The key to perfectly crisp-tender broccoli is to avoid overcooking it. In this recipe, we steam it briefly in the skillet for just 1-2 minutes until it *just* turns bright green. You want it to still have a slight bite and vibrant color. Alternatively, you can blanch it quickly in boiling water, then immediately shock it in ice water to stop the cooking process. This ensures it retains its texture and bright green hue when added back into the stir-fry.

Can I make beef and broccoli ahead of time?

Yes, this recipe is well-suited for making ahead! You can marinate the beef and prepare the sauce up to a day in advance and store them separately in the refrigerator. You can even steam the broccoli a day ahead. However, for the best texture, it’s ideal to cook the beef and combine everything just before serving. The final stir-fry step takes only a few minutes, making it easy to assemble even for busy weeknights.

What kind of oil is best for beef and broccoli stir fry?

For stir-frying, it’s important to use an oil with a high smoke point to handle the high heat. Peanut oil is a classic choice for Chinese cooking and works beautifully here, adding a subtle nutty flavor. Vegetable oil, canola oil, or even avocado oil are also excellent, neutral-flavored alternatives that can withstand high temperatures. Avoid oils with low smoke points like olive oil or butter.

Share Your Version!

I absolutely love seeing how you bring my recipes to life in your own kitchens! If you’ve made this easy Beef and Broccoli, please do share your experience. Leave a star rating and a comment below — your feedback helps other cooks tremendously! If you snap a photo, tag me on Instagram or Pinterest using @exorecipes; I can’t wait to see your creations! I’m always curious to know, what other classic takeout dishes do you dream of making at home?

From my NYC kitchen to yours — I hope this recipe brings as much warmth to your table as it does to mine. — mia 🧡

📌

Love This Recipe? Save It to Pinterest!

If you enjoyed this Chinese Beef and Broccoli recipe, don’t let it get lost in your browser tabs! 😄 Pin it now so you can find it again anytime — and explore hundreds more tried-and-tested recipes waiting for you on my Pinterest boards.

👉 Follow mia on Pinterest @chefrecipes2

📌 Pin this recipe · 🔁 Re-pin your favorites · 💬 Tag me when you make it — I love seeing your creations!

Print

clock clock iconcutlery cutlery iconflag flag iconfolder folder iconinstagram instagram iconpinterest pinterest iconfacebook facebook iconprint print iconsquares squares iconheart heart iconheart solid heart solid icon

Chinese Beef and Broccoli

  • Author: Chef Mia

Description

This beef and broccoli is a popular Chinese take-out meal and it’s also easy enough to make at home. It’s also healthier than most take-out meal options. With juicy tender beef and crisp broccoli brought together in a rich brown sauce, this quick dinner is as colorful as it is delicious. Serve it over hot rice for an authentic Chinese take-out dinner. {Gluten-Free Adaptable}To make this dish gluten-free, use dry sherry instead of Shaoxing wine, and use tamari instead of soy sauce.


Ingredients

Scale
  • 1 lb flank steak (, skirt steak, or other cut (*see footnote 1))
  • 1 tablespoon soy sauce
  • 1 tablespoon peanut oil ((or vegetable oil))
  • 1 tablespoon cornstarch
  • 1/2 teaspoon baking soda ((Optional) (*see footnote 1))
  • 1/2 cup chicken stock ((or beef stock))
  • 2 tablespoons Shaoxing wine ((or dry sherry))
  • 2 tablespoons soy sauce
  • 1 teaspoon dark soy sauce ((*footnote 2))
  • 2 teaspoons brown sugar ((or white sugar))
  • 1 tablespoon cornstarch
  • 1 head broccoli (, cut to bite-size florets)
  • 1 tablespoon peanut oil (or vegetable oil) ((*Footnote 3))
  • 3 garlic cloves (, minced)
  • 2 teaspoons ginger (, minced)

Instructions

  1. Slice the beef against the grain into 0.5 cm (1/4 inch) thick slices or 1-cm (1/2 inch) sticks. Transfer to a small bowl. Add soy sauce, peanut oil, and cornstarch (*Footnote 1). Gently mix well by hand until all the slices are coated with a thin layer of sauce. Marinate for 10 minutes while preparing the other ingredients.
  2. Combine all the ingredients for the sauce in a medium-sized bowl. Mix well.
  3. Add 1/4 cup water into a large nonstick skillet over medium-high heat until the water begins to boil. Add the broccoli and cover. Steam until the broccoli just turns tender and the water evaporates,1 minute or so. Transfer broccoli to a plate. Wipe the pan with a paper towel held in a pair of tongs if theres any water left.
  4. Add the oil and swirl to coat the bottom. Heat over medium high heat until hot. Spread the steak in a single layer. Allow to cook without touching for 30 seconds, or until the bottom side is browned. Flip to cook the other side for a few seconds. Stir and cook until the surface is lightly charred and the inside is still pink.
  5. Add the garlic and ginger. Stir a few times to release the flavor and fragrance.
  6. Return the broccoli to the pan. Stir the sauce again to dissolve the cornstarch completely and pour it into the skillet. Cook and stir until the sauce thickens, about 1 minute. Transfer everything to a plate immediately. Serve hot as a main dish.


Nutrition

  • Calories: 291 kcal
  • Sugar: 4.5 g
  • Fat: 14.3 g
  • Carbohydrates: 13.9 g
  • Protein: 26.6 g


Chinese Beef and Broccoli

ph">For more delicious inspiration, follow me on Pinterest!

Easy 4-Ingredient Peanut Butter Balls – Holiday Favorite

4-ingredient Peanut Butter Balls: Easy No-Bake Treats

⚖️
Difficulty
Easy
⏲️
Prep Time
15

mins

🕒
Cook Time
0

mins

⏱️
Total Time
35

mins

🍽️
Servings
24

When the holiday season creeps up in New York City, and the frantic energy of finding the perfect edible gift takes over, I always find myself returning to a childhood favorite, a taste of my mother’s kitchen transported here. These 4-ingredient peanut butter balls are more than just a treat; they’re a nostalgic hug in candy form. My version, a simple yet utterly foolproof 4 ingredient peanut butter balls recipe, requires no baking and comes together faster than you can say “latke.” It’s the ultimate quick peanut butter treat for any occasion, proving that the most delightful desserts often hide behind the easiest recipes.

Imagine biting into a perfectly smooth, rich ball of peanut butter goodness, encased in a thin, crisp layer of melted chocolate that snaps just so. The aroma of roasted peanuts and sweet chocolate fills the air, a comforting scent that brings a smile to any face. This is the magic of a perfectly executed no-bake peanut butter balls recipe. The texture contrast is divine: the slightly yielding, sweet peanut butter interior against the firm, cool chocolate shell. It’s a symphony of classic flavors, perfected through years of culinary practice, from my Parisian pastry training to my Moroccan culinary roots.

What sets my recipe apart is the subtle yet crucial technique I learned in Paris for achieving that impossibly smooth chocolate coating, and a little trick to ensure your peanut butter dough holds its shape even in a warm kitchen. While many recipes can feel complicated, this one is designed to be foolproof, even for novice bakers. I’ll share a key tip for getting the perfect consistency and warn you about a common pitfall that can lead to a messy, difficult dip. Get ready for the easiest, most decadent no-bake dessert you’ll ever make!

Why This 4-ingredient Peanut Butter Balls Recipe Is the Best

My culinary journey, a blend of Moroccan warmth, French precision, and NYC’s vibrant food scene, has taught me that true culinary genius often lies in simplicity. For these 4-ingredient peanut butter balls, the “secret” isn’t a rare spice or an obscure technique, but rather a perfect balance of ratios and a deep understanding of how simple ingredients interact. My French pastry training instilled in me an appreciation for the exactitude of measurements, which is critical here, especially when dealing with the texture of peanut butter and powdered sugar.

The texture is paramount in any confection, and these no-bake peanut butter balls achieve a divine balance. The dough becomes perfectly firm when chilled, allowing for easy shaping and dipping without becoming crumbly. This is thanks to the specific ratio of peanut butter to butter and the powdered sugar acting as a binder and sweetener. The optional addition of vegetable shortening or coconut oil to the melted chocolate is a detail I picked up in pastry school; it makes the chocolate shell incredibly smooth and helps it set with a beautiful sheen, preventing that dreaded chalky or brittle finish.

These easy no-bake desserts are a dream for busy cooks and families. You don’t need any special equipment, just a bowl, a fork, and a bit of patience for chilling. In a city like New York where time is a precious commodity, a recipe that delivers maximum flavor and satisfaction with minimal effort is invaluable. This recipe is a testament to that philosophy—it’s quick, requires minimal ingredients, and yields consistently delicious results, making it an ideal quick peanut butter treats for last-minute gatherings or everyday cravings.

4-ingredient Peanut Butter Balls Ingredients

Sourcing quality ingredients is key, and living in NYC gives me access to fantastic options. I love picking up creamy peanut butter from a local shop, and good quality chocolate chips are usually easy to find at any major grocery store. If I’m feeling extra fancy, I might grab some artisanal chocolate from a specialty store in Manhattan, but for everyday enjoyment, standard chips work beautifully. My mother in Morocco always used fresh, local peanut butter, and I try to honor that tradition by choosing the best I can find here.

Ingredients List

  • 1/2 cup creamy peanut butter
  • 3 Tbsp salted butter (softened)
  • 1 cup powdered sugar
  • 1 cup semi sweet chocolate chips
  • 1 Tbsp vegetable shortening or coconut oil (optional, for dipping)

Ingredient Spotlight

Creamy Peanut Butter: This is the heart of our balls. For the best texture, I recommend a standard creamy peanut butter, like Jif or Skippy. Natural peanut butter, with its oil separation, can sometimes lead to a greasier dough that’s harder to work with and might not hold its shape as well. Ensure it’s at room temperature for easy mixing. If you use natural peanut butter, you might need to stir it very vigorously to recombine the oil before measuring.

Powdered Sugar: Also known as confectioners’ sugar or icing sugar, this ingredient is crucial for binding the peanut butter and butter together and providing sweetness. It’s sifted, which gives it a fine texture that dissolves beautifully into the peanut butter mixture, creating a smooth, pliable dough. If you only have granulated sugar, you’ll need to process it in a high-powered blender until very fine, but powdered sugar is the easiest and most reliable choice for this recipe.

Semi-Sweet Chocolate Chips: These form the delicious, decadent coating. I opt for semi-sweet as it balances the sweetness of the peanut butter filling perfectly. You can use milk chocolate if you prefer a sweeter treat, or dark chocolate for a more intense flavor. Look for good quality chips that melt smoothly. The optional shortening or coconut oil helps achieve a professional-looking sheen and a clean break when bitten.

Original IngredientBest SubstitutionFlavor / Texture Impact
Creamy Peanut ButterCrunchy Peanut ButterAdds a pleasant textural crunch but may slightly alter the smooth mouthfeel. Ensure it’s well-stirred if natural.
Salted ButterUnsalted Butter + pinch of saltEssentially the same if you add a pinch of salt to mimic the original flavor.
Powdered SugarFinely processed granulated sugar (pulsed in blender)May result in a slightly grittier texture if not processed perfectly smooth.
Semi-Sweet Chocolate ChipsMilk Chocolate or Dark Chocolate ChipsMilk chocolate will yield a sweeter ball; dark chocolate a more intense, less sweet treat.

How to Make 4-ingredient Peanut Butter Balls — Step-by-Step

Follow these simple steps, and you’ll have a batch of perfect no-bake peanut butter balls in no time!

Step 1: Mix the Peanut Butter Base

In a mixing bowl, combine the creamy peanut butter and softened salted butter. Mix them until they are smooth and well-blended. Gradually stir in the powdered sugar until the mixture is thoroughly combined and forms a stiff dough. Cover the bowl and place it in the refrigerator for about 15 minutes to firm up slightly, making it easier to handle.

💡 mia’s Pro Tip: Make sure your butter is truly softened, not melted. This helps create a smooth, cohesive dough. If it’s too cold, it will be hard to mix; too warm, and the dough will be too soft to roll easily.

Step 2: Shape and Chill the Balls

Once chilled, use your hands to roll the dough into approximately 1-inch balls. Place the formed balls onto a baking sheet lined with parchment or wax paper. Cover the baking sheet and refrigerate the balls for at least 20 minutes. This chilling step is crucial as it firms up the balls enough to hold their shape perfectly during the dipping process.

💡 mia’s Pro Tip: For perfectly uniform balls, use a small cookie scoop or a tablespoon measure to portion the dough before rolling. This ensures even size and baking time, leading to a more professional presentation.

Step 3: Melt the Chocolate

While the peanut butter balls are chilling, melt the semi-sweet chocolate chips. You can do this in a microwave-safe bowl in 30-second intervals, stirring well after each, or use a double boiler over simmering water. Stir until the chocolate is completely smooth and melted. If using, stir in the vegetable shortening or coconut oil now; this makes the chocolate silkier and easier to dip.

⚠️ Common Mistake to Avoid: Overheating chocolate in the microwave. This can cause it to seize up and become clumpy, rendering it unusable for dipping. Always stir thoroughly between intervals and aim for a smooth, glossy consistency.

Step 4: Dip and Chill Again

Take one chilled peanut butter ball and carefully dip it into the melted chocolate using a fork or a dipping tool. Allow any excess chocolate to drip off back into the bowl for a clean finish. Place the chocolate-covered ball onto a clean sheet of wax paper or parchment paper. Repeat with the remaining balls. Once all are dipped, cover them and refrigerate until the chocolate coating is set, usually about 15-20 minutes.

💡 mia’s Pro Tip: For a neater dip, gently tap the fork on the side of the bowl to remove excess chocolate. You can also use a toothpick to help guide the ball and smooth out any drips before it sets.

StepActionDurationKey Visual Cue
1Mix Peanut Butter, Butter, and Sugar5-7 minutesStiff, cohesive dough
1 (Chilling)Refrigerate dough15 minutesDough is firm enough to handle
2Shape into balls5-10 minutesUniform 1-inch balls
2 (Chilling)Refrigerate shaped balls20-30 minutesBalls hold shape firmly
3Melt Chocolate (with optional oil)3-5 minutesSmooth, glossy, fluid chocolate
4Dip balls in chocolate10-15 minutesEven coating on each ball
4 (Chilling)Refrigerate dipped balls15-20 minutesChocolate coating is firm and set

Serving & Presentation

These delightful 4-ingredient peanut butter balls are perfect for serving at holiday parties, bake sales, or simply as a sweet treat with your afternoon coffee. For a touch of New York elegance, I often arrange them on a simple white platter, perhaps with a few fresh mint leaves for a pop of color. They look stunning alongside more elaborate desserts, proving that sometimes, the simplest things are the most impactful. They also make a wonderful addition to a cookie box for gifting.

To elevate their presentation, you can drizzle extra melted chocolate over the set coating in a crisscross pattern, or even sprinkle a few finely chopped roasted peanuts or colorful sprinkles before the chocolate sets completely. My mother in Morocco would sometimes add a tiny sprinkle of sea salt on top, a nod to the traditional sweet and salty flavor profiles she loved. These easy no-bake desserts are meant to be enjoyed, so don’t overthink the presentation; their rich flavor will speak for itself.

Pairing TypeSuggestionsWhy It Works
Side DishEspresso or Black CoffeeThe bitterness cuts through the sweetness of the peanut butter and chocolate, creating a balanced bite.
Sauce / DipA small dish of raspberry jamThe tartness of the jam provides a vibrant contrast to the rich, sweet flavors.
BeverageA robust red wine (like a Zinfandel) or a creamy stoutThe wine’s fruitiness or the stout’s chocolate notes complement the dessert’s profile.
GarnishFinely chopped roasted peanuts or flaky sea saltAdds texture and a sophisticated salty counterpoint to the sweetness.

Make-Ahead, Storage & Reheating

For my busy life in NYC, make-ahead recipes are a lifesaver! These 4-ingredient peanut butter balls are perfect for this. I often whip up a batch on a Sunday afternoon, storing them for easy grab-and-go treats throughout the week or for unexpected guests. Their stable nature makes them ideal for meal prep, ensuring a sweet indulgence is always at hand without any last-minute fuss.

MethodContainerDurationReheating Tip
RefrigeratorAirtight containerUp to 2 weeksNo reheating needed. Let sit at room temp for 10 mins before serving for best texture.
FreezerFreezer-safe airtight container or bagUp to 2-3 monthsThaw slowly in the refrigerator overnight. To refresh the chocolate’s sheen, you can briefly chill them again.
Make-AheadPrepared and stored in refrigeratorUp to 2 weeks prior to occasionAllow to come to room temperature for about 15-20 minutes before serving for optimal texture.

If the chocolate coating becomes dull or develops a slight bloom from storage, a quick 10-15 minute chill in the freezer can often help revive its appearance and crispness. For best results, avoid storing them in a container where they can absorb other strong odors from the refrigerator.

Variations & Easy Swaps

VariationKey ChangeBest ForDifficulty Impact
Chocolate SwirlDrizzle contrasting chocolate (white or dark) over set coating.Visual appeal, extra chocolate flavor.Adds a bit more time for drizzling.
Nut Butter SwapUse almond or cashew butter instead of peanut butter.Accommodates nut allergies, introduces new flavors.Slightly different texture and flavor profile.
Spice InfusionAdd a pinch of cinnamon or cardamom to the peanut butter mix.Warm, subtly spiced flavor.Minimal impact, requires an extra pinch of spice.

Nut Butter Alternatives

If you or your guests have a peanut allergy, don’t worry! These balls are wonderfully adaptable. My Parisian instructors often used almond flour in pastries for a delicate texture, so I’d recommend trying almond butter or cashew butter here. The key is to use a creamy, well-stirred variety for the smoothest dough. The flavor will be slightly different, but still incredibly delicious, making these an excellent quick peanut butter treats alternative.

Gluten-Free & Dairy-Free Adaptations

To make these gluten-free, simply ensure your powdered sugar is certified gluten-free, as most are. For a dairy-free version, use a good quality dairy-free butter substitute and dairy-free chocolate chips. I’ve tested this with coconut oil and dairy-free chocolate, and the results are fantastic. The texture remains delightful, meeting the criteria for easy no-bake desserts for everyone.

Seasonal and Flavor Twists

For a festive touch, I love adding a little something extra. A tiny pinch of cinnamon or even a whisper of cardamom, reminiscent of my Moroccan spice blends, can add a complex warmth. For spring or summer, a hint of lemon zest in the peanut butter mixture is surprisingly refreshing. You can also experiment with different flavored chocolate chips, like dark chocolate with orange or milk chocolate with toffee bits, available at specialty shops in the city.

Can I use natural peanut butter for 4-ingredient peanut butter balls?

While you *can*, I generally recommend using standard creamy peanut butter for this recipe. Natural peanut butter, especially varieties where the oil separates, can make the dough too greasy and difficult to roll. If you do use natural peanut butter, make sure to stir it extremely well to reintegrate the oil before measuring. You might also find you need to add a touch more powdered sugar to achieve the correct consistency for rolling these easy no-bake desserts.

How long do you need to chill 4-ingredient peanut butter balls before serving?

There are a couple of chilling steps. First, the dough itself needs about 15 minutes in the fridge to firm up enough to roll into balls. Then, after shaping, it’s crucial to chill those balls for at least 20-30 minutes before dipping them in chocolate. This ensures they hold their shape. Finally, after dipping, chill them for another 15-20 minutes until the chocolate sets. They are then ready to serve, or can be stored!

What can I substitute for powdered sugar in 4-ingredient peanut butter balls?

The best substitute for powdered sugar is finely ground granulated sugar. You can achieve this by pulsing granulated sugar in a high-powered blender or food processor until it reaches a fine, powdery consistency. Be aware that if it’s not ground fine enough, it could result in a slightly grittier texture in your no-bake peanut butter balls. Maple syrup or honey would add too much moisture and alter the dough’s structure significantly.

Can I freeze 4-ingredient peanut butter balls for later?

Yes, absolutely! These 4-ingredient peanut butter balls freeze beautifully. For best results, place them in a single layer on a baking sheet and freeze until firm, then transfer them to an airtight, freezer-safe container or bag. They can be stored in the freezer for up to 2-3 months. Thaw them slowly in the refrigerator overnight before enjoying.

Why are my peanut butter balls crumbly?

Crumbly peanut butter balls usually indicate the dough is too dry. This can happen if you’ve added too much powdered sugar relative to the peanut butter and butter, or if the peanut butter itself is very dry. Ensure your peanut butter and butter are at room temperature and well-combined. If the dough feels too dry, you can try mixing in another teaspoon of softened butter or a touch more peanut butter. Chilling the dough properly also helps it hold together.

What’s the best way to dip the peanut butter balls in chocolate?

The easiest way is to use a fork! Hold a chilled peanut butter ball with the fork and dip it into the melted chocolate. Gently tap the fork on the side of the bowl to allow excess chocolate to drip off. Then, carefully slide the ball onto wax or parchment paper. For a cleaner look, you can use a toothpick to help guide the ball off the fork. Ensure your peanut butter balls are well-chilled so they don’t break apart when dipped.

Can I make these vegan?

Yes, you can easily make these vegan! Substitute the butter with a vegan butter substitute or a solid coconut oil (use less than butter, as it’s richer). Ensure your powdered sugar is vegan (some use bone char in processing) and use dairy-free chocolate chips for the coating. The delicious combination of ingredients still works wonderfully for a vegan version of these quick peanut butter treats.

Why do my chocolate-covered peanut butter balls look dull or chalky?

A dull or chalky appearance, often called ‘bloom,’ usually happens when the chocolate melts unevenly or is reheated too many times. Using a small amount of vegetable shortening or coconut oil (about 1 tablespoon per cup of chocolate chips) in the melted chocolate is my secret from culinary school to prevent this. It helps the chocolate set smoothly and with a beautiful sheen. Also, ensure the peanut butter balls are well chilled before dipping.

Share Your Version!

I’d be absolutely thrilled if you give this easy 4-ingredient peanut butter balls recipe a try! If you do, please leave a star rating and a comment below sharing your experience. I love hearing from you! Have you tried adding a pinch of Moroccan spice, or do you stick to the classic? Share a photo of your beautiful creations on Instagram or Pinterest and tag me @chefrecipes2 – I can’t wait to see your versions!

From my NYC kitchen to yours — I hope this recipe brings as much warmth to your table as it does to mine. — mia 🧡

📌

Love This Recipe? Save It to Pinterest!

If you enjoyed this 4-ingredient Peanut Butter Balls recipe, don’t let it get lost in your browser tabs! 😄 Pin it now so you can find it again anytime — and explore hundreds more tried-and-tested recipes waiting for you on my Pinterest boards.

👉 Follow mia on Pinterest @chefrecipes2

📌 Pin this recipe · 🔁 Re-pin your favorites · 💬 Tag me when you make it — I love seeing your creations!

Print

clock clock iconcutlery cutlery iconflag flag iconfolder folder iconinstagram instagram iconpinterest pinterest iconfacebook facebook iconprint print iconsquares squares iconheart heart iconheart solid heart solid icon

4-ingredient Peanut Butter Balls

  • Author: Chef Mia

Description

These Chocolate Peanut Butter Balls are my favorite candy for the Holidays and so incredibly Easy to make with just 4-ingredients!


Ingredients

Scale
  • 1/2 cup creamy peanut butter
  • 3 Tbsp salted butter (softened)
  • 1 cup powdered sugar
  • 1 cup semi sweet chocolate chips
  • 1 Tbsp vegetable shortening or coconut oil (optional)

Instructions

  1. Mix the peanut butter and softened butter together in a mixing bowl. Gradually stir in powdered sugar until fully combined. Cover and place in the fridge for about 15 minutes to firm up.
  2. Using your hands, shape the dough into 1-inch balls. Place the balls on a baking sheet, cover and refrigerate for at least 20 minutes (this will hold it's shape for dipping).
  3. Melt the chocolate chips according to package instructions.
  4. Using a fork, dip the peanut butter balls one at a time into the melted chocolate. Allow the excess chocolate to fall off. Place the chocolate balls onto wax paper, cover and refrigerate until ready to serve.


Nutrition

  • Calories: 107 kcal
  • Sugar: 8 g
  • Fat: 7 g
  • Carbohydrates: 10 g
  • Protein: 2 g


4-ingredient Peanut Butter Balls

ph">For more delicious inspiration, follow me on Pinterest!
Easy Crock Pot Marry Me Chicken Recipe

Crock Pot Marry Me Chicken: Creamy Sun-Dried Tomato Chicken in Your Slow Cooker

⚖️
Difficulty
Easy
⏲️
Prep Time
15 mins
🕒
Cook Time
210 mins
⏱️
Total Time
225 mins
🍽️
Servings
6

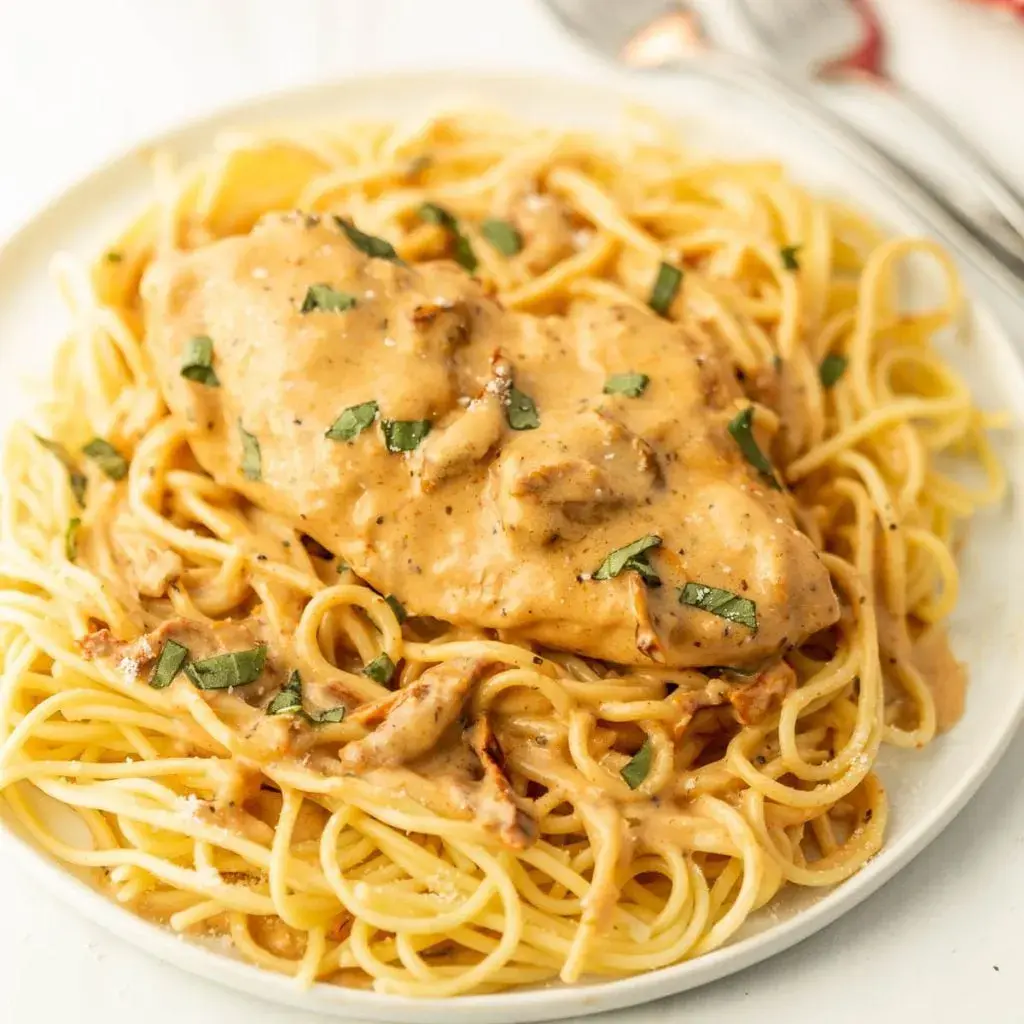
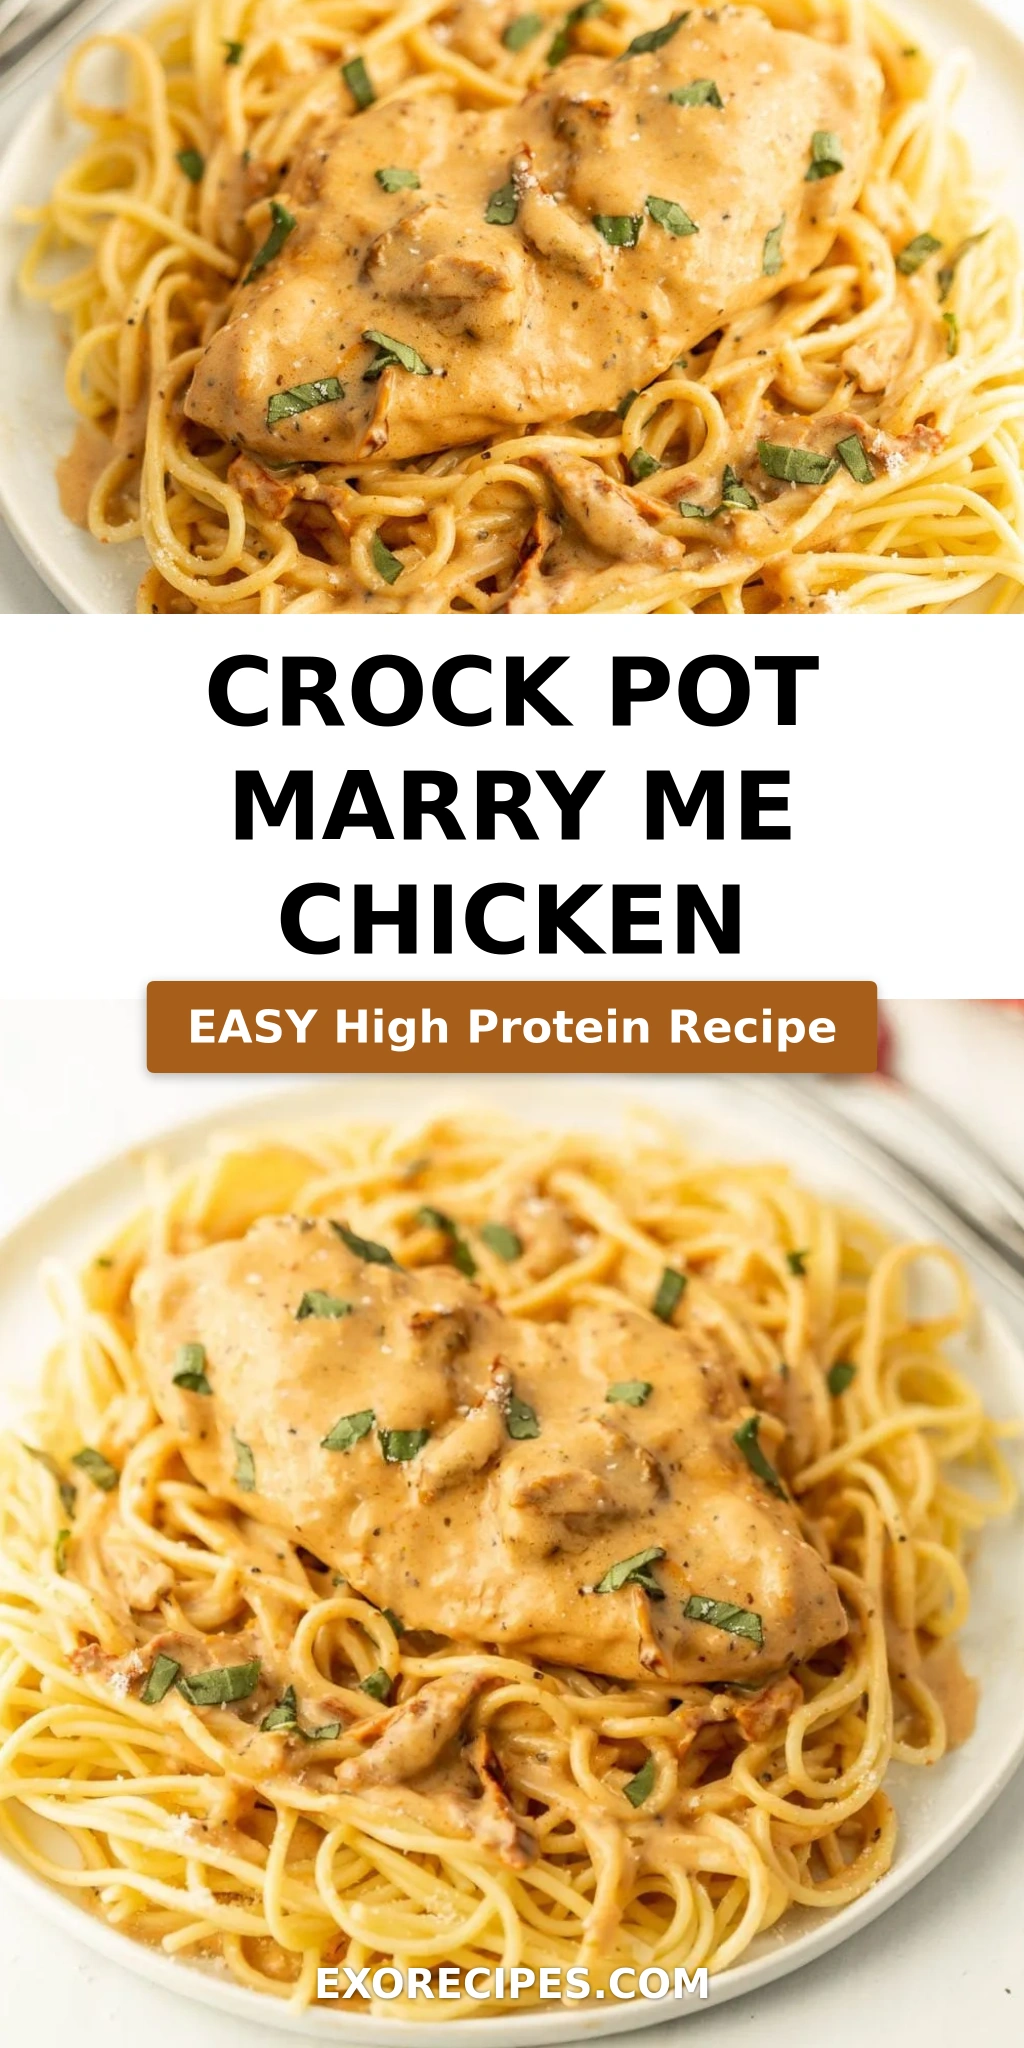
Living in New York City, I’m always on the lookout for meals that are both comforting and incredibly easy to prepare after a long day. My Moroccan heritage taught me the value of slow-simmered flavors, while my years training in Paris instilled a deep appreciation for rich, velvety sauces. This Crock Pot Marry Me Chicken recipe perfectly marries those influences with the convenience of modern slow cooking. The “Marry Me” moniker isn’t just hype; this dish is so decadent and satisfying that it has a way of making everyone declare their love for it! It’s simple enough for a weeknight but special enough for company, and the creamy sun-dried tomato sauce is simply divine.

Imagine this: tender, juicy chicken breasts swimming in a luxurious, vibrant sauce infused with sweet sun-dried tomatoes, fragrant garlic, and a whisper of Italian herbs. The aroma that fills your kitchen as this dish cooks is intoxicating, a promise of the deliciousness to come. The sauce achieves a beautiful, satiny texture that coats every bite of chicken, making it feel like a restaurant-quality meal. It’s a symphony of flavors and textures that feels both familiar and excitingly new. This recipe is proof that effortless cooking can still result in something utterly show-stopping.

What I love most about this easy slow cooker Marry Me Chicken is how forgiving it is. I’ve tweaked this recipe over time to be as foolproof as possible, ensuring even novice cooks can achieve spectacular results. We’ll focus on achieving that perfect creamy consistency without any fuss, and I’ll share a little secret to balancing the richness. You’ll also learn about a common pitfall that can leave your sauce watery, and how to avoid it entirely. Get ready for a crockpot chicken dinner that will have everyone asking for seconds!

Why This Crock Pot Marry Me Chicken Recipe Is the Best

The secret to this vibrant Crock Pot Marry Me Chicken lies in the marriage of simple, high-quality ingredients and a chef-inspired technique adapted for the slow cooker. My background, blending traditional Moroccan aromatics with precise French sauce-making, allows me to elevate this dish beyond the ordinary. The sun-dried tomatoes, for instance, are not just an addition; they are the heart of the flavor, providing a concentrated burst of sweet and tangy goodness that beautifully complements the creamy sauce.

Achieving a luxurious, emulsified sauce is paramount, and that’s where my professional training comes into play. Instead of a heavy cream sauce that can sometimes split in a slow cooker, we create a stable, velvety base by combining flour with chicken broth to create a slurry. This mixture thickens beautifully during the cooking process, and the heavy cream is added towards the end to maintain its richness and delicate texture. This method ensures a silky-smooth finish every time, with no risk of a greasy or separated sauce.

For anyone looking for an easy slow cooker Marry Me Chicken, this recipe is your answer. It requires minimal active cooking time: just a quick sear of the chicken to lock in juices and build flavor, then everything goes into the slow cooker. The slow cooker does all the heavy lifting, transforming simple ingredients into a restaurant-worthy meal. It’s perfect for busy weeknights or when you want to impress guests without spending hours in the kitchen. This truly is a foolproof crockpot chicken dinner.

Crock Pot Marry Me Chicken Ingredients

I love sourcing ingredients for this recipe from my local farmer’s market here in NYC, especially the fresh basil and vibrant sun-dried tomatoes. They always bring an extra burst of freshness. If I’m feeling inspired by my mother’s kitchen in Morocco, I might add a pinch of ras el hanout to the spice blend for a unique aromatic twist. Shopping for these ingredients is a joy, and it sets the stage for a truly delicious meal.

Ingredients List

  • 6 Boneless Skinless Chicken Breasts
  • 2 Tablespoons Olive Oil
  • 1 ½ cups Chicken Broth
  • 3 Tablespoons All Purpose Flour
  • 1 cup Heavy Whipping Cream
  • 1 Tablespoon Minced Garlic
  • ½ teaspoon Salt
  • 1 teaspoon Black Pepper
  • 1 teaspoon Italian Seasoning
  • 1 teaspoon Paprika
  • 1/3 cup Sun Dried Tomatoes (drained)
  • 2 Tablespoons Salted Butter
  • Fresh Basil (optional for garnish)
  • Grated Parmesan Cheese (optional for garnish)

Ingredient Spotlight

Boneless, Skinless Chicken Breasts: These are the foundation of our dish. When shopping in the US, look for plump, firm breasts. For a more tender result, especially if they are very large, you can pound them slightly to an even thickness. This ensures they cook evenly in the slow cooker and absorb the sauce beautifully.

Sun-Dried Tomatoes: These gems are crucial for that signature “marry me” flavor. I prefer oil-packed sun-dried tomatoes as they are more tender and flavorful. Ensure you drain them well before adding them to the crockpot to avoid excess oil. If you can only find dry-packed, you might need to rehydrate them briefly in warm water.

Heavy Whipping Cream: This is key for the luxurious, velvety finish of the sauce. It adds richness and a beautiful creaminess that truly makes the dish sing. It’s important to add it in the last hour of cooking to prevent it from breaking or curdling.

Original IngredientBest SubstitutionFlavor / Texture Impact
Boneless, Skinless Chicken BreastsBoneless, Skinless Chicken ThighsThighs will be more tender and moist but may take slightly longer to cook. The flavor remains similar.
Heavy Whipping CreamFull-fat Coconut Milk (canned) or Half-and-HalfCoconut milk will add a subtle coconut note; Half-and-Half will make the sauce slightly less rich.
Sun-Dried TomatoesRoasted Red Peppers (jarred, drained and chopped)Roasted red peppers will offer a sweeter, milder flavor and less chewiness.

How to Make Crock Pot Marry Me Chicken — Step-by-Step

This recipe is designed for maximum flavor with minimal effort, just the way I like it when I’m juggling my culinary projects in the city!

Step 1: Brown the Chicken

Heat the olive oil in a large skillet over medium-high heat until shimmering. Carefully place the chicken breasts in the hot skillet and sear them for 2-3 minutes per side, until beautifully golden brown. This step is crucial for developing a deeper flavor and ensuring the chicken stays moist during slow cooking. Don’t worry about cooking them through; we just want a gorgeous sear.

💡 mia’s Pro Tip: Use a cast-iron skillet for the best sear. Ensure it’s hot before adding the chicken, and don’t overcrowd the pan – sear in batches if necessary. This browning process is called the Maillard reaction, and it’s where so much flavor is born!

Step 2: Prepare the Sauce Base

While the chicken is searing, whisk together the chicken broth and all-purpose flour in a small mixing bowl until completely smooth. Pour this mixture into your crock pot. Add in the minced garlic, salt, black pepper, Italian seasoning, and paprika. Stir gently to combine these ingredients into a flavorful base for our creamy sauce.

⚠️ Common Mistake to Avoid: Adding flour directly to the hot liquid in the crock pot can cause lumps. Whisking it thoroughly with the cold chicken broth first creates a smooth slurry, ensuring a silky sauce.

Step 3: Cook and Finish

Place the seared chicken breasts into the crock pot, nestling them into the sauce base. Top the chicken evenly with the drained sun-dried tomatoes and dot with the salted butter. Cover the crock pot and cook on LOW for 6-7 hours, or on HIGH for 3-3.5 hours, until the chicken is cooked through and tender. In the final hour of cooking on LOW (or final 30 minutes on HIGH), stir in the heavy whipping cream. This ensures the cream is heated through but doesn’t overcook, maintaining its luscious texture.

💡 mia’s Pro Tip: For the most even cooking, try to select chicken breasts that are similar in size. If one is particularly thick, you can make a small slit in the thickest part to help it cook through more quickly and evenly.

Step 4: Serve with Love

Once the chicken is cooked and the sauce is creamy and heated through, it’s time to serve! Ladle the creamy sun-dried tomato chicken and sauce over your favorite pasta, rice, or even mashed potatoes. Garnish generously with fresh basil and grated Parmesan cheese for an extra pop of freshness and savory flavor. Enjoy this incredible crockpot chicken dinner!

⚠️ Common Mistake to Avoid: Adding the heavy cream too early in the cooking process can cause it to curdle or separate, especially when cooked on high heat for extended periods. Always add it in the last 30-60 minutes.

StepActionDurationKey Visual Cue
1Sear Chicken5-6 minutes total (2-3 per side)Golden brown crust
2Prepare Sauce Base3-4 minutesSmooth, lump-free mixture
3Slow Cook3-7 hours (depending on setting)Chicken is fork-tender and cooked through
3 (cont.)Stir in Cream30-60 minutes (at end of cook time)Sauce is creamy and heated through
4Serve5 minutesBeautifully plated with garnishes

Serving & Presentation

To serve this exquisite Crock Pot Marry Me Chicken, I always opt for a base that will beautifully soak up the decadent sauce. Fettuccine or linguine is my go-to, reminiscent of the classic chicken alfredo dishes found in many of my favorite NYC Italian restaurants. However, fluffy jasmine rice or creamy mashed potatoes are equally wonderful, offering a different yet equally satisfying textural experience.

Presentation is key, even for a rustic slow cooker dish! I love to plate the chicken and sauce over the chosen base, allowing some of the sauce to naturally pool. A generous sprinkle of freshly grated Parmesan cheese adds a salty, nutty depth, while torn fresh basil leaves provide a vibrant green contrast and a burst of herbaceous freshness. The aroma alone will have your guests enchanted, but these visual cues truly elevate the dish to something special.

Pairing TypeSuggestionsWhy It Works
Side DishFettuccine, Linguine, Mashed Potatoes, Crusty Bread, Steamed BroccoliThe pasta and potatoes are perfect vehicles for the rich sauce. Broccoli adds a fresh, slight bitterness to balance the creaminess. Crusty bread is essential for dipping!
Sauce / DipExtra Parmesan Cheese, Red Pepper Flakes (for heat)Parmesan amplifies the savory notes, while red pepper flakes offer a welcome kick to cut through the richness.
BeverageDry White Wine (like Pinot Grigio), Light-Bodied Red Wine (like Pinot Noir), Sparkling Water with LemonA crisp white wine complements the creaminess without being overpowering. A light red offers earthy notes. Sparkling water provides a clean, refreshing contrast.
GarnishFresh Basil, Grated Parmesan, Chopped Parsley, Toasted Pine NutsBasil adds freshness, Parmesan adds saltiness, parsley offers color, and pine nuts give a delightful crunch.

Make-Ahead, Storage & Reheating

As a busy New Yorker, I rely on make-ahead meals, and this Crock Pot Marry Me Chicken is perfect for my weekly meal prep. I often double the recipe on a Sunday to ensure I have delicious lunches or quick dinners ready to go throughout the week. The flavors actually meld and deepen beautifully with time, making leftovers just as good, if not better, than the original dish.

MethodContainerDurationReheating Tip
RefrigeratorAirtight container3-4 daysGently reheat in a saucepan over low heat, adding a splash of broth or water if needed, or microwave in 30-second intervals.
FreezerFreezer-safe container or heavy-duty freezer bags2-3 monthsThaw overnight in the refrigerator, then reheat gently on the stovetop or in the microwave. The sauce might separate slightly upon reheating; whisking well will help restore its creaminess.
Make-AheadCrock Pot or individual airtight containersPrepare up to 2 days in advanceIf making ahead, cook fully, let cool, then refrigerate. Reintroduce cream and reheat gently before serving.

When reheating, I find that a gentle approach on the stovetop preserves the sauce’s texture best. If you notice the sauce looks a little separated after reheating, don’t despair! A good whisk, sometimes with a tiny splash of extra cream or chicken broth, will emulsify it beautifully. Avoid microwaving on a very high power for too long, as this can sometimes make the chicken a bit dry.

Variations & Easy Swaps

VariationKey ChangeBest ForDifficulty Impact
Spicy Mexican FlairAdd chili powder, cumin, and a pinch of cayenne. Swap sun-dried tomatoes for diced jalapeños or green chilies.Heat seekers wanting a south-of-the-border twist.Easy
Gluten-Free / Dairy-FreeUse gluten-free flour. Swap heavy cream for full-fat coconut milk or a cashew cream. Ensure chicken broth is GF.Those with dietary restrictions.Easy Swap
Mediterranean TwistAdd Kalamata olives and chopped artichoke hearts in the last hour. Garnish with feta cheese.Lover of bright, briny flavors.Easy

Spicy Mexican Flair

For a kicked-up version that reminds me of some of the vibrant flavors I encounter in NYC’s diverse culinary scene, try adding a teaspoon of chili powder and half a teaspoon of cumin to the sauce base. A pinch of cayenne pepper can be added for extra heat. Instead of sun-dried tomatoes, finely chop a small can of diced jalapeños or mild green chilies and add them in. You can serve this over rice or with tortilla chips for a truly unique crockpot chicken dinner experience.

Gluten-Free and Dairy-Free Options

Adapting this recipe for gluten-free and dairy-free needs is quite straightforward, and I’ve tested it successfully! To make it gluten-free, simply ensure your chicken broth is certified gluten-free and use a gluten-free flour blend (like cornstarch or arrowroot starch, about 1.5 tbsp) to thicken the sauce. For dairy-free, substitute the heavy whipping cream with a can of full-fat coconut milk (the kind from a can, not a carton) or a homemade cashew cream. The coconut milk will impart a subtle sweetness, while cashew cream will be more neutral. All these swaps are easy and yield delicious results with mia’s expert touch.

Mediterranean Twist with Olives and Feta

Inspired by a summer trip to the Mediterranean coast, I love to infuse this dish with bright, briny notes. In the last hour of cooking, stir in about ½ cup of pitted Kalamata olives (halved or quartered) and ½ cup of chopped jarred artichoke hearts. When serving, crumble some generous pieces of salty feta cheese over the top. This variation offers a wonderful tangy counterpoint to the creamy sauce and is a delightful surprise for your taste buds, reflecting the fresh ingredients found in markets worldwide.

What ingredients do I need for Crock Pot Marry Me Chicken?

To make this easy slow cooker Marry Me Chicken, you’ll need boneless, skinless chicken breasts, olive oil for searing, chicken broth, all-purpose flour for thickening, heavy whipping cream for richness, minced garlic, salt, black pepper, Italian seasoning, paprika for flavor, and drained sun-dried tomatoes. Butter adds a final touch of richness. Optional garnishes include fresh basil and grated Parmesan cheese. These are simple pantry staples that create an incredibly delicious and creamy sun-dried tomato chicken.

How long do I cook Marry Me Chicken in a crock pot?

For the best results with this Crock Pot Marry Me Chicken recipe, cook on LOW for 6-7 hours or on HIGH for 3-3.5 hours, until the chicken is thoroughly cooked and tender. The heavy whipping cream should be stirred in during the last 60 minutes if cooking on LOW, or the last 30 minutes if cooking on HIGH. This timing ensures the chicken is perfectly tender and the sauce has developed a rich, creamy consistency without becoming overcooked.

Can I substitute heavy cream with something else in Crock Pot Marry Me Chicken?

Yes, you absolutely can! If you need to substitute heavy cream, my top recommendation for this creamy sun-dried tomato chicken is full-fat canned coconut milk. It provides a similar richness without a strong coconut flavor. Another good option is half-and-half for a slightly less rich but still creamy sauce. Ensure you add these substitutes towards the end of the cooking time, just as you would with heavy cream, to prevent curdling and maintain that luscious texture.

What should I serve with Crock Pot Marry Me Chicken?

This crockpot chicken dinner is incredibly versatile! I love serving it over pasta like fettuccine or linguine, as the noodles are perfect for soaking up the creamy sun-dried tomato sauce. Other fantastic options include mashed potatoes, rice pilaf, or even a bed of cauliflower mash for a lighter choice. A side of steamed or roasted vegetables, like broccoli or asparagus, also complements the richness beautifully. Don’t forget crusty bread for dipping!

Why is it called Marry Me Chicken?

The name “Marry Me Chicken” is a playful way to describe how irresistibly delicious and decadent this dish is. It implies that the recipe is so good, so captivating, that it could make you want to “marry” it! The rich, creamy sauce, tender chicken, and savory sun-dried tomatoes create a flavor profile that is deeply satisfying and often described as addictive. It’s a dish that instantly makes you feel loved and well-cared for, a true comfort food that’s hard to resist!

Can I use chicken thighs instead of breasts?

Absolutely! Boneless, skinless chicken thighs are a wonderful alternative to chicken breasts in this Crock Pot Marry Me Chicken recipe. Thighs tend to be more forgiving and stay incredibly moist due to their higher fat content. They might take a touch longer to cook through than breasts, so just ensure they are tender and cooked to an internal temperature of 165°F (74°C). The flavor will be just as delightful, perhaps even richer!

Share Your Version!

I always get so excited to see how you bring my recipes to life in your own kitchens! If you’ve made this Crock Pot Marry Me Chicken, please take a moment to leave a rating and a comment below – your feedback truly helps me and other home cooks. If you share a photo of your creation on Instagram or Pinterest, be sure to tag me @exorecipes so I can see your beautiful work! I’m always curious to know what variations you try – did you find a new favorite spice blend or another delicious pairing?

From my NYC kitchen to yours — I hope this recipe brings as much warmth to your table as it does to mine. — mia 🧡

📌

Love This Recipe? Save It to Pinterest!

If you enjoyed this Crock Pot Marry Me Chicken recipe, don’t let it get lost in your browser tabs! 😄 Pin it now so you can find it again anytime — and explore hundreds more tried-and-tested recipes waiting for you on my Pinterest boards.

👉 Follow mia on Pinterest @chefrecipes2

📌 Pin this recipe · 🔁 Re-pin your favorites · 💬 Tag me when you make it — I love seeing your creations!

Print

clock clock iconcutlery cutlery iconflag flag iconfolder folder iconinstagram instagram iconpinterest pinterest iconfacebook facebook iconprint print iconsquares squares iconheart heart iconheart solid heart solid icon

Crock Pot Marry Me Chicken

  • Author: Chef Mia

Description

Creamy and delicious Crockpot Marry Me Chicken is easy to make in the slow cooker. Simple ingredients makes this a family favorite meal.


Ingredients

Scale
  • 6 Boneless Skinless Chicken Breasts
  • 2 Tablespoons Olive Oil
  • 1 ½ cups Chicken Broth
  • 3 Tablespoons All Purpose Flour
  • 1 cup Heavy Whipping Cream
  • 1 Tablespoon Minced Garlic
  • ½ teaspoon Salt
  • 1 teaspoon Black Pepper
  • 1 teaspoon Italian Seasoning
  • 1 teaspoon Paprika
  • 1/3 cup Sun Dried Tomatoes ((drained))
  • 2 Tablespoons Salted Butter
  • Fresh Basil ((optional for garnish))
  • Grated Parmesan Cheese ((optional for garnish))

Instructions

  1. Heat the olive oil in a large skillet over medium high heat. Brown the chicken breasts in the oil for 2-3 minutes per side.
  2. In a small mixing bowl, whisk together the chicken broth and flour. Add this mixture to a crock pot. Add in the minced garlic, salt, pepper, Italian seasoning and paprika. Gently mix to combine these ingredients.
  3. Place the chicken breasts in the crock pot and top the chicken with the sun dried tomatoes and butter. Cover and cook on low for 6-7 hours or on high for 3-3.5 hours until the chicken is cooked through. Stir the heavy whipping cream into the crock pot for the last 60 minutes if cooking on low or 30 minutes if cooking on higher.
  4. Serve warm over pasta topped with the fresh basil and grated parmesan cheese. Enjoy!


Nutrition

  • Calories: 376 kcal
  • Sugar: 4 g
  • Fat: 26 g
  • Carbohydrates: 9 g
  • Protein: 27 g


Crock Pot Marry Me Chicken

ph">For more delicious inspiration, follow me on Pinterest!
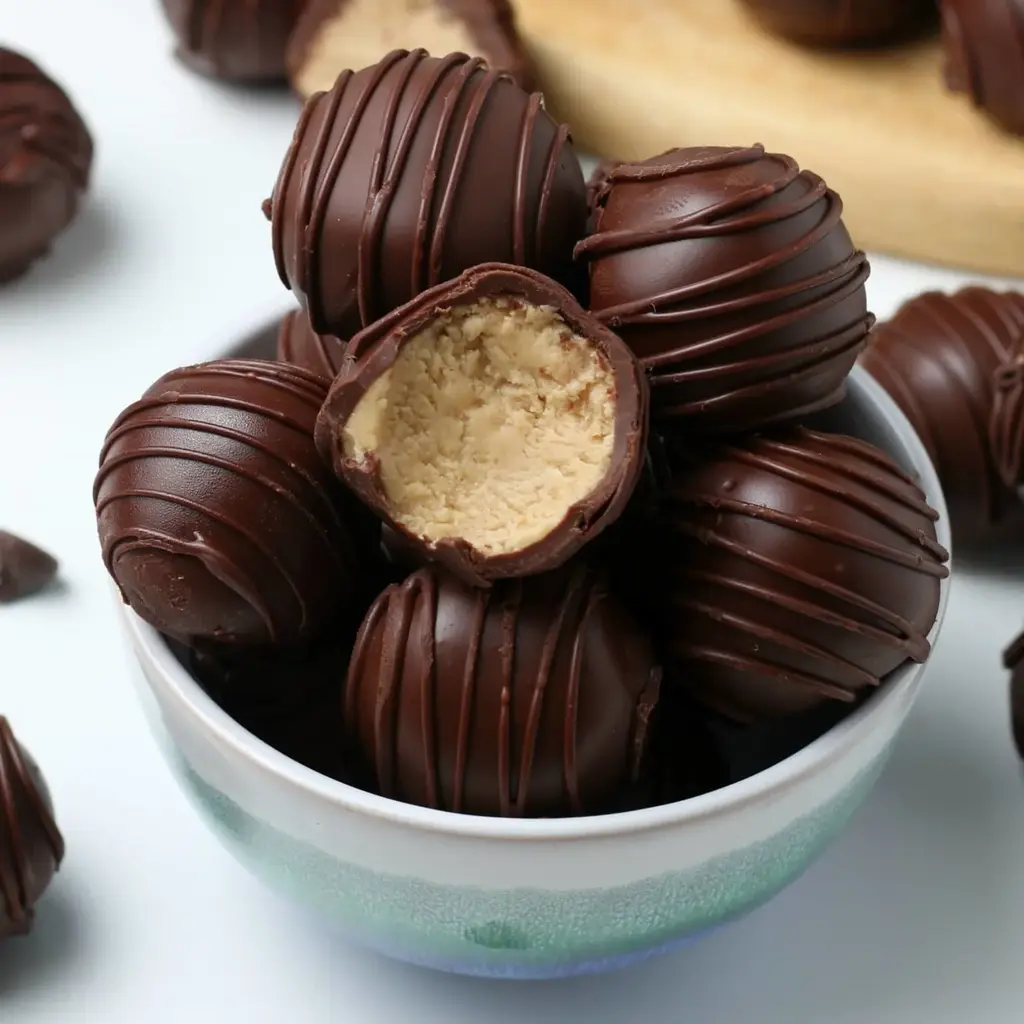
Easy 3 Ingredient Peanut Butter Fudge Recipe

3 Ingredient Peanut Butter Fudge: Easy No-Bake Perfection

⚖️
Difficulty
Easy
⏲️
Prep Time
10 mins
🕒
Cook Time
5 mins
⏱️
Total Time
2.5 hours
🍽️
Servings
16 servings

Growing up in my mother’s kitchen in Marrakech, Morocco, we learned that true flavor often comes from simplicity. The aromatic spices, the slow-cooked tagines – they all taught me the power of a few well-chosen ingredients. When I moved to Paris to hone my pastry skills, I discovered a different kind of magic: precision and technique. Now, in my bustling New York City kitchen, I blend those Moroccan roots and French training with the vibrant energy of this city, always seeking recipes that are both sophisticated and accessible. This 3 ingredient peanut butter fudge recipe is a perfect example of that philosophy. It’s unbelievably easy, incredibly delicious, and utilizes pantry staples to create a treat that tastes like it came from a fancy chocolatier, embodying the very essence of easy peanut butter fudge recipe for any home cook.

Imagine biting into a square of pure bliss: creamy, rich, and utterly decadent. The velvety texture of this simple fudge melts in your mouth, releasing a comforting symphony of sweet white chocolate and the unmistakable, nutty depth of peanut butter. It’s the kind of dessert that transports you, a moment of pure indulgence without any fuss. The aroma alone is enough to fill your home with warmth, reminiscent of cozy afternoons and cherished celebrations. This isn’t just any fudge; it’s a moment of edible sunshine, a testament to how a few humble ingredients can be transformed into something truly spectacular, much like the way my grandmother used to turn a few simple spices into an unforgettable feast in her bustling Moroccan home.

What makes this particular recipe a game-changer is its sheer simplicity. With just three core ingredients, you achieve a texture and flavor profile that rivals more complicated recipes. I’ve spent countless hours in my NYC kitchen refining this so that it’s foolproof, allowing even the most novice baker to achieve professional-looking results with minimal effort. You’ll get a super smooth, rich fudge that sets perfectly every time. I’ll even share a few of my secrets, including a crucial tip on ingredient selection that guarantees success and a common pitfall many home cooks fall into that you can easily avoid.

Why This 3 Ingredient Peanut Butter Fudge Recipe Is the Best

The magic of this 3 ingredient peanut butter fudge lies in its elegant simplicity, a direct result of my culinary journey. From mastering the art of flavor layering in Moroccan cuisine to understanding the precise textures in French pastry, I’ve learned that less can truly be more. This recipe takes three fundamental ingredients—smooth peanut butter, sweet white chocolate, and creamy condensed milk—and transforms them into a luxurious confection. It’s a testament to combining pantry staples with a chef’s touch, creating a simple fudge with peanut butter that delivers rich flavor and a delightful mouthfeel without any complicated techniques or exotic ingredients.

Achieving that perfect, melt-in-your-mouth texture is key, and for this recipe, it’s all about the gentle heating process and the quality of your ingredients. Unlike traditional fudge that requires careful temperature monitoring of boiling sugar, this method relies on the steady, even melting of white chocolate and peanut butter, then incorporating the condensed milk. I learned in Paris that the “double boiler” method or careful microwave intervals are best for delicate ingredients like white chocolate, ensuring a silky-smooth base. This controlled melting prevents overcooking, which can lead to a grainy or greasy texture, guaranteeing a fudge that is both rich and delightfully smooth every single time.

This recipe is your secret weapon for quick treats, holiday platters, or spontaneous cravings. It’s so forgiving, making it ideal for anyone, from young aspiring chefs in your life to seasoned home cooks looking for a reliable, no-fuss dessert. The minimal ingredient list means less shopping and less cleanup, which is a lifesaver for my busy New York City lifestyle. It’s the ultimate demonstration of how an easy peanut butter fudge recipe can yield incredibly satisfying results with minimal effort, perfect for parties or just a sweet treat after dinner.

3 Ingredient Peanut Butter Fudge Ingredients

When I’m sourcing ingredients for my recipes here in New York, I love hitting up local markets, but for this specific fudge, the ingredients are easily found at any major grocery store. The key is in the *type* of each ingredient, which I’ll detail below. My mother always said that the soul of a dish is in its ingredients, and that’s true for even the simplest treats like this! The specific ratio of these three ingredients is what makes this quick peanut butter fudge so perfectly balanced.

Ingredients List

  • 12 ounces white chocolate chips
  • 1.5 cups creamy peanut butter (Crucially, do NOT use natural peanut butter. See spotlight below!)
  • 1 can sweetened condensed milk (14 oz.)

Ingredient Spotlight

White Chocolate Chips: These provide the sweet, creamy base and structure for our fudge. Opt for good quality chips, as they melt more smoothly. In the US, most standard brands will work beautifully. If you can find “melting wafers” made specifically for confectionery, even better, as they tend to be more stable. I rarely use vanilla extract in this as the white chocolate provides enough sweetness and a lovely aroma, but a tiny pinch of sea salt can enhance the flavors beautifully.

Creamy Peanut Butter: This is where flavor and texture really come into play, and crucially, you *must* use creamy, processed peanut butter (like Jif or Skippy). Natural peanut butter, with its separated oils and often gritty texture, will not emulsify properly with the other ingredients, leading to a greasy or separated fudge. The emulsifiers in standard peanut butter are essential for that smooth, consistent texture we’re aiming for in this no bake peanut butter fudge.

Sweetened Condensed Milk: This is the binder and sweetener that brings everything together, creating that luscious, fudgy consistency. It’s a thick, syrupy liquid made from reducing milk and adding sugar. Make sure you’re not confusing it with evaporated milk, which is unsweetened and thinner. The high sugar content in condensed milk also helps the fudge to set properly, giving it that characteristic rich, smooth mouthfeel.

Original IngredientBest SubstitutionFlavor / Texture Impact
Creamy Peanut ButterAlmond Butter or Cashew Butter (creamy, processed)Slightly different nutty flavor profile; texture will remain similar if processed versions are used.
White Chocolate ChipsMilk Chocolate Chips or Semi-Sweet Chocolate ChipsLess sweet, more pronounced chocolate flavor. The fudge will be darker in color. May require slightly more careful melting to avoid seizing.
Sweetened Condensed MilkCoconut Condensed Milk (for dairy-free)Adds a subtle coconut flavor. Ensure it’s a thick, sweetened variety for best results. Texture may be slightly different but still delicious.

How to Make 3 Ingredient Peanut Butter Fudge — Step-by-Step

Making this easy peanut butter fudge recipe is so straightforward, you’ll be amazed at the results. Just follow these simple steps, and you’ll have perfect fudge in no time!

Step 1: Prepare the Pan

First, grab an 8×8 inch baking pan. Spray it lightly with cooking spray to prevent sticking, then line the bottom with either waxed paper or parchment paper. Leave a little overhang on the sides – this makes it super easy to lift the fudge out later. This prep step is small but mighty for a clean release!

💡 mia’s Pro Tip: For an extra professional finish and to ensure the paper doesn’t shift, you can use a tiny bit of cooking spray or a dab of melted chocolate on the underside of the parchment paper corners to stick it to the pan before you start.

Step 2: Melt the Base

In a large, microwave-safe mixing bowl, combine the 12 ounces of white chocolate chips and 1.5 cups of creamy peanut butter. Place the bowl in the microwave and heat in 30-second intervals. Crucially, stir thoroughly after *each* interval until the mixture is completely melted, smooth, and well combined. Be patient; you don’t want to scorch the white chocolate.

Step 3: Incorporate Condensed Milk

Once the white chocolate and peanut butter mixture is silky smooth, pour in the 14 oz. can of sweetened condensed milk. Stir everything together until it’s fully combined and the mixture is uniformly thick and glossy. This is where the magic happens, bringing the fudge to its perfect consistency.

⚠️ Common Mistake to Avoid: Overheating the white chocolate. When melting white chocolate, it’s very sensitive. If you microwave it for too long or at too high a power, it can seize up, becoming grainy and clumpy. Always use short intervals and stir between each one to ensure even melting and prevent burning.

Step 4: Chill to Set

Pour the glorious, smooth mixture into your prepared 8×8 inch baking dish. Spread it out evenly with a spatula. Now, cover the pan (a piece of plastic wrap laid directly on the surface works well, or just cover the pan with its lid or foil) and refrigerate for at least 2 to 3 hours, or until the fudge is completely firm and set. This chilling time is essential for achieving clean cuts.

Step 5: Cut and Serve

Once the fudge is perfectly set and firm to the touch, lift it out of the pan using the parchment paper overhang. Place it on a cutting board and use a sharp knife to cut it into bite-sized pieces. I like to make them about 1-inch squares. This simple fudge with peanut butter is now ready to be enjoyed!

StepActionDurationKey Visual Cue
1Prepare Pan2 minutesGreased and lined 8×8 pan.
2Melt BaseApprox. 2-3 minutes (in 30-sec intervals)Smooth, glossy, combined mixture.
3Add Condensed Milk1 minuteUniformly thick and glossy fudge batter.
4Chill2-3 hoursFirm, set fudge in the pan.
5Cut & Serve5 minutesNeatly cut squares.

Serving & Presentation

This no bake peanut butter fudge is wonderfully versatile. Serve it chilled, straight from the refrigerator, for the firmest texture. As it sits at room temperature, it will soften slightly, becoming even more decadent. For a beautiful presentation, I like to arrange the cut squares on a simple, elegant platter. A sprinkle of flaky sea salt on top just before serving adds a sophisticated touch that contrasts beautifully with the sweetness. In NYC, I often pair these with a good cup of coffee or a rich espresso, much like the way we’d enjoy a small treat after a meal in Paris.

These fudgy bites are also fantastic additions to any dessert spread or cookie box. They pair exceptionally well with slightly tart flavors or anything that balances their rich sweetness. Consider serving them alongside fresh berries, like raspberries or strawberries, which provide a lovely burst of acidity. They also make a perfect accompaniment to slightly richer desserts, such as chocolate brownies or a dense cheesecake, offering a different flavor profile and a delightful chewy-sweet contrast. Don’t be afraid to experiment!

Pairing TypeSuggestionsWhy It Works
Side DishFresh raspberries or strawberries; Chocolate Lava CakesFruity acidity cuts through sweetness; chocolate echoes fudge flavors.
Sauce / DipCaramel sauce (lightly drizzled); Whipped CreamComplements the nutty, sweet flavors; cream adds richness and balances intensely sweet notes.
BeverageEspresso or strong coffee; Sweet dessert wine (e.g., Port); Milk (especially chocolate milk)Bitterness of coffee balances sweetness; wine enhances richness; milk is a classic sweet pairing.
GarnishFlaky sea salt; A single roasted peanut; A small mint leafSalt highlights sweetness; peanut adds a textural crunch and visual cue; mint adds color and freshness.

Make-Ahead, Storage & Reheating

As a busy New Yorker, I live by the mantra of ‘prepare ahead!’ This 3 ingredient peanut butter fudge is a dream for meal prep. You can easily make a batch at the beginning of the week and have delicious, ready-to-grab treats for late-night cravings or impromptu guest drop-ins. The set-and-forget nature of this recipe means you can prepare it on a Sunday afternoon, and it will be perfectly ready to enjoy throughout the week.

MethodContainerDurationReheating Tip
RefrigeratorAirtight container or plastic wrapUp to 2 weeksLet sit at room temperature for 10-15 minutes before serving for a softer texture.
FreezerFreezer-safe container with parchment paper between layersUp to 3 monthsThaw overnight in the refrigerator. For a firmer texture, serve directly from the fridge.
Make-AheadPrepare and chill until firm, then cut. Store as directed below.Up to 2 days before neededAssemble by cutting and arranging just before serving for the best texture.

The fudge will keep its best texture and flavor when stored. I recommend keeping it in an airtight container in the refrigerator. This is the best way to ensure it stays firm and doesn’t absorb any off-flavors from other items in your fridge. If you plan to serve it immediately after thawing from the freezer or just want a softer bite, simply let it sit at room temperature for a few minutes. It’s quite forgiving!

Variations & Easy Swaps

VariationKey ChangeBest ForDifficulty Impact
Chocolate Chip SwirlSwirl in extra chocolate chips at the end.Chocolate lovers; adding texture.Easy
Nut-Free (Sunflower Seed Butter)Use creamy sunflower seed butter.School lunches; nut allergies.Easy
Mexican Chocolate FudgeAdd cinnamon and a pinch of cayenne.Bold flavors; unique treat.Easy

No-Bake Peanut Butter Fudge with Chocolate Chips

For an extra layer of indulgence, consider adding mini chocolate chips to the mixture in Step 3. Stir them in right after the condensed milk. When the fudge is cut, you’ll get delightful little pockets of melted chocolate within the peanut butter base. This adds a wonderful textural contrast and a more complex chocolate-peanut butter flavor profile, perfect for special occasions or when you want to impress.

Simple Fudge with Peanut Butter for Dairy-Free or Gluten-Free

To make this recipe dairy-free, substitute the white chocolate chips with your favorite dairy-free white chocolate alternative and use a good quality coconut condensed milk. The texture might be slightly softer, but the flavor remains wonderfully rich. Rest assured, this fudge is naturally gluten-free, making it a safe and delicious treat for most dietary needs. I often test these variations using ingredients I find at the Union Square Greenmarket!

Quick Peanut Butter Fudge with a Spiced Twist

Inspired by the flavors of my Moroccan heritage, you can add a touch of warmth by stirring in 1/2 teaspoon of ground cinnamon and a tiny pinch of cayenne pepper along with the condensed milk. This creates a delightful ‘Mexican Chocolate’ inspired fudge that has a surprising warmth that complements the peanut butter beautifully. It’s a small addition that makes a big impact – a truly unique flavor fusion!

Can I use natural peanut butter for 3 ingredient peanut butter fudge?

No, I strongly advise against using natural peanut butter for this recipe. Natural peanut butter tends to be oily and separated, lacking the emulsifiers found in conventional peanut butter. These emulsifiers are crucial for binding the ingredients together smoothly. Using natural peanut butter can result in a greasy, grainy, or separated fudge that doesn’t set properly. Stick to creamy, processed peanut butter for the best results in this easy peanut butter fudge recipe.

How long does it take for 3 ingredient peanut butter fudge to set in the fridge?

The typical setting time for this 3 ingredient peanut butter fudge is approximately 2 to 3 hours in the refrigerator. This allows the white chocolate and peanut butter mixture to firm up completely, creating that classic dense and chewy fudge texture. For the best results, ensure your refrigerator is set to a standard temperature and avoid opening the door too frequently during the setting period. Patience here is key for a perfectly set fudge!

What can I use instead of butter in 3 ingredient peanut butter fudge?

This 3 ingredient peanut butter fudge recipe actually doesn’t call for butter! The primary ingredients are white chocolate chips, creamy peanut butter, and sweetened condensed milk. If you were looking to substitute one of these, the most common substitutions would be for the peanut butter (like almond butter or sunflower seed butter) or for the white chocolate (like milk or dark chocolate chips). Always ensure your substitution is creamy and processed when replacing peanut butter to maintain the right texture.

How do you store 3 ingredient peanut butter fudge so it stays fresh?

To keep your 3 ingredient peanut butter fudge fresh and delicious, the best method is to store it in an airtight container. I recommend placing it in the refrigerator for optimal texture and longevity. Properly stored, it can last up to two weeks. If you prefer a softer fudge, you can let it sit at room temperature for about 10-15 minutes before serving. This simple storage method ensures you can enjoy this delightful treat for days!

Can I make this peanut butter fudge dairy-free?

Yes, you absolutely can adapt this 3 ingredient peanut butter fudge to be dairy-free! You’ll need to substitute the white chocolate chips with a good quality dairy-free white chocolate alternative. Additionally, swap the regular sweetened condensed milk for a dairy-free version, such as coconut condensed milk. Ensure your coconut condensed milk is thick and sweetened for the best results. The texture might vary slightly, but the delicious peanut butter flavor will still shine through wonderfully!

What is the best way to melt the white chocolate for this fudge?

The best way to melt white chocolate for this simple fudge recipe is using short intervals in the microwave, stirring thoroughly after each interval. White chocolate can be finicky and prone to seizing if overheated. Start with 30-second bursts on medium power, and stir until almost completely melted and smooth. You can also use a double boiler method over simmering water, stirring constantly. The goal is a completely smooth, luscious mixture before proceeding.

Why is my fudge grainy or oily?

A grainy or oily texture in your 3 ingredient peanut butter fudge is usually a sign that either natural peanut butter was used, or the white chocolate was overheated. As mentioned, natural peanut butter separates and won’t emulsify properly. Overheating white chocolate can cause it to seize or become oily. Ensure you’re using creamy, standard peanut butter and melting the white chocolate gently and slowly, stirring between each heating interval for a silky smooth result.

Share Your Version!

I truly hope you adore this incredibly easy 3 ingredient peanut butter fudge. It’s a recipe that brings me so much joy, and I can’t wait for you to experience it too! If you make this quick peanut butter fudge, please consider leaving a star rating and a comment below – it truly helps others discover the recipe. I also love seeing your creations come to life; share a photo on Instagram or Pinterest and tag me @exorecipes! I’m always curious to hear how you put your own personal flair on things. What’s your favorite way to enjoy a simple peanut butter treat?

From my NYC kitchen to yours — I hope this recipe brings as much warmth to your table as it does to mine. — mia 🧡

📌

Love This Recipe? Save It to Pinterest!

If you enjoyed this 3 Ingredient Peanut Butter Fudge recipe, don’t let it get lost in your browser tabs! 😄 Pin it now so you can find it again anytime — and explore hundreds more tried-and-tested recipes waiting for you on my Pinterest boards.

👉 Follow mia on Pinterest @chefrecipes2

📌 Pin this recipe · 🔁 Re-pin your favorites · 💬 Tag me when you make it — I love seeing your creations!

Print

clock clock iconcutlery cutlery iconflag flag iconfolder folder iconinstagram instagram iconpinterest pinterest iconfacebook facebook iconprint print iconsquares squares iconheart heart iconheart solid heart solid icon

3 Ingredient Peanut Butter Fudge

  • Author: Chef Mia

Description

This Easy Peanut Butter Fudge Recipe is the best recipe with only 3 ingredients! Homemade peanut butter fudge is perfect for your next party.


Ingredients

Scale
  • 12 ounces white chocolate chips
  • 1.5 cups creamy peanut butter ((do not use natural peanut butter))
  • 1 can sweetened condensed milk (14 oz.)

Instructions

  1. Spray an 8X8 baking pan with cooking spray, then line the bottom with waxed paper or parchment paper.
  2. Place the white chocolate chips and peanut butter in a large mixing bowl (microwave safe bowl).
  3. Heat in the microwave in 30-second intervals, stirring after each interval, until the white chocolate chips and peanut butter are melted, fully combined and smooth. Then stir in the sweetened condensed milk until fully combined.
  4. Pour the mixture into the prepared 8X8 baking dish. Refrigerate until the fudge is set (approximately 2-3 hours).
  5. Once the fudge is fully set, cut into pieces and serve!


Nutrition

  • Calories: 224 kcal
  • Sugar: 19 g
  • Fat: 14 g
  • Carbohydrates: 21 g
  • Protein: 6 g


3 Ingredient Peanut Butter Fudge