“`html
Table of Contents
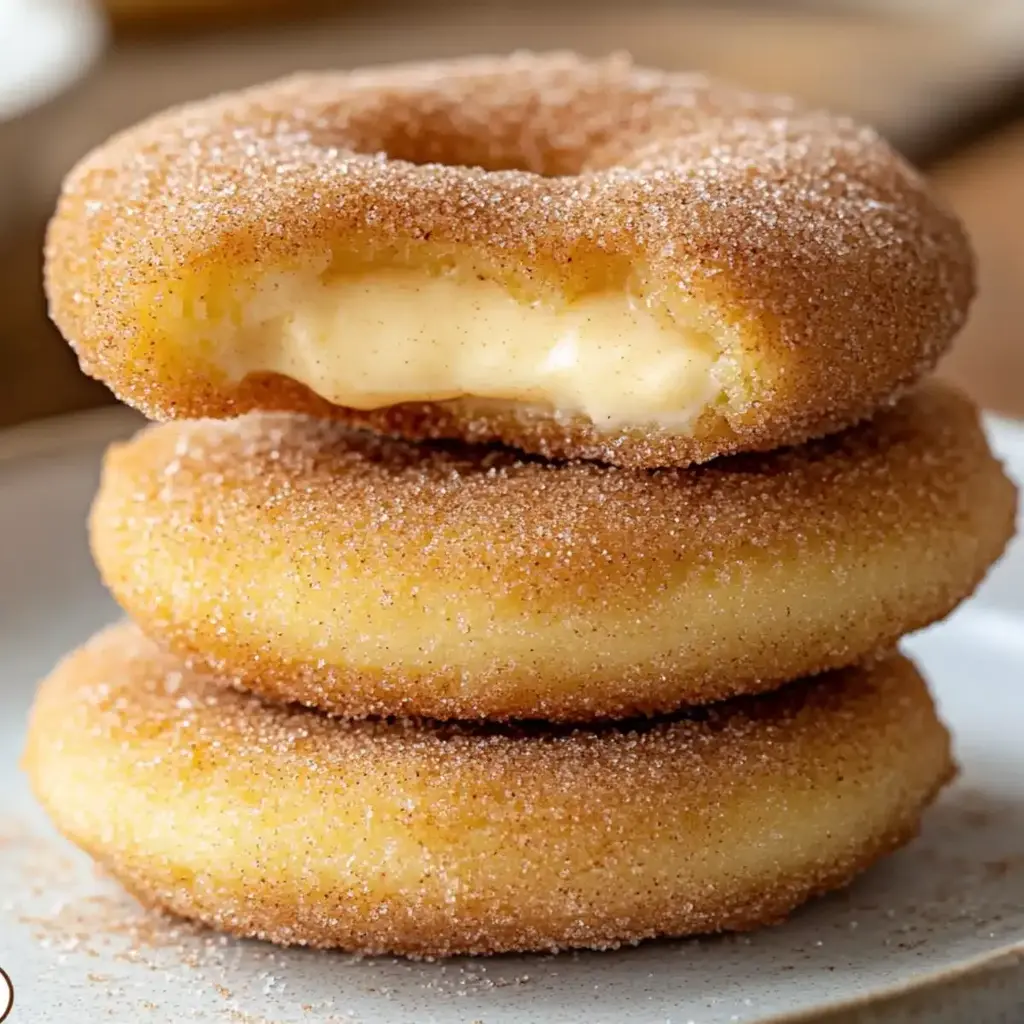
Churro Cheesecake Cookies – Easy Dessert Recipes
Introduction
Are you looking for a dessert that breaks the internet and your taste buds? Did you know that viral desserts like Churro Cheesecake Cookies often see a 300% increase in recipe searches during peak seasons? These irresistible treats combine the comforting warmth of a churro with the decadent creaminess of cheesecake, all wrapped up in a perfectly bite-sized cookie. Imagine a crispy, cinnamon-sugar coated exterior giving way to a luscious, melt-in-your-mouth cream cheese center. It’s the best of both worlds, a dessert mashup that’s destined to become your new favorite. If you’re a fan of simple yet spectacular desserts that impress, you’ve landed in the right place. Get ready to bake your way to viral fame with this easy-to-follow recipe that guarantees deliciousness!
Ingredients
Gather your arsenal of delightful ingredients to create these dreamy Churro Cheesecake Cookies. Each component plays a vital role in achieving that perfect balance of textures and flavors.
For the Cream Cheese Filling:
- 8 oz Philadelphia Cream Cheese, softened: The velvety heart of our cookie. Ensure it’s soft for easy mixing and a smooth, luscious center. It should yield to gentle pressure from your finger.
- 1/4 cup Granulated Sugar: Just enough sweetness to complement the cream cheese without overpowering it.
- 1 large Egg Yolk: This acts as a binder, enriching the filling and giving it a slightly custard-like texture. Ensure it’s at room temperature for better emulsification.
- 1/2 tsp Vanilla Extract: A fragrant kiss that enhances the sweet, creamy notes. Use pure vanilla extract for the best aromatic experience.
For the Cookie Dough:
- 1 cup (2 sticks) Unsalted Butter, softened: The foundation of our cookie texture. It should be soft but not melted, creating beautiful cookies with a slight chew.
- 3/4 cup Packed Light Brown Sugar: Adds moisture and a caramel-like depth of flavor that pairs wonderfully with cinnamon.
- 1/2 cup Granulated Sugar: Balances the sweetness and contributes to the cookie’s crisp edges.
- 2 large Eggs: These bind the dough, provide richness, and help with leavening. Room temperature eggs incorporate more smoothly.
- 1 tsp Vanilla Extract: For that classic cookie aroma and taste.
- 3 cups All-Purpose Flour: The main structure of our cookie. Spoon and level it to avoid a dry dough.
- 1 tsp Baking Soda: Our leavening agent, ensuring the cookies spread just right.
- 1/2 tsp Salt: Enhances all the other flavors and balances the sweetness.
For the Cinnamon-Sugar Coating:
- 1/2 cup Granulated Sugar: The base for our delightful coating.
- 2 tbsp Ground Cinnamon: The star spice that defines the churro flavor. Use a good quality cinnamon for maximum impact.
Substitutions & Notes:
- Dairy-Free: For a dairy-free option, use a vegan cream cheese alternative and ensure your butter and eggs are replaced with suitable vegan substitutes.
- Gluten-Free: A good quality gluten-free all-purpose flour blend can be used in place of traditional flour. You might need to adjust the liquid slightly if the dough seems too dry or wet.
- Cream Cheese: If you don’t have Philadelphia cream cheese, any full-fat block cream cheese will work. Avoid spreadable cream cheese in tubs as it contains more water and can make the filling too runny.
- Egg Wash: Some recipes use a whisked egg or milk for dipping before coating in cinnamon sugar to help it adhere better. This recipe doesn’t strictly require it, but it can help create an even thicker crust.
Timing
25 minutes
15 minutes (optional, for easier handling)
10-12 minutes
Approximately 35-40 minutes (plus optional chilling)
Compared to many cheesecake recipes which can take hours, these Churro Cheesecake Cookies are impressively quick. While the average cookie recipe might be ready in under 30 minutes total, this hybrid offers a delightful complexity of flavor and texture in a similar timeframe as a standard baking project, making it ideal for weeknight cravings or last-minute guests.

Step-by-Step Instructions
Step 1: Prepare the Cream Cheese Filling
In a medium bowl, beat the softened cream cheese with an electric mixer until it’s wonderfully smooth and creamy. Gradually add the 1/4 cup of granulated sugar and beat until well combined and fluffy. Then, beat in the egg yolk and vanilla extract until everything is perfectly incorporated. This luscious mixture is your cheesecake core. Cover the bowl and set it aside. For easier handling later, you can pop it in the freezer for about 15 minutes until it’s slightly firm but not frozen solid.
Step 2: Create the Cream Cheese Center
Now, let’s form the cheesecake centers. Take small portions of the cream cheese mixture (about 1 tablespoon each) and roll them into smooth balls. Place these balls on a small parchment-lined plate or baking sheet. If you have time, freeze these for at least 15-20 minutes, or until firm. This step is crucial for preventing the cream cheese from melting out too much during baking, ensuring you get that distinct cheesecake pocket.
Step 3: Make the Cookie Dough
In a large bowl, cream together the softened unsalted butter, light brown sugar, and granulated sugar with your electric mixer on medium speed until light and fluffy. This usually takes about 2-3 minutes. Scrape down the sides of the bowl as needed. Beat in the eggs one at a time, ensuring each is fully incorporated before adding the next. Stir in the vanilla extract. In a separate medium bowl, whisk together the all-purpose flour, baking soda, and salt. Gradually add the dry ingredients to the wet ingredients, mixing on low speed (or by hand with a sturdy spoon) until just combined. Be careful not to overmix; overmixing can lead to tough cookies.
Step 4: Bring it all Together
Get your baking sheets ready by lining them with parchment paper. Now, for assembly. Take about 2 tablespoons of cookie dough and flatten it slightly in your palm. Place one frozen cream cheese ball in the center of the flattened dough. Gently wrap the dough around the cream cheese ball, ensuring it’s completely enclosed. Roll the dough into a smooth ball. Repeat this process with the remaining dough and cream cheese balls. Place the formed cookie dough balls onto your prepared baking sheets, leaving about 2 inches between each cookie to allow for spreading.
Step 5: Bake to Golden Perfection
Preheat your oven to 350°F (175°C). Bake the cookies for 10-12 minutes, or until the edges are lightly golden brown and the centers appear set but still slightly soft. It’s important not to overbake them, as they will continue to cook slightly on the hot baking sheet. Remove the baking sheets from the oven and let the cookies cool on the sheets for about 5 minutes before transferring them to a wire rack to cool completely. This resting period helps the cookies firm up.
Step 6: The Grand Finale Coating
While the cookies are cooling, prepare the cinnamon-sugar coating. In a shallow bowl or plate, combine the 1/2 cup of granulated sugar and 2 tablespoons of ground cinnamon. Stir them together until well mixed. Once the cookies have cooled slightly (they should still be warm but not piping hot, so the coating adheres), gently roll each cookie in the cinnamon-sugar mixture until evenly coated. If the cookies have cooled too much and the coating isn’t sticking, you can lightly brush them with a little melted butter or a tiny bit of milk before rolling.
Nutritional Information
While a precise nutritional breakdown requires specific ingredient measurements and portion sizes, these cookies are a treat meant for enjoyment. A typical cookie (depending on size and exact ingredients) can be estimated as follows:
- Calories: Approximately 200-250 kcal per cookie
- Fat: Around 12-15g
- Carbohydrates: Roughly 25-30g
- Protein: About 2-3g
- Sugar: Approximately 15-20g
Please note: These are approximate values. For exact nutritional details, it’s recommended to use a recipe calculator with your specific ingredients.
Healthier Alternatives
Craving that churro cheesecake flavor without all the indulgence? Here are some swaps to enjoy them with a bit less guilt:
- Lighter Cream Cheese: Use reduced-fat cream cheese for the filling. The texture might be slightly less rich, but the flavor will still be there.
- Whole Wheat Flour: Substitute half of the all-purpose flour with whole wheat flour for added fiber.
- Sugar Reduction: Slightly decrease the sugar in both the cookie dough and the cinnamon-sugar coating. You can also explore natural sugar substitutes like erythritol or monk fruit sweetener, though note they can affect texture.
- Portion Control: Make smaller cookies to satisfy your craving with less.
- Almond Flour: For a gluten-free and lower-carb option, experiment with almond flour in the cookie dough. You might need to adjust the binding agents.
Serving Suggestions
These Churro Cheesecake Cookies are delightful on their own, but here are some ways to elevate your serving experience:
- Warm with Ice Cream: Serve them slightly warm with a scoop of vanilla bean or cinnamon ice cream for an ultimate dessert indulgence.
- Drizzle with Chocolate: A light drizzle of melted dark or milk chocolate can add another layer of decadent flavor.
- With Coffee or Milk: They make a perfect accompaniment to your morning coffee or a glass of cold milk for an afternoon treat.
- Party Favors: Package them in cute treat bags with a ribbon for homemade party favors.
Common Mistakes
To ensure your Churro Cheesecake Cookies are a roaring success, steer clear of these common pitfalls:
- Overmixing the Dough: This develops the gluten too much, resulting in tough, flat cookies.
- Using Unsoftened Butter/Cream Cheese: This will lead to a lumpy dough or filling and uneven baking.
- Not Chilling the Cream Cheese Centers: Warm cream cheese will melt too quickly, potentially leaking out and making a mess.
- Overbaking: Cookies that are baked too long will be dry and crumbly instead of soft and chewy with a creamy center.
- Not Allowing Cookies to Cool: Trying to move them too soon can cause them to break apart.
Storing Tips
To keep your delightful Churro Cheesecake Cookies fresh:
- Room Temperature: Store cooled cookies in an airtight container at room temperature for up to 3-4 days. Placing parchment paper between layers can prevent them from sticking.
- Refrigerating: For longer storage (up to a week), you can refrigerate them. However, the cookie part might become a bit firmer, so let them come to room temperature before serving.
- Freezing: Unfrosted and unfrosted baked cookies can be frozen in an airtight container for up to 3 months. Thaw them overnight at room temperature.
Conclusion
There you have it – your guide to creating the most amazing Churro Cheesecake Cookies! This recipe perfectly marries the beloved flavors and textures of churros and cheesecake into one delightful, easy-to-make cookie. Whether you’re making them for a family gathering, a potluck, or just a personal treat, these viral sensations are sure to impress. Don’t just dream about them, bake them!
Loved this recipe? Share your Churro Cheesecake Cookies creations with us on social media using #ChurroCheesecakeCookies and tag us! We can’t wait to see your delicious masterpieces!
FAQs
***_Can I make the cream cheese filling ahead of time?_***
Absolutely! The cream cheese filling can be made up to 2 days in advance and stored in the refrigerator. You might need to re-beat it briefly to ensure it’s smooth before forming it into balls for the cookies.
***_Why are my cookies spreading too much?_***
This can happen if your butter is too soft or melted, if you’ve overmixed the dough, or if your oven temperature is too low. Ensure your butter is softened but not melted, mix the dough only until combined, and check your oven’s calibration.
***_Can I omit the egg yolk in the cream cheese filling?_***
The egg yolk helps to bind and enrich the cream cheese filling. While you could try omitting it, the filling might be more prone to leaking and could have a less creamy texture.
***_How do I get a thicker cinnamon-sugar crust?_***
For an extra thick coating, you can lightly brush each cookie with a bit of melted butter or a thin layer of egg wash (a whisked egg with a tablespoon of water) before rolling them in the cinnamon-sugar mixture. This creates a stickier surface for the coating to adhere to.
***_Can I use regular cream cheese (from a tub) instead of block cream cheese?_***
It’s best to use block cream cheese for the filling. Tub cream cheese has a higher moisture content and is less firm, which can lead to a runny filling that leaks out during baking. If you must use tub cream cheese, try draining it very well in a fine-mesh sieve lined with cheesecloth for a few hours.
Churro Cheesecake Cookies – Easy Dessert Recipes
Description
Irresistible churro cheesecake cookies featuring a crispy cinnamon-sugar coating with a creamy Philadelphia cream cheese center. These viral cookies combine the best of churros and cheesecake in one perfect bite.
Ingredients
- 1/2 cup(113g) unsalted butter
- 1/2 cup+ 1 Tbsp (110g) packed light brown sugar
- 3 Tbsp(38g) granulated sugar
- 1large egg (50g), room temperature
- 1/2 tsppure vanilla extract
- 1 1/3 cups(167g) all-purpose flour, spooned and leveled
- 1/2 tspbaking soda
- 1/2 tspground cinnamon
- 1/4 tspfine sea salt
- 3 oz(85g) Philadelphia cream cheese, softened
- 1 1/2 Tbsp(19g) granulated sugar (for filling)
- 1/4 tspvanilla extract (for filling)
- 1/2 cup(100g) granulated sugar (for coating)
- 4 tspground cinnamon (for coating)
- High-quality caramel sauce for drizzling (optional)
Instructions
- Brown the butter in a light-colored saucepan over medium heat for 5-7 minutes until golden and nutty. Transfer to a bowl and cool for 10 minutes.
- Beat softened cream cheese with 1 1/2 Tbsp sugar and 1/4 tsp vanilla for 2 minutes until smooth. Transfer to piping bag and refrigerate.
- Whisk cooled brown butter with brown sugar and 3 Tbsp granulated sugar for 1 minute. Add egg and vanilla, whisking until glossy.
- In separate bowl, whisk flour, baking soda, 1/2 tsp cinnamon, and salt. Fold into wet ingredients in three additions until just combined.
- Mix 1/2 cup sugar with 4 tsp cinnamon in shallow bowl for coating.
- Preheat oven to 350°F (175°C). Line baking sheets with parchment paper.
- Take 2 Tbsp dough, flatten into 3-inch circle. Add 1 tsp filling to center. Bring edges up and seal completely, rolling into smooth ball.
- Roll each ball in cinnamon sugar until fully coated. Place 3 inches apart on baking sheets.
- Bake 12-14 minutes until edges are set but centers look slightly underdone.
- Cool on pan for 5 minutes, then transfer to wire rack. Drizzle with caramel sauce once cooled.
Notes
Brown butter is crucial for flavor – don’t skip this step and watch carefully to prevent burning
Ensure cream cheese is at room temperature for smooth filling
Seal dough completely around filling to prevent leaking
Cookies will look slightly underdone when ready – they continue cooking on the hot pan
Can freeze unbaked cookie balls for up to 2 months – bake from frozen, adding 2 minutes
For extra cinnamon sugar adhesion, brush tops with milk before final coating
Store in airtight container at room temperature for up to 5 days
Nutrition
- Calories: 168
- Sugar: 13.8g
- Fat: 7.8g
- Carbohydrates: 22.4g
- Protein: 2.1g
“`