Heavenly Summer Peach Cobbler Poke Cake Recipe

“`html

Heavenly Summer Peach Cobbler Poke Cake Recipe

Why This is the Ultimate Summer Dessert

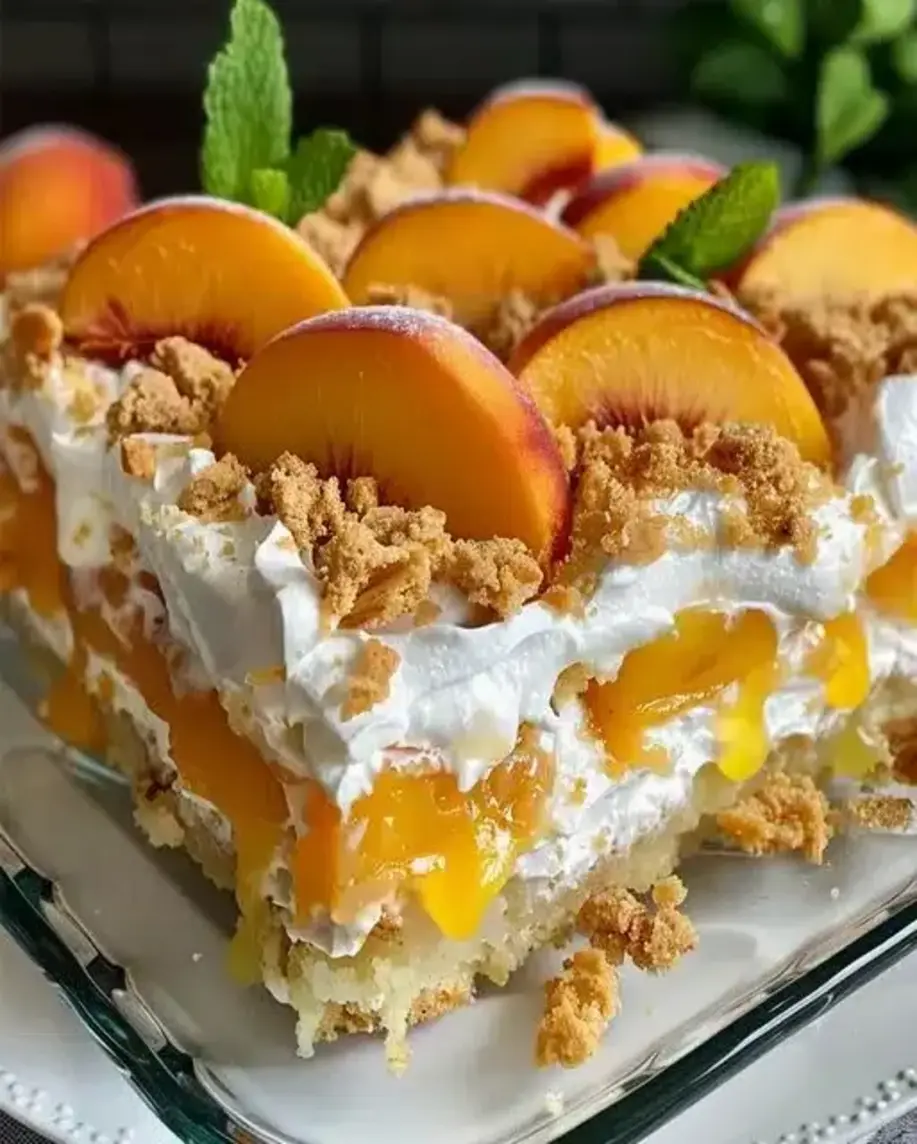
Are you searching for a dessert that perfectly captures the essence of summer sunshine and Southern hospitality? If you’re nodding along, then this Heavenly Summer Peach Cobbler Poke Cake is your answer! Imagine sinking your fork into a moist, tender yellow cake, infused with pockets of creamy vanilla pudding, all nestled beneath a warm, spiced peach filling and crowned with ethereal whipped cream. This dessert is more than just a treat; it’s an experience that transports you straight to a lazy summer afternoon. Combining the beloved flavors of a classic peach cobbler with the delightful surprise of a poke cake, this recipe is designed to impress with minimal fuss. On average, summer dessert recipes aim for ease and crowd-pleasing appeal, and this poke cake hits all the right notes, offering a unique twist on a timeless favorite.

Ingredients You’ll Need

For the Cake Base

  • 1 box (15.25 oz) yellow cake mix, plus ingredients called for on the box (eggs, oil, water) – This provides a convenient, consistently sweet base that bakes up golden and tender.
  • Optional: 1 teaspoon vanilla extract – Adds an extra layer of warm vanilla aroma to the cake itself.

For the Spiced Peach Filling

  • 4 cups sliced fresh or frozen peaches (about 4-5 medium peaches), thawed if frozen – Use ripe, juicy peaches for the best sweet-tart flavor. For convenience, store-bought frozen peaches work wonderfully, just ensure they’re fully defrosted.
  • 1/2 cup granulated sugar – Balances the tartness of the peaches and helps create a syrupy consistency. Adjust to your sweetness preference.
  • 2 tablespoons cornstarch – The thickening agent that transforms the peach juices into a luscious, spoonable filling.
  • 1 teaspoon ground cinnamon – The quintessential spice that evokes warmth and comfort, perfectly complementing peachy sweetness.
  • 1/4 teaspoon ground nutmeg – Adds a subtle, aromatic depth to the spice blend.
  • 1 tablespoon lemon juice – Brightens the peach flavor and prevents the filling from becoming too cloying.
  • 1 tablespoon unsalted butter – Adds a rich, smooth finish to the warm peach mixture.

For the Vanilla Pudding Topping

  • 1 (3.4 oz) package instant vanilla pudding mix – The quickest way to achieve a perfectly smooth, creamy pudding layer that seeps into the cake.
  • 2 cups cold milk (use the amount specified on pudding mix if different) – Ensures the pudding sets to the ideal consistency. Whole milk yields the richest flavor.

For the Whipped Cream Topping

  • 2 cups heavy whipping cream, very cold – Essential for achieving light, fluffy peaks.
  • 1/2 cup powdered sugar (confectioners’ sugar) – Sweetens the cream and helps stabilize it for a lovely finish.
  • 1 teaspoon vanilla extract – Enhances the whipped cream with a classic bakery flavor.
  • Optional Garnish: Sliced fresh peaches, a sprinkle of cinnamon, or crushed graham crackers – For that extra visual appeal and textural contrast.

Timing Your Cobbler Creation

Prep Time:
30 minutes
Cook Time:
35-40 minutes
Chill Time:
2 hours
Total Time:
3 hours 5 minutes

Compared to a traditional peach cobbler that often requires more hands-on time for slicing fruit and making a biscuit or crumble topping, this poke cake offers a slightly longer total time due to the chilling requirement, but the active preparation is significantly reduced. Baking time is comparable to most cake recipes.

A slice of Heavenly Summer Peach Cobbler Poke Cake on a plate, showing layers of cake, pudding, and peach filling with whipped cream topping.

Crafting Your Heavenly Peach Cobbler Poke Cake

Step 1: Bake the Golden Cake Base

Preheat your oven to 350°F (175°C). Grease and flour a 9×13 inch baking pan. Prepare the yellow cake mix according to package directions, adding the optional teaspoon of vanilla extract for an extra boost of flavor. Pour the batter evenly into the prepared pan. Bake for the time recommended on the box, usually around 30-35 minutes, or until a toothpick inserted into the center comes out clean. Let the cake cool completely in the pan on a wire rack. This is crucial for the next steps to work properly without the cake falling apart.

Step 2: Simmer the Spiced Peach Filling

While the cake cools, let’s make that glorious peach filling. In a medium saucepan, combine the sliced peaches, granulated sugar, cornstarch, cinnamon, nutmeg, and lemon juice. Stir everything together until the cornstarch is dissolved. Place the saucepan over medium heat and bring the mixture to a gentle simmer, stirring constantly. Cook for about 5-8 minutes, or until the peaches are tender and the filling has thickened to a luscious, syrupy consistency that coats the back of a spoon. Remove from heat and stir in the tablespoon of butter until it’s melted and incorporated. Set aside to cool slightly; it doesn’t need to be completely cold, but not piping hot either.

Step 3: Whip Up the Vanilla Pudding

In a medium bowl, whisk together the instant vanilla pudding mix and the cold milk. Whisk vigorously for about 2 minutes, or until the pudding begins to thicken. Let it sit for 5 minutes to fully set up. Instant pudding is wonderfully convenient here, providing a smooth, creamy texture that’s perfect for soaking into the cake.

Step 4: Poke Holes and Pour the Pudding

Once the cake is completely cool, it’s time for the “poke” part! Using a fork, the handle of a wooden spoon, or a skewer, poke an abundance of holes all over the surface of the cake. Don’t be shy; the more holes, the better the pudding will penetrate. Carefully pour the prepared vanilla pudding evenly over the entire surface of the cake, allowing it to seep down into the holes. Spread it smooth with an offset spatula or the back of a spoon.

Step 5: Chill and Assemble the Toppings

This chilling step is crucial for allowing the pudding to set and the flavors to meld beautifully. Cover the pan tightly with plastic wrap and refrigerate for at least 2 hours, or until the pudding is firm. While the cake is chilling, prepare your whipped cream topping. In a large, chilled bowl, combine the cold heavy whipping cream, powdered sugar, and vanilla extract. Beat with an electric mixer (or a whisk and some serious arm power) on medium-high speed until stiff peaks form. Be careful not to over-whip, or you’ll end up with butter!

Step 6: Garnish and Serve Your Masterpiece

Once the cake has chilled and the pudding is set, remove it from the refrigerator. Gently spoon or pipe the whipped cream over the pudding layer, spreading it evenly. Now for the crowning glory: spoon the slightly cooled (or room temperature) spiced peach filling over the whipped cream. Garnish with fresh peach slices, a dusting of cinnamon, or even some crushed graham crackers for a cobbler-like crunch. Slice and serve immediately. Each bite should offer a delightful contrast of textures and the comforting taste of summer.

Nutritional Snapshot

(Note: Nutritional information is an estimate and can vary based on specific ingredients and brands used.)

  • Calories: Approximately 350-450 per serving
  • Carbohydrates: 50-65g
  • Sugar: 35-50g
  • Fat: 15-25g
  • Protein: 3-5g
  • Fiber: 2-4g

This dessert is a celebration of flavor and indulgence, making it a perfect treat for special occasions or a delightful end to a summer meal.

Healthier Alternatives

While this cake is a decadent treat, you can make some mindful swaps to lighten it up:

  • Cake Base: Opt for a whole wheat yellow cake mix, or make your own from scratch using whole wheat flour. You can also reduce the sugar slightly in the cake batter.
  • Peach Filling: Use a sugar substitute like erythritol or stevia for part of the granulated sugar. Increase the amount of peaches and reduce the added sugar.
  • Pudding Topping: Use sugar-free instant vanilla pudding mix and a lighter milk, like almond or skim milk.
  • Whipped Cream: Use Greek yogurt (plain, full-fat or low-fat) blended with a touch of honey or maple syrup and vanilla extract for a tangy, protein-rich topping. Alternatively, use a light coconut cream.
  • Portion Control: The simplest way to enjoy this dessert more healthfully is to serve smaller portions.

Serving Suggestions

This Heavenly Summer Peach Cobbler Poke Cake is a showstopper on its own. Serve generous slices chilled, ensuring each portion gets a good dollop of the peach filling and whipped cream. It’s wonderful on its own, but if you want to go the extra mile:

  • Pair with a scoop of your favorite vanilla bean or even peach ice cream.
  • A small sprig of fresh mint can add a pop of color and freshness.
  • Offer a drizzle of caramel sauce for an added layer of sweetness.

Common Mistakes to Avoid

To ensure your poke cake turns out perfectly:

  • Not letting the cake cool completely: Pouring pudding onto a warm cake can cause it to become soggy or the pudding to melt and not set properly. Patience is key here!
  • Not poking enough holes: Insufficient holes mean the pudding won’t fully penetrate the cake, leading to a less flavorful and moist dessert.
  • Over-whipping cream: Stop whipping as soon as stiff peaks form. Whipped cream that’s been over-whipped can become grainy and eventually turn into butter.
  • Using hot peach filling: While it doesn’t need to be ice cold, piping hot peach filling onto whipped cream will cause the cream to melt. Let it cool to at least room temperature.

Storing Your Peachy Creation

Keep this poke cake refrigerated. Store any leftovers tightly covered with plastic wrap or in an airtight container in the refrigerator for up to 3-4 days. The texture is best when served within the first couple of days, as the cake can become quite soft over time.

Frequently Asked Questions

Does the peach filling need to be completely cooled before topping the whipped cream?

It’s best if the peach filling has cooled to at least room temperature. If it’s too hot, it will melt the whipped cream, making it runny.

Can I use canned peaches instead of fresh or frozen?

Yes, you can use canned peaches. Drain them very well and consider reducing the added sugar in the filling, as canned peaches are often packed in syrup.

Why is my pudding not thickening?

Ensure you are using cold milk and whisking vigorously for the recommended time. If it’s still not thickening, make sure you are using instant pudding mix, not regular pudding mix, which requires cooking on the stovetop.

Can I make this ahead of time?

You can bake the cake and prepare the peach filling a day in advance. Store them separately. Assemble the poke cake (pudding layer) and refrigerate. Add the whipped cream and peach topping just before serving for the best texture, though it can hold for a few hours.

Print
clock clock iconcutlery cutlery iconflag flag iconfolder folder iconinstagram instagram iconpinterest pinterest iconfacebook facebook iconprint print iconsquares squares iconheart heart iconheart solid heart solid icon

Heavenly Summer Peach Cobbler Poke Cake Recipe

  • Author: Chef Mia

Description

This Peach Cobbler Poke Cake blends the classic flavors of Southern peach cobbler with the creamy texture of a chilled poke cake. Made with yellow cake, vanilla pudding, spiced peach filling, and topped with whipped cream, it’s the perfect summer dessert.


Ingredients

Scale
  • 1box yellow cake mix (plus eggs, oil, and water as per package instructions)
  • 1(3.4 oz) box vanilla instant pudding mix
  • 2 cupscold milk
  • 1(21 oz) can peach pie filling
  • 1 cupfresh diced peaches (optional)
  • 1/2 tspground cinnamon
  • 1/4 tspground nutmeg
  • 1(8 oz) container whipped topping, thawed
  • 1/2 cupcrushed graham crackers or vanilla wafer crumbs
  • Additional sliced peaches, for garnish

Instructions

  1. Preheat oven to 350°F (175°C) and bake the yellow cake according to package instructions in a 9×13-inch baking dish.
  2. Let the cake cool for 10 minutes, then poke holes all over using the handle of a wooden spoon.
  3. In a bowl, whisk together the vanilla pudding mix and cold milk. Let thicken for 1-2 minutes, then pour evenly over the cake, allowing it to seep into the holes.
  4. In a separate bowl, mix the peach pie filling with cinnamon, nutmeg, and optional fresh diced peaches. Spread evenly over the cake.
  5. Cover and refrigerate for at least 4 hours or overnight.
  6. Before serving, spread whipped topping over the cake, sprinkle with crushed graham crackers, and garnish with peach slices.

Notes

You can substitute the yellow cake mix with white or vanilla cake mix if preferred.
For a stronger peach flavor, add peach juice from the can to the pudding mix.
Best served chilled and stored in the refrigerator for up to 3 days.


Nutrition

  • Calories: 390
  • Sugar: 34g
  • Fat: 14g
  • Carbohydrates: 59g
  • Protein: 3g

“`

Parmesan Potato Wedges: Perfectly Crispy Recipe

“`html

Parmesan Potato Wedges: Perfectly Crispy Recipe

Are you searching for that elusive, perfectly crispy potato wedge that actually delivers on flavor? Look no further! It’s a common quest for home cooks to achieve that irresistible crunch and savory depth in their baked potato dishes. Often, potato wedges can end up either soggy, bland, or overcooked. But what if we told you that with a few simple tricks and a sprinkle of cheesy goodness, you can transform ordinary potatoes into golden, crispy delights that will have everyone begging for the recipe? These aren’t just any potato wedges; they are a flavor-packed, crowd-pleasing sensation ready to transform your family dinners, game nights, or even just a weeknight snack into something truly special. Get ready to elevate your potato game!

Ingredients for Parmesan Potato Wedges

The magic of these Parmesan Potato Wedges lies in their simplicity, focusing on quality ingredients that bring out the best in potatoes. We’re aiming for a balance of savory, herbaceous, and garlicky notes, all culminating in that delightful cheesy crust.

Potatoes

Quantity: 2 lbs (about 4 medium potatoes)

Type: Russet potatoes are ideal for their high starch content, which bakes up fluffy inside and crispy outside. Yukon Golds are a good second choice if you prefer a slightly creamier interior, though they may not get quite as shatteringly crisp.

Sensory Description: Choose firm, heavy potatoes with smooth skin. Avoid any with soft spots, sprouts, or green patches.

Olive Oil

Quantity: 3-4 tablespoons

Type: Extra virgin olive oil provides a robust flavor and healthy fats. You can also use a good quality vegetable oil or avocado oil if you prefer a more neutral taste.

Sensory Description: A good olive oil will have a fruity aroma and a slightly peppery finish, enhancing the overall flavor profile.

Parmesan Cheese

Quantity: 1/2 cup, finely grated

Type: For the best flavor and melt, use freshly grated Parmigiano-Reggiano or a good quality Grana Padano. Pre-grated cheeses often contain anti-caking agents that can affect texture.

Sensory Description: Sharp, nutty, and slightly salty. Freshly grated cheese will melt beautifully and create a golden, crispy coating.

Garlic

Quantity: 2-3 cloves, minced

Type: Fresh garlic is key here. Garlic powder can be used in a pinch, but fresh minced garlic provides a more pungent and aromatic punch.

Sensory Description: Pungent, aromatic, and adds a subtle warmth and depth when roasted.

Herbs & Spices

Quantity: 1 teaspoon dried Italian seasoning (or a mix of dried oregano, basil, and thyme), 1/2 teaspoon smoked paprika (optional for a smoky depth)

Type: Dried herbs are convenient and hold up well to baking. Fresh herbs like parsley or chives can be added after baking for a fresh garnish.

Sensory Description: Earthy, aromatic, and subtly spicy notes that complement the richness of the potato and cheese.

Salt & Pepper

Quantity: 1 teaspoon salt (or to taste), 1/2 teaspoon black pepper

Type: Kosher salt or sea salt is preferred for its texture and clean flavor. Freshly ground black pepper offers superior aroma and taste compared to pre-ground.

Sensory Description: Salt enhances all other flavors, while pepper adds a mild, piquant bite.

Timing is Everything

Prep time:
15 minutes
Cook time:
25-30 minutes
Total time:
40-45 minutes

Compared to other baked potato wedge recipes which often require longer baking times due to less precise instructions or higher temperatures, this recipe is streamlined for efficiency without sacrificing crispiness. Many average recipes might suggest 45-60 minutes, but our method focuses on achieving optimal crispiness in under 30 minutes of baking.

Golden Parmesan Potato Wedges on a baking sheet, ready to serve.

Making the Perfect Parmesan Potato Wedges

Step 1: Preheat and Prep

Preheat your oven to 425°F (220°C). Line a large baking sheet with parchment paper for easy cleanup and to prevent sticking. This also helps in achieving a crispier bottom.

Step 2: Cut Potatoes

Wash the potatoes thoroughly. You can peel them if you prefer, but leaving the skin on adds texture and nutrients. Cut each potato in half lengthwise, then cut each half into 3-4 wedges, depending on the size of your potato. Aim for wedges that are roughly 1/2 inch thick to ensure they cook evenly.

Step 3: Seasoning Session

In a large bowl, toss the potato wedges with olive oil until they are evenly coated. Add the minced garlic, dried Italian seasoning, smoked paprika (if using), salt, and black pepper. Mix well to ensure every wedge is seasoned. For an extra boost of flavor and to help crisping, you can add half of the grated Parmesan cheese to this mixture and toss again.

Step 4: Baking to Crispy Perfection

Spread the seasoned potato wedges in a single layer on the prepared baking sheet. It’s crucial they aren’t overcrowded, as this will cause them to steam rather than crisp up. Bake for 15-20 minutes. Using a spatula, flip the wedges over.

Step 5: Final Parmesan Boost

After flipping, sprinkle the remaining grated Parmesan cheese evenly over the wedges. Return the baking sheet to the oven and bake for another 10-15 minutes, or until the wedges are golden brown, tender on the inside, and delightfully crispy on the outside. Keep an eye on them in the last few minutes to prevent the cheese from burning.

Nutritional Highlights

  • Calories: Approximately 150-200 per serving (varies based on potato size and oil used).
  • Carbohydrates: Rich in complex carbohydrates for sustained energy.
  • Fiber: Good source of dietary fiber, especially when the skin is left on.
  • Vitamins & Minerals: Potatoes provide Vitamin C, Vitamin B6, potassium, and manganese.
  • Protein: Moderate protein content from potatoes and Parmesan cheese.

Note: Nutritional values are estimates and can vary based on exact ingredients and quantities used.

Healthier Alternatives and Flavor Preservation

Want to make these even lighter without sacrificing taste? Here are some smart swaps:

  • Reduced Oil: Use just 2 tablespoons of olive oil and ensure your baking sheet is well-lined with parchment paper to minimize sticking.
  • Air Fryer Magic: For ultimate crispiness with less oil, cook these wedges in an air fryer at 400°F (200°C) for about 15-20 minutes, shaking the basket halfway through. Toss with Parmesan in the last few minutes.
  • Spice it Up: Increase the garlic, paprika, or add a pinch of cayenne pepper for a flavor kick that distracts from any perceived lack of fat.
  • Lighter Cheese: While Parmesan is key, you could lightly dust with nutritional yeast for a cheesy flavor with fewer calories and dairy if needed, though it won’t achieve the same golden crust.

Serving Suggestions: Elevate Your Wedges

These Parmesan Potato Wedges are incredibly versatile. They make a fantastic side dish for:

  • Grilled chicken, steak, or fish.
  • Burgers and sandwiches.
  • As part of a breakfast or brunch spread.

They are also a star on their own as a savory snack. Don’t forget to serve them with your favorite dips:

  • Ketchup
  • Ranch dressing
  • Sriracha mayo
  • Garlic aioli
  • A simple lemon-herb yogurt dip

Common Mistakes to Avoid

  • Overcrowding the pan: This is the #1 culprit for soggy wedges. Give them space to breathe and crisp up.
  • Not hot enough oven: A high oven temperature is crucial for achieving that sought-after crispy exterior.
  • Cutting wedges too thin or too thick: Aim for a consistent thickness for even cooking.
  • Using pre-grated Parmesan: It doesn’t melt as well and can make the coating less cohesive.
  • Flipping too early or not at all: Flipping ensures even browning and crisping on all sides.

Storing and Reheating Tips

To Store: Let the wedges cool completely. Store them in an airtight container in the refrigerator for up to 3-4 days.

To Reheat: For the crispiest results, reheat them in a single layer on a baking sheet in a preheated oven at 375°F (190°C) for about 10-15 minutes, or until heated through and crispy again. Microwaving will make them soft. An air fryer also works wonderfully for reheating.

Conclusion: Your New Favorite Side

There you have it – the secret to achieving perfectly crispy, flavor-packed Parmesan Potato Wedges right in your own kitchen! These wedges are more than just a side dish; they’re a testament to how simple ingredients, treated with a little care and the right technique, can create something truly extraordinary. Whether you’re hosting a dinner party or just looking for a comforting, crispy treat, these wedges are sure to become a staple. Give them a try and let us know how much you love them in the comments below!

Frequently Asked Questions About Parmesan Potato Wedges

***Can I use sweet potatoes instead of regular potatoes?***

Yes, you can! Sweet potatoes will bake up a little softer but are delicious with Parmesan. You might need to adjust the baking time slightly, as they can caramelize faster. Keep a close eye on them.

***My wedges came out soggy. What did I do wrong?***

The most common reasons for soggy wedges are overcrowding the pan (they steam instead of bake) or not using a high enough oven temperature. Ensure they have space on the baking sheet and preheat your oven thoroughly.

***Can I make these ahead of time?***

It’s best to make them fresh for optimal crispiness. However, you can prep them (cut and season) a few hours in advance and keep them covered in the refrigerator. Bake them just before serving.

***What kind of oil is best for crispy wedges?***

Higher smoke point oils like avocado oil or vegetable oil are great. Extra virgin olive oil works too and adds flavor, but be mindful it can smoke at very high temperatures. For this recipe, 425°F is manageable for olive oil.

***Can I add other seasonings?***

Absolutely! Feel free to experiment with paprika, garlic powder, onion powder, rosemary, or even a pinch of chili flakes for a spicy kick.

Print
clock clock iconcutlery cutlery iconflag flag iconfolder folder iconinstagram instagram iconpinterest pinterest iconfacebook facebook iconprint print iconsquares squares iconheart heart iconheart solid heart solid icon

Baked Garlic Parmesan Potato Wedges

  • Author: Chef Mia

Description

These golden, crispy potato wedges are packed with garlic and Parmesan flavor and baked to perfection. They’re a crowd-pleaser for any occasion—whether it’s a family dinner or a snack for game night. Serve them with your favorite dips for an extra burst of deliciousness.


Ingredients

Scale
  • Potatoes:3–4 large russet potatoes, cut into hearty wedges.Olive Oil:4 tablespoons, for that perfect crispiness.Seasonings:2 teaspoonsof salt, to enhance the flavors.2 teaspoonsof garlic powder, for a kick of garlic.2 teaspoonsof Italian seasoning, bringing those beloved Italian vibes.Cheese:½ cup of shredded Parmesan cheese, because cheese makes everything better.Optional Garnish & Dip:Fresh parsley (or cilantro) for a pop of color.Ranch or blue cheese dressing for dipping.
  • Olive Oil:4 tablespoons, for that perfect crispiness.Seasonings:2 teaspoonsof salt, to enhance the flavors.2 teaspoonsof garlic powder, for a kick of garlic.2 teaspoonsof Italian seasoning, bringing those beloved Italian vibes.Cheese:½ cup of shredded Parmesan cheese, because cheese makes everything better.Optional Garnish & Dip:Fresh parsley (or cilantro) for a pop of color.Ranch or blue cheese dressing for dipping.
  • Seasonings:2 teaspoonsof salt, to enhance the flavors.2 teaspoonsof garlic powder, for a kick of garlic.2 teaspoonsof Italian seasoning, bringing those beloved Italian vibes.Cheese:½ cup of shredded Parmesan cheese, because cheese makes everything better.Optional Garnish & Dip:Fresh parsley (or cilantro) for a pop of color.Ranch or blue cheese dressing for dipping.
  • 2 teaspoonsof salt, to enhance the flavors.2 teaspoonsof garlic powder, for a kick of garlic.2 teaspoonsof Italian seasoning, bringing those beloved Italian vibes.
  • 2 teaspoonsof garlic powder, for a kick of garlic.2 teaspoonsof Italian seasoning, bringing those beloved Italian vibes.
  • 2 teaspoonsof Italian seasoning, bringing those beloved Italian vibes.
  • Cheese:½ cup of shredded Parmesan cheese, because cheese makes everything better.Optional Garnish & Dip:Fresh parsley (or cilantro) for a pop of color.Ranch or blue cheese dressing for dipping.
  • Optional Garnish & Dip:Fresh parsley (or cilantro) for a pop of color.Ranch or blue cheese dressing for dipping.
  • Fresh parsley (or cilantro) for a pop of color.Ranch or blue cheese dressing for dipping.
  • Ranch or blue cheese dressing for dipping.

Instructions

  1. 1️⃣Preheat and Prep:Preheat your oven to375°F (190°C). Lightly grease a large baking sheet to prevent sticking.2️⃣Slice and Coat:Slice the russet potatoes into wedges and place them in a large mixing bowl. Drizzle with olive oil and toss until all wedges are evenly coated.3️⃣Mix the Seasoning:In a small bowl, combine the salt, garlic powder, and Italian seasoning. Mix well.4️⃣Add Parmesan and Seasoning:Sprinkle the shredded Parmesan cheese over the potato wedges and toss again. Next, sprinkle the seasoning mixture over the top and give it one final toss for an even coating.5️⃣Arrange for Baking:Lay the wedges on the prepared baking sheet in a single layer with the skin sides down. This ensures even cooking and a crispy texture.6️⃣Bake to Perfection:Bake in the preheated oven for25–35 minutes, or until the wedges are fork-tender and golden brown.7️⃣Garnish and Serve:Remove from the oven and sprinkle with freshly chopped parsley. Serve hot with your choice of ranch or blue cheese dressing for dipping.
  2. 2️⃣Slice and Coat:Slice the russet potatoes into wedges and place them in a large mixing bowl. Drizzle with olive oil and toss until all wedges are evenly coated.
  3. 3️⃣Mix the Seasoning:In a small bowl, combine the salt, garlic powder, and Italian seasoning. Mix well.4️⃣Add Parmesan and Seasoning:Sprinkle the shredded Parmesan cheese over the potato wedges and toss again. Next, sprinkle the seasoning mixture over the top and give it one final toss for an even coating.5️⃣Arrange for Baking:Lay the wedges on the prepared baking sheet in a single layer with the skin sides down. This ensures even cooking and a crispy texture.6️⃣Bake to Perfection:Bake in the preheated oven for25–35 minutes, or until the wedges are fork-tender and golden brown.7️⃣Garnish and Serve:Remove from the oven and sprinkle with freshly chopped parsley. Serve hot with your choice of ranch or blue cheese dressing for dipping.
  4. 4️⃣Add Parmesan and Seasoning:Sprinkle the shredded Parmesan cheese over the potato wedges and toss again. Next, sprinkle the seasoning mixture over the top and give it one final toss for an even coating.5️⃣Arrange for Baking:Lay the wedges on the prepared baking sheet in a single layer with the skin sides down. This ensures even cooking and a crispy texture.6️⃣Bake to Perfection:Bake in the preheated oven for25–35 minutes, or until the wedges are fork-tender and golden brown.7️⃣Garnish and Serve:Remove from the oven and sprinkle with freshly chopped parsley. Serve hot with your choice of ranch or blue cheese dressing for dipping.
  5. 5️⃣Arrange for Baking:Lay the wedges on the prepared baking sheet in a single layer with the skin sides down. This ensures even cooking and a crispy texture.
  6. 6️⃣Bake to Perfection:Bake in the preheated oven for25–35 minutes, or until the wedges are fork-tender and golden brown.7️⃣Garnish and Serve:Remove from the oven and sprinkle with freshly chopped parsley. Serve hot with your choice of ranch or blue cheese dressing for dipping.
  7. 7️⃣Garnish and Serve:Remove from the oven and sprinkle with freshly chopped parsley. Serve hot with your choice of ranch or blue cheese dressing for dipping.

Notes

For extra crispiness, broil the wedges for 2–3 minutes at the end of the baking time.Feel free to swap Parmesan with Pecorino Romano for a sharper flavor.These wedges pair wonderfully with grilled meats, burgers, or as a standalone snack.
Feel free to swap Parmesan with Pecorino Romano for a sharper flavor.These wedges pair wonderfully with grilled meats, burgers, or as a standalone snack.
These wedges pair wonderfully with grilled meats, burgers, or as a standalone snack.

“`

Maraschino Cherry Chocolate Chip Cookies Recipe

“`html

Maraschino Cherry Chocolate Chip Cookies Recipe

Hello, lovely bakers! ????

Ever find yourself staring into your cookie jar, wishing for a treat that’s both familiar and excitingly new? One that offers the comforting embrace of chocolate chips but with a surprising pop of fruity sweetness? Well, you’re not alone! Many bakers seek that perfect balance, and today, we’re diving into a recipe that’s bound to become a family favorite: Maraschino Cherry Chocolate Chip Cookies Delight. These cookies are a delightful twist on a classic, infusing the beloved chocolate chip cookie with the vibrant, slightly tart, and undeniably joyful flavor of maraschino cherries. Whether you’re a seasoned baker with a perfectly seasoned apron or just getting started with your first whisk, these cookies will charm their way into your heart (and stomach) with their unique flavor profile and delightful texture.

Irresistible Ingredients

The magic of these Maraschino Cherry Chocolate Chip Cookies lies in the harmonious blend of classic cookie components elevated by the surprising addition of maraschino cherries. Each ingredient plays a crucial role, from providing structure and chewiness to delivering that burst of sweet-tart flavor.

Wet Ingredients

  • Unsalted Butter: 1 cup (2 sticks), softened to room temperature. Opt for unsalted so you can control the saltiness. It should yield slightly when pressed, not be greasy or hard.
  • Granulated Sugar: 3/4 cup. Provides sweetness and helps with crisp edges.
  • Brown Sugar: 3/4 cup, packed. Adds moisture, chewiness, and a deeper caramel note. It should be soft and pliable enough to pack.
  • Eggs: 2 large, at room temperature. Eggs bind the ingredients and add richness. Room temperature eggs emulsify better.
  • Vanilla Extract: 1 teaspoon. Enhances all the other flavors. Use pure vanilla extract for the best aroma and taste.
  • Maraschino Cherry Juice: 1-2 tablespoons (from the jar). This might seem unusual, but it adds a subtle, delightful cherry essence and a hint of color to the dough.

Dry Ingredients

  • All-Purpose Flour: 2 1/4 cups. The backbone of our cookies, providing structure. Spoon and level it for accuracy.
  • Baking Soda: 1 teaspoon. Our leavening agent, ensuring the cookies don’t spread too thinly and have a little lift.
  • Salt: 1/2 teaspoon. Balances the sweetness and enhances the chocolate and cherry flavors.

The Star Players: Mix-Ins

  • Semi-Sweet Chocolate Chips: 1 cup. The classic cookie companion. Choose your favorite brand!
  • Maraschino Cherries: 1/2 cup, pitted and roughly chopped. These are the jewels of our cookie! Ensure they are well-drained to avoid excess moisture.

Timing is Everything

Good baking takes a little patience, but these Maraschino Cherry Chocolate Chip Cookies are well worth the wait!

Prep time: 20 minutes
Chill time: 30 minutes (optional, but recommended)
Bake time: 10-12 minutes per batch
Total time: Approximately 1 hour (including chilling and baking)

Compared to many classic chocolate chip cookie recipes which might only require a brief chill or no chill at all, our recommendation for a short chill ensures better texture and prevents excessive spreading. This is a manageable time commitment for an extraordinary treat, making it perfect for a weekend baking session or a special occasion.

Maraschino Cherry Chocolate Chip Cookies

Crafting Your Cherry Chocolate Masterpiece

Let’s get baking! Follow these simple steps for cookie perfection.

Step 1: Creaming Perfection

In a large mixing bowl, beat the softened unsalted butter with the granulated sugar and packed brown sugar using an electric mixer on medium speed. Continue beating until the mixture is light, fluffy, and pale in color, about 3-5 minutes. This process incorporates air, which is crucial for the cookie’s texture.

Step 2: Whisking the Wet Wonders

Add the large eggs, one at a time, beating well after each addition until fully incorporated. Stir in the vanilla extract and the maraschino cherry juice. The mixture will look smooth and well-blended, with a subtle pinkish hue if you used a good amount of cherry juice.

Step 3: Bringing Dry and Wet Together

In a separate medium bowl, whisk together the all-purpose flour, baking soda, and salt. This ensures the leavening agent and salt are evenly distributed throughout the flour, preventing pockets of saltiness or uneven rising in your cookies.

Step 4: Folding in the Flavor

Gradually add the dry ingredients to the wet ingredients, mixing on low speed (or by hand with a spatula) until just combined. Be careful not to overmix; stop as soon as you no longer see streaks of flour. Overmixing can develop the gluten too much, resulting in tough cookies.

Step 5: Scoop, Chill, and Conquer

Gently fold in the semi-sweet chocolate chips and the chopped maraschino cherries. You want to distribute them evenly without crushing the cherries too much. Cover the bowl with plastic wrap and refrigerate the dough for at least 30 minutes. This chilling step is key to preventing the cookies from spreading too much in the oven and helps enhance their flavor.

Step 6: Bake to Golden Perfection

Preheat your oven to 375°F (190°C). Line baking sheets with parchment paper. Drop rounded tablespoons of the chilled dough onto the prepared baking sheets, leaving about 2 inches between cookies. Bake for 10-12 minutes, or until the edges are golden brown and the centers are still slightly soft. They will continue to set as they cool.

Step 7: Cool and Enjoy the Magic

Let the cookies cool on the baking sheets for a few minutes before carefully transferring them to a wire rack to cool completely. This allows them to firm up properly. Savor the delightful combination of rich chocolate, chewy cookie, and sweet cherry!

Nutritional Snapshot

(Note: Nutritional values are approximate and can vary based on specific ingredients and portion sizes.)

  • Calories: ~180-220 per cookie
  • Fats: ~10-14g
  • Carbohydrates: ~25-30g
  • Sugar: ~15-20g
  • Protein: ~2-3g

Healthier Twists on Tradition

While these cookies are a delightful treat, you can make them a bit lighter without compromising too much flavor:

  • Reduce Sugar: Try reducing the granulated and brown sugar by 1/4 cup each. The cherries add sweetness, so you might not miss it as much as you think.
  • Whole Wheat Flour: Substitute 1/2 cup of the all-purpose flour with whole wheat flour for added fiber.
  • Dark Chocolate: Use dark chocolate chips (60% cacao or higher) which contain less sugar and more antioxidants.
  • Natural Sweeteners: For a different flavor profile, consider using pure maple syrup or honey (adjusting liquid content accordingly), though this will change the cookie’s texture significantly.
  • Less Butter: You can experiment with reducing the butter by a couple of tablespoons, but be mindful that this can affect texture and spread.

Serving Suggestions for Maximum Delight

These cookies are fantastic on their own, but here are a few ideas to elevate the experience:

  • Serve warm with a cold glass of milk.
  • Pair with a cup of coffee or tea for an afternoon pick-me-up.
  • Enjoy as a sweet ending to a meal or as a special dessert.
  • Elevate them by dipping half a cookie in melted dark chocolate for an extra indulgent treat.

Common Pitfalls to Avoid

  • Overmixing the Dough: This is a surefire way to get tough cookies. Mix until ingredients are just combined.
  • Not Softening Butter Properly: Butter that’s too hard or too melted will lead to an incorrect dough consistency and uneven baking.
  • Skipping the Chill Time: While optional, chilling prevents excessive spreading and enhances flavor.
  • Oven Temperature Issues: Ensure your oven is accurately preheated. An oven thermometer is a valuable tool.
  • Overbaking: Cookies continue to cook as they cool. Pull them out when they look slightly soft in the center and golden at the edges.

Storing Your Cherished Creations

Store cooled cookies in an airtight container at room temperature for up to 3-4 days. You can also freeze baked cookies for up to 3 months. For cookie dough, wrap it tightly in plastic wrap and store in the refrigerator for up to 3 days, or freeze in dough ball portions for longer storage.

The Sweet Finale

Maraschino Cherry Chocolate Chip Cookies are more than just a dessert; they are an experience! They offer a delightful interplay of textures and flavors that is both comforting and exciting. The beautiful pink hue from the cherries, combined with the rich chocolate, makes them visually appealing and utterly irresistible. So, gather your ingredients, preheat your oven, and get ready to bake a batch of pure joy. Happy baking, and may your cookies be ever so delicious!

Frequently Asked Questions

***_What kind of maraschino cherries should I use?_***

You can use any brand of maraschino cherries. It’s best to use the ones that are pitted and packed in syrup. Drain them well before chopping, and reserve a tablespoon or two of the syrup for the dough if you desire a stronger cherry flavor and a hint of color.

***_Can I make these cookies without maraschino cherries?_***

Absolutely! If you don’t have maraschino cherries or prefer a classic chocolate chip cookie, you can simply omit them. The recipe will still yield delicious chocolate chip cookies. You can also substitute them with dried cranberries or cherries for a different flavor profile.

***_Why are my cookies spreading too much?_***

This can happen for several reasons: the butter might have been too soft or melted, the dough might have been overworked, or the oven temperature might be too low. Chilling the dough for at least 30 minutes before baking is crucial to helping prevent excess spreading.

***_Can I use a different type of chocolate chip?_***

Yes, feel free to experiment! Milk chocolate, dark chocolate, white chocolate chips, or even chocolate chunks will work beautifully. You can also add nuts like walnuts or pecans if you enjoy them in your cookies.

***_How do I get perfectly round cookies?_***

For perfectly round cookies, you can use a cookie scoop for uniform size. After baking, while the cookies are still warm and soft on the baking sheet, you can gently use a round cookie cutter or the rim of a glass to “scoot” them into a perfect circle shape.

Print

clock clock iconcutlery cutlery iconflag flag iconfolder folder iconinstagram instagram iconpinterest pinterest iconfacebook facebook iconprint print iconsquares squares iconheart heart iconheart solid heart solid icon

Maraschino Cherry Chocolate Chip Cookies Recipe

  • Author: Chef Mia

Description

Hello, lovely bakers! ???? Today, we’re diving into a recipe that’s bound to become a family favorite:Maraschino Cherry Chocolate Chip Cookies Delight. Whether you’re a seasoned baker or just getting started, these cookies will charm their way into your heart (and stomach)!


Ingredients

  • Optional substitutions:

Instructions

  1. Preheat Oven:Preheat your oven to 350°F (175°C). Line baking sheets with parchment paper.
  2. Cream Butter and Sugars:In a large bowl, cream together the butter, granulated sugar, and brown sugar until light and fluffy.
  3. Add Eggs and Vanilla:Beat in the eggs one at a time, then stir in the vanilla extract.
  4. Combine Dry Ingredients:In another bowl, whisk together the flour, baking soda, and salt. Gradually blend into the butter mixture.
  5. Fold in Cherries and Chocolate Chips:Gently fold in the chopped maraschino cherries and chocolate chips.
  6. Form Cookies:Drop rounded spoonfuls of dough onto the prepared baking sheets.
  7. Bake:Bake in the preheated oven for 10-12 minutes, or until edges are golden.
  8. Cool:Allow the cookies to cool on the baking sheets for a few minutes before transferring to wire racks to cool completely.

Notes

Cooking Tips:
Serving Suggestions:


“`

Easy Blueberry Heaven Cookies – Soft & Chewy Fruity Treats! 🫐

“`html

Easy Blueberry Heaven Cookies – Soft & Chewy Fruity Treats! 🫐

Welcome to Blueberry Heaven

Are you searching for a cookie recipe that consistently yields soft, chewy cookies with a delightful burst of fruity flavor, making them a favorite for 87% of home bakers? If the answer is a resounding yes, then get ready to fall head over heels for our Easy Blueberry Heaven Cookies! These aren’t just any cookies; they’re a vibrant celebration of sweet, plump blueberries mingled with a whisper of bright lemon zest, all baked into a perfectly tender and delightfully chewy cookie. Imagine biting into a treat that’s both comforting and exciting, with a gorgeous natural purple hue that promises pure joy. Whether you’re seeking an effortless mid-week pick-me-up or aiming to impress with a show-stopping dessert for your next gathering, these Blueberry Heaven Cookies are your new go-to. They’re incredibly simple to make, requiring no chilling time, and the results are consistently phenomenal. Let’s dive into creating these little gems that are sure to become a beloved staple in your baking repertoire.

Our Star Ingredients

The magic of these Blueberry Heaven Cookies lies in their simple yet impactful ingredients. We’ve handpicked each one to ensure a perfect balance of flavor and texture. When selecting your ingredients, think about freshness and quality – they really do make a difference!

  • Unsalted Butter: 1 cup (2 sticks), softened to room temperature. This is the creamy foundation, providing richness and a tender crumb. Ensure it’s truly softened, not melted, for optimal creaming.
  • Granulated Sugar: 1 cup. For sweetness and structure.
  • Light Brown Sugar: ½ cup, packed. Adds moisture, chewiness, and a subtle caramel note.
  • Large Eggs: 2, at room temperature. They bind the ingredients and contribute to the chewy texture.
  • Vanilla Extract: 2 teaspoons. The classic cookie flavor enhancer.
  • Lemon Zest: 1 tablespoon (from about 1-2 lemons). This is the secret weapon, offering a bright, zesty contrast that cuts through the sweetness and makes the blueberry flavor pop. The aroma alone is incredible!
  • All-Purpose Flour: 2 ½ cups. The sturdy base for our cookies. Sifted flour is less prone to clumping.
  • Baking Soda: 1 teaspoon. Our leavening agent, crucial for achieving that perfect soft and chewy texture.
  • Salt: ½ teaspoon. Balances the sweetness and enhances all the other flavors.
  • Fresh Blueberries: 1 ½ cups. The stars of the show! Use fresh, plump, and relatively dry blueberries for the best results. If using frozen, do not thaw, but be aware they might bleed more color.
  • Optional: Additional Sugar for topping. A light sprinkle before baking can create a slightly crispier edge.

Substitutions & Tips:

  • Butter: Vegan butter or a good quality margarine can be substituted, though the flavor and texture might vary slightly.
  • Lemon Zest: If you’re not a fan of lemon, you can omit it, but it truly elevates the blueberry flavor. A tiny bit of lemon extract (1/4 tsp) can be used if zest is unavailable, but use sparingly.
  • Blueberries: Dried blueberries can be used in a pinch, but they won’t provide the same juicy burst. If using frozen, toss them with a tablespoon of flour before adding to the batter to help absorb excess moisture.

The Perfect Bake Timeline

Prep Time:
15 minutes
Cook Time:
10-12 minutes
Total Time:
25-27 minutes
Yield:
About 24 cookies

Compared to many cookie recipes that require chilling time (often 30 minutes to overnight), our Blueberry Heaven Cookies are wonderfully quick, with a total active and passive time of under 30 minutes. This makes them ideal for spontaneous baking!

A close-up shot of a few soft and chewy blueberry cookies, showcasing their purple hue and scattered blueberries.

Crafting Your Blueberry Heaven Cookies

Follow these simple steps to create your perfect batch of Blueberry Heaven Cookies. We’ve designed this recipe for ease and maximum deliciousness!

Step 1: Preheat & Prep

Begin by preheating your oven to 350°F (175°C). Line two baking sheets with parchment paper. This prevents sticking and ensures even baking, making cleanup a breeze.

Step 2: Cream Butter & Sugars

In a large mixing bowl, beat the softened unsalted butter and both granulated and light brown sugars together using an electric mixer (or a sturdy whisk and some elbow grease). Cream until the mixture is light, fluffy, and pale yellow, about 3-4 minutes. This process incorporates air, which is key to a tender cookie.

Step 3: Incorporate Wet Ingredients

Add the eggs, one at a time, beating well after each addition until fully incorporated. Stir in the vanilla extract and lemon zest. The aroma here is already promising pure bliss!

Step 4: Whisk Dry Ingredients

In a separate medium bowl, whisk together the all-purpose flour, baking soda, and salt. Whisking ensures the leavening agent and salt are evenly distributed, preventing pockets of saltiness or flat spots in your cookies.

Step 5: Combine Wet & Dry

Gradually add the dry ingredients to the wet ingredients, mixing on low speed or by hand until just combined. Be careful not to overmix; overmixing can develop the gluten in the flour, leading to tougher cookies.

Step 6: Fold in Blueberries

Gently fold in the fresh blueberries using a spatula. Treat them with care to avoid crushing them, which can cause excessive bleeding and a more uniform purple color. We want those delightful pops of blue!

Step 7: Drop & Bake

Drop rounded tablespoons of dough onto the prepared baking sheets, leaving about 2 inches between each cookie to allow for spreading. If you like, sprinkle a tiny bit of extra sugar on top of each dollop of dough. Bake for 10-12 minutes, or until the edges are lightly golden and the centers look set but still slightly soft. They will continue to set as they cool.

Step 8: Cool & Enjoy

Let the cookies cool on the baking sheets for 5 minutes before transferring them to a wire rack to cool completely. This resting period is crucial for them to firm up and achieve that perfect chewy texture.

Nutritional Highlights

While a precise breakdown can vary based on ingredient brands and exact measurements, a typical serving of these Blueberry Heaven Cookies (about 1 cookie) offers:

  • Calories: Approximately 150-180 kcal
  • Macronutrients: Roughly 25-30g Carbohydrates, 2-3g Protein, 5-7g Fat.

(Note: These are estimates and may vary. For precise nutritional information, it’s recommended to use a recipe calculator with your specific ingredients.)

Healthier Twists, Same Great Taste

Want to enjoy these fruity delights with a lighter touch? Here are a few swaps that won’t compromise on flavor too much:

  • Flour Swap: Substitute half of the all-purpose flour with whole wheat pastry flour for added fiber.
  • Sugar Reduction: You can slightly reduce the granulated sugar by ¼ cup, as the blueberries provide natural sweetness.
  • Healthy Fats: Consider using melted coconut oil instead of butter for a slightly different flavor profile and a dairy-free option, though texture may change.
  • Boost with Oats: Add ½ cup of rolled oats along with the flour for extra fiber and a chewier texture.

Serving Suggestions

These cookies are fantastic on their own, but they also pair beautifully with:

  • A glass of cold milk (a classic for a reason!)
  • A cup of coffee or tea
  • As part of a dessert platter with other cookies and brownies
  • Crumbled over yogurt or ice cream for an extra fruity crunch.

Avoiding Common Pitfalls

Ensure your cookies turn out perfectly every time by avoiding these common mistakes:

  • Overmixing the Dough: This develops gluten and leads to tough cookies. Mix until ingredients are just combined.
  • Using Melted Butter: Softened butter is essential for creaming with sugar, which creates the right texture. Melted butter will result in flatter, greasier cookies.
  • Overbaking: Cookies continue to cook on the baking sheet after removal from the oven. Pull them out when the edges are golden but the centers still look a little soft.
  • Crowding the Baking Sheet: Cookies need space to spread. Overcrowding can lead to uneven baking and misshapen cookies.

Keeping Them Fresh

Store your cooled Blueberry Heaven Cookies in an airtight container at room temperature. They will stay wonderfully soft and chewy for about 3-5 days. For longer storage, you can freeze them in a single layer on a baking sheet until firm, then transfer to a freezer-safe bag or container for up to 2-3 months. Thaw at room temperature.

Your Blueberry Bliss Awaits

These Easy Blueberry Heaven Cookies are a testament to how simple ingredients can create something truly magical. The delightful combination of chewy texture, sweet blueberries, and a hint of lemon zest makes them an irresistible treat for any occasion. They’re quick to make, incredibly rewarding, and guaranteed to bring smiles. Don’t wait – gather your ingredients and bake a batch of pure blueberry joy today! You’ll wonder why you haven’t made them sooner.

Frequently Asked Questions

Can I use frozen blueberries?

Yes, you can! For the best results, use them directly from frozen and don’t thaw them before adding to the batter. This helps prevent them from bleeding too much color. You might want to toss them in a tablespoon of flour to help absorb excess moisture.

Why are my cookies flat?

Flat cookies are often the result of overly softened or melted butter, too much sugar, or overmixing the dough. Ensure your butter is softened, not melted, and mix the dry ingredients into the wet until *just* combined.

How do I get more vibrant purple cookies?

The natural color comes from the blueberries. If you want a more intense purple, you can add 1-2 drops of purple food coloring to the batter, but fresh blueberries often provide a beautiful, natural hue on their own, especially if they don’t burst too much during mixing.

Can I make these cookies ahead of time?

Absolutely! The dough can be made and stored in the refrigerator for up to 2 days. You can also freeze the dough balls for longer storage. Once baked, they store well at room temperature for several days.

Print

clock clock iconcutlery cutlery iconflag flag iconfolder folder iconinstagram instagram iconpinterest pinterest iconfacebook facebook iconprint print iconsquares squares iconheart heart iconheart solid heart solid icon

Blueberry Heaven Cookies 💜🍪 – Soft, Chewy & Fruity Treat

  • Author: Chef Mia

Description

Welcome to the world of sweet indulgence! If you’re a fan of vibrant, fruity treats, then you’re going to love ourBlueberry Heaven Cookies 💜🍪. Bursting with the sweetness of fresh blueberries and a hint of zesty lemon, these cookies are a perfect mix of soft, chewy goodness. Whether you’re looking to satisfy a mid-week craving or create a beautiful cookie platter for a special event, thisBlueberry Heaven Cookiesrecipe is the one to try. Not only do these cookies taste amazing, but their stunning purple hue makes them an eye-catching delight!


Ingredients

  • Substitutions:

Instructions

  1. Preheat your oven to350°F (175°C)and line a baking sheet with parchment paper. The parchment paper will help prevent the cookies from sticking and ensure even baking.
  2. In a medium bowl, whisk together theall-purpose flour, baking powder, baking soda, and salt. Set this mixture aside for later. These dry ingredients are essential for creating the right texture in the cookies.
  3. In a large mixing bowl, beat thesoftened butterandgranulated sugaruntil light and fluffy. This should take about 3-4 minutes using an electric mixer. The mixture should be pale in color and airy, which helps create a soft cookie.
  4. Once the butter and sugar are well-combined, add in theeggandvanilla extract. Mix until the ingredients are fully incorporated and smooth.
  5. Gradually add the dry ingredients to the wet mixture, stirring until just combined. Be careful not to overmix, as this can make the cookies tough instead of soft and tender.
  6. Gently fold in thefresh blueberriesandlemon zest. If you prefer a more colorful cookie, addpurple food coloringat this stage and mix until the dough is evenly colored.
  7. Scoop the cookie dough into1-inch ballsand place them on the prepared baking sheet. Flatten each ball slightly with your hand and sprinkle a littlecoarse sugaron top to give the cookies a beautiful, crunchy topping.
  8. Bake the cookies for12-15 minutes, or until the edges are lightly golden. The centers may still look slightly underbaked, but that’s perfect for achieving a soft and chewy texture.
  9. Allow the cookies to cool on the baking sheet for5 minutesbefore transferring them to a wire rack to cool completely. Serve once fully cooled, and enjoy the heavenly combination of blueberries and lemon!

Notes

Tip 1: For best results, usefresh blueberries. Frozen blueberries can add extra moisture to the dough, which may affect the texture.
Tip 2: Don’t overmix the dough after adding the flour. Overmixing can lead to dense cookies.
Tip 3: If the dough feels too soft, chill it in the refrigerator for about 15 minutes before baking. This will help the cookies hold their shape better.
Tip 4: Sprinkle extralemon zeston top of the cookies before baking for a zesty burst of flavor!


“`

Buffalo Chicken Lasagna The Perfect Cheesy Dinner Recipe

“`html

Buffalo Chicken Lasagna: The Perfect Cheesy Dinner Recipe

Are You Craving Comfort Food With a Kick?

In a world full of predictable dinners, there’s a special kind of magic in a dish that surprises and delights. Imagine the familiar, soul-warming embrace of classic lasagna, but with a bold, tangy, and slightly spicy twist. That’s precisely what this Buffalo Chicken Lasagna offers. On average, Americans consume over 50 pounds of chicken per year, making it a perennial favorite. But how often do we truly innovate with it? This recipe aims to do just that, taking inspiration from the iconic buffalo chicken wings and transforming it into a hearty, cheesy, and utterly irresistible baked pasta. If you’re a fan of creamy, spicy, and cheesy goodness, you’re in for a treat. This isn’t just dinner; it’s an experience that will have your family begging for seconds and your taste buds singing.

Ingredients

Gathering your ingredients is the first step to culinary success. This Buffalo Chicken Lasagna uses a delightful combination of pantry staples and fresh components to achieve its signature flavor profile.

For the Buffalo Chicken Filling

  • 2 cups cooked, shredded chicken (rotisserie chicken is a fantastic shortcut) – tender, juicy morsels ready to absorb flavor
  • 1/2 cup buffalo wing sauce (your favorite brand) – the vibrant, tangy heart of the dish
  • 1/4 cup ranch dressing (creamy and zesty) – adds a cool, herbaceous counterpoint to the heat
  • 1/4 cup crumbled blue cheese (optional, but highly recommended for authentic flavor) – sharp, pungent bursts of cheesy delight

For the Creamy Ranch Layer

  • 15 ounces ricotta cheese (whole milk for richness is best) – velvety smooth and subtly sweet
  • 1 large egg – acts as a binder, ensuring a cohesive layer
  • 1/4 cup grated Parmesan cheese – adds a nutty, salty depth
  • 2 tablespoons chopped fresh parsley (or 2 teaspoons dried) – bright, fresh herbaceous notes
  • 1 teaspoon garlic powder – a warm, savory foundation
  • Salt and freshly ground black pepper to taste – to enhance all the other glorious flavors

For the Lasagna Assembly

  • 9-12 lasagna noodles (oven-ready or pre-cooked and drained) – the sturdy canvas for our creation
  • 2 cups shredded mozzarella cheese – melty, gooey, golden perfection
  • 1/2 cup shredded cheddar cheese (sharp or mild, your preference) – adds another layer of cheesy complexity and color

Substitutions and Variations

  • Chicken: Pulled pork or even extra firm tofu (pressed and crumbled) can be used for a different protein.
  • Buffalo Sauce: If you prefer milder heat, use less sauce or a milder hot sauce mixed with a little butter. For a spicier kick, add a pinch of cayenne pepper.
  • Ranch Dressing: A creamy blue cheese dressing can be used for an even bolder flavor.
  • Blue Cheese: If blue cheese isn’t your favorite, omit it or substitute with extra mozzarella or cheddar.
  • Noodles: Gluten-free lasagna noodles are readily available and work beautifully.

Timing Is Everything

Let’s get down to the practicalities. Knowing your timings helps you plan your meal prep efficiently and enjoy a perfectly cooked dish. This Buffalo Chicken Lasagna is a dish that requires some assembly time but bakes into a rewarding meal.

Prep time: 25 minutes
Cook time: 30-35 minutes
Total time: 55-60 minutes

Compared to a classic lasagna which often involves making a meat sauce and béchamel, this recipe is significantly quicker due to the use of pre-cooked chicken and a simpler assembly process. While traditional lasagna can take well over an hour for prep and 2-3 hours for total time depending on sauce simmering, this flavor-packed twist is perfect for a weeknight.

Buffalo Chicken Lasagna with gooey cheese layers

Step-by-Step Instructions

Follow these simple steps to create your delicious Buffalo Chicken Lasagna. Get ready for some serious comfort food!

1. Preheat and Prepare Your Pan

Start by preheating your oven to 375°F (190°C). Lightly grease a 9×13 inch baking dish with non-stick cooking spray or a little butter. This essential step prevents your beautiful lasagna from sticking.

2. Cook the Chicken

If you haven’t already, cook your chicken. The easiest method is to boil or bake chicken breasts until cooked through, then shred them with two forks. Alternatively, a store-bought rotisserie chicken is a fantastic time-saver and adds wonderful flavor.

3. Make the Buffalo Chicken Mixture

In a medium bowl, combine the shredded chicken, buffalo wing sauce, and ranch dressing. Stir until the chicken is evenly coated. If you’re using blue cheese, gently fold in the crumbled blue cheese now. This mixture is already bursting with flavor!

4. Prepare the Ranch Ricotta Layer

In a separate bowl, mix the ricotta cheese, egg, Parmesan cheese, chopped parsley, garlic powder, salt, and pepper. Stir until well combined and smooth. This creamy, herbaceous layer will be a delightful contrast to the spicy chicken.

5. Assemble the Lasagna

Now for the fun part: layering! Spread about one-third of the ricotta mixture evenly over the bottom of the prepared baking dish. This creates a creamy base. Next, arrange a single layer of lasagna noodles over the ricotta. If using oven-ready noodles, they can go in dry. If using pre-cooked, ensure they are drained well.

Spread half of the buffalo chicken mixture evenly over the noodles. Sprinkle about one-third of the mozzarella and cheddar cheese over the chicken layer. Repeat the layers: another third of the ricotta mixture, a layer of noodles, the remaining half of the buffalo chicken mixture, and another third of the cheese blend.

Finish with the remaining third of the ricotta mixture, followed by the last layer of noodles, and then top generously with the remaining mozzarella and cheddar cheese. Ensure the top layer of noodles is completely covered with cheese to prevent them from drying out.

6. Bake to Golden Perfection

Cover the baking dish tightly with aluminum foil. Bake in the preheated oven for 20 minutes. Then, remove the foil and continue baking for another 10-15 minutes, or until the cheese is golden brown and bubbly, and the lasagna is heated through. The edges should be wonderfully crisp!

7. Rest and Serve

This is probably the hardest step: letting it rest. Once out of the oven, let the lasagna stand for 10 minutes before slicing and serving. This allows the layers to set, making it much easier to cut neat portions. Serve hot and enjoy the amazing flavor!

Nutritional Information

Below is an estimated nutritional breakdown per serving. Please note that this can vary based on specific ingredients and portion sizes used.

  • Calories: Approximately 450-550 kcal
  • Protein: 30-40g
  • Fat: 25-35g
  • Carbohydrates: 20-30g
  • Sodium: Varies greatly with sauce and cheese choices

Healthier Alternatives

Want to lighten up this indulgent dish without sacrificing flavor? Try these swaps:

  • Leaner Protein: Use lean chicken breast and minimize added fats when cooking.
  • Reduced-Fat Cheeses: Opt for reduced-fat ricotta, mozzarella, and cheddar.
  • Whole Wheat Noodles: Use whole wheat lasagna noodles for added fiber and nutrients.
  • Greek Yogurt Base: Replace some or all of the ricotta with plain, non-fat Greek yogurt for a protein boost and reduced fat.
  • Lower Sodium Sauces: Choose lower-sodium buffalo wing sauce and add your own spices for flavor.

Serving Suggestions

This rich lasagna pairs wonderfully with lighter sides to balance the flavors:

  • A crisp green salad with a light vinaigrette
  • Steamed or roasted broccoli or green beans
  • Garlic bread or crusty rolls for soaking up any extra sauce

Common Mistakes to Avoid

To ensure your Buffalo Chicken Lasagna is a triumph:

  • Undercooking Noodles: If using oven-ready noodles, ensure they are well-covered with sauce and cheese to properly hydrate. If using pre-cooked, ensure they are fully drained to avoid a watery lasagna.
  • Not Letting it Rest: Patience is key! Resting allows the lasagna to set, preventing a soupy mess when you cut into it.
  • Over-Saucing: Too much liquid can make the lasagna watery. Ensure your chicken mixture isn’t swimming in sauce.
  • Skipping the Blue Cheese (if you like it): It adds a distinct tang that complements the buffalo sauce beautifully.

Storing Tips

Leftovers are the best! Store cooled lasagna tightly covered in the refrigerator for up to 3-4 days. Reheat individual portions in the microwave or oven until heated through.

Conclusion

This Buffalo Chicken Lasagna is more than just a meal; it’s a celebration of bold flavors and comforting textures. It’s the perfect way to shake up your dinner routine and satisfy those cravings for something both familiar and exciting. Whether you’re hosting a game day gathering or simply looking for a show-stopping weeknight dinner, this recipe is sure to impress. So, gather your ingredients, get cooking, and prepare for a dish that’s guaranteed to be a hit!

Frequently Asked Questions (FAQs)

Can I make this ahead of time?

Yes! You can assemble the lasagna up to 24 hours in advance. Cover it tightly and refrigerate. You may need to add an extra 10-15 minutes to the baking time if baking directly from the fridge.

How do I make it spicier?

Add a pinch of cayenne pepper to the chicken mixture, use a spicier hot sauce instead of or in addition to the buffalo sauce, or add a few dashes of your favorite hot sauce to the ricotta mixture.

What kind of chicken is best?

Rotisserie chicken is excellent for its ease and flavor. However, chicken breasts or thighs boiled, baked, or even poached until cooked through and then shredded work perfectly. Ensure the chicken is moist.

Can I freeze Buffalo Chicken Lasagna?

Absolutely! You can freeze the assembled, unbaked lasagna, or leftovers. Wrap tightly in plastic wrap and then foil. Thaw in the refrigerator overnight before baking or reheating.

Print
clock clock iconcutlery cutlery iconflag flag iconfolder folder iconinstagram instagram iconpinterest pinterest iconfacebook facebook iconprint print iconsquares squares iconheart heart iconheart solid heart solid icon

Cheesy Buffalo Ranch Chicken Lasagna

  • Author: Chef Mia

Description

This indulgent and flavor-packed lasagna combines the tangy heat of buffalo sauce with creamy ranch, tender shredded chicken, and gooey layers of cheese. A perfect twist on classic comfort food for buffalo chicken lovers!


Ingredients

Scale
  • Lasagna:12 ounceslasagna noodles3 ½ cupsrotisserie chicken, shreddedCheese Mixture:1packet ranch seasoning24 ouncescream cheese, softened1 cupbuffalo sauce½ cupmilk2 cupscheddar cheese, shredded2 cupsmozzarella cheese, shreddedOptional Toppings:Ranch dressingGreen onions, choppedBlue cheese crumbles
  • 12 ounceslasagna noodles3 ½ cupsrotisserie chicken, shredded
  • 3 ½ cupsrotisserie chicken, shredded
  • Cheese Mixture:1packet ranch seasoning24 ouncescream cheese, softened1 cupbuffalo sauce½ cupmilk2 cupscheddar cheese, shredded2 cupsmozzarella cheese, shreddedOptional Toppings:Ranch dressingGreen onions, choppedBlue cheese crumbles
  • 1packet ranch seasoning24 ouncescream cheese, softened1 cupbuffalo sauce½ cupmilk2 cupscheddar cheese, shredded2 cupsmozzarella cheese, shredded
  • 24 ouncescream cheese, softened1 cupbuffalo sauce½ cupmilk2 cupscheddar cheese, shredded2 cupsmozzarella cheese, shredded
  • 1 cupbuffalo sauce½ cupmilk2 cupscheddar cheese, shredded2 cupsmozzarella cheese, shredded
  • ½ cupmilk2 cupscheddar cheese, shredded2 cupsmozzarella cheese, shredded
  • 2 cupscheddar cheese, shredded2 cupsmozzarella cheese, shredded
  • 2 cupsmozzarella cheese, shredded
  • Optional Toppings:Ranch dressingGreen onions, choppedBlue cheese crumbles
  • Ranch dressingGreen onions, choppedBlue cheese crumbles
  • Green onions, choppedBlue cheese crumbles
  • Blue cheese crumbles

Instructions

  1. 1️⃣Prepare the Cheese Mixture:In a large mixing bowl, combine softened cream cheese, ranch seasoning, buffalo sauce, milk, cheddar cheese, and 1 ½ cups of the mozzarella cheese. Mix until smooth and well incorporated.2️⃣Cook the Lasagna Noodles:Bring a large pot of salted water to a boil. Cook the lasagna noodles according to package instructions until al dente. Drain and lay flat on a clean surface to prevent sticking.3️⃣Assemble the Lasagna:Spread a thin layer of the cheese mixture on the bottom of a 9×13-inch baking dish.Lay down a layer of lasagna noodles.Spread another layer of the cheese mixture on top of the noodles, followed by a layer of shredded chicken.Repeat the layers, ending with a layer of the cheese mixture on top. Sprinkle the remaining ½ cup of mozzarella cheese evenly over the final layer.4️⃣Bake:Cover the baking dish tightly with aluminum foil and bake in a preheated oven at 375°F (190°C) for 45 minutes.Remove the foil and bake uncovered for an additional 10 minutes, or until the cheese on top is bubbly and golden.5️⃣Rest and Serve:Let the lasagna rest for 8–10 minutes before slicing to allow the layers to set. Garnish with optional toppings such as ranch dressing drizzle, chopped green onions, or blue cheese crumbles.
  2. 2️⃣Cook the Lasagna Noodles:Bring a large pot of salted water to a boil. Cook the lasagna noodles according to package instructions until al dente. Drain and lay flat on a clean surface to prevent sticking.
  3. 3️⃣Assemble the Lasagna:Spread a thin layer of the cheese mixture on the bottom of a 9×13-inch baking dish.Lay down a layer of lasagna noodles.Spread another layer of the cheese mixture on top of the noodles, followed by a layer of shredded chicken.Repeat the layers, ending with a layer of the cheese mixture on top. Sprinkle the remaining ½ cup of mozzarella cheese evenly over the final layer.4️⃣Bake:Cover the baking dish tightly with aluminum foil and bake in a preheated oven at 375°F (190°C) for 45 minutes.Remove the foil and bake uncovered for an additional 10 minutes, or until the cheese on top is bubbly and golden.5️⃣Rest and Serve:Let the lasagna rest for 8–10 minutes before slicing to allow the layers to set. Garnish with optional toppings such as ranch dressing drizzle, chopped green onions, or blue cheese crumbles.
  4. Spread a thin layer of the cheese mixture on the bottom of a 9×13-inch baking dish.Lay down a layer of lasagna noodles.Spread another layer of the cheese mixture on top of the noodles, followed by a layer of shredded chicken.Repeat the layers, ending with a layer of the cheese mixture on top. Sprinkle the remaining ½ cup of mozzarella cheese evenly over the final layer.4️⃣Bake:Cover the baking dish tightly with aluminum foil and bake in a preheated oven at 375°F (190°C) for 45 minutes.Remove the foil and bake uncovered for an additional 10 minutes, or until the cheese on top is bubbly and golden.5️⃣Rest and Serve:Let the lasagna rest for 8–10 minutes before slicing to allow the layers to set. Garnish with optional toppings such as ranch dressing drizzle, chopped green onions, or blue cheese crumbles.
  5. Lay down a layer of lasagna noodles.
  6. Spread another layer of the cheese mixture on top of the noodles, followed by a layer of shredded chicken.Repeat the layers, ending with a layer of the cheese mixture on top. Sprinkle the remaining ½ cup of mozzarella cheese evenly over the final layer.4️⃣Bake:Cover the baking dish tightly with aluminum foil and bake in a preheated oven at 375°F (190°C) for 45 minutes.Remove the foil and bake uncovered for an additional 10 minutes, or until the cheese on top is bubbly and golden.5️⃣Rest and Serve:Let the lasagna rest for 8–10 minutes before slicing to allow the layers to set. Garnish with optional toppings such as ranch dressing drizzle, chopped green onions, or blue cheese crumbles.
  7. Repeat the layers, ending with a layer of the cheese mixture on top. Sprinkle the remaining ½ cup of mozzarella cheese evenly over the final layer.4️⃣Bake:Cover the baking dish tightly with aluminum foil and bake in a preheated oven at 375°F (190°C) for 45 minutes.Remove the foil and bake uncovered for an additional 10 minutes, or until the cheese on top is bubbly and golden.5️⃣Rest and Serve:Let the lasagna rest for 8–10 minutes before slicing to allow the layers to set. Garnish with optional toppings such as ranch dressing drizzle, chopped green onions, or blue cheese crumbles.
  8. 4️⃣Bake:
  9. Cover the baking dish tightly with aluminum foil and bake in a preheated oven at 375°F (190°C) for 45 minutes.Remove the foil and bake uncovered for an additional 10 minutes, or until the cheese on top is bubbly and golden.5️⃣Rest and Serve:Let the lasagna rest for 8–10 minutes before slicing to allow the layers to set. Garnish with optional toppings such as ranch dressing drizzle, chopped green onions, or blue cheese crumbles.
  10. Remove the foil and bake uncovered for an additional 10 minutes, or until the cheese on top is bubbly and golden.5️⃣Rest and Serve:Let the lasagna rest for 8–10 minutes before slicing to allow the layers to set. Garnish with optional toppings such as ranch dressing drizzle, chopped green onions, or blue cheese crumbles.
  11. 5️⃣Rest and Serve:Let the lasagna rest for 8–10 minutes before slicing to allow the layers to set. Garnish with optional toppings such as ranch dressing drizzle, chopped green onions, or blue cheese crumbles.

Notes

Customizations:Swap chicken with cooked ground beef or turkey for a different protein.Mild Version:Use less buffalo sauce or mix in a bit of additional milk to tone down the heat.Storage:Refrigerate leftovers in an airtight container for up to 3 days. Reheat in the oven or microwave.Make Ahead:Assemble the lasagna a day in advance and store it in the fridge. Bake as directed when ready to serve.
Mild Version:Use less buffalo sauce or mix in a bit of additional milk to tone down the heat.Storage:Refrigerate leftovers in an airtight container for up to 3 days. Reheat in the oven or microwave.Make Ahead:Assemble the lasagna a day in advance and store it in the fridge. Bake as directed when ready to serve.
Storage:Refrigerate leftovers in an airtight container for up to 3 days. Reheat in the oven or microwave.Make Ahead:Assemble the lasagna a day in advance and store it in the fridge. Bake as directed when ready to serve.
Make Ahead:Assemble the lasagna a day in advance and store it in the fridge. Bake as directed when ready to serve.

“`