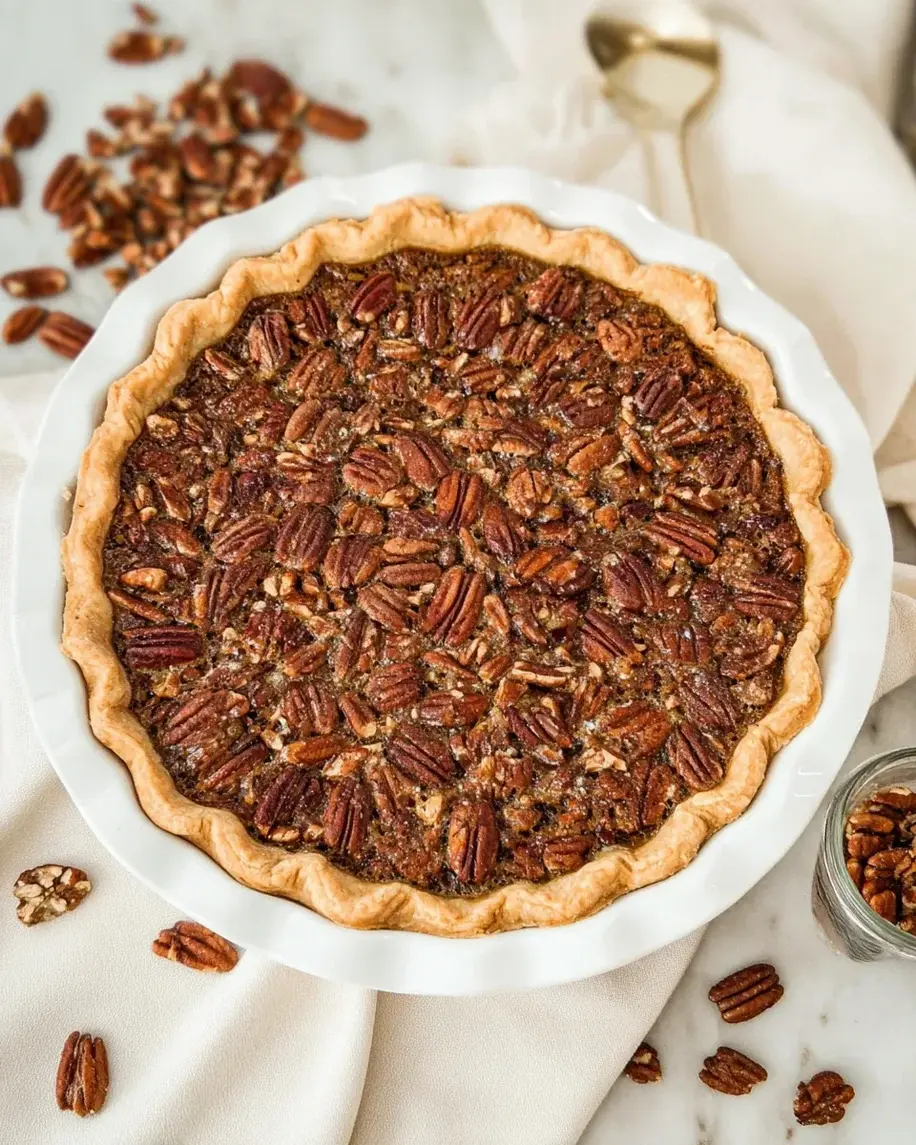
The Ultimate Tenderloin Recipe for Unforgettable Flavor and Tenderness

Tenderloin the Best Ever: A Juicy Culinary Delight

⚖️
Difficulty
Intermediate

⏲️
Prep Time
20 mins

🕒
Cook Time
30 mins

⏱️
Total Time
50 mins

🍽️
Servings
4 servings

Tenderloin the Best Ever is not just a meal; it’s an experience. Imagine a beautifully seared piece of meat, glowing with a tantalizing aroma that fills your kitchen, hinting at the flavors waiting to explode on your palate. Each bite is a symphony of tenderness and seasoning, making it a perfect centerpiece for both family dinners and celebratory gatherings. This recipe promises to elevate your cooking skills while impressing your guests with exquisite flavors and stunning presentation.

Whether you are a seasoned chef or a home cook looking to expand your repertoire, mastering this dish will boost your confidence in the kitchen. The method is straightforward yet requires attention to detail, ensuring that you understand every step to perfect a tenderloin. With a mix of savory spices and cooking techniques perfected over generations, this beloved dish captures the essence of comfort food with a gourmet twist.

Quick Recipe Highlights

  • Flavor Profile: This tenderloin boasts a rich, buttery flavor, balanced with herbs like rosemary and thyme, and a hint of garlic, creating a mouthwatering dish.
  • Texture: The outside is wonderfully seared, providing a beautiful crust that contrasts perfectly with the juicy, tender insides.
  • Aroma: The scent of garlic, herbs, and the roast enhances the overall culinary experience, pulling everyone into the kitchen.
  • Visual Appeal: With a golden crust and vibrant green herbs, the presentation of this tenderloin will be a stunning addition to any table.
  • Skill Level Needed: Intermediate—requires some knowledge of searing and oven roasting techniques.
  • Special Equipment: A frying pan and an oven-proof dish are essential for achieving the perfect sear and finish.

Recipe Overview

  • Difficulty Level: Choosing an intermediate level is crucial, as this dish requires familiarity with both frying and oven techniques, ensuring that the meat remains tender and juicy.
  • Category: This dish beautifully fits into gourmet dinner or holiday meals as a main course that will leave everyone delighted.
  • Cuisine: Rooted in classic culinary traditions, tenderloin recipes are often celebrated in French and American cuisines, showcasing flavors and techniques perfected through time.
  • Cost: While tenderloin can be a bit pricier than other cuts, it’s an investment in quality dining, often costing around $25-$30 per pound.
  • Season: This tenderloin is perfect for any occasion but shines during cooler months, when hearty meals provide comfort.
  • Occasion: Ideal for gatherings, holidays, or special celebrations—this dish is sure to impress friends and family alike.

Why You’ll Love This Recipe

This tenderloin recipe is not only packed with flavor but also offers an incredible textural journey. The initial crunch from the outer crust leads to a succulent interior that melts in your mouth. Each element plays a vital role in achieving that perfect balance of flavors, thanks to the careful selection of herbs and spices that enhance the tenderloin’s natural richness.

In terms of convenience, this recipe simplifies the gourmet cooking experience. With minimal prep time and straightforward cooking methods, you can easily integrate this dish into busy weeknights or leisurely weekends. The ease of preparation merges perfectly with the lavish end result, making it suitable for any occasion.

Nutritionally, tenderloin stands out as a lean cut of meat, offering protein-rich goodness without excessive fats. It can be a great addition to a balanced diet, especially when paired with fresh vegetables or whole grains, allowing you to enjoy a healthy meal without sacrificing taste.

Socially, having a dish like this in your culinary arsenal positions you as a thoughtful host or hostess. Share meals around the table, sparking conversations and memories, as food has this irresistible ability to bring people together.

Lastly, the cost-effectiveness of this recipe cannot be overlooked. Though it features a premium cut of beef, the knowledge gained in preparing it can be applied to other cuts, which are often less expensive. Thus, the skills acquired while creating this best-ever tenderloin can lead to budget-friendly cookouts or special dinners without compromising on quality.

Historical Background and Cultural Significance

The history of tenderloin dates back centuries, intertwining with European gastronomic traditions where high-quality meats symbolize prestige and celebration. Initially reserved for royalty and the affluent, tenderloin gradually evolved into a beloved option in homes as culinary methods became more accessible to the general public.

Culturally, tenderloin holds significance in various cuisines, from French culinary arts showcasing its sophistication to American barbecue traditions celebrating the meat in hearty gatherings. Each culture embodies a unique approach to flavoring and cooking the tenderloin, reflecting local preferences and heritage.

Over time, the evolution of the recipe has seen it adapt to modern palates while maintaining the essential cooking techniques, enhancing tenderness, and flavor. New iterations often incorporate various sauces or marinades tailored to regional tastes.

Regional variations of tenderloin can be found across the globe, with South American chimichurri and Asian teriyaki offering exciting, innovative takes on this classic dish, embracing the spirit of culinary diversity.

Ingredient Deep Dive

For a successful tenderloin dish, high-quality beef is paramount. Tenderloin, known for its exceptional tenderness, comes from the loin of the cow. This choice cut has a rich history, often celebrated in classic cooking styles. It is a lean source of protein, making it a healthy option. When selecting your tenderloin, seek out well-marbled cuts with bright color and minimal surface moisture for the best results. For storage, keep it in the coldest part of your refrigerator and aim to use it within a few days or freeze for longer storage.

Herbs and spices play crucial roles in flavor enhancement. Fresh rosemary and thyme can transform your dish, incorporating fragrant aromas and colorful visuals. As natural flavor enhancers, they not only elevate the meal’s appeal but also provide antioxidant benefits. Ensure they are fresh by checking their color and scent; store them properly in your fridge and use them promptly for optimal flavor.

Common Mistakes to Avoid

  • Overcooking: Always use a meat thermometer to check the internal temperature and avoid drying out the tenderloin.
  • Neglecting to rest: Resting the meat post-cooking allows juices to redistribute, ensuring a juicy final product.
  • Using insufficient seasoning: Don’t shy away from seasoning generously; a well-seasoned cut enhances flavors immensely.
  • Skipping the sear: Searing caramelizes the meat’s exterior, giving more depth to the overall flavor.
  • Inadequate knife skills: Use a sharp knife to ensure clean cuts, showcasing the beautiful texture inside the tenderloin.
  • Ignoring resting time: Always rest your tenderloin before slicing to prevent it from losing its juices.
  • Not accounting for carryover cooking: Remember the meat continues to cook after removing it from the heat.
  • Choosing the wrong pan: Use a pan that can transition from stovetop to oven to optimize your cooking methods.

Essential Techniques

Understanding the technique of searing is crucial for creating the ideal tenderloin. Searing at high heat enhances flavor through the Maillard reaction, contributing to the dish’s rich appeal. To perfect this technique, ensure the pan is hot and dry, and don’t overcrowd the meat, as this can steam rather than sear.

Oven roasting brings out the tenderness of the meat. By transferring your seared tenderloin to an oven, you allow it to cook evenly and thoroughly. To master this technique, use a knife to check doneness, or rely on a thermometer to get precise readings, ensuring juicy perfection.

Pro Tips for Perfect Tenderloin the Best Ever

Start with a high-quality, well-marbled tenderloin for the best flavor.
Always let the meat rest after cooking for at least 10 minutes to lock in the juices.
Experiment with different herb combinations to alter the flavor profile, making the dish your own.
Pair with a rich sauce, like a red wine reduction, for an elevated flavor experience.
Invest in a good meat thermometer to ensure optimal cooking without guesswork.
For extra flavor, marinate the meat overnight to enhance the depth of taste significantly.
Consider using a cast-iron skillet for optimal searing and heat retention.
Garnish with fresh herbs upon serving for a pop of color and flavor boost.

Variations and Adaptations

Regional variations on tenderloin can introduce exciting flavors to the dish. In Latin America, try marinating the tenderloin with lime juice and spices to embrace a zesty tang. Seasonal adaptations may include using fresh herbs or vegetables that coincide with local produce, ensuring freshness and flavor are at their peak.

For dietary modifications, consider a gluten-free marinade or a plant-based tenderloin substitute to cater to different dietary restrictions. Flavor variations can include bold spices or sauces, such as chimichurri or teriyaki, that can provide unique spins to the classic dish.

Texture modifications, such as wrapping the tenderloin in bacon before cooking, can enhance both flavor and richness—creating a delightful contrast to the smoothness of the meat. Presentation alternatives could include slicing the tenderloin into medallions and serving it on skewers for a more casual dining approach.

Serving and Presentation Guide

Plating your tenderloin correctly enhances its appeal. Start by slicing against the grain, ensuring each piece showcases the tender texture. A drizzle of sauce around the edges can add a gourmet touch while enhancing the dish’s presentation.

Garnishing ideas range from fresh herbs to grilled vegetables, adding color and engaging visual elements. Traditional accompaniments like mashed potatoes or seasonal veggies can complement the richness of the meat beautifully.

Temperature considerations are essential; serve your tenderloin warm but not hot to maintain the perfect texture. For portion control, consider slicing into smaller pieces, allowing everyone to share and savor the dish together.

Wine and Beverage Pairing

When it comes to wine pairings, a bold red like Cabernet Sauvignon or Malbec is ideal for complementing the savory notes of the tenderloin. The tannins in these wines balance the fats beautifully, providing a rounded tasting experience. For a non-alcoholic alternative, consider a richly flavored sparkling juice or a herbal tea that enhances the meal’s overall aroma.

Temperature is essential; serve your wine at the appropriate room temperature for reds, ensuring that flavor profiles shine. For unique experiences, consider pairing your tenderloin with aged coffees or robust teas, which can surprise and delight your guests.

Storage and Shelf Life

For optimal storage, place cooked tenderloin in an airtight container or wrap it tightly in foil or plastic wrap. It should be refrigerated and typically last for up to 3-4 days. Be mindful of refrigeration temperatures to prevent spoilage.

Signs of spoilage include an off smell, discoloration, or a slimy texture—always exercise caution. For reheating, use an oven to maintain moisture, keeping it lidded to prevent drying. If you have leftovers, freezing is a viable option; just ensure that the tenderloin is cooled completely before wrapping it tightly for the freezer.

Make Ahead Strategies

To prepare your tenderloin ahead of time, consider marinating the meat overnight to allow deeper flavor penetration. Store the marinated meat wrapped in the refrigerator until you are ready to cook.

During assembly, prepare your sides in advance so you can focus on cooking the tenderloin when guests arrive. By pre-cooking your vegetables or starches, you can ensure everything comes together seamlessly, maintaining the meal’s warm, fresh feel.

For added freshness upon serving, consider adding fresh herbs or a sprinkle of lemon juice right before plating to keep flavors bright and engaging.

Scaling Instructions

When scaling the recipe, halving the tenderloin will require reduced cooking time; always use a thermometer to check doneness. Doubling or tripling may require more space in your oven—consider the size of your roast and adjust cooking time accordingly.

Equipment adjustments may involve using multiple pans or a larger roasting dish, ensuring that the meat remains spaced apart for even cooking. Remember, the key to successful scaling is maintaining the core cooking instructions while adapting for the measurements you need.

Nutritional Deep Dive

The macro breakdown of a serving of tenderloin includes protein, fat, and minimal carbohydrates. A typical portion offers around 27 grams of protein and 9 grams of fat, providing excellent nutrition for active individuals.

Micronutrient analysis shows that tenderloin also contains essential vitamins and minerals, including B vitamins and zinc, supporting various bodily functions. Those monitoring dietary considerations may appreciate the low-fat content alongside its rich protein, which aids in muscle maintenance.

In portion analysis, weigh out servings to control calorie intake, making it easier to include in weight management plans without compromising flavor or satisfaction.

Dietary Adaptations

For those with specific dietary needs, a gluten-free version can easily be adapted by ensuring your marinades are free from gluten-containing ingredients. Dairy-free options can also be embraced by avoiding butter in recipes or choosing plant-based substitutes instead.

If you follow a vegan lifestyle, consider using a meat alternative, marinated tofu, or tempeh that can absorb flavors similarly. On the other hand, low-carb and keto followers can enjoy this dish as it naturally aligns with protein-rich, low-carb principles, making it suitable for those diets.

For paleo diets, focus on the clean, unprocessed elements of this dish while avoiding grains and dairy, ensuring all ingredients meet the diet’s standards. This versatility allows tenderloin to fit various human diets without sacrificing deliciousness.

Troubleshooting Guide

Texture issues can often arise from overcooking. To remedy, slice the outside and check internal temperatures regularly to avoid drying out. For flavor balance troubles, consider adding more seasoning or sauces that can enhance the dish without overpowering it.

Temperature problems may arise when using materials that aren’t oven-safe. To prevent this, ensure all equipment is declared oven-safe to maintain consistency in cooking results. If ingredients prove challenging, remember to have substitutes available or adjust to what you have without compromising the key flavors.

Timing concerns during gatherings can lead to stress. Plan ahead by prepping as much as possible, allowing you to focus on cooking and serving with ease, ensuring a successful dining experience.

Recipe Success Stories

Feedback from the community consistently highlights the tenderloin’s tenderness and flavor impact at gatherings. Many share adaptations that made the dish their own, inspiring others to experiment with flavors and ingredients.

Photographic tips exchanged amongst readers encourage showcasing the vibrant colors and textures inherent in this dish, transforming it from a simple meal to an art piece. These shared experiences reveal the joy this best-ever tenderloin brings to many homes, creating lasting memories associated with every bite.

Frequently Asked Questions

1. How do I know when my tenderloin is done cooking?

Using a meat thermometer is the best way to determine doneness. Aim for an internal temperature of 145°F (63°C) for medium-rare, allowing it to rest before slicing.

2. Can I marinate the tenderloin overnight?

Absolutely! Marinating overnight allows the flavors to penetrate deeply, enhancing the overall taste and tenderness of the meat.

3. What are some good side dishes for tenderloin?

Mashed potatoes, roasted vegetables, or a fresh salad pair beautifully with tenderloin, complementing its rich flavor and texture.

4. How long can I refrigerate my leftovers?

Cooked tenderloin can be stored in the refrigerator for up to 3-4 days when sealed tightly in an airtight container.

5. Can I freeze leftover tenderloin?

Yes, cooked tenderloin can be frozen for up to 3 months. Ensure it is cooled, wrapped tightly, and labeled for easy storage.

6. Is tenderloin the same as filet mignon?

Tenderloin refers to the entire muscle, while filet mignon is cut from the thicker part of the tenderloin. Both are known for tenderness but differ in presentation.

7. What should I do if my tenderloin is tough?

Cooking on lower heat for a longer duration can help break down tough fibers. Ensuring proper resting times post-cook will also help keep the meat tender.

8. Are there healthy ingredients I can add to my tenderloin recipe?

Incorporating spices or herbs, like garlic or rosemary, not only adds flavor but also provides health benefits, making your dish more nutritious.

9. What’s the best way to sear tenderloin?

Use a hot skillet and a bit of oil for searing. Sear each side for 3-4 minutes until a golden crust forms before transferring to the oven to finish cooking.

10. How should I serve tenderloin?

Slice the tenderloin against the grain and serve it on a warm plate. Drizzle sauce over it and garnish with fresh herbs for an elegant touch.

Additional Resources

Explore related recipes, such as a garlic herb roast chicken or pan-seared steak, that complement the celebration around fine dining. Additionally, technique guides on proper knife skills or mastering marinades can enhance your cooking expertise.

Study ingredient recommendations for choosing high-quality meat and efficient cooking methods to ensure every meal is well-prepared. Seasonal variations can inspire creativity in your everyday cooking, allowing you to incorporate local flavors and preferences seamlessly.

Join the Conversation

Engage with your culinary community by sharing photos and experiences from your tenderloin cooking endeavors. Encourage friends and family to leave reviews, facilitating a rich exchange of tips, adaptations, and personal stories related to this beloved dish.

Sharing variations on social media brings likeminded cooks together, sparking new ideas and inspirations for enjoying tenderloin in fresh, exciting ways. Celebrate your culinary journey as you perfect your recipe with the support of others around you.

The Recipe

Tenderloin the Best Ever

Serves: 4

Prep Time: 20 mins

Cook Time: 30 mins

Total Time: 50 mins

Kitchen Equipment Needed

  • Frying pan
  • Oven-proof dish
  • Meat thermometer
  • Knife and cutting board

Ingredients

  • 2 pounds beef tenderloin
  • 3 cloves garlic, minced
  • 2 tablespoons olive oil
  • 1 tablespoon fresh rosemary, chopped
  • 1 tablespoon fresh thyme, chopped
  • Salt and pepper to taste

Directions

  1. Preheat your oven to 400°F (200°C).
  2. Pat the tenderloin dry and season generously with salt and pepper.
  3. Heat olive oil in a frying pan over medium-high heat and add garlic, rosemary, and thyme.
  4. Sear the tenderloin on all sides until browned, about 3-4 minutes per side.
  5. Transfer the tenderloin to the oven-proof dish and place it in the preheated oven.
  6. Roast until the internal temperature reaches 145°F (63°C) for medium-rare, about 20-25 minutes.
  7. Remove from the oven and let rest for at least 10 minutes before slicing.
  8. Slice and serve with your choice of sides and sauces.

Recipe Notes

  • Feel free to adjust the herbs according to your preference.
  • For best results, use a meat thermometer to ensure perfect doneness.
  • Consider marinading the tenderloin for a few hours for deeper flavor.

Delicious Strawberry Lemon Layer Cake Recipe for Every Celebration

Delicious Strawberry Lemon Layer Cake: A Perfect Summer Delight

⚖️
Difficulty
Intermediate

⏲️
Prep Time
30 mins

🕒
Cook Time
25 mins

⏱️
Total Time
55 mins

🍽️
Servings
8

Summer is the season for joyful gatherings, and what better way to celebrate than with a beautiful Strawberry Lemon Layer Cake? This delightful dessert combines the zesty freshness of lemon with the sweet, juicy taste of strawberries, making it a perfect centerpiece for any occasion. The light and fluffy cake layers are filled with luscious strawberry cream, creating a burst of flavor in every bite. Whether you’re hosting a summer picnic or simply treating yourself, this cake will brighten any table with its vibrant colors and irresistible taste.

Imagine cutting into a slice, revealing the bright pink strawberry cream nestled between the golden cake layers, all topped with a light lemon buttercream frosting. Each mouthful is a heavenly blend of sweetness and tartness, ensuring that this Strawberry Lemon Layer Cake is not only a feast for the eyes but also a treat for the palate. To elevate your celebrations, this cake pairs beautifully with a glass of chilled lemonade or sparkling wine.

Quick Recipe Highlights

  • Flavor Profile: Bright citrus notes of lemon combined with the sweetness of fresh strawberries create a refreshing dessert that’s perfect for summer.
  • Texture: The cake layers are light and airy, complementing the smooth and creamy strawberry filling and buttery frosting for a delightful contrast.
  • Aroma: The cake emanates a delightful blend of sweet strawberries and fresh lemons, making it impossible to resist.
  • Visual Appeal: The layers of pink and yellow, adorned with fresh strawberries, create an eye-catching dessert that stands out at any gathering.
  • Skill Level Needed: This recipe requires intermediate baking skills, including mastering two-layer cake assembly and frosting techniques.
  • Special Equipment: A stand mixer or handheld mixer, 9-inch round cake pans, and an offset spatula for frosting are recommended.

Recipe Overview

  • Difficulty Level: This Strawberry Lemon Layer Cake has an intermediate difficulty level, as it requires multiple components and precise timing to ensure the layers rise properly while being filled and frosted adequately.
  • Category: This dessert falls under the category of cakes, specifically layer cakes, which are often showcased during celebrations such as birthdays, weddings, or summer get-togethers.
  • Cuisine: Influenced by classic American baking traditions, this recipe incorporates flavors commonly found in summer desserts, highlighting seasonal fruits like strawberries and citrus.
  • Cost: The approximate cost for the ingredients totals about $15-$20, making it an affordable yet impressive choice for any occasion.
  • Season: Ideal for warm months when strawberries are in season, this cake elevates summer festivities with its refreshing flavors.
  • Occasion: Perfect for birthdays, summer parties, or picnics, this cake serves as a delightful dessert that is sure to impress guests.

Why You’ll Love This Recipe

The taste and texture appeal of this Strawberry Lemon Layer Cake is simply divine. The combination of fresh strawberries and zesty lemons creates a balance of sweetness and tartness that tantalizes the taste buds. Each layer is light and fluffy, ensuring that this cake doesn’t feel overly heavy, leaving room for second servings. Additionally, the strawberries add a juicy bite that complements the smooth cream, making it an unforgettable experience.

Convenience is another reason to love this recipe. Both the cake layers and the strawberry filling can be made in advance, allowing you to assemble the cake just before serving. This makes it an excellent choice for busy hosts who still want to impress their guests without spending all day in the kitchen. Also, the straightforward steps mean that even those new to layer cakes can successfully bring this dessert to life.

When it comes to nutritional advantages, strawberries are a powerhouse of vitamins and antioxidants, and lemons offer a burst of Vitamin C. Together, they contribute a hint of healthiness to this indulgent dessert. Enjoying a piece of this cake means savoring a blend of deliciousness without compromise on nutrition.

This Strawberry Lemon Layer Cake is also perfect for social gatherings. Its stunning presentation encourages sharing and compliments from friends and family. The bright colors and beautiful layers create a conversation starter, making it an ideal dish for celebrations and parties.

Lastly, this recipe remains accessible and cost-effective. With common ingredients that are easily found at local grocery stores and an approximate budget of $15-$20, it offers a gourmet flavor profile without breaking the bank. You can serve a crowd-pleasing dessert that will have your guests raving about your baking skills.

Historical Background and Cultural Significance

The origin of layer cakes dates back to antiquity, evolving with culinary trends over the centuries. Layer cakes gained popularity in the United States during the 19th century, particularly in the South, where celebrations were marked with lavish desserts. Strawberry Lemon Layer Cake reflects this rich history as it combines two flavors that signify summer and festivity.

Culturally, this cake speaks to the importance of seasonal ingredients in American baking, showcasing strawberries that are often associated with summer picnics and gatherings. It exemplifies the home-baking tradition that families have cherished for generations, where recipes were passed down and enriched with personal touches.

Over the years, variations of strawberry layer cakes have emerged, often incorporating different flavors, fillings, and decorations. This evolution showcases the creativity of bakers and the adaptability of cake recipes to modern tastes while honoring classic techniques.

Regional variations can include the use of different berries such as blueberries or raspberries in place of strawberries for a unique twist. Each variation carries its story, highlighting local tastes and seasonal availability, making desserts like Strawberry Lemon Layer Cake a beloved choice nationwide.

Ingredient Deep Dive

Strawberries: Strawberries have been enjoyed since ancient times and symbolize summer’s arrival. They are rich in Vitamin C, fiber, and antioxidants, making them a healthy fruit choice. When selecting strawberries, look for bright red, firm berries with no signs of mold. Store them in the refrigerator unwashed and consume them within a few days for the best flavor. If fresh strawberries are unavailable, frozen strawberries can be used as a substitute.

Lemons: The zesty lemon adds brightness to this cake, enhancing flavors without overpowering sweetness. Lemons are steeped in history; they originated in Asia and have been used in culinary dishes for centuries. Selecting lemons involves looking for firm, brightly colored fruits with smooth skin. Store them in a cool, dry place, and they can last for several weeks. If you have a lemon shortage, lime juice can serve as an excellent alternative.

Common Mistakes to Avoid

  • Overmixing the batter: This can lead to a dense cake. Mix until just combined to ensure a light texture.
  • Not allowing the cake layers to cool properly: Too much heat can cause the frosting to melt and affect the cake’s overall look.
  • Using cold ingredients: For the best texture, make sure to use room temperature eggs and butter to incorporate air better.
  • Ignoring measurements: Accurate ingredient measuring is critical to achieving the right taste and texture, so always use a scale if possible.
  • Not leveling the cake layers: Unlevel layers can lead to a lopsided cake. Use a serrated knife to trim the tops of the cooled cakes for an even stack.
  • Skipping the chilling step before frosting: This helps the layers to firm up, making them easier to frost and stack without slipping.
  • Using too much or too little frosting: A balance is needed to avoid overwhelming the cake while ensuring delicious coverage.
  • Neglecting to plan assembly: Having all your ingredients ready will streamline the building process, leading to a more finished cake.

Essential Techniques

Layering the Cake: Properly layering your cake ensures an even distribution of flavor and texture. To master this technique, cool the cake layers completely before assembly. Trim any dome-shaped tops to create a flat surface for even stacking. Use an offset spatula to spread the filling, ensuring it reaches the edges for a beautiful cross-section.

Frosting: Applying the frosting smoothly can be challenging. Start with a crumb coat—a thin layer of frosting that encloses the crumbs. Chill the cake for 30 minutes before applying a thicker layer of frosting. For a polished finish, dip your spatula in warm water to smooth out the frosting’s edges without adding excess pressure.

Pro Tips for Perfect Strawberry Lemon Layer Cake

Use fresh, ripe strawberries for the best flavor and sweetness, and avoid using overripe strawberries that can alter the texture and flavor of the filling.

Consider adding a splash of lemon extract into the frosting for a more intense lemon flavor that complements the strawberries beautifully.

Experiment with different flavored extracts like vanilla or almond in the cake mixture to enhance depth and complexity.

Always taste as you go, adjusting sweetness or acidity based on personal preference, especially when preparing the filling and frosting.

To keep your cake moist, consider brushing the layers with simple syrup made from equal parts sugar and water before adding the filling.

If decorating the cake, fresh mint leaves or citrus zest enhances both color and flavor, giving it a professional touch.

Storing the finished cake in a cool place will help maintain its textures and flavors, but be sure to cover it well to preserve moisture.

Allowing the cake to sit for a few hours at room temperature before serving can enhance the flavors and make for a more enjoyable eating experience.

Variations and Adaptations

Regional variations of this cake can include substituting the strawberries with seasonal fruits like peaches or blueberries. This creates a different flavor profile while maintaining the lightness of the cake.

For a seasonal adaptation, consider adding a layer of fresh lavender or basil to the strawberry filling for a sophisticated twist perfect for garden parties.

Dietary modifications can be made by creating a gluten-free version using almond flour and substituting dairy with coconut cream for fillers and frostings, ensuring a rich taste without traditional ingredients.

Flavors can be varied by infusing lemon curd or even using key lime juice for added tartness, giving a fun new layer to the cake.

Texture modifications can involve adding a layer of cream cheese frosting in between the vanilla filling and the lemon buttercream for a tangy balance that elevates each bite.

Presentation alternatives include adorning the top with a mix of fruits, edible flowers, or even a drizzle of lemon glaze for that extra wow factor when serving.

Serving and Presentation Guide

Plating techniques like using a cake stand will elevate the visual impact of your Strawberry Lemon Layer Cake. A glass stand is particularly stunning with the colorful layers on display.

Garnishing ideas include fresh strawberry slices, lemon zest, or edible flowers to give an artisan appearance. These elements add freshness and sophistication to the serving.

Traditional accompaniments could include a scoop of vanilla ice cream or a dollop of whipped cream alongside the cake, enhancing the dessert experience.

When serving it, consider using a serrated knife to ensure clean cuts through the layers, particularly if the cake is chilled before slicing.

Temperature considerations are crucial; serve the cake at room temperature for the best flavor and texture experience. Place it on the table about 30 minutes after refrigeration.

For portion control tips, consider slicing the cake into sixths rather than eighths to allow generous servings for each guest without compromising indulgence feelings.

Wine and Beverage Pairing

For wine pairings, a chilled Sauvignon Blanc or a Prosecco complements the freshness of the strawberry and lemon flavors beautifully, pairing well with the cake’s light texture.

Non-alcoholic alternatives can include a refreshing iced tea infused with lemon or a homemade lemonade, balancing the sweetness with citric notes.

If you’re serving coffee, a light roast works nicely, as the subtle flavors won’t overpower the cake, allowing the fruity notes to shine.

Temperature considerations are essential, especially when pairing beverages; serve wines chilled and allow coffee to cool slightly before sipping to maintain flavor integrity.

When serving suggestions present themselves, consider using sparkling water garnished with a slice of lemon as a refreshing palate cleanser in between bites.

Storage and Shelf Life

To ensure the Strawberry Lemon Layer Cake stays fresh, store it in an airtight container or wrap it with plastic wrap. The cool temperature halts spoilage and preserves freshness.

For optimal storage, maintain a cool room temperature, taking care to avoid placing it in direct sunlight, which can cause melting and spoilage.

When it comes to container recommendations, a cake carrier is ideal for transporting while maintaining its shape and decoration.

Signs of spoilage can include an off smell or mold; if noticed, discard the cake immediately to ensure safety.

Reheating instructions aren’t needed for this cake, as it is best enjoyed chilled or at room temperature for optimal taste.

Freezing guidelines include cutting slices, wrapping each in plastic wrap, and placing them in a freezer bag for storage of up to three months. To thaw, move to the refrigerator overnight before serving.

Make Ahead Strategies

Planning a prep timeline can be helpful, allowing the cake layers to cool completely before assembling. Bake the layers a day in advance and store them covered in the fridge.

For storage between steps, wrap the unassembled layers well if made ahead, preventing them from drying out. Ensure they are at room temperature before frosting.

Assessing quality impact includes ensuring that frosting and filling remain light and fluffy; always beat immediately before assembling for the best texture.

During assembly, make it easier by preparing your workspace, having all tools and components close at hand, reducing distractions during the critical layering steps.

Reheating guidelines do not apply, but if the cake must sit out, allow for room temperature for a few hours before serving to enhance flavor.

Consider adding any final touch or fresh fruit right before serving to maintain their vibrancy and freshness that impresses any host.

Scaling Instructions

Halving the recipe can work, particularly if you’re testing or serving fewer people. Adjust cooking times slightly and maintain a note of changes for future reference.

When doubling or tripling the recipe, increase all ingredients proportionally, but watch the baking time—larger cakes can take longer to bake through completely.

Equipment adjustments include using larger pans to accommodate the increased batter. Ensure you have enough equipment on hand to avoid overcrowding your kitchen.

Timing modifications involve checking cakes earlier than usual, as they can bake faster based on oven performance; always test for doneness with a toothpick.

Storage considerations are critical; larger batches of cakes may require more significant space in the fridge or freezer, so plan accordingly to ensure everything stays fresh.

Nutritional Deep Dive

Understanding the macro breakdown of the Strawberry Lemon Layer Cake reveals a treat rich in carbohydrates and sugars from the cake and strawberries. A single slice generally provides a satisfying dessert experience while serving as a sweet finale to meals.

Micronutrient analysis showcases the benefits of strawberries, being high in Vitamin C, potassium, and folate, while lemons contribute similarly valuable nutrients to enhance overall health.

The health benefits found in strawberries, such as improving heart health and lowering blood pressure, provide an added incentive to enjoy this cake in moderation.

Dietary considerations can be made, especially for those counting calories or managing sugar intake. Each slice can be portion-controlled to fit individual diets without compromise.

Portion analysis can guide your serving sizes; a quarter of the cake is enough to satisfy the sweet tooth while allowing room for a balanced diet.

For those managing weight, the use of fresh strawberries provides a guilt-free sweetness that enhances flavor without contributing to feelings of indulgence.

Dietary Adaptations

If you need a gluten-free version, substitute regular flour with almond flour and ensure that all other ingredients are gluten-free friendly.

Dairy-free adaptations can be achieved by using plant-based milk and a coconut-based butter alternative, making the cake rich and creamy without traditional ingredients.

Going vegan? Use flaxseed meal or chia seeds as egg substitutes, and substitute the butter with coconut oil or vegan margarine for a fully plant-based treat.

For those seeking low-carb versions, consider using a sugar substitute and almond flour to create a cake that aligns with dietary restrictions while still delivering on flavor.

The keto adaptation can be realized by decreasing sugars and using nut-based flours, ensuring that you maintain satisfaction without excess carbs.

Paleo enthusiasts can follow similarly by ditching processed sugars and opting for pure maple syrup or honey as sweeteners.

Low-FODMAP adjustments can be made by using lactose-free dairy options and ensuring that additional ingredients fit into the dietary guidelines without aggravating any digestive issues.

Troubleshooting Guide

If you encounter texture issues, ensure that the batter is mixed just until combined. This prevents the development of gluten, leading to a dense cake. Add moisture with a splash of milk if the batter seems dry.

Flavor balance concerns often arise from underwhelming sweetness; always taste your filling and frosting, adjusting with confectioner’s sugar or more lemon juice as needed.

Temperature problems can emerge if the layers are unevenly baked. Use an oven thermometer to ensure consistent heat and rotate the baking pans for even results.

For equipment challenges, ensure your oven is calibrated correctly. If you notice cakes rising too quickly, consider lowering the baking temperature slightly to prevent doming.

If substitutions don’t work as predicted, always test small batches before committing to larger variations to ensure intended flavors shine through.

For timing concerns, adjust your baking times as needed. If the tops brown quickly, use aluminum foil to cover them during baking to safeguard them from burning.

Recipe Success Stories

Community feedback for the Strawberry Lemon Layer Cake often highlights its stunning appearance and delightful taste. Many readers rave about how simple adjustments led to remarkable results that fit individual tastes.

Variation successes can be shared prominently amongst readers; those who’ve adapted the recipe find joy in new elements, from added almond flavor to vibrant herb garnishing.

The emotional connections that stories often bring are also enriching; families share their memories savored alongside pieces of this cake, turning it into a cherished family recipe passed down generations.

Photography tips frequently arise, with readers emphasizing the importance of natural light to capture the colorful layers and vibrant decorations—essential for showcasing your baking achievements on social media.

Frequently Asked Questions

Can I use frozen strawberries for this cake? Yes! Frozen strawberries can be a convenient substitute, just be sure to thaw and drain them first to remove excess moisture.

How do I prevent the cake from drying out? Brush the layers with simple syrup before frosting to keep them moist and flavorful, adding a delightful boost to each slice.

Can I make this cake gluten-free? Absolutely! Use a gluten-free flour blend to maintain the desired texture without the gluten.

What frosting works best with this cake? A light lemon buttercream or a fresh whipped cream frosting complements the flavors beautifully without overpowering the cake.

How long does this cake last? The cake can last about 3-5 days in the refrigerator. For longer storage, consider freezing the layered pieces to maintain freshness.

Can I freeze the assembled cake? Yes, the cake freezes well after frosting. Wrap it tightly in plastic wrap and foil before placing it in the freezer.

What is the best way to frost a layer cake? Use a crumb coat first to seal in the crumbs, chill it, then apply a final layer of frosting for a smooth finish.

Can I reduce the sugar in the recipe? While you can reduce the sugar, keep in mind that it may alter the texture and flavor. Experiment with sugar substitutes for a healthier alternative.

How do I make lemon curd? Lemon curd is made by cooking lemon juice, sugar, eggs, and butter together until thickened. It’s excellent for layering!

What are some variations I can try? Consider adding herbs like basil or thyme, or swapping strawberries for other fruits like raspberries or blueberries for different flavor profiles.

Additional Resources

For related recipes, consider exploring seasonal fruit desserts or other layer cakes that utilize similar techniques for delicious results. Technique guides on cake baking, like mastering buttercream frosting or cake layering, can prove beneficial.

Ingredient information, focusing on the benefits of seasonal fruits or the science behind baking, will enrich your understanding of this dessert. Equipment recommendations should include high-quality cake pans and mixers that can aid in creating the perfect cake.

Seasonal variations can inspire new ideas, such as using gingerbread layers in winter or tropical fruits during warmer seasons, ensuring variety and excitement in your baking routine.

Join the Conversation

Engaging with the community makes baking even more enjoyable. Share your variations of the Strawberry Lemon Layer Cake on social media using specific hashtags, fostering conversations around flavor ideas and decorating techniques.

For photography tips, consider posting in online forums where bakers can exchange visual inspirations and share their success stories of creating the perfect cake.

Encourage recipe reviews and feedback from peers, fostering a community of learners keen to perfect their baking craft while experimenting with flavors.

Not forgetting community engagement, ask friends and family for their input on your cake variations, creating a shared platform for creatively exchanging ideas and experiences.

The Recipe

Strawberry Lemon Layer Cake

Serves: 8

Prep Time: 30 mins

Cook Time: 25 mins

Total Time: 55 mins

Kitchen Equipment Needed

  • Stand mixer or handheld mixer
  • 9-inch round cake pans
  • Offset spatula
  • Mixing bowls
  • Cooling racks

Ingredients

  • 2 cups all-purpose flour
  • 1 ½ cups granulated sugar
  • 1 tablespoon baking powder
  • ½ teaspoon salt
  • ½ cup unsalted butter, softened
  • 1 cup milk
  • 3 large eggs
  • Zest and juice of 2 lemons
  • 2 cups fresh strawberries, sliced
  • 2 cups heavy cream, whipped
  • 1 cup butter, softened (for frosting)
  • 4 cups powdered sugar (for frosting)

Directions

  1. Preheat the oven to 350°F (175°C) and grease the cake pans.
  2. In a bowl, mix flour, baking powder, and salt together.
  3. In a stand mixer, beat the softened butter and sugar until light and fluffy.
  4. Add eggs, one at a time, mixing well after each addition. Then mix in lemon zest and juice.
  5. Gradually add the dry ingredients and milk, alternating between the two until well combined.
  6. Divide the batter evenly between prepared pans and smooth the tops.
  7. Bake for 25 minutes or until a toothpick comes out clean. Cool in pans for 10 minutes, then transfer to cooling racks.
  8. To prepare the filling, whip heavy cream until soft peaks form. Gently fold in sliced strawberries and a bit of lemon juice.
  9. Once cakes are cooled, level the tops if needed and layer the first layer on a serving platter.
  10. Spread a generous layer of strawberry filling on top, then place the second cake layer on top.
  11. In a separate bowl, beat softened butter for the frosting and gradually add powdered sugar, lemon juice, and zest until smooth.
  12. Frost the top and sides of the cake, decorating as desired with fresh strawberries and lemon slices.

Recipe Notes

  • For extra moisture, brush the layers with a lemon simple syrup before frosting.
  • Feel free to customize the berry filling or frosting for different flavor profiles.
  • Always let the cake cool completely before frosting to prevent melting.

Delicious Tuna Salad Sandwich Recipe for Quick Lunches at Home

Tuna Salad Sandwich: A Fresh Twist on a Classic Favorite

⚖️
Difficulty
Easy

⏲️
Prep Time
10 mins

🕒
Cook Time
0 mins

⏱️
Total Time
10 mins

🍽️
Servings
2

To create a truly delightful Tuna Salad Sandwich, you only need a few simple ingredients, but the flavor is a symphony of tastes that will leave you craving more. This sandwich is not only quick and easy to prepare, making it a perfect lunch or snack option, but it’s also delightful in texture with a creamy filling and crunchy vegetables. Whether you enjoy it on a busy weekday or as a snack for a picnic, this tuna salad sandwich is versatile and incredibly satisfying.

The exquisite combination of tuna, creamy mayonnaise, and crisp celery creates a delicious balance, while the subtle tang of lemon juice brightens it all up. Served between two slices of your favorite bread, this sandwich is customizable and can be adjusted to fit your personal taste. Additionally, it’s a great option for meal prep, as it can be stored in the refrigerator and enjoyed over a few days.

Quick Recipe Highlights

  • Flavor Profile: The combination of tuna and mayonnaise with a hint of lemon juice offers a savory and slightly tangy flavor that pleases every palate.
  • Texture: The creamy filling paired with crunchy celery and onion gives a delightful contrast that enhances each bite.
  • Aroma: The aroma of fresh ingredients mingles beautifully, inviting you to take that first bite.
  • Visual Appeal: The creamy filling gleaming with fresh herbs peeking through is visually striking and makes for an inviting presentation.
  • Skill Level Needed: This recipe requires minimal cooking skills, making it perfect for beginners and experienced cooks alike.
  • Special Equipment: No specialized kitchen tools are needed; just a mixing bowl and a knife will do.

Recipe Overview

  • Difficulty Level: The tuna salad sandwich is rated easy due to its straightforward preparation and the lack of cooking involved.
  • Category: This dish is perfect for lunch or as a picnic meal, embodying the ease of a classic sandwich.
  • Cuisine: Originating from Western culinary traditions, tuna salad sandwiches have become a staple in many households.
  • Cost: The ingredients are readily available and affordable, making this sandwich a cost-effective option.
  • Season: Tuna salad sandwiches can be enjoyed year-round, but they are especially refreshing in the warmer months.
  • Occasion: Ideal for quick lunches, gatherings, or even a light dinner, this recipe fits a variety of occasions.

Why You’ll Love This Recipe

Tuna salad sandwiches are loved for their incredible taste and satisfying texture. The smoothness of the tuna combined with the crunch of fresh vegetables creates a delightful contrast that’s both refreshing and filling. Every bite brings different sensations that make this sandwich a truly enjoyable experience.

In terms of convenience, this recipe is a winner. You can prepare it in less than 10 minutes, making it an ideal choice for those busy weekdays when you need something quick yet wholesome. It can also be made in larger batches for meal prepping, saving you time in the kitchen throughout the week.

Nutritionally, tuna is a powerhouse ingredient, packed with omega-3 fatty acids and high in protein. This makes the tuna salad sandwich not just satisfying but also a healthy choice. Pair it with whole grain bread, and you’re boosting its fiber content for a more balanced meal.

Socially, this dish is a fantastic way to entertain. A platter of these sandwiches can be a hit at gatherings, offering guests a classic comfort food element with a fresh twist. They can be customized to cater to different tastes, ensuring that everyone is happy.

Cost-effectiveness is another significant factor. The ingredients for this recipe are generally inexpensive and easy to find. This makes tuna salad sandwiches an accessible and budget-friendly option for families and individuals alike.

Historical Background and Cultural Significance

The tuna salad sandwich has humble beginnings, evolving from simple preservation needs during wartime to becoming a staple in American households in the 20th century. Canned tuna provided a convenient protein source that was easy to store and use, which explains its rapid rise in popularity as families sought quick meal solutions.

Culturally, the tuna salad sandwich represents comfort food, often evoking memories of childhood lunches and family picnics. It’s a recipe that many families have modified over generations, adding their own unique twists based on regional preferences and available ingredients.

Over the years, the basic recipe has seen numerous adaptations, from the inclusion of spicy ingredients to variations such as adding fruits like apples or grapes for a touch of sweetness. Each variation reflects personal tastes and cultural influences that breathe new life into this timeless dish.

Regions offer their own spins on the tuna salad sandwich, with some areas incorporating local ingredients, like fresh herbs or country-style bread. Regardless of these variations, the core elements remain a beloved classic around the world.

Ingredient Deep Dive

Tuna
The heart of the tuna salad sandwich, canned tuna has a long history of being a reliable and accessible protein source. Rich in omega-3 fatty acids, it’s an excellent choice for heart health and overall well-being. When selecting tuna, opt for sustainably caught varieties whenever possible. Store canned tuna in a cool, dry place and use it before the expiration date for the best quality.

Mayonnaise
A key player in bringing the ingredients together, mayonnaise provides creaminess and flavor to the salad. While traditional recipes use regular mayonnaise, options include Greek yogurt or avocado for a healthier twist. Look for mayonnaise made with high-quality ingredients for the best flavor. Store mayonnaise in the refrigerator and always check for freshness before use to avoid spoilage.

Celery
Adding crunch to your tuna salad, celery is not only low in calories but also high in fiber. When selecting celery, look for bright green stalks without blemishes. Store it in the crisper drawer of your refrigerator for optimal freshness. If you’re looking to mix it up, consider substituting with diced bell peppers or pickles for an additional flavor boost.

Common Mistakes to Avoid

  • Overmixing the tuna salad can lead to a mushy texture. Mix gently to maintain a pleasant mouthfeel.
  • Using low-quality tuna can impact flavor. Always choose good quality, sustainably sourced canned tuna for the best taste.
  • Not seasoning adequately can leave your salad bland. Taste and adjust the seasoning with salt, pepper, or additional spices as needed.
  • Ignoring the importance of chilling the salad can affect flavor development. Letting it sit in the fridge for at least an hour enhances the taste.
  • Neglecting to adjust the consistency. If the salad is too dry, add more mayonnaise or yogurt; if too wet, stir in more tuna.
  • Forgetting to taste as you go can lead to unbalanced flavors. Always sample the salad before serving to ensure it’s just right.
  • Using the wrong bread can overshadow the filling. Choose bread that complements without overpowering the tuna salad.
  • Not letting the flavors meld can result in a less flavorful sandwich. Prepare in advance for better results.
  • Using expired ingredients can be a health risk. Always check the freshness of your components before use.
  • Serving it too cold can mute flavors. Allow the sandwich to sit out for a few minutes before enjoying to let the flavors shine.

Essential Techniques

Proper Mixing
Mixing the tuna salad requires a gentle touch. The goal is to combine the ingredients without breaking the tuna down too much. To master this technique, utilize a light folding motion instead of stirring vigorously. Watch for visual cues, such as a cohesive blend where you can still see little chunks of tuna.

Spreading
Spreading the tuna salad onto bread is an art itself. Aim to spread it evenly for a delightful bite every time. Use the back of a spoon or a spreading knife to create an even layer. Be mindful not to overfill, as it can lead to a messy sandwich.

Pro Tips for Perfect Tuna Salad Sandwich

1. Always chill your tuna salad for an improved flavor profile. Letting it rest allows the ingredients to meld beautifully.
2. Experiment with flavored mayonnaises for added depth. Try garlic or chipotle mayo for a twist.
3. Add fresh herbs like dill or chives for an aromatic touch and lively flavor.
4. Use a layered approach in your sandwich for a balanced flavor experience. Spread a layer of mayonnaise on the bread first.
5. Consider toasting the bread for a delightful crunch; this texture adds another layer to the overall experience.
6. Choose whole grain or artisanal bread to enhance nutrition without compromising on flavor.
7. Serve with a side pickle for a tangy contrast that elevates your sandwich experience.
8. For those who love heat, sprinkle in diced jalapeños or a sharp mustard for an exciting kick.

Variations and Adaptations

For those looking for regional variations, consider incorporating local ingredients such as olives or capers, reminiscent of Mediterranean flavors. Seasonal adaptations allow you to switch up ingredients based on what’s fresh. In the winter months, add hearty vegetables like roasted peppers for a different taste experience.

Dietary modifications can cater to various eating styles. For a low-carb version, opt for lettuce wraps instead of bread. Vegans can use chickpeas in place of tuna, binding with similar ingredients for a hearty alternative.

Flavor variations can also be explored by adding fruits such as diced apples or cranberries for a sweet contrast. Texture modifications, like adding crushed nuts or seeds, introduce an enjoyable crunch that enhances the salad.

Presentation alternatives like serving the salad in endive leaves instead of bread provide a beautiful and healthy twist to the classic sandwich.

Serving and Presentation Guide

For an attractive presentation, consider using artisanal bread that showcases the vibrant colors of the tuna salad. Consider diagonal cuts for a more appealing look and place your sandwiches on a rustic wooden board. Garnish with fresh herbs or microgreens for an elegant touch.

Offering traditional accompaniments like pickles or sweet potato chips can provide contrast in flavor and texture. Alternatively, for modern serving suggestions, create a sandwich platter with various salads to accommodate diverse tastes.

Temperature considerations are essential; serve the sandwich at room temperature for optimal flavor. Finally, be mindful of portion control—cutting sandwiches into smaller pieces can make them more shareable at parties.

Wine and Beverage Pairing

When it comes to wine pairings, a crisp white wine, such as a Sauvignon Blanc, complements the tuna salad beautifully, enhancing its freshness. For non-alcoholic alternatives, consider sparkling water with a wedge of lemon for a refreshing touch.

If coffee is your preference, a cold brew coffee pairs nicely with the sandwich, providing a wonderful balance between the rich flavors of the salad. Always serve beverages chilled to ensure the best taste experience during your meal.

Storage and Shelf Life

To store your tuna salad, keep it in an airtight container in the refrigerator. Properly stored, it can last for up to three days. Ensure that it’s kept at a consistent temperature below 40°F to maintain freshness.

When considering signs of spoilage, look for changes in color or odor. If it smells off or has a change in texture, it’s best not to consume it. For reheating instructions, most individuals prefer to enjoy it cold, but if you’re using it in a different dish, ensure it’s heated to a safe temperature.

If you want to freeze the salad, it’s best to do so without mayonnaise, adding it after thawing to maintain texture.

Make Ahead Strategies

To make ahead, prepare your tuna salad earlier in the day or even the night before. Store it in a tightly-sealed container to ensure it stays fresh. This salad is perfect for preparing in batches for lunches or picnics.

When considering quality impact, be aware that the flavors will meld beautifully if allowed to sit, enhancing its overall taste. Assembly tips include leaving the bread separate until serving to prevent it from getting soggy.

For reheating guidelines, ensure that if you do add heat to any component, everything is uniformly heated to retain flavor and texture. Adding fresh elements like lettuce or tomatoes just before serving will keep them crisp.

Scaling Instructions

To halve the recipe, simply use one can of tuna and adjust all other ingredient measurements accordingly. If doubling or tripling, ensure you have ample mixing space and consider using a larger bowl for efficiency.

Timing modifications should be made based on the scale of preparation, allowing slightly more time for mixing as the batch size increases. For storage, larger portions may require additional containers to ensure freshness.

Nutritional Deep Dive

Understanding the macro breakdown is crucial; each sandwich typically features lean protein from tuna and healthy fats from mayonnaise, contributing to a balanced meal. Pay attention to the micronutrient analysis as well, focusing on vitamins and minerals found in vegetables added to the salad.

The health benefits of this recipe are significant, providing essential fatty acids that promote heart health. A serving also offers a great source of protein, aiding in muscle repair and overall body function. Be mindful of portion sizes, as they can greatly affect your caloric intake.

For those monitoring their weight, opting for lower-calorie ingredients such as Greek yogurt instead of mayonnaise can give a similar flavor while cutting calories.

Dietary Adaptations

For a gluten-free adaptation, swap regular bread for gluten-free alternatives or use large lettuce leaves as wraps. If pursuing a dairy-free or vegan route, substitute tuna with chickpeas or a plant-based tuna alternative.

Low-carb and keto diets can enjoy this sandwich with lettuce wraps or sliced avocados in place of the bread. Paleo enthusiasts can use homemade mayo and add extra veggies for crunch.

Finally, low-FODMAP options should consider using specific low-FODMAP vegetables like carrots and cucumbers in the mix, ensuring everyone can enjoy this delicious classic.

Troubleshooting Guide

If your tuna salad is too dry, consider adding more mayonnaise or a splash of lemon juice to enhance moisture. If it lacks flavor, blending in additional spices or fresh herbs can bring it to life.

For temperature problems, if your salad gets too warm before serving, refrigerate for a short time to cool down prior to enjoying. Equipment challenges can arise when blending; ensure your kitchen tools are up to the task, using a sturdy bowl and fork for optimal results.

Should you need to substitute ingredients, knowing which components can easily swap without affecting the overall flavor is key. When timing is a concern, prepare components separately ahead of time to streamline assembly.

Recipe Success Stories

Community feedback typically highlights the versatility of this tuna salad sandwich. Many home cooks have shared their variations, from adding fresh herbs to changing up the type of bread used, showcasing creativity throughout flavors.

Variation successes often include experimenting with flavors—like curry powder or spicy sriracha—bringing a whole new dimension to this classic dish. Reader suggestions frequently entail fresh ingredient ideas, highlighting the adaptability based on individual preferences.

Photography tips from the community emphasize capturing that vibrant green from fresh ingredients and the beautiful presentation on a rustic wooden board. Their enthusiasm continues to inspire new chefs to take on this beloved recipe.

Frequently Asked Questions

Can I use fresh tuna instead of canned?
Absolutely! Fresh tuna can be grilled or seared before being chopped and mixed into the salad, providing a delicious alternative to canned.

How long does tuna salad last in the refrigerator?
When stored properly in an airtight container, it can last up to 3 days in the refrigerator.

Can I freeze tuna salad?
It is not recommended to freeze tuna salad as mayonnaise can separate when thawed. Instead, prepare the base and add mayonnaise after thawing.

What can I substitute for mayonnaise?
You can use Greek yogurt, avocado, or even sour cream as a healthier alternative.

Can I add fruits to my tuna salad?
Yes! Diced apples, grapes, or cranberries can add a delightful sweetness that balances the flavors perfectly.

What type of bread works best?
You can use any bread you prefer, such as whole grain, sourdough, or even wraps.

Is it possible to make this dish vegan?
Yes, substitute the tuna with mashed chickpeas and follow the same recipe.

Can I make tuna salad the night before?
Definitely! Making it ahead of time allows the flavors to meld, enhancing the overall taste.

Is this dish suitable for children?
Yes, this is a kid-friendly recipe. You can reduce spices and serve with their favorite sides.

How can I add more protein to this recipe?
Consider mixing in chopped hard-boiled eggs or using a high-protein bread to boost the protein content.

Additional Resources

If you’re searching for related recipes, explore options like egg salad or chicken salad sandwiches for variety. Technique guides on making homemade mayonnaise can enhance this recipe, allowing for personalization in taste.

Ingredient information about canned tuna varieties can help you choose sustainably sourced options for your recipe. Equipment recommendations may include essential kitchen tools that simplify preparation.

Lastly, consider seasonal variations by incorporating fresh summer produce like bell peppers or cucumbers, making this dish adaptable and inviting throughout the year.

Join the Conversation

Social media sharing brings like-minded food enthusiasts together. When you try this recipe, consider posting a picture to show off your creation. Your photography tips can inspire others, encouraging creativity in the kitchen.

Engage with the community through recipe reviews; honest feedback helps others discover new favorites. Lastly, contribute your recipe variations, turning this classic into something uniquely yours!

The Recipe

Tuna Salad Sandwich

Serves: 2

Prep Time: 10 mins

Cook Time: 0 mins

Total Time: 10 mins

Kitchen Equipment Needed

  • Mixing bowl
  • Spoon or spatula
  • Knife
  • Cutting board
  • Airtight container for storage

Ingredients

  • 1 can (5 oz) tuna, drained
  • 2 tablespoons mayonnaise
  • 1 tablespoon diced onion
  • 1 tablespoon diced celery
  • 1 teaspoon lemon juice
  • Salt and pepper to taste
  • 2 slices of bread (whole grain, sourdough, etc.)
  • Fresh greens (optional)

Directions

  1. In a mixing bowl, combine the drained tuna, mayonnaise, diced onion, diced celery, and lemon juice.
  2. Stir gently until all ingredients are evenly mixed. Season with salt and pepper to taste.
  3. Lay a piece of bread on a cutting board and spread the tuna mixture evenly over it.
  4. If desired, add fresh greens on top of the tuna salad.
  5. Top with the second slice of bread. Cut in half and serve immediately.

Recipe Notes

  • Feel free to customize by adding ingredients like chopped pickles or hard-boiled eggs.
  • This sandwich can be made ahead of time and stored in the refrigerator for up to three days.
  • For added richness, try using flavored mayonnaise or adding a sprinkle of fresh dill.

Deep-Dish Pizza Pie: The Ultimate Comfort Food Recipe Guide

Deep-Dish Pizza Pie Recipe: A Slice of Chicago Love

⚖️
Difficulty
Medium

⏲️
Prep Time
30 mins

🕒
Cook Time
45 mins

⏱️
Total Time
1 hr 15 mins

🍽️
Servings
4

Deep-dish pizza is more than just a meal; it’s an experience that transports you straight to the heart of Chicago. With its thick, buttery crust loaded with rich tomato sauce, mozzarella cheese, and your choice of toppings, this pizza pie embodies comfort food at its best. The moment you cut into its golden edge, the aroma of baking dough and melting cheese wafts through the air, promising a symphony of flavors that will delight your taste buds.

In every slice, you’ll feel the crunch of the crust giving way to layers of savory fillings – a perfect balance of textures, from the soft melted cheese to the robust tang of the sauce. And when your friends and family gather around to share this delicious creation, it’s not just a meal; it’s an inviting atmosphere filled with laughter and stories, creating cherished memories.

Quick Recipe Highlights

  • Flavor Profile: Bold, savory tomato and cheese with herbal notes.
  • Texture: A hearty crust with a delightful crunch and gooey cheese.
  • Aroma: Freshly baked dough mixed with fragrant herbs and rich tomatoes.
  • Visual Appeal: Golden crust layered with vibrant tomato sauce and melted cheese.
  • Skill Level Needed: Moderate; experience with dough preparation helps.
  • Special Equipment: Deep-dish pizza pan; optional pizza stone.

Recipe Overview

  • Difficulty Level: While the skills required are moderate, the rewards far surpass the effort involved, making this recipe a great fit for both novice and experienced cooks.
  • Category: Perfect for dinner, entertaining guests, or a cozy family meal, deep-dish pizza is highly versatile.
  • Cuisine: Originating from Chicago, this pizza style has become an iconic representation of American culinary innovation.
  • Cost: Ingredients are relatively budget-friendly, making it accessible to most home cooks.
  • Season: Ideal for colder months, but can be enjoyed year-round.
  • Occasion: Great for gatherings, game nights, or special occasions when you want to impress guests.

Why You’ll Love This Recipe

This deep-dish pizza pie is a delightful treat for your taste buds! Its taste is nothing short of magnificent, blending the deep flavors of seasoned sausage, tangy tomato sauce, and three types of gooey cheese. Each bite offers a chewiness from the dough that contrasts beautifully with the richness of the toppings, creating layers of flavor that are simply irresistible.

Not only is this pizza delicious, but it’s also convenient for meal prep. You can easily make the dough and freeze it ahead of time, allowing you to create a fantastic homemade pizza with minimal effort during busy weeknights. This makes it an excellent option for families or anyone wishing to have a comforting dinner ready in little time.

Nutritionally, while pizza typically gets a bad rap, incorporating fresh vegetables into your toppings can heighten its health quotient. With nutritious toppings like spinach, bell peppers, or mushrooms, you can create a pizza that satisfies both savory cravings and health-conscious decisions.

When it comes to social gatherings, a deep-dish pizza pie is a hit. Its generous size means everyone can share and enjoy, facilitating a convivial dinner experience. Plus, it’s highly customizable; you can tailor the toppings to suit every guest’s preferences without compromising the overall pizza experience.

The cost-effectiveness of home cooking cannot be overlooked. Investing in fresh ingredients for your pizza is often less expensive than ordering takeout for a large group. With the added bonus of family bonding over pizza making, this recipe is a double win for your wallet and your loved ones!

Historical Background and Cultural Significance

The origin of deep-dish pizza dates back to the 1940s, when it was created in Chicago by Ike Sewell and Ric Riccardo at the famous Pizzeria Uno. Unlike traditional Italian pizza, which features a thin crust, this new style employs a thick crust baked in a deep pan, allowing for an abundance of toppings.

This pizza quickly grew in popularity, becoming an iconic dish that defined Chicago’s culinary profile. The cultural significance of deep-dish pizza extends beyond its deliciousness; it represents a melting pot of American cooking techniques and flavors, merging the Italian love for pizza with elements of American comfort food.

Over the years, this pie has evolved. Variations such as stuffed pizza add an additional layer of filling and crust, while vegetarian and vegan adaptations demonstrate the diversity of today’s taste preferences. Each region has its take on deep-dish, giving it a unique twist while preserving its heartwarming essence.

As deep-dish pizza spreads across the nation, it holds a special place in the hearts of Chicagoans and pizza lovers everywhere, symbolizing indulgence, community, and the simple joy of sharing a slice with loved ones.

Ingredient Deep Dive

– **Flour:** Integral to the crust, flour serves as the foundation of pizza. Whole grain or specialty flours can add distinct flavors and textures. When selecting flour, look for all-purpose or bread flour for a chewy bite. Store it in a cool, dry place, and it can last up to a year. If you’re avoiding gluten, consider alternatives like almond flour or gluten-free blends.

– **Mozzarella Cheese:** This cheese is famous for its melt and stretchability. Choose whole milk or low-moisture mozzarella for a great taste. It’s best selected close to when you’ll be cooking, as it has a shorter shelf life. Substitutions can be made with provolone or vegan cheese if desired.

– **Tomato Sauce:** The star of any pizza! Best with crushed or pureed tomatoes, this sauce brings tanginess and moisture to the deep-dish pie. When buying, go for organic brands with no added sugars. Always store in the refrigerator once opened to maintain freshness. You can replace it with homemade marinara for a customized flavor.

– **Bell Peppers:** A great way to add color and texture, bell peppers offer a slight sweetness and crunch. Always choose firm and brightly colored peppers. for storage, keep them in the crisper drawer of your fridge. For convenience, canned or roasted peppers can be used as substitutes.

Common Mistakes to Avoid

  • Using cold ingredients: Always use room temperature ingredients for the dough to rise properly.
  • Not kneading enough: Overlooking the need for proper kneading can lead to a dense crust.
  • Wrong oven temperature: Make sure your oven is fully preheated; otherwise, the pizza may cook unevenly.
  • Overloading toppings: With deep-dish pizza, less is more; too many toppings can create a soggy pizza.
  • Ignoring resting time: Letting the dough rest allows the gluten to relax, making it easier to stretch.
  • Skipping the pre-bake: For a crispier crust, pre-bake the crust before adding the sauce and toppings.
  • Using too much flour: Be mindful of how much flour you add when rolling; too much can lead to a tough crust.
  • Not letting it cool: Allow the pizza to cool slightly after baking to avoid burning your mouth.
  • Forgetting to oil the pan: Lubricating your pan ensures easy removal and prevents sticking.
  • Cutting too soon: Always wait a few minutes before slicing to help the pizza hold its shape.

Essential Techniques

– **Kneading the Dough:** Proper kneading is vital for developing gluten, which gives the crust its structure. Knead until the dough is elastic and smooth, which usually takes about 10 minutes. Be careful not to over-knead; visual cues like a smooth surface will help you determine when it’s done.

– **Prepping Your Pan:** Oiling the pizza pan is essential for a successful deep-dish pizza. Use a generous amount of olive oil to ensure a beautiful crust. Be sure to spread the oil evenly and up the sides to encourage browning. Check that the oil is warm before adding your dough; this will give your crust a lovely crunch.

– **Layering Toppings:** Layering your toppings correctly is paramount. Start with cheese on the bottom to prevent the crust from becoming soggy, followed by meats, vegetables, and finishing with sauce on top. This method creates a protective barrier that keeps the base crunchy.

Pro Tips for Perfect Deep-Dish Pizza

– Use a high-quality flour to ensure the best structure and taste for your crust. Bread flour works wonders for an airy texture.
– For maximum flavor, consider adding herbs and spices to the dough as it mixes.
– Always allow your dough to rise in a warm space, covered, to enhance its flavor profile and achieve a light texture.
– Don’t rush the baking process; let it cook fully to bring out the nuttiness of the crust.
– After baking, let the pizza cool for at least 10 minutes—this makes slicing easier and reduces mess.
– Experiment with toppings! Try unique combinations such as artichokes or pesto for a gourmet twist.
– Use fresh herbs as a garnish before serving to increase aroma and visual appeal.
– For a healthier take, consider implementing whole grains or hidden veggies into the crust.

Variations and Adaptations

– **Regional Variations:** Different cities have their take on deep-dish pizza; for instance, Detroit-style pizza features a rectangular pan with a thicker crust and is often topped with cheese directly on the dough.
– **Seasonal Adaptations:** Use seasonal vegetables such as zucchini in summer or roasted pumpkin in fall to keep your pizza fresh and flavorful year-round.
– **Dietary Modifications:** Making a gluten-free version is easy with the right flour substitutes, while vegan cheese can replace dairy ingredients for a plant-based option.
– **Flavor Variations:** Get adventurous by incorporating spicy sausage, caramelized onions, or even buffalo chicken for a unique taste.
– **Texture Modifications:** Experiment with different cheese textures; try a mix of Gruyere and mozzarella for a gourmet touch.
– **Presentation Alternatives:** Present individual deep-dish pizzas in mini cast iron skillets for personal servings that impress guests.

Serving and Presentation Guide

Serve your deep-dish pizza hot from the oven in its pan for an authentic experience. If you want to create an elegant presentation, consider slicing it into wedges and plating it with a drizzle of olive oil and a sprinkle of fresh basil. For garnishing, a light sprinkle of parmesan cheese or chili flakes can elevate the dish visually and flavor-wise.

Accompany your pizza with traditional sides like a fresh Caesar salad or garlic bread to round out the meal. Make sure to leave a sharp pizza cutter nearby to slice easily and showcase its gooey interior. Remember to serve it at a just-warm temperature to maximize taste; hot pizza can often mask nuanced flavors.

Wine and Beverage Pairing

The hearty flavors of deep-dish pizza pair well with medium to full-bodied red wines. A Chianti’s acidity complements the tomato sauce while enhancing the flavors of the cheese. Look for wines such as Merlot or Barbera for a smooth balance.

For non-alcoholic alternatives, iced tea or sparkling water can cleanse the palate, offering a refreshing contrast to the rich flavors of the pie. Light beers, such as a pilsner or wheat beer, can also serve as excellent companions for your pizza. Coffee or espresso may work well for a lovely finish to the meal, enhancing the overall dining experience by providing a satisfying end.

Storage and Shelf Life

To maximize your deep-dish pizza’s freshness, store leftovers in an airtight container in the refrigerator for up to 3 days. If you want to keep it longer, consider freezing it. Wrap slices tightly in plastic wrap and aluminum foil before placing them in a freezer-safe container.

To reheat, simply bake in the oven at 350°F until warmed through, approximately 20-25 minutes. Ensure that there’s moisture (a damp paper towel) in the container to prevent the crust from drying out. If you notice any off smell or discoloration, it’s best to discard them.

Make Ahead Strategies

You can prepare your deep-dish pizza in stages to save time. You can make the dough a day in advance and store it in the refrigerator overnight. This resting period enhances the flavor and texture of the crust.

As for toppings, they can be prepped ahead and stored individually. Chopped veggies, meats, and cheese can all be assembled within a day of baking. On the day of, simply roll out the dough, layer your toppings, and bake.

Should you decide to freeze the assembled pizza, ensure it’s wrapped properly to avoid freezer burn, and bake straight from the freezer when you’re ready for a delicious pizza night.

Scaling Instructions

If you want to make a smaller batch of deep-dish pizza, halve the recipe and use a smaller pan, such as a 9-inch round cake pan. Simply divide the ingredients accordingly while ensuring that cooking times remain consistent.

If you’re doubling or tripling the recipe, consider using larger pans, but keep in mind that cooking times may vary, so check doneness closely. Make sure your oven has enough space for the pans, as efficiency and air circulation are essential for even cooking.

Always plan for additional toppings or ingredients when scaling up, as traffic in kitchens can lead to an under-representation of flavors if not accounted for.

Nutritional Deep Dive

When evaluating the nutritional value of deep-dish pizza, keep in mind that it contains a balance of macronutrients. A typical slice features carbohydrates from the crust, protein from cheese and meat, and fats, primarily from cheese and any oil used.

In terms of micronutrients, important elements like calcium from dairy and antioxidants from tomatoes can benefit your health. Consider topping the pizza with fresh veggies to enhance vitamin intake while reducing calorie density, keeping your meal satisfying without overloading on calories.

Weight management can also be mindful; enjoy pizza in moderation and consider portion control practices alongside a salad or vegetable side dish for a balanced meal.

Dietary Adaptations

If you’re looking for gluten-free adjustments, consider using a gluten-free flour blend for the crust. Always double-check ingredients, especially for processed items like sauces.

For a dairy-free version, opt for vegan cheese alternatives and include plenty of flavorful toppings to elevate taste. Vegan sausage or marinated tofu can serve as excellent meat replacements.

If you follow a low-carb or keto diet, experiment with cauliflower crust options; this brings down the carb content while still providing a satisfying base for all your favorite toppings.

Paleo diets can still enjoy this recipe by using almond flour and avoiding dairy toppings. Always enrich your flavors with spices and fresh herbs to mimic traditional tastes.

Troubleshooting Guide

If your deep-dish pizza crust is tough, it may be due to over-kneading or too much flour. Adjusting the amount of flour can prevent this issue, while ensuring you only knead until the dough is smooth.

For a soggy crust, avoid adding too many wet toppings like tomatoes and consider pre-baking the crust. If the center of your pizza remains raw, it may require a longer cook time or a lower oven temperature to heat through without over-browning.

If ingredients are neglected, check for freshness or suitable substitutes. Always taste as you go, ensuring proper seasoning happens throughout the cooking process, which can save a pizza from blandness.

Recipe Success Stories

Many readers have shared their love for this deep-dish pizza recipe, applauding its flavor-packed layers and satisfying crust! Photos of their creations reveal beautiful presentations and variations, proving this recipe’s adaptability.

Numerous cooks have experimented with serrano peppers and spicy Italian sausage, leading to rave reviews from family and friends. The community has united around this recipe, encouraging creativity and experimentation with ingredients.

Those who have made health-conscious variations have shared their delightful results by adding spinach and mushrooms for a recommended veggie boost, enhancing both taste and nourishment while remaining true to the beloved deep-dish style.

Frequently Asked Questions

What’s the best pan to use?

A heavy-duty metal or cast iron pan is ideal for achieving that crispy crust while providing even heat. Choose a pan with deep sides for the best results.

Can I freeze deep-dish pizza?

Yes! Prepare it as normal, then wrap securely in plastic and aluminum foil before freezing. It can last up to three months and should be baked directly from frozen.

How do I store leftovers?

Leftovers should be stored in an airtight container in the refrigerator for up to 3 days. You can also reheat in the oven or microwave for a quick meal.

What are some good topping combinations?

Popular combinations include classic pepperoni, sausage and green pepper, or veggie delights with mushrooms, onions, and olives. Feel free to get creative!

How do I remove the pizza from the pan?

Allow the pizza to cool for a few minutes, then use a spatula to gently lift it out. Having oiled the pan well will help ensure it releases easily.

Can I use pre-made dough?

Absolutely! Store-bought dough can save time, and many brands offer excellent quality. Just roll it out to fit your pan and proceed with the recipe.

Is deep-dish pizza vegetarian friendly?

Yes, you can easily make it vegetarian by using vegetable toppings like bell peppers, zucchini, and mushrooms, along with a rich tomato sauce and ample cheese.

Can I make my tomato sauce?

Of course! A homemade sauce can enhance flavor and freshness. Simply cook down canned tomatoes with garlic, herbs, and olive oil until thick.

How long does it take to bake?

Typically, deep-dish pizza bakes at 425°F for about 40-50 minutes or until the crust is golden and the cheese is bubbly.

What side dishes go well with deep-dish pizza?

A crisp Caesar salad, garlic bread or even a light soup adds complementary elements to the meal while balancing indulgent pizza.

Additional Resources

Explore related recipes for homemade stuffed crust pizza or classic margherita pizza for a delicious variety. Diving into guides on dough preparation and kneading will refine your techniques and yield perfection in every pie.

Don’t forget to check out ingredient information to deepen your understanding of different cheeses and flours, helping you create pizzas that stand out. Cooking supplies and recommendations can further enhance your kitchen setup for even more successful baking experiences.

Join the Conversation

We love hearing from our readers! Join us on social media and share your pictures and modifications to this deep-dish pizza recipe. Post your creations and let us know what variations or toppings delighted your family the most.

Your insights not only inspire us but also help fellow cooks improve their culinary adventures. Whether it’s helping with tips or discovering new ideas together, let’s build a community that celebrates food and creativity!

The Recipe

Deep-Dish Pizza Pie

Serves: 4

Prep Time: 30 mins

Cook Time: 45 mins

Total Time: 1 hr 15 mins

Kitchen Equipment Needed

  • Deep-dish pizza pan
  • Mixing bowl
  • Rolling pin
  • Spatula
  • Measuring cups and spoons

Ingredients

  • 2 ¼ cups all-purpose flour
  • 1 teaspoon salt
  • 1 tablespoon sugar
  • 1 packet (2 ¼ teaspoons) active dry yeast
  • 1 cup warm water
  • 3 tablespoons olive oil
  • 2 cups shredded mozzarella cheese
  • 1 cup Italian sausage, cooked and crumbled
  • 1 cup bell peppers, sliced
  • 2 cups crushed tomatoes
  • Seasoning to taste (oregano, basil, garlic powder)

Directions

  1. In a bowl, mix flour, salt, sugar, and yeast. Gradually add warm water and 2 tablespoons olive oil. Knead until dough is smooth.
  2. Let the dough rise in a warm place for 1 hour until doubled in size.
  3. Preheat oven to 425°F (220°C). Roll out the dough and transfer to a greased deep-dish pizza pan, pressing along the sides.
  4. Layer mozzarella cheese on the bottom of the crust, followed by sausage and bell peppers.
  5. Top with crushed tomatoes, and seasonings, ensuring toppings are evenly distributed.
  6. Bake for 40-50 mins or until the crust is golden brown and cheese is bubbly.
  7. Let it cool for a few minutes before slicing and serving.

Recipe Notes

  • For added flavor, consider marinating the bell peppers in olive oil and herbs before layering.
  • You can substitute turkey or plant-based sausage for a healthier option.
  • Experiment with different cheeses, such as provolone or fontina, for a unique twist.

Delicious Chili Cheese Coneys You’ll Crave to Eat Today

Would You Eat This Chili Cheese Coneys? Discover the Perfect Recipe!

⚖️
Difficulty
Easy

⏲️
Prep Time
15 mins

🕒
Cook Time
20 mins

⏱️
Total Time
35 mins

🍽️
Servings
4 serv

Chili Cheese Coneys are a delightful treat for anyone who loves bold flavors and hearty meals. Picture this: plump hot dogs nestled in warm buns, generously topped with a rich, thick chili that has been simmered to perfection. The finishing touch? A gooey layer of cheese that melts into a bubbling embrace over the edges. Whether you’re serving these at a party, a summer barbecue, or simply indulging in a weekend treat, this recipe will surely satisfy your hunger and elevate your taste buds.

In every bite of this chili cheese coney, you’ll discover the enticing contrast between the crispy hot dog and the oozing chili, all encased within a soft bun. The combination of spices in the chili offers not just heat, but depth, creating a comforting yet exciting taste experience. It’s perfect for gathering around with friends or enjoying on your own as a cozy meal.

Quick Recipe Highlights

  • Flavor Profile: Expect a bold, robust flavor from the chili complemented by the savory heat of the hot dogs.
  • Texture: The combination of crispy and soft textures makes for a delightful mouthfeel with each bite.
  • Aroma: The chili brings together a warm, comforting aroma that fills your kitchen, blending spices, meat, and melting cheese.
  • Visual Appeal: The vibrant colors of the chili, cheese, and garnishes create a feast for the eyes.
  • Skill Level Needed: This recipe is easy enough for beginners but also satisfying for experienced cooks looking for a quick meal.
  • Special Equipment: No special equipment is required; a pot and a stovetop will do the job nicely.

Recipe Overview

  • Difficulty Level: This chili cheese coney recipe is designed for cooks of all skill levels, making it accessible and straightforward.
  • Category: Ideal for casual meals or snacks, it’s perfect for a quick lunch or late-night indulgence.
  • Cuisine: With American roots, chili cheese coneys have become a beloved street food across the country.
  • Cost: Relatively inexpensive, this recipe uses common ingredients that won’t break the bank.
  • Season: Great year-round but particularly satisfying during the fall and winter months.
  • Occasion: Suitable for game days, family gatherings, or even a quiet night in with a movie.

Why You’ll Love This Recipe

The chili cheese coney is beloved for its remarkable taste and texture. The combination of flavors creates an unforgettable experience that delights the palate. This dish balances the smokiness of the hot dogs with the hearty chili, leading to an indulgent treat that feels both comforting and exciting.

One of the standout aspects of this recipe is its convenience. It can be prepared in under 40 minutes, making it a perfect choice for busy weeknights or spontaneous gatherings. Simply gather your ingredients, prepare the chili, and enjoy the satisfaction of a delicious homemade meal in no time!

Nutritionally, chili cheese coneys can also be customized to fit your dietary preferences. By selecting leaner meats or plant-based alternatives, you can easily make a healthier version of this classic comfort food without sacrificing taste.

From a social perspective, serving chili cheese coneys can elevate any occasion. The vibrant colors and appealing aroma will draw your guests in, sparking conversations and shared enjoyment as they indulge in this fantastic dish.

Finally, this recipe is budget-friendly. The main ingredients are affordable, which allows you to feed a crowd without overspending. This easy-to-make dish provides not only deliciousness but also great value.

Historical Background and Cultural Significance

Chili cheese cone corridor origins can be traced back to the classic American hot dog, which gained immense popularity in the early 20th century. The addition of chili and cheese originated in various regions of the United States, demonstrating the melding of culinary traditions that shaped American street food.

Chili, often a beloved dish in its own right, holds cultural significance across various states, especially in Texas, where it is regarded as part of the state’s heritage. Over the years, the traditional chili recipe has evolved, incorporating myriad ingredients reflecting local flavors and preferences.

The evolution of this recipe has seen many adaptations. From spicy variations to vegetarian options, chili cheese cone recipes have become more inclusive, allowing a wider audience to enjoy this delightful dish.

Regionally, you’ll find various takes on chili cheese coneys. Certain areas may favor spicier chilis, while others stick to a milder base, illustrating the diverse palette of American cuisine.

Ingredient Deep Dive

Hot Dogs
Hot dogs have a rich history associated with American culture. Typically made from pork, beef, or poultry, they are a convenient and flavorful protein option. Nutritionally, they can provide a protein boost but should be consumed in moderation due to their sodium levels.

When selecting hot dogs, look for high-quality options with minimal fillers. They can be stored in the fridge and are suitable for freezing if necessary. If you prefer alternatives, turkey or plant-based hot dogs work well in this recipe.

Chili
Chili has roots in Tex-Mex cuisine and has evolved to feature various ingredients, including beans, meat, and spices. Rich in protein and fiber, chili is both nutrient-dense and filling, making it a classic comfort dish.

To select quality chili ingredients, opt for fresh spices and lean ground meat if using; beans can be canned for convenience. Store homemade chili in the fridge for up to a week or freeze it for later use. For a healthier alternative, turkey or meatless chili recipes are great substitutes.

Cheese
Cheese adds creaminess and flavor to chili cheese coneys, enhancing overall satisfaction. As an excellent source of calcium and protein, it can be enjoyed in moderation.

Choosing a melting cheese like cheddar or Monterey jack is key for optimal flavor. Store cheese properly in the refrigerator and consume it before its expiration date. If you’re looking to reduce calories, consider using reduced-fat cheese as a substitution.

Buns
The bun serves as the perfect vessel for all your toppings. Traditional hot dog buns are soft, providing just the right amount of texture contrast. They’re generally affordable and easy to find, making them a staple.

When selecting buns, aim for whole grain or gluten-free versions for dietary preferences. Store buns at room temperature but be cautious of their shelf life. If necessary, they can be frozen for longer storage.

Common Mistakes to Avoid

  • Overcooking the chili, which can lead to a dry and lackluster dish. Simmer just until heated through.
  • Using low-quality hot dogs, which can result in an unappetizing texture and flavor.
  • Neglecting to taste the chili before serving, which may result in missing essential seasoning adjustments.
  • Forgetting to warm the buns before serving, leading to an unsatisfying cold meal experience.
  • Skipping the cheese layer entirely—this step is crucial for that comforting flavor combination!
  • Failing to let your chili rest before serving—it can enhance flavors through simple mingling.
  • Overloading the bun with toppings, which can create a messy eating experience.
  • Not refrigerating leftovers promptly; be sure to do so to maintain food safety.

Essential Techniques

Chili Preparation
The key to mastering chili lies in layering flavors. Sauté onions and garlic first to create a flavor base before adding the other ingredients. Learn to adjust your spice levels to match your taste preference for the best chili experience.

Cheese Melting
Properly melting cheese ensures it will create that gooey texture everybody loves. Add shredded cheese on top of your chili coneys just before serving, or broil for a minute to achieve a beautifully melted finish.

Pro Tips for Perfect Chili Cheese Coneys

1. Experiment with different types of chili powder for varying flavors.
2. Consider homemade chili for a fresher taste compared to canned versions.
3. Allow your chili to cool before serving; this accentuates the flavors.
4. Add toppings such as jalapeños for an added kick and flavor complexity.
5. Choose a variety of cheeses (like pepper jack) for more flavor.
6. Use whole wheat buns for a healthier alternative without sacrificing taste.
7. If making for guests, prepare ingredients ahead of time to streamline the assembly process.
8. Garnish with fresh cilantro or green onions for a vibrant presentation.

Variations and Adaptations

Chili cheese cone variations can be adapted to local preferences, such as adding unique toppings like sauerkraut for a German twist. Seasonal modifications can include roasted veggies in place of chili during summer months.

Dietary adaptations resonate well with guests who prefer health-conscious options. Vegan hot dogs and cheese can be sourced for delicious plant-based alternatives without sacrificing enjoyment.

Flavor variations range from sweet barbecue chili to spicy Chipotle twists offering ultimate flexibility in taste. Texture adjustments include crispy baked chili fries served alongside or within the cone, providing layered crunch.

Serving and Presentation Guide

Proper plating techniques can enhance your overall presentation. Arrange the coneys on a colorful plate, garnishing with fresh herbs or shredded lettuce to introduce vibrant colors.

Consider traditional accompaniments, such as potato chips or salads, which pair beautifully. For modern serving suggestions, try serving with a side of spicy dipping sauce for added enjoyment.

Keep temperature in mind; serve these coneys warm for the best delivery of flavors and personal comfort. Portion control can also be relevant, especially for parties—aim for one to two per serving.

Wine and Beverage Pairing

When pairing beverages with chili cheese coneys, a light red wine such as Pinot Noir enhances the meal without overwhelming flavors. Look for fruity and acidic options which can complement the dish well.

For non-alcoholic alternatives, root beer creates an enjoyable combination, while iced tea serves as a refreshing complement. Consider cold brew coffee for those who desire a caffeine kick alongside their meal.

Serving considerations involve temperature; ensure beverages maintain a cool profile to counteract the warm dish.

Storage and Shelf Life

For optimal storage, keep chili cheese coneys in airtight containers in the fridge. They can last for up to 3-4 days if properly stored. Always check for signs of spoilage before consuming leftovers.

When reheating, use the microwave or stovetop but avoid overheating to preserve texture and flavor. For extended shelf life, consider freezing components separately, storing them properly, and consuming them within 2-3 months.

Make Ahead Strategies

To streamline your process, prepare the chili in advance and refrigerate it for 2-3 days or freeze it for later use. This allows for quicker assembly for those impromptu gatherings.

Consider cooking hot dogs just before serving to maintain their perfect texture, balancing time between each step. Be mindful of quality; a fresh hot dog enhances the meal greatly.

If possible, add fresh elements like diced onions or chopped cilantro right before serving to provide a bright flavor contrast without compromising the overall meal quality.

Scaling Instructions

Halving the chili cheese coney recipe can be done with ease but be mindful of timing. Cook the chili as you usually would, adjusting to your taste preferences.

If doubling or tripling, ensure your stovetop or pot can handle larger batches, making cooking more efficient. Additionally, check cooking times; larger amounts may need slight adjustments.

When scaling, store any additional leftovers in containers and enjoy them later rather than letting them go to waste, ensuring continued flavor enjoyment.

Nutritional Deep Dive

A macro breakdown reveals that chili cheese coneys offer a balanced meal, presenting carbs from buns, proteins from hot dogs, and fats from cheese. Knowing each component’s nutritional content can assist in crafting a more health-conscious meal.

Micronutrient analysis shows ample vitamins and minerals, especially when adding fresh garnishes. Beans in the chili provide fiber, which supports digestion and satiety.

Health benefits of this meal can be enhanced by using leaner meats and reducing cheese, allowing for a lighter indulgence yet retaining its comfort food appeal.

Dietary Adaptations

Gluten-free adjustments can be made by opting for cornstarch-based buns. Dairy-free options are available by using plant-based cheese and hot dogs, making it accessible for lactose intolerances.

Vegan adaptations resonate with many dietary lifestyles, while low-carb modifications can be achieved by utilizing lettuce wraps instead of buns. Paleo enthusiasts can also find enjoyment by selecting primal-friendly ingredients and avoiding processed items.

Keto-friendly adjustments can focus on avoiding beans in chili, while enhancing flavors with spices and incorporating more fiber-rich vegetables instead.

Troubleshooting Guide

Texture issues may arise if chili becomes too thick; extending cooking time can help achieve a satisfying consistency. Conversely, if it’s too watery, simmer without a lid to allow moisture to evaporate.

Flavor balance can be adjusted by adding more salt, sugar, or acid components (like lime juice) to enhance overall taste. For overly spicy chili, counterbalance with additional cheese or options like sour cream.

For timing concerns, have all ingredients prepared and ready for assembly; this can alleviate last-minute rushes or potential dining delays.

Recipe Success Stories

Community feedback highlights how the chili cheese coney recipe warms hearts and creates delightful gatherings. Many readers have shared adaptation stories that show how personal touches can enhance this dish, proving its versatility.

Photography tips have emerged, focusing on capturing the bubbling cheese and rich chili. Enthusiasts suggest showing off vibrant garnishes, creating enticing visual narratives perfect for sharing on social media platforms.

Storytelling through food becomes an enjoyable experience, allowing families and friends to bond over delicious homemade meals with comforting appeal.

Frequently Asked Questions

Can I use turkey or plant-based hot dogs for this recipe?

Yes! Turkey and plant-based hot dogs make excellent substitutions and retain similar flavors without the extra fat.

What type of cheese works best for melting?

Cheddar, Monterey Jack, and Pepper Jack all melt beautifully and add great flavor to your chili cheese coneys.

Can I make chili cheese coneys ahead of time?

Absolutely! You can prepare the chili in advance and reheat it when you’re ready to serve for quicker assembly.

How do I store leftovers?

Store any leftovers in an airtight container in the refrigerator for up to 3-4 days, or freeze for later use.

Is this recipe easily scalable?

Yes! You can easily adjust the recipe for smaller or larger servings while keeping the same delicious flavors.

What toppings can I add for extra flavor?

Fresh jalapeños, chopped onions, sour cream, or cilantro make great flavorful additions to chili cheese coneys.

Can I use store-bought chili instead of homemade?

Yes! Store-bought chili can save time, but feel free to enhance it with extra seasonings or ingredients if desired.

Are chili cheese cone servings customizable?

Yes! Feel free to adjust the assembly of your cone with more or less chili, cheese, or other toppings based on personal preferences.

What can I pair with chili cheese coneys for a complete meal?

Pair your cone with a simple side salad, roasted veggies, or crispy potato chips for balance in flavors and textures.

Can I freeze chili for later use?

Yes! Chili freezes well. Allow it to cool completely, then store it in an airtight container for up to 2-3 months.

Is there a gluten-free option for the bun?

Yes! You can find gluten-free buns at most grocery stores or create a lettuce wrap as an alternative.

Additional Resources

For related recipes, consider exploring classic chili recipes that highlight various flavor profiles or unique ways to elevate simple sandwich staples. Technique guides on grilling hot dogs or making homemade chili can further enrich your cooking skills.

Ingredient information resources can help you learn more about the best options available at your local markets, while equipment recommendations can assist novice cooks in preparing the perfect meal.

Seasonal variations can inspire creative uses of chili cheese coneys for different holidays, encouraging you to innovate while relishing in traditional flavors.

Join the Conversation

Engage with fellow cooking enthusiasts via social media platforms, sharing your success stories, variations, and feedback on the chili cheese coney recipe. Encourage your community to create their own versions and celebrate the love for this classic dish!

Through photography tips, share your beautifully plated chili cheese coneys and inspire others to bring this delicious meal to their tables. Prompt recipe reviews from family and friends, and foster conversation around this comforting, collective culinary experience.

The Recipe

Chili Cheese Coneys

Serves: 4

Prep Time: 15 mins

Cook Time: 20 mins

Total Time: 35 mins

Kitchen Equipment Needed

  • Large skillet
  • Spatula
  • Measuring cups
  • Knife
  • Cutting board

Ingredients

  • 4 hot dogs
  • 4 hot dog buns
  • 2 cups chili (prepared or canned)
  • 1 cup shredded cheese (cheddar or your choice)
  • Optional toppings: diced onions, jalapeños, sour cream

Directions

  1. In a large skillet over medium heat, warm the chili until heated through.
  2. Meanwhile, cook the hot dogs according to package instructions (boil, grill, or fry).
  3. While the hot dogs are cooking, toast the buns lightly on a grill or in the oven.
  4. Once hot dogs are cooked, place them inside the toasted buns.
  5. Spoon the heated chili generously over each hot dog.
  6. Sprinkle cheese on top of the chili, allowing it to melt slightly.
  7. Serve immediately with optional toppings as desired.

Recipe Notes

  • Feel free to customize the chili by adding beans or using store-bought options.
  • For a spicy kick, add crushed red pepper to the chili while heating.
  • This recipe is easily adjustable for larger groups—just scale up accordingly!