Table of Contents
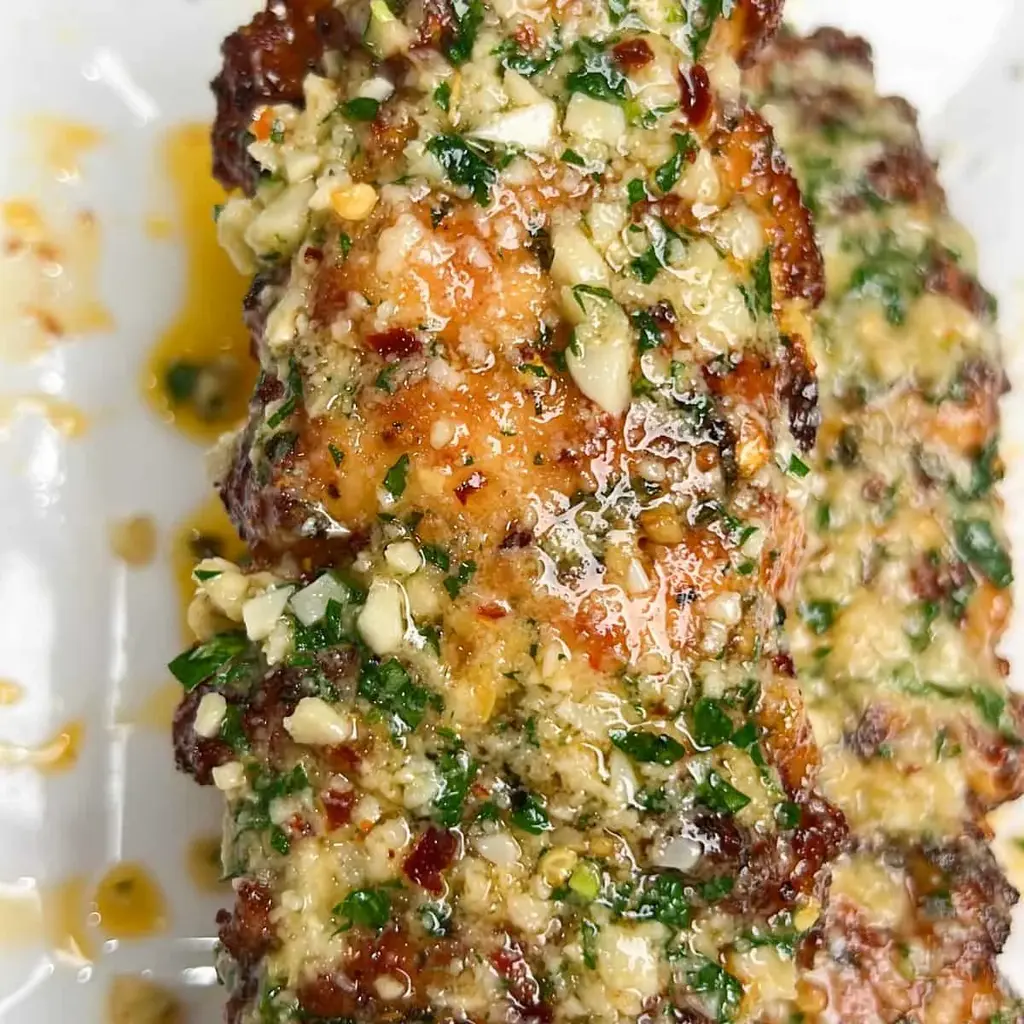
Peppercorn-Crusted Steak with Golden Shallot Soup – A Bistro-Style One-Pot Dinner

Let me tell you something about this peppercorn crusted steak recipe — it’s the kind of dish that brings back my earliest memories of standing beside my mother in our Moroccan kitchen, watching her crush spices with a mortar and pestle. Back then, she’d reach for cumin and coriander, layering warmth into every tagine. But the first time I tasted a proper peppercorn-crusted steak — crusty, pungent, and utterly decadent — was during my culinary training in Paris. A tiny bistro near the 6th arrondissement served a version with a silky shallot sauce that stopped me mid-bite. This peppercorn crusted steak recipe is the marriage of those two worlds: the spice-crushing tradition I learned from my mother and the French technique I honed in Paris. And tonight, I’m bringing it to you from my NYC kitchen.
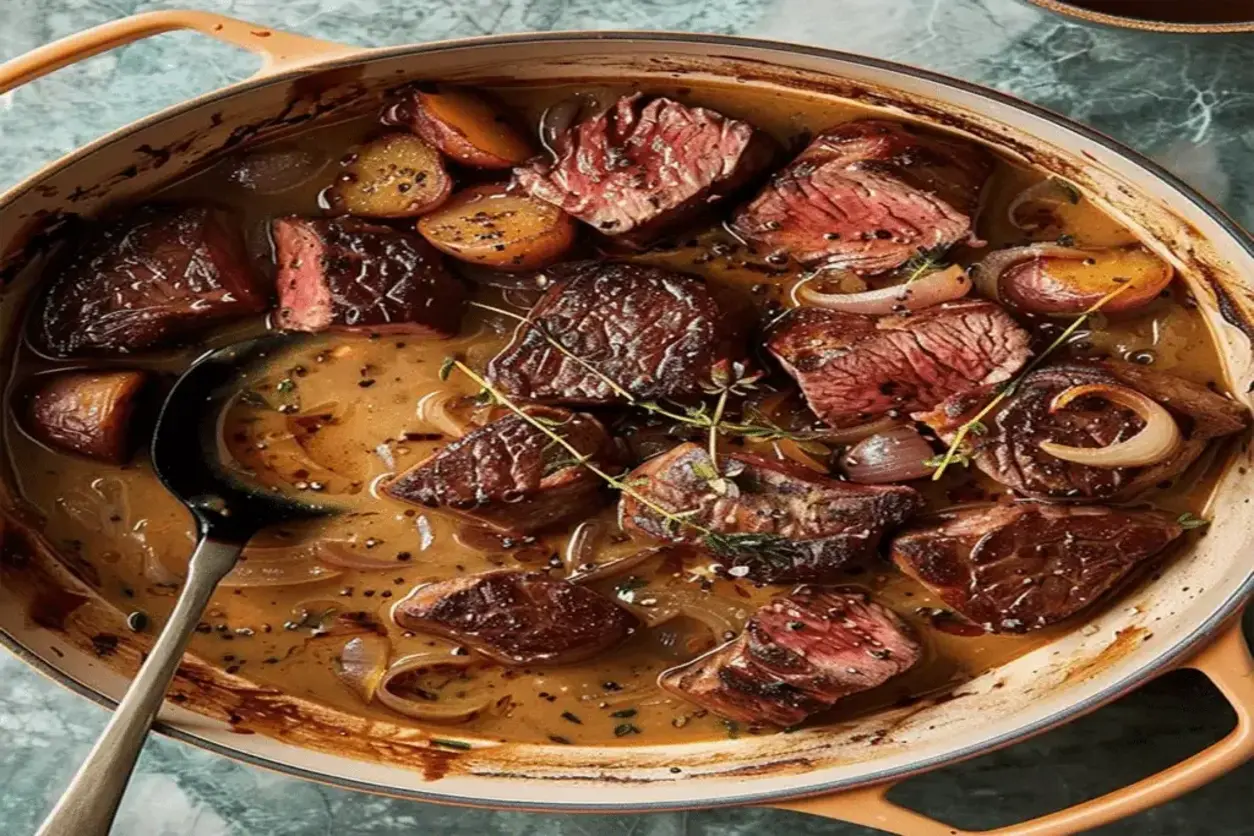
Imagine slicing into a perfectly seared filet mignon — the crust crackles under your knife, releasing the bold, floral punch of cracked black peppercorns. Beneath that, the meat is tender, juicy, and cooked exactly to medium-rare. Now, picture spooning a golden shallot soup alongside it — velvety, rich with beef broth and heavy cream, studded with tender baby potatoes and topped with crispy fried shallots. Every spoonful tastes like caramelized onion soup’s more refined cousin. The shallots melt into the broth, giving it a natural sweetness that tames the peppery bite of the steak. This peppercorn steak with shallot sauce is the kind of pairing that feels both rustic and elegant — and the best part? It all comes together in a single Dutch oven. If you’ve been searching for how to make peppercorn crusted steak that rivals a Parisian bistro, your search ends here.
What sets this gourmet steak recipe apart from others is the technique. I’m not just slapping peppercorns on a steak and calling it a day. I grind the peppercorns coarsely, press them firmly into the meat, and sear the steak in a screaming-hot Dutch oven to develop that deep, aromatic crust. Then — and this is the game-changer — I use the same pan to build the golden shallot soup recipe from scratch, scraping up all those browned bits (the fond) that are packed with flavor. No wasted steps, no extra dishes. The steak rests while the soup simmers, and by the time you’re ready to serve, everything comes together in perfect harmony. For more tips on nailing your steak’s doneness every time, check out my steak cooking temperature guide — it’s the companion resource you didn’t know you needed.
Why This Peppercorn Crusted Steak Recipe Is the Best
The Flavor Secret — This peppercorn crusted steak recipe delivers a depth of flavor that most home cooks don’t achieve because they skip the step of blooming the peppercorns in hot oil. When you crack whole black peppercorns and toast them briefly in the pan before searing, you unlock their natural oils and floral notes. Paired with butter and fresh thyme, the steak develops a crust that’s aromatic, bold, and never harsh. Meanwhile, the golden shallot soup recipe leans on slowly caramelized shallots and a splash of cognac to create a sauce that’s sweet, savory, and utterly luxurious. This is the kind of bistro style steak recipe that tastes like it took hours — but thanks to smart techniques, it’s on your table in 60 minutes.
Perfected Texture — I’ve tested this recipe more times than I can count, and I’ve learned that texture is everything. The peppercorn crust needs to be coarse enough to give you that satisfying crunch but fine enough that it doesn’t fall off the steak. The shallot soup needs to be silky but still have body — hence the waxy baby potatoes that hold their shape and the heavy cream that adds richness without weighing things down. Every element is designed to complement the other, creating a steak with caramelized shallots experience that feels complete and balanced. This isn’t just an easy steak dinner recipe; it’s a masterclass in texture and contrast.
Foolproof & Fast — I know what you’re thinking: a restaurant-quality steak AND a homemade soup in one pot sounds intimidating. But here’s the truth — this peppercorn crusted steak recipe is surprisingly forgiving. The Dutch oven holds heat beautifully, meaning your steak sears evenly every time. The soup comes together with simple techniques you already know: sauté, deglaze, simmer, and stir. If you can follow a homemade shallot soup method, you can make this. And if you’ve never made a pan sauce before, this recipe gently walks you through it. Plus, I’ll share every pro tip I learned in culinary school so you avoid the common pitfalls that trip up even experienced home cooks.
Peppercorn Crusted Steak Recipe Ingredients
I source my peppercorns and shallots from the Union Square Greenmarket in NYC when I can — there’s something about knowing exactly where your ingredients come from that makes the dish taste even better. When I was a pastry student in Paris, I’d visit the Marché d’Aligre and marvel at the piles of shallots, each variety labeled with its provenance. That memory stuck with me, and now I treat shallots as the quiet heroes of this peppercorn crusted steak recipe. They bring sweetness, depth, and that golden color that makes the soup so inviting.
Ingredients List
- 3 tbsp. whole black peppercorns
- 4 (4-oz.) filet mignons or 2 (8-oz.) sirloin steaks, sliced in half
- Kosher salt
- 1/2 c. plus 2 tbsp. extra-virgin olive oil
- 4 tbsp. (1/2 stick) butter
- 2 thyme sprigs, plus 1 tbsp. chopped leaves
- 2 large shallots, 1 finely chopped, 1 sliced into rings
- 3 cloves garlic, finely chopped
- 1/4 c. all-purpose flour
- 1/4 c. cognac or brandy
- 5 c. low-sodium beef broth
- 1 1/2 lb. waxy baby potatoes, quartered
- 1 c. heavy cream
- 2 tbsp. Worcestershire sauce
Ingredient Spotlight
Whole Black Peppercorns — This is the star of the show for this peppercorn crusted steak recipe. Whole peppercorns retain their essential oils far longer than pre-ground pepper, giving you a brighter, more aromatic crust. Look for peppercorns that are uniform in size, shiny, and feel heavy for their size — that’s a sign of freshness. Avoid peppercorns that look dusty or have cracks, as they’ve likely lost their punch. If you only have pre-ground pepper, it won’t give you the same crust texture; I suggest buying whole peppercorns specifically for this how to make peppercorn crusted steak method.
Shallots — Shallots are the backbone of the golden shallot soup recipe. They have a milder, sweeter, and more delicate flavor than onions, which makes them perfect for this soup where you want a subtle sweetness without overpowering the steak. Choose shallots that are firm, with dry papery skins and no sprouting. Large shallots are ideal because they’re easier to slice into rings for frying. If you can’t find shallots, a sweet onion like Vidalia can work in a pinch — just use half the amount and expect a slightly different flavor profile.
Cognac or Brandy — This is the secret weapon in this peppercorn steak with shallot sauce. A splash of cognac deglazes the pan, lifting all those browned bits from the steak into the soup base. It adds warmth, complexity, and a subtle fruity note that complements both the peppercorn crust and the caramelized shallots. Choose a VS or VSOP cognac that’s good enough to sip but not so expensive you’d weep using it in a soup. If you don’t have cognac, brandy, Armagnac, or even a dry sherry can work — just know that sherry will give a slightly nuttier outcome.
| Original Ingredient | Best Substitution | Flavor / Texture Impact |
|---|---|---|
| Whole black peppercorns | Mixed peppercorns (pink, green, black) | Milder, slightly fruity crust; less heat |
| Filet mignon or sirloin | Ribeye or NY strip (8 oz. each) | More marbling = richer flavor, but cook 2 min longer |
| Cognac or brandy | Dry sherry or Armagnac | Sherry adds nutty notes; Armagnac is pricier but complex |
| Waxy baby potatoes | Yukon Gold potatoes, diced 1-inch | Creamier texture, holds shape well |
| Heavy cream | Half-and-half or full-fat coconut milk | Half-and-half = thinner soup; coconut milk = dairy-free but slightly sweet |
| Worcestershire sauce | Soy sauce + a dash of lemon juice | Similar umami, slightly less complex |
How to Make Peppercorn Crusted Steak Recipe — Step-by-Step
I’ll guide you through every detail of this peppercorn crusted steak recipe — from crushing the peppercorns to plating the final dish. Follow these steps, and you’ll have a meal that tastes like it came from a French bistro, all from the comfort of your own kitchen.
Step 1: Prepare the Peppercorn Crust
Place the 3 tablespoons of whole black peppercorns in a mortar and pestle or a sturdy resealable plastic bag. Crush them coarsely — you want some pieces about the size of sesame seeds and some a little smaller. Don’t pulverize them into powder; the texture is what gives this peppercorn crusted steak recipe its signature crunch. Season all sides of your steaks generously with kosher salt, then press the crushed peppercorns firmly into both sides of each steak. Let them sit at room temperature for 15 minutes while you prepare your other ingredients — this helps the crust adhere and the steaks cook more evenly.
💡 Mia’s Pro Tip: For the best crust, let the peppercorn-coated steaks rest uncovered on a plate in the fridge for 30 minutes before cooking. This dries the surface, giving you an even deeper sear.
Step 2: Sear the Steaks
Heat 2 tablespoons of extra-virgin olive oil in a large Dutch oven over medium-high heat until shimmering. Carefully lay the steaks in the pan — you should hear a vigorous sizzle. Cook for 3 minutes on the first side without moving them, until deeply browned. Flip and add the 4 tablespoons of butter and 2 thyme sprigs. Tilt the pan and use a spoon to baste the steaks with the melted butter for about 2 minutes. Continue cooking until an instant-read thermometer inserted into the thickest part reads 130°F for medium-rare (it will rise to 135°F while resting). Transfer the steaks to a cutting board, tent loosely with foil, and let them rest. Reserve the fat in the Dutch oven — that golden, peppery butter is liquid gold for the golden shallot soup recipe.
⚠️ Common Mistake to Avoid: Don’t overcrowd the pan. If you’re cooking 4 steaks, do it in two batches. Overcrowding lowers the pan temperature and causes the steaks to steam instead of sear, which means you lose that crispy peppercorn crust.
Step 3: Build the Golden Shallot Soup Base
Reduce the heat to medium. In the same Dutch oven with the reserved fat, add the finely chopped shallot, chopped garlic, and the 1 tablespoon of chopped thyme leaves. Sauté for 2–3 minutes until the shallot is translucent and fragrant. Sprinkle in the 1/4 cup of all-purpose flour and cook, stirring constantly, for 1 minute — this creates a roux that will thicken the soup beautifully. Slowly pour in the 1/4 cup of cognac or brandy, scraping up any browned bits from the bottom of the pan with a wooden spoon. Cook until the cognac has nearly evaporated, about 30 seconds. Gradually whisk in the 5 cups of low-sodium beef broth, adding it in a steady stream to prevent lumps. Add the quartered baby potatoes and bring the soup to a gentle simmer. Reduce the heat to medium-low and cook for 15–18 minutes, until the potatoes are tender when pierced with a fork. This step transforms the pan juices into a rich homemade shallot soup that’s the perfect companion to the steak.
💡 Mia’s Pro Tip: For a deeper golden color and even more flavor, take an extra 2 minutes to let the shallots caramelize before adding the flour. Let them cook until they turn a light amber color — this adds a natural sweetness that balances the peppercorn crust beautifully.
Step 4: Fry the Shallots
While the soup simmers, heat the remaining 1/2 cup of extra-virgin olive oil in a small skillet over medium heat. Separate the sliced shallot rings and add them to the hot oil in a single layer. Fry for 2–3 minutes, stirring occasionally, until they turn deep golden brown and crispy. Use a slotted spoon to transfer them to a paper towel-lined plate. Season immediately with a pinch of kosher salt. These crispy shallots are the crowning glory for this peppercorn steak with shallot sauce — they add crunch, sweetness, and visual appeal.
⚠️ Common Mistake to Avoid: Don’t walk away from the frying shallots — they can go from golden to burnt in about 20 seconds. Watch closely, and remove them as soon as they reach a deep amber hue. They’ll continue to crisp slightly as they cool.
Step 5: Assemble and Serve
Once the potatoes are tender, stir in the 1 cup of heavy cream and the 2 tablespoons of Worcestershire sauce. Simmer for 2 more minutes, then taste and adjust the salt and pepper if needed. Slice the rested steaks into bite-sized cubes — about 1-inch pieces work perfectly for this shallot soup with steak presentation. Ladle the golden shallot soup into wide bowls, arrange the steak cubes in the center, and top generously with the crispy fried shallots. Serve immediately, while the soup is hot and the steak is tender.
💡 Mia’s Pro Tip: For an extra touch of elegance, drizzle a tiny bit of good extra-virgin olive oil over the soup just before serving, and add a few fresh thyme leaves on top. It’s a small gesture that makes this gourmet steak recipe feel even more special.
| Step | Action | Duration | Key Visual Cue |
|---|---|---|---|
| 1 | Crush peppercorns, season steaks | 10 min + 15 min rest | Peppercorns are coarse, not powdery; crust clings to meat |
| 2 | Sear steaks in butter and thyme | 8–10 min total | Deep brown crust, internal temp 130°F (medium-rare) |
| 3 | Sauté shallots, make roux, add broth and potatoes | 20–22 min | Shallots golden, broth thickens slightly, potatoes tender |
| 4 | Fry sliced shallots | 3–4 min | Deep amber, crispy, not burnt |
| 5 | Add cream and Worcestershire, assemble bowls | 5 min | Soup is golden, creamy; steak cubes are tender |
Serving & Presentation
When I serve this peppercorn crusted steak recipe to friends in my NYC apartment, I like to create a moment around it. I ladle the golden shallot soup into wide, shallow bowls so the broth, potatoes, and steak cubes are all visible. I arrange the steak pieces in a neat cluster in the center — slightly overlapping, like a small tower of seared perfection. Then I heap the crispy fried shallots right on top, letting them tumble over the steak and into the soup. A few fresh thyme leaves scattered around add a pop of green and a whisper of herbal aroma. This bistro style steak recipe is meant to be shared, so I bring the Dutch oven to the table and let everyone serve themselves — it feels warm, convivial, and deeply satisfying.
For the perfect easy steak dinner recipe experience, I recommend serving this with a loaf of crusty sourdough or baguette to soak up every last drop of the shallot soup. A simple green salad with a bright vinaigrette on the side balances the richness. And if you’re feeling extra French, start the meal with a small plate of roasted garlic mashed potatoes as a starter — though honestly, the potatoes are already in the soup, so you’re covered. For the full picture of what to serve alongside, I’ve put together a pairing guide below.
| Pairing Type | Suggestions | Why It Works |
|---|---|---|
| Side Dish | Crusty sourdough, roasted asparagus, simple green salad | Bread soaks up soup; asparagus adds freshness; salad cuts richness |
| Sauce / Dip | Extra pan jus, horseradish cream, Dijon mustard | Jus reinforces peppercorn flavor; horseradish adds heat; mustard cuts richness |
| Beverage | Red blend, Malbec, or a bold French Syrah | Bold reds stand up to pepper crust and creamy soup; tannins complement the beef |
| Garnish | Fresh thyme leaves, flaky sea salt, extra cracked pepper | Thyme echoes the cooking herb; salt enhances all flavors; pepper adds visual contrast |
For wine lovers, I highly recommend a red wine pairing guide to find the perfect bottle for this peppercorn crusted steak recipe. A bold Malbec or a French Syrah complements the peppery crust and creamy soup beautifully without overpowering either element. If you prefer a non-alcoholic option, a sparkling water with a twist of lemon is refreshing and palate-cleansing between bites.
Make-Ahead, Storage & Reheating
As a busy NYC food blogger, I rely on make-ahead strategies to keep my weeknights manageable. This peppercorn crusted steak recipe is wonderfully versatile when it comes to storage. The soup base (without the cream and Worcestershire) can be made up to 3 days in advance, and the steak can be seared ahead and reheated gently. I often prep the golden shallot soup base on Sunday, then finish it with the cream and steak on a Tuesday evening. It’s one of those easy steak dinner recipes that actually gets better as the flavors meld overnight. Below is my tested storage and reheating guide so you can enjoy this homemade shallot soup with steak any day of the week.
| Method | Container | Duration | Reheating Tip |
|---|---|---|---|
| Refrigerator | Airtight container, soup and steak separate | 3–4 days | Reheat soup gently on stovetop, add steak cubes in the last 2 minutes |
| Freezer | Freezer-safe container, soup only (no cream) | 2–3 months | Thaw overnight, add cream and Worcestershire when reheating |
| Make-Ahead | Soup base (no cream) in fridge | Up to 3 days in advance | Add cream, Worcestershire, and seared steak when serving |
One thing I’ve learned from testing this peppercorn crusted steak recipe multiple times: don’t freeze the steak after it’s been seared. The texture suffers when thawed and reheated. Instead, sear the steak fresh when you’re ready to serve, or cook the steak to medium-rare, slice it, and serve it over the reheated soup the next day. The soup itself freezes beautifully if you leave the cream out — just stir it in after thawing and reheating. I’ve even prepped the entire golden shallot soup recipe for a dinner party and finished it in 10 minutes before guests arrived. That kind of efficiency is pure gold in a busy kitchen.
Variations & Easy Swaps
This peppercorn crusted steak recipe is wonderfully adaptable, and I’ve tested several variations over the years to suit different tastes, dietary needs, and seasonal ingredients. Whether you’re cooking for a crowd, avoiding dairy, or craving a different flavor profile, one of these options will fit the bill. Each variation has been tested in my own kitchen, so you can swap with confidence.
| Variation | Key Change | Best For | Difficulty Impact |
|---|---|---|---|
| Moroccan Spiced Steak | Add 1 tsp cumin and 1/2 tsp coriander to peppercorn crust | North African flavor lovers, adventurous palates | Easy — no extra steps |
| Dairy-Free / Paleo | Replace butter with ghee, heavy cream with full-fat coconut milk | Dairy-free, paleo, Whole30 | Easy — simple swap |
| Mushroom & Thyme Shallot Soup | Add 8 oz sliced cremini mushrooms with the shallots | Mushroom lovers, earthy flavor boost | Easy — adds 3 minutes |
Moroccan Spiced Steak Variation
Growing up in Morocco, I watched my mother blend spices with an intuition that still inspires my cooking today. For this variation, I add 1 teaspoon of ground cumin and 1/2 teaspoon of ground coriander to the crushed peppercorns before pressing them into the steak. The warm, earthy notes of cumin and the citrusy undertone of coriander weave beautifully with the sharp bite of the black pepper. It doesn’t change the technique at all — just mix the spices with the peppercorns before crushing. This simple twist turns this peppercorn crusted steak recipe into a cross-cultural fusion that pays homage to my roots while keeping the French bistro soul intact. Homemade beef stock recipe would elevate the soup even further if you have time to make it.
Dairy-Free / Paleo Variation
For those who avoid dairy, this variation is a lifesaver. Replace the 4 tablespoons of butter with ghee (clarified butter) or avocado oil — both have high smoke points and won’t burn during the searing process. For the soup, swap the heavy cream with full-fat coconut milk. The coconut milk adds a subtle sweetness and a velvety texture that complements the peppercorn steak with shallot sauce surprisingly well. The finished soup will have a slightly different flavor profile — a whisper of tropical warmth — but it’s genuinely delicious. I’ve served this version to dairy-free guests who didn’t even notice the swap. It’s still a gourmet steak recipe at heart, just adapted for different needs.
Mushroom & Thyme Shallot Soup Variation
On a chilly autumn evening in New York, I love adding 8 ounces of sliced cremini mushrooms to the golden shallot soup. After you sauté the chopped shallot and garlic, add the mushrooms and cook for 3–4 minutes until they release their liquid and start to brown. Then proceed with the flour and cognac as written. The mushrooms add an umami depth that makes the soup even more satisfying, especially if you’re serving this as a main course. I picked up this trick at a farmers market in NYC when a vendor had the most beautiful creminis — I knew they’d be perfect folded into this shallot soup with steak. The mushrooms also add texture, making each spoonful a little more substantial. If you love the French onion soup vibe, check out my French onion soup recipe for another deeply savory take.
Frequently Asked Questions
What is the best cut of steak for a peppercorn crusted steak recipe?
For this peppercorn crusted steak recipe, I recommend filet mignon or sirloin as the top choices. Filet mignon (4 oz. per person) is incredibly tender and lean, which allows the peppercorn crust to shine without competing with too much marbling. Sirloin is a more affordable option that still delivers great beef flavor — just slice the 8-oz. steaks in half to get 4 portions. Ribeye and NY strip also work beautifully if you prefer a richer, more marbled bite. The key is to choose steaks that are at least 1-inch thick so they can develop a proper crust without overcooking. Always let the steaks come to room temperature for 15–20 minutes before searing for the most even cook.
How do you make golden shallot soup from scratch?
This golden shallot soup recipe starts with the reserved fat from searing the peppercorn-crusted steak — that’s the secret to its deep flavor. Finely chop one large shallot and sauté it in the same Dutch oven with garlic and fresh thyme until translucent. Sprinkle in all-purpose flour to create a roux, then deglaze with cognac or brandy, scraping up all the browned bits. Slowly whisk in low-sodium beef broth, add quartered waxy baby potatoes, and simmer until tender. Finish with heavy cream and Worcestershire sauce for richness and umami. The soup is then topped with crispy fried shallot rings and cubes of the seared steak. It’s a one-pot method that builds layers of flavor from the steak directly into the soup.
Can I substitute green peppercorns for black peppercorns in a peppercorn crusted steak?
Yes, you can substitute green peppercorns for black in this peppercorn crusted steak recipe, but expect a different flavor profile. Green peppercorns are unripe and brine-packed or freeze-dried, so they have a milder, slightly fruity, and less pungent heat compared to black peppercorns. They also have a softer texture, which means the crust won’t be as crunchy. If you use brine-packed green peppercorns, rinse and pat them very dry before crushing, and reduce the salt in the recipe slightly since they carry some brine. The result is a more delicate crust that pairs well with the golden shallot soup recipe. For the classic bistro-style boldness, I still prefer black peppercorns, but green is a lovely twist if you’re feeling adventurous.
What is the ideal cooking time and temperature for a peppercorn crusted steak to be medium-rare?
For this peppercorn crusted steak recipe, the ideal internal temperature for medium-rare is 130°F when you remove the steak from the pan, which will rise to 135°F during resting. The total cooking time depends on the thickness of your steaks: for a 1-inch-thick filet mignon, sear for 3 minutes on the first side, then flip and cook for another 3–4 minutes while basting with butter and thyme. Use an instant-read thermometer for accuracy — it’s the only way to guarantee perfect doneness. If you prefer medium, aim for 140°F (rising to 145°F), and for medium-well, aim for 150°F. For a detailed breakdown of steak temperatures across different cuts, refer to my steak cooking temperature guide.
Can I make this peppercorn crusted steak recipe ahead of time for a dinner party?
Absolutely — this peppercorn crusted steak recipe is ideal for dinner party prep. The golden shallot soup base (without the heavy cream and Worcestershire) can be made up to 3 days ahead and stored in the fridge. Simply reheat the soup base, stir in the cream and Worcestershire, and simmer for 2 minutes while you sear the steaks fresh. I recommend searing the steak just before serving so the peppercorn crust stays crispy. You can also fry the shallot rings a day ahead and store them in an airtight container at room temperature — they’ll stay crunchy for 24 hours. This strategy means you spend just 15 minutes finishing the dish when your guests arrive, leaving you free to enjoy the evening.
What goes well with peppercorn steak and shallot soup?
Since this peppercorn crusted steak recipe already includes a rich golden shallot soup with potatoes, you don’t need much on the side. A crusty sourdough or baguette is perfect for soaking up the broth. A simple green salad with a lemony vinaigrette cuts through the richness beautifully, and roasted asparagus or green beans add color and freshness. For wine, a bold red blend, Malbec, or French Syrah complements the peppery crust and creamy soup. If you’re looking for a starter, my roasted garlic mashed potatoes are a wonderful prelude, or you can keep it light with a charcuterie board.
Can I use bone-in steak for this peppercorn crusted recipe?
Yes, you can use bone-in steaks like a bone-in ribeye or bone-in strip steak for this peppercorn crusted steak recipe. Keep in mind that bone-in steaks take slightly longer to cook because the bone conducts heat differently. I recommend using an instant-read thermometer inserted into the thickest part of the muscle — away from the bone — to check doneness. The bone adds extra flavor to the pan drippings, which then infuse the golden shallot soup. Just be careful when pressing the peppercorn crust onto the bone-in steak — the bone can make it trickier to get an even coating. Otherwise, the technique is identical, and the result is equally spectacular.
How do I prevent the peppercorn crust from falling off the steak?
This is one of the most common questions I get about this peppercorn crusted steak recipe, and the answer lies in three key steps. First, make sure the steaks are patted very dry with paper towels — moisture is the enemy of crust adhesion. Second, season the steaks with salt first, then press the crushed peppercorns firmly into the meat on both sides, using your palm to really press them in. Third, let the coated steaks rest at room temperature for 15 minutes before searing, or better yet, rest them uncovered in the fridge for 30 minutes — this dries the surface even more. When you sear, place the steaks in the pan and don’t move them for at least 3 minutes. The crust will naturally adhere as it caramelizes and bonds with the meat.
Is this recipe gluten-free? How can I make it gluten-free?
This peppercorn crusted steak recipe as written is not gluten-free because of the all-purpose flour used to make the roux for the golden shallot soup. However, making it gluten-free is very straightforward. Replace the 1/4 cup of all-purpose flour with an equal amount of gluten-free all-purpose flour blend that contains xanthan gum (like Bob’s Red Mill 1-to-1). The roux will thicken the soup just as well, and the flavor difference is negligible. Alternatively, you can skip the flour entirely and instead puree about 1 cup of the cooked soup (including some potatoes) and stir it back in for natural thickening. This method actually adds even more body and a creamier texture, making it a wonderful option regardless of dietary needs.
What is the best way to reheat leftover peppercorn crusted steak and shallot soup?
To preserve the quality of this peppercorn crusted steak recipe when reheating leftovers, I recommend separating the components. Reheat the golden shallot soup gently on the stovetop over medium-low heat, stirring occasionally until warmed through. If the soup has thickened too much in the fridge, add a splash of beef broth or water to loosen it. For the steak, slice it into cubes (as in the original recipe) and add them to the soup in the last 2 minutes of reheating — this keeps the meat tender without overcooking. If you have leftover whole steaks, reheat them in a skillet with a splash of broth over medium heat, covered, for 2–3 minutes per side. Avoid microwaving the steak alone, as it can become tough and rubbery.
Share Your Version!
There’s something truly special about a recipe that brings together the boldness of a peppercorn crust and the comfort of a golden shallot soup — and I’d love to see how it turns out in your kitchen. This peppercorn crusted steak recipe is one of those dishes that feels like an occasion, whether you’re cooking for a quiet weeknight dinner or a festive gathering. I hope the step-by-step guidance, the pro tips, and the little stories from my Moroccan and Parisian kitchens make you feel confident and inspired to create something memorable. If you try this recipe, please leave a star rating and a comment below — I read every single one and I love hearing your questions and triumphs.
Take a photo of your beautifully plated peppercorn crusted steak recipe with golden shallot soup and share it on Instagram or Pinterest with the hashtag #MiasKitchen and tag @exorecipes. I’ll be scrolling through the tag and sharing my favorites on my stories! If you have a question about a substitution, a technique, or a timing issue, drop it in the comments and I’ll personally answer within 48 hours. From my NYC kitchen to yours — I hope this recipe brings as much warmth to your table as it does to mine. — Mia 🧡
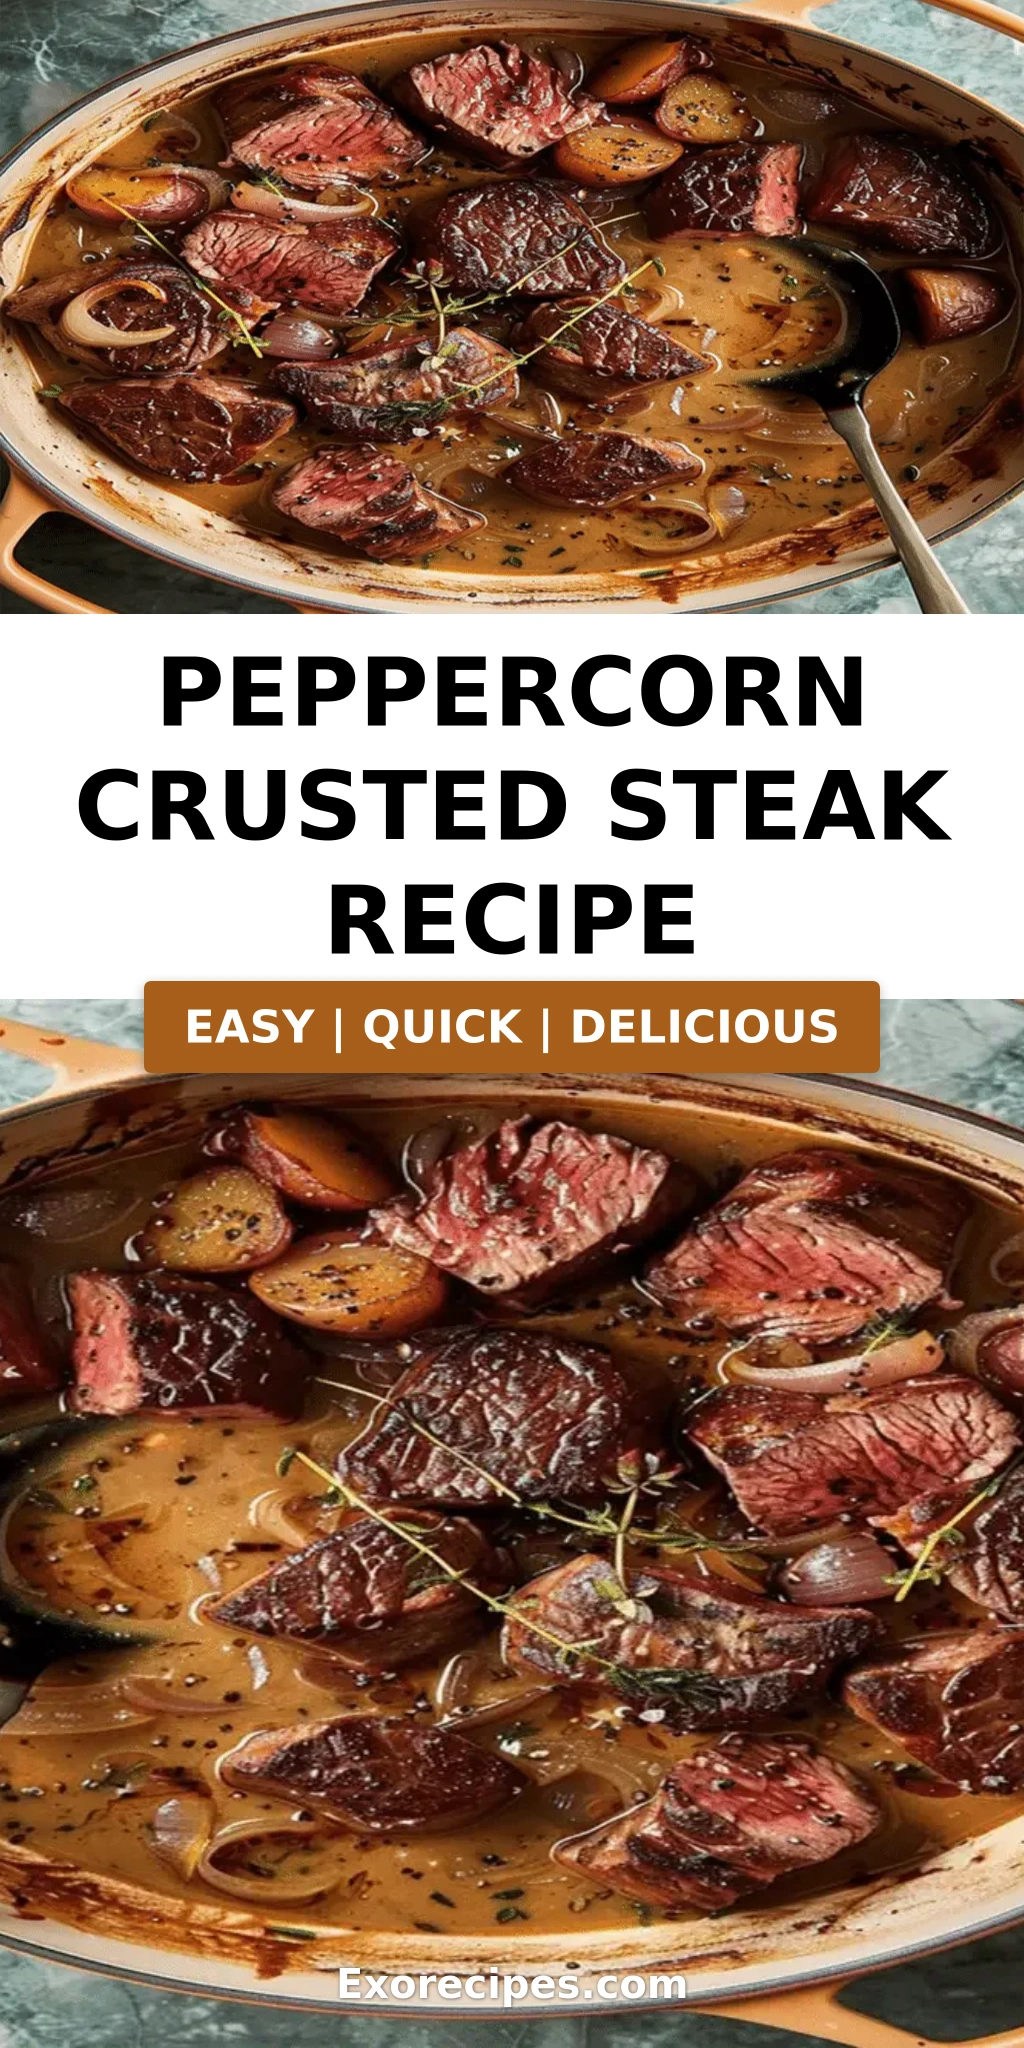
Love This Recipe? Save It to Pinterest!
If you enjoyed this Peppercorn-Crusted Steak with Golden Shallot Soup recipe, don’t let it get lost in your browser tabs! 😄 Pin it now so you can find it again anytime — and explore hundreds more tried-and-tested recipes waiting for you on my Pinterest boards.
👉 Follow Mia on Pinterest @exorecipes📌 Pin this recipe · 🔁 Re-pin your favorites · 💬 Tag me when you make it — I love seeing your creations!
Peppercorn-Crusted Steak with Golden Shallot Soup
- Prep Time: 20 mins
- Cook Time: 40 mins
- Total Time: 1 hr
Description
Just whipped up this Peppercorn-Crusted Steak with a side of Golden Shallot Soup. Absolutely divine
Ingredients
- 3 tbsp. whole black peppercorns
- 4 (4-oz.) filet mignons or 2 (8-oz.) sirloin steaks, sliced in half
- Kosher salt
- 1/2 c. plus 2 tbsp. extra-virgin olive oil
- 4 tbsp. (1/2 stick) butter
- 2 thyme sprigs, plus 1 tbsp. chopped leaves
- 2 large shallots, 1 finely chopped, 1 sliced into rings
- 3 cloves garlic, finely chopped
- 1/4 c. all-purpose flour
- 1/4 c. cognac or brandy
- 5 c. low-sodium beef broth
- 1 1/2 lb. waxy baby potatoes, quartered
- 1 c. heavy cream
- 2 tbsp. Worcestershire sauce
Instructions
- Grind peppercorns coarsely. Season steaks with salt and crushed peppercorns, pressing them into the meat.
- Heat 2 tbsp. oil in a Dutch oven. Cook steaks until browned, add butter and thyme sprigs, and cook until the thermometer reads 135°F. Rest steaks and reserve fat.
- Cook chopped shallot, garlic, and chopped thyme in reserved fat. Add flour, then cognac, and slowly whisk in broth. Add potatoes and simmer until tender. Stir in cream and Worcestershire sauce.
- Fry sliced shallots in 1/2 cup oil until golden. Drain on paper towels and season with salt.
- Divide soup among bowls, top with steak cubes and fried shallots.
Tried This Recipe? Leave a Comment!
Did you make this recipe? I’d love to hear how it turned out! Please leave a comment and a rating below. Your feedback helps other home cooks and supports cheerychop.com!
For more delicious inspiration, follow me on Pinterest!