“`html
Table of Contents
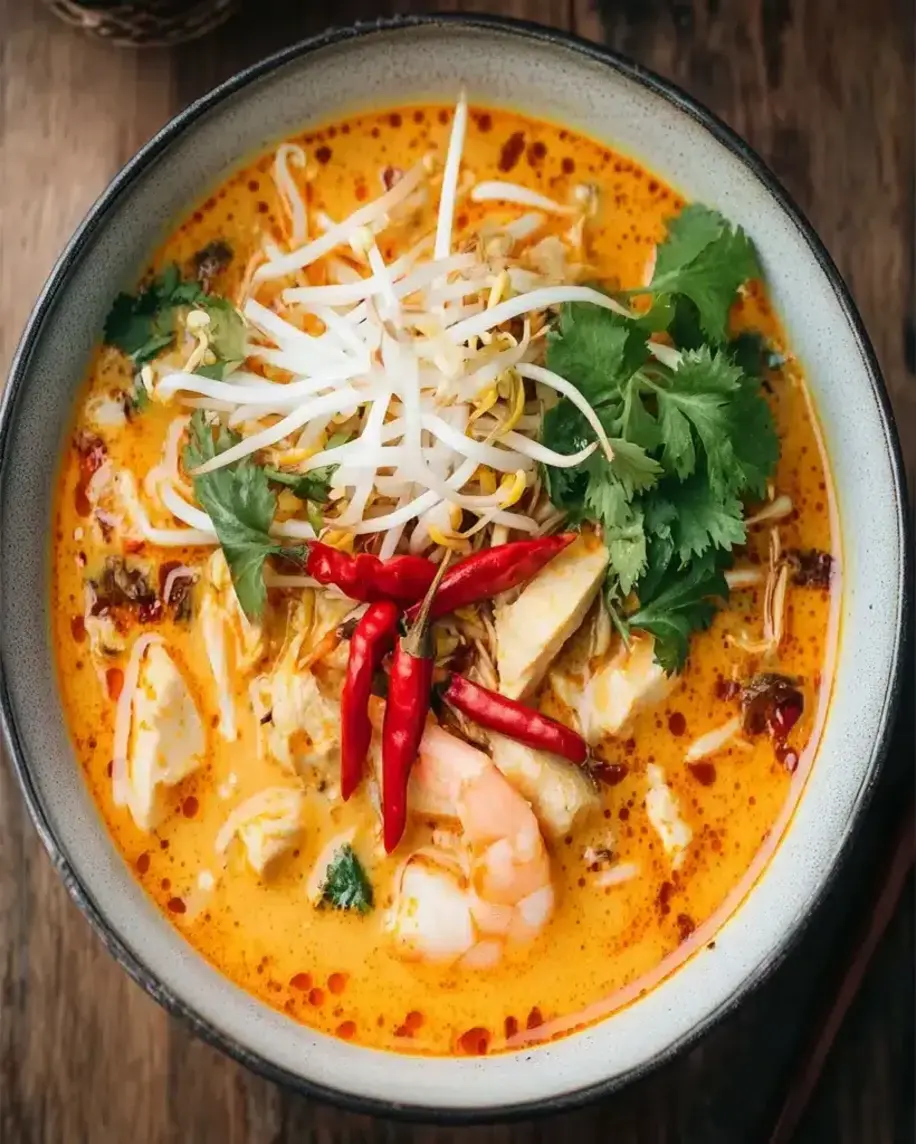
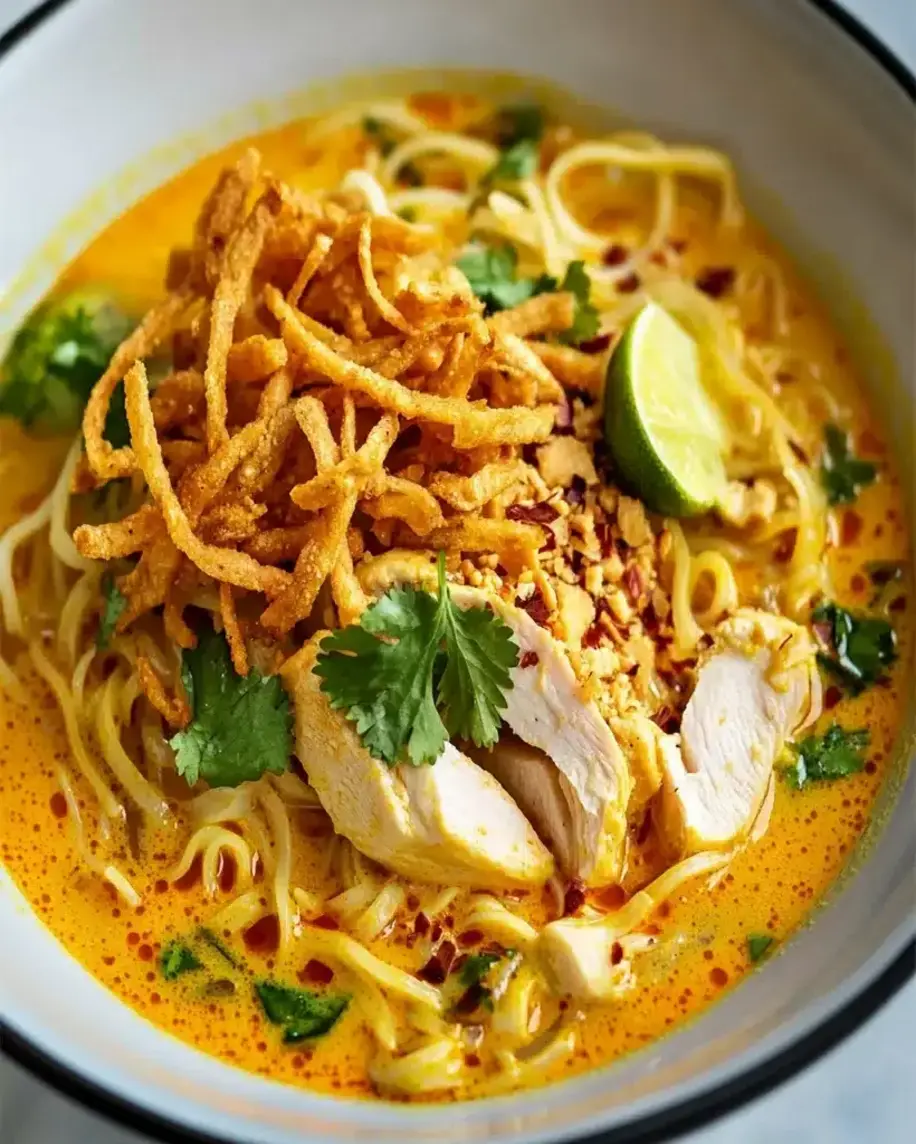
Khao Soi Recipe: Thai Coconut Curry Noodles You’ll Crave
Your Search for a Flavorful Thai Noodle Soup Ends Here
Welcome, food enthusiasts! If you’re in search of a vibrant, flavorful, and truly comforting meal, you’ve come to the right place. Today, we’re diving into a classic Northern Thai dish: Khao Soi, also known as Thai Coconut Curry Noodle Soup. This delicious noodle soup is a harmonious blend of spices, creamy coconut milk, and tender noodles, making it a perfect dish to savor any day of the week. Have you ever wondered how to capture the complex, soul-warming flavors of Authentic Thai street food in your own kitchen? Khao Soi is the answer. It’s a dish that tantalizes the taste buds with its rich, aromatic broth, the satisfying chew of noodles, and a symphony of textures from its various toppings. While it might seem complex, breaking it down makes it wonderfully achievable. Let’s embark on this culinary adventure together and create a Khao Soi that will have you coming back for more!
The Heart of Khao Soi: A Symphony of Ingredients
The beauty of Khao Soi lies in its layered flavors and textures. Here’s what you’ll need to bring this Northern Thai delicacy to life:
For the Curry Paste (or use store-bought):
- 2-3 dried red chilies (soaked in hot water until softened, seeds removed for less heat) – These dried chilies provide a deep, smoky flavor and a beautiful reddish hue to the curry.
- 2 stalks lemongrass, tough outer layers removed, thinly sliced – For a bright, citrusy aroma that cuts through the richness.
- 1 inch galangal, peeled and thinly sliced – A fragrant, peppery cousin of ginger, essential for authentic Thai flavor. If unavailable, use ginger but note a slight flavor difference.
- 4-6 cloves garlic, peeled – A foundational aromatic for depth.
- 1 inch ginger, peeled and sliced – Adds a pungent warmth.
- 1/2 tsp turmeric powder – For color and a subtle earthy note.
- 1 tsp coriander seeds, toasted and ground – Adds a warm, citrusy spice.
- 1/2 tsp cumin seeds, toasted and ground – Offers a slightly bitter, earthy undertone.
- 1/4 tsp white peppercorns, ground – A milder, more nuanced pepperiness.
- 1 shallot, roughly chopped – Brings a mild sweetness and oniony base.
- 1 tbsp shrimp paste (optional, for authentic umami) – A powerful flavor enhancer; omit for vegetarian/vegan.
- 1 tbsp vegetable oil (or coconut oil) – To help form the paste and aid in sautéing.
For the Soup Base:
- 1 tbsp vegetable oil – For sautéing the paste.
- 400ml (1 can) full-fat coconut milk – The creamy, luscious base that defines Khao Soi. Use full-fat for the richest flavor.
- 400ml chicken or vegetable broth – Adds liquid and depth to the broth.
- 1-2 tbsp red curry paste (if not making from scratch, adjust to taste) – A good quality store-bought paste can be a shortcut.
- 1-2 tbsp fish sauce (or soy sauce/tamari for vegetarian) – Provides essential salty, umami depth.
- 1-2 tsp brown sugar or palm sugar – To balance the savory and spicy notes.
- 1 tsp curry powder – Enhances the curry flavor profile further.
For the Noodles and Toppings:
- 200g fresh egg noodles or ramen noodles – These offer a satisfying chew. Some are boiled, some are fried for crunch.
- 100g egg noodles, fried until crispy – For that essential textural contrast.
- Lime wedges, for serving – A squeeze of fresh lime brightens everything up. Absolutely crucial!
- Pickled mustard greens (optional, but traditional) – Adds a tangy, slightly sour counterpoint.
- Shallots, thinly sliced – For a fresh, sharp crunch.
- Cilantro, fresh sprigs – A burst of herbaceous freshness.
- Chili oil or sliced fresh chilies – For an extra kick of heat.
Noodle Nirvana: Timing Your Khao Soi
Compared to the average noodle soup recipe which might hover around 45-60 minutes total, Khao Soi is right in that sweet spot. The initial paste preparation can be expedited with store-bought paste, but making it from scratch adds about 10-15 minutes to prep. The cooking process is relatively quick, focusing on simmering the flavorful broth and preparing the noodles.
Crafting Your Khao Soi: Step-by-Step
Step 1: Prepare the Curry Paste
If making your paste from scratch: Soak the dried chilies in hot water for about 15-20 minutes until softened. Drain and remove seeds. In a mortar and pestle or a small food processor, combine the soaked chilies, lemongrass, galangal, garlic, ginger, turmeric, ground coriander, cumin, white pepper, shallot, and shrimp paste (if using). Pound or process until a relatively smooth paste forms. Add a tablespoon of oil to help it come together. Don’t rush this; the better your paste, the better your Khao Soi.
Step 2: Sauté the Paste and Aromatics
Heat 1 tablespoon of vegetable oil in a large pot or Dutch oven over medium heat. Add your homemade curry paste (or 1-2 tablespoons of good quality store-bought red curry paste). Stir and cook for about 3-5 minutes, until fragrant and slightly darkened. This step is crucial for blooming the spices and developing a deep flavor.
Step 3: Add Coconut Milk and Broth
Pour in the full-fat coconut milk and chicken or vegetable broth. Stir well to combine with the sautéed paste. Bring the mixture to a gentle simmer, scraping any bits from the bottom of the pot.
Step 4: Simmer and Season
Add the curry powder, fish sauce (or soy sauce/tamari), and brown sugar (or palm sugar). Stir to dissolve the sugar. Let the soup base simmer gently for about 15-20 minutes, allowing the flavors to meld and deepen. Taste and adjust seasoning – you’re looking for a balance of salty, sweet, savory, and spicy. If it’s too thick, add a splash more broth. If it’s too thin, let it simmer longer uncovered.
Step 5: Prepare the Noodles
While the soup simmers, cook your fresh egg noodles according to package directions. Drain well. In a separate pan, heat a bit of oil and fry another portion of the cooked egg noodles until golden brown and crispy. These will be your topping for texture. The contrast between soft and crispy noodles is what makes Khao Soi so special.
Step 6: Assemble and Serve
To serve, ladle the hot, fragrant curry soup into bowls. Add a portion of the cooked soft noodles. Top generously with the crispy fried noodles. Garnish with fresh cilantro sprigs, thinly sliced shallots, a generous squeeze of lime, and a side of pickled mustard greens. Add chili oil or fresh chilies for extra heat if desired. Serve immediately and enjoy the explosion of flavors!
Nutritional Snapshot (Approximate Per Serving)
A typical bowl of Khao Soi can be quite rich due to coconut milk and noodles. This is an estimated breakdown:
- Calories: 500-700 kcal
- Protein: 15-25g
- Fat: 30-45g (mostly from coconut milk)
- Carbohydrates: 40-60g
- Sodium: Varies greatly based on fish sauce/soy sauce quantity
Note: Nutritional values are estimates and can vary based on exact ingredients and portion sizes.
Lighter Takes on Khao Soi: Flavorful Swaps
Craving Khao Soi but looking for a lighter version? You can achieve a delicious bowl with a few smart substitutions:
- Reduced Coconut Milk: Use a mix of light coconut milk and vegetable broth, or even mostly broth with just a splash of full-fat coconut milk for flavor.
- Lean Protein: Opt for shredded chicken breast or firm tofu instead of fattier cuts.
- Whole Wheat Noodles: Use whole wheat ramen or spaghetti for added fiber.
- Load up on Veggies: Add extra vegetables like spinach, bok choy, bell peppers, or mushrooms to the broth.
- Skip the Fried Noodles: Rely solely on the soft noodles and fresh garnishes for texture.
Elevate Your Bowl: Serving Khao Soi Perfection
Khao Soi is a complete meal in itself, but garnishes are key to its authentic experience:
- Lime Wedges: Absolutely essential. The acidity cuts through the richness and brightens all the flavors.
- Pickled Mustard Greens: Offer a pungent, sour counterpoint.
- Fresh Shallots: Sliced thinly, they add a sharp, fresh crunch.
- Cilantro: Its herbal freshness is a perfect complement.
- Chili Oil/Chili Flakes: For those who love an extra kick of heat.
Don’t Make These Mistakes with Your Khao Soi!
Avoid these common pitfalls for the best Khao Soi:
- Under-Sautéing the Paste: This is where the flavor foundation is built. Don’t skimp on this step!
- Using Low-Fat Coconut Milk: While healthier options exist, for true Khao Soi richness, use full-fat.
- Skipping Acid: Forgetting the lime juice will leave the dish tasting flat and heavy.
- Not Tasting and Adjusting: Each curry paste and palate is different. Seasoning is an art!
- Overcooking Noodles: Mushy noodles won’t hold up to the rich broth. Cook al dente.
Storing Your Delicious Khao Soi
Leftover Khao Soi soup base (without noodles or most garnishes) can be stored in an airtight container in the refrigerator for up to 3 days. Reheat gently on the stovetop, adding a splash of broth or water if it has thickened too much. It’s best to cook fresh noodles and prepare the crispy noodles and garnishes just before serving to maintain their best texture.
Your Khao Soi Adventure Awaits!
And there you have it – a guide to creating your own incredible Khao Soi at home! This Northern Thai coconut curry noodle soup is more than just a meal; it’s an experience. The complex layers of flavor, the comforting warmth, and the delightful textural contrast make it a dish that truly satisfies. Don’t be intimidated by the ingredient list or the steps; each one builds upon the last to create something magical. So gather your ingredients, embrace the aromatic spices, and dive into the delicious world of Khao Soi. We promise, it’s worth every exquisite bite!
Have you tried making Khao Soi before? What are your secret ingredients or tips? Share your thoughts and results in the comments below! We can’t wait to hear from you!
Frequently Asked Questions about Khao Soi
What is the difference between Khao Soi and other Thai curries?
Khao Soi is unique because it’s a dry-curry noodle dish served with both soft and crispy noodles, and its broth is typically thinner and more intensely flavored with curry paste, coconut milk, and aromatics like lemongrass and galangal. Other Thai curries can be wetter, served with rice, and may use different spice profiles.
Can I make Khao Soi vegetarian or vegan?
Absolutely! To make it vegetarian, use vegetable broth and soy sauce or tamari instead of fish sauce and shrimp paste. For vegan, ensure all ingredients are plant-based, including using a vegan egg noodle substitute or rice noodles, and omitting any egg components.
Where can I find pickled mustard greens?
Pickled mustard greens are commonly found in Asian grocery stores. They are usually in jars or vacuum-sealed packets. If you can’t find them, you can skip them or try a small amount of sauerkraut for a similar tangy element, though the flavor profile will differ.
Can I make the curry paste ahead of time?
Yes, you can make the curry paste up to 2-3 days in advance and store it in an airtight container in the refrigerator. This will save you time on the day you plan to cook the Khao Soi.
What kind of noodles work best for Khao Soi?
Traditionally, fresh egg noodles are used, providing a lovely chewy texture. For the crispy element, these same noodles are deep-fried until golden and crunchy. If you can’t find fresh egg noodles, ramen noodles or even spaghetti can be a suitable substitute (though the texture will vary).

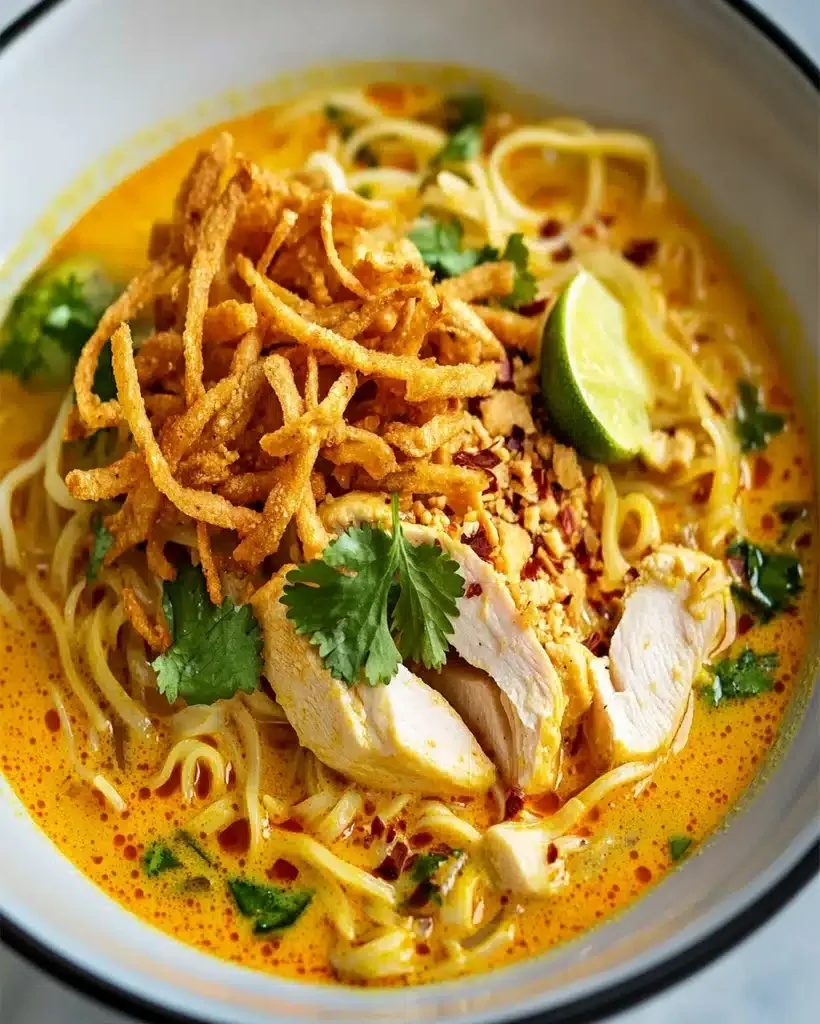
Khao Soi Recipe – Authentic Thai Coconut Curry Noodle Soup
Description
Welcome, food enthusiasts! If you’re in search of a vibrant, flavorful, and truly comforting meal, you’ve come to the right place. Today, we’re diving into a classic Northern Thai dish:Khao Soi, also known as Thai Coconut Curry Noodle Soup. This delicious noodle soup is a harmonious blend of spices, creamy coconut milk, and tender noodles, making it a perfect dish to savor any day of the week.
Ingredients
- 4–6ounces dry rice noodles
- 1 tablespooncoconut, peanut, or olive oil
- 1large shallot, finely diced (or substitute withhalf anonion)
- 2 tablespoonschopped lemongrass
- 4garlic cloves, roughly chopped
- 2 tablespoonsThai Red Curry Paste (store-bought), more for spicier soup
- 1/2 teaspoonground turmeric (or use freshly grated turmeric)
- 1/2 teaspoonyellow curry powder
- 1/2 teaspoonground cardamom
- 14-ouncecan of full-fat coconut milk
- 1 cupchicken broth (or vegetable broth)
- 4–6kaffir lime leaves(optional but recommended)
- 1red bell pepper, thinly sliced (substitute other veggies if preferred)
- 2 tablespoonsfish sauce or vegan fish sauce
- 2 tablespoonssoy sauce (reduce if using vegan fish sauce)
- 2 tablespoonsbrown or palm sugar
- 1 tablespoonchili garlic sauce (Sambal Oelek)
- 8–12ouncesprotein: prawns, crispy tofu, or thinly sliced chicken breast
- Salt and pepperto taste
- 1lime, for squeezing
- Fresh basil (Thai basil is ideal)
- Pickled mustard greens (traditional)
- Cilantro
- Bean sprouts
- Lime wedges
- Crispy noodles
- Thinly sliced red onions or scallions
- Gluten-Free: Use tamari instead of soy sauce.
- Vegetarian/Vegan: Swap chicken broth with vegetable broth and use tofu as the protein
Instructions
- Place the rice noodles in a large baking dish and pour boiling water over them. Let them sit, stirring occasionally until they are al dente. Drain and toss with a little oil to prevent sticking.
- While the noodles are soaking, prep your protein of choice—whether prawns, chicken, or tofu. Dice the shallots, chop the garlic and lemongrass, and slice the red bell pepper.
- In a large pot, heat the oil over medium heat. Add the shallots, garlic, and lemongrass. Sauté until fragrant and golden, about 3-4 minutes. Then, add the red curry paste, turmeric, yellow curry powder, and cardamom. Sauté for another minute to release the flavors.
- Pour in the coconut milk, chicken broth, and kaffir lime leaves. Stir well and bring to a gentle simmer. Once simmering, add the red bell pepper, fish sauce, soy sauce, brown sugar, and chili garlic paste. Stir to combine.
- Add the prawns (or your choice of protein) and gently simmer until fully cooked. For prawns, this will take about 3-5 minutes. If using chicken, ensure it is thoroughly cooked.
- Give a generous squeeze of lime juice and taste the soup. Adjust the seasoning with more salt, pepper, or red curry paste as needed. The goal is to balance salty, sweet, sour, and spicy flavors.
- Divide the cooked noodles into serving bowls. Ladle the flavorful soup over the noodles, ensuring an even distribution of protein and vegetables.
- Top each bowl with your preferred garnishes such as fresh basil, pickled mustard greens, crispy noodles, bean sprouts, and lime wedges. Serve hot and enjoy!
Notes
Fresh Ingredients are Key: Use fresh lemongrass, garlic, and lime leaves for the best flavor.
Adjust Spice Levels: If you prefer a milder soup, reduce the amount of red curry paste or omit the chili garlic sauce.
Make It Ahead: The soup base can be prepared a day in advance, allowing the flavors to meld together.
“`