Easy Crock Pot Chicken Wings Juicy, Delicious & Effortless!

“`html

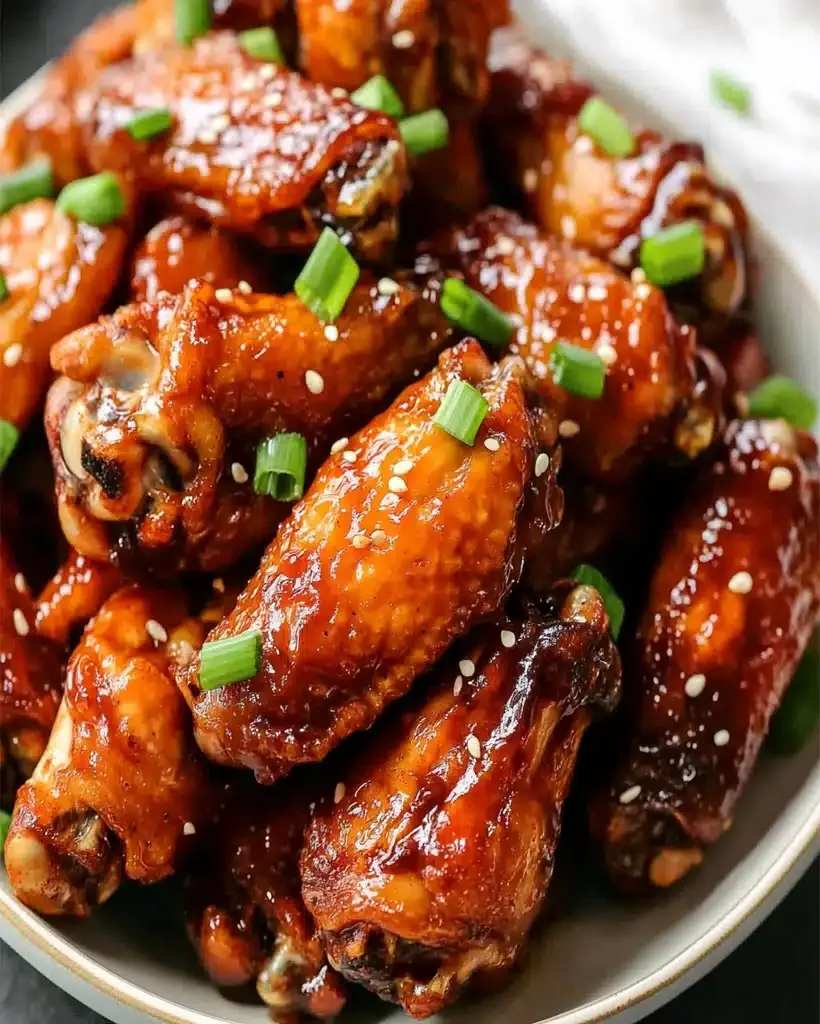
Easy Crock Pot Chicken Wings: Juicy, Delicious & Effortless!

Dive into Deliciousness: Your New Favorite Crock Pot Chicken Wings

Welcome to another delicious slow-cooker recipe! If you’re a fan of chicken wings, this Crock Pot Chicken Wings recipe is going to be your new go-to favorite. It’s sticky, tender, and perfect for any occasion—whether it’s a game day, a casual dinner, or a party appetizer that everyone will rave about! Get ready to experience juicy wings cooked to perfection with minimal effort. The slow cooker magic truly transforms simple chicken wings into something spectacular. Think fall-off-the-bone tender with a rich, flavorful glaze that’s incredibly satisfying.

What You’ll Need for Effortless Crock Pot Chicken Wings

The beauty of this recipe lies in its simplicity. You won’t need a pantry full of exotic ingredients. Most of these are pantry staples, and the star of the show is undoubtedly the chicken wings themselves!

The Stars of the Show: Chicken Wings

Chicken Wings: About 2.5 to 3 pounds. You can use whole wings, cut into drumettes and flats (wingettes), or just the flats if you prefer. Fresh or frozen (thawed) will work. For the best texture, aiming for a mix of drumettes and flats is ideal.

Flavor Powerhouses

Garlic Powder: 1 tablespoon. This provides a foundational savory note that’s essential for wing flavor. Ensure it’s fresh for the best punch. (Substitution: 1 teaspoon garlic granules or 2 cloves fresh garlic, minced, though the powder is easier for even distribution).

Onion Powder: 1 teaspoon. Adds depth and a subtle sweetness. (Substitution: 1/2 teaspoon onion granules).

Paprika: 1 teaspoon. For a hint of color and mild smoky or sweet flavor, depending on the type you use. Smoked paprika is fantastic here! (Substitution: sweet paprika or regular paprika).

Salt: 1 teaspoon. Crucial for enhancing all the other flavors. Adjust to your preference. (Substitution: sea salt, kosher salt).

Black Pepper: 1/2 teaspoon. Freshly ground will offer the best aroma and taste. (Substitution: pre-ground black pepper).

The Melding Magic Sauce

Your Favorite BBQ Sauce: 2 cups. This is where you can really personalize your wings! A classic smoky BBQ sauce, a sweet and tangy one, or even a spicy version will all work wonders. The quantity might seem like a lot, but it creates the rich, sticky glaze we’re aiming for.

Honey or Brown Sugar: 2 tablespoons. This adds that irresistible sticky sweetness and helps the sauce caramelize beautifully. For a less sweet option, reduce slightly. (Substitution: maple syrup, agave nectar).

Worcestershire Sauce: 1 tablespoon. Adds a complex umami depth that balances the sweetness. (Substitution: soy sauce or tamari for a gluten-free alternative, though the flavor profile will shift slightly).

Optional: A pinch of cayenne pepper or hot sauce: For that extra kick! Adjust to your heat preference.

Optional Garnishes for Extra Flair

Chopped Fresh Parsley: For a pop of color and freshness.

Sesame Seeds: Toasted sesame seeds add a nutty crunch.

Ranch or Blue Cheese Dressing: The classic accompaniment for dipping!

Timing is Everything: Prep, Cook, and Total for Wings

Prep Time: 10 minutes
Cook Time: 3-4 hours (on High) or 6-8 hours (on Low)
Total Time: 3 hours 10 minutes – 8 hours 10 minutes

Compare this to average oven-baked wings, which often require at least 45 minutes to 1.5 hours of active cooking time plus prep and cooling. This Crock Pot method significantly reduces active time, making it ideal for busy cooks. You can set it and forget it!

Close-up of juicy, saucy crock pot chicken wings in a bowl, garnished with parsley.

Let’s Get Cooking: Crafting Your Perfect Crock Pot Chicken Wings

This recipe is designed for maximum flavor with minimal fuss. The slow cooker does all the heavy lifting!

Step 1: Prep the Wings & Load the Crock Pot

First, if your wings are not already separated, go ahead and cut them into drumettes and flats. Discard the tips or save them for making chicken stock! Pat the chicken wings thoroughly dry with paper towels. This is an important step, even for slow cooking, as it helps the seasonings adhere better and can contribute to a slightly better texture, especially if you plan to crisp them up later.

Place the dried chicken wings into your slow cooker. For a 3-4 quart slow cooker, this will likely be a single layer. For larger cookers, you might have a bit more space. Avoid overcrowding, as it can lead to steaming rather than slow cooking.

Step 2: Season and Cook to Perfection

In a small bowl, whisk together the garlic powder, onion powder, paprika, salt, and black pepper. Sprinkle this seasoning mixture evenly over the chicken wings in the slow cooker. Toss gently with your hands or a spoon to ensure each wing is coated.

Now, it’s time for the slow cook! Cover the slow cooker and cook on HIGH for 3-4 hours or on LOW for 6-8 hours. The exact time will depend on your slow cooker and how full it is.

Step 3: Sauce and Sear (or Bake for Crispier Skin)

Once the wings are tender and cooked through – they should be easily pierced with a fork and the internal temperature should reach 165°F (74°C) – it’s time to get them saucy. In a separate bowl, whisk together your favorite BBQ sauce, honey (or brown sugar), and Worcestershire sauce. If you’re adding any heat, this is the time to stir in cayenne pepper or hot sauce.

Option A (Most Common & Easiest): Carefully remove the chicken wings from the slow cooker and place them in a large bowl. Pour the prepared BBQ sauce mixture over the hot wings and toss gently to coat them completely. Serve as is, or for a slightly thicker glaze, you can return the sauced wings to the slow cooker on WARM (lid ajar or removed) for about 15-20 minutes to let the sauce thicken a bit more and adhere to the wings.

Option B (For Crispier Skin): This option offers a bit more texture. After the initial slow cook, transfer the wings to a baking sheet lined with parchment paper or foil. Pour some of the sauce over them while still in the slow cooker, toss, then transfer. Broil in a preheated oven (around 400-450°F or 200-230°C) for 5-10 minutes, flipping halfway, until the skin is nicely browned and crispy. Watch them closely to prevent burning! You can also bake them at 400°F (200°C) for about 15-20 minutes.

Step 4: Serve and Enjoy the Fruits of Your Labor

Transfer your beautifully glazed chicken wings to a serving platter. Garnish with fresh chopped parsley and sesame seeds, if desired. Serve immediately with your favorite dips!

Nutritional Breakdown (Approximate)

Please note: This is an approximate nutritional value per serving (assuming 4-6 servings per recipe) and can vary significantly based on the type of chicken wings used (skin on/off, size) and the specific ingredients in your chosen BBQ sauce.

  • Calories: 350-500 kcal
  • Protein: 25-35g
  • Fat: 20-35g (varies greatly with skin)
  • Carbohydrates: 10-25g (primarily from sauce/sugar)
  • Sodium: 800-1500mg (highly dependent on BBQ sauce)

Healthier Alternatives & Flavor-Preserving Swaps

Craving wings but watching your intake? You can make delicious, healthier modifications:

  • Leaner Protein: Use boneless, skinless chicken breast chunks instead of wings for a leaner protein option. Adjust cooking time accordingly (shorter, around 2-3 hours on high).
  • Low-Sugar BBQ Sauce: Opt for BBQ sauces with lower sugar content or make your own sugar-free version using tomato paste, vinegar, and spices.
  • Reduced Honey/Sugar: Cut the amount of honey or brown sugar in the glaze by half, or omit it entirely if your BBQ sauce is sweet enough. You can achieve sticky texture with cornstarch slurry at the end if desired.
  • Baking vs. Broiling: If you opt for the crisping step, baking at a moderate temperature (400°F/200°C) for longer might be preferable to broiling for less intense browning and potentially less charred bits.
  • Serve with Veggies: Instead of fries or chips, pair your wings with a large salad or a platter of raw vegetables like carrots, celery, and bell peppers.

Serving Suggestions: Beyond the Basic Plate

These Crock Pot Chicken Wings are incredibly versatile:

  • Game Day Feast: Serve alongside nachos, sliders, a big salad, and plenty of dips for the ultimate sports-watching spread.
  • Appetizer Platter: They make a show-stopping appetizer for parties, holidays, or any gathering.
  • Quick Dinner: Pair with a simple side salad, coleslaw, or roasted vegetables for a satisfying weeknight meal.
  • Sliders: Shred the meat off the bone after saucing and serve on slider buns for mini BBQ chicken sandwiches.

Common Mistakes to Avoid for Perfect Wings

  • Overcrowding the Crock Pot: This leads to steaming and makes it harder for flavors to develop. Cook in batches if necessary.
  • Not Patting Wings Dry: While not as critical as for oven-roasting, it still helps seasonings adhere better and can impact texture.
  • Skipping the Crisping Step (if desired): If you prefer crispier skin, don’t skip the broiling or baking step. Be sure to monitor closely to prevent burning.
  • Using Stale Spices: Old, weak spices won’t impart enough flavor. Check the freshness of your seasonings.
  • Not Tasting and Adjusting Sauce: Always taste your sauce before glazing. Does it need more sweetness? Tang? Spice? Adjust to your liking.

Storing Your Delicious Creation

Allow the cooked chicken wings to cool completely before storing. Store any leftovers in an airtight container in the refrigerator for up to 3-4 days. They can be enjoyed cold, reheated gently in a skillet, oven, or air fryer to regain some crispiness. Microwaving can make them soft and chewy.

Conclusion: Your Sticky, Tender, Perfectly Effortless Wing Journey

There you have it – incredibly easy, wonderfully flavorful Crock Pot Chicken Wings that are surprisingly tender and delightfully sticky. This recipe removes the intimidation factor from making perfect chicken wings, making it accessible for home cooks of all levels. Whether you’re hosting a party, planning a game day menu, or just craving something delicious and satisfying, these slow cooker wings are sure to be a hit. They truly are juicy, delicious, and effortles!

Ready to impress your friends and family with minimal effort? Give this recipe a try and let us know what you think in the comments below!

FAQs About Crock Pot Chicken Wings

***Can I use frozen chicken wings?***

Yes, you can use frozen chicken wings. Ensure they are fully thawed before starting the recipe. While some slow cooker recipes allow for cooking from frozen, it’s generally recommended to thaw them for even cooking and better texture.

***How do I make the wings crispy?***

The best way to achieve crispier skin is to finish the wings after slow cooking. You can broil them for a few minutes on each side, bake them on a hot baking sheet, or use an air fryer. Watch them closely to prevent burning!

***Can I put the sauce in the crock pot with the wings from the start?***

While you *can* add the sauce from the beginning, it’s generally not recommended for classic BBQ wings. Adding the sauce towards the end allows it to thicken and caramelize without burning, creating a better glaze. If you add it early, the sugar in the sauce can burn on the bottom of the cooker.

***How long do crock pot chicken wings last?***

Leftover crock pot chicken wings can be stored in an airtight container in the refrigerator for 3-4 days. Always ensure they have cooled completely before refrigerating.

***What kind of BBQ sauce should I use?***

Use your favorite! A smoky, sweet, or spicy BBQ sauce will all work well. Experimenting with different brands or types is part of the fun. For a slightly sweeter, more caramelized glaze, you might want a sauce that isn’t already loaded with excessive sugar.

Print
clock clock iconcutlery cutlery iconflag flag iconfolder folder iconinstagram instagram iconpinterest pinterest iconfacebook facebook iconprint print iconsquares squares iconheart heart iconheart solid heart solid icon

Crock Pot Chicken Wings Recipe – Easy, Juicy & Delicious

  • Author: Chef Mia

Description

Welcome to another delicious slow-cooker recipe! If you’re a fan of chicken wings, thisCrock Pot Chicken Wingsrecipe is going to be your new go-to favorite. It’s sticky, tender, and perfect for any occasion—whether it’s a game day, a casual dinner, or a party appetizer that everyone will rave about! Get ready to experience juicy wings cooked to perfection with minimal effort.


Ingredients

Scale
  • 3lbs chicken wings
  • 1 cupBBQ sauce, divided
  • 2 tspbrown sugar
  • 1 tspsea salt
  • 1 tspgarlic powder
  • 1 tspsmoked paprika
  • ½ tspchili powder
  • 1 tsponion powder
  • tspground oregano

Instructions

  1. In a small bowl, mix together all the rub ingredients. Make sure to break up any clumps in the brown sugar to ensure an even coating on the chicken wings.
  2. Pat the chicken wings dry with a paper towel to remove excess moisture. This step is essential for the rub to adhere well. Season the raw chicken wings with the rub on both sides, massaging it into the skin for maximum flavor.
  3. Spray the bottom and sides of a crock pot with nonstick cooking spray. Place the seasoned chicken wings in the bottom. Pour ½ cup of BBQ sauce over the wings and toss to ensure they are fully coated. Cover the crock pot and cook onlow for 3-4 hoursorhigh for 1-2 hours, until they reach an internal temperature of 165°F.
  4. Once the wings are fully cooked, preheat your oven to the broil setting. Place the wings on a wire rack set over a lined baking sheet. Brush with the remaining ½ cup of BBQ sauce. Broil on high for 2-3 minutes until the sauce caramelizes, flipping halfway if desired.

Notes

Use Fresh Ingredients:Fresh garlic and onion can elevate the flavors in the rub if you prefer more intense aromas.
Get Creative with Sauces:Swap the BBQ sauce for buffalo sauce, honey mustard, or even teriyaki for a twist on the classic wings.
Marinate Overnight:If you have time, let the wings marinate overnight with the rub for an even deeper flavor.

“`

Steak Fajita Bowls with Pico de Gallo

“`html

Steak Fajita Bowls with Pico de Gallo

Craving a Flavor-Explosion? Discover Steak Fajita Bowls!

Are you tired of the same old weeknight dinners? Do you find yourself scrolling endlessly for a meal that’s both satisfying and packed with vibrant flavors? If you’re nodding along, then you’re in the right place! Steak Fajita Bowls with Pico de Gallo are here to revolutionize your mealtime. This dish isn’t just food; it’s an experience. Imagine tender, seasoned steak seared to juicy perfection, vibrant, zesty pico de gallo bursting with freshness, all layered over your favorite base. It’s a culinary adventure that’s surprisingly easy to whip up, promising to delight your taste buds and leave you feeling completely content. Let’s dive into how you can create this amazing meal!

The Symphony of Flavors: Ingredients You’ll Need

The beauty of these Steak Fajita Bowls lies in the interplay of fresh, bold ingredients. We’ve carefully selected each component to create a harmonious and incredibly satisfying dish. Don’t worry if you can’t find a specific item; we’ll offer some fantastic substitutions to keep the flavor profile on point!

For the Steak Marinade and Fajitas:

  • 1.5 lbs Flank Steak or Skirt Steak: Choose a well-marbled cut for maximum tenderness and flavor. Skirt steak offers a more robust beefy taste, while flank is a bit leaner.
  • 2 tbsp Olive Oil: A good quality extra virgin olive oil will add subtle fruity notes. Avocado oil is a great high-heat alternative.
  • 1 tbsp Chili Powder: For a smoky, earthy depth.
  • 1 tsp Cumin: The quintessential warm spice that pairs perfectly with Mexican flavors.
  • 1 tsp Smoked Paprika: Adds a delightful smoky sweetness and deep red hue.
  • 1/2 tsp Garlic Powder: Easier to distribute evenly than fresh garlic here.
  • 1/2 tsp Onion Powder: Complements the fresh onion in the pico.
  • 1/4 tsp Cayenne Pepper (optional): For a touch of heat that awakens the palate. Adjust to your spice preference!
  • 1/2 tsp Salt: Essential for bringing out all the flavors.
  • 1/4 tsp Black Pepper: Freshly ground always tastes best.
  • 1 large Onion (sliced): Use yellow or red onion for a sweet, pungent bite.
  • 2 Bell Peppers (sliced): A mix of red, yellow, and green peppers offers a vibrant visual and a spectrum of sweetness.

For the Zesty Pico de Gallo:

  • 3 Roma Tomatoes (diced): Ripe but firm tomatoes are key.
  • 1/2 small Red Onion (finely diced): Its sharp bite is perfect here. If you find raw red onion too strong, you can soak it in ice water for 10 minutes before dicing.
  • 1 Jalapeño Pepper (minced, seeds removed for less heat): Provides a fresh, clean heat. Serrano peppers can be substituted for more spice.
  • 1/4 cup Fresh Cilantro (chopped): The aromatic herb that screams fresh Mexican flavor. If you dislike cilantro, parsley can be used, though the flavor profile will differ.
  • 1 Lime, juiced: Fresh lime juice is non-negotiable for that essential tanginess.
  • Salt to taste: Brightens all the fresh flavors.

For Serving:

  • Cooked Rice, Quinoa, or Cauliflower Rice: Your chosen base creates texture and substance.
  • Optional Toppings: Avocado slices, sour cream or plain Greek yogurt, shredded cheese, black beans, corn salsa.

Your Fajita Fiesta Timeline

Let’s break down the time commitment for these delicious Steak Fajita Bowls. While the prep work is minimal, the cooking process is quick and efficient.

Prep Time:
20 minutes
Cook Time:
15 minutes
Total Time:
35 minutes

Compared to average weeknight meals that can often stretch over an hour, these fajita bowls are a speedy solution for busy evenings. The marinating time for the steak is flexible; you can marinate it for as little as 30 minutes or up to 4 hours for a deeper flavor infusion.

Steak Fajita Bowl with Pico de Gallo and vegetables

Crafting Your Steak Fajita Bowl: A Step-by-Step Guide

Step 1: Prep the Steak

Begin by preparing your steak. If your flank or skirt steak is a large piece, you might want to slice it in half to make it easier to manage in the pan. In a medium bowl, whisk together the olive oil, chili powder, cumin, smoked paprika, garlic powder, onion powder, cayenne pepper (if using), salt, and black pepper. Add the steak to the bowl and toss to ensure it’s evenly coated with the spice mixture. Let it marinate at room temperature for at least 15-20 minutes while you prepare the other components, or cover and refrigerate for up to 4 hours for an even more intense flavor.

Step 2: Make the Pico de Gallo

In a separate bowl, combine the diced Roma tomatoes, finely diced red onion, minced jalapeño (with or without seeds, depending on your heat preference), and chopped fresh cilantro. Squeeze the juice of one fresh lime over the mixture. Season generously with salt. Stir gently to combine all the ingredients. Taste and adjust seasoning if needed – you might want a little more lime or salt. Set aside to allow the flavors to meld while you proceed with cooking the steak and vegetables.

Step 3: Cook the Steak

Heat a large skillet or cast-iron pan over medium-high heat. Add a thin layer of high-heat oil if your pan isn’t well-seasoned. Once the pan is smoking hot, carefully add the marinated steak. Sear for about 3-5 minutes per side for medium-rare, or longer depending on your desired level of doneness. Avoid overcrowding the pan; cook the steak in batches if necessary. Once cooked, remove the steak from the pan and let it rest on a cutting board for at least 5-10 minutes. This resting period is crucial for juicy, tender steak.

Step 4: Prep the Veggies

While the steak is resting, add the sliced onions and bell peppers to the same skillet you used for the steak (no need to clean it – those fond bits add flavor!). Add another tablespoon of olive oil if the pan looks dry. Sauté the vegetables over medium-high heat, stirring occasionally, for about 5-7 minutes, or until they are tender-crisp and slightly caramelized. You want them cooked through but still with a bit of bite.

Step 5: Assemble the Bowls

Now for the best part – assembly! Slice the rested steak against the grain into thin strips. Start by spooning your chosen base (rice, quinoa, or cauliflower rice) into individual bowls. Top generously with the cooked fajita vegetables. Arrange the sliced steak over the vegetables. Finally, spoon a good dollop of your fresh pico de gallo on top. Add any of your desired optional toppings like avocado, a swirl of sour cream or Greek yogurt, shredded cheese, black beans, or corn salsa. Serve immediately and enjoy the explosion of flavors!

Nutritional Highlights (Estimates Per Serving, without optional toppings)

While exact nutritional values can vary based on ingredients and portion sizes, here’s a general idea of what a Steak Fajita Bowl offers:

  • Calories: 450-600 kcal (depending on the base and steak cut)
  • Protein: 30-40g (primarily from the steak)
  • Fat: 20-30g (healthy fats from olive oil, steak)
  • Carbohydrates: 25-40g (depending on your base – rice will be higher than cauliflower rice)
  • Fiber: 5-10g (from vegetables, optional quinoa)

This meal is a great source of lean protein, essential vitamins like Vitamin C from the peppers, and healthy fats. It’s a well-rounded nutritional powerhouse!

Healthier Swaps without Sacrificing Flavor

Looking to lighten things up or cater to specific dietary needs? These bowls are incredibly adaptable:

  • Lighter Protein: Swap flank steak for lean chicken breast, turkey, or even firm tofu for a vegetarian option. Seasoning remains the same!
  • Low-Carb Base: Replace rice or quinoa with cauliflower rice or shredded lettuce for a significantly lower carbohydrate count.
  • Creamy Base (Healthier): Instead of sour cream, use plain Greek yogurt. It offers a similar tang and creaminess with more protein and fewer calories. Avocado is also a fantastic, healthy fat option.
  • Reduced Sodium: Be mindful of salt in marinades and toppings, especially if using pre-made spice blends.

Elevate Your Bowl: Serving Suggestions

The beauty of these fajita bowls is their customizability. Here are some ideas to take them to the next level:

  • Salsa Bar: Offer a variety of salsas – mild, medium, hot, corn salsa, or a mango salsa for a sweet contrast.
  • Guacamole: Chunky homemade guacamole is always a crowd-pleaser.
  • Pickled Elements: Pickled red onions or jalapeños add a delightful tang and crunch.
  • Crunch Factor: A sprinkle of toasted pepitas (pumpkin seeds) or crushed tortilla chips can add a satisfying textural element.

Common Mistakes to Avoid

Even with a simple recipe, a few missteps can impact the final outcome. Here’s how to ensure perfection:

  • Overcrowding the Pan: This leads to steaming rather than searing, resulting in less flavorful, less browned steak and vegetables. Cook in batches if needed.
  • Not Resting the Steak: Skipping the resting period allows the juices to escape when you cut into the steak, making it dry and less tender.
  • Undermarining the Steak: While quick, a short marination time means less flavor penetration. Give it at least 20 minutes if time allows.
  • Using Bland Tomatoes for Pico: Ripe, flavorful tomatoes are essential for a vibrant pico de gallo.

Storing Your Fajita Bowls

Leftovers can be stored in an airtight container in the refrigerator for up to 3 days. For best results, store the components separately if possible, especially the pico de gallo, as it can become watery. Reheat the steak and vegetables gently on the stovetop or in the microwave. Add fresh pico de gallo and any cold toppings after reheating.

Your New Go-To Meal Awaits!

Steak Fajita Bowls with Pico de Gallo are more than just a meal; they’re a vibrant, flexible, and incredibly delicious solution for your weeknight dinner dilemmas. With minimal effort, you can bring the sizzle and zest of fajitas right to your table, customized to your liking. The combination of perfectly seasoned steak, fresh pico de gallo, and your favorite base is a guaranteed hit. Give this recipe a try and discover your new favorite hearty and flavorful bowl!

Frequently Asked Questions

***_What is the best cut of steak for fajitas?_***

Flank steak and skirt steak are traditional choices because they are flavorful and become tender when sliced against the grain after quick cooking. Ribeye or sirloin can also be used.

***_Can I make the pico de gallo ahead of time?_***

Yes, you can make it a few hours ahead. For the freshest taste and texture, it’s best to make it no more than 4-6 hours in advance. Stir well before serving.

***_How spicy are these bowls?_***

The spice level is determined by the cayenne pepper in the marinade and the jalapeño in the pico de gallo. You can control this by adjusting the amount of cayenne and choosing to include or exclude the jalapeño seeds and membranes.

***_Can I use chicken instead of steak?_***

Absolutely! Chicken breast or thighs work wonderfully. You may need to adjust the cooking time slightly depending on the cut and thickness.

***_What are other good base options besides rice or quinoa?_***

Besides cauliflower rice or shredded lettuce, you could also use farro, barley, or even mashed sweet potatoes for a unique twist.

Print
clock clock iconcutlery cutlery iconflag flag iconfolder folder iconinstagram instagram iconpinterest pinterest iconfacebook facebook iconprint print iconsquares squares iconheart heart iconheart solid heart solid icon

Steak Fajita Bowls with Pico de Gallo

  • Author: Chef Mia

Description

Steak Fajita Bowls with Pico de Gallo are a bold and satisfying meal perfect for any night of the week. Juicy, seasoned steak is seared to perfection, then layered with fresh, zesty pico de gallo and a creamy base. Served over rice, quinoa, or cauliflower rice, this customizable bowl is as hearty as it is flavorful.


Ingredients

Scale
  • 1lb flank, skirt, or sirloin steak
  • 2 tbspolive oil
  • 2 tbspfajita seasoning (store-bought or homemade)
  • 2large tomatoes, diced
  • 1small onion, finely chopped
  • 1/4 cupfresh cilantro, chopped
  • Juice of1lime
  • Pinch of salt
  • 1 cupsour cream or Greek yogurt
  • 2 cupscooked rice, quinoa, or cauliflower rice
  • Optional toppings: diced avocado, shredded cheese, lime wedges, fresh cilantro

Instructions

  1. In a bowl, mix olive oil and fajita seasoning. Coat the steak with the marinade and let sit for 15-20 minutes.
  2. Heat a grill or cast-iron skillet over medium-high heat. Cook the steak for 3-4 minutes per side for medium-rare, or to your preferred doneness. Let rest for 5-10 minutes before slicing thinly against the grain.
  3. To make the pico de gallo, combine tomatoes, onion, cilantro, lime juice, and salt in a bowl. Mix well and set aside.
  4. Prepare the base (rice, quinoa, or cauliflower rice) according to package instructions. Keep warm.
  5. Assemble the bowls by layering the base, a dollop of sour cream or Greek yogurt, sliced steak, and a generous scoop of pico de gallo.
  6. Add optional toppings like diced avocado, shredded cheese, or a squeeze of lime. Serve immediately.

Notes

To add extra flavor, marinate the steak for up to 2 hours.
For added crunch, top with sliced jalapeños or crushed tortilla chips.
Store leftovers in separate airtight containers in the refrigerator for up to 3 days. Reheat steak gently to preserve its texture.

“`

Twix Cookie Cups

“`html

Twix Cookie Cups

Gathering your ingredients is the first step to creating these delightful Twix Cookie Cups. We’ve aimed for common pantry staples, but I’ll offer some easy swaps to make this recipe even more accessible.

Cookie Base:

  • 1 cup (2 sticks) unsalted butter, softened (for a rich, creamy foundation)
  • ¾ cup granulated sugar
  • ½ cup packed light brown sugar (adds a hint of molasses for depth)
  • 1 large egg
  • 1 teaspoon vanilla extract (enhances sweetness and aroma)
  • 2 ¼ cups all-purpose flour
  • ½ teaspoon baking soda
  • ¼ teaspoon salt
Caramel Center:

  • 1 can (14 ounces) sweetened condensed milk (creates that signature chewy, sweet caramel)
  • 1 cup light corn syrup (for smooth, pourable caramel)
  • ½ cup unsalted butter
  • 1 teaspoon vanilla extract (optional, but brings out the caramel’s sweetness)
  • Pinch of salt
Chocolate Topping:

  • 1 ½ cups semi-sweet chocolate chips (or milk chocolate for a sweeter profile)
  • 2 tablespoons unsalted butter or coconut oil (for a smooth, glossy finish)

Let’s talk time. Baking is a delightful way to spend an afternoon, and with these Twix Cookie Cups, it’s surprisingly efficient!

Preparation Time

approx. 30 minutes

Cook Time

approx. 8-10 minutes per batch

approx. 1 hour 30 minutes (including chilling and setting)

Compared to many elaborate dessert recipes, Twix Cookie Cups are quite achievable within a single afternoon. While the total time includes cooling and setting, the active prep and bake time is relatively short!

Delicious Twix Cookie Cups stacked as a treat

Alright, let’s get baking! Follow these steps to create your very own batch of Twix Cookie Cups. I’ll guide you through each part with a friendly touch.

Step 1: Preheat and Prepare

First things first, let’s get our oven and baking vessels ready. Preheat your oven to 350°F (175°C). Lightly grease a 24-cup mini muffin tin or a regular muffin tin if you want larger cups. You can use baking spray or a bit of butter and flour. If you’re using a regular muffin tin, you might need to double the cookie dough portion per cup.

In a large bowl, cream together the softened unsalted butter, granulated sugar, and light brown sugar until light and fluffy. This aeration is key for a tender cookie! Beat in the large egg until well combined, then stir in the vanilla extract. In a separate medium bowl, whisk together the all-purpose flour, baking soda, and salt to ensure they are evenly distributed. Gradually add the dry ingredients to the wet ingredients, mixing on low speed or by hand until just combined. Be careful not to overmix, as this can lead to tough cookies. You’ll want a dough that’s soft but not sticky.

Step 3: Caramel Layer

Now for the luscious caramel! In a medium saucepan, combine the sweetened condensed milk, light corn syrup, butter, and salt (if using). Cook over medium heat, stirring constantly, until the mixture comes to a boil and thickens, about 5-8 minutes. It should reach a beautiful caramel color. Remove from heat and stir in the vanilla extract, if desired. Let the caramel cool slightly, but keep it warm enough to be pourable. If you have a candy thermometer, you’re aiming for around 240°F (115°C) for a chewy, not too liquidy caramel.

Step 4: Bake

Take small portions of the cookie dough (about 1 tablespoon for mini muffin tins) and press them into the bottom and up the sides of your prepared muffin cups, forming a cup-like shape. Don’t fill them too high, as the dough will spread. Bake for 8-10 minutes for mini cups, or 12-15 minutes for regular cups, until the edges are lightly golden brown. Immediately after removing from the oven, gently press the center of each cookie cup down further with the back of a small spoon or your thumb to create a deeper well for the caramel. Let them cool in the tin for a few minutes before transferring them to a wire rack to cool completely. This step is crucial; warm cookie cups can break.

Step 5: Chocolate Topping

While the cookie cups are cooling, prepare your chocolate topping. In a microwave-safe bowl, combine the semi-sweet chocolate chips and the butter or coconut oil. Microwave in 30-second intervals, stirring in between, until the chocolate is melted and smooth. Alternatively, you can melt this mixture gently in a double boiler. The butter or coconut oil helps achieve that wonderful gloss and smooth texture, mirroring the Twix bar’s coating.

Once the cookie cups are completely cool and the caramel has thickened slightly but is still pourable, it’s time for assembly! Spoon about 1-2 teaspoons of the slightly cooled caramel into the center of each cookie cup. Don’t overfill, or it will spill out. Then, generously drizzle or spoon the melted chocolate over the caramel layer, ensuring it covers the caramel completely and creates a lovely topping. You can smooth it out with a small offset spatula or the back of a spoon.

Step 7: Chill

Place the assembled Twix Cookie Cups in the refrigerator for at least 30 minutes, or until the chocolate topping is firm and set. This chilling step allows all the layers to meld together and gives you that satisfying “snap” when you bite into them. Once firm, they are ready to be enjoyed!

While these Twix Cookie Cups are a decadent treat, here’s a general estimate of their nutritional value per mini cookie cup. Please note that actual values may vary based on ingredient brands and exact serving sizes.

  • Calories: Approximately 150-200 kcal
  • Carbohydrates: Approximately 20-25g
  • Fat: Approximately 8-12g
  • Sugar: Approximately 15-20g
  • Protein: Approximately 2-3g

Looking to make these a little lighter without sacrificing too much flavor? Here are a few ideas:

  • Cookie Base: Use whole wheat pastry flour for a slightly less refined base. You could also reduce the sugar slightly in the cookie dough.
  • Caramel Center: Experiment with date-based caramel for a natural sweetener. Blend soaked dates with a touch of nut butter and a splash of water until smooth. It won’t be exactly the same, but it offers a lovely caramel-like sweetness.
  • Chocolate Topping: Opt for dark chocolate chips (70% cocoa or higher) which contain less sugar and more antioxidants. You can also use a dairy-free chocolate.
  • Portion Control: Making them in mini muffin tins is already a great way to manage portion sizes!

These Twix Cookie Cups are fantastic on their own, but they also pair wonderfully with a cup of coffee or tea. For an extra special treat, you can serve them slightly warmed (just a few seconds in the microwave) so the caramel is extra gooey. They make a charming addition to any dessert platter or cookie exchange.

To ensure your Twix Cookie Cups turn out perfectly, watch out for these common pitfalls:

  • Overmixing the Dough: This develops gluten too much, resulting in tough cookies. Mix until just combined.
  • Not Pressing the Cookie Base Deeply Enough: This can lead to the caramel spilling out during baking or cooling. Ensure you create a good “well.”
  • Caramel Too Hot or Too Cold: If the caramel is too hot when filling, it may leak. If it’s too cold and stiff, it will be hard to work with. Aim for warm and pourable.
  • Chocolate Not Setting: Ensure the cookie cups are fully cooled before adding caramel and chocolate, and let them chill sufficiently to set.

Store your cooled Twix Cookie Cups in an airtight container at room temperature for up to 2-3 days. If your kitchen is particularly warm, or if you prefer them firmer, they can be stored in the refrigerator for up to a week. They also freeze beautifully! Place them in a single layer on a baking sheet to freeze, then transfer to a freezer-safe bag or container. Thaw at room temperature before enjoying.

There you have it – your very own Twix Cookie Cups, bursting with all the flavors and textures you love from the classic candy bar! These are more than just cookies; they are a little piece of joy, crafted in your own kitchen. Whether you’re a seasoned baker or just starting, these cups are incredibly rewarding to make and even more so to eat. So, gather your ingredients, put on your favorite apron, and dive into this delightful baking adventure. Don’t forget to share your creations – though I wouldn’t blame you if you kept them all to yourself!

***Can I use store-bought cookie dough?***

While the recipe provides a delicious homemade base, you can use store-bought sugar cookie dough in a pinch. You’ll need to adapt the shaping to fit the muffin tin cups.

***What kind of caramel works best?***

The recipe uses a homemade caramel made from sweetened condensed milk. While you could try using pre-made soft caramels, they might not have the same smooth, pourable consistency. The homemade version ensures the perfect chewy texture.

***Can I make these gluten-free or dairy-free?***

Yes, with some ingredient swaps! Use a gluten-free flour blend for the cookie base. For dairy-free, use vegan butter, a dairy-free milk alternative for the caramel (though the consistency might change), and dairy-free chocolate chips.

***How do I get the chocolate to look smooth and glossy like a Twix bar?***

Adding a little bit of butter or coconut oil to your melted chocolate, as suggested in the recipe, is key. This helps create a smooth, flowing consistency that sets with a nice shine.

***My caramel is too runny. What did I do wrong?***

This usually happens if the caramel wasn’t cooked long enough to thicken. You can try cooking it a bit longer over low heat, or if it’s already cooled significantly, slightly reheating it may help it bind better. Ensure you’re using sweetened condensed milk, not evaporated milk.

Print
clock clock iconcutlery cutlery iconflag flag iconfolder folder iconinstagram instagram iconpinterest pinterest iconfacebook facebook iconprint print iconsquares squares iconheart heart iconheart solid heart solid icon

Twix Cookie Cups

  • Author: Chef Mia

Description

Twix Cookie Cups are the ultimate treat for anyone who loves the iconic candy bar. These bite-sized delights feature a soft and buttery cookie base, a gooey caramel center, and a smooth, glossy chocolate topping. Perfect for parties, gifting, or simply satisfying your sweet tooth, these cookie cups are easy to make and absolutely irresistible!


Ingredients

Scale
  • 1/2 cupunsalted butter, softened
  • 1/4 cupgranulated sugar
  • 1/4 cupbrown sugar, packed
  • 1 tspvanilla extract
  • 1 cupall-purpose flour
  • 1/4 tspbaking soda
  • 1/8 tspsalt
  • 20soft caramels (or1/2 cupcaramel sauce)
  • 2 tbspheavy cream (optional, for melting caramels)
  • 1/2 cupmilk or dark chocolate, melted

Instructions

  1. Preheat your oven to 350°F (175°C). Lightly grease a mini muffin tin or line it with paper liners.
  2. In a large mixing bowl, cream together the softened butter, granulated sugar, and brown sugar until light and fluffy. Add the vanilla extract and mix until combined.
  3. Gradually add the flour, baking soda, and salt to the butter mixture. Stir until a soft dough forms.
  4. Scoop about a tablespoon of dough into each mini muffin cup. Press the dough into the bottom and slightly up the sides to create a cup shape.
  5. Bake for 10-12 minutes, or until the edges are lightly golden. Remove from the oven and immediately press down the centers using the back of a spoon or a small cup. Let cool completely in the tin.
  6. Melt the caramels with heavy cream (if using) in a microwave-safe bowl or over low heat on the stovetop. Stir until smooth. Fill each cookie cup with caramel, leaving a little space at the top.
  7. Melt the chocolate in a microwave-safe bowl in 20-second intervals, stirring after each. Spoon melted chocolate over the caramel layer, spreading it to cover the top completely.
  8. Allow the chocolate to set at room temperature or in the refrigerator. Once firm, gently remove the cookie cups from the tin and serve.

Notes

Storage:Keep at room temperature for up to 3 days, refrigerate for up to a week, or freeze for up to 2 months.
Variations:Add a sprinkle of sea salt for a sweet and salty twist, or substitute dark chocolate for a more intense flavor.
Caramel Tip:If using store-bought caramels, melt them with heavy cream for a smoother consistency.

“`

Cilantro Lime Chicken Salad 🥗 – A Burst of Fresh Flavors!

“`html

Cilantro Lime Chicken Salad 🥗 – A Burst of Fresh Flavors!

A Burst of Fresh Flavors!

Are you tired of bland, uninspired salads? Do you crave a dish that excites your palate with a symphony of fresh, zesty, and slightly sweet notes? Today, we’re diving headfirst into a culinary masterpiece: the Cilantro Lime Chicken Salad. This isn’t just any chicken salad; it’s a vibrant concoction featuring a tantalizing Mango Avocado Salsa, making it a refreshing and satisfying meal that’s perfect for any occasion. Imagine tender, flavorful chicken combined with the creamy richness of avocado, the tropical sweetness of mango, the sharp bite of red onion, and the invigorating zing of cilantro and lime. This salad is a feast for the senses – visually stunning, aromatically captivating, and, most importantly, incredibly delicious. It’s a dish that promises to elevate your dining experience and become a firm favorite in your recipe repertoire.

Ingredients

To create this burst of freshness, we’ve broken down the ingredients into three key components: the chicken and base, the vibrant mango avocado salsa, and the zesty dressing. Don’t be intimidated by the list; each element plays a crucial role in creating the harmonious flavor profile.

Chicken and Base Ingredients

  • 2 boneless, skinless chicken breasts (about 1.5 lbs): The protein powerhouse, providing a satisfying and savory base. You can also use leftover rotisserie chicken for a shortcut!
  • 1 tbsp olive oil: For pan-searing the chicken, adding a subtle richness and helping it crisp up beautifully.
  • Salt and freshly ground black pepper: To season the chicken perfectly, enhancing its natural flavor.
  • 1/4 cup finely chopped red onion: Adds a crisp, sharp bite and a beautiful pop of color. If you find raw onion too pungent, soak it in cold water for 10 minutes before chopping.
  • 1/4 cup chopped fresh cilantro: The star of our salad, offering its characteristic bright, herbaceous, and slightly citrusy notes.
  • 1/2 cup corn kernels (fresh, frozen, or canned): For a touch of sweetness and a delightful pop of texture.

Mango Avocado Salsa Ingredients

  • 1 ripe mango, peeled and diced small: Provides a luscious, sweet, and tropical counterpoint to the savory chicken. Aim for a mango that yields slightly to gentle pressure.
  • 1 ripe avocado, diced small: Adds a creamy, buttery texture that melts in your mouth. Ensure it’s ripe but not mushy.
  • 1/4 cup finely diced red bell pepper: Brings a mild sweetness and a vibrant crunch.
  • 1-2 tbsp finely chopped jalapeño (optional): For a hint of heat to balance the sweetness. Remove seeds and membranes for less spice.
  • 1 tbsp fresh lime juice: Crucial for brightening the salsa and preventing the avocado from browning.
  • Pinch of salt: To enhance all the flavors.

Dressing Ingredients

  • 3 tbsp olive oil: The base of our emulsified dressing.
  • 2 tbsp fresh lime juice: The essential zesty component that ties everything together.
  • 1 tsp honey or maple syrup (optional): A touch of sweetness to balance the tartness of the lime.
  • 1 tsp ground cumin: Adds a warm, earthy depth.
  • 1/4 tsp garlic powder: For a subtle, savory garlic note.
  • Salt and freshly ground black pepper: To taste, ensuring perfect seasoning.

Timing

Prep time:
20 minutes
Cook time:
15-20 minutes
Total time:
35-40 minutes

This recipe is remarkably quick, especially if you opt for pre-cooked chicken. The active preparation time is around 20 minutes, while cooking the chicken takes about 15-20 minutes. Most chicken salads take around 20-30 minutes of prep. Our included salsa and fresh dressing elements add a touch more time, bringing the total to about 35-40 minutes, making it slightly longer than average but well worth the fresh, vibrant result.

A vibrant Cilantro Lime Chicken Salad with Mango Avocado Salsa, showcasing colorful ingredients.

Step-by-Step Instructions

Let’s get cooking! Follow these simple steps to create a salad that’s bursting with flavor and color.

Step 1: Cook the Chicken

Pat the chicken breasts dry with paper towels. Season generously with salt and freshly ground black pepper. Heat the olive oil in a skillet over medium-high heat. Add the chicken breasts and cook for 6-8 minutes per side, or until cooked through and an internal temperature of 165°F (74°C) is reached. Let the chicken rest for 5-10 minutes, then dice it into bite-sized pieces.

Step 2: Prepare the Mango Avocado Salsa

While the chicken rests, prepare the salsa. In a medium bowl, gently combine the diced mango, diced avocado, diced red bell pepper, chopped jalapeño (if using), 1 tablespoon of fresh lime juice, and a pinch of salt. Be careful not to over-mix, as you want the avocado to retain its shape.

Step 3: Make the Lime Cilantro Dressing

In a small bowl or jar, whisk together the olive oil, 2 tablespoons of fresh lime juice, honey or maple syrup (if using), ground cumin, garlic powder, salt, and pepper. Continue whisking until the dressing is well combined and slightly emulsified. Taste and adjust seasonings as needed.

Step 4: Assemble the Salad

In a large bowl, combine the diced cooked chicken, chopped red onion, chopped cilantro, and corn kernels. Pour about half of the dressing over this mixture and toss gently to coat. Add the mango avocado salsa to the bowl. Drizzle with the remaining dressing, and carefully toss everything together to combine, ensuring the fragile salsa ingredients are distributed without being mashed.

Step 5: Chill and Serve

For the best flavor, cover the salad and refrigerate for at least 15-30 minutes to allow the flavors to meld. This salad is best served chilled.

Nutritional Information

This Cilantro Lime Chicken Salad is a good source of lean protein and healthy fats, packed with vitamins and minerals from the fresh produce. While exact nutritional values can vary based on ingredient brands and specific quantities, a standard serving (approximately 1/4 of the recipe) typically falls within these ranges:

  • Calories: 300-400 kcal
  • Protein: 25-35g
  • Fat: 15-25g (mostly healthy fats from avocado and olive oil)
  • Carbohydrates: 15-20g (primarily from mango and corn)
  • Fiber: 5-8g

Healthier Alternatives

Looking to make this salad even lighter or cater to specific dietary needs? Here are some swaps that maintain deliciousness:

  • Lighter Protein: Swap chicken breasts for grilled shrimp or firm tofu for a different, equally satisfying protein source.
  • Reduced Fat Dressing: Use plain Greek yogurt or a lighter vinaigrette instead of part of the olive oil in the dressing.
  • Lower Carb Salsa: Omit the corn if you’re looking to reduce carbohydrates.
  • Seed Cycling: For a boost of seeds and nutrients, consider adding a tablespoon of pumpkin seeds or sunflower seeds for crunch.

Serving Suggestions

This versatile salad can be enjoyed in myriad ways:

  • In Lettuce Cups: Serve in crisp butter lettuce or romaine lettuce cups for a light, refreshing meal.
  • With Tortilla Chips: A classic pairing, perfect for scooping up every last bite.
  • Stuffed Avocado: Serve a generous portion inside a halved avocado for an extra creamy treat.
  • As a Side Dish: It makes a fantastic accompaniment to grilled fish or chicken.
  • On Greens: Layer over a bed of mixed greens for a substantial salad.

Common Mistakes to Avoid

To ensure your Cilantro Lime Chicken Salad is perfect every time:

  • Over-mixing the Salsa: Be gentle when combining the mango and avocado to maintain their texture.
  • Using Undercooked Chicken: Always ensure chicken is cooked to a safe internal temperature.
  • Adding Dressing Too Early: If making ahead, consider adding the dressing just before serving to prevent wilting, especially if serving with greens.
  • Ignoring Seasoning: Taste and adjust salt, pepper, and lime juice at each stage for balanced flavor.

Storing Your Salad

Can this vibrant salad be stored? Absolutely! Store any leftovers in an airtight container in the refrigerator for up to 2-3 days. The avocado may brown slightly, but the lime juice helps to mitigate this. It’s best to consume it within the first 48 hours for optimal freshness and texture.

Enjoy Your Vibrant Salad!

The Cilantro Lime Chicken Salad with Mango Avocado Salsa is more than just a meal; it’s an experience. It’s a celebration of fresh ingredients, vibrant colors, and lively flavors that are sure to impress. Whether you’re looking for a healthy lunch option or a standout dish to share at your next gathering, this salad delivers on all fronts. So, don’t hesitate – gather your ingredients and whip up this delightful creation. Your taste buds will thank you!

Frequently Asked Questions

***Can I make this salad ahead of time?***

Yes, you can! It’s best to cook the chicken and prepare the salsa and dressing separately. Combine them about 30 minutes to an hour before serving to allow flavors to meld, or assemble fully and refrigerate for up to 2 days. Add avocado just before serving if making further in advance to prevent browning.

***What kind of chicken is best?***

Boneless, skinless chicken breasts are ideal for their lean texture and quick cooking time. However, rotisserie chicken or even cooked dark meat chicken can be used for convenience or a richer flavor.

***How spicy is this salad?***

The spice level is mild and customizable. The jalapeño in the salsa is optional. If you like it spicier, leave the seeds in the jalapeño or add a pinch of cayenne pepper to the dressing.

***What if I don’t have ripe mango?***

If ripe mango isn’t available, you can substitute with diced pineapple for a similar tropical sweetness and tang. Ensure it’s not overly tart.

Print
clock clock iconcutlery cutlery iconflag flag iconfolder folder iconinstagram instagram iconpinterest pinterest iconfacebook facebook iconprint print iconsquares squares iconheart heart iconheart solid heart solid icon

Cilantro Lime Chicken Salad with Mango Avocado Salsa Recipe

  • Author: Chef Mia

Description

Hello, food enthusiasts! Are you ready to dive into a delightful culinary experience that combines zesty flavors and refreshing textures? Today, we’re bringing you a vibrantCilantro Lime Chicken Salad with Mango Avocado Salsathat’s perfect for any occasion. This salad is not just a feast for your taste buds but also for your eyes. With its colorful ingredients and tantalizing aroma, this dish is bound to become a favorite at your dinner table.


Ingredients

Scale
  • 3 tablespoonsolive oil
  • ½ cupfreshly squeezed lime juice
  • ½ cupfresh chopped cilantro(coriander)
  • 4cloves garlic, crushed
  • 2 teaspoonshoney
  • 1 teaspoonbrown sugar
  • 1 teaspoonground cumin
  • 1 ¼ teaspoonsalt
  • 4chicken thigh fillets(skin removed, no bone)
  • 5 cupsRomaine or Cos lettuce leaves, washed and dried
  • 1red pepper (capsicum), deseeded and sliced
  • 1large mango, diced
  • 1avocado, diced
  • 1green onion (shallot), peeled and thinly sliced
  • Extra cilantro leavesto garnish
  • Red chili flakesto garnish

Instructions

  1. Whisk together olive oil, lime juice, chopped cilantro, garlic, honey, brown sugar, ground cumin, and salt. Ensure that the ingredients are well combined, creating a smooth and flavorful marinade.
  2. Pour a third of the marinade into a shallow dish and add the chicken fillets. Marinate for at least 15 minutes (ideally 1-2 hours if you have time). Set aside the remaining marinade in the refrigerator to use as a dressing later.
  3. Heat a teaspoon of oil in a grill pan or skillet over medium-high heat. Grill the chicken fillets for about 6-7 minutes on each side, or until golden brown and cooked through. Avoid overcrowding the pan to ensure the chicken cooks evenly. Once done, set aside to rest for a few minutes before slicing.
  4. In the same pan, add another teaspoon of oil. Grill or fry the sliced red peppers until they are slightly charred and cooked to your liking. This step enhances the sweetness of the peppers, making them a perfect addition to the salad.
  5. Combine the diced mango, avocado, and green onion in a medium bowl. Add two tablespoons of the reserved dressing to the salsa and gently toss to coat. This step infuses the salsa with the bright, tangy flavors of the cilantro lime dressing.
  6. Arrange the lettuce leaves in a large serving bowl or platter. Top with the grilled peppers and mango salsa. Slice the chicken into strips and layer them over the salad. Drizzle the remaining dressing on top and garnish with extra cilantro leaves and a sprinkle of red chili flakes for an added kick.
  7. Your Cilantro Lime Chicken Salad is now ready to be served! Pair it with some warm tortillas, a side of rice, or enjoy it as a standalone meal.

Notes

Use Fresh Ingredients:Fresh lime juice and cilantro will enhance the flavors of this dish.
Marinate Longer for Better Flavor:If time allows, marinate the chicken overnight for a more intense flavor.
Don’t Overcrowd the Pan:When grilling the chicken, cook in batches if necessary to prevent steaming.
Customize the Salsa:Add some diced jalapeños or swap mangoes for pineapples for a tropical twist.

“`

Coffee Cookies

“`html

Coffee Cookies

Are you a devoted coffee lover searching for the ultimate baked treat?

If your day doesn’t feel complete without a caffeine kick, then you’re in for a delightful surprise! We’ve all been there, reaching for that morning cup or afternoon pick-me-up, wishing for a companion that perfectly complements its rich, bold flavor. Imagine a cookie that embodies that very essence – soft, chewy, and bursting with the irresistible aroma and taste of coffee. That’s precisely what these Coffee Cookies deliver. Forget dry, crumbly disappointments; these cookies are a symphony of textures and tastes, featuring decadent chocolate chunks and a whisper of sweetness that makes them utterly addictive. They are surprisingly simple to whip up, proving that gourmet coffee-infused goodness doesn’t require hours in the kitchen. Get ready to elevate your coffee break to an art form with these simple yet sophisticated treats.

Ingredients

Crafting these blissful coffee cookies requires a blend of pantry staples and a touch of coffee magic. Here’s what you’ll need to create a batch of pure delight:

  • Unsalted Butter: 1 cup (2 sticks), softened to room temperature. This is the creamy base for our cookies, providing richness and chewiness. (Substitution: You can use salted butter, but reduce the added salt in the recipe by ¼ teaspoon.)
  • Granulated Sugar: 3/4 cup. For sweetness and structure, it also helps create those lovely crispy edges.
  • Brown Sugar: 1/2 cup, packed. Adds moisture, a caramelly depth of flavor, and contributes to the chewy texture.
  • Eggs: 2 large, at room temperature. They bind the ingredients together and add richness.
  • Vanilla Extract: 1 teaspoon. A classic enhancer that rounds out the flavors.
  • Instant Espresso Powder or Instant Coffee Granules: 2 tablespoons. The star of our show! This provides the intense coffee flavor without adding excess liquid. Ensure it’s instant for easy dissolving. (Substitution: For a milder coffee flavor, start with 1 tablespoon and adjust to your preference.)
  • All-Purpose Flour: 2 1/4 cups. The workhorse that gives our cookies structure.
  • Baking Soda: 1 teaspoon. Our leavening agent, responsible for that perfect rise and spread.
  • Salt: 1/2 teaspoon. Balances the sweetness and enhances all the other flavors.
  • Chocolate Chunks or Chips: 1 cup. Dark or semi-sweet chocolate pairs beautifully with coffee. Get ready for those melty pockets of deliciousness! (Substitution: Milk chocolate chips or chopped chocolate bars can also be used.)

Timing is Everything

Prep Time: 15 minutes
Chill Time: 30 minutes (recommended)
Cook Time: 10-12 minutes per batch
Total Time: 55 minutes (approximate)

Compared to many cookie recipes that can take over an hour or require lengthy chilling, these coffee cookies are relatively quick to prepare, especially if you skip the chilling step. However, a short chill significantly improves texture and prevents excessive spreading, making it a highly recommended step.

Deliciously baked coffee cookies studded with chocolate chunks.

Step-by-Step Instructions

Step 1: Prep Your Ingredients

Before you begin, ensure your butter is softened to room temperature – it should yield slightly when pressed. This is crucial for achieving a creamy, well-emulsified dough. Line your baking sheets with parchment paper or silicone baking mats; this prevents sticking and makes for easy cleanup. Pre-heat your oven to 375°F (190°C). In a small bowl, whisk together the flour, baking soda, salt, and instant espresso powder until well combined. Set this dry mixture aside.

Step 2: Cream the Butter and Sugar

In a large mixing bowl, use an electric mixer (handheld or stand mixer with paddle attachment) to cream together the softened butter, granulated sugar, and packed brown sugar. Beat on medium speed for about 2-3 minutes, until the mixture is light, fluffy, and pale yellow. This step incorporates air, which is vital for the cookies’ texture and lift.

Step 3: Add Eggs and Vanilla

Add the eggs, one at a time, beating well after each addition until fully incorporated. Scrape down the sides of the bowl as needed. Stir in the vanilla extract. The mixture should look smooth and well-combined.

Step 4: Combine Dry Ingredients

Remember that dry ingredient mixture you set aside in Step 1? Give it another quick whisk to ensure the coffee powder, leavening, and salt are evenly distributed throughout the flour. This prevents pockets of salt or baking soda in your finished cookies.

Step 5: Add Dry to Wet

Gradually add the dry ingredients to the wet ingredients in three additions, mixing on low speed until just combined after each addition. Be careful not to overmix! Overmixing can develop the gluten too much, leading to tough cookies.

Step 6: Fold in Chocolate and Coffee

Using a spatula or wooden spoon, gently fold in the chocolate chunks or chips. If you want an even more intense coffee flavor, you can optionally fold in an additional 1-2 teaspoons of instant espresso powder at this stage, evenly distributing it amongst the chocolate. The dough will be thick and slightly sticky.

Step 7: Chill the Dough

This step is highly recommended for the best cookie texture! Cover the bowl with plastic wrap and refrigerate for at least 30 minutes, or up to 2 days. Chilling solidifies the butter, which prevents the cookies from spreading too much during baking, resulting in thicker, chewier cookies with a more intense flavor.

Step 8: Bake the Cookies

Once chilled, scoop rounded tablespoons of dough onto your prepared baking sheets, leaving about 2 inches between each cookie. They will spread. Bake for 10-12 minutes, or until the edges are golden brown and the centers still look slightly soft. Don’t overbake them! They will continue to set up as they cool on the baking sheet.

After baking, let the cookies cool on the baking sheets for 5-10 minutes before transferring them to a wire rack to cool completely. This allows them to firm up properly.

Nutritional Information

While exact nutritional values can vary based on specific ingredients and portion sizes, a typical serving of these coffee cookies (per cookie, assuming 24 cookies per batch) contains approximate:

  • Calories: 150-200 kcal
  • Carbohydrates: 20-25g
  • Fat: 8-12g
  • Sugar: 12-18g
  • Protein: 2-3g

Please note: This is an estimate. For precise nutritional information, it’s best to use a recipe calculator with your specific ingredients.

Healthier Alternatives

Looking for ways to make these coffee cookies a bit lighter without sacrificing flavor? Try these swaps:

  • Flour: Substitute half of the all-purpose flour with whole wheat flour or almond flour for added fiber and nutrients.
  • Sugar: Reduce the granulated sugar by a couple of tablespoons and adjust the brown sugar slightly. You could also experiment with coconut sugar or a sugar substitute if desired, though this may affect texture.
  • Butter: Replace half of the butter with unsweetened applesauce or mashed banana for moisture and sweetness. Note: This will alter the texture significantly, making them more cake-like.
  • Chocolate: Opt for dark chocolate chips with a higher cocoa content (70% or more) which often contain less sugar.

Serving Suggestions

These coffee cookies are designed to be the ultimate coffee companion. Serve them warm with a hot cup of coffee, latte, or cappuccino for an elevated treat. They’re also delicious with a cold glass of milk or even a scoop of vanilla ice cream for a decadent dessert.

Common Mistakes to Avoid

To ensure perfect coffee cookies every time, steer clear of these common pitfalls:

  • Overmixing the Dough: This develops gluten and leads to tough, dense cookies. Mix until *just* combined.
  • Not Softening Butter Properly: Cold or melted butter will not cream well, impacting the cookie’s texture.
  • Overbaking: Coffee cookies should be slightly soft in the center when removed from the oven to achieve that desirable chewy texture.
  • Skipping the Chill: While optional, chilling the dough prevents excessive spreading and concentrates flavors.

Storing Tips

Store cooled coffee cookies in an airtight container at room temperature for up to 3-4 days. For longer storage, you can freeze baked cookies for up to 3 months. Unbaked cookie dough balls can also be frozen; bake them directly from frozen, adding a couple of extra minutes to the baking time.

Conclusion

These Coffee Cookies are more than just a treat; they are an experience. Infused with the robust flavor of coffee and studded with melty chocolate, they offer a perfect balance of bitterness and sweetness. Their chewy texture and delightful aroma make them an ideal companion to your favorite brew, a welcome addition to any gathering, or simply a well-deserved moment of indulgence. Easy to make and incredibly satisfying, these cookies are sure to become a staple for any coffee aficionado. So go ahead, preheat your oven, and let the irresistible scent of coffee-baked goodness fill your kitchen!

Frequently Asked Questions

***Can I use brewed coffee instead of instant espresso powder?***

Using brewed coffee will add too much liquid to the dough, altering its consistency and making the cookies spread too much. Instant espresso powder or granules are concentrated and dissolve directly into the dough to provide flavor without extra moisture.

***How do I get the coffee flavor to be stronger?***

You can increase the amount of instant espresso powder to 3 tablespoons for a more pronounced coffee taste. Ensure it’s evenly distributed in the dry ingredients.

***Why are my cookies spreading too much?***

Common reasons include using melted butter instead of softened, overmixing the dough, not chilling the dough, or having an oven that runs too hot. Ensure your oven temperature is accurate and chill the dough before baking.

***Can I make these cookies vegan?***

You can adapt these to be vegan by using a vegan butter substitute, a flax egg (1 tablespoon flaxseed meal mixed with 3 tablespoons water, let sit for 5 minutes), and vegan chocolate chips. Ensure your instant coffee is also vegan-friendly.

Print

clock clock iconcutlery cutlery iconflag flag iconfolder folder iconinstagram instagram iconpinterest pinterest iconfacebook facebook iconprint print iconsquares squares iconheart heart iconheart solid heart solid icon

Coffee Cookies

  • Author: Chef Mia

Description

These Coffee Cookies are a delightful treat for coffee lovers! Soft, chewy, and infused with the rich, bold flavor of coffee, they’re the perfect pairing for your morning brew or an afternoon snack. Loaded with chocolate chunks and a hint of sweetness, these cookies are simple to make and irresistibly delicious.


Ingredients

Scale
  • 2 cupsall-purpose flour
  • 1 tspbaking soda
  • 1/4 tspsalt
  • 1 tbspinstant coffee or espresso powder
  • 1 tbspwarm water
  • 3/4 cupunsalted butter, softened
  • 3/4 cupbrown sugar
  • 1/2 cupgranulated sugar
  • 1large egg
  • 1 tspvanilla extract
  • 1 cupchocolate chunks or chips

Instructions

  1. Preheat your oven to 350°F (175°C) and line two baking sheets with parchment paper.
  2. In a small bowl, dissolve the instant coffee or espresso powder in 1 tablespoon of warm water. Set aside.
  3. In a medium bowl, whisk together the flour, baking soda, and salt.
  4. In a large mixing bowl, cream together the softened butter, brown sugar, and granulated sugar until light and fluffy.
  5. Add the egg, vanilla extract, and dissolved coffee mixture to the creamed butter and sugar. Mix until smooth and combined.
  6. Gradually add the dry ingredients to the wet ingredients, mixing on low speed until just combined. Avoid overmixing.
  7. Fold in the chocolate chunks or chips evenly throughout the dough.
  8. Scoop rounded tablespoons of dough onto the prepared baking sheets, spacing them about 2 inches apart.
  9. Bake for 10-12 minutes, or until the edges are golden and the centers look slightly soft.
  10. Remove from the oven and let cool on the baking sheets for 5 minutes before transferring to a wire rack to cool completely.

Notes

For thicker cookies, chill the dough for 30 minutes before baking.
Add a handful of chopped nuts or a sprinkle of cinnamon for extra flavor.
Store cookies in an airtight container at room temperature for up to 5 days, or freeze for up to 3 months.


“`