Chicken Taco Poblano Rice Bowls – So Easy, So Tasty!

“`html

Chicken Taco Poblano Rice Bowls – So Easy, So Tasty!

Welcome to a Flavor Fiesta!

Are you searching for a weeknight dinner that’s bursting with flavor, incredibly easy to make, and satisfies those Mexican-inspired cravings without being overly complicated? You’ve landed in the right place! This Chicken Taco Poblano Rice Bowls recipe is designed to be your new go-to. It’s a vibrant, satisfying meal that expertly blends the comforting elements of a hearty bowl with the zesty, bold tastes of taco night and the smoky depth of poblano peppers. Perfect for busy evenings, meal prep, or simply when you want a delicious, well-rounded meal that’s as fun to assemble as it is to eat.

This recipe is more than just food; it’s an experience. Imagine tender, seasoned chicken, fluffy rice infused with the subtle heat and sweetness of roasted poblano peppers, all topped with your favorite taco fixings. It’s a symphony of textures and tastes that will transport your taste buds straight to culinary bliss. Get ready to spice up your life, one delicious bowl at a time!

What You’ll Need

Gathering your ingredients is the first step to culinary success. We’ve kept this recipe straightforward, focusing on fresh, flavorful components that come together beautifully. Don’t be intimidated by the “poblano” part – it adds a wonderful, mild, smoky depth that truly elevates the dish.

For the Chicken:

  • 1.5 lbs boneless, skinless chicken breasts or thighs, cut into 1-inch pieces (Thighs offer more tenderness and flavor, while breasts are leaner.)
  • 2 tablespoons olive oil (A good quality extra virgin olive oil will add a subtle fruity note.)
  • 1 teaspoon chili powder (Smoked paprika can be a great substitute for a milder, smoky flavor.)
  • 1 teaspoon cumin (Ground cumin is essential for that authentic taco flavor.)
  • ½ teaspoon garlic powder (For a punch of savory aroma.)
  • ½ teaspoon onion powder (Enhances the savory base.)
  • ¼ teaspoon smoked paprika (Optional, for an extra layer of smoky depth.)
  • Salt and freshly ground black pepper, to taste (Season generously for maximum flavor.)

For the Poblano Rice:

  • 2 medium poblano peppers, seeded and finely diced (These have a mild heat and distinctive smoky-sweet flavor. Bell peppers can substitute, but will lack the poblano’s unique character.)
  • 1 tablespoon olive oil (For sautéing the aromatics.)
  • 1 small yellow onion, finely diced (Adds a sweet and pungent base.)
  • 2 cloves garlic, minced (Fresh garlic brings pungent fragrance and depth.)
  • 2 cups uncooked white rice (Long-grain or basmati works well. For a healthier option, use brown rice, but adjust cooking time.)
  • 3 cups chicken broth (Low-sodium is recommended. Vegetable broth can be used for a vegetarian twist if you swap chicken for beans or tofu.)
  • ½ teaspoon cumin
  • Salt and freshly ground black pepper, to taste

For Assembly:

  • 4 cups cooked rice (This is for serving as a base; the poblano rice will be mixed in or served alongside.)
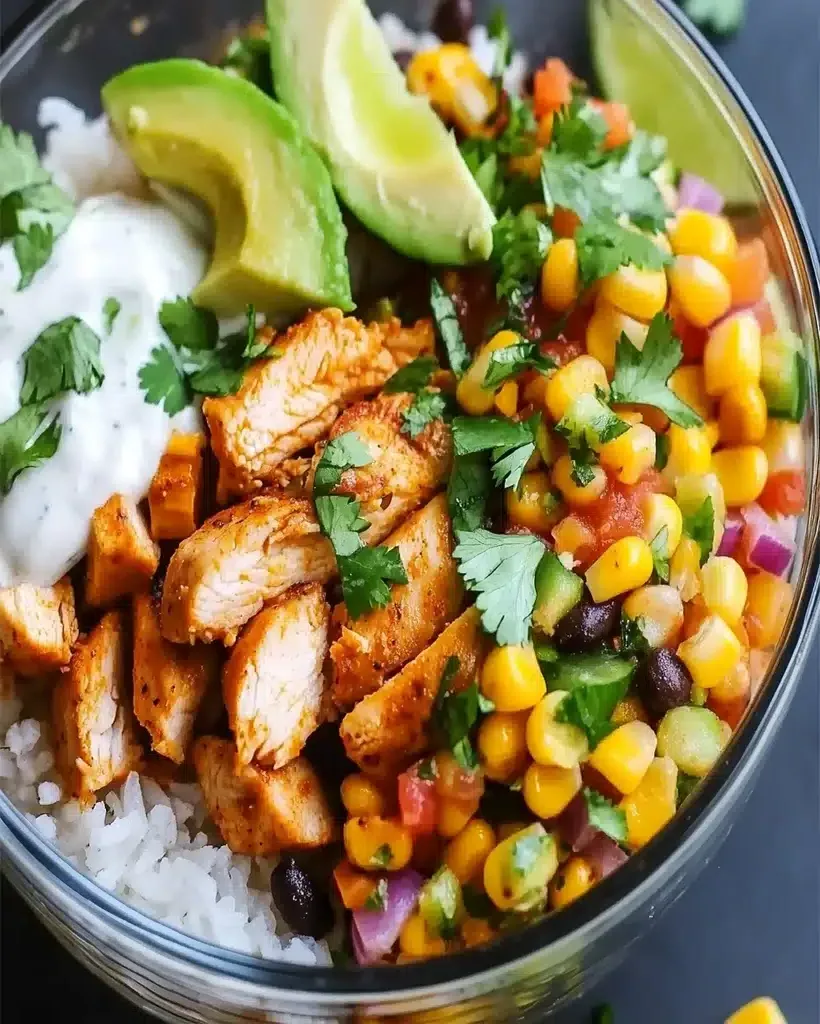
  • Your favorite taco toppings: shredded lettuce, diced tomatoes, pico de gallo, corn salsa, black beans (rinsed and drained), avocado or guacamole, shredded cheese (cheddar, Monterey Jack, or a Mexican blend), sour cream or Greek yogurt, fresh cilantro, lime wedges.

Timing at a Glance

We know you’re busy, so let’s talk time! This recipe is designed for efficiency. Compared to many elaborate rice bowl recipes that can take over an hour, these Chicken Taco Poblano Rice Bowls are a breeze.

Prep Time: 15 minutes
Cook Time: 30 minutes
Total Time: 45 minutes

This makes it a fantastic option for a weeknight meal, often quicker than ordering takeout!

Chicken Taco Poblano Rice Bowls Assembly

Let’s Get Cooking!

Follow these simple steps to create your delicious Chicken Taco Poblano Rice Bowls. We’ve broken it down so it’s easy to follow, even if you’re a beginner in the kitchen.

Step 1: Prep the Chicken

In a medium bowl, combine the chicken pieces with olive oil, chili powder, cumin, garlic powder, onion powder, smoked paprika (if using), salt, and pepper. Toss everything together until the chicken is evenly coated. Let it marinate for about 10-15 minutes while you get started on the rice and vegetables. This step is crucial for infusing the chicken with those vibrant taco flavors.

Step 2: Cook the Chicken

Heat 1 tablespoon of olive oil in a large skillet or cast-iron pan over medium-high heat. Add the seasoned chicken in a single layer (cook in batches if necessary to avoid overcrowding, which can steam the chicken instead of searing it). Cook for 3-4 minutes per side, until browned and cooked through. The chicken should have lovely little crispy edges. Remove the cooked chicken from the skillet and set aside. You can chop it into smaller pieces if you prefer.

Step 3: Prepare the Rice

In the same skillet (no need to clean it!), add another tablespoon of olive oil if needed. Add the diced onion and sauté for about 3-4 minutes until softened and translucent. Stir in the minced garlic and diced poblano peppers and cook for another 2-3 minutes until fragrant and the poblanos start to soften. This process begins to unlock the delicious, subtle sweetness of the poblanos. Add the uncooked rice and cumin to the skillet, stirring to coat the grains in the oil and aromatics. Toast the rice for about 1 minute, stirring constantly.

Step 4: Sauté the Poblanos

Pour in the chicken broth and bring to a boil. Season with salt and pepper. Once boiling, reduce the heat to low, cover the skillet, and simmer for about 15-20 minutes, or until the rice is tender and the liquid has been absorbed. Let it stand, covered, for 5 minutes off the heat before fluffing with a fork.

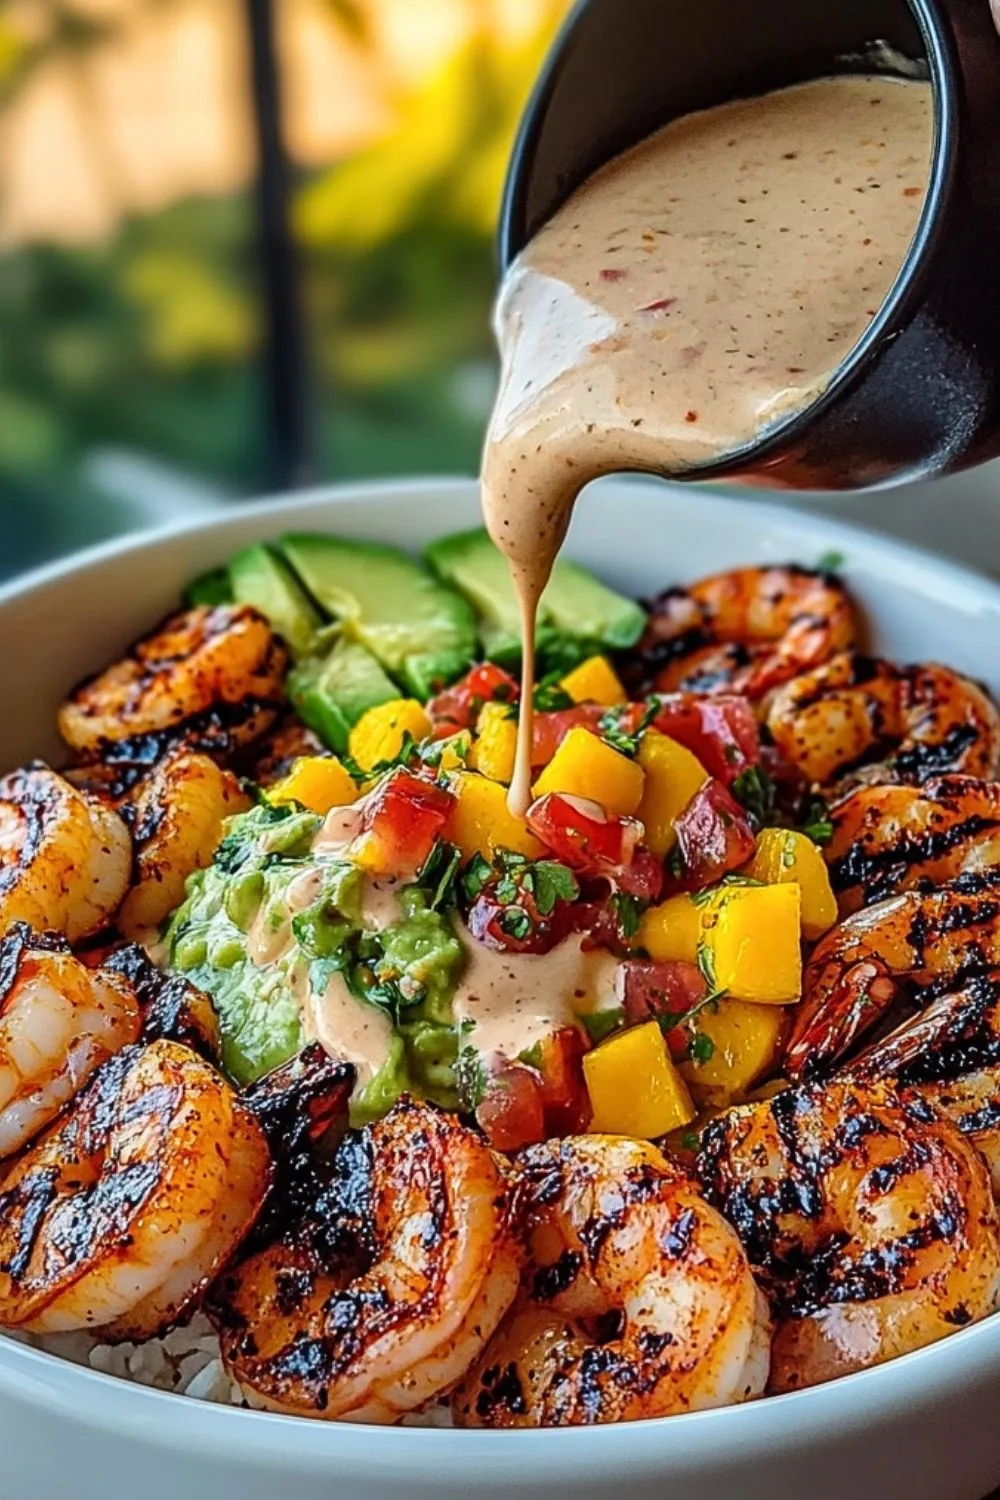
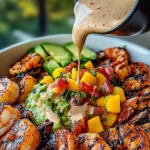
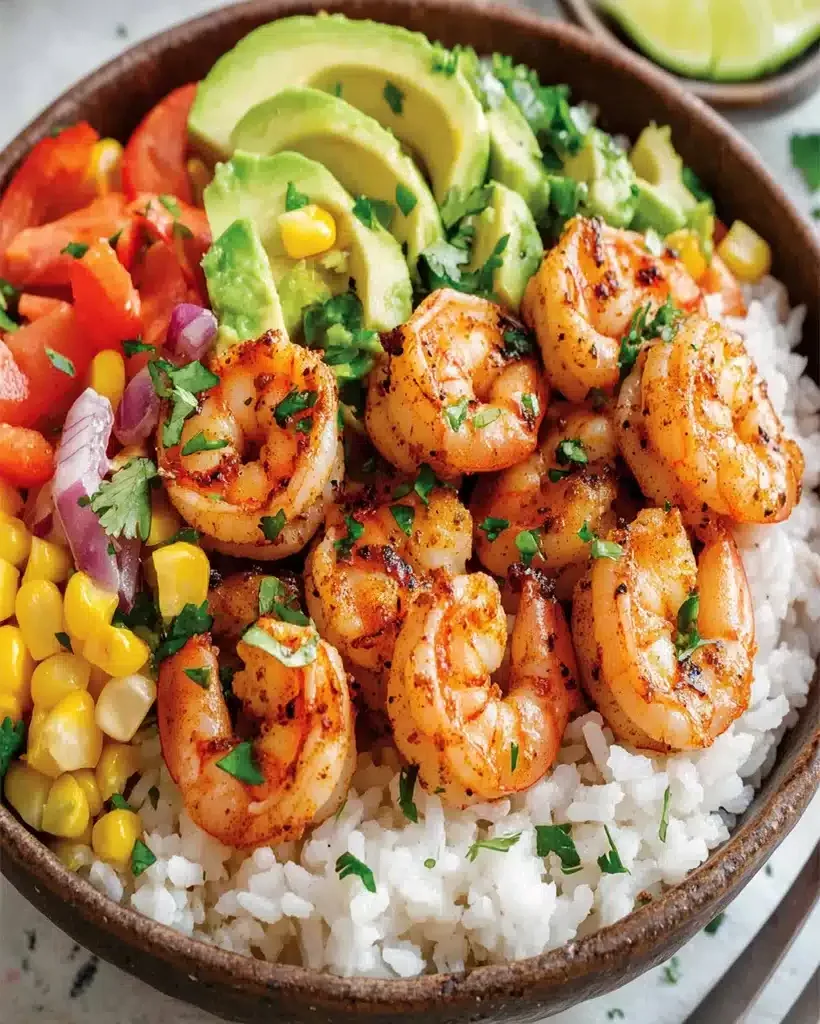
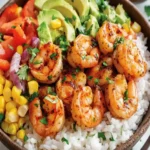
Step 5: Assemble Your Bowls

Now for the fun part! Start with a base of fluffy cooked rice in each bowl. Top generously with the flavorful poblano rice mixture. Add your cooked taco chicken. Then, get creative with your toppings! Pile on shredded lettuce, juicy diced tomatoes, creamy avocado slices, a spoonful of black beans, a sprinkle of cheese, a dollop of sour cream or Greek yogurt, and a squeeze of fresh lime juice. Finish with a scattering of fresh cilantro. The beauty of these bowls is their customizability!

Nutritional Snapshot

While exact nutritional values can vary based on specific ingredients and portion sizes, here’s an estimated overview per serving (assuming 4 servings, without toppings):

  • Calories: Approximately 450-550
  • Protein: 30-40g
  • Carbohydrates: 40-50g
  • Fat: 18-25g (depending on chicken cut and oil used)
  • Fiber: 4-6g

For a more precise breakdown, consider using an online nutritional calculator with your exact ingredient measurements.

Healthier Swaps for Lighter Bowls

Looking to lighten things up without sacrificing flavor? Here are some easy modifications:

  • Rice: Use cauliflower rice or a mix of cauliflower rice and regular rice for a significant carb reduction and added vegetables. Brown rice is also a great whole-grain alternative to white rice.
  • Chicken: Opt for extra-lean chicken breast.
  • Toppings: Load up on fresh vegetables like lettuce, tomatoes, salsa, and bell peppers. Use plain Greek yogurt instead of sour cream for a protein boost and lower fat. Avocado is healthy fat, so enjoy it in moderation.
  • Beans: Black beans are a great source of fiber and protein. Ensure they are rinsed well if using canned.
  • Oil: Use minimal olive oil for cooking, or consider using cooking spray for sautéing the vegetables.

Serving Suggestions

These bowls are a complete meal on their own, but here are some ideas to enhance your dining experience:

  • Guacamole or Avocado Crema: A smooth, creamy addition that complements the spice.
  • Pickled Red Onions: Their tangy crunch cuts through the richness beautifully.
  • A Side of Corn: Grilled or boiled corn on the cob, or a simple corn salad, adds a touch of sweetness.
  • Hot Sauce: For those who like it extra spicy, a dash of your favorite hot sauce is key.
  • Lime Wedges: Always provide extra lime wedges for a fresh zing.

Common Mistakes to Avoid

To ensure your bowls turn out perfectly every time, keep these common pitfalls in mind:

  • Overcrowding the Pan: When cooking the chicken, a crowded pan leads to steaming, not searing. Cook in batches for beautifully browned pieces.
  • Skipping the Pepitas: While optional, not toasting the rice with aromatics can result in a less flavorful depth to your poblano rice.
  • Under-seasoning: Taste and adjust seasoning at each step. Chicken and rice can absorb a lot of salt and pepper.
  • Dicing Poblanos Too Large: Finely dicing ensures they cook down nicely and distribute their flavor evenly throughout the rice.

Storing Your Masterpiece

Leftovers are fantastic for lunch the next day! Store components separately if possible for best quality, especially if you like your toppings crisp.

  • Chicken and Rice: Allow to cool completely and store in airtight containers in the refrigerator for up to 3-4 days.
  • Cooked Toppings: Store any cooked toppings (like beans) separately. Fresh toppings like lettuce, tomatoes, and avocado are best added just before serving.
  • Reheating: Reheat the chicken and rice gently on the stovetop or in the microwave. You can add a splash of water or broth to the rice to help keep it moist.

Enjoy Your Delicious Creation!

There you have it – a vibrant, flavorful, and incredibly satisfying Chicken Taco Poblano Rice Bowl recipe that’s perfect for any occasion. This dish proves that healthy eating can be exciting and delicious. It’s a flexible recipe that encourages creativity, making it easy to adapt to your tastes and dietary needs.

Frequently Asked Questions

***Can I make this recipe vegetarian or vegan?***

Absolutely! For a vegetarian option, substitute the chicken with black beans, seasoned tofu, or your favorite vegetables like sautéed mushrooms and zucchini. For a vegan version, ensure your broth is vegetable-based and skip any dairy toppings like cheese and sour cream, opting for vegan alternatives or just more avocado and salsa.

***What if I can’t find poblano peppers?***

If poblanos are unavailable, you can substitute them with Anaheim peppers (which are similar in mildness) or even green bell peppers. Keep in mind that bell peppers won’t offer the same smoky depth, so you might want to add a pinch more smoked paprika to compensate.

***Can I prepare some components ahead of time?***

Yes! You can cook the chicken and the poblano rice a day in advance and store them in the refrigerator. This will make assembly even quicker on the day of serving. You can also chop most of your fresh vegetables ahead of time.

***Is this recipe spicy?***

Poblano peppers are generally mild, with a slight heat and smoky sweetness. The spice level will depend on the specific peppers you use and the amount of chili powder you add. You can easily adjust the heat by adding more or less of these, or by serving with a spicier salsa or hot sauce.

Print
clock clock iconcutlery cutlery iconflag flag iconfolder folder iconinstagram instagram iconpinterest pinterest iconfacebook facebook iconprint print iconsquares squares iconheart heart iconheart solid heart solid icon

Chicken Taco Poblano Rice Bowls – Easy Mexican Dinner Recipe

  • Author: Chef Mia

Description

Welcome, food enthusiasts! If you’re on the hunt for a quick, delicious meal that combines the best of American and Mexican flavors, thisChicken Taco Poblano Rice Bowlsrecipe is just for you. It’s a great way to spice up your weekly menu while ensuring a balanced and satisfying meal. Let’s dive into making this comforting bowl that’s perfect for lunch or dinner!


Ingredients

  • Taco Seasoning Mix:
  • Optional Add-ons:
  • For more creative chicken recipes, consider exploring thisdelicious chicken jerusalem recipe.

Instructions

  1. Dice the chicken into 1/2-inch cubes. Combine the taco seasoning ingredients in a small bowl and set aside.
  2. Set aside 3 tablespoons of the diced red onion for the pico de gallo. Combine with the diced tomato, 1/4 cup cilantro, 2 teaspoons of lime juice, and 1/4 teaspoon salt in a small bowl. Mix well and set aside.
  3. Heat 2 teaspoons of olive oil in a large skillet over medium-high heat. When hot, add the chicken cubes and cook for 2-3 minutes until they start to brown.
  4. Add the remaining diced onion, poblano pepper, and prepared taco seasoning. Cook for an additional 2-3 minutes until the vegetables soften.
  5. Add 1/2 cup of water and the corn kernels to the skillet. Stir to combine and cook for another 1-2 minutes. Remove from heat.
  6. Divide the heated brown rice among four bowls. Top each with the cooked chicken mixture, cheese, and a spoonful of pico de gallo. Add a dollop of sour cream or Greek yogurt, if desired.

Notes

Use fresh, organic chickenfor the best flavor and tenderness.
If you prefer a spicier kick, add diced jalapenos or extra chili powder to the taco seasoning.
This recipe is flexible—swap out brown rice for quinoa or cauliflower rice for a low-carb option.

“`

Margherita Tortilla Pizza – Your 10-Minute Dinner Fix!

“`html

Margherita Tortilla Pizza – Your 10-Minute Dinner Fix!

Ingredients: The Heart of Your Speedy Pizza

The beauty of this Margherita Tortilla Pizza lies in its simplicity. We’re focusing on fresh, classic Italian flavors that come together in a flash. Here’s what you’ll need:

  • Large Flour Tortillas (9-10 inch): The foundation of our pizza! Opt for good quality, soft flour tortillas. They will crisp up beautifully in the oven. (Substitution: Whole wheat tortillas or even gluten-free wraps can work, but cooking times might vary slightly).
  • Pizza Sauce or Marinara Sauce: About 2-3 tablespoons per tortilla. Choose a sauce that’s rich and flavorful; a good sauce is key. (Substitution: Crushed San Marzano tomatoes, seasoned with a pinch of salt, pepper, and a drizzle of olive oil, make an excellent fresh sauce).
  • Fresh Mozzarella Cheese: Around 1/4 to 1/3 cup shredded or thinly sliced per pizza. Fresh mozzarella melts wonderfully and provides that classic creamy texture. (Substitution: Low-moisture mozzarella for less watery results, or a blend of mozzarella and a sprinkle of Parmesan for extra zing).
  • Fresh Basil Leaves: A generous handful. The aroma and peppery bite of fresh basil are non-negotiable for a true Margherita!
  • Olive Oil: A light brush for the edges of the tortilla. This helps them crisp up and adds a lovely golden hue.
  • Optional: Garlic Powder or Fresh Garlic: A light dusting or a very thin spread on the sauce can elevate the flavor.
  • Optional: Red Pepper Flakes: For a touch of heat.

Timing: Your Quickest Pizza Yet!

Prep time: 5 minutes
Cook time: 5-8 minutes
Total time: 10-13 minutes

Compare this to the average pizza, which can take 30-60 minutes (including prep, rise time, and baking), this tortilla pizza is a weeknight marvel. Get dinner on the table faster than you can decide what to watch!

Margherita Tortilla Pizza ready to be baked

Step-by-Step Instructions: From Tortilla to Tasty Pizza

Follow these simple steps to create your perfect Margherita Tortilla Pizza in a matter of minutes!

Step 1: Prep the Base

Preheat your oven to 400°F (200°C). Lay your tortillas flat on a baking sheet or directly on the oven rack, whichever you prefer for crispiness. If you like a slightly crispier edge, brush the top surface of each tortilla very lightly with olive oil. This also helps the sauce adhere better.

Step 2: Sauce It Up

Spoon about 2-3 tablespoons of your favorite pizza sauce or marinara sauce onto the center of each tortilla. Using the back of the spoon, spread the sauce evenly, leaving about a 1/2-inch border around the edge for the crust. Don’t go too heavy on the sauce, or your tortilla might get soggy!

Step 3: Cheese Please

Sprinkle your shredded or thinly sliced fresh mozzarella cheese evenly over the sauce. Make sure to get good coverage for that satisfying cheesy pull. If using, this is also a good time to lightly sprinkle on some garlic powder or red pepper flakes.

Step 4: Topping Time

Now for the fresh basil! Tear or gently place fresh basil leaves over the cheese. Some people prefer to add basil after baking to keep it vibrant green, but I love the slightly wilted, aromatic basil that cooks with the cheese. You can also add other favorite toppings here, though for a classic Margherita, basil is the star.

Step 5: Bake to Perfection

Carefully place the baking sheet in your preheated oven. Bake for 5-8 minutes, or until the edges of the tortilla are golden brown and crispy, and the cheese is melted and bubbly. Keep an eye on it, as tortillas can go from perfectly baked to burnt very quickly!

Nutritional Information (Approximate per Pizza)

This is a general estimate and will vary based on the specific brands and quantities of ingredients used.

  • Calories: 250-350 kcal
  • Protein: 10-15g
  • Fat: 10-18g
  • Carbohydrates: 25-35g

Healthier Alternatives & Flavor Swaps

Looking to make this even healthier without sacrificing flavor? Try these swaps:

  • Nutrient-Dense Base: Use whole wheat or even cauliflower crust tortillas for added fiber and nutrients.
  • Lighter Cheese: Opt for part-skim mozzarella or a sprinkle of low-fat Parmesan. You can also use a vegan mozzarella alternative.
  • Veggie Boost: Add a thin layer of finely chopped spinach under the cheese, or top with pre-cooked mushrooms, bell peppers, or onions.
  • Sauce Savvy: Use a low-sodium marinara sauce or make your own with canned diced tomatoes, garlic, and herbs.

Serving Suggestions

This Margherita Tortilla Pizza is fantastic on its own, but here are a few ideas to make it a complete meal:

  • Serve with a crisp side salad dressed with a light vinaigrette.
  • Pair with a cup of tomato basil soup for ultimate comfort.
  • Offer a small bowl of olives or marinated artichoke hearts alongside.
  • For a heartier meal, serve with grilled chicken strips or a side of roasted vegetables.

Common Mistakes to Avoid

Even simple recipes can have a few pitfalls! Here’s how to ensure perfection:

  • Too Much Sauce: Over-saucing leads to a soggy tortilla. Use just enough to coat the base.
  • Overcrowding Toppings: While tempting, too many toppings can prevent the tortilla from crisping up evenly. Stick to the Margherita basics for best results.
  • Not Watching Closely: Tortillas cook fast! Keep an eye on your pizza in the oven to avoid burning.
  • Using Wet Cheese: Fresh mozzarella can release a lot of water. Pat it dry with paper towels before slicing or shredding if it seems particularly moist.

Storing Your Pizza

While best enjoyed immediately, leftovers can be stored. Let the pizza cool completely, then wrap tightly in plastic wrap or place it in an airtight container. Refrigerate for up to 2 days. Reheat in a toaster oven or a dry skillet over medium heat to regain some crispiness.

Your New Go-To 10-Minute Meal!

This Margherita Tortilla Pizza is proof that delicious, satisfying meals don’t need to be complicated or time-consuming. It’s the perfect solution for busy evenings, quick lunches, or even a fun weeknight activity with kids. The crispy tortilla base, the tangy sauce, the gooey cheese, and the fresh basil create a flavor profile that’s both classic and incredibly craveable. So next time hunger strikes with limited time, reach for this recipe – you won’t be disappointed!

What are your favorite quick dinner hacks? Share them in the comments below!

FAQs on Margherita Tortilla Pizza

***Can I use corn tortillas instead of flour?***

You can, but corn tortillas are more prone to breaking and tend to get crispier faster. If you use them, consider baking them for a minute or two first to pre-crisp them before adding toppings, and watch them closely during baking.

***How does baking time differ if I don’t preheat the oven?***

If you don’t preheat the oven, the baking time will be significantly longer, and the tortilla may not get as crispy. Preheating is crucial for achieving that desirable quick cook and crisp texture.

***Can I add cooked meats like pepperoni or chicken?***

Absolutely! If you want to add cooked meats, ensure they are pre-cooked and either sliced thinly or diced. Add them along with the cheese or other vegetable toppings.

***What’s the best way to get a crispy tortilla base?***

A very hot oven (400°F/200°C), a light brush of olive oil on the tortilla, and not overdoing the sauce are key. Baking directly on the oven rack or on a preheated pizza stone also helps for maximum crispiness.

Print
clock clock iconcutlery cutlery iconflag flag iconfolder folder iconinstagram instagram iconpinterest pinterest iconfacebook facebook iconprint print iconsquares squares iconheart heart iconheart solid heart solid icon

Margherita Tortilla Pizza Recipe – Quick & Easy Personal Pizza

  • Author: Chef Mia

Description

Welcome to thisMargherita Tortilla Pizza Recipe! If you love pizza but are looking for a quick and delicious alternative, this easy-to-make tortilla pizza will become your go-to. It’s packed with fresh ingredients and the perfect blend of Italian flavors, making it a must-try for pizza enthusiasts and busy cooks alike.


Ingredients

  • Optional Substitutions:

Instructions

  1. Preheat your oven to375 degrees F(190°C). While the oven is heating up, prepare a baking sheet by lightly greasing it or using parchment paper to prevent sticking.
  2. Place your flour tortilla on the baking sheet. Using a spoon, spread a thin layer ofmayonnaiseover the top. This acts as a creamy base, giving the tortilla a golden crust.
  3. SprinkleItalian seasoningevenly over the mayonnaise layer. This seasoning mix of oregano, basil, and thyme adds a hint of authentic Italian flavor to your base.
  4. Arrange thesliced tomatoeson top of the tortilla. Make sure the slices cover the tortilla evenly for consistent flavor in every bite.
  5. Sprinkle a generous amount ofshredded mozzarella cheeseover the tomatoes. Follow up by addinggrated Parmesanfor an extra layer of cheesy goodness.
  6. Drizzle a small amount ofolive oilover the top to enhance the flavors and help the cheese melt evenly.
  7. Bake the pizza in your preheated oven for15 to 20 minutes, or until the cheese is melted and bubbly, and the tortilla edges are crispy and slightly browned.
  8. Once baked, take the pizza out and sprinkle freshly choppedbasil leaves, a little moregrated Parmesan, and somecracked black pepperon top. Cut into slices and serve hot.

Notes

Use a pizza stone:For an even crispier base, place your tortilla on a hot pizza stone before baking.
Go light on the mayo:A little goes a long way, as too much mayo can make the base soggy.
Add toppings carefully:Overloading with too many toppings can make the tortilla limp and reduce its crispiness.

“`

Shrimp and Avocado Bowls with Mango Salsa & Lime-Chili Sauce

“`html

Shrimp and Avocado Bowls with Mango Salsa & Lime-Chili Sauce

Craving a Quick, Flavor-Packed Meal? Meet Your New Go-To Bowl!

Are you constantly on the hunt for weeknight dinners that are both incredibly delicious and remarkably healthy? In today’s fast-paced world, balancing vibrant flavors with nutritional value can feel like a culinary tightrope walk. But what if I told you there’s a dish that delivers a fiesta of tastes and textures, all while being packed with goodness? These Shrimp and Avocado Bowls with Mango Salsa & Lime-Chili Sauce are your answer. They are a tropical escape in a bowl, offering a symphony of sweet, tangy, smoky, and creamy notes that will transport you straight to a sun-drenched beach. Forget bland, boring meals; this recipe is designed to be exciting, satisfying, and surprisingly simple to prepare. Whether you’re a seasoned home cook or just starting your culinary journey, these bowls are a foolproof way to elevate your mealtime. Get ready to discover a dish that’s as nourishing as it is delightful!

Fresh, Vibrant Ingredients for a Taste of Paradise

The magic of these bowls lies in the quality and freshness of its components. Each element plays a crucial role in creating a harmonious balance of flavors and textures. We’ve included suggestions for substitutions to make this recipe adaptable to your pantry and preferences.

For the Mango Salsa:

  • 1 Ripe Mango: Firm but yielding to the touch, offering a sweet, tropical essence. (Substitution: Use nectarines or peaches if mangoes are out of season.)
  • 1/2 Red Onion: Finely diced for a sharp, pungent bite that contrasts the sweetness. (Substitution: Shallots for a milder flavor.)
  • 1/2 Red Bell Pepper: Finely diced for a sweet crunch and vibrant color.
  • 1 Jalapeño: Minced (seeds removed for less heat) for a subtle kick of spice. (Substitution: Serrano pepper for more heat, or a pinch of red pepper flakes.)
  • 1/4 cup Fresh Cilantro: Chopped, providing a bright, herbaceous note. (Substitution: Fresh parsley if cilantro is not your favorite.)
  • Juice of 1 Lime: For a zesty, acidic punch that brightens all the flavors.
  • Pinch of Salt: To enhance all the flavors.

For the Shrimp and Lime-Chili Sauce:

  • 1 lb Large Shrimp: Peeled and deveined, plump and ready to absorb flavor. (Substitution: Medium shrimp or even a firm white fish like cod.)
  • 1 tbsp Olive Oil: For cooking and adding a subtle fruity note. (Substitution: Avocado oil or coconut oil.)
  • 1 tsp Chili Powder: For warmth and a smoky depth.
  • 1/2 tsp Cumin: Earthy and warm, it complements the chili beautifully.
  • 1/4 tsp Smoked Paprika: For an extra layer of smoky complexity.
  • Salt and Black Pepper: To taste.
  • Juice of 2 Limes: The tangy star of our chili sauce.
  • 1 tbsp Honey or Maple Syrup: For a touch of sweetness to balance the acidity. (Vegan option: Maple syrup.)
  • 1 tsp Sriracha or Hot Sauce: Adjust to your desired heat level. (Substitution: Sambal oelek or a pinch of cayenne pepper.)
  • 1 clove Garlic: Minced, adding a pungent, aromatic base.

For Assembly:

  • 2 cups Cooked Rice or Grains: Fluffy jasmine rice, quinoa, or brown rice. (Substitution: Cauliflower rice for a low-carb option.)
  • 1 Ripe Avocado: Sliced or diced for creamy richness. (Substitution: Skip if unavailable, or add extra mango.)
  • Optional Garnishes: Fresh cilantro sprigs, lime wedges, toasted sesame seeds.

Perfectly Timed for Your Busy Schedule

Prep Time:
20 minutes
Cook Time:
10 minutes
Total Time:
30 minutes

Compared to the average weeknight meal that can take upwards of 45 minutes to an hour, these Shrimp and Avocado Bowls are impressively swift. The prep work for the salsa and sauce can be done concurrently, and the shrimp cooks in mere minutes. This makes it an ideal candidate for a quick, satisfying meal when time is of the essence.

A vibrant bowl filled with shrimp, avocado, mango salsa, and rice, drizzled with sauce.

Effortless Steps to Culinary Bliss

Step 1: Prep the Mango Salsa

First things first, let’s get that vibrant salsa ready. Dice the ripe mango into small, bite-sized pieces. In a medium bowl, combine the diced mango with the finely diced red onion, red bell pepper, minced jalapeño (remember to remove seeds if you prefer milder heat!), and chopped fresh cilantro. Squeeze the juice of one lime over the mixture. Add a pinch of salt. Gently toss everything together to combine, ensuring the flavors meld. Set this aside to let the flavors deepen while you prepare the rest of your components. The aroma alone will start to transport you!

Step 2: Make the Lime-Chili Sauce

In a small bowl, whisk together the lime juice from two limes, honey or maple syrup, sriracha or your favorite hot sauce, minced garlic, and a pinch of salt and pepper. Taste and adjust seasonings as needed – you might want it spicier, sweeter, or tangier! This sauce is the flavor powerhouse that ties everything together. Its bright, zesty, and subtly spicy profile is the perfect counterpoint to the creamy avocado and sweet mango.

Step 3: Marinate the Shrimp

Pat your shrimp dry with paper towels; this helps them sear nicely. In a bowl, toss the shrimp with olive oil, chili powder, cumin, smoked paprika, salt, and black pepper. Ensure each shrimp is lightly coated with the spice mixture. Let them marinate for at least 5-10 minutes while you heat your pan. This quick marinade infuses the shrimp with a wonderful smoky and slightly spicy flavor.

Step 4: Cook the Shrimp

Heat a large skillet or grill pan over medium-high heat. Once hot, add the marinated shrimp in a single layer. Cook for 2-3 minutes per side, just until the shrimp turn pink and opaque and are slightly caramelized. Be careful not to overcook them, as they can become tough. Once cooked, remove them from the pan immediately. The residual heat will continue to cook them slightly.

Step 5: Assemble the Bowls

Now for the grand finale! Divide your cooked rice or grains among serving bowls. Arrange the cooked shrimp and sliced or diced avocado over the grains. Generously spoon the fresh mango salsa on top. Drizzle liberally with the prepared lime-chili sauce. Garnish with fresh cilantro sprigs, lime wedges, or toasted sesame seeds if desired. Serve immediately and enjoy the explosion of tropical flavors!

A Nutritious Powerhouse

These bowls are a fantastic source of lean protein, healthy fats, and essential vitamins and minerals. While exact nutritional values can vary based on specific ingredients and portion sizes, a typical serving offers:

  • Calories: Approximately 400-550 kcal
  • Protein: Excellent source, around 30-40g
  • Healthy Fats: From avocado and olive oil
  • Fiber: Good source, especially if using whole grains and plenty of salsa
  • Vitamins: Rich in Vitamin C (from mango and lime), Vitamin A, and B vitamins.

Healthier Alternatives and Flavor Swaps

This recipe is already quite healthy, but here are a few ways to adapt it further or switch up the flavors:

  • Low-Carb Option: Substitute rice or other grains with cauliflower rice.
  • Add More Veggies: Toss in some chopped cucumber, bell peppers, or corn into the salsa for extra crunch and nutrients.
  • Spice Level: Adjust the amount of jalapeño and sriracha to your personal preference. For a milder dish, omit the jalapeño and reduce sriracha.
  • Herb Power: If you’re not a fan of cilantro, fresh mint or basil can offer a refreshing alternative in the salsa.
  • Protein Boost: Add some black beans or edamame for added plant-based protein and fiber.

Serving Suggestions for an Extra Touch

These bowls are a complete meal on their own, but here are a few ideas to elevate your dining experience:

  • Garnish Extravaganza: Don’t skip the optional garnishes! Fresh cilantro, a squeeze of fresh lime, and a sprinkle of toasted sesame seeds add visual appeal and an extra pop of flavor.
  • Crunch Factor: Add a tablespoon of toasted pepitas (pumpkin seeds) or chopped peanuts for a delightful crunch.
  • Creamy Dreams: A dollop of plain Greek yogurt or a drizzle of a light, creamy dressing can add another dimension of texture.
  • Sidekick Salad: Serve with a light, crisp green salad dressed with a vinaigrette for a more substantial meal.

Common Mistakes to Avoid

To ensure your bowls are as perfect as possible, keep these common pitfalls in mind:

  • Overcooking Shrimp: Shrimp cook VERY quickly. Overcooked shrimp become rubbery and tough. Watch them closely and remove them from heat as soon as they turn pink and opaque.
  • Underripe Mango: A hard, unripe mango won’t have the sweetness or soft texture needed for the salsa. Look for a mango that yields slightly to gentle pressure.
  • Mushing the Avocado: If you prefer sliced avocado, gently place it in the bowl rather than mixing it in. This keeps its creamy texture intact.
  • Unbalanced Sauce: Taste and adjust your lime-chili sauce! Without proper balancing of sweet, sour, and spicy elements, the sauce might fall flat.

Storing Tips for Make-Ahead Magic

These bowls are best enjoyed fresh, but leftovers can be stored for a day or two:

  • Best Practice: Store the components separately if possible. Keep the cooked shrimp, salsa, sauce, cooked grains, and sliced avocado in airtight containers in the refrigerator.
  • Assembly: When ready to eat, assemble your bowl and add the avocado just before serving to prevent browning.
  • Already Assembled Bowls: If you assemble the bowls ahead of time, the avocado may brown slightly, and the salsa might release more liquid. They will still be tasty but may not look as vibrant.

Your Tropical Escape Awaits!

These Shrimp and Avocado Bowls with Mango Salsa & Lime-Chili Sauce are more than just a meal; they’re an experience. They prove that healthy eating can be incredibly exciting, bursting with flavor and vibrant colors. The combination of smoky shrimp, sweet and tangy salsa, creamy avocado, and zesty sauce over a bed of wholesome grains is simply irresistible. It’s proof that you don’t need to spend hours in the kitchen to create something truly special. So, the next time you’re wondering what to whip up for dinner, or even a packed lunch, give this tropical delight a try. Your taste buds will thank you!

Frequently Asked Questions

***Can I make the mango salsa ahead of time?***

Yes! The mango salsa can be made a few hours in advance. In fact, letting it sit allows the flavors to meld together beautifully. However, it’s best to add the cilantro just before serving to keep it fresh and bright.

***Is it okay to use frozen shrimp?***

Absolutely. Thaw frozen shrimp completely before using them. Pat them very dry to ensure they sear properly and don’t release too much water into the pan.

***What if I don’t like cilantro?***

No problem! Fresh parsley or even fresh mint can be used as a substitute in the mango salsa. Mint offers a particularly refreshing twist that pairs well with mango and lime.

***Can I grill the shrimp instead of pan-searing?***

Yes, grilling is a fantastic option! Grill the marinated shrimp on medium-high heat for about 2-3 minutes per side, or until pink and slightly charred. This will add an even smokier flavor.

***Is this recipe good for meal prep?***

Yes, this recipe is excellent for meal prep! For best results, store all components separately in airtight containers in the refrigerator and assemble just before eating. This prevents the avocado from browning and keeps the salsa from becoming too watery.

Print

clock clock iconcutlery cutlery iconflag flag iconfolder folder iconinstagram instagram iconpinterest pinterest iconfacebook facebook iconprint print iconsquares squares iconheart heart iconheart solid heart solid icon

Shrimp and Avocado Bowls with Mango Salsa & Lime-Chili Sauce

  • Author: Chef Mia

Description

These Shrimp and Avocado Bowls with Mango Salsa & Lime-Chili Sauce are a tropical-inspired dish bursting with fresh, vibrant flavors. Grilled, smoky shrimp, sweet mango salsa, creamy avocado, and zesty lime-chili sauce come together over a bed of rice or grains for a balanced, nutritious meal. Perfect for a quick weeknight dinner or meal prep, this recipe will transport your taste buds to paradise.


Ingredients

  • For the Bowls:
  • For the Lime-Chili Sauce:
  • For the Mango Salsa:

Instructions

  1. Step 1:Prepare the mango salsa by combining diced mango, red onion, jalapeño (if using), lime juice, cilantro, and a pinch of salt in a bowl. Mix well and set aside in the fridge.
  2. Step 2:Make the lime-chili sauce by whisking together Greek yogurt, mayonnaise, chili powder, lime zest and juice, honey, salt, and pepper. Adjust seasoning to taste and set aside.
  3. Step 3:Pat the shrimp dry and season with chili powder, garlic powder, salt, and pepper. Heat a grill pan or skillet over medium-high heat with a drizzle of olive oil. Cook the shrimp for 2-3 minutes per side until pink and slightly charred.
  4. Step 4:Assemble the bowls by adding a base of cooked rice or quinoa to each bowl. Arrange grilled shrimp, sliced avocado, and mango salsa on top.
  5. Step 5:Drizzle lime-chili sauce generously over the bowls. Garnish with chopped cilantro and serve with lime wedges on the side. Enjoy immediately!

Notes

For added crunch, sprinkle toasted pepitas, chopped nuts, or tortilla strips over the bowls.
Shrimp can be stored in an airtight container in the refrigerator for up to 2-3 days or frozen for up to 1 month.
If you prefer, substitute the shrimp with grilled chicken or tofu for a different protein option.
To adjust spice levels, reduce or omit the jalapeño in the salsa or use mild chili powder.


“`

Crispy Baked Chicken Wings: Easy & Irresistible Recipe!

“`html

Crispy Baked Chicken Wings: Easy & Irresistible Recipe!

Ingredients for Irresistible Wings

The magic of crispy baked chicken wings lies in simplicity. You likely have most of these on hand already! We’ll focus on building flavor and achieving that perfect crisp.

  • 2 lbs Chicken Wings: Look for plump, fresh wings, separated into drumettes and flats. The skin should be intact and vibrant.
  • 1 tablespoon Olive Oil: A good quality extra virgin olive oil will add a subtle fruity note and help with browning. (Substitution: Avocado oil or another neutral high-heat oil.)
  • 1 teaspoon Baking Powder: This is our secret weapon for crispiness! It raises the pH of the skin, drawing out moisture. Make sure it’s aluminum-free. (No real substitutes for this specific crisping effect.)
  • 1 teaspoon Salt: Enhances all the flavors and helps draw out moisture. Kosher salt or sea salt are preferred for their texture.
  • 1/2 teaspoon Black Pepper: Freshly ground is always best for a punchy flavor.
  • Optional Spices: Paprika, garlic powder, onion powder, cayenne pepper – tailor to your taste preference! A smoked paprika adds a wonderful depth.

Timing is Everything for Perfect Wings

Prep time: 10 minutes
Cook time: 40-50 minutes
Total time: 50-60 minutes

Compared to deep-fried wings, this baked version saves you significant time on cleanup and active cooking. Most other baked wing recipes fall within a similar timeframe, but our baking powder trick helps speed up the crisping process!

Crispy baked chicken wings on a baking sheet, ready to be cooked.

Step-by-Step Instructions

Step 1: Preheat and Prep

Preheat your oven to a hot 400°F (200°C). Line a large baking sheet with parchment paper or foil for easier cleanup. If you have a wire rack that fits inside your baking sheet, use it! This allows air to circulate around the wings, leading to crispier results. Pat your chicken wings THOROUGHLY dry with paper towels. This is a crucial step in achieving crispy skin. Moisture is the enemy of crispiness!

Step 2: Season Your Wings

In a large bowl, toss the dried chicken wings with olive oil until they are lightly coated. In a small separate bowl, whisk together the baking powder, salt, pepper, and any other desired spices. Sprinkle this mixture over the oiled wings and toss thoroughly until each wing is evenly coated. Don’t skip the baking powder – it’s the key!

Step 3: Arrange for Crispiness

Arrange the seasoned wings in a single layer on the prepared baking sheet (or on the wire rack set inside the baking sheet). Ensure there’s some space between each wing; overcrowding will cause them to steam rather than crisp. If using a baking sheet directly, you might need to use two sheets. Evenly spaced wings are happy wings!

Step 4: Bake to Perfection

Bake for 20-25 minutes. Then, flip each wing and continue baking for another 20-25 minutes, or until golden brown, crispy, and cooked through. The internal temperature should reach at least 165°F (74°C). For extra crispiness, you can broil them for the last 2-3 minutes, watching carefully to prevent burning.

Step 5: Optional Sauce/Glaze

While the wings are baking, prepare your favorite sauce or glaze. Common choices include buffalo sauce, BBQ sauce, honey garlic, or teriyaki. Once the wings are done, you can toss them in the sauce while still warm, or serve the sauce on the side for dipping.

Step 6: Rest and Serve

Let the wings rest for a few minutes before serving. This allows the juices to redistribute, creating a more succulent bite. Serve hot and enjoy the crispy satisfaction!

Nutritional Information

Please note: Nutritional information can vary greatly depending on the size of the wings, the amount of oil used, and any sauces added. This is an estimate for plain baked wings.

  • Calories: Approximately 250-300 per serving (around 4-5 wings)
  • Protein: 20-25g
  • Fat: 15-20g (mostly from the skin)
  • Carbohydrates: <1g

Healthier Alternatives & Flavor Swaps

While these baked wings are already a healthier option than their fried counterparts, you can make them even more so:

  • Skinless Wings: For significantly less fat and calories, you can remove the skin before seasoning. The crispiness will be reduced, but they will still be delicious.
  • Lighter Sauces: Opt for homemade sauces with a tomato or vinegar base, or use a light drizzle of honey instead of heavy sugary glazes.
  • Spice Up Naturally: Instead of relying solely on salt and pepper, load up on onion powder, garlic powder, smoked paprika, chili powder, or dried herbs for robust flavor without extra sodium or fat.
  • Olive Oil Reduction: While oil aids crisping, you can try using just 1/2 tablespoon if you’re very conscious of fat intake.

Serving Suggestions

These crispy baked chicken wings are incredibly versatile:

  • Game Day Feast: Serve with celery sticks, carrot sticks, and a side of blue cheese or ranch dressing.
  • Appetizer Platter: Arrange them alongside other finger foods like sliders, mini quiches, or loaded potato skins.
  • Main Course: Pair with a fresh green salad, coleslaw, or oven-baked fries for a complete meal.
  • Potluck Perfect: They travel well and are always a crowd-pleaser. Keep them warm in a thermos if needed.

Common Mistakes to Avoid

Don’t let these slip-ups ruin your wings:

  • Not Drying the Wings: This is the biggest culprit for soggy wings. Pat them DRY!
  • Overcrowding the Pan: Wings need space to crisp. Use a large pan or two smaller ones.
  • Skipping the Baking Powder: While not mandatory for cooking, it’s the secret to superior crispiness in baked wings.
  • Opening the Oven Too Much: Resist the urge to peek! Each time you open the oven, you lose heat and extend cooking time.
  • Underbaking: Ensure wings reach a safe internal temperature for both safety and optimal texture.

Storing Your Delicious Wings

Leftover wings can be stored in an airtight container in the refrigerator for up to 3-4 days. Reheating is best done in the oven or an air fryer at around 350°F (175°C) for 10-15 minutes to restore some crispiness. Microwaving will make them soft and chewy.

Conclusion

There you have it – the ultimate guide to achieving incredibly crispy, flavorful baked chicken wings right in your own oven! Forget the deep fryer and the mess; this recipe proves that you can get all the deliciousness with much less effort. Whether you’re hosting a party, enjoying a game night, or just craving a satisfying snack, these oven-baked chicken wings are guaranteed to be a winner. Give this recipe a try, experiment with your favorite seasonings and sauces, and get ready to impress yourself and your guests with your newfound wing-making prowess!

Frequently Asked Questions About Baked Wings

Can I use frozen chicken wings?

It’s best to thaw frozen wings completely in the refrigerator before baking. Baking them from frozen will result in uneven cooking and less crispy skin.

Why are my baked wings not crispy?

The most common reasons are not drying the wings thoroughly, overcrowding the pan, opening the oven too frequently, or not baking at a high enough temperature. Make sure to follow the steps, especially drying and spacing!

Do I really need baking powder?

For the crispiest baked wings, yes! Baking powder (aluminum-free) significantly helps dry out the skin through a chemical reaction that raises the pH, leading to superior crispiness. It doesn’t add flavor.

What temperature should the wings be cooked to?

Chicken wings are safe to eat when they reach an internal temperature of 165°F (74°C). However, for optimal texture and crispiness, they often benefit from cooking a bit higher, around 175-185°F (80-85°C).

Can I make these wings ahead of time?

You can season the wings a few hours in advance and keep them in the refrigerator, uncovered, on a rack. This further helps dry the skin. However, for the crispiest results, it’s best to bake them just before serving.

Print

clock clock iconcutlery cutlery iconflag flag iconfolder folder iconinstagram instagram iconpinterest pinterest iconfacebook facebook iconprint print iconsquares squares iconheart heart iconheart solid heart solid icon

Baked Chicken Wings Recipe: Crispy, Easy & Delicious Wings

  • Author: Chef Mia

Description

Welcome to our delicious baked chicken wings recipe! If you’re looking for crispy and succulent chicken wings without deep-frying, you’re in the right place. Ourbaked chicken wingsare the perfect solution for those who crave flavorful, crispy wings with minimal fuss. With this recipe, you’ll discover the secrets to making perfect wings every single time using just your oven and a few simple ingredients. Whether you’re a fan of spicy, sweet, or classic wings, theseoven-baked chicken wingswill be a hit at your next gathering!


Ingredients

  • For the Rub:
  • Dipping Sauces:
  • Optional Additions:

Instructions

  1. Preheat your oven to425 degrees Fahrenheit.
  2. Line a baking sheet withaluminum foiland lightly spray it with nonstick cooking spray. Place abaking rackon top of the foil. Set aside.
  3. Pat the chicken wings dry with a paper towel to remove any excess moisture.
  4. In asmall bowl, combine all the rub ingredients: baking powder, sea salt, ground black pepper, garlic powder, smoked paprika, chili powder, and onion powder.
  5. Place the wings in aresealable plastic bagor a large bowl.
  6. Add theolive oiland toss the wings to coat evenly.
  7. Sprinkle the rub mixture over the wings, then shake or mix until all wings are evenly coated.
  8. Arrange the seasoned wings in a single layer on thebaking rack.
  9. Place the baking sheet in thepreheated oven.
  10. Bake for20 minutes, thenflipthe wings.
  11. Continue baking for another20-30 minutesuntil the wings are crispy and cooked through.

Notes

For even cooking:Use a baking rack to ensure air circulates around each wing.
Avoid overcrowding:Make sure the wings aren’t touching each other, or they’ll steam instead of crisp.
Add a kick:Toss in a teaspoon of cayenne pepper for spicy wings.


“`

Fiesta Shrimp Rice Bowl – Quick, Flavorful, & Easy!

“`html

Fiesta Shrimp Rice Bowl – Quick, Flavorful, & Easy!

Welcome, food lovers! If you’re searching for a quick and delicious meal that’s perfect for weeknights, look no further than this Fiesta Shrimp Rice Bowl. Bursting with flavors and textures, this shrimp rice bowl is sure to satisfy your cravings while being easy to prepare in under 20 minutes. Whether you’re a fan of spicy seafood or simply want a light yet filling meal, this recipe is the perfect addition to your weekly dinner rotation!

Why You’ll Love This Fiesta Shrimp Rice Bowl

Are you constantly on the lookout for dinners that are both speedy and sensational? In today’s fast-paced world, the demand for quick, weeknight-friendly meals is higher than ever. This Fiesta Shrimp Rice Bowl answers that call with a resounding “Yes!” It’s a symphony of vibrant colors, zesty flavors, and satisfying textures, all coming together in a bowl that feels both indulgent and healthy. The beauty of this dish lies in its simplicity and adaptability. You can whip it up in less than 20 minutes, making it perfect for those evenings when time is scarce but the desire for something delicious is strong. The combination of succulent shrimp, fluffy rice, and fresh, zesty toppings creates a culinary experience that’s both refreshing and deeply satisfying. It’s a complete meal that’s guaranteed to become a go-to in your kitchen.

Fiesta Shrimp Rice Bowl Ingredients

The magic of this Fiesta Shrimp Rice Bowl lies in the harmonious blend of its components. Here’s what you’ll need to create this flavor explosion:

For the Shrimp:

  • 1 lb large shrimp, peeled and deveined: The star of our show! Look for plump, pink shrimp that will cook quickly and absorb flavor beautifully. (Substitution: Medium shrimp work too, just adjust cooking time slightly.)
  • 1 tbsp olive oil: For a healthy base to sauté. (Substitution: Avocado oil or coconut oil for a slightly different flavor profile.)
  • 1 tsp chili powder: Adds a smoky, earthy warmth.
  • ½ tsp cumin: For that quintessential Tex-Mex depth.
  • ¼ tsp garlic powder: A convenient way to add garlicky goodness.
  • ¼ tsp onion powder: Enhances savory notes.
  • Pinch of cayenne pepper (optional): For an extra kick of heat that tingles the senses.
  • Salt and freshly ground black pepper: To taste, balancing all the vibrant spices.

For the Rice:

  • 2 cups cooked rice: The comforting foundation. Jasmine or basmati rice offers a lovely fragrance. (Substitution: Brown rice for extra fiber, quinoa for a protein boost, or even cauliflower rice for a low-carb option. Ensure it’s cooked and warm.)
  • 1 tbsp lime juice: Freshly squeezed for a zesty brightness that cuts through richness.
  • 1 tbsp chopped fresh cilantro: For a burst of herbaceous freshness.

For the Toppings:

  • ½ cup black beans, rinsed and drained: Earthy and filling, adding a satisfying texture.
  • ½ cup corn, fresh, frozen (thawed), or canned (drained): Sweet and crunchy, providing a pop of sunshine.
  • ¼ cup finely diced red onion: For a sharp, pungent bite that awakens the palate.
  • ¼ cup diced avocado: Creamy and rich, offering a luxurious contrast.
  • 2 tbsp chopped fresh cilantro: More herbaceous goodness.
  • 1-2 tbsp salsa or your favorite hot sauce: For that essential fiesta zing!
  • Lime wedges: For a final squeeze of citrusy magic.

Timing is Everything

This recipe is designed for speed! Here’s how the timing breaks down:

Prep time: 10 minutes
Cook time: 10 minutes
Total time: 20 minutes

This is significantly faster than the average main course, which often takes 45 minutes to an hour. The minimal prep and rapid cooking are what make this Fiesta Shrimp Rice Bowl a weeknight superhero!

A vibrant Fiesta Shrimp Rice Bowl overflowing with colorful ingredients.

Step-by-Step Fiesta Shrimp Rice Bowl Magic

Let’s get cooking! Follow these simple steps to create your delicious Fiesta Shrimp Rice Bowl.

Step 1: Prep the Shrimp & Marinade

In a medium bowl, combine the peeled and deveined shrimp with olive oil, chili powder, cumin, garlic powder, onion powder, cayenne pepper (if using), salt, and black pepper. Toss gently until the shrimp are evenly coated in the spices. Let them marinate for about 5-10 minutes while you prepare the other components. This quick marinade infuses the shrimp with incredible flavor.

Step 2: Cook the Rice

If you haven’t already, cook your rice according to package directions. Once cooked, fluff it with a fork. In a small bowl, gently stir in the fresh lime juice and chopped cilantro into the warm rice. This simple step adds a bright, fresh dimension to the rice base.

Step 3: Sauté the Shrimp

Heat a large skillet over medium-high heat. Add the marinated shrimp in a single layer. Cook for 2-3 minutes per side, until the shrimp turn pink and opaque and are cooked through. Be careful not to overcook, as shrimp can become tough quickly. The aroma will be incredible!

Step 4: Assemble the Fiesta Bowls

Divide the lime-cilantro rice among serving bowls. Top with the sautéed fiesta shrimp, black beans, corn, diced red onion, and avocado. Drizzle with your favorite salsa or hot sauce, and garnish with extra cilantro. Serve immediately with lime wedges on the side for an extra burst of freshness.

Nutritional Highlights

This Fiesta Shrimp Rice Bowl is packed with lean protein and essential nutrients. While exact values depend on portion size and specific ingredients used, a typical serving offers:

  • Protein: High in protein thanks to the shrimp.
  • Fiber: Good source of fiber from beans and corn.
  • Vitamins & Minerals: Rich in vitamins A and C, potassium, and folate from the vegetables and avocado.
  • Healthy Fats: Provided by the avocado and olive oil.

(Note: Detailed nutritional information can vary. For precise tracking, it’s recommended to use a nutrition calculator with your specific ingredient measurements.)

Healthier Alternatives & Flavor Boosts

Want to amp up the health factor or switch up the flavors? Try these:

  • Low-Carb Base: Swap the rice for cauliflower rice, which is significantly lower in carbohydrates and calories but still absorbs those delicious flavors.
  • Leaner Protein: While shrimp is lean, you could also use chicken breast strips or firm tofu for a different protein profile.
  • Spice Level Control: Adjust the cayenne pepper and hot sauce to your personal heat preference. For a milder dish, omit the cayenne entirely.
  • Extra Veggies: Add finely diced bell peppers (any color!), jalapeños, or cherry tomatoes for extra color, crunch, and nutrients.
  • Creamy Dressing: For a touch of creaminess without heavy dairy, whisk together Greek yogurt, lime juice, and a pinch of salt.

Serving Suggestions

This Fiesta Shrimp Rice Bowl is a complete meal on its own, but here are a few ideas to complement it:

  • Chips and Guacamole: For a fun appetizer or an extra crunchy element.
  • Side Salad: A light green salad with a citrus vinaigrette.
  • Mexican Corn Salad (Esquites): If you love corn, a side of creamy, cheesy esquites would be divine.
  • Fresh Tortillas: Warm corn or flour tortillas to scoop up any extra goodness.

Common Mistakes to Avoid

Even with simple recipes, a few common pitfalls can detract from the final dish:

  • Overcooking the Shrimp: This is the most common mistake. Shrimp cook very quickly; watch them closely until they just turn pink.
  • Using Stale Spices: Ensure your chili powder, cumin, and other spices are relatively fresh for maximum flavor impact.
  • Not Seasoning Enough: Don’t be shy with salt and pepper. Taste and adjust seasoning as needed, especially for the rice and the shrimp marinade.
  • Mushy Rice: If your rice is already day-old, it might be a bit clumpy. Fluff it well and consider adding a tiny bit more moisture (like a splash of water or broth) if it seems dry.

Storing Your Fiesta Masterpiece

Leftovers can be stored in an airtight container in the refrigerator for up to 2 days. It’s best to store the rice and cooked shrimp separately from the fresh toppings (like avocado and red onion) if possible to maintain their texture and freshness. Reheat gently on the stovetop or in the microwave, and add fresh toppings before serving.

A Fiesta for Your Tastebuds

There you have it – a vibrant, flavorful, and incredibly quick Fiesta Shrimp Rice Bowl that’s perfect for any night of the week. It’s proof that delicious, satisfying meals don’t need to take hours to prepare. The combination of tender, spicy shrimp, zesty rice, and fresh toppings is a guaranteed hit. So, gather your ingredients, get cooking, and prepare for a fiesta of flavors that will have everyone asking for seconds!

Frequently Asked Questions

***Can I prepare some components ahead of time?***

Yes! You can cook the rice and chop the vegetables (except avocado, which browns) a day in advance. You can also marinate the shrimp a few hours before cooking. This will make assembly even faster!

***What kind of shrimp should I use?***

Large or jumbo shrimp (16-20 or 21-25 count per pound) work best as they are substantial and easier to handle. Peel and devein them before cooking.

***Is this recipe spicy?***

The base recipe has a mild warmth from the chili powder and optional cayenne. You can easily control the spiciness by adjusting the amount of cayenne pepper and the type/amount of salsa or hot sauce you use.

***Can I make this vegetarian or vegan?***

Absolutely! Omit the shrimp and add a plant-based protein like seasoned black beans, firm tofu, or tempeh. Ensure your salsa and any other additions are vegan-friendly.

***What if I don’t have lime juice?***

Lemon juice can be used as a substitute for lime juice, though it will slightly alter the flavor profile. It will still provide the necessary acidity to brighten the dish.

Print
clock clock iconcutlery cutlery iconflag flag iconfolder folder iconinstagram instagram iconpinterest pinterest iconfacebook facebook iconprint print iconsquares squares iconheart heart iconheart solid heart solid icon

Fiesta Shrimp Rice Bowl Recipe – Quick, Easy, and Delicious

  • Author: Chef Mia

Description

Welcome, food lovers! 🌟 If you’re searching for a quick and delicious meal that’s perfect for weeknights, look no further than thisFiesta Shrimp Rice Bowl. Bursting with flavors and textures, this shrimp rice bowl is sure to satisfy your cravings while being easy to prepare in under 20 minutes. Whether you’re a fan of spicy seafood or simply want a light yet filling meal, this recipe is the perfect addition to your weekly dinner rotation!


Ingredients

Scale
  • 2 tablespoonsolive oil or avocado oil
  • 2 tablespoonslime juice (about1large lime)
  • 1 teaspoonsmoked paprika
  • 1 teaspooncumin
  • 1/2 teaspoonchili powder
  • 1/2 teaspoongarlic powder
  • 1/2 teaspoonsalt
  • 1/4 teaspoonblack pepper
  • 1/8 teaspooncayenne pepper (more if you want it spicier)
  • 2 tablespoonsfresh chopped cilantro
  • 1lbraw shrimp, peeled and deveined
  • 2 cupsuncooked white rice (or substitute with quinoa, brown rice, or even lettuce for a low-carb option)
  • 1/4 cupdiced red onion
  • 1/2 cupdiced cherry tomatoes
  • 1jalapeñosliced (optional)
  • Fresh chopped cilantro
  • 1largeavocado, sliced
  • 1(15 ounce) canfire-roasted corn, drained
  • To serve: Homemade creamy jalapeño ranch or store-bought cilantro ranch dressing

Instructions

  1. In a medium-sized bowl, mix together the olive oil, lime juice, smoked paprika, cumin, chili powder, garlic powder, salt, black pepper, and cayenne pepper.
  2. Add the fresh chopped cilantro and whisk until everything is well combined.
  3. Pat the shrimp dry using a paper towel and add it to the bowl with the marinade.
  4. Toss the shrimp until fully coated, cover, and marinate in the refrigerator for at least 15 minutes to let the flavors meld.
  5. While the shrimp is marinating, cook your rice according to package instructions. For a quicker option, use minute rice, which takes only 5 minutes to prepare.
  6. Once cooked, fluff the rice with a fork and keep it warm.
  7. Heat a large skillet over medium-high heat (no oil needed, as the marinade has plenty of oil).
  8. Add the marinated shrimp in a single layer and cook for 2-3 minutes on one side, or until they turn pink and slightly opaque.
  9. Flip the shrimp and cook for another 2-3 minutes until done. The shrimp will form a loose “C” shape when perfectly cooked.
  10. Remove from heat and set aside.
  11. Place a generous scoop of rice in each bowl.
  12. Top with diced red onion, cherry tomatoes, sliced jalapeños, avocado, and fire-roasted corn.
  13. Finally, add the cooked shrimp on top and sprinkle with fresh cilantro.
  14. Drizzle with creamy jalapeño ranch or cilantro ranch dressing.
  15. Squeeze extra lime juice over the top for a zesty finish and serve immediately.

Notes

Use Fresh Shrimp:Fresh shrimp gives the best flavor and texture, but frozen shrimp works just as well if thawed properly.
Spice Level:Adjust the cayenne pepper to control the heat level. For a milder version, omit the jalapeños and cayenne.
Rice Alternatives:For a healthier twist, try substituting rice with quinoa, brown rice, or even cauliflower rice.
Marination Time:While 15 minutes is sufficient, marinating the shrimp for up to 2 hours will result in deeper flavor penetration.

“`