“`html
Table of Contents
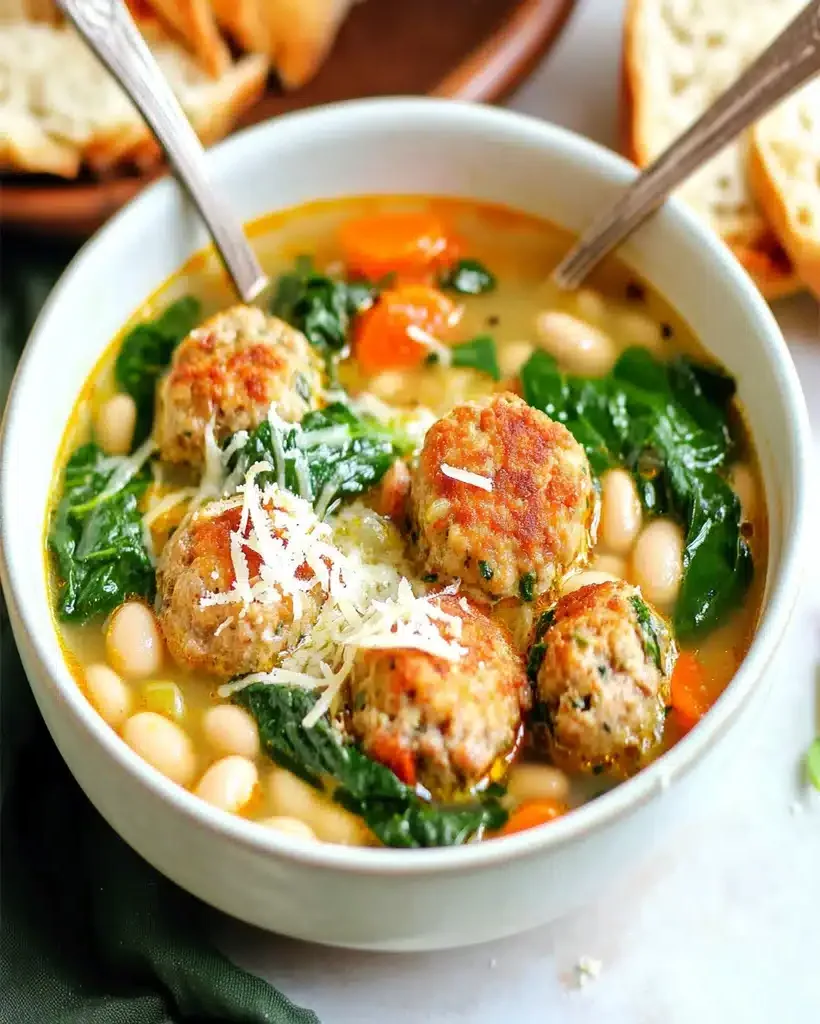
Spinach & White Bean Meatball Soup: Cozy, Healthy, & Delicious!
Welcome to a Bowl of Comfort!
Are you looking for a meal that’s both incredibly comforting and surprisingly good for you? In our busy lives, finding recipes that tick all the boxes—delicious, healthy, quick, and family-friendly—can feel like a quest. That’s where this Spinach and White Bean Meatball Soup comes in! It’s a dish designed to warm you from the inside out, packed with lean protein from tender chicken meatballs, nutrient-rich spinach wilted to perfection, and creamy, satisfying white beans. This soup isn’t just a meal; it’s an experience, bringing together wholesome ingredients into a harmonious, flavorful bowl that will become a staple in your weekly rotation. Get ready to discover your new favorite way to enjoy a hearty, healthy dinner!
Freshness in Every Spoonful: The Ingredients
The magic of this soup lies in its simple yet impactful ingredients. We’re focusing on fresh, wholesome components that come together to create a symphony of flavors and textures. Get ready to gather these delightful items:
For the Tender Chicken Meatballs:
- 1 lb ground chicken: Lean and a fantastic base for tender meatballs. (Substitution: Ground turkey or a mix of ground chicken and pork for richer flavor.)
- 1/4 cup breadcrumbs (panko preferred for lightness): Acts as a binder, keeping meatballs moist and tender. (Substitution: Gluten-free breadcrumbs or even finely ground oats for a gluten-free option.)
- 1 large egg: Essential for binding the ingredients together.
- 2 cloves garlic, minced: Adds a pungent, aromatic punch.
- 1/4 cup finely chopped fresh parsley: For a burst of fresh, herbaceous flavor. (Substitution: Dried parsley, about 1 tablespoon, but fresh yields a brighter taste.)
- 1/2 teaspoon salt: Enhances all the other flavors.
- 1/4 teaspoon black pepper: A warm, subtle spice.
- 1 tablespoon olive oil: For gently browning the meatballs.
For the Flavorful Soup:
- 1 tablespoon olive oil: The foundation for sautéing aromatics.
- 1 large onion, chopped: Sweet and aromatic, forms the flavor base.
- 2 carrots, peeled and diced: Adds sweetness and a lovely texture.
- 2 celery stalks, diced: Provides a subtle bitterness and aromatic depth.
- 4 cloves garlic, minced: For that essential savory kick.
- 8 cups low-sodium chicken broth: The soul of our soup, choose a good quality one. (Substitution: Vegetable broth for a vegetarian version with white beans and spinach, or good quality chicken stock.)
- 2 (15-ounce) cans cannellini beans, rinsed and drained: Creamy, mild, and wonderfully filling. (Substitution: Great Northern beans or butter beans for a similar creamy texture.)
- 5 ounces fresh spinach, roughly chopped: Wilted greens add a vibrant color and nutrients. (Substitution: Kale, Swiss chard, or even pre-washed baby spinach.)
- 1 teaspoon dried Italian seasoning: A classic blend of herbs that complements the soup perfectly.
- Salt and freshly ground black pepper to taste: To perfectly balance the flavors.
- Optional: A squeeze of fresh lemon juice or a pinch of red pepper flakes for a little zing.
Time Well Spent: Prep & Cook
This soup is designed for weeknight ease. The prep time is minimal, involving chopping veggies and mixing meatballs. Most of the cook time is hands-off simmering. Compared to more complex soups that might take hours, 50 minutes is a breath of fresh air for such a wholesome and satisfying meal.
Crafting Your Cozy Bowl: Step-by-Step
Let’s dive into creating this delightful soup. Follow these simple steps, and you’ll have a bowl of pure comfort ready in no time!
Step 1: Make the Meatballs
In a medium bowl, combine the ground chicken, breadcrumbs, egg, minced garlic (from the meatball ingredients), chopped parsley, salt, and pepper. Use your hands to gently mix everything until just combined. Be careful not to overmix, as this can result in tough meatballs. Roll the mixture into small, bite-sized meatballs (about 1-inch in diameter). You should get around 16-20 meatballs.
Heat 1 tablespoon of olive oil in a large pot or Dutch oven over medium heat. Add the meatballs in batches, being careful not to overcrowd the pot. Brown them lightly on all sides for about 5-7 minutes. They don’t need to be cooked through at this stage, as they will finish cooking in the soup. Remove the browned meatballs from the pot and set them aside on a plate.
Step 2: Prepare the Soup Base
Add the remaining 1 tablespoon of olive oil to the same pot over medium heat. Add the chopped onion, carrots, and celery. Sauté for about 5-7 minutes, stirring occasionally, until the vegetables have softened slightly and the onion is translucent. This process, known as building your aromatic base, is crucial for developing deep flavor.
Stir in the minced garlic (from the soup ingredients) and cook for another minute until fragrant, being careful not to burn it.
Step 3: Simmer and Cook
Pour in the chicken broth, scraping up any browned bits from the bottom of the pot – this is pure flavor gold! Add the Italian seasoning. Bring the broth to a gentle simmer.
Carefully return the browned meatballs to the simmering broth. Reduce the heat to low, cover the pot, and let the soup simmer for at least 15-20 minutes. This allows the meatballs to cook through completely and the flavors of the broth to meld beautifully.
Step 4: Add Spinach and Beans
Stir in the rinsed and drained cannellini beans. Allow them to heat through for about 5 minutes. This adds a wonderful creaminess and heartiness to the soup.
Finally, add the fresh spinach to the pot. It might seem like a lot, but it will wilt down quickly. Stir it into the hot soup until it’s just wilted, which should only take 1-2 minutes. Overcooking the spinach will turn it a dull green and diminish its vibrant flavor and nutrients.
Step 5: Finish and Serve
Taste the soup and season with additional salt and freshly ground black pepper as needed. If you like a little zing, stir in a squeeze of fresh lemon juice or a pinch of red pepper flakes.
Ladle the hot soup into bowls, ensuring each serving gets plenty of meatballs, beans, and spinach. Serve immediately and enjoy the comforting embrace of this wholesome meal!
Fueling Your Body: Nutritional Highlights
This soup is a nutritional powerhouse, offering a balanced blend of protein, fiber, and essential vitamins and minerals. Here’s a general breakdown per serving (approximate values):
- Calories: ~280-350 kcal
- Protein: ~20-25g
- Fat: ~10-15g
- Carbohydrates: ~25-30g
- Fiber: ~5-8g
This is a wonderfully satisfying meal that supports energy levels and keeps you feeling full without being heavy. The combination of lean protein from chicken, complex carbs from beans, and micronutrients from spinach and vegetables makes it a truly wholesome choice.
Smart Swaps: Healthier Alternatives
While this recipe is already quite healthy, here are a few suggestions to make it even lighter or cater to specific dietary needs, without sacrificing flavor:
- Lower Sodium: Opt for “no salt added” chicken broth and adjust salt towards the end of cooking.
- Gluten-Free: Use gluten-free breadcrumbs in the meatballs, or skip them entirely and add a little more egg for binding if needed. Ensure your broth is also gluten-free.
- Extra Veggies: Feel free to add other nutrient-dense vegetables like zucchini, bell peppers, or even a handful of peas in the last 10 minutes of simmering.
- Lighter Meatballs: For even leaner meatballs, ensure you’re using 93% lean or higher ground chicken.
Serving Suggestions to Elevate Your Meal
This soup is a complete meal on its own, but here are a few ideas to make it even more special:
- Crusty Bread: A warm, crusty baguette or artisan bread is perfect for dipping into the flavorful broth.
- Fresh Herbs: A sprinkle of fresh parsley or chives just before serving adds a final touch of freshness and color.
- A Dollop of Yogurt: For a creamy, cooling contrast, a small dollop of plain Greek yogurt or sour cream can be delicious.
- Side Salad: A light, crisp green salad with a simple vinaigrette makes for a balanced lunch or dinner pairing.
Common Mistakes to Avoid
To ensure your soup turns out perfectly every time, steer clear of these common pitfalls:
- Overmixing Meatballs: This is the number one culprit for tough meatballs. Mix gently until just combined.
- Overcooking Spinach: Add spinach right at the end and let it wilt naturally. Overcooked spinach loses its nutrients and appealing texture.
- Not Browning Meatballs: While they finish cooking in the soup, a light sear adds depth of flavor and helps them hold their shape.
- Burning Garlic: Minced garlic cooks very quickly. Add it towards the end of sautéing vegetables and stir constantly.
Storing & Reheating Your Delicious Soup
Leftovers are a gift! This soup stores beautifully:
- Refrigeration: Store cooled soup in an airtight container in the refrigerator for up to 3-4 days.
- Reheating: Gently reheat on the stovetop over low heat, stirring occasionally, until warmed through. You can also reheat individual portions in the microwave. Add a splash of broth or water if the soup has thickened considerably.
- Freezing: While possible, the beans and spinach might change texture slightly upon thawing. If freezing, it’s best to add the spinach and beans after reheating a thawed soup. For best results, freeze the broth and meatballs separately or thaw and reheat thoroughly.
A Hug in a Bowl
This Spinach and White Bean Meatball Soup is more than just a recipe; it’s a beacon of comfort and health. The tender chicken meatballs, the creamy cannellini beans, and the vibrant spinach all come together in a rich, savory broth that’s incredibly satisfying and nourishing. It’s the perfect antidote to a chilly evening or a busy weeknight when you need a wholesome meal that doesn’t compromise on flavor or ease. We hope you’ll add this delightful soup to your go-to recipe collection. Give it a try and let us know how it turned out in the comments below! Happy cooking!
Frequently Asked Questions
***What kind of chicken is best for the meatballs?***
Ground chicken is ideal. You can use breast or thigh meat, or a blend. For the leanest option, choose ground chicken breast. If you prefer a richer flavor, using meat from chicken thighs or a mix of breast and thigh meat works wonderfully.
***Can I make this soup vegetarian or vegan?***
Yes! To make it vegetarian, simply omit the chicken meatballs and add extra beans, or use vegetarian meatballs. For a vegan version, use vegetable broth, omit chicken meatballs, and ensure your breadcrumbs are vegan. You could also add hearty vegetables like potatoes or sweet potatoes for extra substance.
***Can I use dried beans instead of canned?***
Absolutely! If using dried beans, you’ll need to soak them overnight and cook them until tender before adding them to the soup according to the recipe timing. This will increase the overall cooking time.
***How can I make the soup spicier?***
For a spicier kick, add a pinch of red pepper flakes to the soup base when you sauté the vegetables, or stir in a small amount of sriracha or your favorite hot sauce at the end of cooking. You can also serve with extra red pepper flakes on the side.
***Can I make the meatballs ahead of time?***
Yes, you can form the meatballs and store them in the refrigerator for up to 24 hours before cooking, or freeze them for longer storage. If freezing, it’s best to freeze them in a single layer on a baking sheet until firm, then transfer to a freezer bag.

Spinach and White Bean Meatball Soup Recipe | Easy Dinner
Description
Welcome, food enthusiasts! Today, I’m excited to share with you a heartwarming and delicious recipe forSpinach and White Bean Meatball Soup. This dish combines tender chicken meatballs, nutritious spinach, and creamy white beans into a hearty bowl that’s perfect for any weeknight dinner. Whether you’re looking for comfort food or a wholesome meal packed with protein and greens, this soup will be a delightful addition to your recipe collection.
Ingredients
- For the Chicken Meatballs:
- Substitution Suggestions:
Instructions
- In a large bowl, mix ground chicken, Panko, Parmesan, oregano, basil, parsley, garlic powder, and red pepper flakes. Season with salt and pepper.
- Form the mixture into 3/4-to-1-inch meatballs, making around 25-30 meatballs.
- Heat 1 tablespoon of olive oil in a large stockpot or Dutch oven over medium heat.
- Add the meatballs in batches and cook until browned on all sides (about 2-3 minutes per batch). Transfer to a plate lined with paper towels and set aside.
- Add the remaining olive oil to the same pot.
- Sauté the garlic, onion, and carrots for 3-4 minutes until fragrant and tender.
- Stir in thyme and basil, cooking for another minute until the spices release their aroma.
- Pour in chicken stock, add bay leaves, and 1 cup of water.
- Bring the mixture to a boil, then reduce to a simmer.
- Add uncooked orzo pasta and the prepared meatballs.
- Cook for 10-12 minutes until the orzo is tender and meatballs are fully cooked.
- Stir in the spinach and cannellini beans, letting the spinach wilt (about 2 minutes).
- Remove from heat and stir in lemon juice and parsley.
- Season with salt and pepper to taste.
Notes
Use Fresh Ingredients:Always opt for fresh baby spinach and freshly grated Parmesan for the best flavor.
Adjust Spice Levels:Customize the heat by adding more or less red pepper flakes.
Prevent Overcooking:Keep an eye on the orzo to avoid a mushy texture. Cook untilal dente.
“`