Table of Contents
- Introduction: Elevating Your Game
- Ingredients: The Building Blocks of Flavor
- Timing Is Everything
- Step-by-Step Instructions: Crafting Perfection
- Nutritional Information: A Glimpse at Your Feast
- Healthier Alternatives: Guilt-Free Indulgence
- Serving Suggestions: Completing the Plate
- Common Mistakes to Avoid
- Storing Tips: Relishing the Leftovers
- Conclusion: A Culinary Triumph
- Frequently Asked Questions (FAQs)
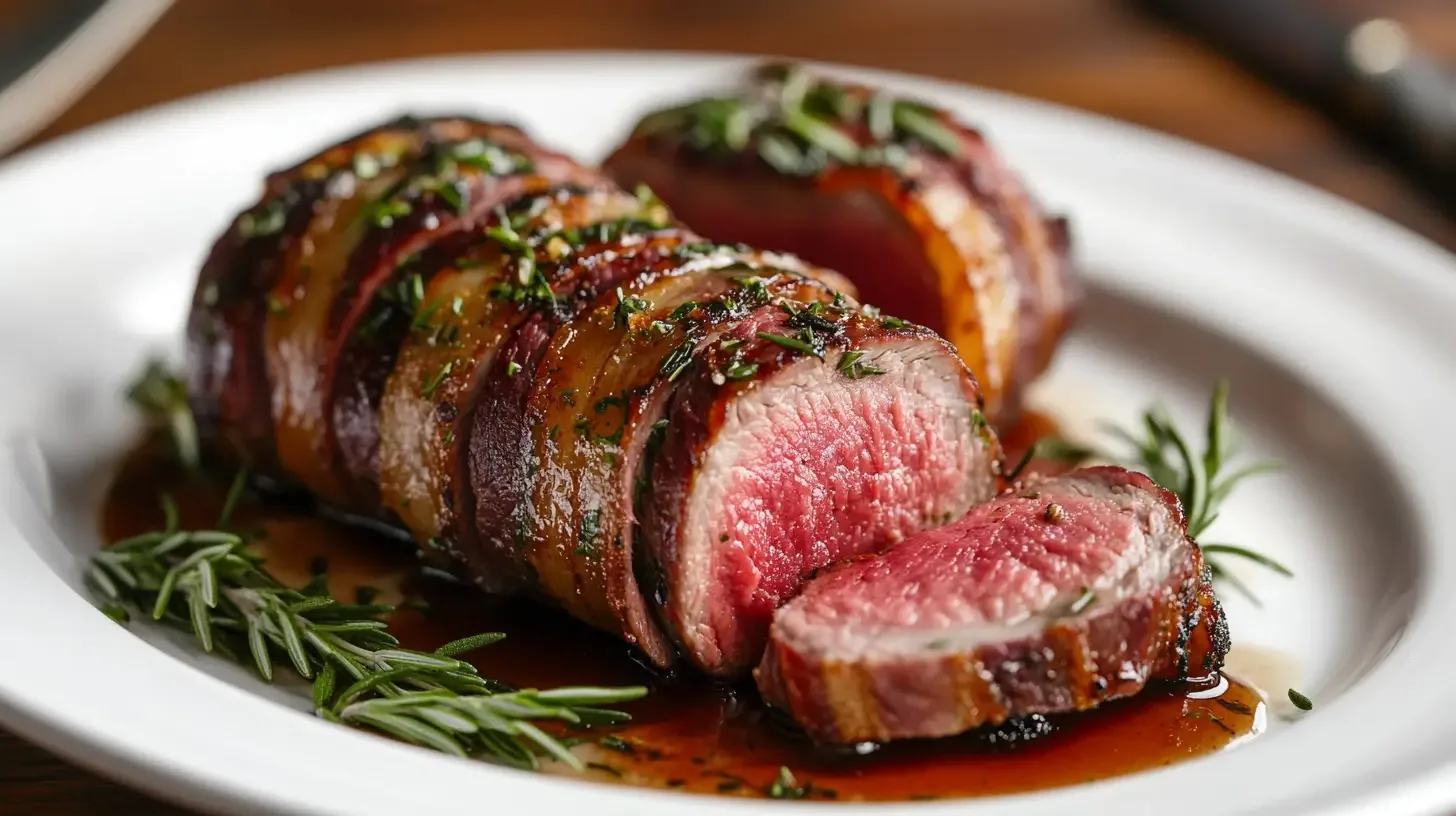
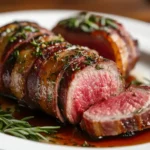
Bacon Wrapped Deer Tenderloin for the Ultimate Feast
Introduction: Elevating Your Game
Are you looking to transform a humble cut of venison into a centerpiece that will wow your guests? If you’re anything like the millions of home cooks who cherish the unique flavor of game meat, you’re probably wondering how to best prepare deer tenderloin to achieve that melt-in-your-mouth texture and rich, satisfying taste. Many resources suggest simple roasting or grilling, but what if you could elevate it even further? This recipe for Bacon Wrapped Deer Tenderloin is designed to do just that, combining the lean, delicate flavor of venison with the irresistible salty crispness of bacon, creating a dish that’s truly fit for a king.
Ingredients: The Building Blocks of Flavor
The magic of this dish lies in its simplicity and thoughtful combination of high-quality ingredients. Each component plays a crucial role in delivering a symphony of textures and tastes.
The Star of the Show: Deer Tenderloin
You’ll need approximately 1 to 1.5 pounds of fresh deer tenderloin. This cut is incredibly tender and has a mild, yet distinct, gamey flavor. Ensure it’s properly trimmed of any excess silver skin or connective tissue for the best texture. If you can’t source deer tenderloin, a high-quality beef tenderloin or even pork tenderloin can be substituted, though the flavor profile will change.
The Flavor Enhancers
To complement the venison, we’ll use a simple yet effective marinade and rub:
- 2 tablespoons olive oil: Provides a base for basting and helps the rub adhere.
- 1 tablespoon Worcestershire sauce: Adds a complex umami depth and a hint of tang.
- 1 teaspoon garlic powder: For that essential savory aroma and taste without burning.
- 1 teaspoon onion powder: Brings a subtle sweetness and aromatic complexity.
- 1/2 teaspoon black pepper, freshly ground: For a gentle warmth and spice.
- 1/2 teaspoon kosher salt: Enhances all the other flavors.
- Optional: 1/2 teaspoon dried rosemary or thyme: Adds an earthy, woodsy note that pairs beautifully with game.
The Crispy Hug: Bacon
For wrapping, you’ll need 6-8 slices of good quality bacon. Opt for a medium-cut bacon – not too thin to burn quickly, and not too thick to prevent even crisping. The rendered fat from the bacon will baste the tenderloin as it cooks, adding immense richness and flavor.
Timing Is Everything
15 minutes
20-30 minutes
35-45 minutes
Compared to a standard roast, this recipe is quite swift. Most deer tenderloin recipes involve longer marinating times or slower roasting. Here, the direct searing and relatively quick roasting method, combined with minimal prep, makes this an ideal dish for a weeknight feast or when you’re short on time but craving something special. The 15 minutes of prep is mainly for trimming and seasoning, while the cook time allows for perfect browning and internal temperature achievement.
Step-by-Step Instructions: Crafting Perfection
Step 1: Prepare the Tenderloin
Begin by removing the deer tenderloin from its packaging and patting it thoroughly dry with paper towels. This is a crucial step for achieving a good sear. Carefully inspect the tenderloin and remove any silverskin (a thin, wiry membrane) using a sharp knife, as it can be tough and unpleasantly chewy. Trim away any excess fat, but leave a thin layer of the natural fat if present, as it adds moisture and flavor.
Step 2: Season Generously
In a small bowl, whisk together the olive oil, Worcestershire sauce, garlic powder, onion powder, black pepper, salt, and any optional herbs. Place the prepared tenderloin on a clean plate or in a shallow dish. Pour the mixture over the tenderloin, ensuring it’s evenly coated on all sides. You can gently rub the marinade into the meat. Let it sit for about 10-15 minutes at room temperature while you preheat your oven and prepare the bacon.
Step 3: Wrap It Up
Lay out your bacon slices on a clean surface, slightly overlapping them to create a full wrap. Place the seasoned tenderloin at one end of the bacon strip. Begin to tightly wrap the bacon around the tenderloin, ensuring no gaps. Overlap the bacon slices as you go. You might need to tuck the ends under or secure them with toothpicks if they are loose, but usually, the natural stickiness of the bacon and a tight wrap is enough. If using toothpicks, remember to remove them before serving!
Step 4: Sear for That Crust
Preheat your oven to 400°F (200°C). Heat a heavy-bottomed, oven-safe skillet (like cast iron) over medium-high heat. Add a tablespoon of oil if your skillet isn’t well-seasoned, or if the bacon is very lean. Carefully place the bacon-wrapped tenderloin into the hot skillet, seam-side down if possible. Sear for 1-2 minutes per side, until the bacon is golden brown and starting to crisp up. This step builds an incredible crust and renders some of the bacon fat.
Step 5: Roast to Perfection
Once seared, transfer the skillet directly to the preheated oven. Roast for approximately 10-15 minutes for medium-rare (internal temperature of 130-135°F or 54-57°C), or 15-20 minutes for medium (140-145°F or 60-63°C). Use a reliable meat thermometer inserted into the thickest part of the tenderloin (avoiding the bacon) for accuracy. Remember that venison is lean and can dry out quickly, so avoid overcooking.
Step 6: Rest and Slice
This is arguably the most important step for tender, juicy meat. Once the tenderloin reaches your desired temperature, carefully remove the skillet from the oven. Transfer the bacon-wrapped tenderloin to a cutting board and tent it loosely with foil. Let it rest for at least 10-15 minutes. This allows the juices to redistribute throughout the meat, ensuring every slice is moist and flavorful. After resting, remove any toothpicks and slice the tenderloin into 1-inch thick medallions.
Nutritional Information: A Glimpse at Your Feast
While actual nutritional values will vary based on the exact size and fat content of the venison and bacon used, here’s a general estimate per serving (assuming 4 servings):
- Calories: Approximately 350-450 kcal
- Protein: 35-45g
- Fat: 20-30g (this will vary significantly with bacon quality)
- Carbohydrates: 2-4g
- Cholesterol: Varies, but typically high due to bacon.
Note: This is a rich dish. For a lighter meal, consider reducing the amount of bacon or using turkey bacon.
Healthier Alternatives: Guilt-Free Indulgence
Want to enjoy this incredible dish with a slightly lighter footprint? Here are a few swaps:
- Turkey Bacon or Leaner Pork Belly: Use turkey bacon for a significant reduction in fat and calories while still providing a smoky, crispy element. Very lean pork belly can also be an option.
- Reduced Salt Marinade: Cut back on the added salt in the marinade. The bacon itself is quite salty.
- Herb-Crusted Venison: Skip the bacon entirely and focus on a robust herb and spice crust for the tenderloin.
- Olive Oil/Avocado Oil Spray: Instead of a full olive oil marinade, use a light spray to help seasonings adhere, then rely on the bacon fat for richness.
Serving Suggestions: Completing the Plate
This Bacon Wrapped Deer Tenderloin is a luxurious main course that pairs beautifully with a variety of side dishes. Consider serving it with:
- Roasted Root Vegetables: Carrots, parsnips, and potatoes roasted alongside the tenderloin or separately complement its earthy flavors.
- Creamy Mashed Potatoes or Cauliflower Mash: A classic comforting pairing.
- Wild Rice Pilaf: Echoes the wild nature of the venison.
- Sautéed Mushrooms and Onions: Adds another layer of savory depth.
- A Crisp Green Salad with a Vinaigrette: Provides a refreshing contrast to the richness of the dish.
Common Mistakes to Avoid
To ensure your Bacon Wrapped Deer Tenderloin turns out perfectly every time, keep these common pitfalls in mind:
- Overcooking: Deer tenderloin is very lean. Use a meat thermometer and remove it from the heat once it reaches your desired internal temperature.
- Not Resting the Meat: Skipping the rest period will result in dry, less flavorful meat.
- Ignoring Silverskin: Failure to remove this membrane can make the tenderloin tough and unpleasant.
- Uneven Searing: Ensure your pan is hot enough before adding the tenderloin for a beautiful, flavorful crust.
- Using Low-Quality Bacon: The bacon plays a significant role in flavor and texture; opt for good quality for the best results.
Storing Tips: Relishing the Leftovers
Leftover Bacon Wrapped Deer Tenderloin should be stored in an airtight container in the refrigerator. It will keep well for 2-3 days. For the best quality, let the meat come to room temperature slightly before reheating gently in a low oven (around 250°F or 120°C) or in a skillet over low heat to avoid drying it out. Avoid microwaving, as it can toughen the meat. Leftovers are fantastic in sandwiches, salads, or diced into omelets.
Conclusion: A Culinary Triumph
This Bacon Wrapped Deer Tenderloin recipe is more than just a meal; it’s an experience. It’s a testament to how simple, quality ingredients, combined with a little technique, can create something truly extraordinary. The smoky, salty crunch of the bacon perfectly elevates the delicate, lean flavor of the venison, resulting in a dish that is both elegant and incredibly satisfying. Whether you’re an experienced hunter, a seasoned cook, or just someone looking to explore the delicious world of game meats, this recipe is sure to become a favorite. Give it a try for your next special occasion and prepare to impress!
Loved this recipe? Share your thoughts below! Have you tried making bacon-wrapped game before? What are your favorite side dishes to pair with venison? Let us know in the comments!
Frequently Asked Questions (FAQs)
***What temperature should deer tenderloin be cooked to?***
For medium-rare, aim for an internal temperature of 130-135°F (54-57°C). For medium, 140-145°F (60-63°C). Always use a meat thermometer and account for carryover cooking.
***Can I substitute beef tenderloin for deer tenderloin?***
Absolutely! Beef tenderloin is an excellent substitute and will yield a similar tender result. The flavor will be less “gamey” but still delicious. Adjust cooking times if the beef tenderloin is significantly different in thickness.
***Why is my bacon not crispy?***
Ensure your pan is hot enough for searing and your oven is at the correct temperature. Also, using a medium-cut bacon usually yields better crispiness than very thick-cut bacon. Overcrowding the pan during searing can also lead to steaming rather than crisping.
***How do I prevent the venison from drying out?***
The bacon wrap helps immensely! However, the most critical steps are not overcooking (use a thermometer!) and resting the meat after cooking. Overcooking is the number one culprit for dry venison.
***Can I marinate the tenderloin overnight?***
Yes, you can marinate the tenderloin overnight, but be mindful of acidic ingredients in your marinade, as they can start to “cook” the meat if left too long. For this simple oil-based marinade, overnight is perfectly fine. Pat it dry before searing.
Bacon Wrapped Deer Tenderloin
Description
For extra flavor:Brush with a mixture of melted butter and honey before roasting.Cooking temperatures:125°F (52°C) for rare, 130-135°F (54-57°C) for medium-rare, 140°F+ (60°C+) for medium.Pairing suggestion:Serve with roasted vegetables, mashed potatoes, or a side salad
Ingredients
- 1 deer (venison) tenderloin (about 1–1.5 lbs)
- 8–10 slices thick-cut bacon
- 2 tbsp olive oil
- 2 tsp garlic powder
- 1 tsp onion powder
- 1 tsp smoked paprika
- 1 tsp salt
- ½ tsp black pepper
- 1 tbsp Worcestershire sauce
- 1 tbsp Dijon mustard (optional)
- Fresh rosemary or thyme (for garnish)
Instructions
- Preheat Oven & Prep Tenderloin:Preheat oven to 375°F (190°C). Pat the venison dry and rub it with olive oil, garlic powder, onion powder, smoked paprika, salt, and pepper.
- Wrap with Bacon:Lay bacon slices slightly overlapping on a cutting board. Place the tenderloin on top and roll it tightly, securing the ends with toothpicks.
- Sear for Crispiness:Heat a skillet over medium-high heat. Sear the bacon-wrapped tenderloin for 1-2 minutes on each side until crispy.
- Bake to Perfection:Transfer to a baking sheet and roast for 20-25 minutes or until the internal temperature reaches 130°F (54°C) for medium-rare.
- Rest & Serve:Let it rest for 5-10 minutes before slicing. Garnish with fresh rosemary or thyme and serve with a balsamic glaze or your favorite sauce
Notes
For extra flavor:Brush with a mixture of melted butter and honey before roasting.Cooking temperatures:125°F (52°C) for rare, 130-135°F (54-57°C) for medium-rare, 140°F+ (60°C+) for medium.Pairing suggestion:Serve with roasted vegetables, mashed potatoes, or a side salad