“`html
Table of Contents
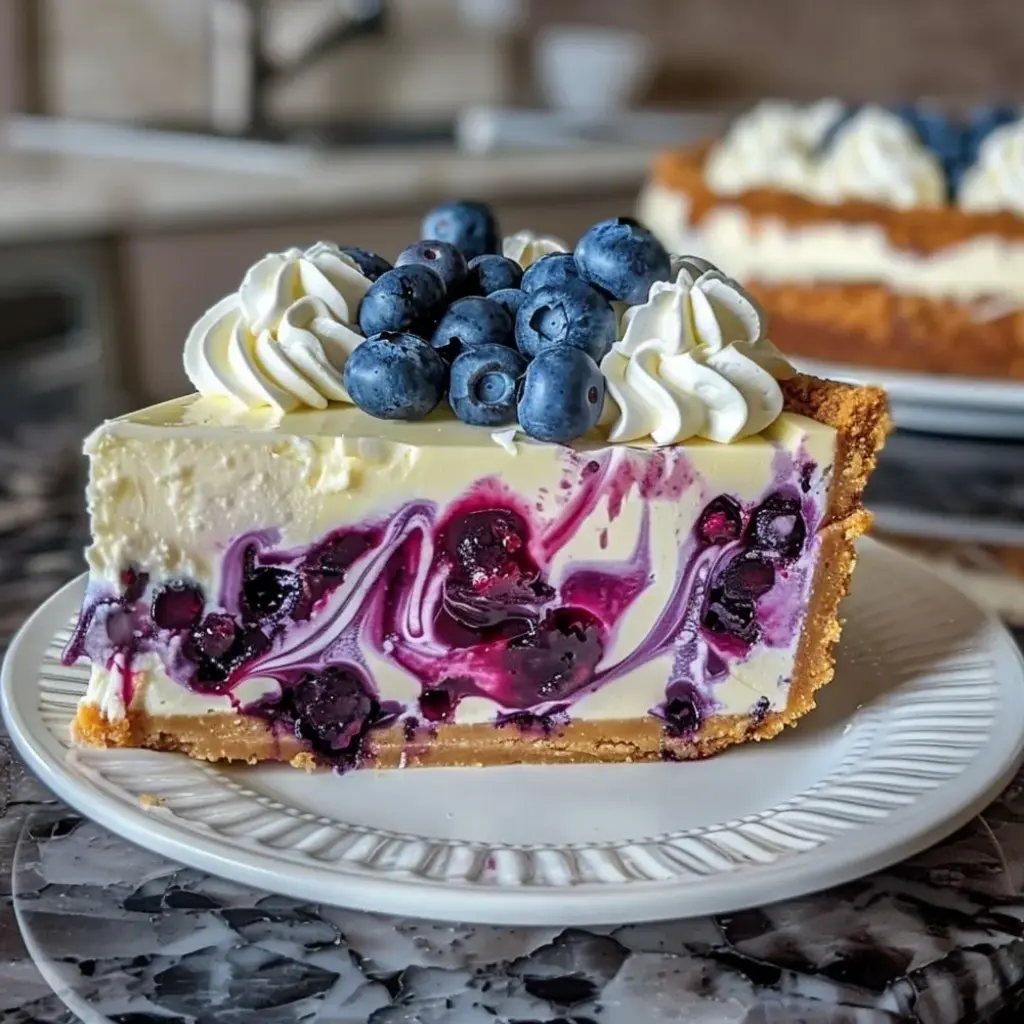
Blueberry Swirl Cheesecake
Craving a Dessert That’s Both Showstopping and Delicious?
Are you searching for that perfect dessert that whispers elegance and screams flavor? In a world of quick fixes and ordinary sweets, the quest for a truly memorable dessert can feel never-ending. But what if we told you that the answer to your dessert dreams—a creamy, fruity, and undeniably decadent Blueberry Swirl Cheesecake—is within your reach? This isn’t just any cheesecake; it’s a harmonious blend of a buttery graham cracker crust, a silken cream cheese filling, and vibrant swirls of homemade blueberry compote. It’s the kind of dessert that garners oohs and aahs at every gathering, yet is surprisingly approachable for the home baker. Whether you’re a seasoned baker looking to perfect your technique or a beginner ready to tackle a showstopper, this recipe promises a guaranteed impress. Get ready to create a dessert that’s as stunning to look at as it is delightful to devour!
Ingredients to Create Your Blueberry Swirl Dream
Crafting the perfect Blueberry Swirl Cheesecake requires attention to detail and the freshest ingredients. Here’s what you’ll need to bring this magical dessert to life, with a few notes for your baking convenience.
For the Graham Cracker Crust:
- 2 cups graham cracker crumbs: These form the crunchy, buttery foundation. (Roughly 14-16 full graham crackers, pulsed in a food processor until fine crumbs). Substitution: Digestive biscuits or shortbread cookies work beautifully too.
- 1/4 cup granulated sugar: Adds a touch of sweetness to complement the crust.
- 1/2 cup unsalted butter, melted: This is the binder that holds your crust together, imbuing it with rich, buttery flavor. Ensure it’s fully melted and slightly cooled.
For the Blueberry Swirl Compote:
- 2 cups fresh or frozen blueberries: The star of our swirl! They release a gorgeous color and sweet-tart flavor. If using frozen, no need to thaw them beforehand.
- 1/4 cup granulated sugar: Balances the tartness of the blueberries and helps create a syrupy consistency. Adjust to your sweetness preference.
- 1 tablespoon fresh lemon juice: Brightens the blueberry flavor and adds a subtle tang.
- 1 teaspoon cornstarch (optional, for thickening): If you prefer a thicker compote, this is your secret weapon. Mix with 1 tablespoon of cold water before adding to the blueberries.
For the Cream Cheese Filling:
- 3 (8-ounce) packages cream cheese, softened: The heart of our cheesecake! Ensure it’s at room temperature for a perfectly smooth, lump-free filling. Cold cream cheese is the enemy of creamy cheesecake.
- 1 1/4 cups granulated sugar: Sweetness that balances the tang of the cream cheese.
- 3 large eggs, at room temperature: They provide structure and richness. Like the cream cheese, room temperature is key for seamless incorporation.
- 1 teaspoon vanilla extract: Adds that classic, warm aroma and flavor.
- 1/2 cup sour cream, at room temperature: Contributes a luscious tang and creamy texture. Full-fat sour cream is recommended.
Timing is Everything for a Perfect Cheesecake
Compared to many other cheesecake recipes that might require extensive cooling periods or multi-day processes, this Blueberry Swirl Cheesecake is relatively streamlined. The preparation of the compote can even be done while the crust bakes, saving you precious time. The longest wait is for the chilling, but that’s just anticipation for deliciousness!

Step-by-Step Instructions
Step 1: Preheat and Prep
First things first, let’s get our oven ready for baking. Preheat your oven to 350°F (175°C). If you plan to use a water bath (highly recommended for even baking and preventing cracks), prepare your springform pan now. Wrap the outside of your 9-inch springform pan tightly with a couple of layers of heavy-duty aluminum foil to make it waterproof. This step is crucial if you opt for the water bath method.
Step 2: Make the Graham Cracker Crust
In a medium bowl, combine the graham cracker crumbs and granulated sugar. Pour in the melted butter and stir until the crumbs are evenly moistened, resembling wet sand. Press this mixture firmly and evenly into the bottom and slightly up the sides of your prepared springform pan. You can use the bottom of a glass or a measuring cup to help compact it. Place the crust in the freezer for about 10-15 minutes while you prepare the blueberry compote and filling. This helps it set and become wonderfully crisp.
Step 3: Prepare the Blueberry Compote
In a small saucepan, combine the blueberries, granulated sugar, and lemon juice. If using cornstarch, whisk it with cold water in a small bowl until smooth and set aside. Heat the blueberry mixture over medium heat, stirring occasionally, until the blueberries begin to burst and release their juices, about 5-7 minutes. If using cornstarch, stir it into the bubbling blueberry mixture and continue to cook for another 1-2 minutes until the compote has thickened slightly. Remove from heat and let it cool completely. You may want to mash some of the blueberries with a fork for a chunkier texture, or blend for a smoother swirl.
Step 4: Make the Cream Cheese Filling
In a large bowl, using an electric mixer (stand mixer with paddle attachment or a hand mixer), beat the softened cream cheese on medium speed until it’s completely smooth and creamy, with no lumps. Gradually add the granulated sugar and continue beating until well combined and smooth, scraping down the sides of the bowl as needed. Beat in the eggs one at a time, mixing just until each egg is incorporated. Be careful not to overmix once the eggs are added, as this can incorporate too much air, leading to cracks. Stir in the vanilla extract and then the sour cream until just combined and the batter is smooth and luscious.
Step 5: Assemble the Cheesecake
Pour about half of the cream cheese filling over the prepared crust. Dollop about half of the cooled blueberry compote over the cream cheese layer. Drizzle the remaining half of the cream cheese filling over the compote, and then dollop the rest of the compote on top. Use a skewer or a knife to gently swirl the compote into the cream cheese, creating beautiful marbled patterns. Don’t over-swirl, you want distinct ribbons of blueberry!
Step 6: Bake Your Masterpiece
If using a water bath: Place the foil-wrapped springform pan into a larger roasting pan. Carefully pour hot water into the roasting pan until it comes about halfway up the sides of the springform pan. If not using a water bath: Place the springform pan directly onto the center rack of the preheated oven. Bake for 70-80 minutes, or until the edges are set and the center is just slightly jiggly when the pan is gently nudged. A slight wobble is good; a liquid center is not.
Step 7: Cool and Chill
Once baked, turn off the oven and let the cheesecake cool in the oven with the door slightly ajar for about 1 hour. This slow cooling process helps prevent cracking. After the hour, carefully remove the cheesecake from the oven (and water bath, if used). Remove the foil from the pan. Let it cool completely on a wire rack at room temperature. Once fully cooled, cover the cheesecake tightly with plastic wrap and refrigerate for at least 4-6 hours, or preferably overnight, to allow it to set completely and develop its signature dense, creamy texture.
Nutritional Information (Estimated Per Serving)
While specific values can vary based on exact ingredients and portion sizes, a typical slice of this Blueberry Swirl Cheesecake contains approximately:
- Calories: 400-500 kcal
- Fat: 25-35g
- Saturated Fat: 15-20g
- Carbohydrates: 35-45g
- Sugar: 25-35g
- Protein: 6-9g
- Cholesterol: 100-150mg
Healthier Alternatives for a Lighter Indulgence
Looking to make this decadent dessert a little lighter without sacrificing flavor? Try these swaps:
- Crust: Use crushed whole wheat graham crackers or even a blend of almond flour and oats for a nuttier, fiber-rich crust sweetened with a touch less sugar. Reduce butter slightly or use a bit of applesauce for binding.
- Cream Cheese: Substitute half of the cream cheese with reduced-fat cream cheese or even Neufchâtel cheese. For a significant reduction, try a blend of Greek yogurt and a reduced-fat cream cheese.
- Sugar: Reduce the overall sugar content in both the crust and filling. Use natural sweeteners like a touch of maple syrup or honey in your compote, or a sugar substitute in the filling if you’re comfortable using them.
- Sour Cream: Full-fat Greek yogurt offers a similar tang and creaminess with more protein and less fat.
Remember, these adjustments might slightly alter the texture, but the delicious blueberry swirl will still shine through!
Serving Suggestions for Maximum Delight
This Blueberry Swirl Cheesecake is a star on its own, but here are a few ideas to elevate your serving:
- Fresh Berries: Garnish with a handful of fresh blueberries, raspberries, or a mix of berries for a vibrant contrast.
- Whipped Cream: A dollop of lightly sweetened whipped cream is a classic and welcome accompaniment.
- Mint Garnish: A sprig of fresh mint adds a pop of color and freshness.
- Sauce Drizzle: If you have any extra blueberry compote, a little extra drizzle on the plate looks beautiful.
Common Mistakes to Avoid
Preventing common cheesecake woes will ensure your success:
- Overmixing the Batter: This incorporates too much air, leading to cracks and a coarser texture. Mix eggs just until combined.
- Using Cold Ingredients: Cream cheese, eggs, and sour cream *must* be at room temperature for a smooth, homogenous filling.
- Opening the Oven Door Too Soon: Avoid opening the oven frequently during baking, and allow for gradual cooling in the oven at the end.
- Not Chilling Enough: Cheesecake needs ample time in the refrigerator to fully set and develop its signature dense, creamy texture. Patience is key!
- Skipping the Water Bath (if you’re prone to cracks): While not strictly necessary, a water bath provides gentle, even heat distribution, crucial for preventing cracks.
Storing Your Blueberry Swirl Cheesecake
To keep your cheesecake fresh and delicious:
- Refrigeration: Store leftover cheesecake, covered tightly with plastic wrap or in an airtight container, in the refrigerator for up to 3-4 days.
- Freezing: Unfrosted cheesecake freezes well. Wrap individual slices or the whole cheesecake tightly in plastic wrap, then in aluminum foil. Freeze for up to 1-2 months. Thaw overnight in the refrigerator before serving.
The Sweetest Ending
The Blueberry Swirl Cheesecake is more than just a dessert; it’s an experience. The journey from a buttery crust to a rich, creamy filling swirled with vibrant blueberry goodness is incredibly rewarding. It’s a testament to how simple ingredients, when treated with care, can create something truly spectacular. So, gather your ingredients, embrace the process, and prepare to wow yourself and your loved ones. Don’t just bake a cake; bake a memory! Ready to dive into creating this masterpiece? Your kitchen awaits its next delicious adventure!
Frequently Asked Questions
***Is it okay to use frozen blueberries for the compote?***
Absolutely! Frozen blueberries are often even better for compote as they tend to break down more easily, releasing their juices and creating a thicker sauce. You can use them directly from the freezer without thawing.
***My cheesecake cracked! What went wrong?***
Cracking is a common cheesecake concern! It’s usually caused by overmixing the batter (incorporating too much air), overbaking, or a sudden temperature change. Using room temperature ingredients, mixing gently, a water bath, and gradual cooling in the oven are the best ways to prevent it.
***How do I know when the cheesecake is done baking?***
The edges of the cheesecake should look set, and the center should be slightly jiggly when you gently nudge the pan. It shouldn’t be liquid, but it will firm up considerably as it cools and chills.
***Can I make this cheesecake ahead of time?***
Yes! In fact, it’s highly recommended. Cheesecakes need to chill for at least 4-6 hours, but overnight is best for optimal texture and flavor. This makes it a perfect make-ahead dessert for parties.
***What is a water bath and why should I use it?***
A water bath (or bain-marie) involves placing your springform pan in a larger pan filled with hot water. It creates a steamy, humid environment in the oven, which helps the cheesecake bake gently and evenly, preventing cracks and ensuring a creamy texture. It’s like a spa treatment for your cheesecake!

Blueberry Swirl Cheesecake
Description
This Blueberry Swirl Cheesecake is a creamy and fruity dessert that’s perfect for any occasion. With a velvety cream cheese filling swirled with a sweet blueberry compote and a buttery graham cracker crust, it’s as stunning as it is delicious. Whether served at a party or enjoyed as a treat for yourself, this cheesecake is guaranteed to impress!
Ingredients
- Graham Cracker Crust:
- Cheesecake Filling:
- Blueberry Compote:
Instructions
- Preheat oven to 325°F (163°C).
- In a bowl, combine graham cracker crumbs, melted butter, and sugar. Press the mixture into the bottom of a 9-inch springform pan. Bake for 10 minutes, then let cool.
- To make the blueberry compote, heat blueberries, sugar, water, and lemon juice in a small saucepan. Simmer until slightly thickened, then stir in the cornstarch slurry. Let cool.
- In a large bowl, beat cream cheese and sugar until smooth. Add eggs one at a time, then mix in sour cream and vanilla extract.
- Pour the cheesecake filling over the crust. Spoon dollops of blueberry compote on top and swirl gently with a toothpick or skewer.
- Place the springform pan in a water bath and bake for 60-70 minutes, or until the edges are set but the center is slightly jiggly.
- Turn off the oven, crack the door, and let the cheesecake cool for 1 hour. Refrigerate for at least 4 hours or overnight before serving.
Notes
Store leftovers in the refrigerator for up to 5 days or freeze individual slices for up to 2 months.
For added texture, sprinkle chopped nuts like almonds or pecans on top.
Substitute raspberries or blackberries for blueberries if desired.
“`