“`html
Table of Contents
- Craving a Flavorful Thai Dish?
- Authentic Thai Yellow Chicken Curry Ingredients
- Perfectly Timed Thai Yellow Chicken Curry
- Easy Step-by-Step Thai Yellow Chicken Curry
- Nutritional Highlights
- Smarter Swaps for a Lighter Curry
- Serving Thai Yellow Chicken Curry
- Common Pitfalls to Avoid
- Keeping Your Curry Fresh
- Your New Go-To Thai Comfort Meal
- Frequently Asked Questions
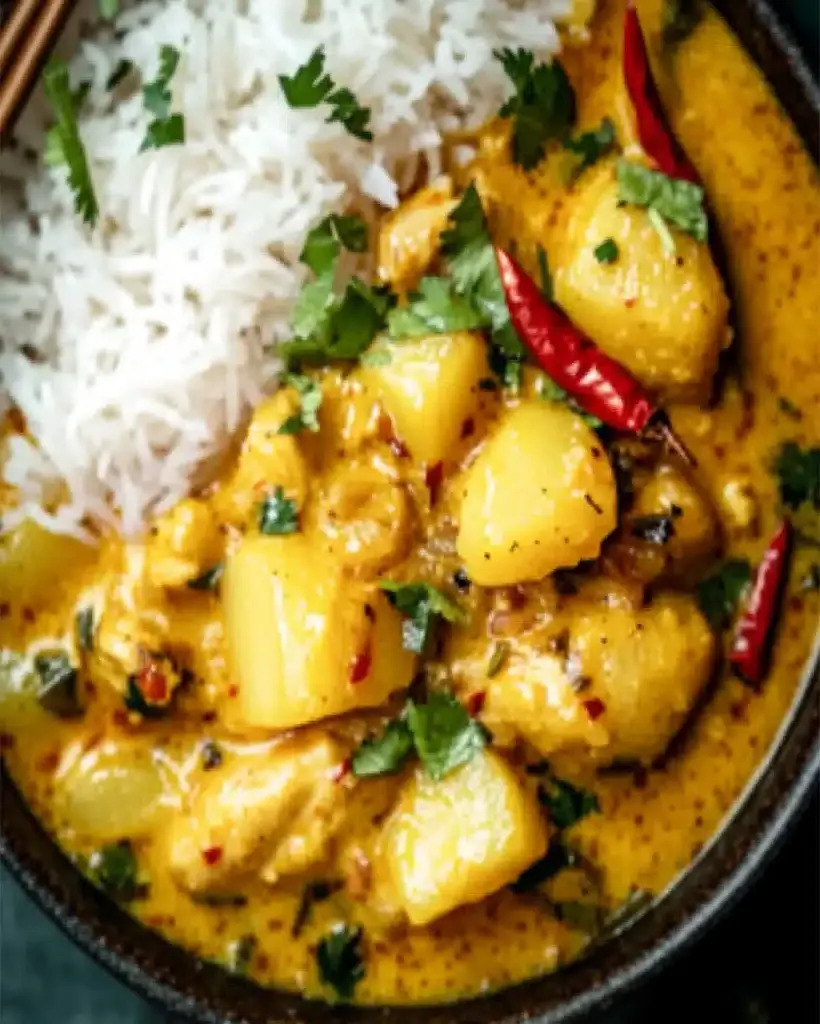
Thai Yellow Chicken Curry with Potatoes | Easy & Flavorful Meal
Craving a Flavorful Thai Dish?
Are you seeking a dinner that’s both comforting and bursting with exotic flavors, something that feels like a warm hug in a bowl? If you’re like millions of home cooks who turn to Thai cuisine for its incredible depth of flavor and aromatic spices, then this Thai Yellow Chicken Curry with Potatoes is about to become your new favorite. This authentic and hearty meal brings together succulent chicken, tender golden potatoes, and a fragrant, homemade yellow curry paste, creating a dish that’s perfect for weeknights yet impressive enough for guests. It’s remarkably quick to prepare, packing a punch of flavors that will transport you straight to the bustling streets of Thailand. Ready to create a culinary masterpiece that’s as easy as it is delicious?
Authentic Thai Yellow Chicken Curry Ingredients
The magic of this Thai Yellow Chicken Curry lies in its vibrant paste and the harmonious blend of fresh ingredients. We’ll break them down for clarity.
For the Yellow Curry Paste
- Dried Red Chilies: 5-7 (adjust for heat; soak in hot water for 10 minutes, then drain). These provide a foundational warmth and subtle fruity notes.
- Shallots: 2 medium, peeled and roughly chopped. Shallots offer a sweeter, more delicate onion flavor than regular onions.
- Garlic: 4-5 cloves, peeled. Essential for its pungent, savory depth.
- Galangal: 1-inch piece, peeled and thinly sliced. This fragrant rhizome, similar to ginger but with peppery, citrusy notes, is crucial for authentic Thai flavor. (Substitution: Fresh ginger, but the flavor profile will shift slightly.)
- Lemongrass: 1 stalk, tough outer layers removed, thinly sliced. It imparts a bright, citrusy aroma.
- Turmeric: 1 teaspoon ground or a 1/2-inch fresh piece, peeled and sliced. This gives the curry its characteristic golden hue and earthy undertones.
- Coriander Seeds: 1 teaspoon, toasted until fragrant. Adds a warm, citrusy, and slightly floral note.
- Cumin Seeds: 1/2 teaspoon, toasted. Provides a warm, earthy flavor.
- Shrimp Paste (Belacan/Kapi): 1/2 teaspoon (optional, but highly recommended for authentic umami). Adds a unique depth of flavor. (Vegetarian/Vegan Sub: Miso paste or omit.)
- Lime Zest: Zest of 1/2 lime. Brightens the paste with a citrusy punch.
- Vegetable Oil: 1 tablespoon, for blending. Helps to create a smooth paste.
For the Curry
- Chicken Thighs: 1.5 lbs (about 680g), boneless, skinless, cut into bite-sized pieces. Thighs stay more tender and juicy than breast. (Substitution: Chicken breast, cut into chunks.)
- Coconut Milk: Two 13.5 oz (400ml) cans, full-fat. The creamy base that emulsifies the flavors.
- Yellow Potatoes: 1 lb (about 450g), peeled and cut into 1-inch cubes. They absorb the curry beautifully and add heartiness. (Substitution: Sweet potatoes or Yukon Gold potatoes.)
- Fish Sauce: 2 tablespoons. The quintessential Thai condiment for salty, umami depth. (Substitution: Soy sauce or tamari for vegetarian option.)
- Brown Sugar: 1 tablespoon (or palm sugar for authenticity). Balances the spice and savory notes.
- Vegetable Oil: 2 tablespoons, divided. For sautéing.
- Lime Juice: 1 tablespoon, freshly squeezed. Adds a final bright, acidic lift.
- Optional Garnishes: Fresh cilantro, sliced red chilies, kaffir lime leaves (added during simmering for aroma), sliced red bell peppers.
Perfectly Timed Thai Yellow Chicken Curry
Compared to many authentic Thai curry recipes that can take over an hour, this version is streamlined for busy weeknights without sacrificing flavor. The prep time is mostly dedicated to chopping and blending the curry paste, while the cooking time focuses on tenderizing the chicken and potatoes.
Easy Step-by-Step Thai Yellow Chicken Curry
Step 1: Prepare the Vibrant Yellow Curry Paste
If using dried chilies, soak them in hot water for about 10 minutes until softened. Drain them thoroughly. In a food processor or blender, combine the soaked chilies (seeds removed if you prefer less heat), shallots, garlic, galangal, lemongrass, turmeric, toasted coriander and cumin seeds, shrimp paste (if using), and lime zest. Add 1 tablespoon of vegetable oil. Process until you have a relatively smooth, fragrant paste. You might need to scrape down the sides a few times. This is the soul of your curry!
Step 2: Sear the Tender Chicken
Pat the chicken pieces dry with paper towels. This helps them achieve a nice sear. Heat 1 tablespoon of vegetable oil in a large pot or Dutch oven over medium-high heat. Add the chicken pieces in a single layer (cook in batches if necessary to avoid crowding the pan). Sear for about 2-3 minutes per side until lightly browned. The chicken doesn’t need to be cooked through at this stage. Remove the chicken from the pot and set aside.
Step 3: Sauté the Aromatic Base
In the same pot used for the chicken, reduce the heat to medium. If the pot seems dry, add another teaspoon of oil. Add the prepared yellow curry paste. Sauté the paste for 2-3 minutes, stirring constantly, until it becomes deeply fragrant and slightly darker in color. This step, known as “blooming” the paste, is crucial for developing its full flavor and aroma.
Step 4: Bloom the Curry Paste and Add Creamy Coconut Milk
Pour in about half of one can of coconut milk. Stir it into the curry paste, scraping up any browned bits from the bottom of the pot. Bring to a gentle simmer and cook for about 5 minutes, allowing the coconut milk to emulsify and the flavors to meld. Once the oil starts to separate slightly from the sauce, add the remaining coconut milk from both cans. Stir well to combine.
Step 5: Simmer with Soft Potatoes
Add the cubed potatoes to the pot. If you’re using kaffir lime leaves, add them now. Bring the curry back to a gentle simmer, then reduce the heat to low, cover, and cook for 15-20 minutes, or until the potatoes are fork-tender and the chicken is cooked through. Stir occasionally to prevent sticking. The potatoes will absorb the rich, aromatic sauce.
Step 6: Finish and Season to Perfection
Once the potatoes and chicken are cooked, stir in the fish sauce and brown sugar. Taste and adjust seasoning as needed. You might want a little more saltiness from fish sauce, sweetness from sugar, or a touch of acidity. Stir in the fresh lime juice just before serving to brighten the flavors. If using, stir in some sliced red bell peppers for a pop of color and freshness. Remove kaffir lime leaves if used.
Nutritional Highlights
While exact nutritional values vary based on ingredients and portion sizes, a typical serving of this Thai Yellow Chicken Curry with Potatoes (approx. 1/6th of the recipe) offers:
- Calories: 450-550 kcal
- Protein: 25-35g
- Fat: 25-35g (primarily from coconut milk)
- Carbohydrates: 25-35g (from potatoes and sugar)
- Fiber: 3-5g
(Note: These are approximate and do not include rice or other accompaniments.)
Smarter Swaps for a Lighter Curry
Looking to lighten things up without sacrificing that incredible flavor? Try these simple substitutions:
- Reduced-Fat Coconut Milk: Use a mix of light and full-fat coconut milk, or opt for all light to significantly reduce fat content. The creaminess will be slightly less intense.
- Lean Protein: Swap chicken thighs for chicken breast or even firm tofu for a vegetarian option. Ensure tofu is pressed well to prevent waterlogging.
- Alternative Vegetables: Load up on more non-starchy vegetables like broccoli florets, green beans, snap peas, or cauliflower. Add them in the last 10-15 minutes of simmering.
- Controlled Sweetness: If you’re watching sugar intake, reduce or omit the brown sugar and rely on the natural sweetness of other ingredients.
Serving Thai Yellow Chicken Curry
This rich and flavorful curry is best served piping hot. It pairs perfectly with:
- Steamed Jasmine Rice: The classic accompaniment that soaks up all the delicious sauce.
- Brown Rice or Quinoa: For a healthier, whole-grain option.
- Fresh Herbs: A generous sprinkle of fresh cilantro and perhaps some thinly sliced red chilies for visual appeal and an extra kick.
- Lime Wedges: For guests to add an extra burst of citrus.
Common Pitfalls to Avoid
To ensure your curry turns out perfectly every time, steer clear of these common mistakes:
- Skipping the Paste Blooming: Not sautéing the curry paste enough in oil. This step is vital for developing complex flavors.
- Overcrowding the Pot: Adding too much chicken or paste at once, which leads to steaming rather than searing and can dilute flavors.
- Using Low-Quality Coconut Milk: Opt for full-fat, good-quality canned coconut milk for the best creamy texture and flavor. Avoid “coconut milk beverage” found in cartons, which is too thin.
- Adding Lime Juice Too Early: The bright citrus flavor of lime juice dissipates with prolonged heat. Add it at the very end.
Keeping Your Curry Fresh
Leftover Thai Yellow Chicken Curry can be stored in an airtight container in the refrigerator for up to 3-4 days. The flavors often meld and deepen overnight, making it even tastier the next day.
To Reheat: Gently reheat the curry on the stovetop over low heat, stirring occasionally, until heated through. You may need to add a splash of water or coconut milk if it has become too thick. Avoid microwaving, as this can sometimes affect the texture of the chicken and potatoes.
Your New Go-To Thai Comfort Meal
This Thai Yellow Chicken Curry with Potatoes is more than just a meal; it’s an experience. It’s a perfect balance of creamy, savory, and slightly sweet, with fragrant spices that tantalize the senses. Its simple preparation makes it accessible for any home cook, while its authentic flavors deliver a truly satisfying taste of Thailand. Embrace the warmth, the aroma, and the incredible taste. Whip up a batch this week and let yourself be transported!
Did you try this recipe? Share your experience in the comments below! We love to hear how our recipes turn out in your kitchens!
Frequently Asked Questions
***What is the difference between Thai yellow, red, and green curry paste?***
The primary difference lies in the chilies used: red curry uses dried red chilies, green curry uses fresh green chilies (making it spicier and brighter), and yellow curry often uses dried red chilies but also incorporates turmeric and other warming spices for its distinct color and milder, earthier flavor profile.
***Can I make this curry vegetarian or vegan?***
Absolutely! Substitute the chicken with firm or extra-firm tofu (pressed and cubed) or other vegetables like extra potatoes, cauliflower, or chickpeas. Omit the shrimp paste or substitute with a little miso paste for umami. Ensure your fish sauce is replaced with soy sauce or tamari.
***How spicy is Thai yellow curry?***
Typically, yellow curry is the mildest of the three main Thai curry pastes. However, the heat level can be adjusted by the number and type of chilies used in the paste. This recipe uses a moderate amount, but you can add or reduce them to suit your preference.
***Why is my curry sauce so thin?***
This can happen if you use low-fat coconut milk, don’t simmer it long enough to reduce, or use too much liquid. Ensuring you use full-fat coconut milk and letting the curry simmer gently for at least 10-15 minutes after adding the potatoes and chicken helps thicken the sauce as the starches from the potatoes release.
Thai Yellow Chicken Curry Recipe with Potatoes | Easy Meal
Description
Welcome, curry lovers! If you’re craving a bold, comforting, and flavorful dish, look no further than this deliciousThai Yellow Chicken Curry with Potatoes. This authentic and hearty meal brings together tender chicken, golden potatoes, and a fragrant, homemade yellow curry paste, sure to become your go-to comfort food. It’s perfect for weeknights, quick to prepare, and packed with flavors that will transport you to the heart of Thailand.
Ingredients
- Tip: For a vegetarian version, substitute chicken with tofu or chickpeas and omit the fish sauce.
Instructions
Notes
Coconut Milk vs. Coconut Cream: Use coconut cream for a richer, thicker curry. If you prefer a lighter version, coconut milk works perfectly as well.
Spice Level: For a spicier curry, you can add Thai chilies or red pepper flakes.
Make it Ahead: This curry tastes even better the next day, making it ideal for meal prepping.
“`