“`html
Table of Contents
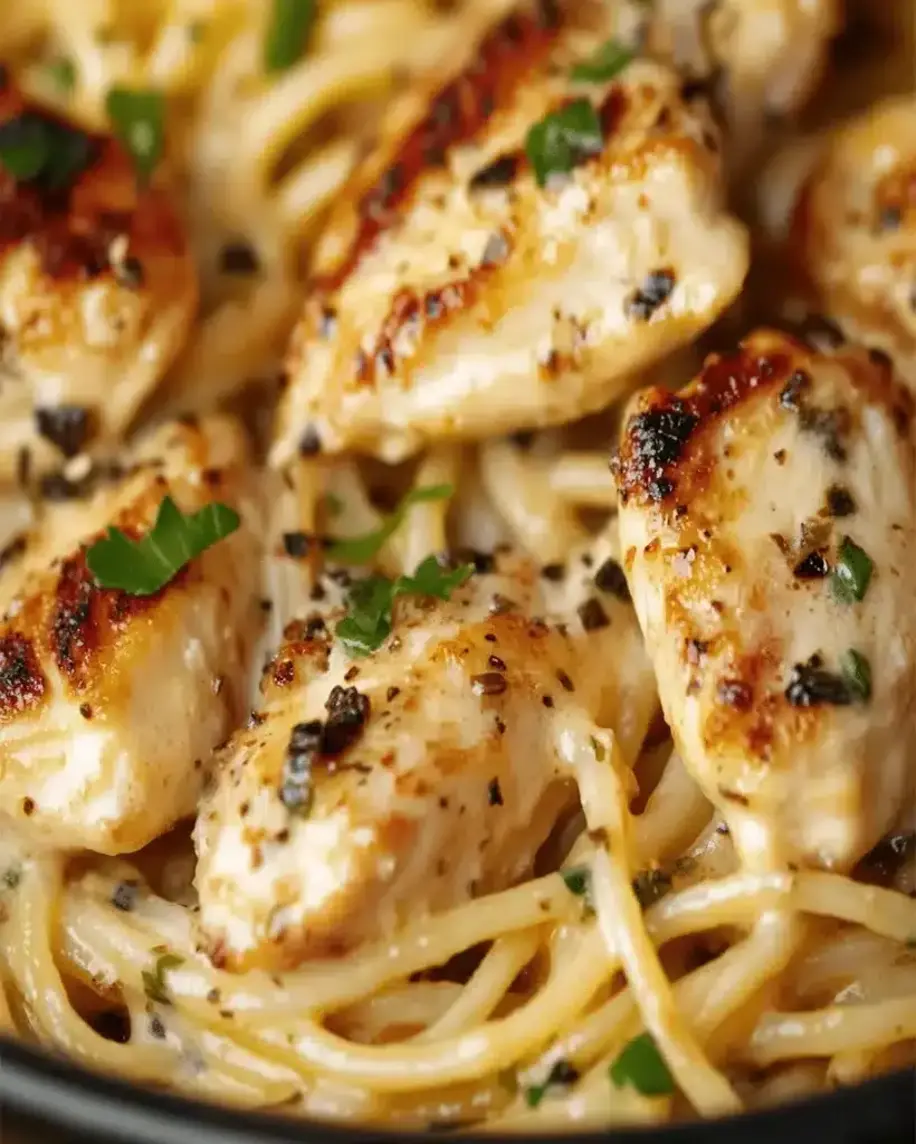
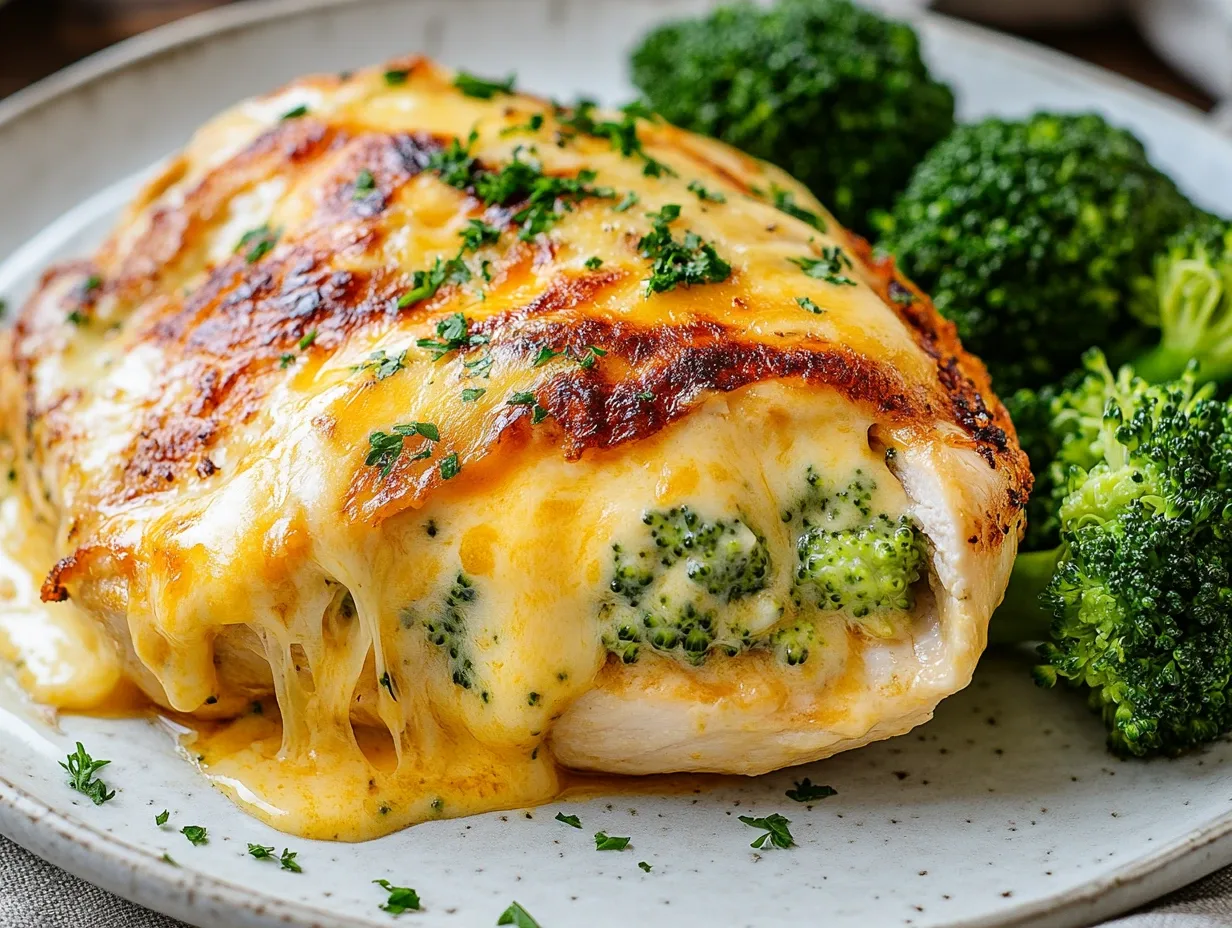
Easy Broccoli Cheese Stuffed Chicken Breast Recipe
Are you looking for a weeknight dinner that’s both impressive and incredibly easy to make? In a world teeming with quick meal options, finding one that balances health, flavor, and simplicity can feel like a culinary quest. But what if we told you that a dish that’s cheesy, creamy, and bursting with flavor could be on your table in under an hour? This Easy Broccoli Cheese Stuffed Chicken Breast recipe is designed to do just that. Imagine tender, juicy chicken breasts cradling a warm, melty mixture of tender broccoli and rich cheese – it’s comfort food at its finest, perfect for satisfying even the pickiest eaters. Say goodbye to bland chicken and hello to a delightful, flavor-packed meal that’s surprisingly simple to execute.
Ingredients
Gather these simple ingredients to create your culinary masterpiece:
- 4 Boneless, Skinless Chicken Breasts: Look for chicken breasts that are roughly the same thickness for even cooking.
- 1 cup Broccoli Florets: Finely chopped, these add a delightful pop of green and a subtle earthy flavor. (Substitution: Frozen chopped broccoli, thawed and squeezed dry, works just as well.)
- 4 oz Cream Cheese: Softened for easy mixing, this is the creamy base of our filling. (Substitution: Neufchâtel cheese for a slightly lighter option.)
- 1/2 cup Shredded Cheddar Cheese: Sharp cheddar provides a tangy, robust flavor that pairs perfectly with broccoli. (Substitution: A blend of cheddar and Monterey Jack, or Gruyère for a nuttier profile.)
- 1/4 cup Grated Parmesan Cheese: Adds a salty, umami depth to the filling.
- 1 clove Garlic: Minced, for that essential aromatic kick. (Substitution: 1/2 teaspoon garlic powder if fresh garlic isn’t available.)
- Salt and Black Pepper: To taste, enhancing all the other flavors.
- 1 tablespoon Olive Oil: For searing the chicken, adding a golden crispness.
- Optional Seasonings: A pinch of red pepper flakes for a hint of heat, or a teaspoon of onion powder for extra savory notes.
Timing
Compared to an average stuffed chicken recipe which can often take 50-60 minutes total, this easy version shaves off valuable time making it perfect for busy weeknights.
Step-by-Step Instructions
Step 1: Prepare the Chicken
First, let’s get our chicken ready. Take your boneless, skinless chicken breasts and place them on a clean cutting board. Using a sharp knife, carefully slice a pocket into the thickest side of each breast. You’re aiming to create a space for our delicious filling, but be careful not to cut all the way through. Think of it like making a little pouch or a horizontal slit. Once pocketed, season both sides generously with salt and freshly ground black pepper. This initial seasoning is key to building flavor from the inside out.
Step 2: Make the Broccoli Cheese Filling
Now for the star of the show – the filling! In a medium bowl, combine the softened cream cheese, shredded cheddar cheese, grated Parmesan cheese, minced garlic, and finely chopped broccoli florets. If you’re adding any optional seasonings like red pepper flakes or onion powder, stir them in now. Mix everything together until it’s well combined and you have a rich, creamy, cheesy mixture. Taste it (carefully!) and adjust the salt and pepper as needed. This is where all the magic happens, so don’t be shy with the flavor!
Step 3: Stuff the Chicken
With your chicken prepared and filling ready, it’s time to bring them together. Using a spoon or a small spatula, carefully stuff the broccoli cheese mixture into the pockets you created in each chicken breast. Don’t overstuff, as you don’t want the filling to ooze out too much during baking. If the pockets are a bit stubborn to open, you can gently press them apart. Once stuffed, if you find the chicken breasts are opening a bit too much, you can secure them with toothpicks, though often they stay together well enough on their own.
Step 4: Bake to Perfection
Preheat your oven to 375°F (190°C). Lightly grease a baking dish or a baking sheet with a bit of olive oil or cooking spray. Place the stuffed chicken breasts in the prepared dish. You can drizzle a little more olive oil over the top of each chicken breast if you like, and give them another light sprinkle of salt and pepper. Pop the dish into your preheated oven and bake for 25-30 minutes, or until the chicken is cooked through and the internal temperature reaches 165°F (74°C). The cheese should be bubbly and slightly golden. Let it rest for a few minutes before serving; this is crucial for juicy chicken!
Nutritional Information
(Approximate per serving, assuming 4 servings)
- Calories: 350-400 kcal
- Protein: 35-40g
- Fat: 20-25g
- Carbohydrates: 5-8g
- Fiber: 1-2g
- Sodium: Varies based on cheese and added salt
Please note that these are estimates and can vary based on specific ingredients and portion sizes used.
Healthier Alternatives
Looking to lighten things up without sacrificing flavor? Try these simple swaps:
- Lighter Cream Cheese: Opt for reduced-fat cream cheese or Greek yogurt (strained for thickness) as a base for the filling.
- Leaner Cheese: Use part-skim mozzarella or a reduced-fat cheddar.
- More Veggies: Add finely chopped spinach or sautéed mushrooms to the filling for extra nutrients and bulk.
- Whole Wheat Breadcrumbs: If you want a crispy coating, use whole wheat breadcrumbs.
Serving Suggestions
This versatile dish pairs beautifully with a variety of sides to create a complete and satisfying meal. Consider serving it with:
- Roasted Vegetables: Asparagus, broccoli florets, bell peppers, or Brussels sprouts roasted alongside the chicken or separately.
- Mashed Potatoes: Creamy mashed potatoes or healthier cauliflower mash.
- Quinoa or Rice: A light and fluffy bed of your favorite grain.
- A Simple Salad: A fresh green salad with a light vinaigrette for a refreshing contrast.
Common Mistakes to Avoid
To ensure your stuffed chicken breast is a triumph, keep these common pitfalls in mind:
- Not Cutting a Deep Enough Pocket: If the pocket is too shallow, it will be difficult to stuff and the filling may spill out.
- Overfilling: Stuffing too much filling can cause it to leak out during cooking, leading to a messier presentation and less filling inside the chicken.
- Not Seasoning Adequately: Chicken breasts can be bland if not seasoned well. Don’t forget salt and pepper on both the chicken and in the filling.
- Overcooking: Chicken can dry out quickly. Use a meat thermometer to ensure it’s cooked through but not overdone.
- Skipping the Rest: Allowing the chicken to rest for 5-10 minutes after baking helps redistribute the juices, resulting in much more tender and flavorful chicken.
Storing Tips
Leftovers of this delicious stuffed chicken breast can be stored in an airtight container in the refrigerator for up to 3-4 days. For the best results when reheating, gently warm it in a covered baking dish in the oven at around 325°F (160°C) until heated through, or microwave on medium power. Avoid over-reheating to prevent drying out.
Conclusion
There you have it – a simple yet incredibly satisfying Broccoli Cheese Stuffed Chicken Breast recipe that’s perfect for any occasion. It’s a dish that proves healthy eating doesn’t mean compromising on flavor. Whether you’re a seasoned cook or just starting out, this recipe is sure to become a staple in your meal rotation. Ready to impress your family with minimal effort? Give this recipe a try and taste the cheesy, broccoli-filled goodness!
Frequently Asked Questions
***Can I use chicken thighs instead of breasts?***
Yes, you can! Chicken thighs are more forgiving and tend to stay moister. You might need to adjust the cooking time slightly, so use a meat thermometer to ensure they reach an internal temperature of 165°F (74°C).
***What if I don’t have fresh broccoli? Can I use frozen?***
Absolutely! Thaw frozen broccoli florets completely and then chop them finely. It’s crucial to squeeze out as much moisture as possible using paper towels or a clean kitchen towel before adding it to the filling to prevent it from becoming watery.
***How do I prevent the filling from leaking out too much?***
Ensure you don’t overstuff the chicken breasts. You can also try securing the opening with toothpicks. Baking the chicken snugly in a baking dish can also help prevent excessive leakage.
***Can I make this recipe ahead of time?***
You can prepare the filling and stuff the chicken breasts a few hours in advance. Store them covered in the refrigerator. When you’re ready to cook, you might need to add a few extra minutes to the baking time.
***My chicken is cooked but the cheese isn’t melted and bubbly. What went wrong?***
This can happen if the cheese mixture wasn’t sufficiently softened or if the chicken cooked too quickly before the cheese had time to melt. Ensure your cream cheese is truly at room temperature, and if the chicken is cooked through but the cheese isn’t melted, you can place it under the broiler for a minute or two (watching very closely!) until bubbly.

Best Broccoli Cheese Stuffed Chicken Breast
Description
Thischeesy, creamy, and flavor-packedstuffed chicken breast is the perfect weeknight dinner! Juicy chicken is filled with a rich broccoli and cheese mixture, then baked to perfection. Serve it with a side of roasted veggies or mashed potatoes for a complete meal!
Ingredients
- ✅For the Chicken:4boneless, skinless chicken breastsSalt and pepper, to tasteOlive oil (for drizzling)✅For the Filling:1 cupbroccoli florets, steamed and finely chopped1 cupshredded cheddar cheese½ cupcream cheese, softened2cloves garlic, minced1 teaspoondried thyme½ teaspoonpaprika¼ teaspoonred pepper flakes (optional)
- ✅For the Filling:1 cupbroccoli florets, steamed and finely chopped1 cupshredded cheddar cheese½ cupcream cheese, softened2cloves garlic, minced1 teaspoondried thyme½ teaspoonpaprika¼ teaspoonred pepper flakes (optional)
Instructions
- 1️⃣Preheat the oven: Set your oven to375°F (190°C). Grease a baking dish with olive oil and set aside.2️⃣Flatten the chicken: Place the chicken breasts between two sheets of plastic wrap or parchment paper. Use a meat mallet or rolling pin to pound them to an even½-inch thickness.3️⃣Season the chicken: Sprinkle both sides withsalt and pepperto taste.4️⃣Prepare the filling: In a mixing bowl, combinechopped broccoli, shredded cheddar, cream cheese, minced garlic, thyme, paprika, and red pepper flakes. Stir until well mixed.5️⃣Stuff the chicken: Spoon the broccoli cheese mixture onto one side of each chicken breast. Carefully roll them up, enclosing the filling. Secure withtoothpicks or cooking twineto keep everything in place.6️⃣Bake: Place the stuffed chickenseam-side downin the greased baking dish. Drizzle the tops witholive oiland sprinkle with extra salt and pepper if desired.7️⃣Cook to perfection: Bake for25-30 minutes, or until the chicken is cooked through and the internal temperature reaches165°F (75°C).8️⃣Rest & Serve: Remove from the oven and let the chicken rest fora few minutesbefore slicing. Garnish with fresh herbs if desired.
- 2️⃣Flatten the chicken: Place the chicken breasts between two sheets of plastic wrap or parchment paper. Use a meat mallet or rolling pin to pound them to an even½-inch thickness.3️⃣Season the chicken: Sprinkle both sides withsalt and pepperto taste.4️⃣Prepare the filling: In a mixing bowl, combinechopped broccoli, shredded cheddar, cream cheese, minced garlic, thyme, paprika, and red pepper flakes. Stir until well mixed.5️⃣Stuff the chicken: Spoon the broccoli cheese mixture onto one side of each chicken breast. Carefully roll them up, enclosing the filling. Secure withtoothpicks or cooking twineto keep everything in place.6️⃣Bake: Place the stuffed chickenseam-side downin the greased baking dish. Drizzle the tops witholive oiland sprinkle with extra salt and pepper if desired.7️⃣Cook to perfection: Bake for25-30 minutes, or until the chicken is cooked through and the internal temperature reaches165°F (75°C).8️⃣Rest & Serve: Remove from the oven and let the chicken rest fora few minutesbefore slicing. Garnish with fresh herbs if desired.
- 3️⃣Season the chicken: Sprinkle both sides withsalt and pepperto taste.
- 4️⃣Prepare the filling: In a mixing bowl, combinechopped broccoli, shredded cheddar, cream cheese, minced garlic, thyme, paprika, and red pepper flakes. Stir until well mixed.5️⃣Stuff the chicken: Spoon the broccoli cheese mixture onto one side of each chicken breast. Carefully roll them up, enclosing the filling. Secure withtoothpicks or cooking twineto keep everything in place.6️⃣Bake: Place the stuffed chickenseam-side downin the greased baking dish. Drizzle the tops witholive oiland sprinkle with extra salt and pepper if desired.7️⃣Cook to perfection: Bake for25-30 minutes, or until the chicken is cooked through and the internal temperature reaches165°F (75°C).8️⃣Rest & Serve: Remove from the oven and let the chicken rest fora few minutesbefore slicing. Garnish with fresh herbs if desired.
- 5️⃣Stuff the chicken: Spoon the broccoli cheese mixture onto one side of each chicken breast. Carefully roll them up, enclosing the filling. Secure withtoothpicks or cooking twineto keep everything in place.6️⃣Bake: Place the stuffed chickenseam-side downin the greased baking dish. Drizzle the tops witholive oiland sprinkle with extra salt and pepper if desired.7️⃣Cook to perfection: Bake for25-30 minutes, or until the chicken is cooked through and the internal temperature reaches165°F (75°C).8️⃣Rest & Serve: Remove from the oven and let the chicken rest fora few minutesbefore slicing. Garnish with fresh herbs if desired.
- 6️⃣Bake: Place the stuffed chickenseam-side downin the greased baking dish. Drizzle the tops witholive oiland sprinkle with extra salt and pepper if desired.
- 7️⃣Cook to perfection: Bake for25-30 minutes, or until the chicken is cooked through and the internal temperature reaches165°F (75°C).8️⃣Rest & Serve: Remove from the oven and let the chicken rest fora few minutesbefore slicing. Garnish with fresh herbs if desired.
- 8️⃣Rest & Serve: Remove from the oven and let the chicken rest fora few minutesbefore slicing. Garnish with fresh herbs if desired.
Notes
🥦 Serve with roasted vegetables or a side salad for a low-carb meal.🍚 Pair with mashed potatoes, rice, or quinoa for a heartier dinner.🔥 Drizzle with a little hot sauce or honey mustard for extra flavor.
ThisBroccoli Cheese Stuffed Chicken Breastis rich, cheesy, and totally satisfying!Enjoy!🧀🍗✨
“`