“`html
Table of Contents
Easy Broiled Lobster Tail Recipe – Buttery, Juicy & Delicious!
Craving a Gourmet Meal? Let’s Make Broiled Lobster Tails!
Did you know that seafood consumption is at an all-time high, with nearly 90% of Americans enjoying it regularly? If you’re part of that statistic and love the luxurious taste of lobster, you might be wondering how to prepare it at home without the restaurant price tag. Welcome to our easy and flavorful Lobster Tail Recipe! If you’re looking to elevate your dining experience, this recipe is perfect for special occasions or whenever you’re craving a gourmet meal at home. These tender and juicy lobster tails are broiled to perfection, and the combination of buttery richness and a hint of smokiness makes them irresistible. Forget complicated techniques; this broiled lobster tail recipe is designed for simplicity and maximum flavor, ensuring you can impress your guests or treat yourself to something truly special with minimal fuss.
Ingredients: The Stars of Our Lobster Show
The beauty of this recipe lies in its simplicity, allowing the natural sweetness of the lobster to shine. We’re using a few key ingredients to enhance, not overpower, its delicate flavor. For about 4 servings, you’ll need:
- 4 (6-ounce) lobster tails (coldwater varieties like Maine or Canadian are preferred for their sweet, tender meat. If you can only find warm-water tails, they’ll still work, but might be slightly less sweet.)
- 1/2 cup (1 stick) unsalted butter, melted (High-quality butter is key for that rich, decadent flavor. You can substitute with a good quality margarine if necessary, but the flavor won’t be quite as deep.)
- 4 cloves garlic, minced (Freshly minced garlic provides a pungent aroma and sharp flavor that complements the sweet lobster. Garlic powder can be used in a pinch, about 1 teaspoon, but fresh is always best.)
- 2 tablespoons fresh lemon juice (The brightness of lemon cuts through the richness of the butter and enhances the lobster’s flavor. Bottled lemon juice is an option, but fresh will offer a more vibrant taste.)
- 2 tablespoons fresh chopped parsley (For a burst of freshness and color. Dried parsley can be substituted, using about 2 teaspoons, but fresh is visually more appealing.)
- 1/4 teaspoon smoked paprika (This is our secret ingredient for a subtle hint of smokiness without grilling. Regular paprika can be used, but won’t impart the same depth. A pinch of cayenne pepper can add a touch of heat if you like spice.)
- Salt and freshly ground black pepper, to taste (Essential for enhancing all the flavors.)
- Optional: Lemon wedges for serving.
Timing is Everything: Prep, Cook, and Enjoy
Compared to the average complex seafood dish, this broiled lobster tail recipe is incredibly quick. Many recipes involving lobster can take upwards of 30-45 minutes of active prep and cooking, especially if more intricate sauces or preparation methods are involved. Our simple broiling technique gets these luxurious tails on your plate in under 30 minutes from start to finish, making it perfect for weeknight gourmet or impressive last-minute entertaining.
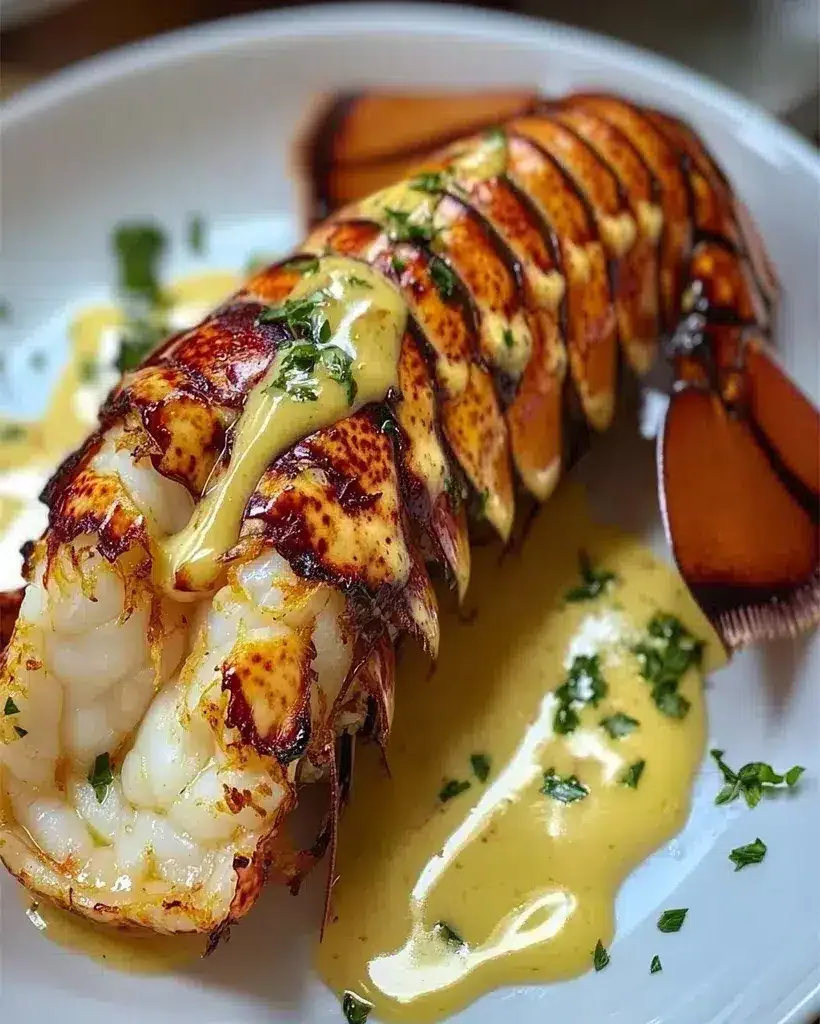
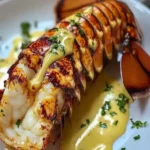
Deliciously broiled lobster tails ready to be devoured.
Step-by-Step: Your Path to Perfectly Broiled Lobster
Step 1: Prepare the Lobster Tails
First things first, let’s get those beautiful lobster tails ready. If your lobster tails are frozen, make sure they’re fully thawed. Place each lobster tail on a clean cutting board. Using sharp kitchen shears, carefully cut down the center of the top shell, exposing the meat. Be careful not to cut all the way through to the bottom shell. Gently open the shell at the cut and loosen the meat, then carefully lift it out of the shell and rest it on top, so the curved shell is on the bottom and the tail meat is exposed on top. This method is called “butterflying” and makes the meat easier to brush with the delicious butter mixture and prevents it from falling out during cooking. Make a small cut through the underside of the meat (near the end of the tail) and thread the very end of the meat through this cut, pulling it up to expose the top. This helps the tail stand up and makes for a beautiful presentation.
Step 2: Create the Garlic Herb Butter
In a small bowl, combine the melted butter, minced garlic, fresh lemon juice, chopped parsley, and smoked paprika. Whisk everything together until it’s well combined. This aromatic butter is where all the magic happens! The garlic infuses the butter with its pungent flavor, the lemon juice adds a zesty brightness, the parsley brings a fresh herbaceous note, and the smoked paprika lends a kiss of smoky depth that elevates the entire dish. Taste a tiny bit (carefully, it’s butter!) and add salt and freshly ground black pepper to your liking. Remember, lobster is naturally a bit salty, so don’t overdo it with the salt at this stage.
Step 3: Coat the Lobster
Now for the fun part! Generously brush the exposed lobster meat with the prepared garlic herb butter mixture. Ensure you coat the meat evenly, getting into all the nooks and crannies. Don’t be shy with the butter; it’s what makes the lobster so incredibly juicy and flavorful. You should have enough butter to give each tail a good coating. The paprika should slightly tint the butter, giving it a lovely hue.
Step 4: Broil to Perfection
Preheat your broiler on high. Arrange the butterflied lobster tails on a baking sheet lined with parchment paper or foil for easy cleanup. Place the baking sheet onto the middle rack of your oven, about 4-6 inches away from the broiler element. Broil for 8-12 minutes, depending on the size of your lobster tails and the intensity of your broiler. You’ll know they’re done when the meat is opaque, firm to the touch, and has a lovely slightly caramelized appearance on top. The shells will also turn a vibrant red. Keep a close eye on them, as broilers can be fierce and the lobster can go from perfectly cooked to overcooked very quickly!
Step 5: Serve Immediately
Once perfectly broiled, carefully remove the baking sheet from the oven. Brush with any remaining melted butter from the pan, or give them another quick brush of fresh melted butter if desired. Serve the broiled lobster tails immediately, with lemon wedges on the side for an extra squeeze of fresh citrus. The aroma alone will have everyone at the table eagerly anticipating their first bite!
Nutritional Information (Estimated Per Tail)
While exact nutritional values can vary based on the size of the lobster tail and the exact amount of butter used, here’s an approximate guide:
- Calories: 250-350 kcal
- Protein: 25-35g
- Fat: 15-25g (primarily from butter)
- Carbohydrates: 2-5g
- Cholesterol: High (as expected with lobster and butter)
Lobster is a fantastic source of lean protein and provides essential minerals like selenium and zinc. The butter adds healthy fats and a rich mouthfeel. For those mindful of fat or cholesterol intake, consider the “Healthier Alternatives” section.
Healthier Alternatives: Flavor Without the Guilt
We love the indulgence, but if you’re looking for a lighter version, here are a few swaps:
- Butter Swap: Use olive oil or a good quality avocado oil instead of butter. While it won’t be as rich, it still carries the garlic and herbs beautifully.
- Reduced Butter: Use only 1/4 cup of butter and supplement with 1/4 cup of olive oil or even a splash of the lobster cooking liquid (if you boiled them first).
- Added Veggies: Broil some asparagus spears or cherry tomatoes alongside the lobster. They absorb the delicious butter/oil drippings and make for a more complete, lighter meal.
- Lighter Seasoning: Reduce the butter quantity significantly and focus more on lemon, garlic, herbs, and a pinch of chili flakes for flavor.
Serving Suggestions: Elevate Your Feast
These broiled lobster tails are naturally impressive, but they pair beautifully with a variety of sides:
- Classic Pairing: Steamed or roasted asparagus, a fresh green salad, and crusty bread to sop up any extra buttery sauce.
- Starch Options: Creamy mashed potatoes, lemon-garlic orzo, or even simple boiled new potatoes.
- Seafood Extravaganza: Serve alongside grilled shrimp, scallops, or a seafood pasta for a truly decadent spread.
- Rice Pilaf: A light and flavorful rice pilaf can be a great side to balance the richness.
Common Mistakes to Avoid
Keep these tips in mind to avoid common pitfalls:
- Overcooking: This is the cardinal sin of lobster! Overcooked lobster becomes tough and rubbery. Watch it closely during the final minutes of broiling.
- Not Thawing Properly: If using frozen tails, ensure they are fully thawed before preparing. Partially frozen tails won’t cook evenly.
- Skipping the Butterfly: Not butterflying the tail can make it harder to cook evenly and serve. It simply makes the process much easier and more appealing.
- Broiler Too Close: If your broiler is too close, the lobster can burn before it’s cooked through. Adjust the rack position as needed.
- Under-Seasoning: Lobster meat has a naturally sweet flavor that benefits from proper seasoning. Don’t be afraid to salt and pepper!
Storing and Reheating Tips
Storing: Leftover cooked lobster tails are best stored in an airtight container in the refrigerator for up to 1-2 days. Keep them in their shells if possible, or wrap them tightly in plastic wrap.
Reheating: It’s tricky to reheat lobster without drying it out. The best method is gentle warming:
- Oven Method: Place tails in a baking dish and add a tablespoon of butter or water to the bottom. Cover tightly with foil and warm in a low oven (around 250°F / 120°C) for about 5-10 minutes, until just heated through.
- Broiler (Carefully!): A very quick broil (1-2 minutes maximum) can work, but watch it like a hawk.
- Best Served Fresh: Honestly, lobster is always best enjoyed fresh. If possible, plan to eat your broiled lobster tails the same day they are prepared.
Your Luxurious Lobster Awaits!
There you have it – a simple yet utterly delicious method for preparing restaurant-quality broiled lobster tails right in your own kitchen. The combination of tender, juicy lobster meat bathed in a savory garlic herb butter with a hint of smokiness is simply divine. This recipe proves that gourmet dining doesn’t need to be complicated or require a special trip out. So, go ahead, gather your ingredients, and treat yourself or your loved ones to this exquisite dish. You deserve it!
Love this recipe? Share your thoughts in the comments below!
Or, if you tried this recipe, let us know how it turned out! Your feedback helps us create even better recipes for you.
Frequently Asked Questions
***Can I use frozen lobster tails?***
Yes, you can use frozen lobster tails, but be sure to thaw them completely in the refrigerator overnight before preparing. For quicker thawing, you can submerge them in cold water for about 30-60 minutes, changing the water occasionally.
***What’s the best way to butterfly lobster tails?***
Using sharp kitchen shears, cut down the center of the top shell from the fan tail to the base. Gently open the shell and pull the meat out and over the top, resting it on the shell. You can also make a small slit in the underside of the meat to tuck the tip through for a more stable presentation.
***How do I know when the lobster is cooked?***
The lobster meat will turn opaque white and become firm to the touch. The shell will turn a bright red. Overcooked lobster will be tough and rubbery, so watch closely and aim for just cooked.
***Can I grill lobster tails instead of broiling?***
Absolutely! Grilling is another fantastic method. Prepare the tails the same way, then grill them shell-side down (or meat-side down briefly) over medium-high heat for about 5-7 minutes per side, depending on size, basting with butter. Ensure the heat isn’t too high to avoid burning.
***What kind of lobster tails are best?***
Coldwater lobster tails, like those from Maine and Canada, are generally prized for their sweet, tender meat. Warm-water tails (e.g., from the Caribbean or South Pacific) can also be delicious but may have a slightly firmer texture and less sweetness.
Lobster Tail Recipe: Easy, Delicious Broiled Perfection
Description
Welcome to our easy and flavorfulLobster Tail Recipe! If you’re looking to elevate your dining experience, this recipe is perfect for special occasions or whenever you’re craving a gourmet meal at home. These tender and juicy lobster tails are broiled to perfection, and the combination of buttery richness and a hint of smokiness makes them irresistible.
Ingredients
- Optional substitutions:
Instructions
- Ensure your lobster tails are fully thawed before cooking. If frozen, place them in the refrigerator overnight, or submerge them in cold water for faster thawing.
- Set your oven to the broil setting, aiming for 500°F (260°C). Adjust the rack so that the lobster tails will be 4-5 inches away from the broiler.
- Using kitchen shears, cut down the center of the shell lengthwise. Gently spread open the shell and pull the lobster meat upward, leaving the end attached to the shell for a beautiful presentation.
- In a small bowl, whisk together melted butter, garlic, lemon juice, paprika, and cayenne pepper. This savory mixture will enhance the flavor of the lobster.
- Generously brush the butter mixture over the lobster meat and broil for about 1 minute per ounce, or until the meat is opaque and lightly browned.
Notes
Use Fresh Lobster:Whenever possible, opt for fresh lobster tails to ensure the best flavor and texture.
Avoid Overcooking:Lobster meat can become tough if overcooked, so keep a close eye on them while broiling.
Herb Variations:Add parsley, chives, or thyme to the butter mixture for an herbaceous twist.
“`