“`html
Table of Contents
- Why You’ll Adore These Reese’s Butterfinger Cheesecake Bars
- Ingredients: Your Guide to Cheesecake Bliss
- Timing: Your Road to Dessert Perfection
- Step-by-Step Instructions: Crafting Your Masterpiece
- Nutritional Information: A Sweet Look
- Healthier Alternatives: Indulge Wisely
- Serving Suggestions: Elevate Your Treat
- Common Mistakes to Avoid
- Storing Tips: Keep the Deliciousness Going
- Conclusion: A Final Bite of Heaven
- Frequently Asked Questions: Your Burning Questions Answered
Reese’s Butterfinger Cheesecake Bars
Are you looking for a dessert that screams indulgence and satisfies that deep-seated craving for peanut butter and chocolate? If your answer is a resounding YES, then you’ve landed in the perfect spot. Today, we’re diving headfirst into the decadent world of Reese’s Butterfinger Cheesecake Bars, a dessert so rich, so creamy, and so utterly irresistible, it’s practically a love letter to your taste buds. So, buckle up, fellow dessert enthusiasts, because this is the recipe you’ve been dreaming of.
Why You’ll Adore These Reese’s Butterfinger Cheesecake Bars
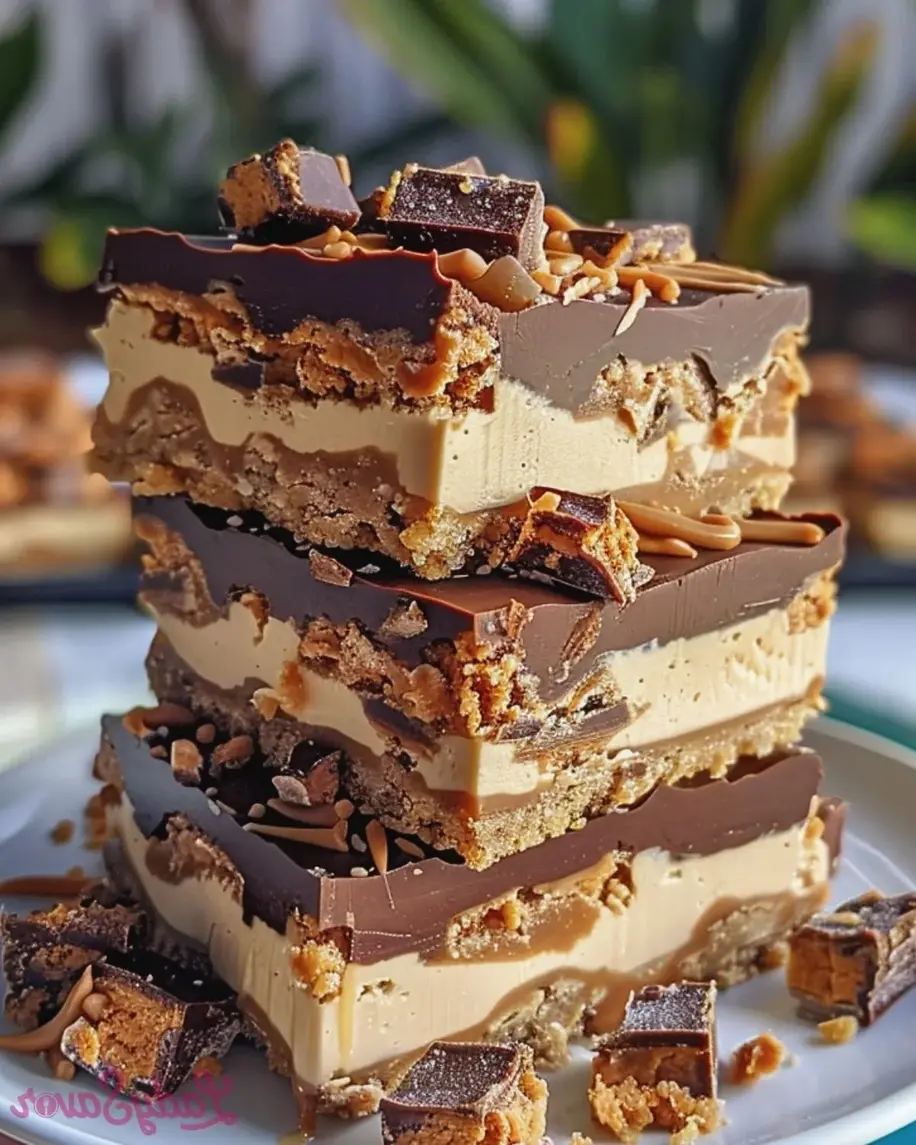
In the grand tapestry of desserts, some creations stand out for their sheer ability to evoke pure joy. Reese’s Butterfinger Cheesecake Bars are undoubtedly one of them. Imagine a foundation of crisp, buttery graham cracker crust, providing the perfect textural contrast. Nestled atop this is a layer of impossibly smooth, rich peanut butter cheesecake filling, so creamy it melts in your mouth. But we don’t stop there. Oh no. The finale is a luxurious chocolate ganache, generously sprinkled with the crunchy, peanut-buttery shards of Butterfinger and the beloved Reese’s Pieces. It’s a symphony of textures and flavors – crunchy, creamy, sweet, and a little bit salty – all coming together in perfect harmony. These bars are more than just a dessert; they are an experience. They are perfect for any occasion, from a casual get-together with friends to a grand celebration. They’re the kind of dessert that makes people ask, “Who made these?!” and eagerly await a second slice. Whether you’re a die-hard Reese’s fan, a Butterfinger aficionado, or simply a lover of all things peanut butter and chocolate, these bars are guaranteed to become a new favorite.
Ingredients: Your Guide to Cheesecake Bliss
Gathering your ingredients is the first step towards dessert nirvana. For Reese’s Butterfinger Cheesecake Bars, we’re aiming for quality and deliciousness. Don’t shy away from using your favorite brands – it all contributes to the final flavor profile!
For the Graham Cracker Crust
- 2 cups graham cracker crumbs (about 14-16 full graham crackers) – These form the sturdy, slightly sweet foundation.
- 1/4 cup granulated sugar – Just a touch of sweetness to complement the graham crackers.
- 1/2 cup unsalted butter, melted – Binds everything together and adds richness.
Substitution Tip: If graham crackers aren’t your favorite, consider using shortbread cookie crumbs or even crushed pretzels for a salty-sweet twist.
For the Creamy Peanut Butter Cheesecake Filling
- 24 ounces cream cheese, softened to room temperature – The essential creamy base. Make sure it’s truly soft for a smooth texture!
- 3/4 cup granulated sugar – Balances the tang of the cream cheese.
- 2 large eggs, room temperature – Bind the filling and give it structure.
- 1 teaspoon vanilla extract – Enhances all the sweet notes.
- 1 cup creamy peanut butter (standard commercial brand like Jif or Skippy) – The star of the show! Its smooth, sweet profile is key.
- 1/4 cup milk or heavy cream – Helps achieve the perfect pourable consistency.
Substitution Tip: For an even richer peanut butter flavor, you could use a natural peanut butter, but ensure it’s well-stirred and at room temperature. Be aware that natural peanut butters can sometimes affect the texture slightly.
For the Luscious Chocolate Topping
- 1 cup semi-sweet chocolate chips – The foundation of our rich topping.
- 1/2 cup heavy cream – Creates a smooth, glossy ganache.
Substitution Tip: Dark chocolate chips can be used for a more intense chocolate flavor. You can also use milk chocolate chips for a sweeter topping.
For Garnish
- 1/2 cup chopped Butterfinger candy bars – For that signature crunch and peanut butter candy flavor.
- 1/4 cup Reese’s Pieces – Tiny bursts of chocolate and peanut butter joy.
Substitution Tip: If you can’t find Butterfinger, you could use chopped peanut butter cups or even just extra Reese’s Pieces for a slightly different, but equally delicious, crunch.
Timing: Your Road to Dessert Perfection
40 minutes
30-35 minutes
4 hours (minimum)
Approx. 5 hours 15 minutes
Compared to a standard cheesecake which often requires a water bath and longer baking times, these bars are relatively quick to assemble and bake. The majority of the time is dedicated to chilling, which is crucial for achieving that perfect firm yet creamy texture.

Step-by-Step Instructions: Crafting Your Masterpiece
Let’s get baking! Follow these steps closely for a dessert that will have everyone singing your praises.
Step 1: Preheat and Prepare Your Pan
Preheat your oven to 350°F (175°C). Line an 8×8 inch baking pan with parchment paper, leaving an overhang on the sides. This will make it super easy to lift the finished bars out of the pan. Lightly grease the pan before lining it to ensure the parchment paper sticks.
Step 2: Create the Graham Cracker Crust
In a medium bowl, combine the graham cracker crumbs and granulated sugar. Pour in the melted butter and stir until all the crumbs are evenly moistened. Press this mixture firmly and evenly into the bottom of your prepared baking pan. Use the bottom of a glass or a measuring cup to get a nice, compact layer. Bake the crust for 10 minutes. This helps to set it and prevent it from becoming soggy. Once baked, remove from the oven and let it cool slightly while you prepare the filling.
Step 3: Whip Up the Cheesecake Filling
In a large bowl, beat the softened cream cheese with an electric mixer on medium speed until it’s completely smooth and creamy, ensuring there are no lumps. Gradually add the granulated sugar and continue beating until well combined and smooth. Beat in the eggs one at a time, mixing just until each is incorporated. Be careful not to overmix once the eggs are added, as this can lead to cracks. Stir in the vanilla extract, creamy peanut butter, and milk until the filling is uniform in color and texture. It should be thick but pourable.
Step 4: Assemble and Bake the Cheesecake Layer
Pour the peanut butter cheesecake filling evenly over the baked graham cracker crust. Spread it gently with a spatula to ensure an even layer. Bake in the preheated oven for 30-35 minutes, or until the edges are set and the center is still slightly jiggly. It will continue to set as it cools. Avoid overbaking, as this can make the cheesecake dry.
Step 5: Prepare the Chocolate Topping
While the cheesecake is baking or cooling, prepare the chocolate topping. Place the semi-sweet chocolate chips in a heatproof bowl. Heat the heavy cream in a small saucepan over medium heat until it just begins to simmer around the edges. Pour the hot cream over the chocolate chips and let it sit for 5 minutes without stirring. Then, gently whisk the mixture until smooth and glossy. If any chocolate chips remain unmelted, you can microwave the mixture in 10-second intervals, stirring in between, until smooth.
Step 6: Add the Finishing Touches
Once the cheesecake layer is out of the oven and slightly cooled (it doesn’t need to be fully cold), pour the warm chocolate ganache evenly over the top. Use an offset spatula to spread it into a smooth layer. Immediately sprinkle the chopped Butterfinger pieces and Reese’s Pieces evenly over the chocolate topping before it sets. This ensures they stick beautifully.
Step 7: Chill and Serve
Allow the bars to cool at room temperature for about 30 minutes, then cover the pan loosely with plastic wrap and refrigerate for at least 4 hours, or preferably overnight. Chilling is crucial for the cheesecake to set properly and for the flavors to meld. Once chilled, use the parchment paper overhang to lift the entire block out of the pan. Slice into bars using a sharp knife (wiping the knife clean between cuts for neatness). Enjoy your slice of heaven!
Nutritional Information: A Sweet Look
Please note: Nutritional information is an estimate and can vary based on specific ingredients and portion sizes. This is for one bar, assuming 16 bars are cut from the pan.
- Calories: Approx. 450-550 kcal
- Protein: Approx. 8-12g
- Fat: Approx. 30-40g
- Carbohydrates: Approx. 40-50g
- Sugar: Approx. 30-35g
Healthier Alternatives: Indulge Wisely
While these bars are a decadent treat, you can make some mindful swaps to lighten them up:
- Crust: Substitute half the graham crackers with crushed whole wheat biscuits or reduce the butter by a tablespoon.
- Cheesecake Filling: Use reduced-fat cream cheese and Greek yogurt for a portion of the cream cheese. Reduce sugar by a quarter cup.
- Topping: Use dark chocolate chips (higher cocoa content means less sugar) and a thinner layer of ganache. For a truly lightened topping, consider a drizzle of melted peanut butter rather than a full ganache.
- Candies: Reduce the amount of Butterfinger and Reese’s Pieces, or opt for chopped nuts like peanuts or almonds for crunch.
Remember, even with healthier swaps, moderation is key!
Serving Suggestions: Elevate Your Treat
These bars are fantastic on their own, but here are a few ideas to take them to the next level:
- A dollop of whipped cream: A classic pairing that adds lightness.
- A drizzle of extra chocolate or peanut butter sauce: For the ultimate indulgence!
- A scoop of vanilla or chocolate ice cream: Especially perfect if serving as a dessert to guests.
- Fresh raspberries or strawberries: The tartness of the berries can cut through the richness beautifully.
Common Mistakes to Avoid
- Not softening cream cheese: Lumpy cheesecake is a sad cheesecake! Ensure your cream cheese is at room temperature.
- Overmixing the batter: This can incorporate too much air, leading to cracks in the cheesecake. Mix until just combined.
- Cutting the bars too soon: Patience is key! Allow adequate chilling time for the bars to firm up for clean cuts.
- Using cold eggs: Room temperature eggs incorporate better into the batter, resulting in a smoother, more consistent cheesecake.
Storing Tips: Keep the Deliciousness Going
Store these Reese’s Butterfinger Cheesecake Bars in an airtight container in the refrigerator. They will stay fresh and delicious for up to 3-4 days. If you need to store them for longer, you can freeze them. Wrap the bars tightly in plastic wrap, then in aluminum foil or place them in a freezer-safe container. They can be frozen for up to 2 months. Thaw overnight in the refrigerator before serving.
Conclusion: A Final Bite of Heaven
Reese’s Butterfinger Cheesecake Bars are a true masterpiece for any dessert lover. The combination of the crunchy crust, creamy peanut butter cheesecake, and decadent chocolate topping studded with iconic candies creates a flavor and texture sensation that’s simply unforgettable. They are the perfect treat to impress at any gathering or to simply spoil yourself with. Gather your ingredients, follow these steps, and prepare to experience dessert perfection. Don’t hesitate to share your creations with us or leave a comment below!
Frequently Asked Questions: Your Burning Questions Answered
What is the best type of peanut butter to use?
For the creamiest texture and classic flavor, a standard commercial creamy peanut butter like Jif or Skippy is recommended. Natural peanut butters can separate and alter the texture.
How do I get clean cuts for my cheesecake bars?
Use a long, sharp knife. For the cleanest cuts, dip the knife in hot water and wipe it dry between each slice. This helps the knife glide through the chilled cheesecake smoothly.
Can I make these ahead of time?
Yes! These bars are ideal for making ahead as they require significant chilling time. They are often even better the next day as the flavors meld.
My cheesecake baked with cracks. Is it ruined?
Not at all! Cracks happen and don’t affect the taste. The topping and plenty of delicious mix-ins will hide any imperfections. Overbaking is usually the main culprit for cracks, so try to pull it out when the center is just slightly jiggly.
Reese’s Butterfinger Cheesecake Bars
Description
Reese’s Butterfinger Cheesecake Bars are the ultimate dessert for peanut butter and chocolate lovers. With a crunchy graham cracker crust, a creamy peanut butter cheesecake layer, and a luscious chocolate topping sprinkled with Butterfinger and Reese’s pieces, these bars are as indulgent as they are irresistible. Perfect for parties, celebrations, or simply satisfying your sweet tooth!
Ingredients
- For the Crust:
- For the Cheesecake Layer:
- For the Topping:
Instructions
- Preheat the oven to 350°F (175°C) and line a 9×13-inch baking dish with parchment paper.
- In a bowl, mix the graham cracker crumbs, melted butter, and sugar. Press the mixture firmly into the bottom of the baking dish to create an even crust. Bake for 10 minutes and let it cool.
- Beat cream cheese, peanut butter, and sugar in a mixing bowl until smooth. Add eggs one at a time, mixing well after each addition. Stir in vanilla extract.
- Pour the cheesecake batter over the cooled crust, spreading evenly. Bake for 25-30 minutes, until the center is set but slightly jiggly. Let it cool completely.
- Melt the chocolate chips and peanut butter together in the microwave in 30-second intervals, stirring until smooth. Spread this mixture over the cooled cheesecake.
- Sprinkle crushed Butterfinger and chopped Reese’s on top, pressing gently to adhere. Chill in the refrigerator for at least 2 hours until fully set.
- Use the parchment paper to lift the bars out of the dish. Slice and serve!
Notes
For clean slices, dip a knife in hot water and wipe between cuts.
Store in an airtight container in the refrigerator for up to 5 days or freeze for up to 3 months.
For added crunch, sprinkle chopped peanuts or pretzels on top.
Swap Reese’s or Butterfinger with your favorite candy bars for a fun variation.
“`