“`html
Table of Contents
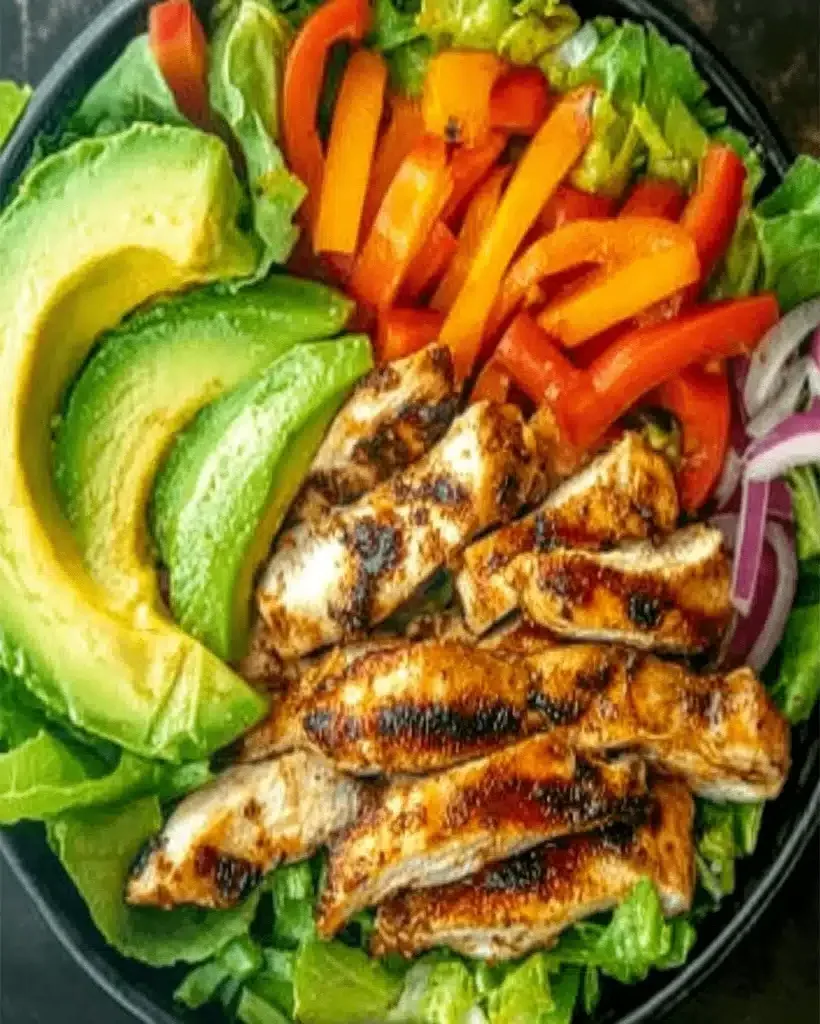
Grilled Chili Lime Chicken Fajita Salad – Fresh, Zesty & So Flavorful! 🥗
Introduction
Are you searching for a vibrant, healthful, and incredibly delicious meal that’s perfect for any day of the week? Wondering if you can get the bold flavors of fajitas in a light and refreshing salad format? You’re in luck! This Grilled Chili Lime Chicken Fajita Salad is the answer to your culinary prayers. With succulent, marinated chicken thighs grilled to perfection, colorful bell peppers and onions charred just right, and the creamy goodness of avocado, this salad delivers an explosion of tastes and textures that will leave you satisfied and energized. It masterfully merges the best of a hearty fajita feast with the crispness of a fresh salad, creating a dish that’s truly a must-try. Perfect for a weeknight dinner or a impressive lunch, this salad is set to become a staple in your recipe repertoire, guaranteed to elevate your meal game to new heights!
Ingredients
This Grilled Chili Lime Chicken Fajita Salad is all about fresh, vibrant components that sing together. Here’s what you’ll need:
For the Chicken Marinade:
- 1.5 lbs boneless, skinless chicken thighs: These provide juicy, tender results that hold up well to grilling. (Substitution: Chicken breast can be used, but be careful not to overcook).
- 2-3 tablespoons lime juice: Freshly squeezed is best for that bright, zesty tang.
- 1 tablespoon olive oil: Helps the marinade adhere and ensures even cooking.
- 1-2 teaspoons chili powder: Adjust to your spice preference for a warm, earthy kick.
- 1 teaspoon cumin: Adds a smoky, slightly sweet depth.
- 1/2 teaspoon smoked paprika: For an extra smoky layer and beautiful color.
- 1/4 teaspoon garlic powder: Or 1 clove fresh minced garlic for a more pungent punch.
- Salt and freshly ground black pepper to taste: Essential for bringing out all the flavors.
For the Fajita Veggies:
- 1 large red bell pepper, sliced into strips: For sweetness and vibrant color.
- 1 large green bell pepper, sliced into strips: Offers a slightly more earthy, crisp note.
- 1 large yellow or orange bell pepper, sliced into strips (optional): For extra color and sweetness.
- 1 large red onion, sliced into thick half-moons: Its sweetness caramelizes beautifully when grilled.
- 1 tablespoon olive oil: To help them char and soften.
- Pinch of salt and pepper: To season.
For the Salad Base and Toppings:
- 8-10 cups chopped romaine lettuce or mixed greens: A crisp, refreshing base.
- 1 ripe avocado, diced: For creamy texture and healthy fats.
- 1/2 cup black beans, rinsed and drained: Adds protein and a hearty element. (Optional, for extra fiber and substance).
- 1/4 cup fresh cilantro, chopped: For a burst of fresh, herbaceous flavor.
- 1/4 cup crumbled cotija cheese or feta cheese: For a salty, tangy finish. (Optional).
- Lime wedges for serving: To add a final squeeze of bright acidity.
For the Dressing:
- 1/4 cup olive oil: The base of our vinaigrette.
- 2 tablespoons lime juice: Mirrors the marinade for cohesive flavor.
- 1 teaspoon honey or agave nectar: Balances the acidity with a touch of sweetness.
- 1/2 teaspoon cumin: Echoes the fajita spices.
- 1/4 teaspoon chili powder: For a gentle warmth.
- Salt and pepper to taste: To perfect the seasoning.
Timing
Compared to many grilled salads that might involve more complex marinades or longer cooking times, this Grilled Chili Lime Chicken Fajita Salad is relatively quick. The marination time is crucial for flavor, but if you’re short on time, even 15-20 minutes will start infusing the chicken. Most standard grilled chicken salads can take anywhere from 45 minutes to over an hour for preparation and cooking, so this recipe is quite efficient for its flavor payoff.
Step-by-Step Instructions
Step 1: Marinate the Chicken
In a medium bowl, whisk together the lime juice, olive oil, chili powder, cumin, smoked paprika, garlic powder, salt, and pepper. Add the chicken thighs to the bowl and toss to coat them evenly with the marinade. Cover the bowl and refrigerate for at least 30 minutes, or up to 4 hours. For deeper flavor, longer marination is better.
Step 2: Prepare the Vegetables
While the chicken marinates, prepare your vegetables. Slice the bell peppers and red onion into even strips or thick half-moons. In a separate bowl, toss the sliced vegetables with 1 tablespoon of olive oil, a pinch of salt, and pepper. This light seasoning will help them caramelize beautifully on the grill.
Step 3: Grill the Chicken and Vegetables
Preheat your grill to medium-high heat. Clean and oil the grill grates to prevent sticking. Place the marinated chicken thighs on the hot grill and cook for about 6-8 minutes per side, or until cooked through and nicely charred. The internal temperature should reach 165°F (74°C). Remove the chicken from the grill and let it rest for about 5-10 minutes before slicing. While the chicken rests, grill the seasoned pepper and onion strips. Grill them for about 4-6 minutes per side, until they are tender-crisp and have appealing grill marks. You want them slightly charred but still retaining a bit of bite.
Step 4: Assemble the Salad
Once the chicken has rested, slice it into bite-sized pieces or strips. In a large salad bowl, combine the chopped romaine lettuce or mixed greens. Add the grilled vegetables, diced avocado, and rinsed black beans (if using).
Step 5: Make the Dressing
In a small jar or bowl, combine the olive oil, lime juice, honey (or agave), cumin, chili powder, salt, and pepper. Whisk or shake vigorously until well combined and emulsified. Taste and adjust seasonings as needed.
Step 6: Dress and Serve
Add the sliced grilled chicken to the salad bowl. Drizzle about half of the dressing over the salad and toss gently to combine. Add more dressing if desired, to your preference. Garnish with fresh cilantro and crumbled cotija or feta cheese (if using). Serve immediately with fresh lime wedges on the side.
Nutritional Information
While exact nutritional values can vary based on portion size and specific ingredients used, a typical serving of this Grilled Chili Lime Chicken Fajita Salad is estimated to provide:
- Calories: Approximately 400-500 kcal
- Protein: 30-40g
- Fat: 25-35g (healthy fats from avocado and olive oil)
- Carbohydrates: 15-25g (from vegetables and beans)
- Fiber: 5-10g
(Note: This is an approximation. For precise details, it’s recommended to use a nutritional calculator with your specific ingredients and quantities.)
Healthier Alternatives
Looking to lighten this salad up even further without sacrificing flavor? Here are some smart swaps:
- Chicken Breast: Use lean chicken breast instead of thighs for a lower fat option, but be mindful of cooking time to keep it moist.
- Reduced Oil: Lightly brush vegetables with oil instead of tossing, or use cooking spray for grilling.
- Reduced Cheese: Omit the cheese altogether or use a very small amount of a sharp cheese for maximum flavor impact.
- Lighter Dressing: For an even lighter dressing, reduce the olive oil and increase lime juice, or even use a non-fat Greek yogurt base for a creamy, lighter alternative.
- Quinoa Base: Instead of or in addition to greens, add a half cup of cooked quinoa for complex carbohydrates and sustained energy.
Serving Suggestions
This salad is a complete meal on its own, bursting with flavor and nutrients. However, here are a few ways to enhance your dining experience:
- With a Side of Cornbread: A slightly sweet, crumbly cornbread is a delightful contrast to the zesty, spicy salad.
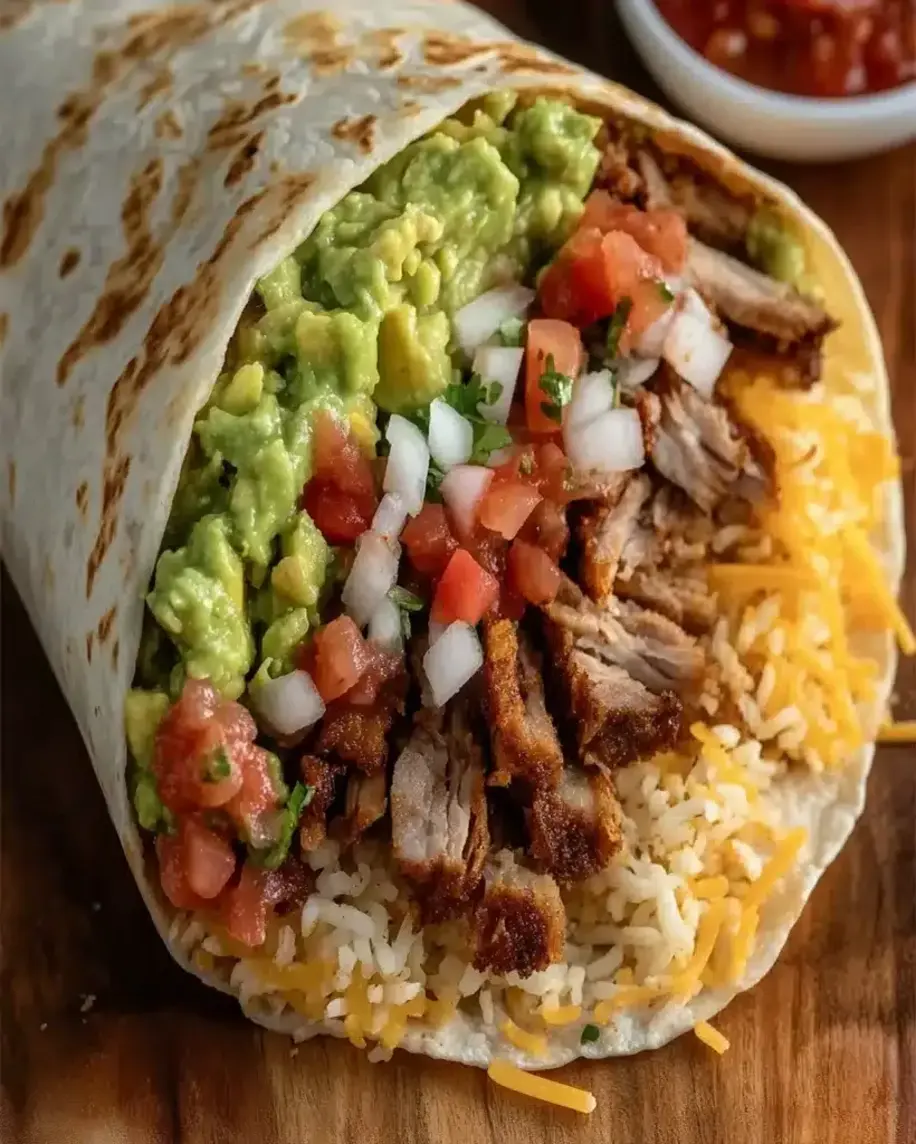
- As Tacos or Wraps: Chop the grilled chicken and veggies finer and serve them in warm corn tortillas or whole wheat wraps with your favorite fajita toppings.
- With Tortilla Chips: Serve a scoop of the salad alongside some crunchy tortilla chips for added textural enjoyment.
- Add a Dollop of Salsa or Guacamole: To further amplify the Mexican-inspired flavors.
Common Mistakes to Avoid
To ensure your Grilled Chili Lime Chicken Fajita Salad is perfect every time, keep these common pitfalls in mind:
- Overcooking the Chicken: Dry chicken can ruin the dish. Use a meat thermometer and aim for 165°F (74°C).
- Undermining Marinade Time: Insufficient marination means less flavor penetration. Give it at least 30 minutes.
- Not Resting the Chicken: Resting allows the juices to redistribute, resulting in more tender chicken.
- Overcrowding the Grill: This leads to steaming rather than grilling, preventing those desirable char marks and caramelization. Grill in batches if necessary.
- Dressing Too Early: Highly absorbent greens will wilt if dressed too far in advance. Toss just before serving.
Storing Tips
This salad is best enjoyed fresh, but leftovers can be stored with a few considerations:
- Best Method: Store the grilled chicken, grilled vegetables, and salad base separately in airtight containers in the refrigerator. Prepare the dressing and store it in a separate small container. This prevents the greens from wilting and the avocado from browning.
- Assembled Salad: If you must store it assembled, place the dressing in a small container and add it just before serving. It will keep for 1-2 days, but the texture may be compromised.
- Reheating: The chicken and vegetables can be gently reheated if desired, but they are also delicious served cold or at room temperature in the salad.
Conclusion
This Grilled Chili Lime Chicken Fajita Salad is a culinary masterpiece that brings together vibrant flavors, satisfying textures, and wholesome ingredients. It’s a testament to how simple grilling and fresh produce can create an extraordinary meal. Whether you’re looking for a healthy weeknight dinner, a flavorful lunch, or a dish to impress your guests, this fajita salad delivers. Don’t wait—gather your ingredients and get ready to experience a taste sensation that’s both fresh and incredibly fulfilling. Give it a try and let us know what you think!
FAQs
***Can I make this salad ahead of time?***
Yes, you can prep most components ahead. Grilling the chicken and vegetables, chopping the greens, and making the dressing can all be done in advance. Store them separately and assemble just before serving to maintain freshness and crispness.
***What kind of grill should I use?***
You can use any type of grill – charcoal, gas, or even an indoor grill pan. The key is to achieve medium-high heat for good searing and charring.
***Can I use store-bought chili lime seasoning?***
Absolutely! If you have a favorite chili lime seasoning blend, feel free to use it for the marinade. Adjust the spices based on its salt content and flavor profile.
***Is this kid-friendly?***
This salad can be kid-friendly! You can adjust the chili powder for a milder flavor, serve the components separately (letting them pick and choose), or serve the chicken and veggies in soft tortillas on the side.
***What if I don’t have a grill?***
No problem! You can pan-sear the chicken and vegetables in a hot skillet with a little oil. You can also roast the vegetables at high heat in the oven (400-425°F) for a similar effect.

Grilled Chili Lime Chicken Fajita Salad | Zesty & Delicious
Description
Are you craving a flavorful and satisfying meal that’s both healthy and delicious? Look no further than thisGrilled Chili Lime Chicken Fajita Salad! With juicy, marinated chicken thighs, grilled peppers, and creamy avocado, this dish offers a perfect blend of flavors and textures. Whether you’re a salad lover or a fajita fan, this dish brings the best of both worlds together. Let’s dive in and explore this must-try recipe that will elevate your dinner game!
Ingredients
- Marinade/Dressing:
- Salad:
- For a dairy-free option, skip the sour cream, and if you’re avoiding sugar, consider using a sugar substitute like honey or maple syrup.
Instructions
- Start by whisking together the olive oil, lime juice, cilantro, garlic, brown sugar, chili flakes, cumin, and salt. This mixture will serve as both your marinade and dressing.
- Pour half of the marinade into a shallow dish and add the chicken thighs. Let them marinate for at least two hours, or overnight for best results. Refrigerate the remaining marinade to use as a dressing.
- Heat a teaspoon of olive oil in a grill pan over medium-high heat. Grill the marinated chicken fillets for about 5-7 minutes on each side until they are golden, crispy, and fully cooked. Once done, let the chicken rest before slicing.
- Wipe down the grill pan and add another teaspoon of oil. Grill the bell peppers and onion slices until they are slightly charred and cooked to your liking.
- Slice the chicken into strips. On a large serving platter, arrange the lettuce, avocado slices, grilled peppers, onions, and chicken strips. Drizzle with the reserved marinade dressing, and garnish with extra cilantro.
- Serve with a dollop of sour cream if desired. Enjoy!
Notes
Use Fresh Ingredients: Fresh lime juice and cilantro make a huge difference in the flavor of the marinade.
Marinate Longer: If time allows, marinate the chicken overnight for extra flavor.
Adjust the Heat: For a spicier dish, add more chili flakes or swap them out for fresh jalapeños.
“`