“`html
Table of Contents
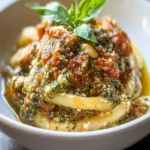
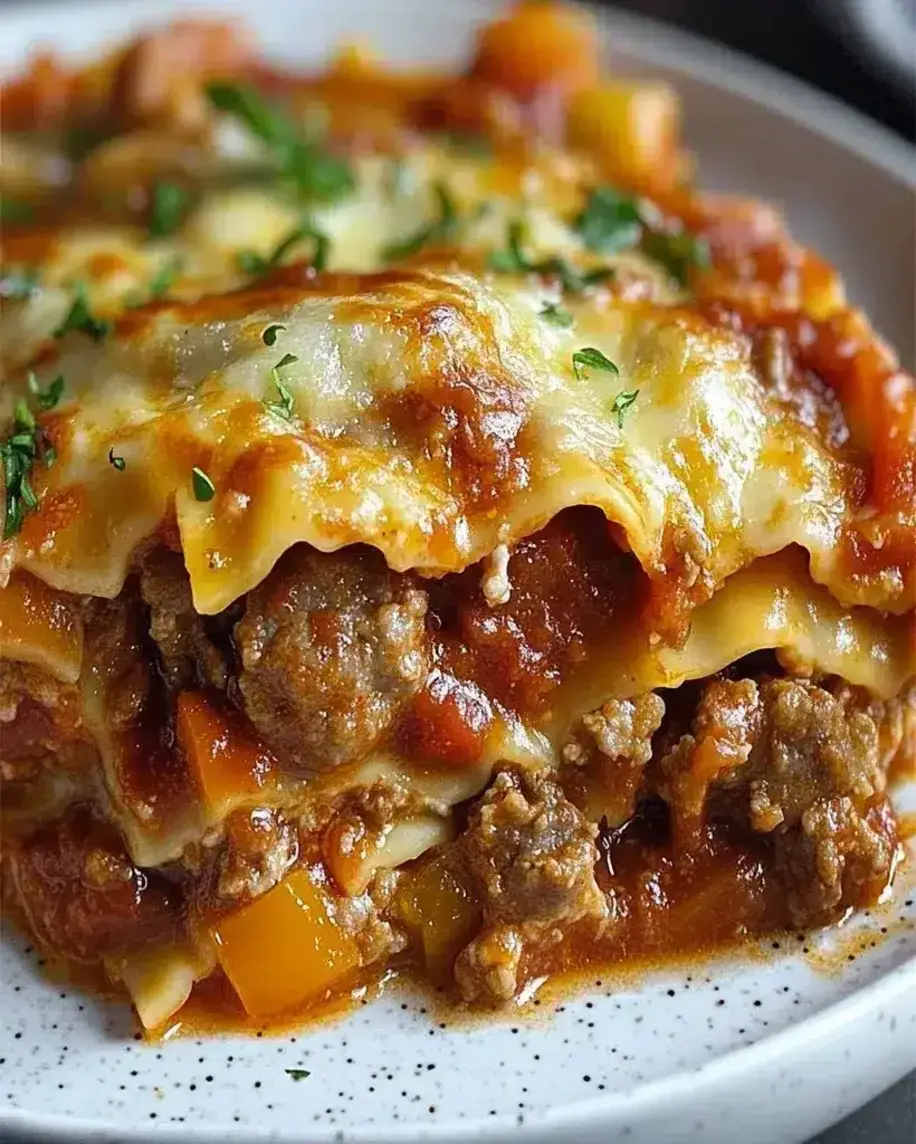
Slow Cooker Sausage & Peppers Ravioli Lasagna – Easy & Flavorful! 🤤
Are you looking for a weeknight dinner that feels gourmet but requires minimal effort, perhaps shaving off at least 30 minutes from traditional lasagna prep? If so, you’ve landed in the right place! Welcome to a new and exciting recipe on our journey to discovering amazing, comforting dishes! Today, we will dive into the world of hearty, cheesy comfort food with a twist—Slow Cooker Sausage and Peppers Ravioli Lasagna. This delicious dish combines the best of Italian flavors with the ease and convenience of a slow cooker. Whether you’re a lasagna lover or a fan of ravioli, this meal will become a new favorite in your weekly dinner rotation. Get ready to wow your family with this flavorful and simple recipe!
Ingredients
Gather these delightful components to create your masterpiece:
- 1 lb Italian sausage (sweet or hot): The backbone of our flavor profile. Choose your preferred spice level for a truly personalized dish. Mildly spiced sausage offers a rich, savory base, while hot Italian sausage will bring a pleasant kick and warmth.
- 1 large onion, thinly sliced: Adds a sweet, mellow depth when cooked down. A yellow or sweet onion works best here, caramelizing beautifully.
- 2 bell peppers (any color), thinly sliced: Bringing vibrant color and a slight sweetness. Red, yellow, or orange peppers are excellent choices, offering a tender bite and a visually appealing contrast.
- 3 cloves garlic, minced: For that essential pungent aroma and flavor. Freshly minced garlic will always provide the most robust taste.
- 1 (24 oz) jar marinara sauce: The speedy sauce base. Opt for a good quality marinara that you love the taste of, as it will be the primary liquid. Look for one with rich tomato flavor and balanced herbs.
- 1 (15 oz) can fire-roasted diced tomatoes, undrained: Adds texture and a hint of smokiness. The fire-roasting deepens the tomato flavor and provides little bursts of juicy goodness.
- 1 (9 oz) package refrigerated ravioli (any filling): The star of our “lasagna” layers! Cheese or spinach ravioli are classic choices, but feel free to experiment with mushroom or butternut squash for a unique twist.
- 1 (15 oz) container ricotta cheese: For creamy pockets of indulgence. Whole milk ricotta will offer the creamiest texture, but part-skim is a fine substitute.
- 1 large egg: Binds the ricotta mixture. A standard large egg is perfect.
- 1/2 cup grated Parmesan cheese, plus more for topping: Adds a salty, nutty finish. Freshly grated Parmesan will always yield superior flavor and meltability.
- 1/4 cup chopped fresh parsley (optional): For a touch of freshness. Fresh parsley adds a lovely pop of green and a bright, herbaceous note.
- 1.5 cups shredded mozzarella cheese: For that glorious cheesy topping. A blend of mozzarella and provolone can also be delicious for extra depth.
- Salt and freshly ground black pepper to taste: To enhance all the wonderful flavors.
Timing
20 minutes
2.5-3 hours
3 hours 20 minutes
This recipe is designed for efficiency, coming in at an average total time that is significantly less than many traditional lasagna recipes, which can often take 4-5 hours from start to finish, including baking and resting. The slow cooker does the heavy lifting, allowing you more time to relax or tend to other tasks.

Instructions
Step 1: Prep Your Veggies and Sausage
Begin by placing a large skillet over medium-high heat. If your Italian sausage has a casing, remove it. Add the sausage to the hot skillet and break it apart with a spoon. Cook until it’s browned and cooked through, about 5-7 minutes. Once browned, drain off any excess grease, leaving just a little bit in the pan for flavor. Add the thinly sliced onion and bell peppers to the skillet with the sausage. Sauté for 5-7 minutes until the vegetables begin to soften. Stir in the minced garlic and cook for another minute until fragrant. This step builds a delicious base of flavor.
Step 2: Layer the Lasagna
In your slow cooker insert (a 6-quart or larger is recommended), spread about 1/2 cup of marinara sauce evenly across the bottom. This prevents sticking and adds moisture. Next, spoon the sausage and pepper mixture over the sauce. In a medium bowl, stir together the ricotta cheese, egg, Parmesan cheese, and chopped parsley (if using). Season this mixture with salt and pepper to your taste. Dollop spoonfuls of the ricotta mixture evenly over the sausage and pepper layer. Arrange the refrigerated ravioli in a single layer over the ricotta, trying to cover as much surface area as possible. It’s okay if they overlap slightly. Pour the remaining marinara sauce and the undrained fire-roasted diced tomatoes over the ravioli, ensuring they are mostly covered. Sprinkle the shredded mozzarella cheese evenly over the top. You can add a little extra Parmesan here if you like it extra cheesy.
Step 3: Cook It Up
Cover the slow cooker with its lid. Cook on LOW for 2.5 to 3 hours, or on HIGH for 1.5 to 2 hours. The exact cooking time will depend on your slow cooker’s model and settings. You’re looking for the ravioli to be tender and the sauce to be bubbling gently around the edges. It’s important not to overcook, as the ravioli can become mushy if left too long.
Step 4: Uncover and Melt
Once the ravioli is cooked through, carefully remove the lid. If you desire a more golden and bubbly cheese topping, you can switch your slow cooker to the “warm” setting or remove the lid and place it under the broiler in your oven for 2-3 minutes, watching it very closely to prevent burning. *Alternatively, you can simply allow the residual heat to melt and slightly toast the cheese for about 15-20 minutes with the lid slightly ajar.* Let the lasagna rest for about 10-15 minutes before serving. This allows it to set up slightly, making it easier to scoop and serve without it falling apart.
Nutritional Information
- Calories: Approximately 450-550 per serving (varies based on sausage type, cheese, and portion size)
- Protein: High, from sausage, ricotta, and Parmesan
- Carbohydrates: Moderate, primarily from ravioli and sauce
- Fat: Moderate to high, depending on cheese and sausage used
Please note: Nutritional values are estimates and can vary.
Healthier Alternatives
You can lighten this dish without sacrificing too much flavor:
- Leaner Sausage: Opt for turkey or chicken Italian sausage, or a reduced-fat pork sausage.
- Whole Wheat Ravioli: Look for whole wheat versions of your favorite ravioli.
- Reduced-Fat Cheeses: Use part-skim ricotta and reduced-fat mozzarella.
- More Veggies: Bulk it up with extra vegetables like zucchini, spinach, or mushrooms in the sausage mixture.
- Lighter Sauce: Use a marinara with less added sugar and oil.
Serving Suggestions
This hearty lasagna is a meal in itself, but it pairs wonderfully with:
- A simple green salad with a light vinaigrette.
- Crusty garlic bread for soaking up extra sauce.
- Steamed or roasted green beans or broccoli.
Common Mistakes to Avoid
- Overcrowding the Ravioli: If your ravioli is layered too thickly or unevenly, it may not cook through properly. Aim for a single layer.
- Not Enough Liquid: Ensure the ravioli is well-covered with sauce. If it looks too dry, you can add a splash of broth or water.
- Overcooking: This can lead to mushy ravioli and a watery lasagna. Keep an eye on the cooking time.
- Skipping the Rest Time: Letting the lasagna rest helps it set, making it easier to serve and improving texture.
Storing Tips
Leftovers can be stored in an airtight container in the refrigerator for up to 3-4 days. Reheat gently in the microwave or oven until heated through.
Conclusion
This Slow Cooker Sausage and Peppers Ravioli Lasagna is a testament to how simple ingredients and a little slow cooker magic can create an unbelievably delicious and comforting meal. It’s perfect for busy weeknights, family gatherings, or whenever you crave a taste of Italian-inspired comfort without the fuss. Give this recipe a try and let us know how it turned out in the comments below! We’d love to hear your variations and enjoy this fantastic dish!
FAQs
Can I use fresh ravioli instead of refrigerated?
Yes, you can! Fresh ravioli will cook even faster, so reduce the cooking time. You might want to check for tenderness around the 1.5-2 hour mark on low.
What kind of ravioli filling works best?
While cheese ravioli is a classic, any filling will work! Spinach, mushroom, or even a meat-filled ravioli will be delicious. Just adjust seasoning if your ravioli is already seasoned.
Can I make this recipe ahead of time?
You can assemble the lasagna in the slow cooker insert the night before and refrigerate it. Add an extra 30-60 minutes to the cooking time on low in the morning since you’re cooking from cold.
My sauce seems too watery. What can I do?
If the sauce is too thin towards the end of cooking, remove the lid and cook on HIGH for the last 30 minutes to allow some liquid to evaporate. Alternatively, you can serve it as is; the pasta will absorb some of the liquid.
Can I freeze this lasagna?
This dish is best enjoyed fresh. However, if you have leftovers, they can be frozen in individual portions. Thaw overnight in the refrigerator and reheat gently.
Slow Cooker Sausage and Peppers Ravioli Lasagna Recipe
Description
Welcome to a new and exciting recipe on our journey to discovering amazing, comforting dishes! Today, we will dive into the world of hearty, cheesy comfort food with a twist—Slow Cooker Sausage and Peppers Ravioli Lasagna. This delicious dish combines the best of Italian flavors with the ease and convenience of a slow cooker. Whether you’re a lasagna lover or a fan ofravioli, this meal will become a new favorite in your weekly dinner rotation. Get ready to wow your family with this flavorful and simple recipe!
Ingredients
- Optional substitutions:
Instructions
- In a medium skillet, cook the Italian sausage over medium heat until browned and cooked through, breaking it into smaller pieces. Drain any excess fat.
- Add the chopped onion and bell peppers to the skillet with the sausage. Cook for an additional 3-5 minutes until the vegetables are softened.
- Spread a thin layer of marinara sauce on the bottom of the slow cooker. Then, arrange a layer of frozen ravioli over the sauce. Spoon a portion of the sausage and pepper mixture over the ravioli, and sprinkle mozzarella and Parmesan cheese on top. Continue layering the sauce, ravioli, sausage and peppers, and cheese until all ingredients are used, ending with a layer of cheese on top.
- Sprinkle the dried oregano, basil, garlic powder, and salt and pepper on the top cheese layer. Cover and cook on low for 4-5 hours, or until the ravioli is tender and the cheese is melted and bubbly.
- Allow the lasagna to rest for 10 minutes before serving to help it set and make slicing easier. Enjoy!
Notes
Tip 1: Use fresh mozzarella for an extra creamy texture.
Tip 2: If you want a bit of a crunch, broil the top layer of cheese in the oven for 2-3 minutes after cooking.
Tip 3: Substitute the marinara sauce with a spicyarrabbiatasauce for a kick of heat.
“`