“`html
Table of Contents
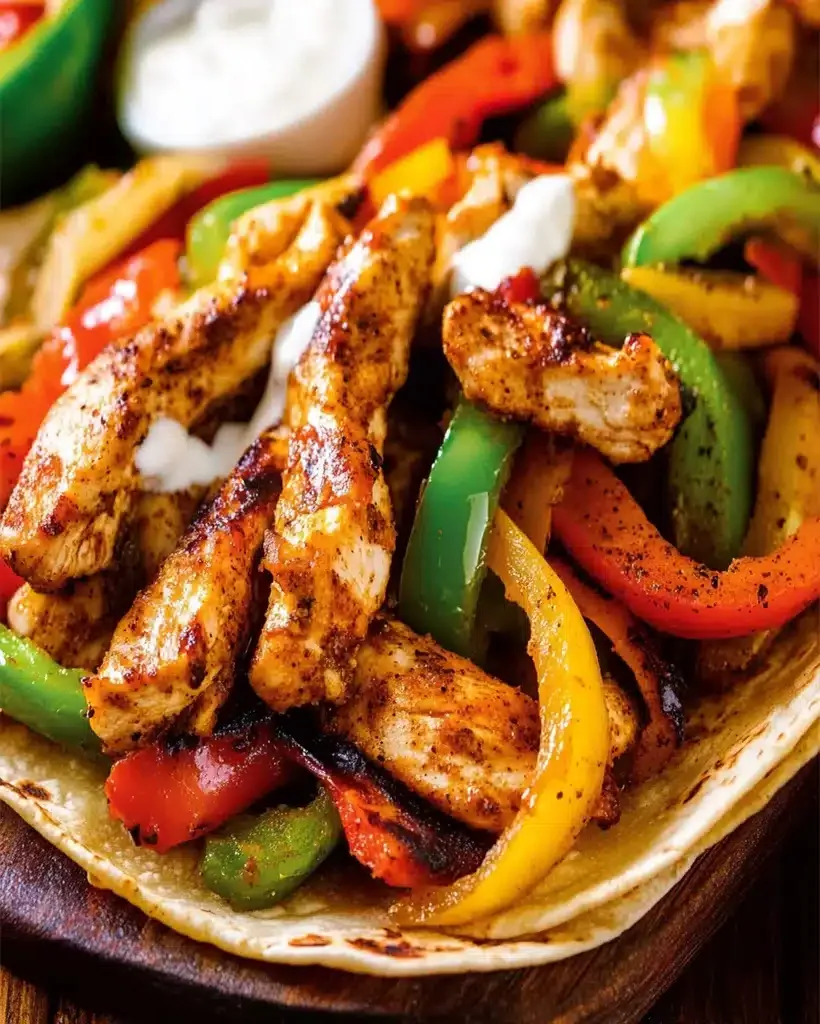
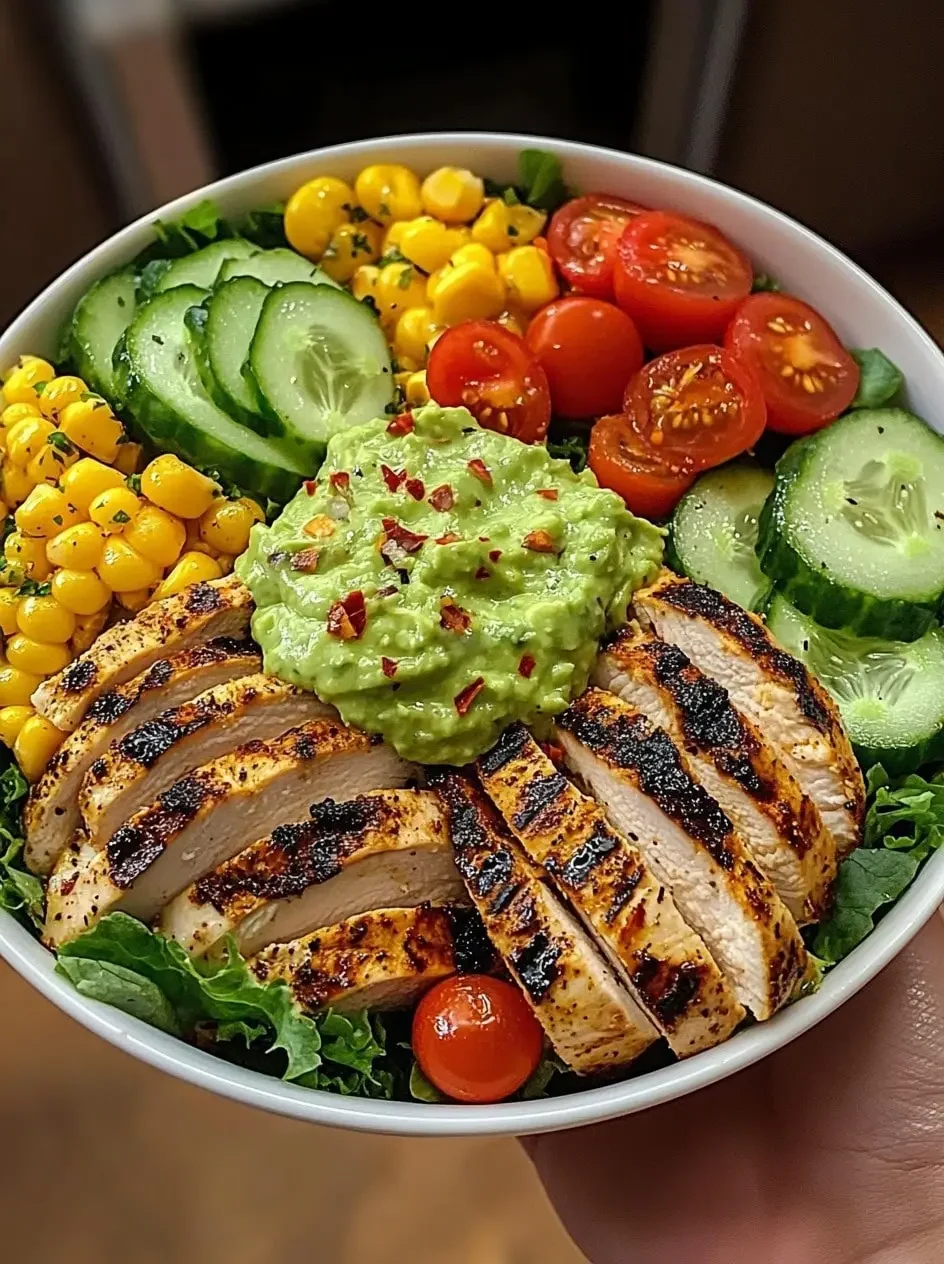
Epic Grilled Chicken Bowl with Creamy Avocado Sauce & Veggies
Are you looking for a healthy, flavorful, and satisfying meal that can be prepared ahead of time? If so, you’re in the right place! This Epic Grilled Chicken Bowl with Creamy Avocado Sauce & Veggies is a game-changer.
Your New Favorite Weeknight Warrior
Packed with bold flavors, fresh veggies, and a creamy avocado sauce, this vibrant bowl is a satisfying, nutrient-rich meal you’ll crave again and again! Perfect for meal prep, a quick lunch, or a hearty dinner, this dish is loaded with lean protein, fiber, and healthy fats to keep you feeling full and energized. In a world where convenience often trumps nutrition, finding a meal that ticks all the boxes – health, taste, and ease of preparation – can feel like striking gold. This grilled chicken bowl is exactly that treasure. Its versatility allows for endless customization, making it a staple for busy individuals and families alike. Let’s dive into how to create this culinary masterpiece that’s as good for you as it tastes.
The Symphony of Flavors: Ingredients
The magic of this bowl lies in the quality and freshness of its components. Here’s what you’ll need:
For the Grilled Chicken:
- 1.5 lbs boneless, skinless chicken breasts or thighs: Choose meaty breasts for lean protein, or thighs for extra moisture and flavor.
- 2 tbsp olive oil: The base for our marinade, ensuring juicy chicken.
- 1 tbsp lime juice: Adds a tangy zest that brightens the chicken’s flavor. Freshly squeezed is best!
- 2 cloves garlic, minced: Pungent and aromatic, it’s a flavor foundation.
- 1 tsp smoked paprika: For a subtle smoky depth and beautiful color.
- 1/2 tsp cumin: Earthy and warm, it complements the paprika perfectly.
- Salt and freshly ground black pepper to taste: Essential for enhancing all the other flavors.
For the Creamy Avocado Sauce:
- 1 ripe avocado: The star of the show, providing unparalleled creaminess and healthy fats. Make sure it’s soft to the touch.
- 1/4 cup plain Greek yogurt or sour cream: For an extra creamy texture and a slight tang. (Yogurt for a lighter option).
- 2 tbsp lime juice: Cuts through the richness of the avocado and adds brightness.
- 1 small clove garlic: A hint of garlic to add complexity.
- 2-4 tbsp water or milk: To reach your desired drizzling consistency.
- Salt and pepper to taste: To balance the flavors.
- Optional: A pinch of cilantro or a dash of hot sauce: For an extra layer of flavor.
For the Bowl Fillings:
- 2 cups cooked quinoa or brown rice: Your flavorful base. Fluffy and perfectly cooked, of course!
- 1 cup black beans, rinsed and drained: Earthy, protein-packed, and satisfying.
- 1 cup corn kernels (fresh, frozen, or roasted): Sweet pops of sunshine. Roasted gives an extra depth of flavor.
- 1/2 cup cherry tomatoes, halved: Juicy, sweet, and a burst of freshness.
- 1/2 cup diced red onion: Sharp, crisp, and adds a vibrant bite.
- 1/2 cup chopped fresh cilantro: For that distinctive, bright, herbaceous finish.
- Optional: Sliced jalapeños, avocado slices, a wedge of lime: For customizable garnish.
Timing is Everything
Compared to many complex recipes, this bowl is relatively quick! Average grilled chicken recipes might take longer for marinades, but this one balances quick marinating with efficient cooking.
Crafting Your Masterpiece: Step-by-Step
Step 1: Marinate the Chicken
In a bowl or a zip-top bag, whisk together olive oil, lime juice, minced garlic, smoked paprika, cumin, salt, and pepper. Add the chicken pieces and ensure they are well-coated. Let it marinate for at least 15 minutes at room temperature, or up to 4 hours in the refrigerator for deeper flavor. If you’re short on time, even 10 minutes makes a difference!
Step 2: Prepare the Avocado Sauce
While the chicken marinates, let’s make that luscious sauce. In a blender or food processor, combine the ripe avocado, Greek yogurt (or sour cream), lime juice, garlic clove, salt, and pepper. Blend until completely smooth and creamy. Add water or milk, a tablespoon at a time, until you reach your desired drizzling consistency. Taste and adjust seasoning as needed. If using, stir in cilantro or hot sauce now.
Step 3: Cook the Chicken
Preheat your grill (or a grill pan) to medium-high heat. Lightly oil the grates to prevent sticking. Remove chicken from marinade, letting any excess drip off. Grill for 6-8 minutes per side, or until the chicken is cooked through (internal temperature reaches 165°F or 74°C) and has beautiful grill marks. Let the chicken rest for 5-10 minutes before slicing or dicing.
Step 4: Prep the Veggies
While the chicken rests, ensure all your bowl fillings are ready. Cook your quinoa or brown rice according to package directions if you haven’t already. Halve the cherry tomatoes, dice the red onion, chop the cilantro, and rinse the black beans. If you’re using fresh corn, grill or boil it until tender.
Step 5: Assemble the Bowls
Now for the fun part! Divide your cooked quinoa or brown rice among serving bowls. Arrange the sliced grilled chicken, black beans, corn, cherry tomatoes, and red onion. Generously drizzle with the creamy avocado sauce. Garnish with fresh cilantro and any optional toppings like jalapeños or extra avocado slices. Serve immediately with a lime wedge.
Nutritional Snapshot
This bowl is a powerhouse of nutrients:
- Lean Protein: From the grilled chicken to keep you full and support muscle health.
- Fiber: Abundant in quinoa/rice, beans, and veggies, promoting digestive health.
- Healthy Fats: Primarily from the avocado and olive oil, crucial for brain function and satiety.
- Vitamins & Minerals: A rich source from the colorful assortment of vegetables.
(Note: Actual nutritional values will vary based on portion sizes and specific ingredients used.)
Wholesome Swaps & Enhancements
Looking to boost the nutrition or cater to dietary needs? Try these:
- Plant-based protein: Swap chicken for grilled tofu, tempeh, or a hearty lentil mixture.
- Grain-free base: Use cauliflower rice or a bed of mixed greens instead of quinoa/rice.
- Lower-fat sauce: Replace Greek yogurt with silken tofu or a lighter dairy-free yogurt alternative.
- Extra veggies: Load up on spinach, bell peppers, zucchini, or sweet potatoes for added nutrients and antioxidants.
Perfect Pairings & Serving Ideas
This bowl is a complete meal on its own, but here are a few ideas to elevate it:
- Serve with a side of salsa or a dollop of pico de gallo for extra freshness.
- Add a sprinkle of toasted pumpkin seeds or sunflower seeds for a delightful crunch.
- Enjoy with a glass of iced green tea or infused water.
Common Mistakes to Avoid
Prevent these common pitfalls for the best results:
- Overcooking the chicken: This leads to dry, tough meat. Use a meat thermometer to ensure perfect doneness.
- Under-seasoning: Don’t be shy with salt and pepper; they are flavor enhancers!
- Watery avocado sauce: Add liquid gradually to achieve the right consistency.
- Skipping the rest: Letting the chicken rest after grilling allows the juices to redistribute, keeping it moist.
Smart Storing for Later
This bowl is fantastic for meal prep!
- Individual Components: Store cooked chicken, grains, and chopped veggies in separate airtight containers in the refrigerator for up to 3-4 days.
- Avocado Sauce: Store in an airtight container with a layer of plastic wrap pressed directly onto the surface to minimize browning. It’s best consumed within 1-2 days.
- Assembled Bowls: For best results, assemble just before serving or store components separately to prevent sogginess, especially if adding the sauce later.
Embrace the Bowl Bliss!
The Epic Grilled Chicken Bowl with Creamy Avocado Sauce & Veggies is more than just a meal; it’s a testament to how healthy eating can be incredibly delicious and satisfying. It’s a versatile, nutrient-dense dish that’s perfect for anyone looking to simplify their meal routine without sacrificing flavor or health. Give it a try and experience the vibrant, wholesome goodness for yourself. You might just find it becomes your go-to!
Frequently Asked Questions
***Can I make this bowl vegan?***
Absolutely! Replace the chicken with grilled tofu, tempeh, or seasoned chickpeas. For the sauce, omit the Greek yogurt or use a plant-based alternative like silken tofu or vegan yogurt. Ensure your base grain is also vegan.
***How do I prevent the avocado sauce from turning brown?***
The lime juice in the recipe helps, but for storage, press plastic wrap directly onto the surface of the sauce before sealing the container. This minimizes air exposure.
***What kind of grill should I use?***
A charcoal grill, gas grill, or an indoor grill pan will all work beautifully. The key is achieving a nice sear and cooking the chicken through.
***Can I use store-bought grilled chicken?***
Yes, you can! If you’re really pressed for time, pre-cooked grilled chicken strips can be a convenient shortcut. Just ensure they are seasoned to your liking.
Epic Grilled Chicken Bowl with Creamy Avocado Sauce & Veggies
Description
Packed withbold flavors,fresh veggies, and acreamy avocado sauce, this vibrant bowl is asatisfying, nutrient-rich mealyou’ll crave again and again! Perfect for meal prep, a quick lunch, or a hearty dinner, this dish is loaded withlean protein, fiber, and healthy fatsto keep you feeling full and energized.
Ingredients
- 2chicken breasts(seasoned withpaprika, garlic powder, salt, and black pepper)
- 2 tablespoonsolive oil
- 2 cupschopped lettuce
- 1 cupdiced tomatoes
- 1 cupsliced cucumber
- ½ cupgrilled or canned corn kernels
- 1ripeavocado
- 1 tablespoonfresh lemon juice
- 1garlic clove,minced
- ¼ cupchopped cilantro
- ¼ cupGreek yogurt(ordairy-free yogurtfor a vegan option)
- Salt and freshly cracked black pepper, to taste
Instructions
- Prepare the chicken: Rub thechicken breastswitholive oil, ensuring they are well-coated.
- Season the chicken: Sprinklepaprika, garlic powder, salt, and black pepperevenly over both sides of the chicken.
- Heat the grill: Preheat agrill pan or outdoor grilltomedium-high heat.
- Cook the chicken:Place the chicken on the grill and cook for6–8 minutes per side.Avoid moving it too much to get a nice, even char.
- Place the chicken on the grill and cook for6–8 minutes per side.
- Avoid moving it too much to get a nice, even char.
- Check doneness: The internal temperature should reach165°F (74°C). Use a meat thermometer for accuracy.
- Rest the chicken: Remove the chicken from the grill and let itrest for 5 minutesbefore slicing it into strips. This helps retain its juiciness.
- Wash and dry the vegetables: Rinse thelettuce, tomatoes, cucumber, and cornthoroughly. Pat them dry with a paper towel.
- Chop and slice:Lettuce: Chop into bite-sized pieces.Tomatoes: Dice them into small chunks.Cucumber: Slice into thin rounds or half-moons.Corn: If using canned corn, drain and rinse. If using fresh corn, grill it lightly for extra flavor.
- Lettuce: Chop into bite-sized pieces.
- Tomatoes: Dice them into small chunks.
- Cucumber: Slice into thin rounds or half-moons.
- Corn: If using canned corn, drain and rinse. If using fresh corn, grill it lightly for extra flavor.
- Mix the veggies: In alarge mixing bowl, toss together thelettuce, tomatoes, cucumber, and corn.
- Prepare the avocado: Cut theavocadoin half, remove the pit, and scoop the flesh into ablender or food processor.
- Add flavor boosters: Toss in thelemon juice, minced garlic, chopped cilantro, Greek yogurt, salt, and pepper.
- Blend until smooth:If the mixture is too thick, add asplash of waterto reach a drizzling consistency.Blend until you get acreamy, smooth texture.
- If the mixture is too thick, add asplash of waterto reach a drizzling consistency.
- Blend until you get acreamy, smooth texture.
- Taste and adjust: Add moresalt, lemon juice, or cilantroas needed for balance.
- Divide the veggie mixturebetween twoserving bowls.
- Add the grilled chicken: Arrange the slicedgrilled chickenon top of the veggies.
- Drizzle the sauce: Pour a generous amount of thecreamy avocado sauceover the chicken and vegetables.
- Enhance the flavor: Sprinkle withchili flakesorcrushed black pepperfor a spicy kick.
- Add crunch: Garnish withtoasted sesame seedsorpumpkin seedsfor extra texture.
- Serve immediatelyand enjoy yourEpic Grilled Chicken Bowl with Creamy Avocado Sauce & Veggieswhile fresh!
Notes
Grill alternative: If you don’t have a grill, you canpan-searthe chicken in a nonstick skillet overmedium-high heat.
Make it vegan: Replace thechickenwithgrilled tofuand usedairy-free yogurtfor the sauce.
Storage tips:Chicken: Store cooked chicken in an airtight container in the fridge for up to4 days.Avocado sauce: Best used fresh but can be stored in an airtight container for1-2 dayswith plastic wrap pressed directly on the surface to prevent browning.Veggies: Keep them separate and assemble just before serving to prevent sogginess.
Chicken: Store cooked chicken in an airtight container in the fridge for up to4 days.
Avocado sauce: Best used fresh but can be stored in an airtight container for1-2 dayswith plastic wrap pressed directly on the surface to prevent browning.
Veggies: Keep them separate and assemble just before serving to prevent sogginess.
Nutrition
- Calories: 450
- Protein: 40g
“`