Table of Contents
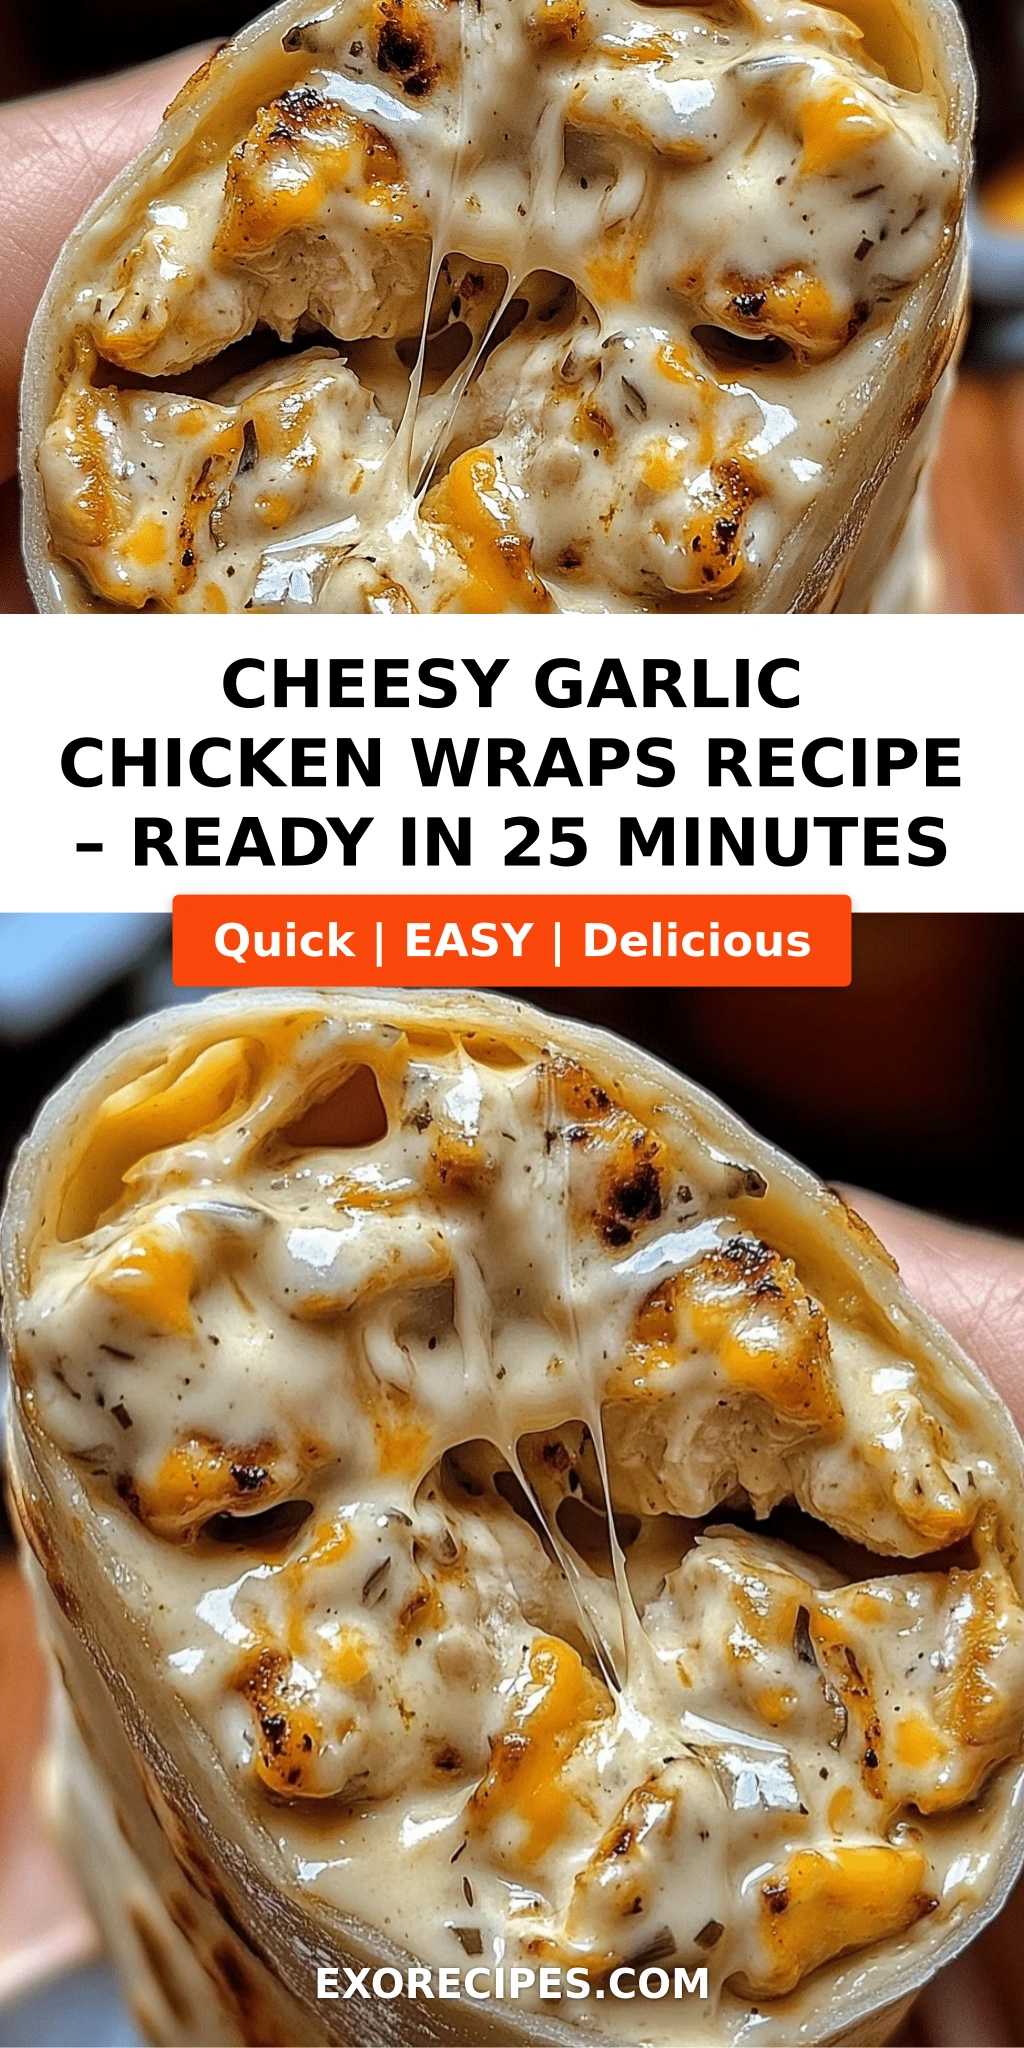
Cheesy Garlic Chicken Wraps: Golden Butter-Crisp Recipe – Quick & Irresistible
Introduction
I still remember the first time I made Cheesy Garlic Chicken Wraps for my family after a long day at the farmers market in Union Square. I had come home with a bundle of fresh garlic from a local farm, and the scent of it hitting melted butter in my cast iron skillet took me straight back to my mother’s kitchen in Morocco. She would always say, “Garlic is the heart of every dish.” And she was right. These wraps are born from that same love of bold, simple flavors — tender chicken, two kinds of melted cheese, and a generous kiss of garlic, all hugged by a warm, golden tortilla. It’s a dinner that comes together in under 30 minutes and disappears just as fast.
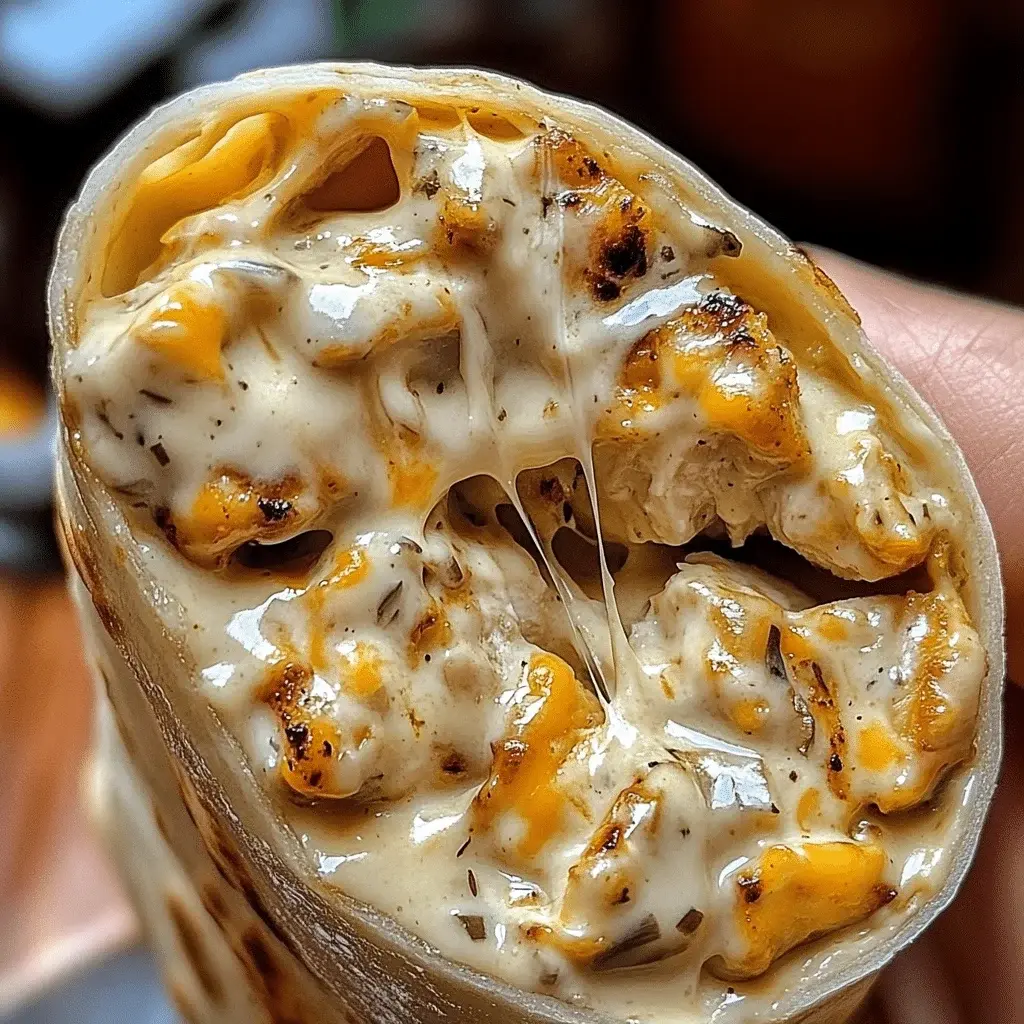
When you bite into one of these wraps, the first thing you notice is the crackle of the buttery, crisped tortilla. Then comes the creamy richness of mozzarella and the sharp, nutty punch of Parmesan — each bite melting into shredded chicken that’s been tossed with mayonnaise, fresh garlic, and a whisper of parsley. The flavor is both familiar and elevated, like a classic chicken wrap that went to culinary school in Paris. The technique I use — sautéing the wraps seam-side down in butter — seals the filling and creates a crust that keeps everything inside warm and luscious.
As a trained cook who now lives in New York City, I’ve tested this recipe over a dozen times to make it foolproof for any home cook. My version avoids the common trap of soggy wraps by using just enough mayonnaise to bind the filling without making it wet. And I always use a combination of pre-shredded mozzarella (the kind that melts like a dream) and freshly grated Parmesan for that extra umami hit. I’ll show you how to get that perfect golden brown in a skillet — no air fryer required, though I’ll share that option too. Let’s get rolling.
Why This Cheesy Garlic Chicken Wraps Recipe Is the Best
💡 mia’s Pro Tip: The secret weapon here is the double-cheese layer: mozzarella for that gooey stretch and Parmesan for depth. I learned this combination during my pastry training in Paris, where we often used Gruyère in croque monsieurs — but for these wraps, mozzarella and Parmesan are the perfect American-friendly duo. The mayonnaise acts as a barrier, keeping the chicken moist without making the tortilla soggy.
⚠️ Common Mistake to Avoid: Don’t overfill the wraps! If you stuff them too full, they won’t seal properly and the cheese will leak out into the pan, burning instead of melting inside. Use a generous but manageable amount — about ½ cup of chicken mixture per wrap.
The technique of pan-frying in butter (not oil) is what creates that irresistible golden crust. I start with the seam side down so the wrap seals itself shut as the cheese melts and the butter browns. This is a trick I use for all my folded dishes — from empanadas to these wraps — and it never fails. Best of all, this recipe is beginner-friendly: no complicated steps, minimal ingredients, and total time under 30 minutes.
Cheesy Garlic Chicken Wraps Ingredients
Every time I walk through Chelsea Market, I head straight to the poultry stand for fresh chicken breasts and to the cheese shop for a block of real Parmesan. The ingredients in this recipe are simple, but the quality matters. Here’s what you need — all available at any good US supermarket.
Ingredients List
- 2 large boneless, skinless chicken breasts, cooked and shredded
- 4 large flour tortillas (burrito size, about 10 inches)
- 1 cup shredded mozzarella cheese (low-moisture part-skim works best)
- ½ cup grated Parmesan cheese (freshly grated from a wedge)
- 4 cloves garlic, minced
- 3 tablespoons unsalted butter
- ¼ cup mayonnaise
- 1 teaspoon dried parsley
- ½ teaspoon salt
- ¼ teaspoon black pepper
Ingredient Spotlight
Chicken: For the best texture, I recommend poaching the chicken breasts in salted water with a bay leaf until just cooked through (about 15 minutes), then shredding with two forks. This keeps the meat tender and juicy. If you’re short on time, a rotisserie chicken works beautifully — just skip any skin and shred the breast and thigh meat. Avoid using canned chicken; it’s too mushy for these wraps.
Mozzarella: Low-moisture part-skim mozzarella is the gold standard for melting. It stretches beautifully without becoming greasy. Fresh mozzarella (the kind packed in water) has too much moisture and will make your wraps soggy. If you only have fresh, pat it dry thoroughly and shred it — but whole-milk low-moisture is even better for flavor.
Garlic: Fresh garlic is non-negotiable for this recipe. Pre-minced jarred garlic has a flat, metallic taste that won’t give you that punch. I mince four cloves finely so the garlic melts into the mayonnaise and chicken, releasing its essential oils without burning during cooking.
Parmesan: The pre-grated stuff in a green can is fine in a pinch, but for the best nutty, salty flavor, buy a wedge of real Parmigiano-Reggiano and grate it yourself just before using. I keep a wedge in my fridge at all times — it lasts for weeks and transforms any dish.
| Original Ingredient | Best Substitution | Flavor / Texture Impact |
|---|---|---|
| Mayonnaise | Greek yogurt (plain, full-fat) | Slightly tangier, less rich; still creamy |
| Mozzarella | Provolone or Monterey Jack | Slightly different melt; Provolone adds a buttery note, Jack is milder |
| Parmesan | Asiago or Pecorino Romano | Asiago is nuttier, Romano is saltier and sharper |
| Butter | Olive oil or avocado oil | Loses the golden brown richness; use ghee for best buttery flavor without dairy |
How to Make Cheesy Garlic Chicken Wraps — Step-by-Step
Making these wraps is as satisfying as eating them. Follow these steps and you’ll have a perfectly golden, cheesy wrap every time.
Step 1: Prepare the Filling
In a medium bowl, combine the shredded chicken, mayonnaise, minced garlic, dried parsley, salt, and pepper. Stir until every shred of chicken is coated. The mayonnaise should cling to the chicken without pooling — if it looks too wet, add a tablespoon more chicken. This mixture can be made up to a day in advance and refrigerated.
💡 mia’s Pro Tip: Taste the mixture before wrapping — it should be well-seasoned but not salty (the Parmesan will add salt later). I like to add a squeeze of lemon juice if the chicken tastes flat.
Step 2: Assemble the Wraps
Lay one tortilla on a clean work surface. Spoon about ½ cup of the chicken mixture onto the lower third of the tortilla, spreading it into a 4-inch log shape. Sprinkle about ¼ cup mozzarella and 2 tablespoons Parmesan on top. Fold the two sides over the filling, then roll from the bottom up, tucking tightly as you go. Repeat with remaining tortillas.
⚠️ Common Mistake to Avoid: Don’t overstuff! If the wrap bulges, the cheese will leak. Use a kitchen scale for even portions: ½ cup chicken mixture and ¼ cup total cheese per wrap is perfect.
Step 3: Sear to Perfection
Place a large non-stick or cast iron skillet over medium heat. Add 1½ tablespoons of the butter (save the rest for the second batch). Once the butter melts and starts to sizzle (but not brown), place the wraps seam-side down in the skillet. Cook for 2–3 minutes, until the seam is golden and sealed. Carefully flip with a spatula and cook the other side for another 2–3 minutes, until the tortilla is deeply golden and the cheese inside is melted. Repeat with the remaining butter and wraps.
💡 mia’s Pro Tip: If you’re making a big batch, keep the finished wraps warm on a baking sheet in a 200°F oven while you finish the rest. They’ll stay crisp for up to 20 minutes.
Step 4: Slice and Serve
Let the wraps rest on a cutting board for 1 minute (this lets the cheese set so it doesn’t all ooze out when cut). Slice each wrap diagonally in half or into three pinwheels if serving as appetizers. Serve immediately with your favorite dips.
⚠️ Common Mistake to Avoid: Cutting too soon will cause a cheese explosion! Give it that minute of rest — trust me, it makes a difference.
| Step | Action | Duration | Key Visual Cue |
|---|---|---|---|
| 1 | Mix filling | 5 minutes | Coated, not soupy |
| 2 | Assemble wraps | 5 minutes | Tight log, ends tucked |
| 3 | Sear seam-side down | 2–3 minutes per side | Golden brown, cheese starting to bubble at ends |
| 4 | Rest and slice | 1 minute rest | Cheese set, cut cleanly |
Serving & Presentation
I love serving these wraps straight from the skillet, cut on the bias, with a little pile of crunchy iceberg lettuce and a bowl of sour cream mixed with hot sauce on the side. The contrast of warm, melty wrap and cool, crisp lettuce is pure comfort. My Moroccan heritage also whispers to me to add a sprinkle of za’atar on the plate — it’s a touch I picked up from my mother’s spice bazaar days in Marrakech, and it works beautifully with the garlic and cheese.
For a full dinner, pair these wraps with a simple tomato salad dressed with olive oil and red wine vinegar, or a bowl of roasted sweet potato wedges. In New York, I often grab a tub of fresh salsa verde from the Lower East Side deli and use it as a dip — it cuts through the richness perfectly.
| Pairing Type | Suggestions | Why It Works |
|---|---|---|
| Side Dish | Simple green salad, roasted broccoli, or black beans | Freshness balances the richness; beans add fiber |
| Sauce / Dip | Sour cream, ranch dressing, or spicy sriracha mayo | Coolness contrasts the warm, buttery wrap; spice adds kick |
| Beverage | Iced tea, a crisp lager, or a sparkling lemonade | Refreshing palate cleansers; the beer cuts through fat |
| Garnish | Chopped cilantro, pickled jalapeños, or a sprinkle of za’atar | Brightens the flavor; za’atar adds an earthy, tangy note |
Make-Ahead, Storage & Reheating
Living in New York, I meal-prep like a pro. These wraps are fantastic made ahead and stored — they reheat beautifully in a skillet or air fryer, staying crisp rather than steaming up. Just don’t freeze them assembled; the texture of the tortilla suffers.
| Method | Container | Duration | Reheating Tip |
|---|---|---|---|
| Refrigerator | Airtight container with paper towel (to absorb moisture) | Up to 3 days | Reheat in a dry skillet over medium-low, 2–3 min per side |
| Freezer | Wrap individually in foil, then place in freezer bag | Up to 2 months | Thaw overnight in fridge; reheat in air fryer at 350°F for 5 min |
| Make-Ahead | Assemble wraps, keep uncooked in fridge | Up to 8 hours in advance | Cook straight from fridge, add 1 extra minute per side |
For the crispiest reheat, I avoid the microwave — it makes the tortilla rubbery. Instead, give the wraps a quick toast in a dry non-stick pan (no extra butter needed) or air fry at 350°F for 4–5 minutes. The cheese will re-melt and the outside will be just as crunchy as the first day.
Variations & Easy Swaps
| Variation | Key Change | Best For | Difficulty Impact |
|---|---|---|---|
| Moroccan Spiced | Add 1 tsp ras el hanout, ½ tsp cumin, and a handful of golden raisins to the chicken | Sweet-savory twist, great for lunch | Easy (just add spices) |
| Gluten-Free / Dairy-Free | Use gluten-free tortillas, dairy-free mozzarella (e.g., Miyoko’s), and omit Parmesan or use vegan Parm | Dietary restrictions | Easy (tortillas need careful handling) |
| Buffalo Chicken | Replace 2 tbsp mayo with hot sauce and add 1 tbsp melted butter to the chicken mixture | Spicy lovers, game day | Easy |
Moroccan Spiced Version
If you want to take a little trip to my homeland, add a teaspoon of ras el hanout (a North African spice blend available at most Middle Eastern grocery stores) and a pinch of cumin to the chicken mixture. Toss in a handful of golden raisins for sweetness. The warm spices echo the garlic and cheese beautifully, and the raisins burst with juice when you bite into them. It’s a variation I often make when the autumn leaves start falling in Central Park.
Gluten-Free & Dairy-Free Version
For my friends with sensitivities, I’ve tested this with both gluten-free tortillas (look for a blend with tapioca and rice flour — they hold up better) and dairy-free mozzarella shreds. Miyoko’s brand melts the most convincingly, though it won’t stretch quite like dairy cheese. Omit the Parmesan or use a vegan alternative. The wraps will still be delicious, just slightly less decadent. I serve them with a side of creamy cashew dip.
Buffalo Chicken Twist
When I’m craving something spicy, I swap out half the mayonnaise for Frank’s RedHot and stir in a tablespoon of melted butter to the chicken mix. The result is a buffalo chicken wrap with all the cheesy goodness. Use blue cheese crumbles instead of Parmesan for an even bolder flavor. This version is a hit at every Super Bowl party I host — it disappears off the platter.
How do you keep cheesy garlic chicken wraps from getting soggy?
The key is controlling moisture in the filling and using the right cooking technique. First, avoid adding any watery vegetables like raw tomatoes or wet bell peppers directly into the chicken mixture — if you add veggies, sauté them first to remove excess liquid. Second, use mayonnaise instead of a watery sauce like cream cheese or sour cream; mayonnaise is oil-based and won’t soak into the tortilla. Third, cook the wraps seam-side down in butter over medium heat; the butter creates a barrier that seals the tortilla and prevents the filling from making the underside soggy. Finally, let the wraps rest for a minute after cooking so the cheese sets before slicing.
What type of cheese melts best for cheesy garlic chicken wraps?
For the perfect melt, I recommend a combination of low-moisture part-skim mozzarella and freshly grated Parmesan. Mozzarella gives you that classic stretchy, ooey-gooey texture, while Parmesan adds a salty, nutty depth that balances the garlic. Avoid fresh mozzarella (the kind packed in water) because it releases too much moisture during cooking, making the tortilla soggy. Other great melting cheeses include provolone, Monterey Jack, or even a mild cheddar. If you want extra creaminess, a slice of American cheese in the middle works wonders — it melts like a dream.
Can I use pre-cooked chicken for cheesy garlic chicken wraps?
Absolutely! Pre-cooked chicken is a time-saver and works beautifully in this recipe. The best options are shredded rotisserie chicken (discard the skin and use both white and dark meat for flavor) or leftover grilled chicken that you chop or shred. If you’re using plain cooked chicken breast, make sure it’s not dry — add an extra tablespoon of mayonnaise or a splash of chicken broth to the mixture. Avoid canned chicken; its texture is too mushy and it lacks the firm shreds you want in a wrap. Just be sure to season the chicken well since plain pre-cooked meat can be bland.
How long should you cook cheesy garlic chicken wraps in the air fryer?
Air frying these wraps is a fantastic option for extra crispiness without standing over a skillet. Preheat your air fryer to 370°F. Place the assembled wraps seam-side down in a single layer (you may need to work in batches). Lightly spray or brush the tops with a little oil or melted butter so they brown evenly. Cook for 5 minutes, then carefully flip with tongs and cook for another 4–5 minutes, until the tortilla is golden and the cheese is melted. The exact time depends on your air fryer model, so check at the 4-minute mark. Let them rest for 1 minute before cutting.
Can I make cheesy garlic chicken wraps ahead of time?
Yes! You can prepare the chicken filling up to 2 days in advance and store it in an airtight container in the refrigerator. For the best texture, assemble the wraps just before cooking — the tortillas can become slightly damp if they sit with the filling too long. However, if you want to prep the entire meal, assemble the wraps, wrap each one tightly in plastic wrap, and refrigerate for up to 8 hours. When ready to cook, remove the plastic wrap and cook as directed, adding an extra minute per side. Do not freeze assembled wraps; freezing ruins the tortilla texture.
What dipping sauce goes best with cheesy garlic chicken wraps?
These wraps are incredibly versatile when it comes to dips. My personal favorite is a simple sour cream and chive dip — just mix sour cream with chopped fresh chives, a pinch of salt, and a squeeze of lemon. Ranch dressing is also a classic pairing that echoes the garlic and cheese flavors. For a spicy kick, try a sriracha mayonnaise (2 parts mayo to 1 part sriracha) or a chipotle crema made with canned chipotles in adobo. If you want something tangy, a green salsa verde or even a balsamic glaze drizzled on the plate works surprisingly well.
Can I use corn tortillas instead of flour tortillas?
You can, but the result will be quite different. Corn tortillas are smaller and more rigid; they tend to crack when rolled tightly, especially if they are not warmed first. To use them, warm each tortilla in a dry skillet for about 30 seconds per side until pliable, then fill and roll as directed. The cooking time will be shorter — about 1–2 minutes per side — because corn tortillas brown faster. The flavor will be earthier and more rustic, which pairs nicely with the garlic. However, flour tortillas are the traditional choice for a reason: they provide the soft, chewy wrap that holds the filling together perfectly.
How do I prevent the cheese from leaking out while cooking?
Cheese leakage is usually caused by overfilling or not sealing the wrap properly. First, use the correct amount of filling — about ½ cup of chicken mixture and ¼ cup of cheese per large burrito-size tortilla. Second, fold the sides of the tortilla over the filling before rolling, and tuck them in tightly. Third, when you place the wrap in the skillet, always start with the seam side down. The heat melts the cheese, which then glues the seam shut as the tortilla browns. If a little cheese does escape, don’t panic — it will create a crispy cheese lacy edge that is delicious to snack on.
Can I add vegetables to the filling?
Absolutely — vegetables add color, crunch, and nutrition. The best options are diced bell peppers (any color), finely chopped spinach, or sautéed mushrooms. To keep the wraps from becoming soggy, I recommend pre-cooking any watery vegetables. Sauté diced bell peppers in a little oil for 3 minutes until they soften and release their moisture; let them cool before adding to the chicken mixture. For spinach, wilt it in the microwave for 30 seconds, then squeeze out every drop of water with a paper towel. Adding up to ½ cup of prepared vegetables per wrap works beautifully without compromising the texture.
What’s the best way to reheat leftover cheesy garlic chicken wraps?
The microwave is convenient but will turn your tortilla rubbery and soft. For the crispiest results, use a dry skillet over medium-low heat. Place the wrap in the skillet, cover loosely with a lid, and cook for 2–3 minutes per side until heated through and the crust is re-crisped. Alternatively, an air fryer at 350°F for 4–5 minutes works perfectly. If you must use the microwave, wrap the wrap in a paper towel and microwave on high for 30 seconds, then immediately toast it in a toaster oven or dry pan for 1 minute to restore some crunch. Do not reheat in a microwave more than once.
Share Your Version!
I truly hope you love these Cheesy Garlic Chicken Wraps as much as I do. There’s something so satisfying about creating a warm, cheesy meal that comes together in 25 minutes — it’s the kind of dinner that makes a busy weekday feel like a little celebration. If you try this recipe, please leave a star rating and a comment below. I read every single one and I love hearing about your tweaks — especially if you try the Moroccan spiced version with ras el hanout!
Snap a photo of your golden wraps and tag me on Instagram @exorecipes or share it on Pinterest. I’d be thrilled to see your creation. And if you have any burning questions about the technique or ingredients, drop them in the comments — I answer every question myself. From my NYC kitchen to yours — I hope this recipe brings as much warmth to your table as it does to mine. — mia 🧡
Love This Recipe? Save It to Pinterest!
If you enjoyed this Cheesy Garlic Chicken Wraps recipe, don’t let it get lost in your browser tabs! 😄 Pin it now so you can find it again anytime — and explore hundreds more tried-and-tested recipes waiting for you on my Pinterest boards.
👉 Follow mia on Pinterest @chefrecipes2
📌 Pin this recipe · 🔁 Re-pin your favorites · 💬 Tag me when you make it — I love seeing your creations!
🍳 What’s your go-to weeknight wrap filling?
Drop your favorite combo in the comments — I’m always looking for new ideas to test in my NYC kitchen!
Cheesy Garlic Chicken Wraps
- Prep Time: 15 minutes
- Cook Time: 10 minutes
- Total Time: 25 minutes
- Yield: 4 1x
- Method: Main Course
- Cuisine: American
Description
These Cheesy Garlic Chicken Wraps are a quick and easy dinner option, packed with flavor from garlic, melted cheese, and tender chicken, all wrapped in a warm tortilla. Perfect for busy weeknights!
Ingredients
- 2 large boneless, skinless chicken breasts, cooked and shredded
- 4 large flour tortillas
- 1 cup shredded mozzarella cheese
- 1/2 cup grated Parmesan cheese
- 4 cloves garlic, minced
- 3 tablespoons butter
- 1/4 cup mayonnaise
- 1 teaspoon dried parsley
- 1/2 teaspoon salt
- 1/4 teaspoon black pepper
Instructions
- 1. In a small bowl, mix together the shredded chicken, mayonnaise, minced garlic, parsley, salt, and pepper.
- 2. Lay out the tortillas and divide the chicken mixture evenly among them, spreading it over the bottom half of each tortilla.
- 3. Sprinkle equal amounts of mozzarella and Parmesan cheese over the chicken mixture.
- 4. Fold in the sides of each tortilla, then roll up tightly from the bottom to enclose the filling.
- 5. In a large skillet over medium heat, melt the butter. Place the wraps seam-side down in the skillet.
- 6. Cook for 2-3 minutes per side, until golden brown and the cheese is melted.
- 7. Remove from skillet, let cool slightly, then slice in half and serve.
Notes
For extra flavor, you can add diced bell peppers or spinach to the filling. Serve with sour cream or ranch dressing for dipping.
Nutrition
- Calories: 520
- Sugar: 3g
- Fat: 28g
- Carbohydrates: 30g
- Protein: 35g
Tried This Recipe? Leave a Comment!
Did you make this recipe? I’d love to hear how it turned out! Please leave a comment and a rating below. Your feedback helps other home cooks and supports cheerychop.com!
For more delicious inspiration, follow me on Pinterest!
