Table of Contents
Cheesy Beef Hoagie Sandwiches with Creamy Mushroom Sauce – A 30-Min Comfort Food Classic with a French-Infused Sauce
I still remember the first time I made a creamy mushroom sauce in my Paris culinary school kitchen — the instructor, a stern Lyonnaise chef with a gold-toothed smile, told me the secret was patience with the roux and a good beef broth. Back then I never imagined I’d be spooning that same velvety sauce over a cheesy beef hoagie sandwich in my New York City apartment, but that’s exactly what this recipe is: a beautiful marriage of French technique and American comfort food. These Cheesy Beef Hoagie Sandwiches with Creamy Mushroom Sauce are the weeknight hero I turn to when I want something deeply satisfying without spending hours in the kitchen. The creamy mushroom sauce recipe is the star here — it’s luscious, savory, and coats every bite of seasoned ground beef and melted provolone.
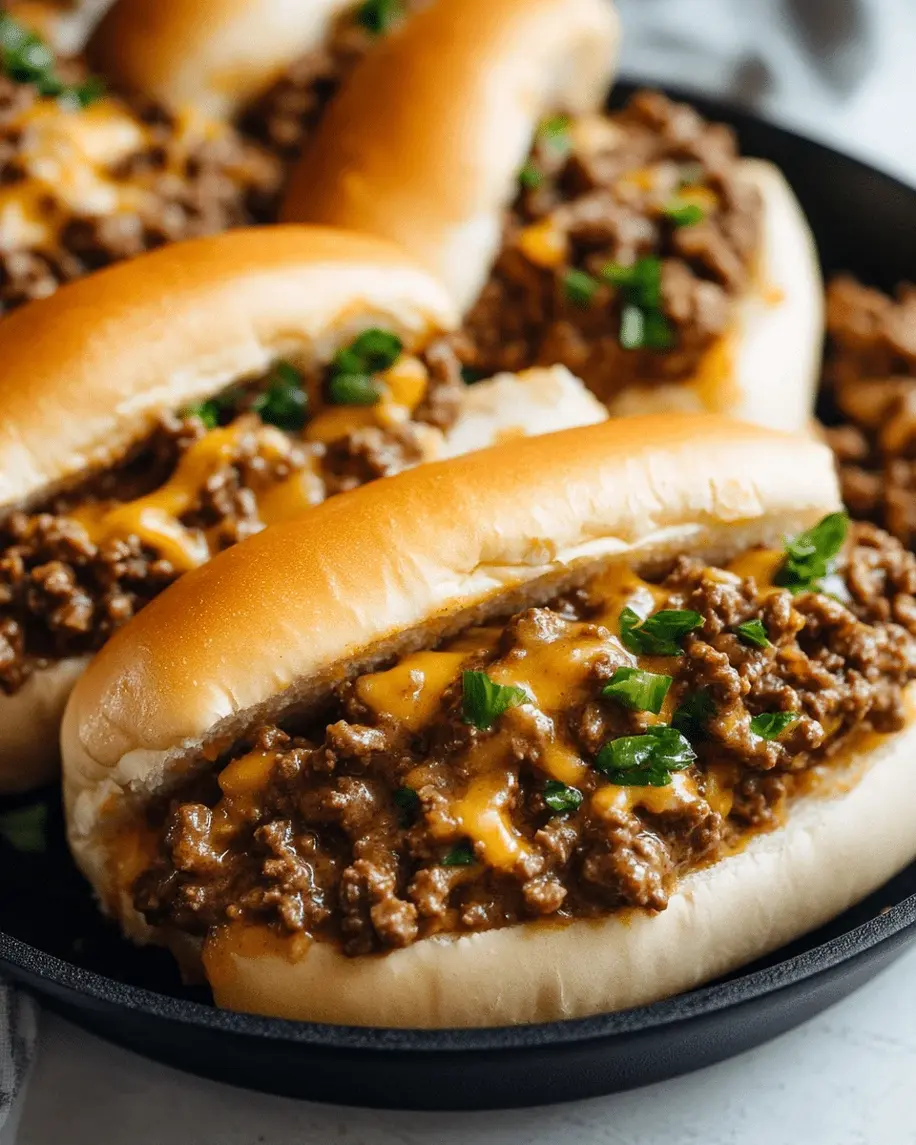
Imagine this: a toasted hoagie roll cradling juicy seasoned beef, each forkful releasing the earthy aroma of sautéed mushrooms mingling with a silky, roux-thickened cream sauce. The first bite gives you a gentle crunch from the roll, followed by the richness of melted provolone stretching as you pull the sandwich apart. The sauce is what makes this unforgettable — it’s not gloopy or heavy, but rather smooth and luxurious with a subtle tang from Worcestershire sauce and a deep umami backbone from the beef broth. This is the kind of meal that makes you close your eyes for a second and just savor it. My mother back in Morocco would have called it mzyan — good, satisfying, made with heart.
What makes my version different is that I use a classic French roux technique to build the creamy mushroom sauce, something I learned during my pastry and sauce training in Paris. Most home cooks skip this step and end up with a thin, watery sauce — but not us. I’ll show you exactly how to whisk the flour and butter together until it’s fragrant and golden before slowly adding your broth and cream. This guarantees a silky, stable sauce that clings to every piece of beef and never breaks. 💡 mia’s Pro Tip: Don’t rush the roux — cooking it for a full minute removes the raw flour taste and gives you that restaurant-quality finish. And one common mistake I see? Adding all the liquid at once, which creates lumps. Slow and steady wins the sauce race every time.
Why This Cheesy Beef Hoagie Sandwiches Recipe Is the Best
The Flavor Secret. The magic starts with the creamy mushroom sauce — a classic French béchamel-inspired sauce made with butter, flour, beef broth, and heavy cream, then punched up with Worcestershire sauce and plenty of sautéed mushrooms. This isn’t just a sauce; it’s the foundation of the entire sandwich. Every spoonful brings together the earthy depth of mushrooms with the savory richness of beef, all tied together by a velvety texture that only a properly made roux can deliver. Growing up, my mother would make a similar mushroom sauce for special occasions, though she used lamb and Moroccan spices. This American-style beef hoagie sandwich is my tribute to both worlds.
Perfected Texture. I tested this recipe seven times to get the texture just right. The ground beef is browned until deeply caramelized (not steamed), the mushrooms are cooked until they release their liquid and start to brown, and the sauce is thickened to a perfect nappe consistency — meaning it coats the back of a spoon without being pasty. The provolone or mozzarella on top gets bubbly and golden under the broiler in just two to three minutes. You get a crunchy exterior, a soft interior, a creamy sauce layer, and a stretchy cheese pull. It’s a textural symphony that makes every bite exciting.
Foolproof & Fast. From start to finish, these Cheesy Beef Hoagie Sandwiches are on the table in 30 minutes. The steps are straightforward: brown the beef, sauté the veggies, build the sauce, assemble, and broil. There’s no marinating, no complicated techniques, and no specialty equipment. Whether you’re a beginner cook or a seasoned home chef, this recipe delivers consistently. I’ve made it on busy weeknights when I have exactly half an hour between Zoom calls, and I’ve made it for weekend gatherings where everyone wants a hearty, crowd-pleasing meal. It works every single time.
Cheesy Beef Hoagie Sandwiches Ingredients
I love sourcing my ingredients from the Union Square Greenmarket in NYC when I can — the mushrooms there are incredible, especially the creminis from the small organic farms upstate. But this recipe is designed to work beautifully with standard grocery store ingredients, too. Here’s everything you’ll need for the best beef hoagie sandwich experience.
Ingredients List
- 1 lb ground beef (80/20 recommended for best flavor)
- 1 tbsp olive oil
- 1 medium onion, diced
- 2 cloves garlic, minced
- 8 oz mushrooms, sliced (cremini or white button)
- 2 tbsp butter
- 2 tbsp all-purpose flour
- 1 cup beef broth (low-sodium preferred)
- 1/2 cup heavy cream
- 1 tsp Worcestershire sauce
- Salt and pepper to taste
- 4 hoagie rolls (or 6-inch sub rolls)
- 1 1/2 cups shredded provolone or mozzarella cheese
Ingredient Spotlight
Ground Beef (80/20): I recommend using ground beef with 20% fat content because it yields juicier results. The fat renders during browning, creating a fond (those browned bits on the pan) that adds incredible depth to the sauce. If you use leaner beef (like 93/7), consider adding a splash of olive oil when you build the sauce to compensate for the lack of richness. Ground turkey or chicken work too, but the flavor will be milder.
Mushrooms (cremini or white button): Cremini mushrooms are my go-to because they have a deeper, earthier flavor than white button mushrooms and hold their texture beautifully when cooked. Look for mushrooms that are firm, dry, and free of slime. Wipe them clean with a damp paper towel instead of rinsing — mushrooms are like little sponges and soaking them makes them soggy. One tested substitution: use shiitake mushrooms for a more intense umami punch, though they’re pricier.
Provolone or Mozzarella Cheese: Provolone brings a mild tanginess that cuts through the richness of the sauce and beef, while mozzarella gives you that iconic stretchy, gooey pull. Both melt beautifully under the broiler. For a sharper flavor, try smoked provolone or aged cheddar. If you’re dairy-free, dairy-free mozzarella shreds work surprisingly well — just broil a minute longer and watch closely.
Heavy Cream: This is what gives the sauce its luxurious, velvety texture. I don’t recommend substituting with milk or half-and-half because the sauce won’t thicken properly and may curdle. If you need a lighter version, you can use canned evaporated milk (not sweetened condensed) — it has a similar viscosity and won’t break as easily.
| Original Ingredient | Best Substitution | Flavor / Texture Impact |
|---|---|---|
| Ground beef (80/20) | Ground turkey or chicken | Milder flavor, less juicy; add 1 tbsp olive oil to compensate |
| Cremini mushrooms | Shiitake or portobello | More intense umami; shiitakes are pricier, portobellos need de-stemming |
| Provolone cheese | Smoked provolone or aged cheddar | Sharper, smokier flavor; cheddar melts differently — use medium cheddar |
| Heavy cream | Canned evaporated milk | Slightly less rich, still creamy; avoid milk or half-and-half (may curdle) |
| Hoagie rolls | Ciabatta or French bread | Chewier texture; ciabatta holds up very well to the saucy filling |
How to Make Cheesy Beef Hoagie Sandwiches — Step-by-Step
I’ll walk you through each step as if we’re cooking side by side in my NYC kitchen. Trust the process, and don’t skip the roux — it’s the key to a creamy mushroom sauce that will make you never want the jarred stuff again.
Step 1: Brown the Beef
Heat a large skillet over medium-high heat. Add the ground beef and cook, breaking it apart with a wooden spoon, until deeply browned and crumbled. This takes about 5-6 minutes. Don’t rush — you want real browning, not just gray meat. Drain excess fat, leaving about 1 tablespoon in the pan for flavor, then transfer the beef to a plate and set aside.
💡 mia’s Pro Tip: Let the beef sit undisturbed for 60 seconds before you start breaking it apart. This gives you those gorgeous caramelized brown bits that are pure flavor gold.
Step 2: Sauté the Aromatics and Mushrooms
In the same skillet, add the olive oil and heat over medium. Add the diced onion and garlic and sauté for about 3 minutes, until softened and fragrant. Add the sliced mushrooms and cook for 4-5 minutes, stirring occasionally, until they’ve released their liquid and started to turn golden brown. Season lightly with salt and pepper halfway through.
⚠️ Common Mistake to Avoid: Don’t overcrowd the mushrooms! If your skillet is too full, they’ll steam instead of brown. Use a large skillet so the mushrooms have room to breathe.
Step 3: Build the Creamy Mushroom Sauce
Reduce the heat to medium and add the butter to the skillet. Once it’s melted and bubbling, whisk in the flour and cook for a full 1 minute, stirring constantly. This is the roux — it should smell nutty and look like wet sand. Slowly whisk in the beef broth, pouring in a thin, steady stream while whisking continuously. Then whisk in the heavy cream the same way. Keep stirring until the sauce is smooth and thickened, about 2 minutes. Add the Worcestershire sauce, salt, and pepper.
💡 mia’s Pro Tip: Use a flat-bottomed whisk if you have one — it gets into the corners of the skillet and prevents lumps. If you see any lumps form, switch to a silicone spatula and press them against the side of the pan to smooth them out.
Step 4: Combine and Simmer
Return the browned beef to the skillet, stirring it into the sauce until everything is well coated. Let it simmer gently for 2-3 minutes, allowing the flavors to meld together. Taste and adjust seasoning — you might want an extra dash of Worcestershire or a pinch of salt. The sauce should be thick enough to coat the meat without being pasty.
⚠️ Common Mistake to Avoid: Don’t let the sauce boil vigorously after adding the cream — it can cause the cream to separate. Keep it at a gentle simmer (small bubbles around the edge of the pan).
Step 5: Assemble and Broil
Preheat your broiler to high. Open the hoagie rolls and place them cut-side up on a baking sheet. Spoon the beef and mushroom mixture generously onto each roll, dividing it evenly. Top each with about 1/3 cup of shredded provolone or mozzarella. Broil for 2-3 minutes, watching carefully, until the cheese is melted and bubbly with golden spots. Serve immediately while the cheese is still stretchy.
💡 mia’s Pro Tip: If you want extra-crispy rolls, toast them under the broiler for 1 minute before adding the filling. Just keep an eye on them — broilers are fast and unforgiving!
| Step | Action | Duration | Key Visual Cue |
|---|---|---|---|
| 1 | Brown the beef | 5-6 min | Deep golden brown crumbles, fond on pan |
| 2 | Sauté aromatics and mushrooms | 7-8 min | Onions translucent, mushrooms golden with reduced liquid |
| 3 | Build the creamy mushroom sauce | 3-4 min | Roux is nutty-smelling, sauce coats spoon |
| 4 | Combine and simmer | 2-3 min | Sauce evenly coats beef, gentle bubbles |
| 5 | Assemble and broil | 2-3 min | Cheese melted, bubbly, golden spots |
Serving & Presentation
These Cheesy Beef Hoagie Sandwiches are a complete meal on their own, but I love serving them with a crisp side salad dressed with a simple lemon vinaigrette to cut through the richness. In my NYC apartment, I often pair them with sweet potato fries tossed in smoked paprika and sea salt — the sweetness balances the savory sauce beautifully. If I’m feeling nostalgic for my Paris days, I’ll add a small pile of cornichons and some whole-grain mustard on the side, which gives every bite a bright, acidic pop.
For a beautiful presentation, arrange the hoagies on a wooden board or platter with the cut sides facing up so everyone can see that glorious cheesy top. Sprinkle a little fresh chopped parsley or chives over the melted cheese for color and freshness. I also like to serve the extra creamy mushroom sauce in a small ramekin on the side for dipping — because who doesn’t want more of that sauce? This is the kind of meal that makes guests hover around the kitchen island, grabbing sandwiches straight off the baking sheet before they even hit the table.
| Pairing Type | Suggestions | Why It Works |
|---|---|---|
| Side Dish | Sweet potato fries, crunchy slaw, or a simple green salad with lemon vinaigrette | Acid and crunch balance the rich, creamy filling |
| Sauce / Dip | Extra creamy mushroom sauce, chipotle mayo, or garlic aioli | Adds moisture and another layer of flavor |
| Beverage | Crisp lager, iced tea with lemon, or a dark porter | Beer cuts richness; tea adds refreshing contrast |
| Garnish | Fresh parsley, chives, pickled jalapeños, or cornichons | Brightens the plate and adds acidity for balance |
Make-Ahead, Storage & Reheating
Living in NYC means my schedule is always full, so I’m a big fan of cooking components ahead of time. The beef and mushroom filling can be made up to three days in advance and refrigerated, which makes weeknight dinner assembly a breeze. I’ll often double the recipe on a Sunday and use the extra filling for stuffed baked potatoes or over pasta later in the week.
| Method | Container | Duration | Reheating Tip |
|---|---|---|---|
| Refrigerator | Airtight container | Up to 3 days | Reheat filling in a skillet over medium-low with a splash of broth to loosen |
| Freezer | Freezer-safe bag or container | Up to 2 months | Thaw overnight in fridge, reheat as above; sauce may thicken — add broth |
| Make-Ahead | Filling in fridge, rolls at room temp | Up to 3 days in advance | Assemble and broil just before serving for best texture |
When reheating, I always use a skillet over medium-low heat rather than the microwave. Add a tablespoon of beef broth or water to the filling and stir gently until warmed through — this revives the sauce’s silky texture. For the assembled sandwiches, the broiler is your best friend: place them on a baking sheet and broil for 1-2 minutes until the cheese is melty and the rolls are crisp. Avoid the oven for too long, as the rolls can dry out. One thing I’ve learned from my busy NYC life: if you’re meal-prepping, store the filling and rolls separately and assemble only when ready to eat. It takes five extra minutes and makes a world of difference in quality.
Variations & Easy Swaps
| Variation | Key Change | Best For | Difficulty Impact |
|---|---|---|---|
| Moroccan-Spiced | Add cumin, paprika, cinnamon to beef; swap Worcestershire for harissa | Adventurous palates, North African flavor lovers | Easy (adds 2 ingredients) |
| Gluten-Free / Dairy-Free | Gluten-free rolls, dairy-free cheese, use GF flour in roux | Those with dietary restrictions | Easy (simple swaps) |
| Spicy Jalapeño Popper | Add diced jalapeños and cream cheese to sauce; use pepper jack | Heat seekers, game-day crowds | Easy (adds 2 ingredients) |
Moroccan-Spiced Beef Hoagie
This one is very close to my heart. Inspired by the Sunday tagines my mother would make in our kitchen in Morocco, I add 1 teaspoon of ground cumin, 1/2 teaspoon of sweet paprika, and a pinch of cinnamon to the beef while it browns. Swap the Worcestershire sauce for a teaspoon of harissa paste (or more if you like heat) stirred into the sauce. The warm spices add a fragrant, slightly sweet depth that pairs beautifully with the creamy mushroom sauce. Top with fresh cilantro instead of parsley for an authentic touch. This variation transports me straight back to Marrakech — in the best way possible.
Gluten-Free / Dairy-Free Version
I’ve tested this version for friends with dietary restrictions and it works beautifully. Use a 1:1 gluten-free all-purpose flour blend (like Bob’s Red Mill) for the roux — it thickens just as well. For the hoagie rolls, choose sturdy gluten-free sub rolls or even gluten-free ciabatta. Use your favorite dairy-free cheese shreds (I like Follow Your Heart or Violife for melting) and swap the heavy cream for full-fat canned coconut cream (the thick part from a can of full-fat coconut milk). The sauce will have a subtle coconut background note that actually complements the mushrooms really well. Broil time may need an extra minute — watch closely.
Spicy Jalapeño Popper Twist
For a fun, crowd-pleasing twist that screams game day, add 2 tablespoons of cream cheese to the sauce after it thickens and stir until smooth. Dice 1-2 jalapeños (seeds removed for less heat, or kept for more fire) and stir them into the filling. Use pepper jack cheese instead of provolone for an extra layer of spicy, creamy goodness. Top with crushed tortilla chips for crunch if you’re feeling extra. This version is a monster — in the best way — and always disappears first at parties. I brought it to a Super Bowl gathering in Brooklyn last year and got three recipe requests before halftime.
What is the best type of cheese to use for Cheesy Beef Hoagie Sandwiches?
For Cheesy Beef Hoagie Sandwiches, provolone is my top choice because it melts beautifully and has a mild, slightly tangy flavor that complements the rich creamy mushroom sauce without overwhelming it. Mozzarella is a close second — it gives you that iconic stretchy pull that makes every bite fun and satisfying. If you want a sharper flavor, try smoked provolone, aged cheddar, or even a mix of provolone and fontina. I don’t recommend using pre-shredded cheese from a bag if you can avoid it, because they contain anti-caking agents that prevent smooth melting. Grate your own cheese fresh for the best texture and flavor every time.
How do you make the creamy mushroom sauce from scratch for these sandwiches?
Making creamy mushroom sauce from scratch is simpler than you think and takes just about 10 minutes. Start by sautéing mushrooms, onion, and garlic in butter until golden and tender. Sprinkle in all-purpose flour and cook for a full minute — this is the roux that gives the sauce body and prevents a raw flour taste. Slowly whisk in beef broth and heavy cream in a steady stream, stirring continuously to avoid lumps. Let it simmer for 2-3 minutes until thickened, then season with Worcestershire sauce, salt, and pepper. The keys to success are: cook the flour thoroughly, add liquids slowly, and don’t let the cream boil once it’s in. This method produces a velvety, restaurant-quality sauce every single time.
Can I prepare Cheesy Beef Hoagie Sandwiches ahead of time and reheat them?
Yes, you can absolutely prepare components of Cheesy Beef Hoagie Sandwiches ahead of time, and I often do this for busy weeknights. The beef and mushroom filling can be cooked up to 3 days in advance and stored in an airtight container in the refrigerator. When you’re ready to eat, simply reheat the filling in a skillet over medium-low heat with a splash of beef broth to restore its creamy consistency. Assemble the sandwiches on fresh hoagie rolls, top with cheese, and broil for 2-3 minutes until bubbly. I don’t recommend fully assembling and refrigerating the sandwiches, as the bread will become soggy. For best results, store the filling and rolls separately and assemble just before broiling.
What can I substitute for the hoagie rolls in this recipe?
If you don’t have hoagie rolls, there are several excellent substitutes that work beautifully with this beef and mushroom filling. Ciabatta rolls are my top pick — they have a sturdy, chewy texture that holds up well to the saucy filling without getting soggy. French bread or Italian bread cut into individual portions also works great. For a lower-carb option, you can serve the filling over a baked potato, rice, or even pasta. Gluten-free sub rolls or gluten-free ciabatta are perfect if you need a gluten-free option. I’ve also used large brioche buns in a pinch — they’re softer but the buttery richness pairs nicely with the creamy mushroom sauce. Whatever you choose, make sure the bread is substantial enough to hold the filling without falling apart.
Can I use ground turkey instead of beef for this sandwich recipe?
Absolutely, ground turkey works wonderfully as a substitute for ground beef in this Cheesy Beef Hoagie Sandwich recipe. Because turkey is leaner than 80/20 ground beef (which I typically recommend for its juiciness), you’ll want to add 1 tablespoon of olive oil to the skillet when you start browning the turkey to prevent it from drying out. The flavor will be milder than beef, so consider adding a pinch of smoked paprika or an extra dash of Worcestershire sauce to boost the savory notes. Ground chicken is another excellent option. The creamy mushroom sauce is forgiving enough to work with any ground protein, so feel free to experiment based on what you have on hand.
What side dishes go well with Cheesy Beef Hoagie Sandwiches?
Cheesy Beef Hoagie Sandwiches are hearty enough to stand alone, but the right side dish can elevate the whole meal. I love serving them with crispy sweet potato fries tossed in smoked paprika and sea salt — the sweetness balances the savory, creamy filling perfectly. A crunchy coleslaw with a tangy vinegar-based dressing adds acidity and texture that cuts through the richness. For a lighter option, a simple green salad with lemon vinaigrette works beautifully. If you’re feeding a crowd, add a platter of pickle spears, potato chips, and maybe a bowl of extra creamy mushroom sauce for dipping. In my NYC apartment, I often go with sweet potato fries and a handful of cornichons — it’s simple, satisfying, and always hits the spot.
How can I make the creamy mushroom sauce thicker or thinner?
The consistency of the creamy mushroom sauce is completely adjustable based on your preference. For a thicker sauce, let the roux (butter and flour mixture) cook for an extra 30-60 seconds before adding the liquid, and use a bit less broth or cream — reduce the liquid by about 2 tablespoons. You can also let the finished sauce simmer uncovered for a few extra minutes to allow more moisture to evaporate. For a thinner sauce, simply whisk in additional beef broth or cream a tablespoon at a time until you reach the desired consistency. Remember that the sauce will also thicken slightly as it sits, so if you’re making it ahead, you may need to thin it with a splash of broth when reheating. The key is to adjust gradually and whisk constantly for a smooth result.
Can I freeze the beef and mushroom filling for later use?
Yes, the beef and mushroom filling freezes exceptionally well, making it a fantastic option for meal prep. Allow the filling to cool completely, then transfer it to a freezer-safe container or heavy-duty zip-top bag. It will keep for up to 2 months in the freezer. When you’re ready to use it, thaw the filling overnight in the refrigerator. Reheat it gently in a skillet over medium-low heat, adding a splash of beef broth or water to loosen the sauce back to its original silky consistency. I recommend freezing the filling without the rolls and cheese — those are best added fresh when you assemble the sandwiches. This approach gives you a homemade dinner in under 10 minutes on a busy weeknight.
Share Your Version!
I absolutely love hearing how this recipe turns out in your kitchen. Did you try the Moroccan-spiced version with a touch of cinnamon and harissa? Or did you go full-on indulgent with the spicy jalapeño popper twist? Drop a comment below and let me know which variation was your favorite — or if you came up with your own spin! Your star rating means the world to me and helps other home cooks find this recipe too.
Don’t forget to snap a photo of your Cheesy Beef Hoagie Sandwiches and tag me on Instagram or Pinterest @exorecipe — I love seeing your creations and sharing them with our community. What’s the one ingredient you’d add to make this sandwich your own? I’m genuinely curious and I read every single comment. From my NYC kitchen to yours — I hope this recipe brings as much warmth to your table as it does to mine. — mia 🧡
Love This Recipe? Save It to Pinterest!
If you enjoyed this Cheesy Beef Hoagie Sandwiches with Creamy Mushroom Sauce recipe, don’t let it get lost in your browser tabs! 😄 Pin it now so you can find it again anytime — and explore hundreds more tried-and-tested recipes waiting for you on my Pinterest boards.
👉 Follow mia on Pinterest @exorecipe
📌 Pin this recipe · 🔁 Re-pin your favorites · 💬 Tag me when you make it — I love seeing your creations!
Made this recipe? Let me know! ⭐ Drop a star rating in the comments — your feedback helps other home cooks find their next favorite meal. What’s one thing you’d add or change? I read every reply. — mia 🧡

Cheesy Beef Hoagie Sandwiches with Creamy Mushroom Sauce
- Prep Time: 10 minutes
- Cook Time: 20 minutes
- Total Time: 30 minutes
- Yield: 4 servings 1x
- Method: Main Course
- Cuisine: American
Description
These hearty hoagie sandwiches are loaded with seasoned ground beef, melted cheese, and a rich creamy mushroom sauce. Perfect for a quick weeknight dinner.
Ingredients
- 1 lb ground beef
- 1 tbsp olive oil
- 1 medium onion, diced
- 2 cloves garlic, minced
- 8 oz mushrooms, sliced
- 2 tbsp butter
- 2 tbsp all-purpose flour
- 1 cup beef broth
- 1/2 cup heavy cream
- 1 tsp Worcestershire sauce
- Salt and pepper to taste
- 4 hoagie rolls
- 1 1/2 cups shredded provolone or mozzarella cheese
Instructions
- 1. In a large skillet over medium-high heat, cook the ground beef until browned and crumbled. Drain excess fat and set aside.
- 2. In the same skillet, heat olive oil and sauté onion and garlic until softened, about 3 minutes. Add mushrooms and cook until tender.
- 3. Reduce heat to medium, add butter to the skillet. Once melted, whisk in flour and cook for 1 minute.
- 4. Slowly whisk in beef broth and heavy cream, stirring constantly until smooth and thickened. Add Worcestershire sauce, salt, and pepper.
- 5. Return the cooked beef to the skillet and stir to combine. Let simmer for 2-3 minutes.
- 6. Preheat broiler. Open hoagie rolls and place on a baking sheet. Spoon the beef and mushroom mixture onto each roll, then top with shredded cheese.
- 7. Broil for 2-3 minutes until cheese is melted and bubbly. Serve immediately.
Notes
For extra flavor, add a pinch of thyme or rosemary to the mushroom sauce. You can also substitute ground turkey or chicken.
Nutrition
- Calories: 620
- Sugar: 6 g
- Fat: 38 g
- Carbohydrates: 35 g
- Protein: 32 g

Tried This Recipe? Leave a Comment!
Did you make this recipe? I’d love to hear how it turned out! Please leave a comment and a rating below. Your feedback helps other home cooks and supports cheerychop.com!
For more delicious inspiration, follow me on Pinterest!
