Momma’s Creamy Baked Macaroni and Cheese: Best Comfort Food Recipe

creamy baked mac and cheese, homemade baked macaroni and cheese, cheesy macaroni bake, mac and cheese casserole, best baked mac and cheese

Momma’s Creamy Baked Macaroni and Cheese: A Family Favorite

When it comes to comfort food, few dishes can rival the sheer indulgence of Momma’s creamy baked macaroni and cheese. This recipe is a staple in many homes, offering the perfect balance of rich, gooey cheese and a crispy, golden-brown topping. Whether you’re making it for a holiday gathering, a family dinner, or just because you’re craving something special, this mac and cheese is guaranteed to hit the spot.

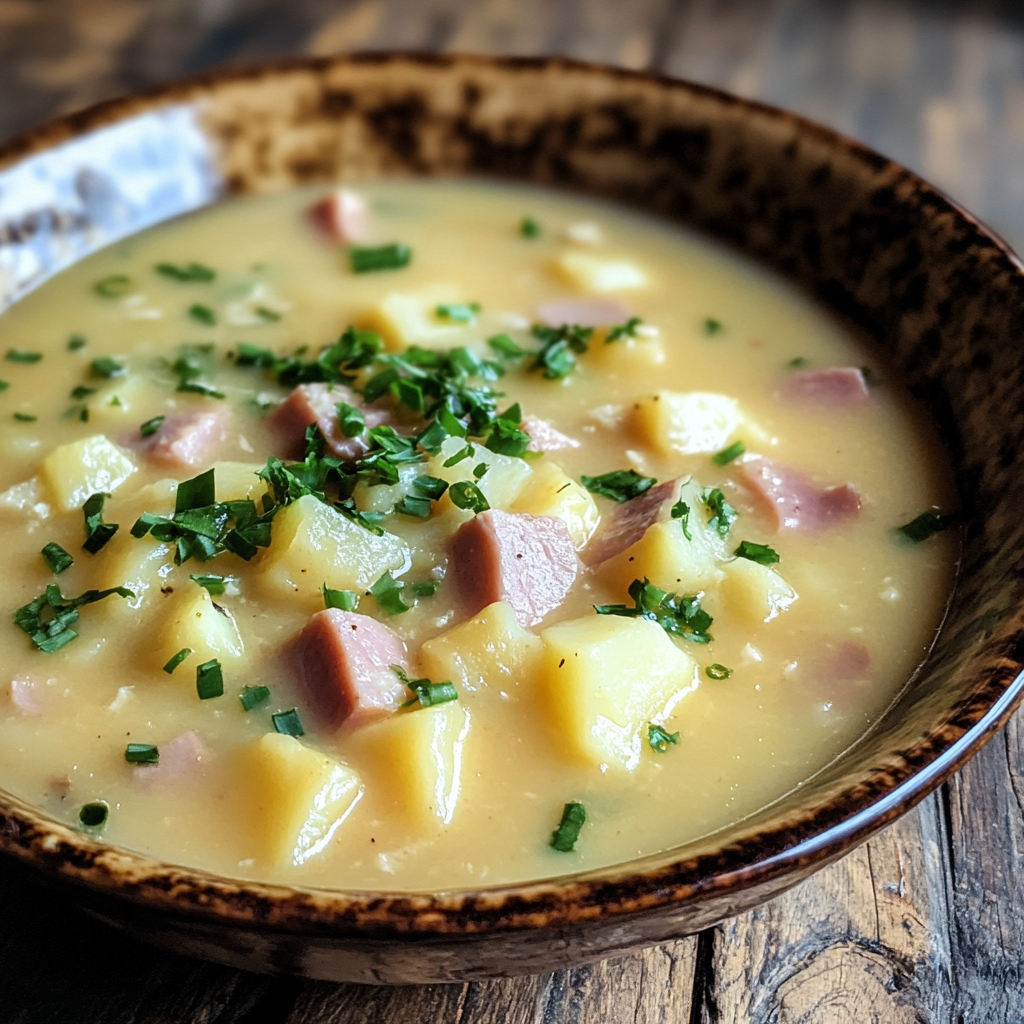
This dish holds a special place in American cuisine, often evoking memories of family dinners and holiday gatherings. Not only is it a meal that everyone loves, but it’s also one that can easily be adapted based on your preferences and available ingredients. If you’re a fan of hearty, classic dishes, you’ll also want to explore recipes like The Ultimate Comfort Food Crockpot Potato Soup with Hashbrowns, which shares that same cozy, comforting vibe.

Why Creamy Baked Macaroni and Cheese Is a Classic

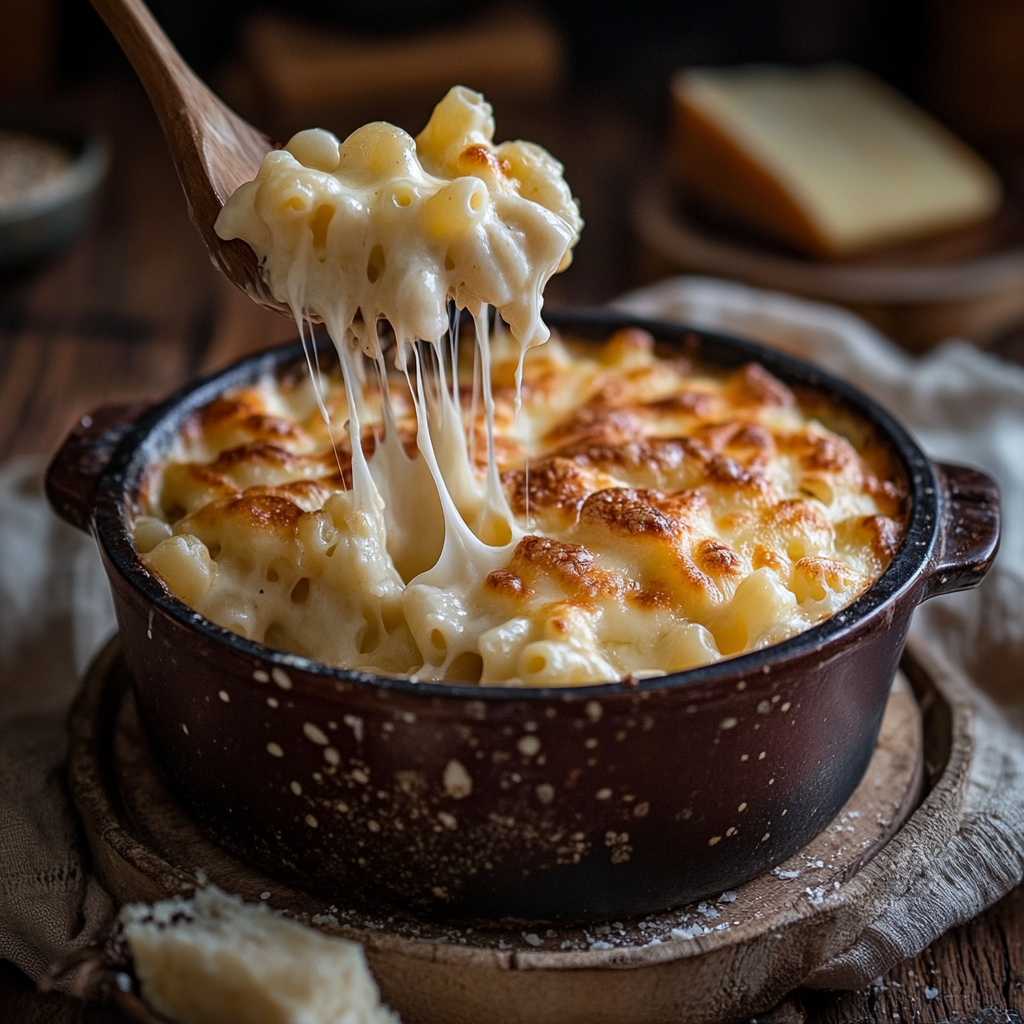
Macaroni and cheese isn’t just a side dish—it’s a culinary tradition. While the boxed versions might satisfy a quick craving, nothing beats the homemade, baked version when you want something truly special. The baked variety gives you the best of both worlds: a soft, creamy interior and a crunchy, cheesy top layer.

What sets Momma’s creamy baked macaroni and cheese apart from the stovetop version is the texture and complexity. The creamy sauce, made with a base of milk, butter, and flour, combines perfectly with sharp cheddar cheese to create a rich, velvety consistency. As it bakes, the top crisps up, providing a satisfying crunch that contrasts with the gooey pasta underneath.

For a similarly creamy dish that also takes advantage of simple ingredients, check out Slow Cooker Magic: Unveiling the Ease of Crock Pot Baked Ziti.


Key Ingredients for Creamy Baked Macaroni and Cheese

To make this decadent dish, you’ll need the following simple but essential ingredients:

  • Macaroni pasta: Elbow macaroni is the classic choice, but other short pasta shapes work too.
  • Cheddar cheese: Sharp cheddar is ideal for its strong, tangy flavor. You can also mix it with Gruyère or mozzarella for added creaminess.
  • Butter and flour: These two ingredients form the base of a béchamel sauce, which is key to getting that creamy texture.
  • Milk or cream: Whole milk or heavy cream adds richness to the sauce. For a lighter version, you can use low-fat milk.
  • Seasonings: Salt, pepper, and a bit of mustard powder help to bring out the cheese’s flavor without overpowering it.
  • Breadcrumbs (optional): If you like a crispy topping, sprinkling breadcrumbs on top before baking gives the dish added texture.

The combination of these ingredients creates that perfect balance between creamy and crunchy that makes this dish so special.


Step-by-Step Guide to Making Momma’s Creamy Baked Macaroni and Cheese

1. Cook the Pasta

Start by cooking the elbow macaroni in salted water until it is just shy of al dente. This is crucial because the pasta will continue to cook in the oven. Drain and set aside.

2. Make the Cheese Sauce

  • In a large saucepan, melt the butter over medium heat.
  • Stir in the flour to form a roux, cooking for about 2 minutes until golden.
  • Gradually whisk in the milk, ensuring that there are no lumps.
  • Continue to whisk until the mixture thickens, about 5 minutes.
  • Once the sauce is smooth, stir in the grated cheese, one handful at a time, until fully melted and creamy.

Tip: For an extra-rich sauce, use a combination of sharp cheddar and Gruyère. Mozzarella adds extra creaminess but keep it minimal so it doesn’t overwhelm the other flavors.

3. Combine the Pasta and Cheese Sauce

Once the cheese sauce is ready, pour it over the drained pasta and stir until every noodle is coated. For a creamier texture, some people like to reserve a small portion of the cheese sauce to drizzle over the top just before baking.

4. Add Toppings and Bake

Transfer the cheesy pasta into a greased baking dish. If you prefer a crispy top, sprinkle breadcrumbs mixed with melted butter and a little extra cheese on top. Bake in a preheated oven at 350°F (175°C) for about 30-35 minutes, or until the top is golden and bubbly.


Popular Variations of Momma’s Creamy Baked Macaroni and Cheese

This dish is endlessly customizable. While the classic recipe is always a hit, there are many ways to switch it up based on your tastes:

1. Cheesy Bacon Mac and Cheese

  • Add crumbled, crispy bacon to the cheese sauce for a smoky, savory flavor that pairs perfectly with the creaminess of the cheese.

2. Spicy Mac and Cheese

  • For a kick, stir in diced jalapeños, a dash of hot sauce, or cayenne pepper. This version is ideal for those who love a little heat with their comfort food.

3. Veggie Mac and Cheese

  • Boost the nutritional value by adding cooked broccoli, spinach, or even roasted cauliflower to the dish before baking. This variation adds color and texture while maintaining the creaminess of the sauce.

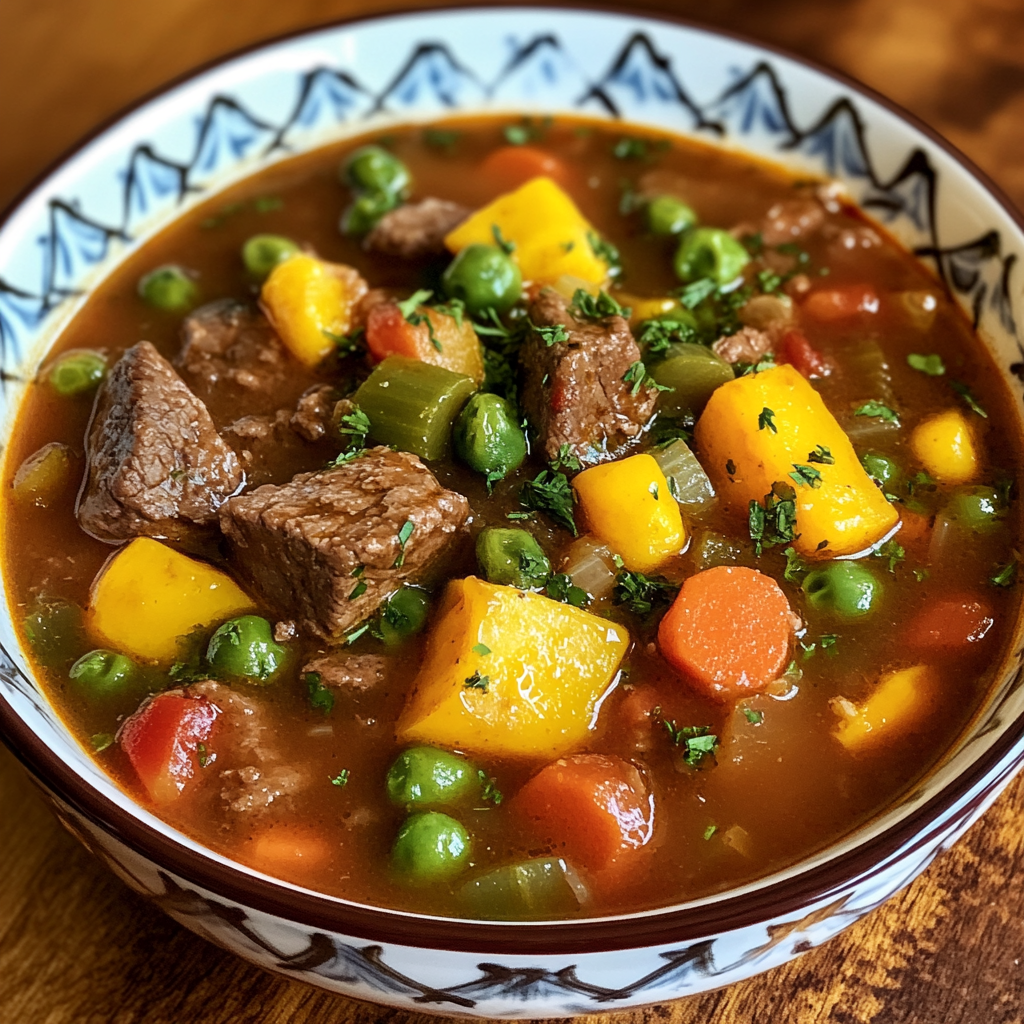
For a truly indulgent twist, try adding ham or sausage to the mix. And if you’re looking for more delicious comfort food ideas, don’t miss No Peek Beef Tips: The Ultimate Comfort Food You’ve Been Missing, another hearty meal that is perfect for cozy nights in.


Tips for Achieving the Perfect Creamy Texture

Achieving that perfect creamy consistency in your baked macaroni and cheese can sometimes be tricky. Here are a few tips to ensure your dish turns out flawlessly every time:

  • Undercook the pasta: Since the pasta will continue cooking in the oven, it’s best to boil it until just before al dente.
  • Use fresh cheese: Pre-shredded cheese often contains anti-caking agents that prevent it from melting smoothly. Always shred your cheese by hand for the best results.
  • Balance the sauce: Too much flour in the roux can make the sauce grainy, while too little will make it runny. Stick to the recipe’s proportions to achieve that perfect consistency.

Storing and Reheating Momma’s Creamy Baked Macaroni and Cheese

Leftovers of this dish are just as delicious as the day you make it—if not better. Here’s how to store and reheat it without losing any of that creamy goodness.

Storing

  • Transfer any leftovers to an airtight container and store them in the refrigerator for up to 4 days.

Reheating

  • To reheat, cover the dish with aluminum foil and place it in a 350°F oven for about 20 minutes or until heated through. For a crispier top, remove the foil for the last 5 minutes of reheating.
  • You can also microwave individual portions, but the oven is recommended to retain the texture.

Frequently Asked Questions About Momma’s Creamy Baked Macaroni and Cheese

1. Can I make this dish ahead of time?

Yes! You can assemble the entire dish, cover it with plastic wrap, and store it in the fridge for up to 24 hours before baking. Just be sure to add a few extra minutes to the baking time if starting from cold.

2. What type of cheese works best?

Sharp cheddar is the classic choice, but combining it with Gruyère, mozzarella, or even Parmesan can add depth and complexity to the flavor.

3. How can I make the top even crispier?

Mix breadcrumbs with a little melted butter and sprinkle them on top of the mac and cheese before baking. You can also add a bit of Parmesan for an extra cheesy crust.

4. Can I freeze baked macaroni and cheese?

Yes! Freeze it before baking or after baking. If freezing before, assemble the dish and freeze it for up to 3 months. When you’re ready to bake it, thaw it overnight in the refrigerator and then bake as directed. If freezing after baking, just thaw and reheat in the oven.

5. Can I make this recipe gluten-free?

Absolutely! Simply substitute the flour with a gluten-free alternative like cornstarch or a gluten-free flour blend. Additionally, use gluten-free pasta to ensure the entire dish is gluten-free.


Conclusion: Why Momma’s Creamy Baked Macaroni and Cheese Is the Perfect Comfort Food

There’s a reason Momma’s creamy baked macaroni and cheese has been a beloved dish for generations—it’s comforting, indulgent, and incredibly satisfying. The combination of tender pasta, gooey cheese sauce, and a crunchy baked top makes it the ultimate family dinner. Whether you’re preparing it for a holiday gathering or just because you’re craving something rich and creamy, this recipe is sure to become a staple in your home.

For more mouthwatering comfort food recipes, explore The Ultimate Comfort Food Crockpot Potato Soup with Hashbrowns, another dish that will warm you from the inside out.

Hearty Ham & Potato Soup Recipe: A Perfect Comfort Meal

creamy ham and potato soup, ham and potato chowder, leftover ham soup, easy ham and potato soup, ham and vegetable soup

Delicious Ham & Potato Soup: The Perfect Comfort Food Recipe

When it comes to hearty, warm, and comforting meals, few dishes can beat a steaming bowl of ham & potato soup. Whether it’s a chilly night or you’re trying to use up leftover ham from a holiday dinner, this classic soup is the perfect solution. With tender chunks of potato, flavorful ham, and a creamy or brothy base, this soup is as satisfying as it is easy to make. In this guide, we’ll explore how to make ham and potato soup from scratch, offer several variations, and provide tips on storing and reheating your leftovers.


Why Ham & Potato Soup is a Family Favorite

Ham and potato soup is a versatile dish that brings together simple, budget-friendly ingredients to create a meal that feels indulgent without breaking the bank. The combination of savory ham, tender potatoes, and a flavorful broth or creamy base is a winning one that appeals to both kids and adults alike. It’s also a great way to make the most of leftover ham from holidays like Christmas or Easter.

For more inspiration on comforting soups, check out The Ultimate Comfort Food Crockpot Potato Soup with Hashbrowns, which is another easy, warming meal for cold days.


Key Ingredients for Ham & Potato Soup

To make the best ham & potato soup, you’ll need the following ingredients:

  • Ham: Leftover ham from a roast or a store-bought ham steak works perfectly.
  • Potatoes: Russet potatoes are ideal because they break down slightly, thickening the soup.
  • Vegetables: Carrots, celery, and onions for added depth of flavor.
  • Broth: Chicken or vegetable broth forms the base, giving the soup a rich taste.
  • Milk or Cream: For a creamy version of the soup, add milk, half-and-half, or heavy cream.
  • Seasonings: Salt, pepper, thyme, garlic powder, and bay leaves.

For a budget-friendly take on this recipe, you can easily adapt it using ingredients you likely already have on hand, such as canned broth or frozen vegetables.


Step-by-Step Instructions for Homemade Ham & Potato Soup

Making ham & potato soup is incredibly simple and requires just a few steps:

1. Sauté the Vegetables

In a large soup pot, heat some oil or butter over medium heat. Add chopped onions, carrots, and celery. Sauté until softened, about 5 minutes.

2. Add the Ham and Potatoes

Next, add the diced ham and peeled, cubed potatoes to the pot. Stir everything together so the vegetables and ham are well combined.

3. Pour in the Broth

Pour in the chicken or vegetable broth, making sure all the ingredients are submerged. Add your seasonings, such as salt, pepper, thyme, and a bay leaf for extra flavor. Bring the soup to a boil, then reduce the heat and let it simmer for about 20 minutes, or until the potatoes are tender.

4. Make it Creamy (Optional)

For a creamy version, stir in milk or cream during the last 5 minutes of cooking. You can also thicken the soup by mashing some of the potatoes with a fork or immersion blender.

5. Serve and Enjoy

Remove the bay leaf, adjust seasoning to taste, and serve the soup hot. Garnish with chopped parsley or shredded cheese if desired.

For more ideas on how to make comforting, easy soups, take a look at Slow Cooker Magic: Unveiling the Ease of Crock Pot Baked Ziti, which is another great option for busy weeknights.


Creamy vs. Brothy Ham & Potato Soup

One of the best things about ham & potato soup is its versatility. Whether you prefer a creamy texture or a lighter, brothy base, you can easily tailor this recipe to your liking.

  • Creamy Version: This version uses milk, half-and-half, or heavy cream to create a rich, indulgent soup. For an even thicker texture, you can mash some of the potatoes or stir in a flour or cornstarch slurry.
  • Brothy Version: If you prefer a lighter soup, you can skip the cream and enjoy a broth-based version. This is ideal for those who are watching their calorie intake or prefer a soup with more broth.

Popular Variations of Ham & Potato Soup

There are countless ways to customize ham & potato soup to suit your taste or dietary needs. Here are a few popular variations:

1. Cheesy Ham & Potato Soup

Add shredded cheddar, Monterey Jack, or Parmesan to the soup for an extra layer of flavor. Stir in the cheese during the last few minutes of cooking to ensure it melts smoothly.

2. Ham & Sweet Potato Soup

For a slightly sweeter, more nutritious version, substitute sweet potatoes for regular potatoes. Sweet potatoes add a touch of natural sweetness and extra vitamins to the soup.

3. Vegetable-Loaded Ham & Potato Soup

Boost the veggie content by adding frozen peas, corn, or chopped spinach to the soup. This adds both color and nutrition, making it a more well-rounded meal.

4. Dairy-Free Ham & Potato Soup

To make the soup dairy-free, simply skip the milk or cream, or substitute it with coconut milk for a slightly different flavor profile.


How to Store, Freeze, and Reheat Ham & Potato Soup

Ham & potato soup is perfect for meal prep, as it stores and reheats beautifully. Here’s how to keep your leftovers fresh:

Storing in the Fridge

Store the soup in an airtight container in the fridge for up to 4 days. When reheating, add a bit of broth or milk to refresh the texture.

Freezing for Later

Ham and potato soup can be frozen for up to 3 months. If you’re making a creamy version, consider freezing the soup before adding the cream to avoid separation during thawing. Add the cream when reheating the soup instead.

Reheating

To reheat, simply warm the soup in a pot on the stove over medium heat, stirring occasionally until heated through. You may need to add a splash of broth or cream to restore the soup’s consistency.


Nutritional Benefits of Ham & Potato Soup

While ham and potato soup is undeniably delicious, it also offers several nutritional benefits:

  • Protein: Ham provides a good source of protein, which is essential for muscle repair and overall health.
  • Fiber: Potatoes are rich in fiber, which promotes digestive health and helps you feel full.
  • Vitamins and Minerals: The vegetables in the soup (carrots, celery, onions) provide essential vitamins like vitamin A and C, as well as important minerals like potassium.

For a healthier version, consider using lower-sodium broth and lean ham, or substitute some of the potatoes with cauliflower for a lower-carb option.


FAQs About Ham & Potato Soup

1. Can I make ham and potato soup without cream?
Yes! Simply leave out the cream for a brothy version of the soup, or use a dairy-free alternative like coconut milk if you prefer.

2. What type of ham is best for ham and potato soup?
Leftover ham from a holiday roast works best, but you can also use store-bought ham steaks or even a ham bone for added flavor.

3. How do I thicken ham and potato soup?
To thicken the soup, you can mash some of the potatoes or add a flour or cornstarch slurry. This will create a thicker, more stew-like consistency.

4. Can I freeze ham and potato soup?
Yes, ham and potato soup freezes well, but if you’re making a creamy version, it’s best to add the cream after reheating to prevent separation.

5. How long will ham and potato soup last in the fridge?
When stored in an airtight container, the soup will last for up to 4 days in the refrigerator.


Final Thoughts

Whether you’re looking for a quick and easy meal or a way to use up leftover ham, ham & potato soup is a fantastic option that the whole family will love. With its simple ingredients and customizable nature, you can adapt this recipe to suit your taste preferences or dietary needs. For more delicious comfort food recipes, don’t forget to check out The Ultimate Comfort Food Crockpot Potato Soup with Hashbrowns and Slow Cooker Magic: Unveiling the Ease of Crock Pot Baked Ziti.

With just a few ingredients and minimal effort, you’ll have a warm, hearty meal ready to enjoy!

Homemade Chicken and Dumplin’s: Easy Comfort Food Recipe

chicken and dumplings, Southern chicken and dumplings, easy chicken and dumplings recipe, comfort food chicken dumplings, chicken and biscuit dumplings

Homemade Chicken and Dumplin’s: A Comforting Classic

When it comes to comfort food, few dishes rival the heartwarming, belly-filling goodness of homemade chicken and dumplin’s. This Southern classic is beloved for its rich, creamy broth, tender chicken, and, of course, fluffy dumplings that practically melt in your mouth. Whether you’re craving a nostalgic meal or looking for a family-friendly dinner, this recipe will become a staple in your kitchen.

In this article, we’ll walk through how to make chicken and dumplings from scratch, discuss the best types of dumplings, and explore various recipe variations. Not only will you learn how to prepare the perfect broth and chicken, but you’ll also discover key tips for making the lightest, fluffiest dumplings possible.


Why Homemade Chicken and Dumplin’s is the Ultimate Comfort Food

Chicken and dumplin’s holds a special place in the hearts of many due to its simplicity and soul-warming qualities. It’s one of those dishes that brings people together, whether for Sunday family dinners or special gatherings.

One of the great things about this recipe is its adaptability. Traditionally, it was a budget-friendly dish that allowed families to stretch their ingredients. With just a few pantry staples—flour, broth, chicken, and vegetables—you can create a hearty meal that feels indulgent. For more simple yet heartwarming dishes, check out The Ultimate Comfort Food Crockpot Potato Soup with Hashbrowns.


Key Ingredients for Homemade Chicken and Dumplin’s

To make homemade chicken and dumplin’s, you’ll need the following key ingredients:

  • Chicken: A whole chicken, bone-in thighs, or boneless chicken breasts can be used. Rotisserie chicken works as a quick substitute.
  • Vegetables: Onion, celery, and carrots are the base of most recipes.
  • Chicken Broth: Homemade broth gives the best flavor, but store-bought works too.
  • Flour and Baking Powder: These are the main components of dumplings.
  • Milk or Buttermilk: Adds moisture and tenderness to the dumpling dough.
  • Seasonings: Salt, pepper, thyme, and parsley.

Each of these ingredients plays a critical role in creating the delicious, savory taste of chicken and dumplings. You can customize the dish by adding more vegetables like peas or potatoes, depending on your preference.


Step-by-Step Instructions: How to Make Chicken and Dumplin’s from Scratch

Here’s a simple yet delicious recipe for making chicken and dumplings from scratch.

1. Cook the Chicken

  • Option 1: Boil a whole chicken in salted water with vegetables for 30-40 minutes until the chicken is fully cooked. Remove, shred the chicken, and set aside.
  • Option 2: Use pre-cooked rotisserie chicken for a faster version.

2. Prepare the Broth

  • In the same pot, add chopped onions, celery, and carrots to the broth and simmer for 10 minutes.
  • Season with salt, pepper, thyme, and bay leaves.
  • Add chicken back into the broth.

3. Make the Dumplings

  • Combine flour, baking powder, and salt.
  • Add cold butter, and mix until crumbly.
  • Stir in milk or buttermilk until dough forms.

4. Drop or Roll Dumplings

  • Drop Dumplings: Spoon the dough directly into the simmering broth.
  • Rolled Dumplings: Roll the dough flat and cut into strips before adding to the broth.

5. Simmer and Serve

  • Cover and simmer for 10-15 minutes until the dumplings are cooked through.
  • Garnish with fresh parsley and serve hot.

For another easy, comforting dish with minimal prep time, explore Slow Cooker Magic: Unveiling the Ease of Crock Pot Baked Ziti.


Types of Dumplings: Rolled vs. Drop Dumplings

One of the most debated topics in the world of chicken and dumplin’s is the type of dumplings used. While both rolled and drop dumplings are delicious, they each bring their own texture and style to the dish.

Rolled Dumplings

  • Texture: Rolled dumplings are thin and chewy, resembling thick noodles.
  • Preparation: The dough is rolled out flat and cut into strips before being simmered in the broth.
  • Tip: For extra flavor, roll the dough out and sprinkle it with fresh herbs before cutting.

Drop Dumplings

  • Texture: Drop dumplings are fluffy, soft, and more biscuit-like.
  • Preparation: The dough is spooned directly into the broth, where it puffs up as it cooks.
  • Tip: Keep the broth simmering gently to prevent the dumplings from becoming soggy.

Both dumpling types are beloved for their own reasons, so feel free to experiment and find your favorite. No matter which style you choose, you’re in for a treat.


Recipe Variations for Chicken and Dumplin’s

Chicken and dumplin’s is a versatile dish, and there are numerous ways to put your own spin on it. Here are some popular variations:

1. Southern-Style Chicken and Dumplin’s

  • This version features flat, rolled dumplings simmered in a rich, hearty broth. It’s a staple in many Southern households and delivers a chewy, satisfying bite with every spoonful.

2. Creamy Chicken and Dumplin’s

  • Add a bit of heavy cream or evaporated milk to the broth for a richer, creamier texture. This variation is especially comforting during cold winter months.

3. Gluten-Free Chicken and Dumplin’s

  • Use a gluten-free flour blend to create dumplings that are just as delicious and fluffy as the original. Be sure to adjust the liquid ratio if needed.

4. Low-Carb Chicken and Dumplin’s

  • Replace the dumplings with cauliflower florets or low-carb almond flour dumplings to make a keto-friendly version.

5. Spicy Chicken and Dumplin’s

  • For those who love heat, add crushed red pepper flakes, diced jalapeños, or cayenne pepper to the broth. Top with freshly chopped cilantro for an extra burst of flavor.

Storage and Reheating Instructions

Chicken and dumplin’s is one of those dishes that tastes even better the next day. Here’s how to store and reheat your leftovers:

Storing in the Fridge

  • Allow the dish to cool completely before transferring it to an airtight container.
  • Chicken and dumplin’s can be stored in the fridge for up to 3 days.

Freezing

  • Chicken and dumplin’s freeze well, but the dumplings may become slightly softer upon reheating.
  • To freeze, place the cooled dish in freezer-safe containers and freeze for up to 3 months.

Reheating

  • Reheat on the stove over medium heat, stirring occasionally, until the broth and dumplings are warmed through. Add a bit of water or broth if needed to maintain the consistency.

For more inspiration on freezing and reheating hearty comfort foods, visit No Peek Beef Tips: The Ultimate Comfort Food You’ve Been Missing.


FAQs About Homemade Chicken and Dumplin’s

1. Can I use store-bought biscuit dough for dumplings? Yes! If you’re short on time, you can use canned biscuit dough. Cut the biscuits into quarters and drop them into the simmering broth.

2. What type of chicken is best for chicken and dumplin’s? Bone-in chicken thighs provide the most flavor, but a whole chicken or boneless breasts will work too.

3. How do I thicken the broth? To thicken the broth, remove ¼ cup of the broth and mix it with 1 tablespoon of cornstarch. Stir it back into the pot and simmer until thickened.

4. Can I make this dish in a slow cooker? Yes, chicken and dumplin’s can be made in a slow cooker. Cook the chicken, vegetables, and broth on low for 6-8 hours, then add the dumplings in the last 30 minutes of cooking.

5. Why are my dumplings dense instead of fluffy? Dense dumplings are often the result of overmixing the dough. Mix just until combined, and avoid stirring the dumplings once they’re added to the broth.


Final Thoughts

There’s nothing quite like a warm bowl of homemade chicken and dumplin’s to comfort the soul. With its rich broth, tender chicken, and fluffy dumplings, this dish is the ultimate in comfort food. Whether you prefer rolled or drop dumplings, creamy or brothy, chicken and dumplin’s is a meal that brings people together and leaves everyone satisfied.

So grab your ingredients, pull out your pot, and get ready to enjoy this Southern classic. For more comforting, homemade recipes, be sure to explore our favorite comfort food ideas and make your next meal a family favorite.

So Tasty Vegetable Beef Soup ~ Easy Instant Pot Recipe

hearty vegetable beef soup, Instant Pot beef stew, quick vegetable beef soup, easy beef soup recipe, pressure cooker beef soup

So Tasty Vegetable Beef Soup ~ Instant Pot Recipe

Making a hearty and delicious vegetable beef soup has never been easier, thanks to the Instant Pot. This savory dish combines tender beef, vibrant vegetables, and rich broth to create a soul-warming meal that is perfect for cold days or a cozy family dinner. In this article, we’ll take you through a step-by-step guide to making the best vegetable beef soup using your Instant Pot, discuss variations, provide serving suggestions, and answer common questions to ensure your soup turns out perfectly every time.

Why Choose the Instant Pot?

The Instant Pot is not only a time-saver, but it also enhances flavors by sealing in all the nutrients from the vegetables and beef. With the pressure cooking function, you can reduce the cooking time compared to traditional methods like slow cooking or stovetop simmering, while still delivering rich and flavorful results. Whether you’re short on time or looking for a hands-off way to prepare this classic soup, the Instant Pot is an ideal tool.

Additionally, the Instant Pot makes it easy to sauté and pressure cook in the same pot, reducing the number of dishes to clean up after your meal.


Related Recipes: If you love cozy soups, don’t miss out on The Ultimate Comfort Food Crockpot Potato Soup with Hashbrowns, another hearty and easy-to-make dish.


Key Ingredients for Vegetable Beef Soup

To make this hearty vegetable beef soup, you’ll need:

  • Beef: Chuck roast, stew meat, or ground beef all work well.
  • Vegetables: Classic choices include onions, carrots, celery, potatoes, and tomatoes.
  • Seasonings: Garlic, thyme, bay leaves, and Worcestershire sauce for extra depth of flavor.
  • Broth: Use beef broth for a rich base, or substitute with chicken broth for a lighter flavor.

Pro Tip: You can also add ingredients like green beans, corn, or zucchini to increase the vegetable content and texture variety in your soup.

Step-by-Step Instructions

1. Sauté the Beef

  • Turn on the Instant Pot to the sauté setting and add a bit of olive oil.
  • Once hot, add your cubed beef and cook until browned on all sides, about 5-7 minutes.
  • Remove the beef and set aside.

2. Sauté Vegetables

  • In the same pot, add the diced onions, carrots, and celery. Cook until they start to soften, about 3-4 minutes.
  • Add minced garlic and cook for another minute until fragrant.

3. Deglaze and Add Remaining Ingredients

  • Pour in about ½ cup of broth to deglaze the pot, scraping any browned bits off the bottom (this adds flavor to the soup).
  • Return the beef to the pot, and add the remaining vegetables, broth, seasonings, and bay leaves.

4. Pressure Cook

  • Close the lid and set the Instant Pot to pressure cook on high for 25 minutes.
  • Once the cooking time is done, allow the pot to release pressure naturally for 10 minutes, then perform a quick release.

5. Adjust Seasoning and Serve

  • Open the lid, and stir the soup.
  • Taste and adjust seasoning if needed. Serve hot, garnished with fresh parsley or a sprinkle of Parmesan cheese.

Did you know? You can also use your Instant Pot to make delicious casseroles like Slow Cooker Magic: Unveiling the Ease of Crock Pot Baked Ziti.


Why You Should Make This Soup

Making vegetable beef soup in the Instant Pot isn’t just about convenience—it’s about creating deep, complex flavors in a fraction of the time. The pressure cooking method locks in all the juices, ensuring the beef is tender and the vegetables are perfectly cooked. Here’s why this soup should be in your regular meal rotation:

  • Quick and Easy: Ready in under an hour, this soup can be whipped up on busy weeknights.
  • Nutritious: Packed with fiber, protein, and essential vitamins from the vegetables and beef.
  • Customizable: Add or swap vegetables to suit your taste or dietary needs.
  • Meal Prep-Friendly: Make a big batch and freeze portions for later.

Recipe Variations

While the classic recipe is delicious, you can easily modify it to fit your taste preferences or dietary restrictions.

1. Make It Vegetarian

  • Swap out the beef for mushrooms or lentils and use vegetable broth. You’ll still get that rich, hearty flavor without the meat.

2. Go Low-Carb

  • Replace potatoes with cauliflower or zucchini for a keto-friendly version of this soup.

3. Add More Spices

  • For a more flavorful soup, consider adding paprika, oregano, or cumin to the mix.

4. Beef Substitutes

  • If you prefer poultry, substitute the beef with chicken or turkey. Adjust the cooking time accordingly since these proteins cook faster than beef.

Serving Suggestions

Pair your vegetable beef soup with:

  • Crusty bread or garlic bread for dipping.
  • A side salad with a light vinaigrette to balance the richness of the soup.
  • Top the soup with a dollop of sour cream, shredded cheese, or fresh herbs for added flavor and texture.

How to Store and Reheat

This soup stores exceptionally well, making it ideal for meal prep.

  • In the Fridge: Store leftovers in an airtight container in the fridge for up to 4 days.
  • In the Freezer: Freeze the soup in portion-sized containers for up to 3 months. Be sure to leave room in the container for expansion.
  • Reheating: Reheat the soup on the stove over medium heat, or use the microwave for individual portions.

Pro Tip: When reheating frozen soup, thaw it overnight in the fridge for easier and faster warming.

Nutritional Benefits

This soup is not only comforting but also highly nutritious. It’s packed with:

  • Protein: From the beef, providing sustained energy and muscle repair.
  • Fiber: From the vegetables, aiding digestion and keeping you fuller longer.
  • Vitamins and Minerals: Such as vitamin A (from carrots), potassium (from potatoes), and iron (from beef).

For a lighter version, consider using leaner cuts of beef or adding more vegetables to bulk up the dish without extra calories.

FAQs

1. Can I make this soup without an Instant Pot?

Yes! You can use a slow cooker or make it on the stovetop. For the slow cooker, follow the same steps and cook on low for 6-8 hours. For the stovetop, simmer the soup for about 1.5 to 2 hours, until the beef is tender.

2. How can I make the soup thicker?

If you prefer a thicker soup, add a tablespoon of flour or cornstarch mixed with cold water (known as a slurry) after the pressure cooking step. Simmer the soup until it thickens.

3. What other vegetables can I add?

Feel free to get creative with the vegetables! Consider adding green beans, bell peppers, spinach, or mushrooms to change up the texture and flavor profile.

4. Can I cook this soup ahead of time and reheat it?

Absolutely! This soup actually tastes better the next day as the flavors continue to meld together. Simply store it in the fridge or freezer and reheat when ready to serve.

5. How do I adjust the recipe for a larger or smaller serving size?

To increase or decrease the serving size, simply scale the ingredients up or down. Keep the cooking time the same, as the pressure cooker will adjust for the quantity inside.

Conclusion

Vegetable beef soup is a classic comfort food that you can easily make in your Instant Pot. With its rich flavors, nutritional benefits, and versatile nature, it’s a recipe you’ll want to make time and again. By using fresh ingredients and following our tips for variations, you can tailor this soup to suit your family’s tastes and dietary needs. Whether you’re serving it for a cozy dinner or prepping meals for the week, this soup is guaranteed to be a hit!

Perfect Homemade Stuffing Balls with Classic Bread Stuffing

bread stuffing balls, holiday stuffing recipe, homemade stuffing balls, easy stuffing balls, baked stuffing balls

Delicious Stuffing Balls with Homemade Bread Stuffing Recipe

Introduction

Stuffing is a timeless side dish often associated with holiday dinners, but its versatility makes it a year-round favorite. Whether you’re preparing a Thanksgiving feast or just want a comforting side dish, this stuffing balls recipe with homemade bread stuffing is sure to delight.


Ingredients for Stuffing Balls

  1. Bread cubes – Stale bread is best for the texture needed in stuffing balls.
  2. Butter – Adds rich flavor and moisture.
  3. Onion and celery – A classic combination for any stuffing recipe.
  4. Herbs – Sage, thyme, and parsley.
  5. Chicken broth – Helps bind the stuffing mixture.
  6. Eggs – Acts as a binder for forming the stuffing balls.

Step-by-Step Guide to Making Stuffing Balls

1. Preparing the Bread Cubes

2. Sautéing the Vegetables

  • In a large skillet, melt butter and sauté onions and celery until softened. These add essential flavor and moisture to the stuffing.

3. Adding Seasoning and Mixing Ingredients

  • Add fresh herbs like sage, thyme, and parsley to your vegetable mix. The fragrant herbs elevate the flavor.

4. Combining Bread, Broth, and Eggs

  • In a large bowl, combine the sautéed vegetables with bread cubes. Pour in chicken broth and whisked eggs to help bind the mixture.

5. Forming and Baking the Stuffing Balls


Stuffing Balls Variations

  • Add sausage for a hearty version.
  • Try using cornbread instead of white bread for a southern twist.
  • Add cranberries or apples for a sweet contrast.

Serving Suggestions

Serve your stuffing balls alongside roast turkey or chicken for a complete meal. They also pair well with gravy, cranberry sauce, or mashed potatoes.

Internal link: For a classic pairing, serve these stuffing balls with our homemade cranberry sauce recipe


FAQs

Can I make stuffing balls ahead of time?

Yes, you can make the stuffing balls the day before. Just shape them and refrigerate. Bake them fresh the next day.

Can I freeze stuffing balls?

Yes, cooked stuffing balls can be frozen for up to 3 months. Just reheat in the oven before serving.

What kind of bread is best for stuffing?

Stale white or sourdough bread is recommended. Cornbread works well for a different flavor profile.


Conclusion

This stuffing balls recipe offers the comfort of traditional stuffing with the convenience of bite-sized portions. Try out this recipe for your next gathering, and let the flavors of homemade bread stuffing be the highlight of your meal.

External link: Check out this article for more holiday stuffing tips


Internal Linking Opportunities:

  1. Link to How to Make Homemade Bread Cubes article (URL: https://exorecipes.com/homemade-bread/)
  2. Link to Crispy Air-Fryer Onion Rings Recipe article (URL: https://exorecipes.com/crispy-air-fryer-onion-rings-easy-delicious/)
  3. Link to Homemade Cranberry Sauce Recipe article (URL: https://exorecipes.com/cranberry-sauce-recipe/)