Mountain Dew Apple Cobbler: A Sweet and Easy Dessert Recipe

easy apple cobbler, soda apple cobbler, crescent roll apple cobbler, apple dessert with Mountain Dew, sweet apple cobbler recipe

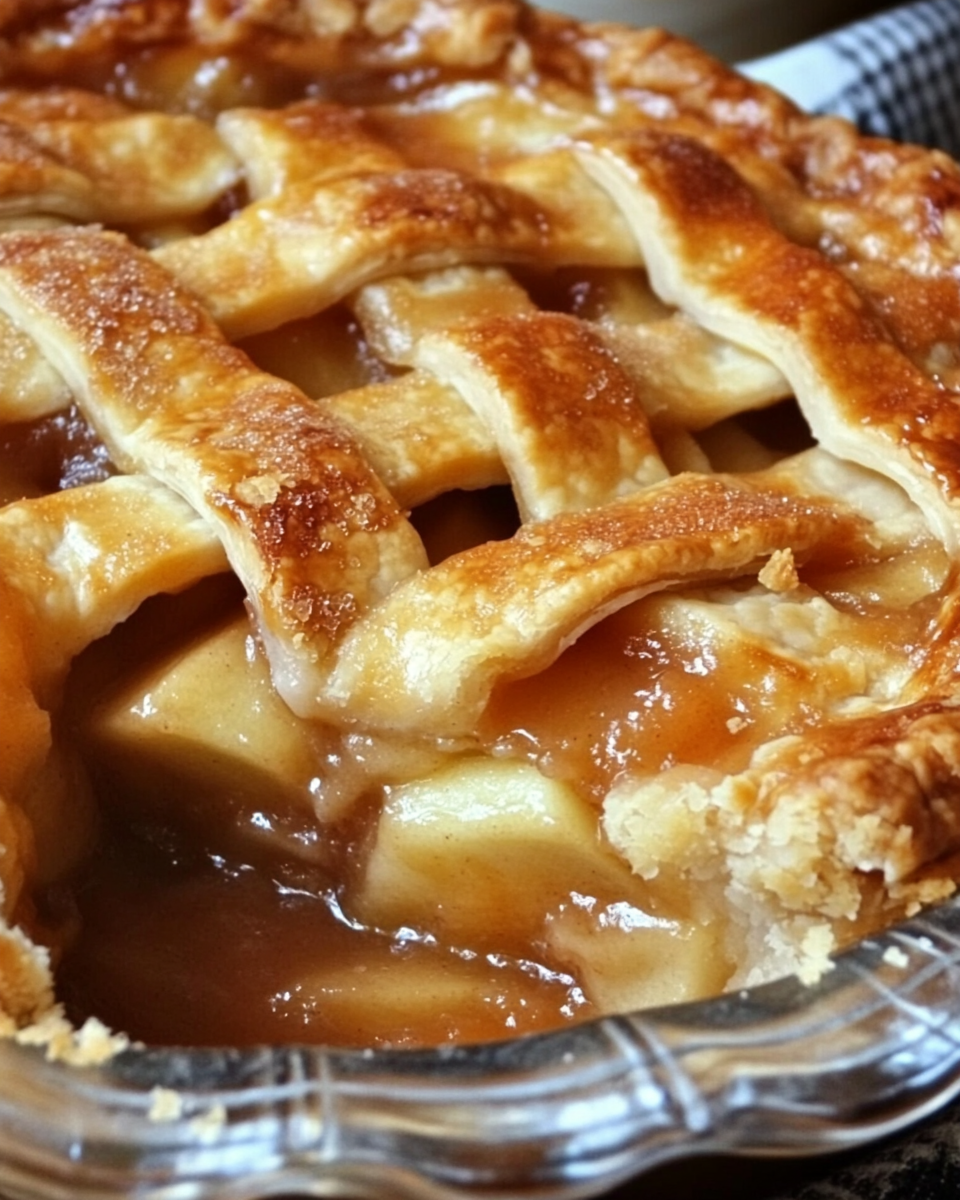
Mountain Dew Apple Cobbler: A Fizzy Twist on a Classic Dessert

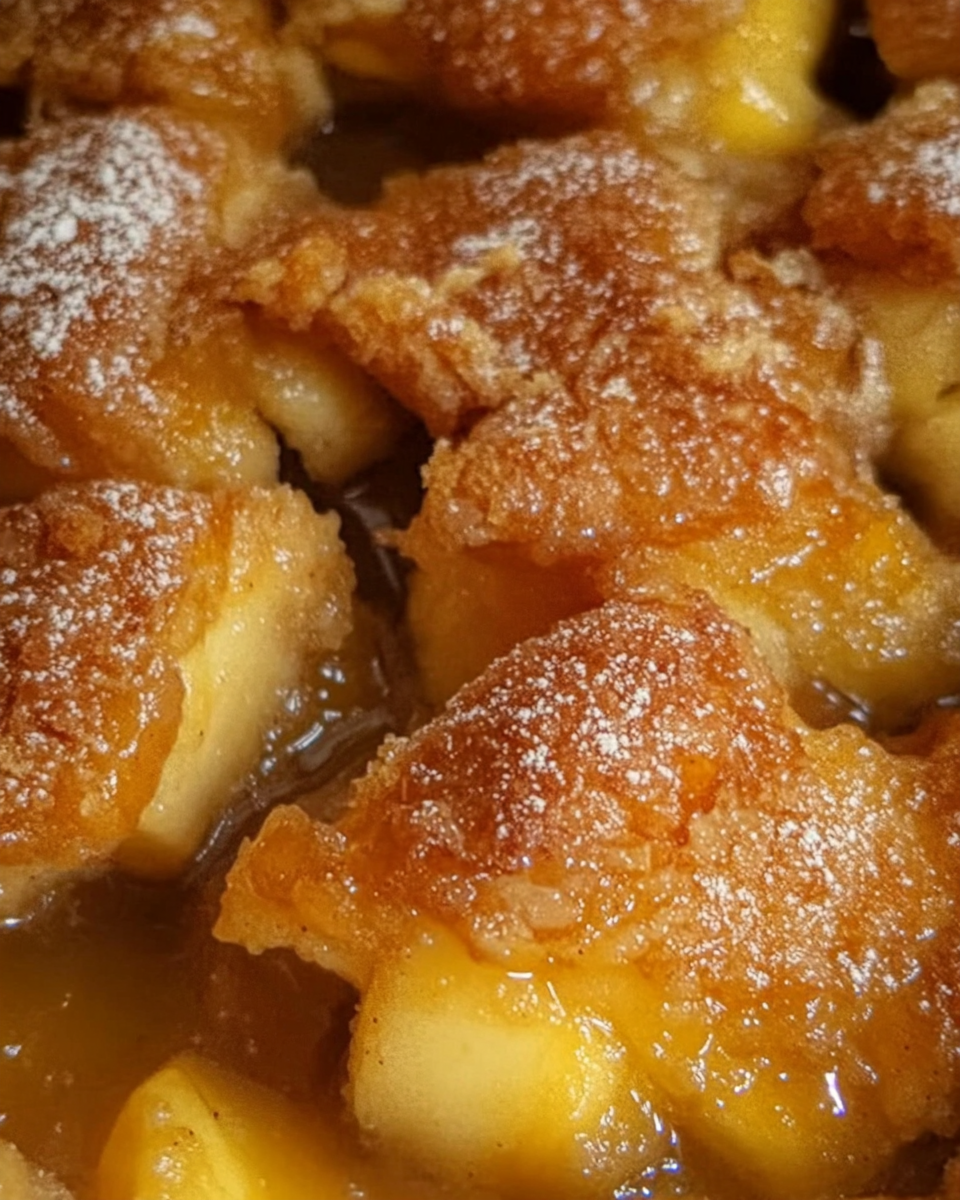
Mountain Dew Apple Cobbler is a unique twist on the classic apple cobbler that incorporates the fizzy sweetness of Mountain Dew soda. Combining the tangy flavor of apples with buttery crescent roll dough and a fizzy kick from the soda, this dessert has become a surprising favorite for anyone looking for an easy and indulgent treat. Whether you’re preparing it for a family gathering or just want a fun and flavorful dessert, this Mountain Dew Apple Cobbler is a must-try.

In this guide, we’ll break down everything you need to know to make this delicious dessert. From step-by-step instructions to tips for perfecting the recipe, this article will ensure your cobbler turns out irresistibly good. We’ll also suggest a few internal recipes that complement this cobbler perfectly.


Ingredients for Mountain Dew Apple Cobbler

To make Mountain Dew Apple Cobbler, you’ll need the following ingredients:

  • Apples: 3 to 4 medium Granny Smith apples, peeled, cored, and sliced.
  • Crescent Roll Dough: 2 cans of crescent rolls (you can also use puff pastry if preferred).
  • Butter: 1 cup (2 sticks) of unsalted butter, melted.
  • Sugar: 1 cup of granulated sugar and ½ cup of light brown sugar.
  • Ground Cinnamon: 1 teaspoon for a warm, spiced flavor.
  • Mountain Dew: 1 can (12 oz) for that unexpected twist.
  • Vanilla Extract: 1 teaspoon for extra flavor.

For more dessert inspiration, check out Kentucky Butter Cake: A Slice of Southern Comfort for another indulgent recipe that pairs well with a family gathering.


Step-by-Step Instructions for Mountain Dew Apple Cobbler

Preparation Time:

  • Prep Time: 15 minutes
  • Cook Time: 40-45 minutes
  • Total Time: 1 hour

Step-by-Step Guide:

  1. Preheat the Oven
    Preheat your oven to 350°F (175°C). Lightly grease a 9×13-inch baking dish.
  2. Prepare the Apples
    Peel, core, and slice the apples into 8 wedges each. Set the apples aside while preparing the rest of the ingredients.
  3. Wrap the Apples in Crescent Rolls
    Open the cans of crescent roll dough and separate them into triangles. Place one apple slice on the wide end of each triangle and roll it up tightly. Place the apple-wrapped dough pieces into the prepared baking dish, arranging them evenly.
  4. Make the Butter-Sugar Mixture
    In a medium saucepan, melt the butter over low heat. Stir in the granulated sugar, brown sugar, and cinnamon. Cook and stir until the sugar is mostly dissolved, then remove from heat and stir in the vanilla extract.
  5. Assemble the Cobbler
    Pour the butter-sugar mixture evenly over the crescent rolls. Open the can of Mountain Dew and pour it around the edges of the baking dish, making sure not to pour it directly over the dough to keep it from becoming soggy.
  6. Bake the Cobbler
    Bake the cobbler in the preheated oven for 40-45 minutes, or until the crescent rolls are golden brown and the sauce is bubbly. If the top browns too quickly, cover the dish loosely with foil during the last 10 minutes of baking.
  7. Cool and Serve
    Let the cobbler cool for about 10 minutes before serving. Serve warm with a scoop of vanilla ice cream or a dollop of whipped cream for an extra indulgent treat.

For another unique dessert, check out Crockpot Apple Butter for a flavorful spread you can make alongside your cobbler.


Tips for Success

Here are some tips to help ensure your Mountain Dew Apple Cobbler turns out perfectly every time:

  • Use Tart Apples: Granny Smith apples are ideal for this recipe because their tartness balances the sweetness of the sugar and Mountain Dew. If you prefer a sweeter apple, Honeycrisp or Fuji are good alternatives.
  • Don’t Overcrowd the Dish: Make sure the crescent-wrapped apples are arranged in a single layer and have enough room to expand during baking.
  • Watch the Baking Time: Keep an eye on the cobbler as it bakes. If the top starts to brown too quickly, cover it with foil to prevent burning while the center continues to cook.

For a more traditional apple pie recipe, try our Lawdy That’s Naughty Apple Pie, which combines rich ingredients for a decadent dessert.


Variations of Mountain Dew Apple Cobbler

This recipe is versatile and can be easily modified to suit your tastes. Here are some variations you might want to try:

  • Use Different Sodas: If you don’t have Mountain Dew, you can substitute it with Sprite, 7-Up, or ginger ale. Each soda will give the cobbler a slightly different flavor, but they all work well with apples.
  • Fruit Substitutions: Swap the apples for peaches, pears, or mixed berries for a new twist on the classic cobbler.
  • Add Nuts: For added texture, sprinkle chopped pecans or walnuts over the cobbler before baking.
  • Spice It Up: Experiment with adding other warm spices like nutmeg, allspice, or cloves to the butter-sugar mixture for a more complex flavor profile.

For more creative cobbler recipes, check out our Caramel Apple Pecan Dump Cake, which offers a similarly indulgent, fruit-forward dessert.


Nutritional Information

Here’s a basic breakdown of the nutritional content for Mountain Dew Apple Cobbler per serving (based on 8 servings):

  • Calories: 450
  • Fat: 20g
  • Carbohydrates: 65g
  • Sugar: 40g
  • Protein: 4g

To make the recipe a bit lighter, you can reduce the sugar or use a sugar substitute. You can also try using light crescent roll dough to cut back on calories and fat.


Serving Suggestions

Mountain Dew Apple Cobbler is best served warm, and there are plenty of ways to make it even more delicious:

  • Vanilla Ice Cream: A classic pairing for cobbler, the cold ice cream contrasts with the warm, gooey cobbler for a perfect balance of flavors.
  • Whipped Cream: Add a dollop of freshly whipped cream for a lighter option.
  • Drizzle with Caramel Sauce: For an extra indulgent treat, drizzle caramel sauce over the cobbler before serving.

For a similarly indulgent dessert, try Ultimate Blueberry Pie for a fruit-filled dessert with a buttery crust.


FAQs About Mountain Dew Apple Cobbler

Q: Can I use other sodas instead of Mountain Dew?
A: Yes, you can use other sodas like Sprite, ginger ale, or 7-Up as a substitute. Each one will slightly alter the flavor, but all work well with the apples and dough.

Q: What apples work best in this cobbler?
A: Granny Smith apples are ideal due to their tart flavor and firm texture. Other good options include Honeycrisp or Fuji if you prefer a sweeter apple.

Q: Can I make this cobbler ahead of time?
A: Yes, you can prepare the cobbler up to a few hours before baking. Store it in the fridge until you’re ready to bake it, or bake it in advance and reheat before serving.

Q: How do I prevent the crescent dough from becoming soggy?
A: To prevent sogginess, be sure to bake the cobbler until the crescent rolls are golden brown and the sauce is bubbling. Pouring the Mountain Dew around the edges rather than directly over the dough also helps keep the texture crisp.

Q: Can I freeze Mountain Dew Apple Cobbler?
A: Yes, you can freeze this cobbler for up to 3 months. Be sure to cool it completely before freezing, and reheat it in the oven for the best results.


Internal Linking Opportunities

If you enjoyed making Mountain Dew Apple Cobbler, try some of these other delicious dessert recipes from ExoRecipes:


Conclusion

Mountain Dew Apple Cobbler is an easy and delicious twist on the traditional cobbler. The sweet apples, buttery crescent rolls, and fizzy Mountain Dew create a dessert that’s sure to impress. Whether you’re making it for a casual family dinner or a special gathering, this cobbler will be a crowd-pleaser. Try the recipe today and enjoy the perfect balance of sweet, tart, and buttery flavors.

Unstuffed Cabbage Rolls: Easy One-Pot Comfort Food Recipe

deconstructed cabbage rolls, cabbage roll skillet, easy cabbage roll recipe, unrolled cabbage rolls, cabbage and beef recipe

Unstuffed Cabbage Rolls: A Simple and Comforting Meal

Unstuffed cabbage rolls are a deconstructed version of the traditional cabbage rolls but with the same hearty flavors of beef, cabbage, and a rich tomato sauce. It’s an easy, one-pot meal that’s perfect for busy weeknights, meal prepping, or serving a crowd. This recipe retains all the classic flavors of cabbage rolls but eliminates the time-consuming process of rolling individual cabbage leaves. Instead, all ingredients are cooked together in a skillet, creating a delicious and comforting dish.

In this article, I’ll guide you through a step-by-step process of preparing this dish, offering tips, variations, and serving suggestions. Additionally, I will link related internal recipes that complement this hearty meal.


Ingredients for Unstuffed Cabbage Rolls

To make these unstuffed cabbage rolls, you’ll need the following ingredients:

  • Ground Beef: 1 lb of ground beef (or ground turkey for a leaner option).
  • Cabbage: 1 medium head of cabbage, chopped.
  • Onion: 1 medium onion, finely chopped.
  • Garlic: 3 cloves of garlic, minced.
  • Rice: 1 cup of cooked white or brown rice.
  • Tomatoes: 1 can (14.5 oz) of diced tomatoes.
  • Tomato Sauce: 1 can (15 oz) of tomato sauce.
  • Seasonings: Salt, pepper, paprika, and red pepper flakes (optional).
  • Beef Broth: 1 cup to help create a rich sauce.
  • Olive Oil: For sautéing.

For a perfect side dish, check out The Ultimate Comfort Food: Crockpot Potato Soup with Hashbrowns, which pairs excellently with the hearty flavors of these unstuffed cabbage rolls.


Step-by-Step Instructions for Unstuffed Cabbage Rolls

Preparation Time:

  • Prep Time: 15 minutes
  • Cook Time: 30 minutes
  • Total Time: 45 minutes

Step-by-Step Guide:

  1. Cook the Ground Beef and Onions
    Heat a large skillet over medium-high heat. Add olive oil and cook the ground beef until browned. Add the chopped onions and garlic, and cook until soft and fragrant. Drain excess fat if necessary.
  2. Add the Cabbage
    Stir in the chopped cabbage and cook for about 5 minutes until it starts to wilt.
  3. Add Tomatoes and Seasonings
    Pour in the diced tomatoes, tomato sauce, beef broth, and seasonings (salt, pepper, paprika, and red pepper flakes). Stir everything together and bring it to a simmer.
  4. Simmer and Cook the Rice
    Cover the skillet, reduce the heat, and let the mixture simmer for about 20 minutes until the cabbage is tender. Meanwhile, cook your rice according to package instructions.
  5. Combine the Rice
    Once the cabbage is tender and the sauce has thickened, stir in the cooked rice. Let everything heat through for a few minutes before serving.

For another easy one-pot meal, you can try this Slow Cooker Baked Ziti, which is also simple and satisfying.


Tips for Success

Here are some tips to ensure your unstuffed cabbage rolls turn out perfectly every time:

  • Choose the Right Cabbage: Green cabbage works best for this dish as it holds its shape and cooks down nicely without becoming too mushy.
  • Use Lean Ground Meat: While ground beef is traditional, you can also use ground turkey or chicken to reduce the fat content.
  • Simmer Slowly: The longer the cabbage and beef simmer together, the more flavorful the dish becomes.
  • Add a Little Spice: If you like a little heat, add red pepper flakes or a dash of hot sauce to spice things up.

For more recipes that require minimal prep, check out this comforting No Peek Beef Tips.


Variations of Unstuffed Cabbage Rolls

This versatile dish can be adapted to suit your preferences or dietary needs. Here are some popular variations:

  • Low-Carb Version: Skip the rice entirely for a low-carb version. You can also substitute cauliflower rice for a keto-friendly option.
  • Vegetarian Option: Use lentils or a plant-based ground meat substitute to create a vegetarian version of this dish.
  • Spicy Version: Add a chopped jalapeño or extra red pepper flakes to kick up the heat.
  • Slow Cooker Method: Brown the meat and onions, then transfer everything to a slow cooker. Cook on low for 6-8 hours for an easy, hands-off version.

Another comfort food variation you might love is this Cabbage and Sausage Skillet, which is hearty and delicious.


Nutritional Information

Unstuffed cabbage rolls are a hearty dish, but you can make healthy adjustments. Here’s a basic nutritional breakdown per serving:

  • Calories: 350 per serving
  • Protein: 25g
  • Carbohydrates: 30g (with rice)
  • Fat: 15g

For a lower-calorie option, use lean ground turkey or omit the rice. Adding more vegetables like bell peppers or carrots can also boost the nutritional value.


Serving Suggestions

This dish pairs well with a variety of sides. Here are some ideas:

  • Mashed Potatoes: Serve the unstuffed cabbage rolls over creamy mashed potatoes for a hearty, comforting meal.
  • Crusty Bread: A slice of crusty bread is perfect for soaking up the delicious tomato sauce.
  • Green Salad: A light green salad with a vinaigrette can balance out the richness of the dish.

For another meal idea, check out Family Night Favorite: Easy French Bread Pizza, which pairs nicely with this dish.


FAQs About Unstuffed Cabbage Rolls

Q: Can I make this dish ahead of time?
A: Yes! You can make the entire dish ahead of time and store it in the refrigerator for up to 3 days. Reheat on the stovetop or microwave when ready to serve.

Q: Can I freeze unstuffed cabbage rolls?
A: Absolutely. This dish freezes well. Just cool the dish completely, transfer it to freezer-safe containers, and freeze for up to 3 months.

Q: Can I use other meats in this recipe?
A: Yes, ground pork, chicken, or turkey can be used in place of ground beef.

Q: How can I make the sauce thicker?
A: If your sauce is too thin, let it simmer uncovered for an additional 10-15 minutes to reduce the liquid. You can also add a tablespoon of cornstarch mixed with water to thicken the sauce.

Q: Can I make this in a slow cooker?
A: Yes! After browning the meat and onions, transfer everything to a slow cooker and cook on low for 6-8 hours.


Internal Linking Opportunities

If you enjoyed making these unstuffed cabbage rolls, try some other comforting recipes from ExoRecipes:


Conclusion

Unstuffed cabbage rolls are a simple yet comforting meal that takes all the flavors of traditional cabbage rolls and turns them into an easy, one-pot dish. Whether you’re making this for a weeknight dinner or meal prepping for the week, this recipe is sure to satisfy. With tips for variations, serving suggestions, and storage instructions, you can enjoy this dish any way you like.

Try this recipe today and discover how easy it is to enjoy the hearty flavors of cabbage rolls without the fuss!

Easy and Delicious Chuck Roast Recipe: A Hearty One-Pot Meal

slow-cooked chuck roast, tender beef chuck roast, chuck roast with vegetables, braised chuck roast, hearty chuck roast recipe

Easy – Delicious Chuck Roast: A Flavorful, Hearty Recipe for Any Occasion

Chuck roast is a beloved cut of beef that is perfect for slow cooking. With its rich marbling and connective tissue, this cut turns wonderfully tender when cooked low and slow. If you’re looking for an easy, delicious recipe that’s both flavorful and satisfying, then this easy chuck roast is a must-try. This guide will walk you through the steps to make the perfect chuck roast, including tips, variations, and helpful serving suggestions.

In this article, I’ll also recommend some related recipes that pair perfectly with this dish. We will also link to some internal recipes to help you explore more comforting meals like this one.


Ingredients for Easy Delicious Chuck Roast

To make this delicious chuck roast, you’ll need:

  • Chuck Roast: 3 to 4 pounds, well-marbled.
  • Carrots: 4 large carrots, peeled and chopped.
  • Potatoes: 4 medium Yukon gold or russet potatoes, quartered.
  • Onions: 1 large onion, sliced.
  • Beef Broth: 2 cups, for braising the roast.
  • Garlic: 4 cloves, minced.
  • Seasonings: Salt, pepper, rosemary, thyme, and bay leaves for flavor.

For a perfect accompaniment, consider making The Ultimate Comfort Food: Crockpot Potato Soup with Hashbrowns as a side dish.


Step-by-Step Instructions for Easy Delicious Chuck Roast

Preparation Time:

  • Prep Time: 15 minutes
  • Cook Time: 4-5 hours
  • Total Time: 5 hours 15 minutes

Step-by-Step Guide:

  1. Preheat the Oven or Slow Cooker
    Preheat your oven to 300°F or set your slow cooker to low.
  2. Sear the Chuck Roast
    Heat a skillet over medium-high heat and sear the chuck roast on all sides until it develops a nice brown crust. This step helps to lock in the flavor.
  3. Prepare the Vegetables
    In a large pot or slow cooker, place the chopped carrots, potatoes, onions, and garlic. These will cook with the beef and absorb all the wonderful juices.
  4. Braise the Roast
    Place the chuck roast on top of the vegetables. Pour beef broth over everything and season with rosemary, thyme, bay leaves, salt, and pepper.
  5. Slow Cook to Perfection
    Cover the pot or slow cooker. If using the oven, braise for 4 hours, checking occasionally. In a slow cooker, let it cook on low for 8-9 hours or until the meat is tender and falls apart easily.
  6. Make the Gravy
    Remove the roast and vegetables from the pot. Strain the cooking liquid and return it to the stovetop. Bring the liquid to a simmer and thicken with cornstarch to create a rich, flavorful gravy.

For a more hands-off cooking experience, try making a slow-cooker baked ziti for another hearty dinner option. You can find the recipe here.


Tips for Success

To ensure your easy delicious chuck roast comes out perfectly every time, here are some helpful tips:

  • Choose a Well-Marbled Roast: Look for a chuck roast with plenty of marbling for the most tender and flavorful result.
  • Don’t Skip the Searing: Searing the meat before slow cooking adds extra flavor and locks in the juices.
  • Cook Low and Slow: Whether in the oven or a slow cooker, cooking the roast slowly at a low temperature ensures the meat becomes melt-in-your-mouth tender.
  • Use the Right Potatoes: Yukon gold or russet potatoes hold up well during the long cooking process and absorb the flavors of the beef.

For more hearty, comforting meals, you might enjoy No Peek Beef Tips: The Ultimate Comfort Food, which shares similar slow-cooking techniques.


Variations of Chuck Roast

There are several ways you can customize this chuck roast recipe to suit your taste:

  • Herb-Crusted Chuck Roast: Before searing, rub the roast with a mixture of fresh herbs like rosemary, thyme, and parsley for an aromatic finish.
  • Spicy Chuck Roast: Add crushed red pepper flakes or chipotle powder to the seasoning mix for a spicy twist.
  • BBQ Chuck Roast: Replace half the broth with your favorite barbecue sauce for a tangy, sweet flavor profile.
  • Asian-Inspired Chuck Roast: Use soy sauce, ginger, and sesame oil in place of broth for an umami-rich roast.

For a similarly comforting dish, check out Family Night Favorite: Easy French Bread Pizza to round out your dinner menu.


Nutritional Information

While chuck roast is indulgent, it’s also packed with protein and nutrients. Here’s a quick overview:

  • Calories: 400 per serving
  • Protein: 35g
  • Fat: 22g
  • Carbohydrates: 15g (from the vegetables)
  • Sodium: 650mg

For a leaner option, you can trim excess fat from the roast or use a lower-fat cut of beef like sirloin.


Serving Suggestions

There are many ways to serve chuck roast to create a complete meal:

  • Serve Over Mashed Potatoes: The rich gravy from the chuck roast pairs beautifully with mashed potatoes. You can make mashed potatoes by following this guide: Best Mashed Potatoes Recipe.
  • With Roasted Vegetables: Carrots, Brussels sprouts, or green beans roasted with garlic make excellent side dishes.
  • Crusty Bread: Serve with a slice of crusty bread to soak up the delicious gravy.

For a lighter pairing, you could also make a fresh salad like Apple Cranberry Walnut Salad.


FAQs About Chuck Roast

Q: Can I cook this recipe in a slow cooker?
A: Absolutely! This recipe works wonderfully in a slow cooker. Just set it to low for 8-9 hours, and you’ll have tender, juicy meat.

Q: Do I need to sear the roast before cooking?
A: While searing isn’t strictly necessary, it adds a lot of flavor and texture to the roast. It’s worth the extra step!

Q: What can I use instead of beef broth?
A: If you’re out of beef broth, you can substitute chicken broth, vegetable broth, or even water with a splash of soy sauce or Worcestershire sauce for depth of flavor.

Q: Can I freeze leftover chuck roast?
A: Yes! Chuck roast freezes well. Just be sure to store it in an airtight container or freezer-safe bag for up to 3 months.

Q: What’s the best way to reheat chuck roast?
A: Reheat chuck roast in a covered dish in the oven at 325°F until warmed through. You can also reheat individual portions in the microwave, but the oven method helps retain the moisture and flavor.


Internal Linking Opportunities

Explore more slow-cooked and hearty dishes that pair well with easy delicious chuck roast:


Conclusion

Easy – Delicious Chuck Roast is a classic dish that delivers big on flavor with minimal effort. With tender beef, hearty vegetables, and rich gravy, this meal is sure to become a family favorite. Whether you’re cooking for a crowd or meal prepping for the week, this recipe will leave you satisfied and eager for leftovers.

Lawdy That’s Naughty Apple Pie: A Decadent Twist on a Classic Dessert

indulgent apple pie, caramel apple pie, rich apple dessert, bourbon apple pie, decadent apple dessert

Lawdy That’s Naughty Apple Pie: A Decadent Twist on a Classic

Lawdy That’s Naughty Apple Pie is not your ordinary apple pie. This indulgent dessert takes the classic flavors of apple pie and elevates them with rich, flavorful twists that make it truly “naughty.” With a buttery crust, caramel, and perhaps a splash of bourbon or rum, this apple pie is perfect for those who love a bit of decadence in their desserts. Whether you’re baking for a special occasion or just want to treat yourself, this pie is sure to impress.

In this article, we’ll dive deep into the recipe, offer tips for perfecting the pie, and suggest creative variations. I’ll also link to internal recipes that complement this dish, ensuring you have the perfect dessert experience.


Ingredients for Lawdy That’s Naughty Apple Pie

Here are the key ingredients you’ll need to make this indulgent pie:

  • Apples: 6 medium Granny Smith or Honeycrisp apples, peeled and thinly sliced.
  • Sugar: ½ cup granulated sugar and ¼ cup light brown sugar.
  • Spices: 1 teaspoon cinnamon, ½ teaspoon nutmeg, and a pinch of allspice.
  • Butter: 4 tablespoons of unsalted butter.
  • Caramel Sauce: ½ cup of rich caramel sauce.
  • Bourbon (Optional): 2 tablespoons for an extra naughty twist.
  • Pie Crust: A double crust, either store-bought or homemade.
  • Egg Wash: 1 egg beaten with a tablespoon of water for a golden finish.

These ingredients come together to create a pie that is not only delicious but also luxurious. For more rich apple recipes, check out our Cider-Basted Apple Dumplings for another unique take on apple desserts.


Step-by-Step Instructions for Lawdy That’s Naughty Apple Pie

Preparation Time:

  • Prep Time: 30 minutes
  • Cook Time: 1 hour
  • Total Time: 1 hour 30 minutes

Step-by-Step Guide:

  1. Prepare the Apples
    Peel and slice the apples into thin, even slices. Toss them in a bowl with granulated sugar, brown sugar, cinnamon, nutmeg, and allspice. Set aside.
  2. Make the Filling
    In a large skillet, melt the butter over medium heat. Add the apple mixture and cook until the apples start to soften, about 5-7 minutes. Remove from heat and stir in the caramel sauce and bourbon, if using.
  3. Assemble the Pie
    Roll out the bottom crust and place it in a 9-inch pie dish. Fill with the apple mixture, spreading it evenly. Roll out the top crust and cover the pie, sealing the edges with a fork or your fingers. Cut a few slits in the top crust to allow steam to escape.
  4. Add the Finishing Touches
    Brush the top crust with the egg wash for a golden finish. Sprinkle with a little extra sugar for added sweetness.
  5. Bake the Pie
    Preheat your oven to 375°F (190°C). Bake the pie for 50-60 minutes, or until the crust is golden brown and the filling is bubbling. If the edges of the pie brown too quickly, cover them with foil.
  6. Cool and Serve
    Allow the pie to cool for at least 2 hours before slicing. Serve warm with a scoop of vanilla ice cream or a drizzle of caramel sauce for an extra indulgent treat.

For more classic dessert ideas, you might also enjoy our Ultimate Blueberry Pie, which features a similarly rich and fruity filling.


Tips for Success

To make sure your Lawdy That’s Naughty Apple Pie turns out perfectly every time, here are some tips:

  • Choosing the Right Apples: Granny Smith or Honeycrisp apples are ideal for baking because they hold their shape and provide a balance of tartness and sweetness.
  • Avoiding a Soggy Crust: For a crisp bottom crust, consider blind-baking the crust for 10 minutes before adding the filling.
  • Caramel Perfection: If you’re making your own caramel sauce, be sure to cook it until it’s thick but still pourable. This ensures it blends perfectly with the apples without making the filling too runny.
  • Perfecting the Pie Crust: For a flaky, golden crust, use cold butter and don’t overwork the dough. For a helpful guide on making the perfect pie crust, check out Serious Eats’ guide to a flaky pie crust.

Variations on Lawdy That’s Naughty Apple Pie

This pie is delicious as-is, but you can try these variations for a unique twist:

  • Salted Caramel Apple Pie: Add a sprinkle of sea salt to the caramel sauce for a sweet and salty flavor profile.
  • Bourbon-Apple Pie: Increase the bourbon to 4 tablespoons for a more pronounced boozy flavor.
  • Crumb-Topped Version: Swap the top pie crust for a buttery crumble made of oats, brown sugar, and butter.
  • Vegan Version: Use a vegan butter substitute and a plant-based pie crust to make this dessert dairy-free.

For more unique takes on apple desserts, check out our recipe for Caramel Apple Pecan Dump Cake, which offers another indulgent twist on classic fall flavors.


Nutritional Information

Although this pie is meant to be a decadent treat, here’s a look at the basic nutritional profile for Lawdy That’s Naughty Apple Pie:

  • Calories: 350 per slice (based on 8 slices)
  • Fat: 16g (mostly from butter and pie crust)
  • Carbohydrates: 45g
  • Sugars: 25g
  • Protein: 3g

For those looking to make it a little lighter, you can reduce the sugar or use a sugar substitute in the filling.


FAQs About Lawdy That’s Naughty Apple Pie

Q: What makes this pie “naughty”?
A: The richness of the caramel sauce, the indulgence of butter, and the optional addition of bourbon give this pie its “naughty” reputation. It’s a decadent twist on the classic apple pie, perfect for special occasions.

Q: Can I use a pre-made pie crust?
A: Absolutely! Store-bought pie crusts work well if you’re short on time. Just be sure to follow the baking instructions on the package.

Q: Can I freeze this pie?
A: Yes, you can freeze the pie either baked or unbaked. To freeze a baked pie, let it cool completely, then wrap it tightly in plastic wrap and aluminum foil. To freeze an unbaked pie, assemble it, wrap it tightly, and freeze. When ready to bake, you can bake it directly from frozen, adding an extra 10-15 minutes to the bake time.

Q: How do I prevent the filling from being too runny?
A: Using a thickener like cornstarch or flour can help the filling hold together. Cooking the apples beforehand also helps release some of their juices, reducing the amount of liquid in the pie.

Q: Can I use different types of apples in this recipe?
A: Yes! While Granny Smith and Honeycrisp are ideal, you can mix and match with other varieties like Braeburn or Golden Delicious for a different flavor profile.


Internal Linking Opportunities

If you enjoyed making this Lawdy That’s Naughty Apple Pie, you’ll also love these other indulgent desserts from ExoRecipes:


Conclusion

Lawdy That’s Naughty Apple Pie is the ultimate indulgence for anyone who loves rich, flavorful desserts. Whether you’re baking it for a special occasion or simply treating yourself, this pie is sure to impress with its decadent flavors and buttery crust. Serve it warm with a scoop of vanilla ice cream, and you’ll have a dessert that’s unforgettable.

Pork Chops & Potatoes Casserole: A Comforting One-Pan Meal for Busy Weeknights

creamy pork casserole, pork chops with potatoes, cheesy pork and potato bake, one-pan pork dinner, pork and potato recipe

Pork Chops & Potatoes Casserole: A Comforting, One-Pan Meal

Pork chops and potatoes casserole is a timeless comfort food dish that brings together tender pork chops, creamy potatoes, and melted cheese in a flavorful, hearty meal. Whether you’re cooking for a family dinner or looking for an easy yet delicious one-pan meal, this casserole is the perfect solution. With layers of seasoned pork chops, thinly sliced potatoes, and a creamy mushroom sauce, this dish is bound to become a favorite.

In this article, we’ll take you through the steps of making this classic dish, offer tips for success, and explore different variations. I’ll also highlight internal links to related recipes that complement this meal perfectly.


Ingredients for Pork Chops & Potatoes Casserole

To make this pork chops & potatoes casserole, you’ll need:

  • Pork Chops: 4 boneless or bone-in pork chops.
  • Potatoes: 4 medium-sized russet or Yukon gold potatoes, thinly sliced.
  • Cream of Mushroom Soup: 1 can (10.5 oz) of condensed cream of mushroom soup.
  • Cheddar Cheese: 1 cup of shredded cheddar cheese.
  • Milk: 1 cup of milk to create a smooth sauce.
  • Onions: 1 medium onion, thinly sliced.
  • Seasonings: Garlic powder, salt, pepper, and paprika.

These ingredients work together to create a savory, creamy casserole. If you’re looking for a comforting soup to pair with this dish, check out this ultimate comfort food potato soup recipe.


How to Make Pork Chops & Potatoes Casserole

Preparation Time:

  • Prep Time: 20 minutes
  • Cook Time: 1 hour
  • Total Time: 1 hour 20 minutes

Step-by-Step Instructions:

  1. Preheat the Oven
    Preheat your oven to 375°F (190°C).
  2. Brown the Pork Chops
    Heat a skillet over medium-high heat and sear the pork chops for 2-3 minutes per side until browned. Set aside.
  3. Prepare the Potatoes
    Peel and slice the potatoes into thin rounds. Layer half of the potatoes in a greased 9×13-inch baking dish.
  4. Assemble the Casserole
    Layer the sliced onions over the potatoes, then place the pork chops on top. Season with garlic powder, paprika, salt, and pepper. Add the remaining potato slices over the pork chops.
  5. Make the Sauce
    In a bowl, mix the condensed cream of mushroom soup with the milk until smooth. Pour the mixture evenly over the casserole.
  6. Bake the Casserole
    Cover the baking dish with foil and bake for 45 minutes. After 45 minutes, remove the foil, sprinkle cheddar cheese on top, and bake uncovered for an additional 15 minutes until the cheese is melted and bubbly.
  7. Serve and Enjoy
    Let the casserole cool for 10 minutes before serving. Garnish with fresh parsley if desired.

For another one-pot comfort food recipe, try slow-cooker baked ziti, which is equally satisfying and easy to prepare.


Tips for Success

To ensure your pork chops & potatoes casserole turns out perfectly every time, keep these tips in mind:

  • Use Thick-Cut Pork Chops: Thick-cut pork chops will retain their juiciness during the baking process, while thinner cuts may dry out.
  • Thinly Slice the Potatoes: For even cooking, make sure to slice the potatoes as thinly as possible.
  • Adjust the Sauce Consistency: If the sauce is too thick, you can add a little more milk to achieve the desired creaminess.
  • Cover the Casserole Initially: Covering the dish with foil helps the potatoes cook through without drying out. Removing the foil at the end allows the cheese to melt and brown.

Variations of Pork Chops & Potatoes Casserole

This casserole is incredibly versatile. Here are a few variations you can try:

  • Cheesy Variation: Add more cheese or swap cheddar for other varieties like mozzarella or Swiss for a different flavor profile.
  • Herb-Infused Pork Chops: Marinate the pork chops in fresh herbs like rosemary, thyme, or sage before browning to enhance the flavors.
  • Vegetable Additions: Add vegetables like carrots, green beans, or mushrooms for extra nutrition and flavor.
  • Gluten-Free Version: Use a gluten-free cream of mushroom soup to make the casserole gluten-free.

If you enjoy the combination of pork and potatoes, you might also like these pork chops with mushroom sauce, which pairs tender pork with a rich mushroom gravy.


Health and Nutritional Considerations

Casseroles can be heavy, but there are ways to lighten up this dish:

  • Lean Pork Chops: Use lean pork chops or trim off excess fat to reduce the calorie content.
  • Low-Fat Dairy: Substitute regular milk with low-fat or skim milk and use reduced-fat cheese for a healthier option.
  • Add More Vegetables: Boost the nutritional value by adding more vegetables like spinach or zucchini.

Serving Suggestions

This casserole is a complete meal on its own, but here are some ideas for side dishes:

  • Green Salad: A simple green salad with a light vinaigrette complements the richness of the casserole.
  • Garlic Bread: Serve with a slice of crusty garlic bread to soak up the creamy sauce.
  • Steamed Vegetables: Lightly steamed vegetables like broccoli or asparagus make for a healthy, balanced side.

For more meal ideas, check out creamy garlic Parmesan chicken, another comforting dish that pairs well with vegetables.


FAQs About Pork Chops & Potatoes Casserole

Q: Can I use bone-in pork chops for this casserole?
A: Yes, bone-in pork chops can be used, but they may require a slightly longer baking time.

Q: Do I need to peel the potatoes?
A: Peeling the potatoes is optional. If you prefer a more rustic casserole, you can leave the skins on.

Q: Can I make this casserole ahead of time?
A: Yes, you can assemble the casserole the night before and refrigerate it. When ready to bake, remove it from the fridge and let it come to room temperature before placing it in the oven.

Q: How can I make the casserole gluten-free?
A: Use a gluten-free cream of mushroom soup or make your own gluten-free sauce using broth and cornstarch.

Q: Can I freeze leftovers?
A: Yes, you can freeze leftovers in an airtight container. Thaw overnight in the fridge and reheat in the oven until warmed through.


Internal Linking Opportunities

If you enjoyed this pork chops & potatoes casserole, be sure to explore other comfort food classics from ExoRecipes:

  • “Rediscovering Comfort: Sour Cream and French Fried Onion Pork Chops”: A delicious variation on pork chops.
  • “One-Pan Pork Chops and New Potatoes”: Another flavorful pork and potato dish perfect for weeknights.
  • “Crockpot Ranch Chicken and Potatoes”: A slow-cooker version of a similar hearty meal.

Conclusion

Pork chops & potatoes casserole is a comforting, easy-to-make dish that combines the richness of creamy potatoes with the savoriness of pork chops. Whether you’re serving it for a family gathering or simply craving a hearty meal, this dish is sure to satisfy.

For more comforting casseroles, don’t forget to try bacon ranch chicken quesadillas or creamy garlic Parmesan chicken.

Print
clock clock iconcutlery cutlery iconflag flag iconfolder folder iconinstagram instagram iconpinterest pinterest iconfacebook facebook iconprint print iconsquares squares iconheart heart iconheart solid heart solid icon

Pork Chops & Potatoes Casserole: A Comforting One-Pan Meal for Busy Weeknights

  • Author: Chef Ema

Description

This Pork Chops & Potatoes Casserole is a simple yet comforting one-pan meal that’s perfect for busy weeknights. With tender pork chops, creamy potatoes, and a savory sauce, this dish comes together effortlessly to create a hearty and delicious dinner.


Ingredients

Scale

For the Pork Chops & Potatoes:

  • 4 boneless pork chops (or bone-in if preferred)
  • 4 medium potatoes, peeled and thinly sliced
  • 1 tbsp olive oil
  • Salt and pepper, to taste
  • 1 tsp garlic powder
  • 1 tsp onion powder
  • 1/2 tsp paprika
  • 1 tsp dried thyme or Italian seasoning

For the Creamy Sauce:

  • 1 (10.5 oz) can cream of mushroom soup
  • 1/2 cup sour cream
  • 1/2 cup chicken broth
  • 1/2 cup shredded cheddar cheese
  • 1 tbsp Dijon mustard (optional for extra flavor)
  • 1/4 tsp garlic powder
  • 1/4 tsp onion powder
  • 1/4 tsp black pepper

For Topping:


  • 1/4 cup grated Parmesan cheese (optional)
  • 1/4 cup chopped fresh parsley (for garnish)

Instructions

1. Preheat & Prepare Baking Dish:

  1. Preheat your oven to 375°F (190°C).
  2. Grease or lightly spray a 9×13-inch baking dish with cooking spray.

2. Season & Sear the Pork Chops:

  1. Season the pork chops with salt, pepper, garlic powder, onion powder, paprika, and dried thyme.
  2. Heat olive oil in a large skillet over medium-high heat.
  3. Sear the pork chops for 2-3 minutes per side, until golden brown. Remove from the skillet and set aside (they will finish cooking in the oven).

3. Prepare the Potatoes:

  1. Layer the sliced potatoes evenly in the bottom of the prepared baking dish.
  2. Season with salt, pepper, and garlic powder.

4. Make the Creamy Sauce:

  1. In a medium bowl, combine cream of mushroom soup, sour cream, chicken broth, shredded cheddar cheese, Dijon mustard, garlic powder, onion powder, and black pepper. Stir until smooth and well combined.

5. Assemble the Casserole:

  1. Pour the creamy sauce over the sliced potatoes in the baking dish. Spread it out evenly.
  2. Place the seared pork chops on top of the potatoes and sauce.

6. Bake:

  1. Cover the baking dish with foil and bake for 30 minutes.
  2. After 30 minutes, remove the foil, sprinkle Parmesan cheese (if using) over the top, and bake uncovered for an additional 10-15 minutes, until the pork chops are cooked through (internal temperature of 145°F) and the potatoes are tender.

7. Serve & Enjoy:


  1. Let the casserole rest for 5 minutes before serving.
  2. Garnish with fresh parsley for added flavor and color.

Notes

This Pork Chops & Potatoes Casserole is the perfect dish for a busy weeknight—hearty, comforting, and packed with delicious flavors! A true family favorite that’s easy to make and sure to satisfy everyone.


#OnePanDinner #ComfortFood #PorkChops #EasyDinner #WeeknightMeals