Delightfully Sinful Brownies: The Ultimate Decadent Treat

rich chocolate brownies, fudgy brownies, decadent brownies, caramel brownies, peanut butter brownies

Delightfully Sinful Brownies Recipe: The Ultimate Indulgence

If you’re a fan of rich, decadent desserts, Delightfully Sinful Brownies are the ultimate indulgence. These gooey, fudgy brownies, layered with chocolate, caramel, and a touch of marshmallow, make the perfect treat for any occasion. Let’s dive into this delightful recipe that promises to be a hit at any gathering.


Ingredients for Delightfully Sinful Brownies

For the most delicious, mouth-watering brownies, you’ll need the following ingredients:

  • Brownie Base:
    • 1 cup unsalted butter, melted
    • 2 cups granulated sugar
    • 1 cup unsweetened cocoa powder
    • 4 large eggs
    • 1 1/2 cups all-purpose flour
    • 1 tsp vanilla extract
    • 1/2 tsp salt
  • Sinful Toppings:
    • 1/2 cup peanut butter
    • 1/2 cup caramel sauce
    • 1 cup mini marshmallows
    • 1/2 cup pecans, chopped

For other dessert ideas, you can check out this Kentucky Butter Cake, which is a Southern classic, just as indulgent as these brownies.


How to Make Delightfully Sinful Brownies

Step 1: Prepare the Brownie Batter

  • Preheat your oven to 350°F (175°C) and grease a 9×13-inch baking pan.
  • In a large bowl, mix melted butter, sugar, and cocoa powder until smooth.
  • Add eggs, one at a time, beating well after each addition. Stir in vanilla extract.
  • Gently fold in flour and salt, mixing just until combined.

Step 2: Bake the Brownies

  • Spread the batter evenly into the prepared pan.
  • Bake for 25-30 minutes, or until a toothpick inserted into the center comes out mostly clean. Be careful not to overbake, as you want the brownies to stay fudgy.

Adding the “Sinful” Touch

Step 3: Layer the Toppings

  • Immediately after removing the brownies from the oven, spread the peanut butter evenly across the top while still warm.
  • Drizzle caramel sauce over the peanut butter layer, then sprinkle mini marshmallows and chopped pecans over the top.

Step 4: Set and Serve

  • Let the brownies cool completely before cutting into squares for clean, beautiful slices.
  • For extra indulgence, pair them with a scoop of vanilla ice cream or a dollop of whipped cream.

Tips for Perfect Brownies

  • Don’t Overmix: Stir the brownie batter until just combined to avoid tough brownies.
  • Chill Before Cutting: For cleaner slices, chill the brownies in the fridge before cutting.
  • Add a Crunch: If you like an extra crunch, add a handful of chocolate chips or crushed cookies to the batter.

For another comfort food treat, try Crockpot Potato Soup with Hashbrowns.


Variations on Delightfully Sinful Brownies

  • Salted Caramel Brownies: Sprinkle flaky sea salt over the caramel for a sweet and salty twist.
  • Nut-Free Version: Omit the pecans for a nut-free option, or replace them with your favorite crunchy topping.
  • Double Chocolate Brownies: Stir chocolate chips into the brownie batter for an extra chocolaty boost.

Nutritional Information and Healthier Alternatives

Estimated Nutrition Per Brownie:

  • Calories: 450
  • Fat: 25g
  • Carbohydrates: 50g
  • Protein: 5g

Healthier Alternatives:

  • Lower Sugar: Replace some sugar with a natural sweetener like Stevia.
  • Gluten-Free: Use gluten-free flour instead of all-purpose flour for a gluten-free version.
  • Dairy-Free: Substitute the butter with coconut oil for a dairy-free alternative.

Storing and Serving Delightfully Sinful Brownies

  • Storage: Store brownies in an airtight container at room temperature for up to 4 days.
  • Freezing: Wrap individual brownie squares in plastic wrap and freeze for up to 3 months.
  • Serving Suggestions: These brownies are perfect served warm with a scoop of vanilla ice cream or drizzled with extra caramel sauce.

FAQs About Delightfully Sinful Brownies

Q: How can I make my brownies fudgier?

  • To make brownies fudgier, use less flour and add an extra egg yolk for richness.

Q: Can I add other toppings to these brownies?

  • Absolutely! You can add toppings like crushed cookies, candy pieces, or drizzle melted chocolate over the top.

Q: What makes brownies fudgy rather than cakey?

  • Fudgy brownies have a higher fat-to-flour ratio. Reducing the flour and increasing the butter or chocolate helps create that rich, dense texture.

Internal Linking Opportunities

To create internal links that enhance user experience and SEO, here are some suggested articles from the Exorecipes site that can be linked within the text:

These internal links not only guide the reader to other delicious recipes but also boost SEO.


Conclusion

Delightfully Sinful Brownies are a dessert lover’s dream, combining the best of chocolate, caramel, and peanut butter into one decadent treat. Whether you’re hosting a party or just craving something sweet, these brownies are guaranteed to satisfy. Try experimenting with different toppings and flavors to make them your own!

For more sweet inspirations, be sure to check out Strawberry Freezer Pie for another easy and refreshing dessert option.
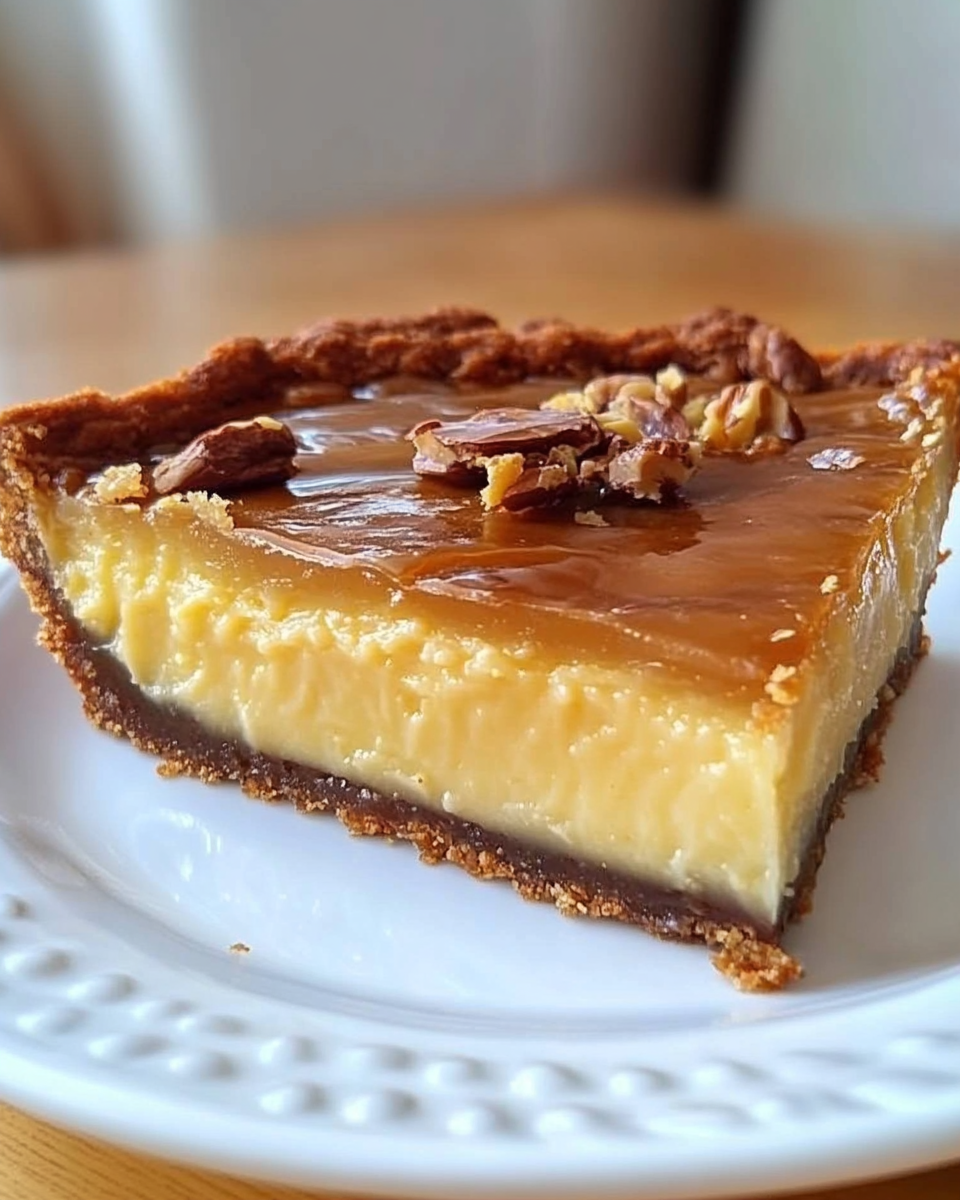
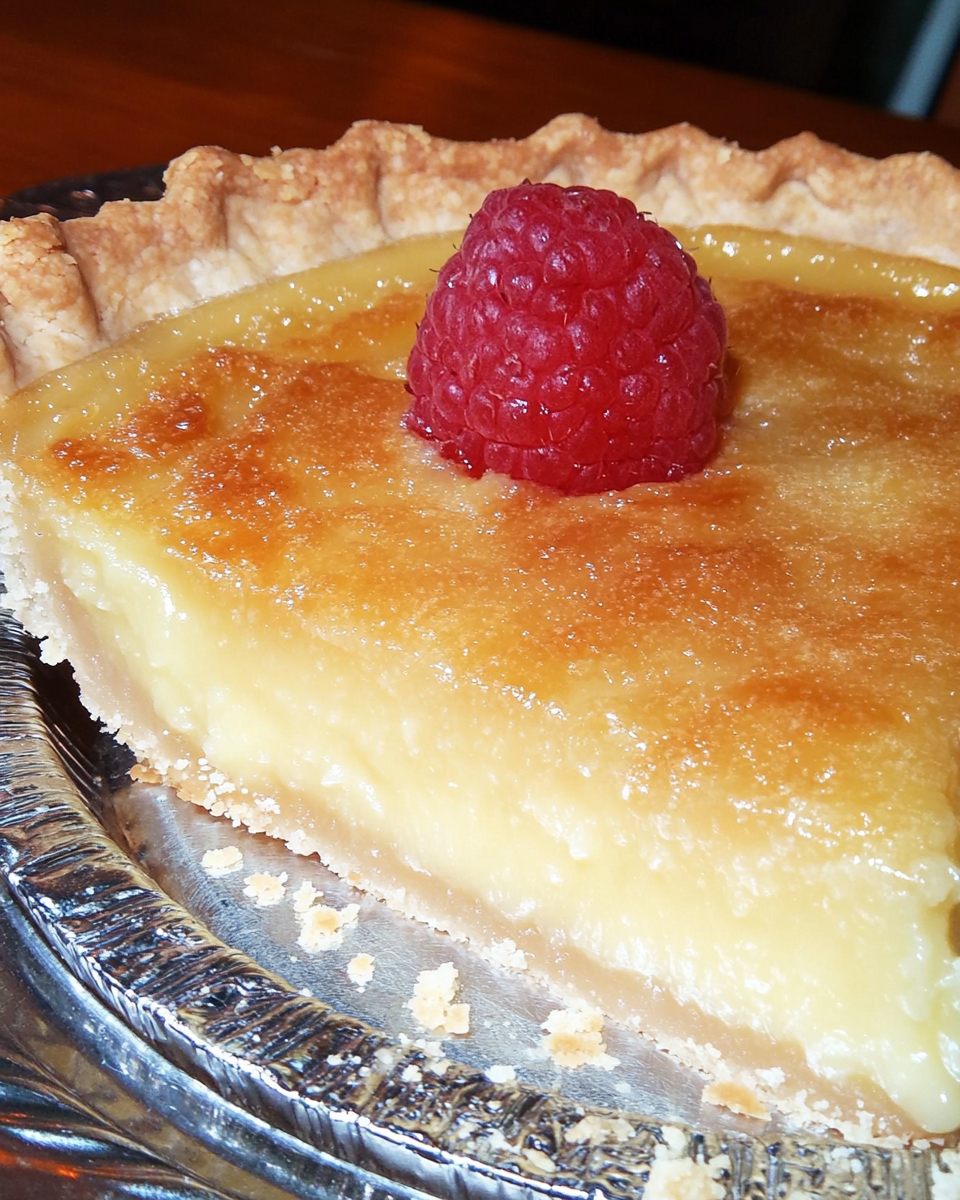
How to Make Buttermilk Pie: A Classic Southern Dessert

Southern buttermilk pie, classic buttermilk pie, easy buttermilk pie recipe, homemade buttermilk pie, custard pie

Buttermilk Pie Recipe: A Timeless Southern Classic

If you’re looking for a dessert that’s simple, delicious, and oozing with Southern charm, buttermilk pie is the perfect choice. This creamy custard pie, made with tangy buttermilk and a few basic pantry ingredients, has been a staple in Southern kitchens for generations. In this guide, we’ll walk you through the recipe, provide tips for making the perfect buttermilk pie, and explore some variations to try.


Ingredients for Buttermilk Pie

The secret to a perfectly creamy buttermilk pie lies in the simple, everyday ingredients that work together to create a rich and tangy filling. Here’s what you’ll need:

  • 1 stick of unsalted butter (softened)
  • 2 cups granulated sugar
  • 3 large eggs
  • 1 tablespoon all-purpose flour
  • 1 cup full-fat buttermilk
  • 1 teaspoon vanilla extract
  • Dash of ground nutmeg (optional)
  • 1 unbaked 9-inch pie crust

For more Southern-inspired desserts, try Kentucky Butter Cake, another beloved classic that’s rich and buttery.


Step-by-Step Guide to Making Buttermilk Pie

Step 1: Prepare the Filling

  • Preheat your oven to 350°F (175°C).
  • In a large bowl, cream together the softened butter and sugar until light and fluffy.
  • Add the eggs one at a time, beating well after each addition.
  • Stir in the flour, followed by the buttermilk and vanilla extract. Mix until smooth and well-combined.

Step 2: Prepare the Pie Crust

  • Roll out your pie dough (or use a store-bought crust for convenience) and fit it into a 9-inch pie dish. Trim and crimp the edges as desired.
  • Pour the buttermilk mixture into the unbaked pie crust, smoothing the top with a spatula if needed.

Step 3: Bake the Pie

  • Bake the pie in the preheated oven for 40-50 minutes, or until the center is set and a light golden brown.
  • To prevent the edges of the crust from over-browning, cover them with aluminum foil or a pie crust shield after the first 20 minutes of baking.

Tip: You can also try No Peek Beef Tips for a savory dish to balance out the sweet buttermilk pie.


Tips for the Perfect Buttermilk Pie

  • Room Temperature Ingredients: Make sure your butter and eggs are at room temperature for a smooth, even filling.
  • Avoid Overbaking: The center should still have a slight jiggle when done. Overbaking can lead to a dry pie.
  • Nutmeg or Cinnamon: A dash of nutmeg or cinnamon can add a nice warm flavor to the pie if you’re looking for something extra.

Variations on Buttermilk Pie

If you’re feeling adventurous, here are a few fun variations on the classic buttermilk pie recipe:

  • Citrus Buttermilk Pie: Add the zest of one lemon or orange to the filling for a bright, tangy twist.
  • Coconut Buttermilk Pie: Stir in 1/2 cup of shredded coconut for a tropical take on this Southern favorite.
  • Chocolate Buttermilk Pie: Melt 1/2 cup of chocolate chips and mix it into the filling for a rich, chocolatey version.

Nutritional Information and Healthier Alternatives

Estimated Nutrition Per Slice:

  • Calories: 380-420
  • Fat: 20g
  • Carbohydrates: 50g
  • Protein: 5g

Healthier Alternatives:

  • Low-Sugar Version: Replace some or all of the sugar with a sugar substitute like Stevia or monk fruit sweetener.
  • Lighter Pie Crust: Use a whole-wheat pie crust or reduce the butter in the crust for a lighter option.
  • Lower Fat: Substitute half of the butter with Greek yogurt for a healthier, yet still creamy, filling.

If you’re looking for more ways to lighten up your cooking, check out Crockpot Potato Soup with Hashbrowns for a comforting yet lightened soup recipe.


Storing and Serving Buttermilk Pie

  • Storing: Store the pie covered in the refrigerator for up to 4 days. Buttermilk pie tastes even better chilled, so feel free to make it a day ahead of time.
  • Freezing: You can freeze buttermilk pie for up to 3 months. Wrap it tightly in plastic wrap and foil before freezing. Thaw overnight in the fridge before serving.
  • Serving Suggestions: Serve buttermilk pie at room temperature or chilled. It pairs beautifully with whipped cream or fresh berries for an added touch of sweetness and texture.

For more make-ahead desserts, try Strawberry Freezer Pie, a simple and refreshing no-bake option.


FAQs About Buttermilk Pie

Q: Does buttermilk pie need to be refrigerated?
Yes, because it contains dairy, buttermilk pie should be stored in the refrigerator.

Q: What does buttermilk pie taste like?
Buttermilk pie has a tangy, sweet flavor, similar to custard pie, but with a distinct tartness from the buttermilk.

Q: Can I make buttermilk pie without a crust?
Yes, a crustless version can be made by pouring the filling into a greased pie dish and baking as usual.

Q: What is the difference between buttermilk pie and chess pie?
The main difference is that chess pie typically contains cornmeal, giving it a thicker texture, while buttermilk pie is smoother and more custard-like.


Internal Linking Opportunities

Mama Seward’s Strawberry Cake Recipe: A Sweet and Classic Dessert

strawberry cake recipe, homemade strawberry cake, classic strawberry cake, easy strawberry cake recipe, best strawberry cake

Mama Seward’s Strawberry Cake Recipe: A Sweet Tradition

When it comes to family gatherings and special occasions, nothing beats the timeless appeal of a homemade strawberry cake. Mama Seward’s Strawberry Cake is a beloved recipe passed down through generations, renowned for its moist texture and rich strawberry flavor. In this guide, you’ll learn how to recreate this classic cake, from preparing the ingredients to perfecting the frosting.


Ingredients for Mama Seward’s Strawberry Cake

The secret to Mama Seward’s Strawberry Cake lies in the combination of simple ingredients that come together to create something extraordinary. Here’s what you’ll need:

Cake Ingredients:

  • 1 box white cake mix
  • 1 box strawberry gelatin
  • 1 cup vegetable oil
  • ½ cup milk
  • 4 eggs
  • 1 cup mashed sweetened strawberries (fresh or frozen, not drained)

Frosting Ingredients:

  • 1 stick unsalted butter, softened
  • 1 pound powdered sugar
  • ½ cup mashed strawberries, drained

For another cake recipe with Southern charm, check out Kentucky Butter Cake.


Step-by-Step Instructions for Mama Seward’s Strawberry Cake

Step 1: Preparing the Cake

  • Preheat your oven to 350°F and grease two 9-inch round cake pans.
  • In a large bowl, combine the cake mix, strawberry gelatin, oil, milk, eggs, and mashed strawberries.
  • Mix until the batter is smooth, then pour it evenly into the prepared cake pans.

Step 2: Baking the Cake

  • Bake the cakes for 30-35 minutes or until a toothpick inserted into the center comes out clean.
  • Let the cakes cool in the pans for about 10 minutes, then transfer them to wire racks to cool completely.

Step 3: Preparing the Frosting

  • In a separate bowl, beat the softened butter and powdered sugar together until smooth.
  • Gradually add the drained mashed strawberries, adjusting the consistency as needed. Ensure the strawberries are well-drained to prevent runny frosting.

If you’re looking for another fruity delight, try Strawberry Freezer Pie, a perfect no-bake option.


Tips for the Perfect Strawberry Cake

  • Use Fresh Strawberries for Best Flavor: While frozen strawberries work in a pinch, fresh strawberries bring out the most flavor.
  • Draining the Strawberries for the Frosting: Be sure to thoroughly drain the strawberries before adding them to the frosting to avoid excess moisture that can make the frosting too thin.
  • Gelatin for Extra Strawberry Flavor: The strawberry gelatin not only enhances the cake’s color but also infuses the cake with a more intense strawberry flavor.

Variations on Mama Seward’s Strawberry Cake

Looking to put your own twist on this classic cake? Here are a few variations to consider:

  • Layered Strawberry Cake: Turn this recipe into a multi-layer cake by doubling the frosting and adding a layer of sliced fresh strawberries between the cake layers.
  • Lemon-Strawberry Cake: Add a hint of lemon by mixing lemon zest into the cake batter and frosting. This adds a bright, tangy flavor that complements the sweetness of the strawberries.
  • Gluten-Free Strawberry Cake: Substitute the cake mix with a gluten-free alternative, ensuring that everyone at the table can enjoy this dessert.

Nutritional Information and Healthier Alternatives

Estimated Nutrition Per Slice (based on 12 servings):

  • Calories: 400-450
  • Fat: 20g
  • Carbohydrates: 50g
  • Protein: 4g

Healthier Substitutes:

  • Lower-Sugar Option: Swap the powdered sugar with a sugar substitute to reduce the sugar content in the frosting.
  • Lightened Cake: Replace half the oil with applesauce for a lighter texture without sacrificing moisture.
  • Dairy-Free Frosting: Use vegan butter in the frosting for a dairy-free version of the cake.

For more health-conscious dessert ideas, check out Crockpot Potato Soup with Hashbrowns.


Storing and Serving Mama Seward’s Strawberry Cake

  • Refrigeration: Store any leftover cake in an airtight container in the fridge for up to 5 days. The frosting can soften at room temperature, so refrigerating will keep it firm.
  • Freezing: You can freeze the unfrosted cake layers for up to 3 months. Wrap them tightly in plastic wrap and aluminum foil before freezing. Thaw overnight in the fridge before frosting and serving.

For more dessert ideas that freeze well, try No Peek Beef Tips, a savory comfort food recipe that complements sweet desserts.


FAQs About Mama Seward’s Strawberry Cake

Q: Can I use frozen strawberries for the cake?
Yes, frozen strawberries can be used if fresh strawberries aren’t available. Just be sure to thaw and drain them well before adding them to the cake batter.

Q: Why is my frosting too runny?
Runny frosting is often caused by excess liquid from the strawberries. Make sure to thoroughly drain the mashed strawberries before mixing them into the frosting.

Q: Can I make this cake gluten-free?
Absolutely! Simply substitute the cake mix with a gluten-free alternative to make this cake suitable for those with gluten sensitivities.

Q: Can I make this cake ahead of time?
Yes! You can bake the cake layers ahead of time and freeze them. When you’re ready to serve, thaw the layers and prepare the frosting.


Internal Linking Opportunities

  • Kentucky Butter Cake: Pair Mama Seward’s Strawberry Cake with this buttery Southern favorite for a delicious dessert table.
  • Strawberry Freezer Pie: For another easy strawberry dessert, try this refreshing freezer pie.
  • No Peek Beef Tips: After indulging in this strawberry cake, balance out the meal with a savory comfort dish like beef tips.

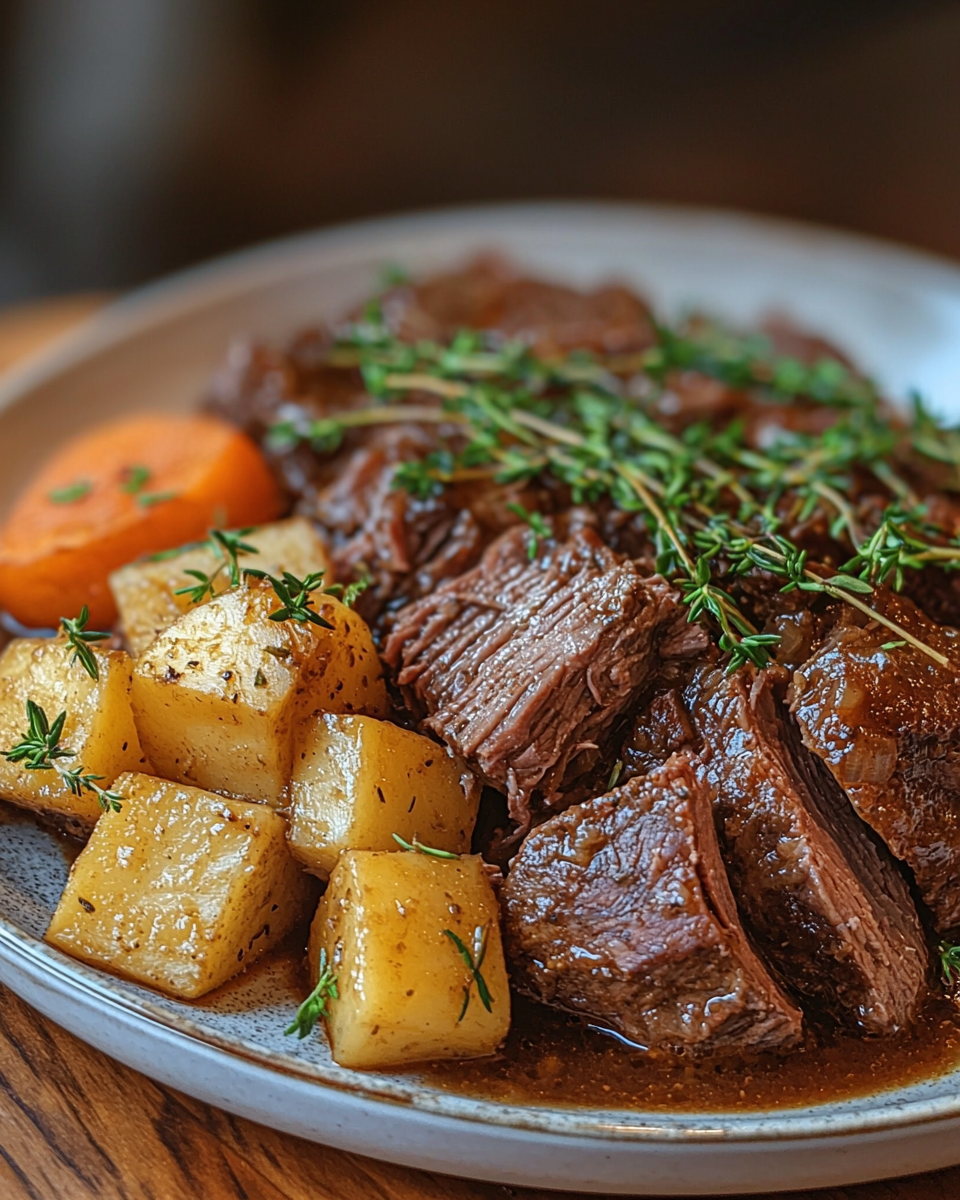
How to Make the Perfect Pot Roast: A Classic Comfort Food Recipe

best pot roast, classic pot roast recipe, tender pot roast, easy pot roast, slow-cooked pot roast

Perfect Pot Roast Recipe: A Comfort Food Classic

When it comes to hearty and flavorful comfort food, few dishes can rival the perfect pot roast. With fall-apart-tender beef and a medley of vegetables slow-cooked in rich broth, this dish is ideal for family dinners or special occasions. In this article, we’ll guide you through creating a flavorful, foolproof pot roast, along with tips, variations, and storage advice.


Key Ingredients for the Perfect Pot Roast

  • Beef Roast: A chuck roast is the ideal cut for pot roast due to its marbling, which melts during cooking and makes the meat incredibly tender. Other good options include brisket or rump roast.
  • Vegetables: Carrots, potatoes, onions, and celery are classic additions that absorb the flavor of the cooking liquid.
  • Aromatics and Herbs: Fresh rosemary, thyme, and bay leaves elevate the flavor. Adding garlic is essential for deep, savory notes.
  • Broth and Wine: Beef broth is a must for the base, while red wine adds richness and complexity.

For a similar slow-cooked meal idea, check out Crockpot Potato Soup with Hashbrowns.


How to Make the Perfect Pot Roast

Step 1: Season and Sear the Beef

Generously season the beef roast with salt, pepper, and garlic powder. In a large Dutch oven, sear the meat on all sides until browned. This step locks in the juices and creates a flavorful crust.

Step 2: Build the Flavor Base

Remove the roast from the pot, then sauté onions, garlic, and celery in the same pot until softened. This helps develop the base flavor. Deglaze the pot with red wine or beef broth, scraping up the browned bits from the bottom.

Step 3: Slow Cook with Vegetables

Add the roast back into the pot along with the vegetables and fresh herbs. Pour in the broth, cover, and roast in the oven at 325°F for 3-4 hours. The roast should be fork-tender when done.

For more slow-cooking inspiration, try Slow Cooker Magic: Unveiling the Ease of Crock-Pot Baked Ziti.


Variations of the Perfect Pot Roast

  • Instant Pot Pot Roast: For a faster option, use an Instant Pot. Sear the roast, add vegetables and broth, then pressure cook for about 60-90 minutes.
  • Slow Cooker Pot Roast: Cook on low in a slow cooker for 6-8 hours, allowing the flavors to meld and the meat to become tender.
  • Red Wine Pot Roast: Add 1 cup of red wine along with the beef broth for a richer, more complex flavor.

Tips for a Perfect Pot Roast

  • Use the Right Pot: A Dutch oven is best for even cooking and heat retention.
  • Sear the Meat First: This step helps lock in moisture and adds a depth of flavor to the final dish.
  • Low and Slow: The secret to a tender pot roast is slow cooking at a low temperature. Patience is key!
  • Resting Time: After cooking, let the pot roast rest for 10-15 minutes to allow the juices to redistribute.

For more tips on mastering the perfect roast, check out No Peek Beef Tips: The Ultimate Comfort Food.


Nutritional Information and Healthier Alternatives

Estimated Nutrition Per Serving:

  • Calories: 500-600
  • Fat: 35g
  • Carbohydrates: 25g
  • Protein: 35g

Healthier Alternatives:

  • Lean Cut: Opt for a leaner cut like bottom round roast to reduce fat content.
  • Low-Sodium Broth: Use low-sodium beef broth to control salt intake.
  • More Vegetables: Add extra vegetables like parsnips, sweet potatoes, or butternut squash for a healthier twist.

Storing and Reheating Leftovers

  • Refrigerating: Store leftover pot roast in an airtight container in the fridge for up to 4 days.
  • Freezing: Freeze the pot roast in portions, either before or after cooking. Reheat slowly to maintain moisture.
  • Reheating: Gently reheat in a Dutch oven on the stove or in the oven at 300°F. Adding a little broth will prevent it from drying out.

For other make-ahead meal ideas, explore Kentucky Butter Cake: A Slice of Southern Comfort.


FAQs About Pot Roast

Q: What cut of beef is best for pot roast?
A: Chuck roast is ideal due to its fat content, which melts during cooking. Brisket and rump roast are also good options.

Q: Can I make pot roast in a slow cooker?
A: Yes! Sear the meat first, then transfer to a slow cooker and cook on low for 6-8 hours.

Q: Should I use red wine in pot roast?
A: Red wine adds a rich, deep flavor, but if you prefer a non-alcoholic version, you can use beef broth instead.

Q: Why is my pot roast tough?
A: Toughness usually results from not cooking the roast long enough. The key is to cook it low and slow until the meat is fall-apart tender.


Internal Linking Opportunities

Easy Cheesy Potatoes: The Ultimate Comfort Food Side Dish

cheesy potato casserole, baked cheesy potatoes, cheesy hash browns, potato side dish, comfort food potatoes

Easy Cheesy Potatoes: The Ultimate Comfort Food Side Dish

When you’re craving a cozy, cheesy, and comforting side dish, look no further than easy cheesy potatoes. This dish is a favorite for family gatherings, potlucks, and holiday feasts. Whether you’re making it with fresh potatoes or hash browns, the combination of creamy cheese sauce and tender potatoes is sure to please. Let’s dive into the step-by-step process, tips for perfecting the dish, and delicious variations.


Ingredients for Easy Cheesy Potatoes

To make the perfect cheesy potatoes, you need just a handful of ingredients:

  • Potatoes: Yukon Gold or Russet potatoes work best, but frozen hash browns are a quick alternative.
  • Cheddar Cheese: Sharp cheddar gives the dish its rich, cheesy flavor.
  • Sour Cream: Adds a creamy texture and slight tang.
  • Condensed Soup: Cream of chicken or cream of cheddar adds richness.
  • Butter: For extra flavor and a silky sauce.
  • Optional Add-ins: Bacon bits, diced ham, or green onions to add more flavor and texture.

For more potato-based comfort dishes, see Crockpot Potato Soup with Hashbrowns.


How to Make Easy Cheesy Potatoes

Step 1: Preparing the Potatoes

If using fresh potatoes, peel and dice them into 1-inch cubes. For frozen hash browns, simply thaw before using.

Step 2: Making the Cheese Sauce

In a large bowl, combine melted butter, sour cream, shredded cheddar cheese, and condensed soup. Whisk until smooth and creamy.

Step 3: Combining and Baking

Toss the diced potatoes or hash browns with the cheese sauce. Transfer the mixture to a greased baking dish and bake uncovered at 375°F for 30-40 minutes until the top is golden and bubbly.

For more tips on using a slow cooker, check out Slow Cooker Magic: Unveiling the Ease of Crock-Pot Baked Ziti.


Delicious Variations of Cheesy Potatoes

  • Loaded Cheesy Potatoes: Add bacon, green onions, and extra cheese on top for a loaded version.
  • Vegetarian Cheesy Potatoes: Substitute the cream of chicken soup with cream of mushroom for a vegetarian option.
  • Spicy Cheesy Potatoes: Add diced jalapeños or sprinkle cayenne pepper into the cheese sauce for some heat.
  • Cheesy Scalloped Potatoes: Thinly slice the potatoes and layer them with cheese sauce for a more elegant dish.

Tips for Making the Best Cheesy Potatoes

  • Grate Your Own Cheese: Pre-shredded cheese contains anti-caking agents that prevent it from melting smoothly.
  • Don’t Overcook the Potatoes: Parboil the potatoes before mixing with the cheese sauce to ensure they are tender but not mushy.
  • Cool Before Serving: Let the dish sit for a few minutes after baking. This will help the sauce thicken and make it easier to serve.

For more comfort food ideas, see Kentucky Butter Cake: A Slice of Southern Comfort.


Nutritional Information and Healthier Alternatives

Nutritional Estimate Per Serving:

  • Calories: 350-400
  • Fat: 22g
  • Carbohydrates: 28g
  • Protein: 8g

Healthier alternatives:

  • Low-Fat Version: Use reduced-fat sour cream and cheddar cheese.
  • Greek Yogurt Swap: Replace half the sour cream with Greek yogurt for a lighter option.
  • Oven-Baked Option: For a healthier twist, roast the potatoes before mixing them with the cheese sauce.

Storing and Reheating Cheesy Potatoes

  • Refrigeration: Store leftovers in an airtight container in the fridge for up to 4 days.
  • Freezing: To freeze, assemble the dish and freeze before baking. Thaw in the fridge overnight and bake as usual.
  • Reheating: Reheat in the oven at 350°F until warm and crispy. For an extra-crispy top, broil for the last few minutes of reheating.

FAQs About Easy Cheesy Potatoes

Q: Can I make cheesy potatoes ahead of time?
Yes, you can assemble the dish ahead of time and store it in the fridge for up to 2 days before baking.

Q: Can I use frozen hash browns for cheesy potatoes?
Absolutely! Frozen hash browns are a convenient substitute for fresh potatoes. Just make sure to thaw them first.

Q: How do I make cheesy potatoes less watery?
Ensure you drain the potatoes well if using fresh, and avoid adding too much liquid to the cheese sauce.

Q: Can I make cheesy potatoes in a slow cooker?
Yes, cheesy potatoes can be made in a slow cooker. Layer the ingredients and cook on low for 4-6 hours, stirring occasionally.


Internal Linking Opportunities