Garlic Butter Lobster and Scallops: An Elegant Seafood Feast
Indulge in the luxurious flavors of Garlic Butter Lobster and Scallops, a dish that pairs the richness of lobster and scallops with the savory notes of garlic and butter. Perfect for date nights or special occasions, this recipe is surprisingly easy to make and adds a gourmet touch to any meal.
For another seafood favorite, try our Crispy Popcorn Shrimp, a crowd-pleaser that’s equally delicious and fun to make at home.
Ingredients for Garlic Butter Lobster and Scallops
Each ingredient in this dish plays a role in building the flavors, ensuring each bite is filled with a delicate balance of buttery richness and seafood sweetness.
Core Ingredients
- Lobster Tails: The star of this dish, lobster offers a delicate sweetness that pairs well with garlic butter.
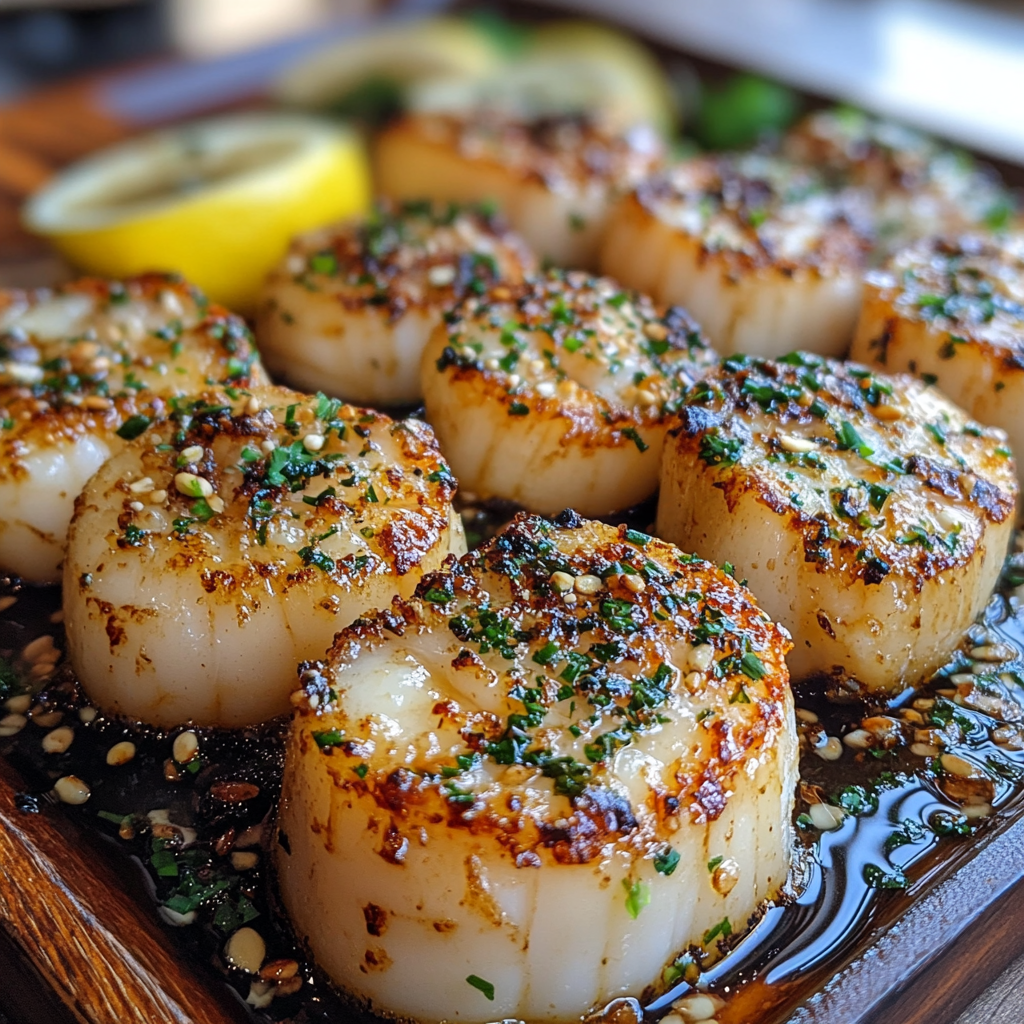
- Scallops: Known for their tender texture, scallops absorb the garlic butter while adding a subtle oceanic flavor.
- Butter and Garlic: Melted butter with fresh garlic brings a warm, savory aroma that complements the seafood perfectly.
- Fresh Herbs: Parsley or chives add a fresh pop of color and flavor.
For another garlic butter-based dish, try our Garlic Rosemary Steak and Potatoes Skillet, perfect if you’re craving a hearty surf-and-turf experience.
Step-by-Step Recipe Guide for Garlic Butter Lobster and Scallops
Step 1: Preparing the Garlic Butter Sauce
- Melt Butter and Add Garlic: In a small skillet, melt the butter over medium heat and add minced garlic, stirring until it turns golden brown.
- Add Fresh Herbs and Lemon Juice: Mix in chopped parsley and a splash of lemon juice to balance the richness of the butter.
Step 2: Cooking the Lobster
- Prepare the Lobster Tails: Split each lobster tail lengthwise and season lightly with salt and pepper.
- Grill or Broil the Lobster: Grill or broil the lobster tails, brushing them with garlic butter throughout the cooking process to keep them moist and flavorful.
For more grilling tips and delicious seafood pairings, explore Honey Garlic Butter Roasted Carrots, which make a perfect side dish for rich seafood meals.
Step 3: Searing the Scallops
- Dry the Scallops: Pat scallops dry to ensure a golden crust forms when they’re seared.
- Sear in Hot Skillet: Sear each scallop for 2-3 minutes per side in a hot skillet with a small amount of garlic butter, cooking until a crispy, caramelized crust develops.
Step 4: Finishing Touches
- Drizzle Remaining Garlic Butter: Drizzle the remaining garlic butter over the lobster and scallops.
- Garnish and Serve: Add extra lemon slices or fresh herbs for garnish, serving immediately for the best texture and flavor.
Customizing Your Garlic Butter Lobster and Scallops
Flavor Variations and Add-Ins
- White Wine Reduction: Add white wine to the garlic butter for an added layer of depth.
- Spice It Up: Red pepper flakes or paprika can bring a hint of spice that balances the butter’s richness.
- Use Shrimp: If scallops aren’t available, swap them for shrimp to enjoy similar textures and flavors.
To explore more unique flavors, check out our Spicy Pineapple Jalapeño Chutney, which brings a fiery-sweet element to seafood or poultry dishes.
Nutritional Insights and Health Benefits
Nutritional Profile of Key Ingredients
- Lobster: Rich in protein and low in fat, lobster is a nutritious seafood choice that’s high in essential nutrients like vitamin B12 and zinc.
- Scallops: Known for their low-calorie, high-protein content, scallops are also a great source of omega-3 fatty acids, supporting heart health.
- Butter and Garlic: While butter provides healthy fats in moderation, garlic is known for its antioxidant and anti-inflammatory benefits.
If you’re looking to pair this dish with a health-conscious side, try Greek Style Lemon Roasted Potatoes, which offers a light, zesty complement to the richness of the garlic butter.
Healthier Alternatives
- Light Butter or Olive Oil: For a lighter version, substitute half of the butter with olive oil.
- Lemon Zest: For added flavor without calories, use lemon zest instead of extra butter in the sauce.
- Serve with a Light Salad: Pair with a fresh green salad to add fiber and additional nutrients.
Expert Tips for Perfecting Garlic Butter Lobster and Scallops
- Dry the Scallops: Ensuring scallops are dry before searing will create a better crust.
- Avoid Overcooking: Both lobster and scallops can become tough when overcooked, so keep a close eye on cooking times.
- Infuse Butter with Garlic Slowly: Let the garlic simmer gently in butter for a mellow, flavorful sauce without bitterness.
For more expert seafood tips, check out Ultimate Guide to Perfect French Bread Pizza, where timing and ingredient preparation are key to great texture and flavor.
FAQs About Garlic Butter Lobster and Scallops
Can I Make This Dish with Frozen Lobster or Scallops?
Yes, both can be used, but make sure they’re fully thawed and patted dry before cooking to ensure the best texture.
What’s the Best Way to Store Leftovers?
Store leftover lobster and scallops in an airtight container in the fridge for up to two days. Reheat gently in a skillet to prevent overcooking.
Can I Make This Recipe Without Garlic?
Yes, while garlic enhances the dish, you can use shallots or herbs for a milder flavor.
Should I Use Fresh or Frozen Scallops?
Fresh scallops are ideal, but if frozen is more convenient, make sure to thaw and dry them thoroughly.
For more FAQs on handling seafood, visit our Mastering Crispy Popcorn Shrimp page, where we discuss techniques for prepping and cooking seafood.
Storage, Reheating, and Serving Tips
- Storage: Keep leftovers in the refrigerator in an airtight container for up to two days.
- Reheating: Reheat in a skillet over low heat with a small amount of butter to prevent the seafood from becoming rubbery.
- Serving Suggestions: Pair with steamed vegetables, garlic mashed potatoes, or crusty bread to soak up the sauce.
For more storage and meal-prep tips, see our Ultimate Guide to Comfort Food for ideas on storing and reheating hearty dishes.
Conclusion
Garlic Butter Lobster and Scallops is an indulgent, satisfying dish that showcases the rich flavors of seafood and garlic butter. Perfect for impressing guests or enjoying a special meal at home, this recipe is easy to make and offers customizable options. Whether served with a fresh salad or a side of potatoes, this dish is sure to become a favorite.
For a complete surf-and-turf meal, consider pairing this with Perfect Ribeye Steak for an unforgettable dining experience.